The Maw (Level)
From Halopedia, the Halo wiki
|
Prev: |
|
|
Next: |
|
| The Maw | |
|---|---|

| |
|
Game: |
|
|
Player: |
|
|
Date: |
|
|
Location: |
Inside the crash site of the UNSC Pillar of Autumn |
 |
Halopedia doesn't currently have a walkthrough for this level; could you write one? |
The Maw is the tenth and final level in Halo: Combat Evolved. The Master Chief makes his way through the Pillar of Autumn's wreck in order to detonate the ship and destroy Halo, The Flood and the Covenant armada, thus delaying the destruction of humans and potentially, the galaxy. Just like the other two levels before, you will have no allies.
Weapons
- Pistol
- Assault Rifle
- Shotgun
- Rocket Launcher
- Frag Grenade
- Plasma Pistol
- Plasma Rifle
- Needler
- Plasma Grenade
- Fuel Rod Gun (non-usable)
Vehicles
- Warthog
- Banshee
- Longsword (non-drivable)
- Pelican (non-drivable)
- Spirit (non-drivable)
- Ghost (only on the Custom Edition)
- The ship Pillar of Autumn (non-drivable)
Transcripts
Part 01: And the Horse You Rode In On
{Opening cinematic-The camera skims low over a large body of desert, tinted gold by an oncoming sunrise. A very majestic Gregorian style chant rises}
{The camera slowly pans up as it flies over the sand, revealing a burnt coastline, and a giant gouge where the terrain has been ripped away and the former sea has flooded into the newly-formed canyon. At the top of that canyon rises the massive stern of the Pillar of Autumn, relatively intact. The camera circles around the side and front of her, revealing that her nose is hanging just slightly off a massive cliff, and that the antennae along the bow have been bent and torn away. The entire bow has been burnt badly; the metal is scarred. A sad fate for the ship. As the camera circles around to reveal the starboard side, a slightly damaged, smoking Banshee drifts into view.}
{The camera cuts to a view of the outside through one of the ship's Bumblebee docking slips. The damaged Banshee comes into the frame and veers wildly towards the Pillar of Autumn.}
Cortana: "This thing is falling apart!"
Master Chief: "It'll hold."
Cortana: "We're not gonna make it!"
Master Chief: "We'll make it."
Cortana: "Pull up! Pull up!"
{The Banshee drops just before reaching the Bumblebee slip and smashes into the side of the ship, sending debris and fire hurling out madly.}
Cortana: {sardonic} "You did that on purpose, didn't you?"
{The Master Chief's hand appears from below and grips the edge of the slip, and he pulls himself up and onto the Pillar of Autumn.}
Gameplay
Cortana: "We need to get to the bridge. From there, we can use the Captain's neural implants to initiate an overload of the ship's fusion engines. The explosion should damage enough systems below it to destroy the ring."
{When you reach the bridge}
Cortana: "The bridge. We made it. Let's get to work."
{When you clear all the Spec Ops Grunts inside}
Cortana: "I need you to upload me into the control systems. The terminal is located next to the main viewscreen."
{Cinematic-The Chief takes Cortana's chip from his helmet and inserts it into the cylindrical terminal near the front of the bridge. Cortana appears above it.}
Cortana: "I leave home for a few days, and look what happens. This won't take long."
{She concentrates for a moment, and the main screen flickers to life. "Self Destruct Sequence Initiated" is displayed across the top, and numbers begin counting down from what is, as far as we can tell, a random starting point between twelve and sixteen minutes.}
Cortana: "There. That should give us enough time to make it to a lifeboat and put some distance between ourselves and Halo before the detonation."
{The Master Chief moves to unplug Cortana from the terminal, but stops abruptly when he hears an all-too-familiar voice}
343 Guilty Spark: "I'm afraid that's out of the question, really."
Cortana: "(groans) Oh, hell."
{The camera cuts to show 343 Guilty Spark extending arcs of energy across a series of consoles in a large room which, we learn later, is Engineering}
343 Guilty Spark: "Ridiculous! That you would imbue a warship's AI with such a wealth of knowledge! Weren't you worried it might be captured? Or destroyed?"
{Cut to Cortana}
Cortana: "He's in my data arrays, a local tap!"
{Cut to 343 Guilty Spark}
343 Guilty Spark: "You can't imagine how exciting this is! To have a record of all of our lost time! Human history, is it? Fascinating."
{343 Guilty Spark flutters around Engineering, as groups of Sentinels hover around in the background, and scans another console}
343 Guilty Spark: "Oh how I will enjoy every moment of its categorization! And to think that you would destroy this installation. As well as this record. I am shocked. Almost too shocked for words."
{Cut to the bridge. A tone sounds over the ship's speakers}
Cortana: (with a note of frustrated awe in her voice) "He stopped the self-destruct sequence...."
{The Chief surveys the bridge carefully with his Assault Rifle, never missing a beat}
343 Guilty Spark: "Why do you continue to fight us, Reclaimer? You cannot win! Give us the construct, and I will endeavor to make your death relatively painless and -"
{Another tone sounds}
Cortana: "At least I still have control over the comm channels."
Master Chief: "Where is he?"
Cortana: "I'm detecting taps throughout the ship, Sentinels most likely. As for the Monitor ... he's in Engineering. He must be trying to take the core offline! Even if I could get the countdown restarted ... I don't know what to do." (She shrugs her arms in desperation)
Master Chief: "How much firepower would you need to crack one of the engine's shields?"
Cortana: "Not much. A well-placed grenade perhaps, but why-"
{She turns to see the Master Chief, who is calmly tossing a frag grenade up and down}
Cortana: "Okay, I'm coming with you."
{A squad of Sentinels descend from above and take position along the shattered windows of the bridge}
{The Sentinels open fire, shattering the main display and touching off the Chief's shields. The Chief quickly drops behind cover, removes Cortana from the terminal and places her into his helmet, and raises his rifle}
{Once you've dispatched the Sentinels and leave the bridge}
Cortana: "The ship was heavily damaged when it crashed. Head to the cryochamber. We should be able to get to the engine room through there."
'{When you reach Engineering}
Part 02: Light Fuse, Run Away
Cortana: "Engine room located. We're here."
{As you run a little farther in}
Cortana: "Alert! The Monitor has disabled all command access. We can't restart the countdown. The only remaining option is to detonate the ship's fusion reactors. That should do enough damage to destroy Halo. Don't worry, I have access to all of the reactor schematics and procedures. I'll walk you through it. First, we need to pull back the exhaust couplings. That will expose a shaft that leads to the primary fusion drive core."
{Throughout this entire sequence, 343 Guilty Spark mumbles a whole bundle of stuff at you. Here's what he's got on his mind:}
- "You would destroy this installation, as well as this fascinating record?"
- "Do you require medical attention?"
- "Your behavior is not in accordance with established protocols."
- "Oh, how touching."
- "Detaching the failsafe just now?"
- "Please. Surrender the construct and I will endeavor to make the necessary repairs as quickly as possible."
- "The Flood continue to multiply, Reclaimer!"
- "Why do you continue to ignore your task?"
- "Are you perhaps ill?"
- "Why do you continue to resist us, Reclaimer?"
- "Inconsistent."
- "This AI construct possesses far too much data."
- "Unacceptable, Reclaimer."
{When you open one of the manifolds}
Cortana: "Good! Step one complete! We have a straight shot into the fusion reactor! We need a catalyst explosion to destabilize the magnetic containment field surrounding the fusion cells. Use an explosive. I recommend a Grenade or a Rocket. If you run out of explosives, there is an armory station located near the engine room's entrance."
{When you knock out the reactor}
Cortana: "Analyzing. Fusion reactor number one destabilizing. Use explosives on the other three reactors. That should be enough to trigger a wildcat explosion of the engines."
{When you kill the third reactor, leaving only one left}
Cortana: "Keep it up! Only one more fusion reactor to go!"
{After you destroy the final reactor}
Cortana: "That did it! The engine's gone critical! Based on the current rate of decay, we should have fifteen minutes to get off the ship; we don't have much time! We should move outside and signal for evac. Accessing schematics . . . there's a service lift at the top of the engine room! It leads to a class 7 service corridor that runs along the ship's dorsal structure. Hurry!"
{Once you reach the elevator, clear the mass of Spec Ops Covenant descending to meet you, and start the long ride up}
Cortana (O.S.): "Cortana to Echo 419, come in Echo 419!"
Foe Hammer (O.S.): "Roger, Cortana. I read you, 5 by 5."
Cortana: "The Pillar of Autumn's engines are going critical, Foe Hammer! Request immediate extraction! Approach the crash site and be ready to pick us up at external access junction 4C as soon as you get my signal!"
Foe Hammer (O.S.): "Affirmative. Echo 419 going on station."
{A few moments later, still on the elevator}
Foe Hammer (O.S.): "Echo 419 to Cortana. Things are gettin' noisy down there. Everything okay?"
Cortana (O.S.): "Negative, negative! We have a wildcat destabilization of the ship's fusion core. The engines must have sustained more damage than we thought! (off radio) Analyzing! We have six minutes (5 minutes if on Legendary difficulty) before the fusion drives detonate. We need to evac NOW!"
{When you reach the top of the elevator}
Part 03: Warning: Hitchhikers May Be Escaping Convicts
Cortana: "Activating final countdown timer. When it reaches zero, the engines will detonate. The explosion will generate a temperature of almost 100,000,000 degrees. Don't be there when it blows."
{If you leave the Warthog station on foot}
Cortana: "We can't make it on foot, we need a vehicle!"
{If you're still leaving the station on foot}
Cortana: "Alert: We need to keep moving, get back in the Warthog."
{When you near the nav marker at which Foehammer is supposed to extract you}
Cortana (O.S.): "Cortana to Echo 419! Request extraction now, on the double!"
Foehammer: "Affirmative, Cortana. Foehammer inbound."
{When you reach the large open platform}
Cortana: "Wait, stop! This is where Foehammer is coming to pick us up. Hold position here." (There is no sense to don't stop here, even if you have seen this before. If you won't wait for Foehammer, the scene will jump, and you won't earn any time)
(If you wait for Foehammer)
{Foehammer appears around the hull of the Pillar of Autumn, listing badly, on fire, and trailed by a pair of Banshees}
Cortana (O.S.): "(urgently) Cortana to Echo 419! Two Covenant Banshees are approaching on your six! Evade, say again, evade!"
{An explosion lurches the Pelican, the starboard wing dips, ablaze, and Foehammer yells into the speaker as she passes under the platform.}
Foehammer (O.S.): "I'm hit! Mayday! Mayday! Airfoil structures have been shot to hell! I can't hold her! I can't hold on!"
{Foehammer continues to yell, inaudibly, into the speaker. The Pelican flies into the distance, still ablaze, collides into the Pillar of Autumn's hull and explodes, debris flying everywhere.}
Cortana (O.S.): "Echo 419!...Echo 419, come in Echo 419.(off speaker) She's gone. Calculating alternate escape route. The ship's inventory shows one Longsword fighter still docked in Launch Bay 7. If we move now, we can make it!"
(If you hurry past the platform, Cortana's message is cut short.)
{As you come around the final S-curve in the corridor}
Cortana: "Chief, up ahead there's a gap in the trench! At top speed, we should be able to clear it!"
{As you reach the bay}
Cortana: "That's the ship! Move, we need to get aboard now!"
{As you reach the ramp leading up to the Longsword platform-cinematic}
(Dust and Echoes plays)
{The Chief makes a break across the platform for the fighter, The Flood closing in behind him. He makes it through the open door just before them, and slams the hatch closed as he runs through}
Cortana: "We're cutting it close!"
{The Chief, sprinting for the cockpit, is jarred by an explosion and braces himself against a wall, shaking his head. He reaches the cockpit, jumps into the seat, quickly punches a series of buttons, and takes the controls in his hands}
Master Chief: "Here we go."
{The Longsword rises above the platform slowly, turning to face the open end of the bay, and lights its engines, rocketing away from the exploding ship. The camera cuts to an exterior view of the Pillar of Autumn, as it burns and explosions flare all along its length. A horde of Flood stumble slowly towards it, and the Longsword arrows from the starboard side of the ship away into the sky the camera cuts to follow the Longsword, looking back towards the Pillar of Autumn as the explosions intensify. The Longsword clears the atmosphere, flying away from Halo. The Master Chief stares straight ahead, piloting the fighter as quickly as he can. Cut to a frontal view of the Longsword; as it sweeps past the camera, the distant side of Halo is drowned out in a huge light, which grows and grows, and then a massive shock front sweeps through the ring, shattering it into sections. In the cockpit, a screen beeps and displays: "Engine Temp Critical"}
Cortana: "Shut them down, we'll need them later."
{The Chief flips a few switches and the Longsword's engines die, leaving it drifting. Debris from the blast hurtles past it, still hot and glowing}
Cortana: "Fancy a look?"
{The Master Chief rises from his chair and moves to one of the Longsword's windows. Halo has broken into a few dozen large fragments, all of which are slowly spinning away from each other. As the Chief watches, one massive fragment comes swiftly from the far side of the ring and collides with another, closer one, splitting it in half, and the two go spinning off in a giant gout of fire and debris. Silent explosions spread throughout Halo.}
Master Chief: (braces himself against the frame of the Longsword's cockpit) "(quietly) Did anyone else make it?"
Cortana: "Scanning." (Pause) "Just ... dust and echoes. We are all that's left."
(The Master Chief shakes his head and moves back to his seat)
Cortana: "(hesitant) We did what we had to do ... for Earth. An entire Covenant armada obliterated, and the Flood ... we had no choice. Halo ... It's finished."
Master Chief: "No." (The Longsword is alone in space, and through the window the Master Chief reaching up to unclip his helmet from the rest of his suit, camera moves up, the frame of the Longsword blocks the view from Master Chief's face but if you mod and use a debug cam Master Chief really just has another helmet under it) "I think we're just getting started."
{The Chief removes his helmet, but the cockpit's frame blocks the view of his head. The camera tracks the Longsword for a few a moments, Basis looming large in the background, before panning to focus on a large spiral galaxy hanging in the sky, an ornament emblazoned across the heavens. A few final, dark notes of a cello play, and everything fades}
(After the credits)
{A glowing object flies away from Halo's wreckage, towards the camera. The Monitor, 343 Guilty Spark, has survived.}
Bonus Ending (This is only seen when beating The Maw on Legendary mode)
{Sergeant Johnson struggles with a Stealth Elite for an Assault Rifle, among a multitude of dead Flood forms with the Pillar of Autumn in the background.
Sergeant Johnson: "C'mere you mother--! I'm gonna. Grrr... ah."
{They suddenly stop and turn to see the ship preparing to explode in the distance.}
Sergeant Johnson: "Oh shi..."
Sergeant Johnson: "This is it, baby! (affectionately) Hold me."
Elite: "...mmf."
{The two embrace as the ship explodes}
Note: this ending did not really happen in Bungie canon, as Sergeant Johnson was actually on a Pelican.
Halo 2 begins....
Walkthrough
Part 01:...And the Horse You Rode In On
You begin this level with a plasma rifle. This is a good thing. Sentinels evidently have a soft spot for the Covenant because any Covenant weapons will really tear them up. If you wait around in the first area long enough, four Sentinels will appear and float in from outside. While they're outside they won't fight back so take as many out as you can. Once they're inside, the rest should fall to your plasma rifle easily. Move into the tunnels and look for a hole in the floor. infection forms will come pouring out of it to greet you. Wait for the carnage to die down below, before dropping down the ladder.
Also right at the start of the level you can actually jump down off the ship and still be alive in co-op, but its not really that exciting.
There should be a diagonal support you can peek over to shoot at a group of Sentinels. Duck behind it if your shields get low. There are more infection forms in this area, so make sure to pop them all before moving down the hall. Peeking around the corner to your right you'll see a group of Flood. Fire off a couple of shots at one of them, throw a grenade, and then run backwards back down the hall gunning them down as they round the corner after you. Throw another grenade or so if necessary. There should be a shotgun and a pistol among the wreckage. Pick them up.
As you move towards the next area, a door will be smashed open with a ton of Flood behind it. Move to the left of the door so they won't be able to see you when it opens. Bounce a frag grenade into their midst, then follow up with your trusty shotgun. There are a lot of Flood here, so another grenade thrown far back into the hall and slightly around the corner would be a good idea. Your shotgun will finish the job nicely.
Next comes the mess hall. Open the door into the next area, but don't go through. Pop the infection forms first. Now you can just barely peek in and zoom in with your pistol to your left. A Hunter should come storming into the hall and start taking down the Flood. Aim for that bright orange back meat, and start shooting. If just one pistol round gets past his armor, he's dead. No need to wait for the perfect shot. He's too busy with the Flood to notice you. Another Hunter will smash through a door to your right, but he'll soon retreat into the mess hall if you don't kill him first. Follow him and shoot him in the back as he battles the Flood. Grab the health pack (remember there are two here) and a few grenades here if you need to. You have to do all this very quickly so you can take advantage of the confusion in the next area. If you're having trouble, don't worry about killing the Hunters. You can get them later. If you look at one of the walls near the health packs you can see a menu.
You may get a déjà vu feeling as you enter the mess hall for your first difficult battle of the level, and as on the first level, you should run straight through the chaos. Once safely on the other side of the Covenant, you have a few options. You could just move on to the bridge and leave these enemies behind, but where's the fun in that? We're going to go back in and use our pistol to pick off the SpecOps Grunts. Then you can rush the SpecOps Officer Elite and blast him a few times with the shotgun. Be careful. This type of Elite makes use of grenades extensively and with worrying accuracy.
Another group of Covenant will enter the room now, so run back to where you originally entered this area. If any Hunters still live, use the multiple doors to the mess hall to get behind them and nail them in the back. Again, peek out and use your pistol to pick off the Grunts. These Elites can be a problem. They throw grenades too. If you are within reach of a needler, you can use that to get rid of some of them. A generous amount of grenades thrown in their direction will often make them retreat into the hallway they came out of. This leaves you in control of the mess hall, so grab a needler and a bunch of grenades and take them out from relative safety. Once this group is dead, you can scavenge this area thoroughly. Keep your shotgun and pistol, but fill up a needler and keep it handy as well.
There's a health pack on the way to the bridge, but don't grab it until you really need it. There is an elite waiting for you just around the corner, so either stick him or fill him full of needles. The grunts around here can be disposed of in any number of ways. Use your imagination. Before you trigger the cutscene, drop your pistol in a safe place, and pick up a Covenant weapon. Any will do.
If you skip the cutscene, you'll still have the display in front of you for cover. It also stays if you die and restart here. Either way, use it for cover and unleash your Covenant weapon on the Sentinels. Pick up your pistol and head out.
The mess hall is now closed off and a new area full of Flood has opened. Blast through the first one you see with your shotgun, then leave a grenade for the others as you retreat. The rest will file out of the door after you. Shotgun and grenade as usual. Now move in the ammo room, which isn't nearly as full of ammo as its name suggests, through the pile of assault rifles and approach the far door. Wait for the battle to die down before going through. There should be two Hunters and an Elite left sitting in a pile of grenades. Throw one of your own to soften them up.
Again, you have a couple of options. You could leave the Hunters (and the health pack they're sitting on) behind, or you could kill them. Killing them is actually very easy if you take advantage of a nice little feature in the programming. Move into the next hall and you should trigger a load point. Now go back to the hunters and you should trigger another one on the way. Basically since the hunters were unloaded from memory, they forgot they saw you. So if you're sneaky, you can peek in and shoot them in a weak spot. If they see you, just unload/load them again. This is a great trick for enemies near load spots throughout the game, though it's kind of cheap. If you're too honorable for such a thing, you can always do it the old-fashioned way, huge amounts of damage or dancing with them until they make themselves vulnerable. Anyway, dispose of them, then scavenge what you can from this hallway. Grab a Covenant weapon before you go. There are Sentinels ahead.
By now you know the routine. Blast Sentinels. Pop Flood. Retrieve your old weapon. There are two groups of Sentinels here to mow down.
The next area is the cryochamber. There is one hell of a battle going on in here, so stay back and let the carnage ensue. If you want to make things easier, you can just run straight up the ladder and skip this whole battle, but then you wouldn't get to kill all these Flood that deserve death so richly, so throw a grenade into the group of Flood, finish them with your shotgun, and blast the Sentinels.
If you wait while they're fighting, locate a health pack nearby. You'll have to jump over those same pipes you jumped over when you first started playing Halo. It's on the left, but as usual don't get it until you really need it.
When the battle dies down, go into the cryochamber and finish off any Sentinels with the shotgun. Climb up the ladder, then move towards the next area, and you should trigger another wave of Flood to enter the room below you. (If you keep at least one of the Sentinels alive, these Flood will not spawn. Try to keep it on the opposite side of the central glass walkway from you.) Drop a grenade down then drop down yourself (after the grenade goes off) and blast a hole through them running through the doors they entered through. Retreat all the way over the pipes to where the health pack is. They should be easy to take out from the safety of these halls.
Once they are finished, go back up the ladder and move into the control room overlooking the cryochamber. There are two more Sentinels here. The shotgun is very effective at this close of a range, but be careful of the explosion when they die. The health pack here should be reserved for later use. There's a tough battle waiting in the next hall. On your right as you enter the control room is a door to another little room. This is a great place to hide, reload, and recharge in the upcoming battle. On your left as you entered is a hall full of flood. Ridiculous amounts of flood will come pouring down this hallway. Use your shotgun at medium range and your pistol and grenades at long range and just keep firing. Aim for the carrier flood (the ones that explode). And watch out for flood with rocket launchers. Fall back to your hiding room as often as necessary. Some flood will follow you all the way back here, but at least not all of them will. There will be short breaks allowing you to move forward and pick up ammo before falling back. Eventually they will stop coming. You can try just running through this hall with guns blazing and you'll face fewer enemies, but I'll have to advocate the safer route in this walkthrough. You get to kill more stuff that way. Grab the health pack now if you managed to conserve it throughout the onslaught.
Move down the hall scavenging and cleaning up any stragglers. Keep going straight and you'll find an overshield tucked away in a dead-end. A group of flood will spawn in this room as you leave, so run quickly out of this room, turn left, and move into the maintenance tunnels. You can kill these flood if you want, but it just makes even more spawn in their place.
There are several exits from the tunnels. The far left exit dumps you out into a room with a lot of dead elites and plasma grenades on the ground. The far right exit is blocked, but there's a health pack here along with some frag grenades. Fill up on these goodies while the battle rages outside. Flood will just keep coming down this hall, so wait until there are just a couple of Covenant left, then make a break for it. Run across the hall into the door on the other side. Follow the path around and you should come out and see two energy shields in front of you. Head out, pump a few shotgun shells into anything nearby, and take a left. Follow the big red arrows on the ground towards the armory.
Ahhh, the armory. The sight of all this weaponry brings tears to the eye. Fill up a shotgun and a rocket launcher and get ready to kill some stuff. Towards the back of the room some Active Camo flood will come after you. They hurt just as much as the visible ones and look even cooler. You're in a room full of shotgun shells and rockets. I think you know what to do. Head off to engineering when you're through here.
When you're in the armory, make sure you have a shotgun. If you do not want to fight the Camo Flood, get the SG and the rocket launcher. Then head to engineering.
Part 02: Light Fuse, Run Away
(When you go to the door on the left to the engine room, grenade jump with a frag. then on level 2 jump on the reactor thing and activate the thing to destroy the reactor.)
At this point conserving ammo is pointless, so blast away with the shotgun as long as it takes. You can always go back to the armory to restock. And there are eight health packs on the sides of computers on the first floor of the engine room, so have yourself a good old time blowing stuff up.
When you have the choice of going right or left, go right. Enter the engine room and go up the ramp to your right. Turn left and head all the way back through the door to level 2. Follow the path up until you reach level 3. You can hit the switches in any order. It doesn't make much of a difference.
After you hit each switch, jump onto the retracting pipe and ride it back across the room. Drop down for cover, switch to your rocket launcher, and carefully aim a rocket at the bright slits as they're opening up. Make sure you score a hit before moving on. If you miss and have no ammo left a well placed grenade can blow up it up.
For one of the vents, there's a set of three barrels you can use to get back up to level 3 without having to go back through the halls. Jump on the blue one turned on its side. Then jump on the yellow one that's right side up. Next jump on the exhaust coupling (the big square pipe). From here you can just barely jump up onto level 3 where the computers are. It helps to run along the left side of the pipe when you make the jump so you don't get pushed off if you miss. This saves you one trip at least.
If it the rocket (if you're using them) goes a long way into the reactor, you may see orange or red blood.)
Once you're done, Cortana will show you where you to go. Follow her lead, but be careful. Riding the elevator are a couple of grunts with fuel rod guns and a few elites. As the elevator is coming down, aim your rocket launcher for maximum destruction. The elites may survive the rocket, but not your grenades and shotgun. Don't be afraid to retreat here. You're not on a timer... yet. Once everything is dead, move onto the elevator. You should still have at least one rocket and one grenade left. They might be necessary. A few shotgun shells would be good too. Reload everything, switch to your shotgun, and get ready.
Part 03: Warning: Hitchhikers May Be Escaping Convicts
Grab the first warthog on the right. You should get a health pack on the way. If at any point you flip your Warthog, get back in and keep driving as quickly as possible. Only shoot something if it's directly in your path.
Stay in the middle as you enter the first big room. Drop down under the floor, but as you go back up this ramp, steer slightly to one side. When you exit you'll see why. Go around this obstacle then continue down the middle of the path for the rest of this room.
The first hallway is rather uneventful. Line your hog up to one side so your off-center entering the next room.
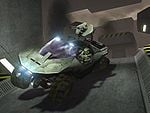
The center way in this room flips me more often than not, so I'm going to suggest the tunnels to the side. Lean even more to your chosen side as you exit these tunnels to get around a wall, then back to the middle to exit. This room and the next hallway are full of sentinels, so when you leave, you might want to take a second to recharge. Better to waste the time recharging than die.
The next hallway has a short cut through it. Go to the left of the first column, then to the right of the second column, then swing around and take the hall to your left. If you're having a lot of trouble getting in, don't worry about it. It's more important to keep moving.
The third big room has a wall blocking your way as soon as you enter. Come in at a steep angle and stay close to one of the walls. There's a catwalk here on either side that the warthog can drive on that gets you through the room quickly. After steering around the big wall, you could also take the off-center tunnel down, and then head back to the middle for the rest of the room. Either way works fine.
The third hall is pretty simple. Get yourself straightened out for the next room.
The fourth room is nasty. Head through the middle and you'll eventually be stuck with a bunch of pillars in your way. Slalom around them. Go to the left of the first one, then to the right of the next, then to the left, etc. until you're through. Head back to the middle for the rest of this room.
After all that, the rest of this run is a breeze. The next hallway leads you to Foe Hammer, but don't stop and wait for her. We all know what happens here. Keep on trucking.
The next winding hallway has another helpful short cut on the right. Again it's after the second column. Halfway through the short-cut tunnel on your right is another tunnel that leads to the Thirsty Grunt easter egg, but you can come back to visit it after you beat the game. You'd better keep moving.
Soon you'll be warned of a big jump ahead.
You have two choices now:
- Line yourself up as evenly as you can and floor it. No chance for corrections in mid-flight. There are actually two jumps right in a row here, so keep straight. There's another easter egg here right after the first jump, but this one takes even more time, so come back for it later.
- Or to be completely on the safe side, if you're playing on Easy or Legendary, you can look in circles whilst falling to prevent any damage being inflicted by falling onto the lower floor under the lift. NOTE: This may not work in versions of Halo without the "Xbox Classics" on it.
Keep straight and steady and soon you'll see the hangar opening up before you.
The end is in sight, but your Warthog is blocked by a bunch of junk. You'll have to run the rest of the way. There are a lot of nasty things to hinder your escape, but you can avoid most of them by getting out of the middle area and running alongside it. Few of the combatants will notice you out here.
If you think you're not going to make it, or just want to have some fun, park your warthog right up against the obstacles and get out. Switch to your rocket launcher and throw a grenade under the warthog. Just after the grenade goes off, shoot the warthog with a rocket and you'll send it flying over the obstacles. Now you can get back in and ride to your longsword in style.
Halo: Combat Evolved Ending (Easy/Normal/Heroic)
The only difference in the endings on higher difficulties is when the level is completed on Legendary. The only difference there is the ending video is slightly longer than on lower difficulties
Trivia
- This is one of the only levels where you can see an Elite in a Shade. He is in the warthog run.You can see another Elite in a shade on the level Keyes.
- The small drop before the bridge Echo 419 is supposed to pick you up on there is another warthog against the wall that you jump off from.
- This is the only level when in a cutscene you see that the Chief's shields are really working when the Sentinels shoot him in the cutscene.
- What looks like an approaching Flood army in the final cutscene was revealed to be about 6 or 7 Flood forms, in the Halo 3 Legendary DVD Cutscene commentary.
- This is the only level that has a time limit in the Halo trilogy, although when the Warthog Run was remade in Halo (level), if you take too long and do not die you will be unable to finish the level.
- The definition of a "maw" is "the throat, jaws, and gullet of a flesh-eating animal".
- In the U.S. Marine Corps, MAW is an acronym for Marine Air Wings.
- In a small room near the armory, there are two dead Minor Elites. If you shoot at the Forerunner symbols on their backs your shots deflect back and hit you, causing you to take damage.
- The only way you can actually see the Pillar of Autumn explode is to let the timer run down to zero. A cutscene will show it exploding. It is also shown in the Legendary Ending.
- The Pillar of Autumn is approximately 1.17 km long. This, however, contradicts the final level of Halo: Combat Evolved where the player must drive along a 3.5 km long service corridor that supposedly runs the length of the ship. This was probably for generating the tension and atmosphere necessary for the level. However, as Master Chief's route was not straight, the curves and twists would be able to create at least 3km for him to drive.
- This is the only level where Elite Combat Forms will use active camouflage. They will come in from the locked door in the Armory, along with several regular Combat Forms.
- In the cutscene where the Chief takes off his helmet, he actually has a second helmet on underneath, because Bungie didn't model a face for him. This can only be seen with the proper modding tools required to alter cutscenes. This was also revealed in the Halo 3 Legendary Edition bonus disc.
- If you wait a while at the start of the level four sentinels will float in and attack you.
- The Assault Rifles and Shotguns in the Armory cannot be picked up. Shotgun ammo are in the green boxes near the rocket launchers.
- If you skip the bridge cutscene before the sentinels shatters the main display, the display will not be shattered when you start.
- In the part called "Warning: Hitchhikers May Be Escaping Convicts" on Legendary, you have only five minutes before the engines explode. This is different from Easy, Normal, and Heroic Campaign modes, which have six minutes.
- At the beginning cutscene were it shows the Pillar of Autumn on its sides, you can see a Marathon logo on the outside of the ship like in the beginning of the game.
- The Thirsty Grunt appears in this level.
- In the level, there is a room under one of the runways (that you can get to when you're on the warthog) that has the word "rex" written in human blood splatters and bullet holes.
- The part where you get out of the access ways, where you find a battle between the Sentinels and the Covenant, if you wait for a while the sentinels will get destroyed and an large amount of Flood will come out of the doorway where the sentinels come out.
- The end of this level is very similar to the end of Halo 3 level, Halo. This was more than likely intentional on Bungie's part.
- In the hallways throughout the level, you can hear Spark humming to himself. This humming can be heard even before Spark reveals himself to the Chief and Cortana.
- The final chapter of the level, "Warning: Hitchikers May Be Escaping Convicts", is referenced in Halo 3 level Tsavo Highway as "Warning: Hitchikers May Have Jetpacks".
- At the the end of the final cutscene after or right before the screen goes black you hear a flood combat form if you turn up your volume.
- Though you can mod The Maw in HMT so you can run faster, which is faster and less flip prone than a warthog (you can't 'flip' your body), you cannot do this because of canon. Cortana keeps asking you to go back and get a warthog. This is true even when running faster allows you to over come those high slopes that you 'need' a warthog for. If you set the speed to 40 for your matg Game Globals, you will run many times faster than a Warthog.
- The Banshees that attack and follow Echo 419 have open cockpits so they look like no one is piloting them.
- There is a weird glitch where a Flood Combat form is fighting alongside the Covenant during the battle with the Sentinels. It is unknown whether it was a glitch in the program or an accident.
- This is the only level in which a shotgun appears, albeit with no ammo. Normally, it would simply disappear when you walk over it.
- There is a Sentinel on Normal that will help you throughout the level if you shoot it with a pistol in the eye.
- In the beginning cutscene, Master Chief crashes his Banshee into the wall and climbs up into the ship. This is similar to a scene in the Halo 2 level The Oracle, where the Arbiter crashes a Heretic Banshee into the wall before climbing it and re-entering the Gas Mine.
- If you wait until the timer expires, it will show an alternate ending where the ship explodes.
- The music at the very end is the same as the ending music in Halo 3.
- In the Longsword hangar, there is two shades placed on each side of the bay. Due to their height, it is hard to tell if an Elite or Grunt is manning the turrets.
- When you get to the warthog run part you can only chose the first two warthogs becuase if you try to get the others they explode on you and you have to flip the warthog back up to drive it.
- On the part of the warthog run when foehammer goes to pick you up you can just skip it and continue and it will save you some time cuase you already know what happens to foehammer at the end.
Images
- Halo-14.jpg
The Front Of The Pillar Of Autumn
| Preceded by Keyes |
Halo Campaign Missions The Maw |
Succeeded by Halo Credits |
