Windward (Level)
From Halopedia, the Halo wiki
Template:Ratings Template:Multiplayer Map Infobox
Windward is a Halo 3: ODST Firefight map. It is based on the NMPD HQ campaign map. Players spawn with a Sniper Rifle at the start of the round but it cannot be found anywhere on the map. All players spawn with SMGs. There is a Banshee which spawns at the beginning of every wave and 2 Missile Pod Turrets with which to shoot it down.
The Special Enemy of this map are Banshees (1 per wave).
Layout
Central building
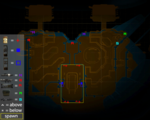
Players start in a central building on the second floor. When they leave this room, they will enter a hall with stairs in the middle. On the other side of the hall there is a room with two med-kits. If you go downstairs, you will find two med-kits on each side of the hall (making it four med-kits in the central building). Should you take the doors in the lower hall, you will enter a small room with doors that lead on the left and right ledge. In the middle of this small room is a rocket launcher pack (two rockets).
Exterior/ledges, courtyard and tunnels
- Looking towards the ledges, you will find the rocket launcher on the left (on a small dispenser, which is near the missile pod) and the shotgun on the right side (this time it is further away from the missile pod than the rocket launcher is). Going all the way to the ledge will reward the player with extra ammunition.
- On both sides of the central building, there are two courtyards (or gardens) with multiple stairs and paths which lead to: second floor of the central building, rocket ammo room, landing pads and ledges.
- This map has a number of small tunnels which lead to two landing pads. You can enter these tunnels from the lower courtyards near the ledges.
Enemy spawn points
Enemies can enter the playing field by a number of ways: Phantoms (which land on the pads or in the middle of the courtyards) or from the "monster closets" (shielded doors that the player can't enter). When the bonus round begins, the grunts can come from the roofs of the surrounding building or from the mentioned "monster closets". Enemies which appear on this map are: Brutes (all forms and ranks), grunts, jackals (a beam rifle jackal can appear as well, but most of the times they are equipped with carbines or shields), drones (shielded variant is present as well) and hunters.
Tips
- The best way to play this map is to hold up in the central building and exit only to get the rocket launcher and missile pods inside. Then, it’s all about good aim and a little bit of crowd control.
- If you decide to stay outside, you will be either shot to death, or stuck after the Catch Skull comes into play (there are just too many places from which the grenades can bounce off.)
- If you decide to hold the tunnels, then you will probably burned by stalker brutes (which are hard to detect and even harder to avoid once they enter the tunnels), stuck by grenades (if the Catch Skull comes into play) or caught by kamikaze Grunts.
- The Sniper Rifle is not very useful in this map. Try to get a magnum/plasma pistol combo. A Carbine is also a good choice, but once the Famine Skull kicks in, you are going to have some difficulty in keeping an ample supply of ammo. To kill Brutes and Jackals, you can use your magnum and plasma pistol. Use a missile pod or a rocket launcher to deal with Chieftains and Hunters. Note: during the final wave, the Sniper Rifle can become vastly important, for getting rid of any enemies which will cause you hell later(And just refuse to stay down, like the Chieftans.)
- A great hiding spot is underneath the escalator. Usually you can sneak out for a quick assassinations.
- The interesting thing about this map is even though the Sniper Rifle isn't very useful, you will never find a moment where you run out of ammo. In fact, there are about three boxes of Sniper ammo around the map, one located near the shotgun, another located near the spare rockets, and a third and final box located near the hallway, on the left(Facing the incoming Phantoms) courtyard which leads to the lower docking area. You can find some spare rockets inside the center building.
- A good idea is to stay on the top level of the map hopping between the left and right ledges using the central building as cover when thing get a little too hairy(such as an attack by a swarm of Drones).Falling back into the top room of the level allows you to choose where your opponents run instead of vise-versa as well as allow you to keep your auto mag and m7 well stocked(the SMG is excellent against Drones and Hunters).
- You can make a Banshee fall out of the sky and die by overcharging the plasma pistol.
Achievement
Score over 200,000 points to unlock an achievement for this map (can be done solo on any difficulty) worth 10 G.
Trivia
- Windward is currently the only Firefight map in which the player starts with a Sniper Rifle as a primary weapon rather than spawning with the default load being the Silenced M7 SMG and M6C/SOCOM.
- If a player travels to the rocket spawn to the left of the missile pod there is a happy face if the player jumps off the cliff in the corner.
- If the player looks on the floor inside on the upsairs health room, there are two different ID badges that have actual pictures on them.
- If you are on the landing pads and the Banshees are there, you can make them fall on the pad by overcharging the plasma pistol and shooting the Banshee as it comes down on strafing dive. Even though the Banshee might fall on the platform, you can not hijack it for gameplay reasons.
Gallery
Sources

