The Silent Cartographer
From Halopedia, the Halo wiki
|
Prev: |
|
|
Next: |
|
| The Silent Cartographer | |
|---|---|
| File:SilentCart.png | |
|
Game: |
|
|
Player: |
|
|
Date: |
|
|
Location: |
On the surface of Installation 04 |
 |
Halopedia has a walkthrough guide for this level; see The Silent Cartographer/Walkthrough. |
The Silent Cartographer is the fourth campaign level in Halo: Combat Evolved and Halo: Combat Evolved Anniversary.
The Covenant believe that the Silent Cartographer is somewhere under an island, with multiple structures concealing the installation. The Master Chief leads the UNSC Marines in an assault on that island that contains the map room for the Halo Installation, in order to locate the Control Room.
In Halo: Combat Evolved Anniversary, completion of this level on any difficulty rewards the player the "The Silent Cartographer" achievement and 25 Gamerscore points. On Heroic or Legendary, if the player doesn't lose any Marine allies in the initial assault on the beach, he or she receives the "Beachhead" achievement and 10 Gamerscore points. On Heroic and Legendary, if the player doesn't fire their weapon at all after accessing the Cartographer, he or she is awarded the "Grenadier" achievement, worth 25 Gamerscore points.
Transcript
The Silent Cartographer
{Original Cutscene} {Anniversary Cutscene}
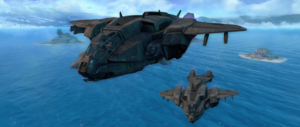
Two Pelican dropships, Echo 419, in front, and Bravo 022, in back, approach an island, low over the water. The Master Chief is inside Echo 419.
{Gameplay}
- Cortana: "The Covenant believe that what they call the "Silent Cartographer" is somewhere under this island. The Cartographer is a map room that will lead us to Halo's control center. The island has multiple structures and installations. One of them contains the map room."
The Pelican dropships land on the beach's corner, the Covenant troops begin firing at them.
- Flight Captain Carol Rawley (COM): "We're approaching the LZ, it's gonna be hot! Get set to come out swingin'. Touchdown! Hit it, Marines!"
- Gunnery Sergeant Waller: "Go, go, go!"
or
- Gunnery Sergeant Waller: "Pile out people, let's move!"
or
- Marine #1: "Pile out! Go, go, go!"
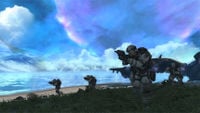
The UNSC forces move forward, and eventually the beach is cleared of Covenant hostiles.
- Marine #1: "Area's secure. All hostiles have been eliminated."
or
- Cortana: "Area's secure."
- Rawley (COM): "Affirmative. Echo 419 inbound. Somebody order a Warthog?"
- Waller (COM): "Hey, I didn't know you made house calls, Foehammer!"
or
- Marine #1 (COM): "Music to my ears, Foehammer!"
- Rawley (COM): "You know our motto: We Deliver."
As the Chief boards the driver seat of the Warthog, two Marines occupy the passenger seat and the turret.
- Cortana: "Okay, let's move out. Let's go find the map room that will show us the location of Halo's control center."
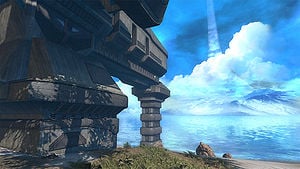
The Warthog race through one of sides of the island, encountering Covenant resistance. The vehicle approaches a structure protruding out of the cliff wall. A Spirit dropship beside it takes off.
- Cortana: "There, in the cliff wall; I'll bet the Silent Cartographer is somewhere inside that facility."
- Cortana: "They're already inside! We need to get in there quick, before they discover the location of Halo's control center!"
- Private First Class Hosky: "Anyone else see what I see? How are we supposed to get around that, huh?"
They eliminate the patrolling troops outside the structure.
- Cortana: "The Covenant are putting up a real fight! The Cartographer must be here. My analysis indicates that the map room should be at the bottom floor of this facility. Let's keep going inside."
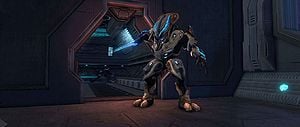
The Chief enters the structure and reaches the top a slope that leads to an open door. A group of Covenant stand guard at the door, with a Sangheili Zealot blocking the way in.
- Cortana: "Don't let them lock the doors!"
The doors close as the guards, except for the Zealot, are eliminated.
- Cortana: "Interesting... I underestimated the Covenant's understanding of Halo's subsystems. They've locked the doors, and we don't have enough firepower to get through them."
- Cortana (COM): "Cortana to Keyes."
- Captain Jacob Keyes (COM): "Go ahead, Cortana. Have you found the control center?"
- Cortana (COM): "Negative, Captain. The Covenant have impeded our progress. We can't proceed unless we can disable this installation's security system."
- Keyes (COM): (slight pause) "Understood. We're still en route to the objective. I may be out of contact when we get there. (pause) Here are your orders. I want you to use any means necessary to force your way into the facility and find Halo's control center. We have to get to the center before the Covenant, and failure, people, is not an option."
- Rawley (COM): "Echo 419 to ground teams. I'll stay on station and keep an eye out for Covenant boogies."
- Waller (COM): "Second squad, ready to roll! Soon as everybody's topside!"
- Marine #2 (COM): "LZ looks secure, Sir, nothing moving."
- Keyes (COM): "Good luck, people. Keyes out."
- Cortana: "We need to find the security override to get this door open."
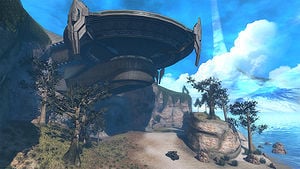
The Chief returns to the surface and explores the island on the Warthog. He eventually passes the substation, which juts out of a cliff.''
- Cortana: "Well, there's the entrance to the security substation, but it looks like we'll have to look for another way up."
They come across a path guarded by Covenant leading up into the island.
- Cortana: "It looks like there is a path leading to the interior of the island."
The Chief makes his way towards the security substation, fighting past multiple Covenant troops including a pair of Mgalekgolo. Eventually, he reaches the substation. Once inside, he has to deal with another pair of Mgalekgolo.
He proceeds into the facility, meeting the security override panel.
- Cortana: "Use the holo-panel to shut down the security system."
'If the Security Station is entered before going to the auto-locking door to the Cartographer:
- Cortana: "This isn't the map room. Analyzing... (pause) This is a security override station for the main facility, located somewhere else on this island. Shut the system down so the Covenant won't be able to lock us out."
The Chief shuts down the system.
{Original Cutscene} {Anniversary Cutscene}
The previously locked door opens to reveal the Sangheili Zealot, who dashes out of the door in surprise.
- Cortana: "Good. That should open the door that leads into the main shaft."
It's Quiet...
{Gameplay}
The Chief moves down the hall from the security substation, towards the exit.
- Bravo 022 Pilot (COM): "Mayday, mayday! Dropship Bravo 022 taking enemy fire! Repeat! We are under heavy fire and are losing altitude!"
- Cortana (COM): "Understood. We're on our way."
A group of Stealth Sangheili attempt to ambush the Chief. The Chief defeats them and heads back up.
The Chief exits the substation and sees Bravo 022's wreckage on the beach below. Marine bodies and Covenant forces can be seen around it.
- Cortana: "Chief, Bravo 022 was bringing us some heavy weapons. After I saw we were up against Hunters, I thought you could use them. Let's move down the beach. Keep an eye out for any cargo we can salvage."
The Chief returns to the entrance to the Cartographer which is now guarded by another pair of Mgalekgolo. The Chief defeats them and enters the structure again. He enters through the now-unlocked door leading to the shaft. The Zealot is not present.
Shafted
{Original Cutscene} {Anniversary Cutscene}
Master Chief walks out onto the platform overlooking the shaft and kicks a loose piece of debris (a Grunt methane mask in Anniversary) down into the seemingly bottomless shaft. No sound is heard back. The Chief looks up and around.
{Gameplay}
The Chief moves farther down into the facility, wiping out any Covenant resistance. He moves into the third of four levels.
- Rawley (COM): "Foehammer to ground teams, you got two enemy dropships coming in fast!"
- Waller (COM): "Dammit! Okay, people, we got company comin', let's set the table. Engage enemy forces on sight!"
- Cortana (COM): "It'll be easier to hold them off from inside the structure. Can you get inside?"
- Waller (COM): "Negative! They're closin' in too fast, negative! (pause) Chief! You gotta find the Cartographer! We'll keep 'em busy as long as we can!"
- Cortana (COM): "Give 'em hell, Marine."
- Cortana: "We'll be in a tight spot if we don't get out of here before additional reinforcements arrive. Let's find that map."
The Chief finally reaches the Cartographer.
- Cortana: "There. That holo-panel should activate the map."
The Chief activates the holo-panel.
{Original Cutscene} {Anniversary Cutscene}
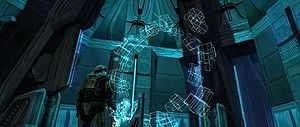
The Cartographer hologram display begins to spin, and the diagram of Halo begins to break into sections.
- Cortana: "Analyzing... Halo's control center is located there. That structure appears to be some sort of temple or shrine, if I've interpreted this correctly. (pause) Interesting. A shrine is an unlikely place to put such a significant installation."
{Gameplay}
- Cortana (COM): "Cortana to Captain Keyes."
No response.
- Rawley (COM): "The Captain has dropped out of contact, Cortana. His ship may be out of range or having equipment problems."
- Cortana (COM): "Keep trying. Let me know when you've reestablished contact, and then tell him that the Master Chief and I have determined the location of the control center. We'll be heading there as soon as we're topside."
- Rawley (COM): "Affirmative. Foehammer out."
Covenant reinforcements, including the Sangheili Zealot seen previously, have retaken the upper levels of the facility, forcing the Chief to fight his way back up.
The Chief reaches to the exit of the facility. Any Marines on the Warthog are killed by the Stealth Sangheili, who the Chief quickly dealt with.
- Cortana (COM): "Cortana to Echo 419. The Chief and I are topside, requesting pickup."
- Rawley (COM): "Roger. On my way."
The Chief boards the Pelican dropship.
{Original Cutscene} {Anniversary Cutscene}
Echo 419 lifts off from the platform and rises quickly, circling the center of the island.
- Cortana (COM): "Let's get moving. Foehammer. Here are coordinates and a flight plan I've worked up."
- Rawley (COM): "Uh, Cortana - these coordinates are underground!"
- Cortana (COM): "The Covenant did a thorough seismic scan. My analysis shows that Halo is honeycombed with deep tunnels - which circle the whole ring."
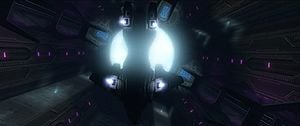
The structure where the first pair of Mgalekgolo appeared lifts up, revealing a vertical underground tunnel; Echo 419 lowers into it as the structure returns to its original position.
- Rawley (COM): "I hope your analysis is on-the-money, Cortana. This Pelican won't turn on a dime."
- Cortana (COM): "Look on the bright side, Foehammer. The last thing the Covenant will expect is an aerial insertion...from underground."
Echo 419 continues to lower through the structure. The top closes with a crash.
Fade to black.
Level ends.
Trivia
Glitches
- If the player doesn't move from the very beginning of the level until the Marines have cleared the beach and the Warthog is down, the normal dialogue will start with Cortana saying to move up the beach, without you being there to start it by getting in the driver seat of the Warthog.
- Players won't drown If he/she drives a Warthog out into the ocean, even if they are fully submerged. The marines on the Warthog will also live, and won't drown when talking (which can be done by shooting them). The player can also lure Mgalekgolo and Sangheili into the deep water, and they will also survive.
- The Zealot in the first part of level who stands behind the door can be killed using several Magnum clips. However, he will still appear later in the level.
- The player can get on top of the island by grenade jumping, or by making a Mgalekgolo push him/her up the cliffs.
- It is also possible to drive the Warthog into the door before it locks near the beginning of the level. The door will close through the midsection of the Warthog, with the driver and passenger seats on the other side of the locked door. The person driving is able to get out of the Warthog at this point and stay on the other side of the doorway, skipping a large chunk of the level. If done, the Zealot on the other side will not move or act, and can be killed easily, though he will appear again upon coming back up when exiting the Cartographer. This glitch is quite hard to do, requiring that the Warthog be driven at full speed and with perfect accuracy into the doorway, and requires a bit of luck and knowledge of the path.
- It can also be noted that a Warthog can be driven down into the main structure to where the locked door is. If the Marines in the Warthog stay in the tunnels they will survive the Covenant attack at the end of the level. If the player manages to get the Warthog even further into the tunnel, where they first met the Zealot, and get inside, the Marines will freeze.
Easter eggs
- In Halo: Combat Evolved Anniversary, the fourth terminal can be found against the Marathon-symbol-shaped structure where the first pair of Mgalekgolo is fought, on the circular part and beneath the horizontal column.
- In Anniversary, the Famine skull can be found on the small plateau where the Pelican Bravo 022 crashed into. The skull is right on the corner in between three bushes.
- In Anniversary, Bandanna skull can be found at the end of the tunnel, on the ceiling in the security console chamber. The player needs to use explosive jump to reach the column. An alternative method is for the first player to crouch on the window strip in the tunnel below the skull, then having a second player kill himself and subsequently respawn on top of the first player. The skull would then be instantly acquired.
- In Anniversary, the image for the level features an Arbiter in the top left corner.
References
- The multiplayer map Death Island is based off of this level.
- The beginning of the level resembles the beach landings, or D-Day, from World War II, with the Marines and Master Chief landing on a beach, pushing forward into enemy fortifications.
- The interior room of the Cartographer in Halo 3 has a striking resemblance to that of the Cartographer in this level, except with more details and slightly upsized. A similar shaped island can be found in Halo 3, or more specifically, an unfinished island that is a major feature of the landscape as the player drives along the collapsing Installation 04B in the final level, Halo. The island, like the rest of the visible landscape, is still snowy, surrounded by metal structures and unfinished, but from above it is nearly identical in shape. The Master Chief drives around it just before the jump.
- The architecture used for the interior of the Cartographer is based off of the architecture used for the Forerunner structure seen in the Halo E3 2000 Trailer.
Miscellaneous
- The original objective of this mission was to assassinate a Covenant Prophet who was trying to find the Silent Cartographer.[1]
- Interestingly, Sergeant Waller can be brought into the facility as a passenger in the Warthog. However, he will still talk on the radio to Cortana and Echo 419 as though he is back at the Landing Zone.
- At the flipped Warthog at the interior path there are four dead Marines, one more than the Hog can carry, although Corporal Harland had one of his soldiers lie under the LAAG gun during the Battle of Sigma Octanus IV.[2]
- The two Mgalekgolo that are found in front of the main facility after the security override is deactivated are named Igido Nosa Hurru and Ogada Nosa Fasu.[3]
- On Easy and Normal difficulties, in the initial Pelican ride, the Chief sits next to Sergeant Waller on Echo 419; however, on Heroic and Legendary difficulties, the Chief sits next to an Asian Marine.
- The Huragok were meant to be on this level, but were deleted from the game, although not the map's code.
- Bungie stated that the Silent Cartographer was a sort of sandbox where they just threw a lot of things in to have tested, like lighting, graphics, weapons or vehicles.[citation needed] It was never intended to be a level for players to play in, until it later became a memorable, official level.
- This level is the most popular to perform Warthog Jumping on, due to the large number of Marines, Warthogs, and the presence of rocket launchers. Its popularity lead to the creation of the flash game called Pelican.[citation needed]
- Strangely, there are Shotgun ammo boxes scattered in some points of the island, though they are only meant to appear two levels later. The same happens in the previous level and in the next one.
- If the player returns to the circular open area where the pair Hunters are confronted before boarding onto Echo-419, there will be a landed Spirit dropship with a lance of Grunts and Jackals guarding it. These lances were probably part of the forces that overwhelmed the Marines guarding the beach.
- In Halo: Combat Evolved Anniversary the nubs at the end of the platform have been removed. Instead the Master Chief kicks an Unggoy methane mask over the edge.
- When entering the chamber of the unlocked door in the Cartographer building, there is a large locked vent-like installation in the wall of the first room with sleeping Grunts. This vent-like component may be some sort of inactive Sentinel launcher.
- In Anniversary, the beginning of the level (during the ride on a Pelican) is treated as a cutscene. On cooperative play, the screen will remain as one HUD until the the Pelicans land. This is similar to the Halo: Reach campaign level The Package, though the second player has no control of the HUD in this case.
Gallery
- 2364942877 dfea615887 o.jpg
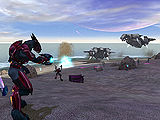
An overview of the level.
Marines storming the beach in Halo: Combat Evolved Anniversary.
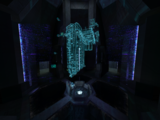
A holographic map of the Silent Cartographer.
Sources
- ^ Halo 3 Legendary Edition - DVD Commentary
- ^ Halo: The Fall of Reach, page 165
- ^ Halo: The Flood, page 162
| Preceded by The Truth and Reconciliation |
Halo Campaign Missions The Silent Cartographer |
Succeeded by Assault on the Control Room |
