Tip of the Spear
From Halopedia, the Halo wiki
Template:Ratings Template:New Content
Tip of The Spear is the fifth Campaign level in Halo: Reach.[1][2]
Upon completing the level on Normal or higher, the player will unlock the To War achievement and 10 Gamerscore.
Summary
The level began with Noble Six fighting alongside Catherine-B320, Noble Team's second-in-command in a large counter-attack against the Covenant, and later Jorge-052 to destroy a large tower that was powering an electromagnetic shield around a Covenant base.[3] Later in the mission, Noble Six was shot down and had to complete part of the mission on foot.[4]
Transcript
August 12, 2552 08:00 Hours
A convoy of Scorpions, Warthogs, a few Mongooses along with Falcons and 2 Pelicans advance on an enemy position.
Auntie Dot: "It appears that Noble Team's discovery last night was not an anomaly. Large Covenant deployments have occurred undetected, and we are now under attack across the Viery territory, including orbital defenses. As per the Winter Contingency, we are countering on every front. Noble's reconnaissance has also identified sophisticated Covenant army hiding canopies, and has been pointed what appears to be a landing zone for additional Covenant forces, the origin of which is yet to be determined."
Carter: "That landing zone has been tagged by UNSC command as a Priority One target."
Jun: "Det charge link is loud and clear."
Kat: "Copy that! Acquiring signal on the pylon. Detonating in three, two..."
At this point, the subtitles show Jun saying, "Time to bake that cake we made last night!" (The dialogue was confirmed by Bungie to have been a last-minute change.) [5]
Kat detonates the charge that was planted on the pylon by Jun.
Banshees swoop down on the convoy, along with several Wraith mortar rounds, which destroy part of the convoy. As Kat and Noble Six drive, the Warthogs in front get destroyed, and a the bridge collapses.
Noble Six: "Incoming!"
Kat: "Might want to hold onto something!"
Fade to white.
Fade back to Noble Six's point of view, which is hazy. Vision clears, and Six looks toward the destroyed bridge. A Warthog attempts to clear the jump but fails, and falls into the canyon below.
Catherine-B320: Six! Can you hear me? Six, you alright? I could use some help!
Six grabs the Grenade Launcher on the ground.
Noble Six: On my way.
Gameplay begins.
Tempest Perimeter
The Warthog Kat is using for cover explodes.
Carter-A259: Kat, Six, what's your status?
Catherine-B320: Pylons are down, we're pushing up the hill.
Kat and Six encounter heavy resistance as they move up the hill, including two Fuel Rod Shade variants. After eliminating the enemy forces in the area, a Pelican shows up with a Rocket Warthog.
Carter-A259: Kat, be advised, ONI has identified 2 hostile anti-aircraft guns southwest of your location.
Catherine-B320: Copy Commander. New target Six, shut down those AA guns. Commandeer that Warthog, get us there in one piece.
Kat and Six drive a short distance before arriving at the AA gun.
Carter-A259: Six, AA guns should be in visual range.
2 Lima 4: 2 Lima 4 to Noble One, those guns are pounding us with high velocity plasma shells.
Auntie Dot: Which would mean a strike by the Frigate Grafton is also out of the question.
Carter-A259: Noble Six, all our birds are stuck out of range unless you can do something about those guns.
As they approach the gun, a large battle can be seen in the valley below. 3 Scarabs and multiple Ghosts, Wraiths, and Banshees attack a large group of Warthogs, Scorpions, and Falcons.
Kat and Six proceed to the AA gun, encountering resistance along the way. Six eventually makes it inside and destroys the gun.
2 Lima 4: Control, 2 Lima 4, permission to commence bombing runs, heading 224.6 over.
After the AA gun is destroyed, 2 Frigates and 3 Longswords fly overhead.
Carter-A259: Good work Noble Six, UNSC air support skies are clear.
Control: Copy 2 Lima 4 bombing run, heading 224.6 permission granted. Out.
The Frigates open fire on the Covenant forces in the valley, as 2 Lima 4 commences a bombing run on the three Scarabs, destroying two of them and disabling the third.
Kat and Six proceed on, soon driving under a partially destroyed bridge. A Pelican, while under fire from a Phantom, drops off a temporary bridge, allowing Noble Team to continue. They soon arive at a mining facility that is across a canyon.
Hand Over Fist
Carter-A259: Noble Six, there's a mining facility near your location, the Covenant are using it as a Command outpost, troopers on site have already engaged.
The Spartans arrive at a bridge over the canyon. Several Army troopers are under fire from Covenant troops and a Shade turret, which are soon neutralized. The Spartans and troopers advance on the facility.
Auntie Dot: New intelligence. Friendly forces near the Covenant outpost have spotted a high value target, an Elite Zealot in fact.
Carter-A259: Eyes on the prize Noble. Take out that Zealot if you get the chance, but keep movin' towards the spires.
They move into the facility, encountering resistance as they go.
Catherine-B320: No visual on target.
The Spartans move farther into the facility, eventually finding the Zealot.
If Six eliminates the Zealot,
Catherine-B320: High value target has been neutralized. Impressive, Six.
After eliminating the enemy forces in the area, Kat and Six move outside to find two Unggoy, two Ghosts, and a Revenant. When Noble Six exits the mining facility, the two Grunts attempt to escape in the Ghosts but are quickly eliminated. Six and Kat proceed down a trail in the Revenant, encountering Covenant forces as they go.
Carter-A259: Update Six, scans show another Covenant AA gun ahead of your location. I want you to neutralize that gun, by any means necessary.
Kat and Six arrive at the second AA gun and engage a large amount of Covenant forces, including two Wraiths and a Hunter pair.
After neutralizing the Covenant forces in the area, Six proceeds inside the gun and destroys the gun's power core.
A Phantom soon arrives to drop off reinforcements, which are soon defeated.
A Pelican arrives soon after, dropping off troopers.
Carter-A259: Well done Six, ONI needs up-close recon on those spires, we're gonna fly you the rest of the way.
Catherine-B320: Jorge has a Falcon inbound to your position. Lieutenant, highlighting the LZ now.
A navpoint appears on Six's HUD.
Catherine-B320: Commander, I'm going to set up a forward observation post here.
Carter-A259: Copy that, I'm waiting on new intel. See what you can see, Carter out.
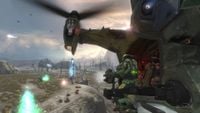
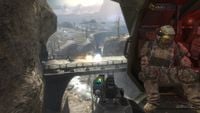
The Falcon arrives and Noble Six mans the turret.
Jorge-052: Need a lift, Spartan?
Jorge-052: Spotted some nasty business in the canyon on the way down.
Falcon pilot: I'll call out targets as we go.
The Spire
The Falcon flies along the river, eventually reaching a bridge, with Covenant forces attempting to cross it.
Falcon Pilot: Top of the canyon, dead ahead.
Six eliminates the forces on the bridge. Jorge and Six encounter more resistance further down the canyon, but Six eliminates them as well.
Falcon pilot: Nice shooting Spartan.
Jorge-052: Stay sharp Six, we're not out of the canyon yet.
The Falcon approaches a spire that is shielded.
Falcon pilot: There's the spire.
Carter-A259: Solid copy, Dot.
Auntie Dot: Latest intel suggests these spires may be projecting electromagnetic cloaking shields.
They arrive at the edge of the shield. The pilot hesistates, hovering just outside it.
Jorge-052: Priority One pilot, gotta know what's in there.
Falcon pilot: Affirmative sir, here we go.
The Falcon flies towards the shield, the screen flashes white.
The Falcon begins to spin out of control.
Falcon pilot: We just lost all power. We're going down.
Jorge-052: Lock your armor, Spartan!
Falcon pilot: Brace for a hard landing.
The Falcon crashes, Six is thrown a short distance from the Falcon, Jorge emerges from the Falcon, tossing out equipment. Six grabs the rifle on the ground and stands up. After looking around briefly, Jorge picks up his gun.
Jorge-052: Crew's dead. We shouldn't stay here.
Jorge-052: I'm showing hostiles all over the place, we gotta move.
Jorge and Six move across the river, the spire in view.
Jorge-052: Commander, we got eyes on the spire, looks like a staging area.
Carter: Copy, we have your visual. Dot's working the problem, stand by.
Auntie Dot: Noble Five, ONI believes those spires to be teleportation terminals.
Jorge-052: Teleporter? Linked to what?
Carter-A259: Frigate Grafton is on station ready to kill that spire, but first we need to power down its shields.
Jorge-052: Understood. Six, I'll hold these bastards off, you find a way to the top of the spire.
Noble Six eventually makes it to one of the gravity lifts, send them up to the top of spire.
Jorge-052: Noble Leader, Six is on his/her way up.
Carter-A259: Get in there, take out that shield Lieutenant.
Carter-A259: Spartans, I'm en route with a Falcon, will pick you up as soon as you knock out power to that shield.
Jorge-052: Ready when you are Six.
Noble Six proceeds to eliminate the Covenant forces at the top of the spire. An Elite Ultra, seen manning the controls of the spire, draws his Energy Sword as soon as Noble Six engages him.
Carter-A259: Hurry Lieutenant, we got a Frigate inbound to blow that spire as soon as the shield is powered down.
After Noble Six eliminates the hostiles in the spire, he proceeds to the spire controls.
Carter-A259: Lieutenant, drop the shield and get out of there.
Six powers down the shield.
Gameplay ends.
The shield dissipates, Six is then shown running for a Falcon, leaping off the spire, and is caught by Jorge, who pulls Six up into the Falcon.
Carter-A259: Get us outta here.
The Falcon begins to pull away from the spire.
Carter-A259: Control? This is Noble One. Spire One is green and you're free to engage... Have a nice day.
Air Control: Copy that, Noble One. Be advised, all ground units: Frigate Three-One-Eight heavy is inbound, and MAC rounds have been authorized.
Jorge-052: MAC rounds? In atmosphere?
Carter-A259: One way to get their attention! Hang on to your teeth, people!
The Spartans brace themselves.
The Grafton is then shown flying towards the spire, firing its MAC cannon, hitting the spire and toppling it.
Plasma suddenly goes through the Grafton's mid-section.
Auntie Dot: New contact. High-tonnage.
The Spartans watch as the Grafton's aft section explodes, and the forward section crashes to the ground.
Jorge-052: Somebody tell me this ain't happening!
Air Control: UNSC frigate Grafton, do you copy?
Carter-A259: The Grafton is dust! We need to get out of here, NOW!
The camera then looks up to show a Covenant Supercarrier, the Long Night of Solace, holding position over the destroyed spire, reponsible for glassing the Grafton.
Fade out.
Trivia
- The Covenant tower that Noble Six destroys is the central location for the multiplayer Invasion map, Spire.
- Tip of the Spear was alluded to in a Bungie Weekly Update before Halo Reach's release, which hinted on a level with the initials "TotS", becoming an instant favorite among fans.
- The civilian flatbed truck is featured in Tip of the Spear.
- The widely known "Wilhelm Scream" is featured in the opening cinematic of this level in the campaign trailer footage. This is not the case for the actual game.
- The frigates that appear after the AA Guns are destroyed seem to be the same model as the In Amber Clad.
- In the opening cinematic, Jun was originally supposed to say "Time to bake that cake we made last night!" , instead of his det-charge lines found in the game. This line still appears in the subtitles over his actual dialogue.
Gallery
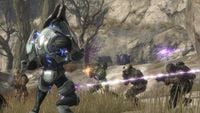
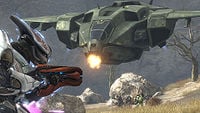
An Elite Ultra and a Pelican.
- Halo Reach - Warthog Run.jpg
A convoy of Warthogs.
- HaloReach - Grafton01.png
Covenant Supercarrier destroying the UNSC Grafton.
Sources


