Sidewinder: Difference between revisions
From Halopedia, the Halo wiki
(→Trivia) |
mNo edit summary |
||
| Line 60: | Line 60: | ||
== Trivia == | == Trivia == | ||
*In the machinima series [[Red vs. Blue]], Sidewinder was the [[base]] where [[Church]] was previously stationed before being sent to [[Blood Gulch]]. It is also the location where [[Sarge]]'s bomb in Church's robot body detonated and sent all the characters (except Church) into the future. It is also where Sarge keeps his weather machine. | *In the machinima series [[Red vs. Blue]], Sidewinder was the [[base]] where [[Church]] was previously stationed before being sent to [[Blood Gulch]].It is also where Church Grif and later the others were teleported. It is also the location where [[Sarge]]'s bomb in Church's robot body detonated and sent all the characters (except Church) into the future. It is also where Sarge keeps his weather machine. | ||
*Sidewinder bears a salient resemblance to the level [[Ice Fields]] as well as the [[Halo: Combat Evolved]] campaign mission, [[Assault on the Control Room]]. | *Sidewinder bears a salient resemblance to the level [[Ice Fields]] as well as the [[Halo: Combat Evolved]] campaign mission, [[Assault on the Control Room]]. | ||
*"Sidewinder" is also the name of a [http://en.wikipedia.org/wiki/AIM-9_Sidewinder missile] and a [http://en.wikipedia.org/wiki/Crotalus_cerastes snake] for which it is named. | *"Sidewinder" is also the name of a [http://en.wikipedia.org/wiki/AIM-9_Sidewinder missile] and a [http://en.wikipedia.org/wiki/Crotalus_cerastes snake] for which it is named. | ||
Revision as of 16:37, June 19, 2008
Template:Multiplayer Map Infobox
Summary
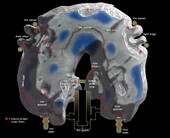
Sidewinder is a horseshoe-shaped multiplayer map in Halo: Combat Evolved.
The main feature of this map is the ice patches on the front of the horseshoe in between the bases that can cause any ground vehicle without treads or hover abilities to slide, making it hard to control the vehicle. On the outer edge of the map are two large cliffs that are connected to each base with teleporters. These areas are popular sniping spots, as they provide a large view and a quick route to an easily defensible area. On the inner edge, there is a network of tunnels which lead to the opposing bases. Four power-ups can be found in the lower section of the tunnel. There is a Sniper Rifle, Shotgun, Health Pack, Plasma Pistol, Pistol and an Assault Rifle inside each base.
It was re-made into the Halo 3 map Avalanche, which was released on April 15th as part of the Legendary map pack.[1]
Tactics
- A good defensive technique in CTF is to park a rocket warthog inside your base behind the flag. The player then goes into the gunner seat picking off any enemies that enter, beware of snipers however.
- Players on foot will almost always take the ledges around and snipe at the enemy base. They will also pick up heavy weapons along the way and use these to assault the enemy base.
- When on offense in CTF, teams should use a few vehicles to pin down the enemy and then use a fast and maneuverable vehicle to steal the flag.
- The map is a favorite for Team King with a moving hill. This gametype pleases people with all preferences. Snipers can pick off and slow the attack of the enemy. People who like close range can charge in with a shotgun and assault rifle. Those who are experienced with heavy weapons can mop up an entire enemy assault. Those who like vehicles can charge in and have some extra protection if in the "hill."
- In the PC version of Halo 1, the teleporters allow players to go back through them.
- An effective CTF offensive is to have someone drive your teams Scorpion around the bend to a good view point of your enemy's upper base. Also drive your teams warthog up to the bend but not around it. in front of the Scorpion. Once in position, have the person in the Scorpion start firing at their upper base to distract their sniper. The 2 people at your base then travel through the center to the enemy's side of the center area, and stop. Also have another person use the Ghost and charge the enemy's base. When they come out to attack the ghost, have your teams sniper and pick them off. Now the 2 people waiting can go grab the enemy's flag. Here's the part where you need the Warthog. Drive up to pick them up while the sniper, Ghost, Warthog, and Scorpion provide cover. Though elaborate, this maneuver can prove to be quite effective.
Power-ups
- Active Camouflage - Exit the base, go in to the tunnels, and turn away from the sloped tunnel.
- Health Pack - A health pack can be found on either side of the middle teleporter or in the front of either base.
- Overshield - An Overshield can be found at the Shade turret in the middle of the map.
Trivia
- In the machinima series Red vs. Blue, Sidewinder was the base where Church was previously stationed before being sent to Blood Gulch.It is also where Church Grif and later the others were teleported. It is also the location where Sarge's bomb in Church's robot body detonated and sent all the characters (except Church) into the future. It is also where Sarge keeps his weather machine.
- Sidewinder bears a salient resemblance to the level Ice Fields as well as the Halo: Combat Evolved campaign mission, Assault on the Control Room.
- "Sidewinder" is also the name of a missile and a snake for which it is named.
