Mission 13: Assault on the Supply Lines: Difference between revisions
From Halopedia, the Halo wiki
m (→Destroy the Wraiths: Link cleanup, replaced: Type-26 Wraith → {{Pattern|Zurdo|Wraith}}) |
m (Text replacement - "(hs[as])-1" to "$1-gold") |
||
| Line 13: | Line 13: | ||
|place=[[X50]] | |place=[[X50]] | ||
|objective=Ambush the Wraith convoy to create a diversion. | |objective=Ambush the Wraith convoy to create a diversion. | ||
|hsa- | |hsa-gold=150,000 | ||
|hsa-2=65,000 | |hsa-2=65,000 | ||
|hsa-3=50,000 | |hsa-3=50,000 | ||
Revision as of 20:20, April 5, 2023
|
Prev: |
|
|
Next: |
|
| Assault on the Supply Lines | |
|---|---|

| |
|
Game: |
|
|
Player: |
|
|
Date: |
|
|
Location: |
|
|
Objective(s): |
Ambush the Wraith convoy to create a diversion. |
| Spartan Assault scores | |
 |
Halopedia doesn't currently have a walkthrough for this level; could you write one? |
Assault on the Supply Lines is the thirteenth mission of Halo: Spartan Assault. If the player kills a convoy target with every stationary gun in the level, the Never Knew What Hit Them achievement unlocks.[1]
Introduction
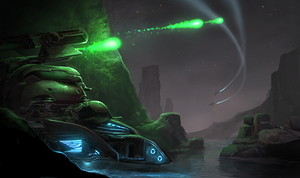
South of the Forerunner structure, a collection of thousands of spiked rock formations known as the Basalt Maze protruded from the moon's thick ice. Covenant supply lines were running straight through the Maze to set up more defenses around the Forerunner structure.
Spartan Davis connected with UNSC combat technicians who believed they could render the Forerunner structure inert. They just needed the chance to get inside the structure. Getting the combat engineers close to the Forerunner structure would be extremely difficult, so Davis created a diversion to provide them with the best chance. The Basalt Maze provided an ideal location for his plan.
Objectives
Destroy the Wraiths
Spartan Edward Davis and two UNSC Marines are standing in a small UNSC outpost with a stationary turret nearby; they must destroy six Wraiths. A Ogab'd-pattern anti-aircraft Wraith moves towards the outpost, but Davis takes control of the turret to destroy it. Its Unggoy Minor escort detail is also killed by Davis. Davis and the Marines continue north where they encounter a second AA Wraith and its Unggoy guards. After the trio manages to destroy the Wraith, two Unggoy Majors attack from the north, but are quickly killed. As they move forward, several more Unggoy futilely attempt to stop the Spartan. With several stationary turrets nearby, Davis destroys an oncoming Zurdo-pattern Wraith. Directly behind it, a third AA Wraith arrives and attacks the Spartan and a Sangheili Major rushes the Spartan. Davis manages to destroy all Covenant forces.
As he moves forward, a second Type-26 Wraith arrives, escorted by several Sangheili Minors, Majors, and a large lance of Kig-Yar Minors. Additionally, Davis and the Marines are attacked by several suicidal Unggoy from the north. After destroying the fifth Wraith, Covenant forces continue to attack Davis and any surviving Marines. Soon, the sixth and final AA Wraith arrives. The Spartan eventually manages to destroy it.
Reach the extraction point
With the six Wraiths destroyed, Davis and the surviving Marines flee south to the extraction point. Another Type-26 Wraith attacks from the north and follows the Spartan, accompanied by a Sangheili Major and several suicidal Unggoy Minors. Davis and the Marines continue to retrace their steps south, while engaging large amounts of Unggoy Minors and Majors. Eventually, Davis returns to the UNSC outpost he started at initially and boards a landed AV-14 Hornet along with any surviving Marines.
Complete the mission before reinforcements arrive
This objective is active concurrently with the two objectives above. Davis has four minutes and thirty seconds to destroy the six Wraiths before the reinforcements arrive.
Sources
| |||||||||||||||||||||||||||||||||||