Mission 4: Live to Fight: Difference between revisions
From Halopedia, the Halo wiki
Sith Venator (talk | contribs) No edit summary |
No edit summary |
||
| (23 intermediate revisions by 10 users not shown) | |||
| Line 1: | Line 1: | ||
{{Title|Live to Fight}} | {{Title|Live to Fight}} | ||
{{Level | {{Status|Gameplay}} | ||
|prev=[[Mission 3: Reinforcement of the Perch|Reinforcement of the Perch]] | {{Level infobox | ||
|next=[[Mission 5: The Last Stand|The Last Stand | |pagegamelabel=HSA | ||
|prev=''[[Mission 3: Reinforcement of the Perch|Reinforcement of the Perch]]'' | |||
|concurrent=''[[Operation A: Umbra]]'' | |||
|next=''[[Mission 5: The Last Stand|The Last Stand]]'' | |||
|name=Live to Fight | |name=Live to Fight | ||
|image=[[File:Live to Fight.png|300px]] | |image=[[File:Live to Fight.png|300px]] | ||
|player=[[ | |game=''[[Halo: Spartan Assault]]'' | ||
|date=[[ | |player=[[Player_character#Top-Down_Shooter|Spartan Palmer]] | ||
|date=[[2554]] {{C|actual events}}<br> | |||
[[2557#December|December 2557]] {{C|simulation}}{{Ref/Note|[[Roland]] was activated on December 5, 2557. The events of ''[[Halo: Spartan Strike]]'' also takes place during 2557, as shown by the introductory cutscene of ''Operation A: Orphic Spear''. Being a sequel to ''Halo: Spartan Assault'' it is implied (although not confirmed) that the present day events of ''Spartan Strike'' take place after those of ''Spartan Assault''.}} | |||
|place=[[X50]] | |place=[[X50]] | ||
|objective= | |objective= | ||
|hsa-gold=90,000 | |||
|hsa-silver=65,000 | |||
|hsa-bronze=40,000 | |||
}} | }} | ||
Although the [[UNSC]] forces successfully slowed the [[Covenant]], enemy numbers were too great to halt their advance indefinitely. A continuous stream of Covenant infantry, | '''Live to Fight''' is the fourth mission of ''[[Halo: Spartan Assault]]''. The mission features [[Sarah Palmer|Spartan Sarah Palmer]] fighting her way through a valley with a {{Pattern|Zurdo|Wraith}}, as she destroys [[Merg Vol's Covenant|Covenant]] [[Ogab'd-pattern anti-aircraft Wraith|air support]]. | ||
==Introduction== | |||
Although the [[UNSC]] forces successfully slowed the [[Merg Vol's Covenant|Covenant]], enemy numbers were too great to halt their advance indefinitely. A continuous stream of Covenant infantry, {{Pattern|Zurdo|Wraith}}s, and air support were moving towards [[Research Facility Alpha]]. | |||
Having concluded that returning to the main facility would be useless, [[Sarah Palmer|Spartan Palmer]] began fighting her way upstream through the invasion in an attempt to reach one of the northern outposts. Her plan was to destroy Covenant air support and give the UNSC [[AV-14 Hornet|Hornet]]s a chance to land near the outposts. The ultimate goal was to get off [[X50]] and warn [[Draetheus V|Draetheus-V]] of the Covenant invasion. | |||
==Objectives== | |||
===Destroy the Wraith wreckage to clear the path=== | |||
[[Sarah Palmer|Spartan Sarah Palmer]] is standing nearby a {{Pattern|Zurdo|Wraith}} and wreckages of numerous [[Merg Vol's Covenant|Covenant]] and UNSC vehicles, including an [[M808 Scorpion]]. Palmer enters the Wraith, but her path to the rest of the valley is blocked by the wreckage of another Wraith. After destroying the remains of the Wraith, Palmer continues through into the valley in her own Wraith. | |||
===Destroy the Anti-Air Wraiths=== | |||
As she continues through the valley, Palmer encounters two [[Unggoy Minor]]s, led by a single [[Sangheili Minor]]. Palmer quickly eliminates the Covenant hostiles. Further in the valley, she encounters a {{Pattern|Ogab'd|anti-aircraft Wraith}} and three Unggoy Minors. As she nears the AA Wraith, it shoots down a passing [[AV-14 Hornet]]. The Spartan eventually manages to destroy the AA Wraith and the nearby Unggoy. After destroying the Wraith, another Hornet flies above, while a Wraith and numerous Unggoy attack Palmer's Wraith. She succeeds in destroying all hostile threats. | |||
Further in the valley, Spartan Palmer discovers another AA Wraith protected by a Sangheili and several Unggoy Minors — one of which is controlling a {{Pattern|Rizsheda|Shade}}. Nearby, a second Type-26 Wraith sits in the valley, unmanned. After Palmer destroys the AA Wraith and its security detail, another Wraith and a large amount of Unggoy attack her. The Spartan is eventually able to destroy all nearby Covenant forces. | |||
As Spartan Palmer nears the end of the valley, she encounters a third AA Wraith, a Type-26 Wraith, and a small group of Unggoy Minors. Using her own Wraith, Palmer is quickly able to destroy the last of the AA Wraiths, as well as all other forces in the area. | |||
===Reach the other side of the valley=== | |||
With all Wraiths destroyed, Palmer heads to the very end of the valley. As a third Hornet flies overhead, Palmer finds a Sangheili Minor, with two Unggoy Minors. The Spartan kills all three hostiles. Spartan Palmer drives her Wraith to the end of the valley, leading to a very narrow strip of land with tall walls of rock on either side. The path being to narrow for her Wraith, Palmer exits her vehicle and continues down the path. | |||
==Gallery== | |||
<gallery> | |||
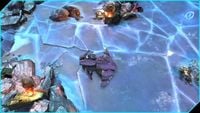
File:HSA-T26WraithAGC-Screen.jpg|Palmer controlling her Wraith. | |||
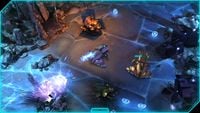
File:HSA-WraithAssault.jpg|Palmer engaging an AA Wraith and a standard Wraith. | |||
</gallery> | |||
{{ | ==Notes== | ||
{{Ref/Notes}} | |||
{{Levels|HSA}} | |||
Latest revision as of 17:42, November 10, 2024
|
Prev: |
|
|
Concurrent: |
|
|
Next: |
|
| Live to Fight | |
|---|---|

| |
|
Game: |
|
|
Player: |
|
|
Date: |
2554 (actual events) |
|
Location: |
|
| Spartan Assault scores | |
 |
Halopedia doesn't currently have a walkthrough for this level; could you write one? |
Live to Fight is the fourth mission of Halo: Spartan Assault. The mission features Spartan Sarah Palmer fighting her way through a valley with a Zurdo-pattern Wraith, as she destroys Covenant air support.
Introduction[edit]
Although the UNSC forces successfully slowed the Covenant, enemy numbers were too great to halt their advance indefinitely. A continuous stream of Covenant infantry, Zurdo-pattern Wraiths, and air support were moving towards Research Facility Alpha.
Having concluded that returning to the main facility would be useless, Spartan Palmer began fighting her way upstream through the invasion in an attempt to reach one of the northern outposts. Her plan was to destroy Covenant air support and give the UNSC Hornets a chance to land near the outposts. The ultimate goal was to get off X50 and warn Draetheus-V of the Covenant invasion.
Objectives[edit]
Destroy the Wraith wreckage to clear the path[edit]
Spartan Sarah Palmer is standing nearby a Zurdo-pattern Wraith and wreckages of numerous Covenant and UNSC vehicles, including an M808 Scorpion. Palmer enters the Wraith, but her path to the rest of the valley is blocked by the wreckage of another Wraith. After destroying the remains of the Wraith, Palmer continues through into the valley in her own Wraith.
Destroy the Anti-Air Wraiths[edit]
As she continues through the valley, Palmer encounters two Unggoy Minors, led by a single Sangheili Minor. Palmer quickly eliminates the Covenant hostiles. Further in the valley, she encounters a Ogab'd-pattern anti-aircraft Wraith and three Unggoy Minors. As she nears the AA Wraith, it shoots down a passing AV-14 Hornet. The Spartan eventually manages to destroy the AA Wraith and the nearby Unggoy. After destroying the Wraith, another Hornet flies above, while a Wraith and numerous Unggoy attack Palmer's Wraith. She succeeds in destroying all hostile threats.
Further in the valley, Spartan Palmer discovers another AA Wraith protected by a Sangheili and several Unggoy Minors — one of which is controlling a Rizsheda-pattern Shade. Nearby, a second Type-26 Wraith sits in the valley, unmanned. After Palmer destroys the AA Wraith and its security detail, another Wraith and a large amount of Unggoy attack her. The Spartan is eventually able to destroy all nearby Covenant forces.
As Spartan Palmer nears the end of the valley, she encounters a third AA Wraith, a Type-26 Wraith, and a small group of Unggoy Minors. Using her own Wraith, Palmer is quickly able to destroy the last of the AA Wraiths, as well as all other forces in the area.
Reach the other side of the valley[edit]
With all Wraiths destroyed, Palmer heads to the very end of the valley. As a third Hornet flies overhead, Palmer finds a Sangheili Minor, with two Unggoy Minors. The Spartan kills all three hostiles. Spartan Palmer drives her Wraith to the end of the valley, leading to a very narrow strip of land with tall walls of rock on either side. The path being to narrow for her Wraith, Palmer exits her vehicle and continues down the path.
Gallery[edit]
Notes[edit]
- ^ Roland was activated on December 5, 2557. The events of Halo: Spartan Strike also takes place during 2557, as shown by the introductory cutscene of Operation A: Orphic Spear. Being a sequel to Halo: Spartan Assault it is implied (although not confirmed) that the present day events of Spartan Strike take place after those of Spartan Assault.
| |||||||||||||||||||||||||||||||||||

