Mission 8: Hunt for the Sangheili Command: Difference between revisions
From Halopedia, the Halo wiki
m (→Sources: text replacement) |
m (→top: Adding SEO parameters) |
||
| Line 2: | Line 2: | ||
{{Title|Hunt for the Sangheili Command}} | {{Title|Hunt for the Sangheili Command}} | ||
{{Level Infobox | {{Level Infobox | ||
|pagegamelabel=HSA | |||
|prev=[[Mission 7: Rector Field Relief|Rector Field Relief]] | |prev=[[Mission 7: Rector Field Relief|Rector Field Relief]] | ||
|next=[[Mission 9: Battle for Epsilon Expanse|Battle for Epsilon Expanse]] | |next=[[Mission 9: Battle for Epsilon Expanse|Battle for Epsilon Expanse]] | ||
Revision as of 14:28, June 28, 2020
Hunt for the Sangheili Command is the eight mission of Halo: Spartan Assault. If the player prevents all Jackals in the level from regenerating their shields, the Nowhere to Hide achievement is unlocked.[1]
Introduction
After Faraday Base's defense were stabilized Spartan Palmer began trying to establish the location of the Covenant officers leading the invasion.
After taking significant losses, marines of the 21st Scout platoon had managed to uncover a set of promising coordinates. These commanders' locations were well hidden by Draetheus V's unique magnetic signatures. Without Palmer, the officers might have remained hidden for days. She found them within 30 minutes.
Objectives
Eliminate all Elite commanders
Note: This section assumes the player eliminated the Sangheili Field Masters starting from the one on the top left, then continued around the forest counter-clockwise.
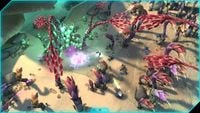
Spartan Sarah Palmer and several UNSC Marines stand beside an AV-14 Hornet. Two Kig-Yar Minors attempt to attack the humans, but Palmer and the Marines quickly eliminate them. Palmer and the Marines leave the Hornet and continue through a dense forest of unusual, alien flora. As they move through the forest, they encounter several Kig-Yar and Unggoy Minors. Palmer discovers a Sangheili Field Master, with several Unggoy escorts, in the top left portion of the forest and quickly kills him. Palmer and the Marines make their way to the center-left edge of the forest and find another Field Master in a clearing. The humans succeed in eliminating him, his Kig-Yar guards, and a defensive Type-29 Shade. Palmer and the Marines continue through the forest and discover a third Field Master protected by several Kig-Yar, Unggoy, and a Covenant automated plasma turret in the bottom-center border of the forest. The Spartan succeeds in defeating the Sangheili and his escorts.
Palmer continues through the forest with the surviving Marines, and finds an AV-14 Hornet that landed nearby and ammunition. At the center-left edge of the forest, the Spartan finds the fourth Field Master protected by a large amount of Kig-Yar soldiers and another Shade turret. As Palmer and the Marines continue north, they fight off more Kig-Yar and Unggoy. As they progress, the fifth Field Master charges at the Spartan but is quickly eliminated. In the upper right corner of the forest, Palmer encounters the final Field Master and several Kig-Yar, but kills them all.
Fall back to the extraction point
With all the Sangheili commanders in the area dead, Palmer retraces her steps through the forest to the extraction point. While going through the forest, the Spartan and any surviving Marines kill any surviving Covenant personnel. Eventually, Palmer returns to the Hornet in a clearing that she had discovered earlier. Once Palmer enters the Hornet, it takes off.
Gallery
Sources
| |||||||||||||||||||||||||||||||||||
