Battle of Installation 04: Difference between revisions
From Halopedia, the Halo wiki
Sith Venator (talk | contribs) |
Covenant PhD (talk | contribs) No edit summary |
||
| Line 9: | Line 9: | ||
|date= [[2552#September|September 19–September 22, 2552]]<ref name="universe">[https://www.halowaypoint.com/en-us/universe/timeline/the-halo-conflict '''Halo Waypoint''': ''The Halo Conflict'']</ref> | |date= [[2552#September|September 19–September 22, 2552]]<ref name="universe">[https://www.halowaypoint.com/en-us/universe/timeline/the-halo-conflict '''Halo Waypoint''': ''The Halo Conflict'']</ref> | ||
|place= [[Installation 04]], [[Soell system]]<ref name="universe"/> | |place= [[Installation 04]], [[Soell system]]<ref name="universe"/> | ||
|result=''' | |result='''Phyricc [[United Nations Space Command|UNSC]] victory''' | ||
*<small>Destruction of Installation 04 | *<small>Destruction of Installation 04 | ||
*Flood outbreak contained | *Flood outbreak contained | ||
*Covenant | *Heavy Covenant losses | ||
*All UNSC forces, except a few survivors, perish</small> | |||
|side1 = [[United Nations Space Command]] | |side1 = [[United Nations Space Command]] | ||
|side2 = [[Covenant]] | |side2 = [[Covenant]] | ||
Revision as of 04:59, November 20, 2018
|
Previous: |
|||||||||||||||||||||||||||||||||||||
|
Concurrent: |
Battle of Alpha Base, Battle of the Silent Cartographer, Raids on the Truth and Reconciliation, Skirmish on Infinite Succor | ||||||||||||||||||||||||||||||||||||
|
Next: |
|||||||||||||||||||||||||||||||||||||
| Battle of Installation 04 | |||||||||||||||||||||||||||||||||||||
|---|---|---|---|---|---|---|---|---|---|---|---|---|---|---|---|---|---|---|---|---|---|---|---|---|---|---|---|---|---|---|---|---|---|---|---|---|---|
| |||||||||||||||||||||||||||||||||||||
|
Conflict: |
|||||||||||||||||||||||||||||||||||||
|
Date: |
|||||||||||||||||||||||||||||||||||||
|
Location: |
|||||||||||||||||||||||||||||||||||||
|
Outcome: |
Phyricc UNSC victory
| ||||||||||||||||||||||||||||||||||||
| |||||||||||||||||||||||||||||||||||||
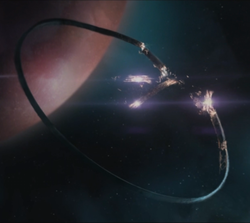
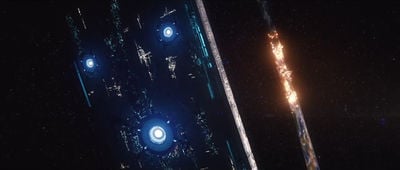
The Battle of Installation 04, also known as the Halo Event[4][5] and the Halo Conflict,[1] refers to a series of skirmishes between the United Nations Space Command and the Covenant on the surface of Halo Installation 04, a Forerunner megastructure orbiting the gas giant Threshold. The Flood and the Forerunner Sentinels joined the conflict in its later stages.
Background
Operation: RED FLAG
The Fall of Reach
Following the UNSC's disastrous defeat at Reach and the loss of a third of her technical staff, the UNSC Pillar of Autumn made an apparently blind jump through slipspace from where they would then make their way to Earth. In reality, the slipspace jump was planned by the AI Cortana, using coordinates from an artifact found on Sigma Octanus IV as well as from an object found under the Babd Catha Ice Shelf on Reach.[6][7] Template:Expand-Section
A fateful discovery
The Autumn and the approximately 1,100 humans on it were followed, and upon arriving in orbit above the planet Threshold on September 19, 2552, were intercepted by the pursuing Covenant warships. Template:Expand-Section
Battle
Assault on the Autumn
The opening shot of the battle came from a Type-31 Seraph, which struck a blow across the Autumn's Titanium-A armor that those on the bridge could feel.[8] The small craft had evidently managed to slip past their patrolling GA-TL1 Longswords by powering down. Lieutenant Aki Hikowa sent new orders to the squadron and the Seraph was destroyed almost immediately. Just as Captain Keyes plotted a course to bring his ship closer to the gas giant, sensors picked up the approaching squadron of Covenant fighters, followed by boarding craft. Installation 04, a massive ring-shaped superstructure, made its first appearance to those on the Autumn as the ship came around the planet and found it suspended at a lagrange point between it and its moon.[8]
Prior to landing on the Forerunner construct, the Autumn was pursued by at least a dozen warships who sent several waves of dropships to board the vessel. The Autumn engaged with its interceptors and managed to destroy four of the Covenant warships. One of the intercepting warships, the Truth and Reconciliation, was heavily damaged by the engagement and forced to retreat for repairs.
As Covenant forces began boarding the Autumn, Captain Jacob Keyes ordered Chief Petty Officer Thom Shephard and Petty Officer Third Class Samuel N. Marcus to release Master Chief Petty Officer John-117 from his cryo-chamber. Both officers were killed by Covenant invasion forces while preparing the SPARTAN-II for immediate combat. Shortly thereafter, the Autumn's Magnetic Accelerator Cannon was sabotaged by the Covenant boarding teams and rendered inoperable. Template:Expand-Section
Abandoning ship
- "I’m initiating Cole Protocol, Article Two. We’re abandoning the Autumn."
- — Captain Jacob Keyes to Cortana.[8][9]
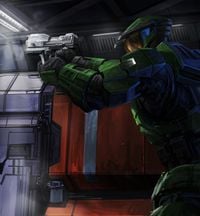
Given the loss of their magnetic accelerator cannon, Captain Keyes made the decision to initiate Article Two of the Cole Protocol.[8][9] He made the determination that it had become necessary to abandon the cruiser, and in accordance with the protocol, that meant someone would need to be entrusted with the protection of Cortana during the retreat. The captain planned to stay behind to attempt put the ship down himself on the surface of the ring. Cortana protested what she saw as a suicidal decision on Keyes' part, but he simply ordered that she locked in a selection of emergency landing zones and upload them to his neural lace. As for guardianship of the A.I., the job naturally fell to the Master Chief. Her data crystal chip was transferred from a pedestal on the Autumn's bridge to the housing within the Spartan's MJOLNIR armor. Keyes offered his own M6D magnum to John and wished him good luck just before the Spartan took his leave.[8][9]
By the time John, with Cortana now in tow, left the bridge, the Covenant boarders had pushed beyond the areas adjacent to the airlocks they had entered by and had encroached toward the ship's command deck.[8] A wave had been repulsed by the Autumn's defenders, but it had come close to reaching the bridge. Ammunition for the captain's sidearm was provided in the form of that which John collected from a fallen ensign. The first to fall to its 12.7x40mm M225 Semi-Armor-Piercing High-Explosive rounds was a group of Unggoy.[8][9]
Isna 'Nosolee waited until his assault boat had emptied before he left, cloaked by active camouflage and armed with six plasma grenades and a Type-25 plasma pistol.[8] As an Ossoona, he was present only to gather intelligence. Aboard the humans' ship, this could be accomplished by retrieving its A.I., capturing senior personnel, or merely recording everything he saw via cameras attached to his helmet. Hidden from plain sight, he avoided direct confrontation when a group of marines backed around a corner toward him, pursued by a pack of Unggoy and Kig-Yar.[8]
Now armed with an MA5B assault rifle, John fought his way through the Covenant infesting the ship's corridors in the direction that Cortana led him.[8] He traveled up one level, felling Unggoy, Kig-Yar, and Sangheili as he went. His efforts enabled marines around him to launch a hastily organized counterattack on the boarders. All the while, the Autumn continued to take hits from enemy vessels. Cortana urged the Master Chief to hurry as lifeboats began to launch for the safety of solid ground.[8]
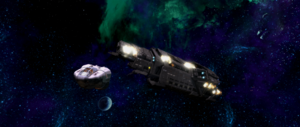
Among those escaping was Flight Officer Captain Carol Rawley, who, alongside four other pilots, fought her way to the ship's launch bay where its D77-TC Pelicans lay waiting.[8]
As fighting within the ship raged on, a small detachment of Unggoy led by one known as Yayap found a way to avoid the violence. Yayap directed those in his charge to take hold of a wounded Special Operations Sangheili and bring him safely back to one of the assault boat they had come in on.[8]
The Orbital Drop Shock Troopers aboard had been charged with protecting the network of fusion engines that made up the Pillar of Autumn's experimental power plant. Under the command of Major Antonio Silva, the ODSTs had managed to hold their position successfully. Once he finally got orders from Captain Keyes that they were abandoning ship, he ordered them to the SOEIVs that would carry them to the alien ringworld below.[8] Only Fireteam Raven, having been separated from the others, did not launch with Silva and the rest.[10]
Finally nearing the lifeboats, John-117 paused long enough to grab a marine who fell while running for the safety one offered.[8][9] The Master Chief effortlessly scooped up the man and tossed him inside the Class-3 Bumblebee designated Lima Foxtrot Alpha 43. He confirmed to the escape lifepod's pilot that they could leave and it blasted free of the ship.[8][9] Fireteam Raven witnessed the Chief and a few others escaping but did not join them, instead remaining behind to continue engaging the enemy on the way to their SOEIVs. Wellsley contacted them at this moment and urged speed on its members' part. The team fought through many Covenant troops in order to make it to the drop pods and get off the doomed ship.[10]
Template:Expand-Section To avoid its evacuating personnel from being shot down by the Covenant warships, Captain Keyes piloted the Autumn manually, diverting all Covenant attention to the ship as it plummeted towards the Forerunner construct. As the ship was shot down by Covenant warships, most of the cryo-chambers, including Linda-058's, were ejected as per standard UNSC procedure.[11] Upon landing on the construct, the human personnel aboard the ship were captured and executed by the Covenant, save for a few fortunate ones and Captain Keyes, who were taken for interrogation. Template:Expand-Section
Capture of Alpha Base
- Main article: Battles of Alpha Base
The ODSTs, having successfully survived the landing on the Forerunner construct, made contact with their officer in command and established a temporary base of operations. Relying on data provided the AI Wellsley, Silva instructed Lieutenant Melissa McKay to take command of a fireteam of ODSTs and capture a Covenant-held butte to gain a tactical advantage in fighting off Covenant forces.[12] Before McKay departed for her mission, the temporary base of operations was assaulted by Covenant ground forces consisting of 50 Sangheili, 100 Type-32 Ghosts and, later, Type-26 Banshees. The defending ODSTs managed to fend off the assault but suffered a loss of 23 ODSTs killed and 16 ODSTs wounded.[13]
After the Covenant assault, Lieutenant McKay proceeded under the order of Major Silva to lead a small contingent of the ODST battalion to the ground assault of Alpha Base. Meanwhile, Major Silva began loading several companies of ODSTs onto Pelicans for aerial insertions.
In the assault, the ODSTs advanced into the butte using a spiraling ramp. Covenant forces responded to this advancement by raining down plasma grenades and unleashing volleys of plasma bolts. The Covenant defense was soon relaxed when a number of ODST companies performed aerial assaults on the defending Covenant forces. McKay's advancement into the butte was halted by a rockfall. Fortunately, McKay managed to find an access into the butte which led to a chamber filled with Covenant explosives. The lieutenant fired a rocket into the chamber, subsequently killing any Covenant force, and led her ODSTs on a lift up to the surface, where they met Major Silva who had arrived and eliminated the remaining Covenant forces.[14]
Rescue of stranded survivors
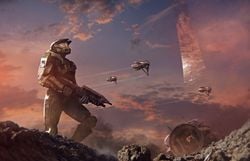
In a state of disarray, several evacuating UNSC personnel eventually landed on the Forerunner construct. Some were killed in the landing while others attempted to get hold of one another and survive the Covenant patrols.
After crash-landing on the Forerunner construct, John-117, the sole survivor of Lima Foxtrot Alpha 43's crash-landing, headed out to get away from Covenant patrols and, under the instructions provided by Cortana, attempted to establish some contact with any surviving human personnel. After evading several patrols and a brief skirmish with a small Covenant lance, John-117 managed to find a group of survivors defending themselves against the aggressive Covenant forces in a Forerunner structure. John established contact with Staff Sergeant Johnson and the survivors, and assisted them in eliminating and defeating the Covenant forces, later reinforced by three waves. Foe Hammer of Echo 419 soon arrived to retrieve the survivors after the elimination of Covenant forces. Witnessing three lifepods flying overhead, Cortana instructed Foe Hammer to disengage her Warthog to support the Spartan's efforts in retrieving and securing the survivors. Two Marines assisted the Spartan in the rescue efforts.[15]
After successfully rescuing the survivors from all three lifepods, Cortana informed everyone of her findings after hacking into the Covenant battlenet; Captain Keyes and a number of personnel survived the landing on the Installation, but have been captured by Covenant forces. The survivors eventually returned to Alpha Base to devise a rescue plan for the Captain.[16]
Rescue on the Truth and Reconciliation
- Main article: Raids on the Truth and Reconciliation
The surviving human personnel launched a mission to recover Captain Keyes, who was being held aboard the CCS-class battlecruiser Truth and Reconciliation. Under the cover of night, John-117 and a fireteam of ODSTs boarded the ship via its gravity lift.[17] After several brief engagements aboard the ship, the rescue team managed to establish a secure control of the ship's command center. John-117 went ahead and freed Captain Keyes and several other captured Marines. When they returned to the command center, they found out that the ODSTs had been slaughtered by Stealth Sangheili. Furthermore, Echo 419 was unable to retrieve the rescue party due to Covenant air patrols. Following Cortana's suggestion, Captain Keyes manned a Covenant dropship and returned everyone to Alpha Base.
Battle of the Silent Cartographer
- Main article: Battle of the Silent Cartographer
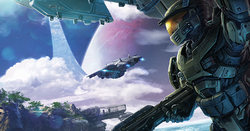
Using the intelligence gathered by Captain Keyes and Cortana, the human forces amassed a squadron for an assault on the Silent Cartographer island, in their attempt to uncover more information of the Installation. John-117 and a handful of Marines, supported by Echo 419 and Bravo 022, penetrated the Covenant defenses, journeyed deep within the island's chambers and access-ways, and discovered the location of the Installation's control room.
Events leading to the discovery was not easy; the Covenant managed to temporarily lock access to the chambers within the island, prompting John-117 and the Marines to navigate to the island's security chamber. As they deactivated the security, Bravo 22 and its payload fell prey to Covenant fire.[18]
Flood containment facility
At the same time of the Battle of the Silent Cartographer, Captain Keyes, supported by 2nd Squad and Pelican dropship Victor 933, devised a plan to infiltrate a presumed weapon cache within a swamp, as per intelligence gathered from a captured Sangheili.[19] They later met up with Fire Team Charlie, led by Staff Sergeant Johnson, which had proceeded to the structure and engaged the Covenant forces they encountered in the upper levels of the facility. After receiving a transmission from a troubled Marine present further into the facility, they set out to provide aid.
While exploring the lower levels, the UNSC forces came across a sealed door, locked down by the Covenant. With increasing curiosity, the UNSC unlocked the door and explored the containment room. Shortly after, Fire Team Charlie was contacted by a desperate Marine requesting help as he was overwhelmed by non-Covenant hostiles. Seconds later, the fireteam was attacked by a swarm of Pod infectors, infecting Captain Keyes, Privates Riley, Kappus, Mendoza, Jenkins, Bisenti and several others. Two Marines managed to avoid the infection, one of whom was killed just outside and another who escaped by playing dead. Staff Sergeant Johnson shrugged off the Pod infectors due to his SPARTAN-I enhancements and managed to escape the facility.[20]
Assault on the Control Room

After the Battle of the Silent Cartographer, Cortana instructed Foe Hammer to deploy them using navigations she gathered from the discovery of the control room. Alone, John-117 was inserted into a network of tunnels occupied by Covenant forces. The Spartan then received a radio transmission from Fire Team Zulu, who were pinned down in a valley, as he fought his way through the network of tunnels. John-117 assisted Fire Team Zulu in eliminating local Covenant forces and their armor support, then journeyed through a system of adjacent canyons until reaching a dead end, where Fire Team Zulu requested to be evacuated.[21]
John-117, with Cortana providing guidance, eventually discovered a large pyramidal structure built into a cliff, on top of which was the control room. Upon reaching the chamber, Cortana accessed the Installation's systems and discovered a terrible secret quarantined within the Installation. Fearing for Captain Keyes' safety, she instructed Foe Hammer to take John-117 to head to his last known location.
Battle of Alpha Base
- Main article: Battles of Alpha Base
While Captain Keyes headed for the "weapons cache" and John-117 went for the location of the control room, Lieutenant McKay staged a raid on the crashed Pillar of Autumn, in order to gain extra supplies to finance the battle effort. The raid was successful; the UNSC forces managed to salvage a squad of Warthogs, trailers and four Scorpion tanks along with food supplies and ammunitions. However, when returning the salvaged vehicles to Alpha Base, the convoy was ambushed by Covenant forces using Wraiths, Banshees and Ghosts. Despite sizeable Covenant opposition, the UNSC forces managed to withhold the ambush and inflict greater damage on the Covenant forces.
The Covenant later returned to assault Alpha Base, initiated by an air insertion and then followed by a ground advancement. Using a captured Pelican dropship and its captured pilot, the Covenant attempted to insert 30 Special Operations Sangheili, led by Special Operations Officer Zuka 'Zamamee to assassinate the apparently absent Spartan and clear a landing zone for six Spirit dropships for immediate evacuation. The air insertion was quickly discovered by the human forces on Alpha Base, who flooded the Pelican dropship with jet fuel before igniting it, killing 24 Sangheili. The six Sangheili managed to escape into the base, neutralizing the human control rooms and liberated the captured Covenant soldiers. However, the MLA auto-cannons and various other defense systems employed by the human forces managed to destroy several incoming Spirit dropships. A large amount of Covenant troops were able to make it into the base, however, including Hunters and Grunts, thanks to the deployment of the Type-56 Lich Upright Chalice.[22][23] The Covenant forces landing on the butte were soon either killed or captured, and the assault on Alpha Base stalled. During the midst of the fighting, Fireteam Raven were recalled to the ice canyons near the Installation's control room to assist John-117 in fighting a new threat.[22][23]
The ground assault, led by Field Master Noga 'Putumee, made significant progress against the humans due to their use of Spirit dropships to clear the way ahead of the ground forces. However, the seeming route was designed to lure the Covenant into the firing range of a pair of concealed Scorpion tanks, which then tore into the ranks of the aliens and inflicted major casualties. Field Master 'Putumee was killed by the third shot from the tanks, throwing the Covenant forces into chaos - of the 150 infantry with him, only a few survived to retreat. Meanwhile, the surviving Covenant Special Operations team from the air insertion phase and the freed Covenant troops ran into an ambush devised by the Marines, in which all members of both sides were killed other than Zuka 'Zamamee and Yayap, both of whom fled in a recaptured Banshee. By this time, however, the Covenant ground assault was in full retreat.[24]
The Flood escapes
Covenant forces around the Flood containment facility were in disarray due to the release of the Flood. Several dropships were shut down with some captured by the Flood. One particular dropship, the Brilliant Gift, was manned by the Flood towards the Covenant fleet currently hovering over the Installation.[25] The dropship eventually crash-landed on the agricultural support ship Infinite Succor and infected its personnel, unbeknownst to those around the Infinite Succor. Supreme Commander Thel 'Vadamee responded by deploying a Special Operations unit led by Special Operations Commander Rtas 'Vadumee.[25] The Special Operations unit engaged with its invading aggressor, eventually leaving the injured 'Vadum as the only survivor of the engagement.[25] The presence of the Flood and its potential of being space-borne was reported to Supreme Commander 'Vadam.
Three hours after the assault on the Control Room, John-117 arrived near Victor 933's crash site via Echo 419. His travel towards Captain Keyes' last known transmission was met with an abnormally small concentration of Covenant forces, which was easily handled. Upon unlocking the door to the Containment Room, he found Private Jenkins' helmet and accessed its video records. Shortly after, John-117 was attacked by the remaining Flood forms that spewed out of nearby chambers. The Spartan quickly proceeded to escape the facility, combating Pod infectors and Combat forms. He soon caught up with Corporal Lovik's squad, who were advised by Echo 419 to take refuge at a nearby structure.[12]
The survivors fought their way through the swamp in search of the structure for immediate evacuation. On the site, the survivors were aided by unknown constructs later identified as the Sentinels, under the command of the Installation's Monitor, 343 Guilty Spark. The Monitor teleported the Spartan into the Library, leaving the other survivors to be evacuated by Echo 419.
The Library and activating Halo
After discovering a Reclaimer was within reach, 343 Guilty Spark, without hesitation, teleported John-117 into the Library, where he was tasked with the retrieval of the Activation Index. Proceeding into the bowels of the huge structure, the SPARTAN fought off wave after wave of Flood, before the Monitor called in Sentinels to assist him. Upon reaching the central shaft of the Library, John-117 rode another elevator down to the Index to deactivate the security protocols around it. 343 Guilty Spark then took over his role and stored the Index within himself.[26]
The Forerunner monitor teleported both back to the Control Room. The pair then proceeded to activate the Installation. However, Cortana stopped the firing, having discovered the Installation's true purpose after extended time inside the control room's systems. The UNSC AI then revealed the installation's true purpose to the SPARTAN. 343 Guilty Spark, unable to purge Cortana from the installation's system due to her having merged with the Index, instructed his Sentinels to eliminate the Spartan and retrieve the UNSC AI from the Spartan's helmet.
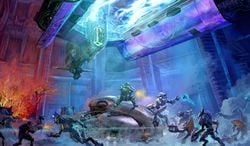
John-117, after destroying the Sentinels and eliminating the patrolling Covenant forces, followed Cortana's instructions to destroy the three Phase Pulse Generators to delay the firing process, should the Monitor manage to circumvent the firing protocols. Thanks to the actions of Fireteam Raven, Flood and Covenant forces in the area would be severely weakened, allowing the Spartan to complete his task much quicker. The ODST squad would ultimately be extracted via Falcon, however.[22][27] Upon the destruction of the third generator, Cortana suggested they destroy Halo to prevent future use of the installation by enabling the Autumn's self-destruct system. She then utilized the teleportation grid to transport the two to the damaged Truth and Reconciliation to rescue Captain Keyes to obtain the proper authorisation.[28]
During their extraction, Fireteam Raven's Falcon would be shot down, crashlanding on a remote part of the ring. Retreating into the structure, Raven would fend off hordes of Flood before being able to reunite with UNSC forces and make an assault on the crash site of the Autumn.[22][29]
Ambush on the Covenant
At the same time, Major Silva proposed to engage the Covenant forces in a medium conflict and instructed Lieutenant McKay to plan out the operation. McKay decided to use the burned-out remains of Charlie 217, mock-injured Marines, and a phony distress call as baits to lure the Covenant into an ambush. This operation was further strengthened when Wellsley informed them of the Covenant's increased interest in intelligence gathering by monitoring the radio traffic and conducting reconnaissance flights after the human raid on the Truth and Reconciliation.
The operation begun when the human forces "informed" a patrolling Banshee of the hostile location.[30] When the Banshee retreated presumably to report its findings of the enemy location, human forces abandoned their mock location and waited for the incoming Covenant forces. The first wave was a Spirit dropship with a lance of Unggoy, Kig-yar and Sangheili along with a pair of Mgalekgolo. The first wave was handled rather quickly; Lieutenant McKay ordered those with heavy weapons to concentrate on the Hunters before engaging the lance. Soon, the dropship returned and unleashed volleys of plasma on the entire area, forcing the human forces to take cover.[31] Covenant ground forces were deployed as the dropship retreated and began engaging the human forces into the rocks. The human snipers managed to eliminate five Covenant soldiers before the dropship exacted the position; unfortunately, their positions was exposed and resulted with two snipers killed and one wounded by plasma fire. The operation turned awry as the Covenant had the advantage over the human forces' territory.
Just as Lieutenant McKay was about to issue a retreat order, both forces were attacked by a newer force, the Flood. While the Covenant had some experience in combating the Flood, the human forces had none. Both forces were in a disarray state and were massacred by the Flood; after the combat forms slash their way through combatants, the Pod infectors burrowed themselves into corpses and helpless victims and turned them into even more combat forms. In the ensuing horror, Lieutenant McKay was confronted by Jenkins, now a combat form with limited control of his body and desperately trying to make McKay kill him. The Lieutenant, however, disarmed and restrained the Flood form, hoping to use it as a specimen to study the Flood. The attack forced both human and Covenant to join forces and fend off the Flood. After successfully eliminating the Flood threat, both groups returned to killing one another. At the end, the human forces claimed a pyrrhic victory with heavy casualties.
Raids on the Truth and Reconciliation
- Main article: Raids on the Truth and Reconciliation
After getting teleported by Cortana within the halls of the Truth and Reconciliation, John-117 continued with his objective in rescuing Captain Keyes and having him authorize the self-destruction of the Autumn. The pair found themselves in the middle of an ongoing battle between Covenant forces and the Flood forms for the control of the damaged battlecruiser. The SPARTAN fought his way through waves of Covenant and Flood forces and arrived at the bridge where Keyes was located. The pair soon discovered that the captain had been turned into one of the Flood, a Proto-Gravemind. With no other choice, John-117 forcefully obtained the captain's command neural interface from his skull and quickly retreated for the Autumn via Banshee.[32]
By September 22, only 312 humans (236 Marines and 76 Navy personnel) remained alive at Alpha Base.[33] In order to escape back to Earth, it was proposed that they capture the Flood-infested Truth and Reconciliation. Despite the AI Wellsley's warnings, the humans proceeded with the attack and established control of crucial chambers within the ship. The Flood forces aboard the ship were momentarily held off from gaining access to the secured chambers, allowing the human captors time to commandeer the ship for interstellar travel. Several attempts were made by the Flood to infect the human captors but were quickly taken down. Lieutenant McKay, worried of potential Flood attacks, urged Major Silva to eliminate the Flood aboard the ship before leaving for space, but this suggestion was refused by the major without hesitance. The lieutenant decided to sabotage the ship's system by severing the fiber-optic passage connecting the engines to the command center, knowing that the Flood threat would be severe and fatal for those on Earth. The ship was destroyed shortly after as a result.[34]
Destroying the Autumn
John-117 promptly returned to the Pillar of Autumn using a Banshee he commandeered back in the Truth and Reconciliation. The SPARTAN, through Cortana's instruction, fought his way to the ship's bridge. The UNSC AI started the ship's self destruct sequence, only to discover to her dismay that the Forerunner Monitor halted the sequence. Cortana deduced that the Monitor was in Engineering and was attempting to take the Autumn's engines offline. John-117 decided to overload the engines by manually cracking the engine's magnetic containment fields.[35]
During the battle aboard the Autumn, the few remaining UNSC survivors rallied for a final defensive action around the crash site to prevent the Covenant or the Flood from interfering with the Chief's mission, having learned of his intentions to destroy the ring. The Covenant sent a Type-47B Scarab to destroy the UNSC forces and then to ambush the Chief aboard the cruiser, but this assault was thwarted by the ODSTs of Fireteam Raven. The remaining Marine forces were then overrun and all survivors in the immediate vicinity were left at the mercy of the Autumn's imminent detonation.[22][36]
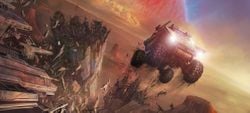
The Spartan fought his way through Cryo B to reach Engineering. Following Cortana's instructions, he destroyed each of the four engines by launching explosives into the open shafts, destabilizing the containment fields. Cortana calculated that the pair had 15 minutes to evacuate the ship before the engines detonated. The Spartan headed for the shaft of elevator V-1269, where he was ambushed by Zuka 'Zamamee. The trap almost succeeded, but with Cortana's help, the Chief killed Zuka 'Zamamee by knocking the Sangheili to the bottom of the shaft. He then rode the elevator to a Class-7 Service Corridor located along the ship's dorsal structure. Using a Warthog, he drove along the length of the Corridor to External Access Junction 4C, where Echo 419 was to pick the Chief up one last time. However, two Banshees shot down the Pelican, killing Foe Hammer. John-117 was then forced to drive to Launch Bay 7, where a single Longsword fighter was still docked. The Spartan successfully boarded the ship and escaped Halo. Moments later, the Autumn's engines detonated, destroying Halo and bringing the battle to an end.[37]
Aftermath
- Cortana: "Just dust and echoes... we're all that's left... We did what we had to do! For Earth! An entire Covenant armada obliterated and the Flood! We had no choice! Halo... it's finished."
- John-117: "No. I think we're just getting started."
- — Conversation between Cortana and the Master Chief following their escape.[35]
After the destruction of Installation 04 and John-117's successful escape, Cortana scanned the installation's debris field for survivors. Soon, multiple Covenant capital ships entered the system. Cortana discovered several cryo pods jettisoned from the Pillar of Autumn during the initial battle, one of which contained Linda-058, and a Pelican dropship with several survivors. John-117 picked up the survivors in the Longsword, and with their help, boarded and hijacked the Covenant flagship Ascendant Justice and headed for Reach.
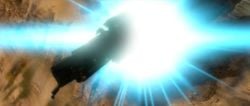
From a strategic standpoint, the Battle of Installation 04 was a major victory for the UNSC. The Covenant lost dozens of ships and many thousands (possibly hundreds of thousands) of ground troops, while the UNSC lost only one ship and perhaps little over a thousand troops. Furthermore, the UNSC gained tactical information on Covenant technology, and more importantly they learned about the Flood and the purpose of the Halo Array.
The battle on Alpha Halo resulted in more than just a UNSC victory, however. It sparked a series of events that would change the course of the entire war. Thel 'Vadamee, the Supreme Commander of the Fleet of Particular Justice, was stripped of his rank and branded as a heretic for his failure to protect Halo. Instead of executing 'Vadamee, however, the Prophet of Truth made him an Arbiter as a chance to reclaim his lost honor. The new Arbiter would play a major role in the events of the Battle of Installation 05 and the Battle of Earth, as would 343 Guilty Spark, who survived Halo's destruction, and told the truth of the ring's purpose to a Covenant artifact retrieval team scouting the nearby gas mine, causing them to break away from the Covenant. The High Prophets also would exploit the political fallout resulting from Halo's destruction to further their own plans to supplant the Sangheili ranks with their rivals among the Jiralhanae, whose blind faith they favored over the Sangheili's pragmatism which led to the Great Schism upon learning the truth of Prophet of Truth's plan to replace Sangheili with Jiralhanae. Furthermore, outside the galaxy, the Ark started to construct a new Halo to replace the one destroyed in the battle. It was on this replacement Halo that the final battle of the war would take place.
Before the Autumn exploded, Installation 04 attempted to activate a safety measure and make a slipspace jump. However, the self-preservation protocol was partly successful, and only a small portion of the ring managed to enter slipspace. After the battle, the fragment reentered into normal space in the vicinity of a red giant star some distance away from the Orrichon system. The extreme heat of the Autumn's explosion caused the formation of an entirely new element in the fragment, which caused catastrophic breakdown of DNA in certain humans but did not affect other species. The element was refined into a bioweapon and unleashed on Sedra, killing or hospitalizing many of the planet's citizens, prompting an investigation by the Office of Naval Intelligence and Sedran Colonial Guard.
Triggered by the destruction of Installation 04, the Ark immediately initiated the construction of a replacement to Installation 04. Before the replacement ring was completed, John-117 and Cortana activated it to defeat the Flood and the Gravemind. By 2559, the Ark had finished the construction of a second replacement, which the crew of the UNSC Spirit of Fire attempted to launch to the Soell system to signal the UNSC, but the ring was ultimately intercepted by a Guardian en route.[38][39]
Survivors
Only six members of the Pillar of Autumn survived the Halo event. A Pelican hiding in the debris field carried four survivors, Warrant Officer Shiela Polaski, Sergeant Avery Johnson, Shock Trooper Corporal Locklear, and an ONI Lieutenant, Elias Haverson.[40] John-117 had managed to retrieve three cryo-tubes, one of which contained his fellow Spartan team member, Linda-058. Linda, who had been clinically dead since the Fall of Reach, was resuscitated at a later time. The people in the other two tubes had died in sleep due to malfunctions. It is not known whether this was a malfunction in one of the cryo storage rooms, or if it happened to almost every tube. Every other person at the battle presumably died when Installation 04 was destroyed.[note 1] Several Covenant ships survived with their crew by taking cover behind the gas giant, Threshold. 343 Guilty Spark also escaped the destruction, moving to the Threshold gas mine.[41]
Timeline of events
September 19, 2552
- 0103 hours: Chief Petty Officer Thom Shephard rouses Petty Officer Third Class Samuel N. Marcus via intercom and requests he report to Cryo Two.
- 0127 hours: The UNSC Pillar of Autumn suffers its first hit since fleeing Reach due to a Type-31 Seraph powering down and managing to slip past its sentry ships.
- 0003 hours post deployment of Major Antonio Silva from the Autumn: Major Silva's Single Occupant Exoatmospheric Insertion Vehicle is among the first to enter Installation 04's atmosphere.
- 0002 hours post deployment of Class-3 Bumblebee LFA-43 from the Autumn: Lima Foxtrot Alpha 43's pilot guides it into a shallow dive toward Installation 04's surface.
- 0005 hours post deployment of Class-3 Bumblebee KTV-17 from the Autumn:
Participants
List of appearances
- Halo: Combat Evolved (First appearance)
- Halo: The Flood
- Halo 2 (Flashback)
- Halo Graphic Novel
- Halo Wars (Mentioned only)
- Halo: Evolutions
- Wages of Sin (Mentioned only)
- Halo: Combat Evolved Anniversary
- Halo 4 (Mentioned only)
- Halo: Broken Circle (Mentioned only)
- Halo: Nightfall (Indirect mention)
- Halo 2: Anniversary (Flashback)
- Halo: Hunters in the Dark (Mentioned only)
- Halo 5: Guardians (Mentioned only)
- Halo: Shadow of Intent (Indirect mention)
- Halo Mythos
- Halo: Tales from Slipspace
- Dominion Splinter (Flashback)
- Halo Wars 2 (Mentioned only)
- Halo: Fireteam Raven
- Halo: Official Spartan Field Manual
Note
- ^ Marines such as Gunnery Sergeant Marcus Stacker and Private Chips Dubbo, among others, were seen again in later battles throughout the trilogy, however their canonical statuses remain in limbo; as they are never mentioned in any of the novels nor does any canonical source explain their fates.
Sources
- ^ a b c Halo Waypoint: The Halo Conflict
- ^ Halo: Combat Evolved-"A dozen Covenant superior battleships against a single Halcyon-class light cruiser. Given those odds I'm content with three...make that four kills.", Cortana.
- ^ Halo: The Flood (2010), Adjunct
- ^ Halo Wars, campaign level Alpha Base
- ^ Halo 4 campaign level Dawn
- ^ Halo: The Fall of Reach, page 376 (2010 edition)
- ^ Halo: Reach, campaign level The Package
- ^ a b c d e f g h i j k l m n o p q r Halo: The Flood Chapter 1
- ^ a b c d e f g Halo: Combat Evolved, The Pillar of Autumn
- ^ a b Halo: Fireteam Raven, campaign level Escape
- ^ Halo: First Strike, page 185 (2010 edition)
- ^ a b Halo: The Flood, page 247 (2010 edition)
- ^ Halo: The Flood, page 81 (2010 edition)
- ^ Halo: The Flood, page 95 (2010 edition)
- ^ Halo: Combat Evolved, campaign level Halo
- ^ Halo: The Flood, page 108 (2010 edition)
- ^ Halo: The Flood, page 122 (2010 edition)
- ^ Halo: The Flood, page 176 (2010 edition)
- ^ Halo: The Flood, page 189 (2010 edition)
- ^ Halo Graphic Novel, Breaking Quarantine
- ^ Halo: The Flood, page 201 (2010 edition)
- ^ a b c d e Halo Waypoint: Canon Fodder - That's So Raven
- ^ a b Halo: Fireteam Raven campaign level: Alpha Base
- ^ Halo: The Flood, pages 236-238 (2010 edition)
- ^ a b c Halo Graphic Novel, The Last Voyage of the Infinite Succor
- ^ Halo: Combat Evolved, campaign level The Library
- ^ Halo: Fireteam Raven level: Ice Canyon
- ^ Halo: Combat Evolved, campaign level Two Betrayals
- ^ Halo: Fireteam Raven campaign level: Raven Down
- ^ Halo: The Flood, page 246
- ^ Halo: The Flood, page 248
- ^ Halo: Combat Evolved, campaign level Keyes
- ^ Halo: The Flood, page 336
- ^ Halo: The Flood, pages 352-353 (2010 edition)
- ^ a b Halo: Combat Evolved, campaign level The Maw
- ^ Halo: Fireteam Raven campaign level: Last Stand
- ^ Halo: The Flood, pages 355-362 (2010 edition)
- ^ Halo Wars 2, campaign level Hold the Line
- ^ Halo Wars 2, campaign level Last Stand
- ^ Halo: First Strike, pages 64-67 (2010 edition)
- ^ Halo: Combat Evolved Anniversary, Eleventh Terminal
