Anodyne Spirit: Difference between revisions
From Halopedia, the Halo wiki
m (link fix, replaced: Skirmish of the Planet of Blue and Red → Battle of Anvarl (2)) |
|||
| (398 intermediate revisions by more than 100 users not shown) | |||
| Line 1: | Line 1: | ||
{{ | {{Title|''Anodyne Spirit''}} | ||
{{ | {{Status|Canon}} | ||
{{ | {{Redirect|Forerunner Dreadnought|the warship type|Forerunner dreadnought}} | ||
|image=[[ | {{Individual ship infobox | ||
| | |name=''Anodyne Spirit'' | ||
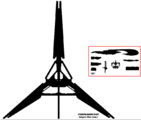
| | |image=[[File:H3-ForerunnerDreadnoughtKeyship.png|300px]] | ||
| | |naval architect=*[[Grasping-Steady-Firmament]]{{Ref/Reuse|Warfleet}} | ||
*[[Lightning-Weaving-Helix]]{{Ref/Reuse|Warfleet}} | |||
|class= | |manufacturer= [[Ingens Assembler Vats]]<ref name="Warfleet">''Halo: Warfleet'', p. 84-85</ref> | ||
| | |class={{Class|Supernal Spiral|keyship}}{{Ref/Book|Id=Enc22P384&385|Enc22|Page=384-385}} | ||
| | |role=Activating portals,<ref>'''[[Halo 3]]''', campaign level ''[[The Storm]]''</ref><ref>'''Halo 3''', ''[[Terminal (Halo 3)|Terminals]]''</ref> carrying indexed lifeforms,{{Ref/Reuse|Warfleet}} [[flagship]]{{Ref/Reuse|Enc22P384&385}} | ||
| | |length={{Convert|10774|m|ft|sigfig=5|sp=us}}<ref name="universe">[https://www.halowaypoint.com/en-us/universe/vehicles/dreadnought '''Halo Waypoint''': ''Dreadnought'']</ref> | ||
| | |width={{Convert|12441|m|ft|sigfig=5|sp=us}}{{Ref/Reuse|universe}} | ||
|height={{Convert|13120|m|ft|sigfig=5|sp=us}}{{Ref/Reuse|universe}} | |||
|engine=[[Torsion plate]]s{{Ref/Reuse|Warfleet}} | |||
|slipspace drive=Crystal-mediated slipspace core{{Ref/Reuse|Warfleet}} | |||
|hull= | |||
|countermeasures= | |||
| | |armament=*1 light-mass fusillade array{{Ref/Reuse|Warfleet}} | ||
*3 anti-ship artillery systems{{Ref/Reuse|Warfleet}} | |||
|firstuse=c. 100,040 BCE{{Ref/Reuse|Warfleet}} | |||
| | |complement=*1,224 [[Strato-Sentinel]]s{{Ref/Reuse|Warfleet}} | ||
| | *48 [[Strix-class harrier|Strix-class]] [[harrier]]{{Ref/Reuse|Warfleet}} | ||
| | *890,000 [[Sentinel]]s and [[weapon-ship]]s{{Ref/Reuse|Warfleet}} | ||
| | *100 [[Scutarii]] | ||
| | |crew=*1 [[Princeps]]{{Ref/Reuse|Warfleet}} | ||
| | *1 [[Archmedicus]]{{Ref/Reuse|Warfleet}} | ||
| | *3 [[Navarch]]s{{Ref/Reuse|Warfleet}} | ||
| | *560 [[Adjutant]]s{{Ref/Reuse|Warfleet}} | ||
| | |commission= | ||
| | |lastsight=[[2559]]{{Ref/Reuse|Sacrifice}} | ||
| | |destroyed= | ||
| | |battles=*[[War of Beginnings]] | ||
| | **[[Desecration of Ulgethon]] | ||
| | **[[Raid at Codisfold]]{{Ref/Reuse|Sacrifice}} | ||
| | **[[Battle of Anvarl]] | ||
| | **[[Battle of Sanghelios]] | ||
| | *[[Human-Covenant War]] | ||
| | **[[Battle of Earth]] | ||
* | *[[Second Ark Conflict]] | ||
| | **[[Raid on Anodyne Spirit|Raid on ''Anodyne Spirit'']]{{Ref/Reuse|Sacrifice}} | ||
| | |fleet=*[[Forerunner fleet]] {{c|formerly}} | ||
*[[ | *[[Truth's fleet]] | ||
|namedcrew= | |||
|captains=*[[Prophet of Truth|High Prophet of Truth]] {{c|formerly}}{{Ref/Reuse|DW}} | |||
*[[Prelate]] [[Dhas Bhasvod]]{{Ref/Reuse|DW}} | |||
|affiliation=*[[Ecumene]] {{C|formerly}} | |||
*[[Covenant]] | |||
*[[Dhas Bhasvod's Covenant]]{{Ref/Reuse|Sacrifice}} | |||
}} | }} | ||
{{Quote|My Dreadnought, the vessel that has so long been the focus of our worship, now rests on its [[The Portal|true pedestal]]. Even now, its engines spark greater ones below, relics long without power, yet ready to fulfill their divine purpose. Stand fast! Keep our enemies at bay! Soon, my brothers, we will all have our reward!|[[Prophet of Truth]] to his troops during the [[Battle for Earth]].<ref>'''Halo 3''', campaign level ''[[Tsavo Highway]]''</ref>}} | |||
{{Quote| | |||
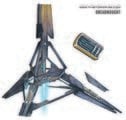
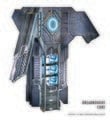
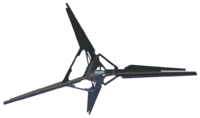
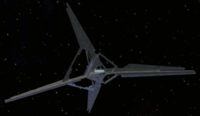
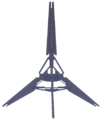
The ''' | The '''''Anodyne Spirit''''',{{Ref/Reuse|Warfleet}} known to the [[Covenant]] as the '''Forerunner Dreadnought''' or simply the '''Dreadnought''',{{Ref/Reuse|Warfleet}}<ref name="Warfleet2">''Halo: Warfleet'', p. 90</ref> is a [[Forerunner]] [[Supernal Spiral-class keyship|''Supernal Spiral''-class]] [[keyship]] discovered by the [[San'Shyuum]] on their homeworld, [[Janjur Qom]].<ref name="Halo3Six">'''Halo 3''', ''[[Terminal (Halo 3)|Terminal Six]]''</ref><ref>'''[[Halo 3]]''', ''[[Terminal (Halo 3)|Terminal Four]]''</ref>{{Ref/Reuse|Enc22P384&385}} | ||
As a keyship, ''Anodyne Spirit'' was part of the Forerunner strategy against the [[Flood]], as one of the only vessels capable of activating [[slipspace portal]]s to reach [[Installation 00|the Ark]]. Following the [[Great Purification|firing]] of the [[Halo Array]], ''Anodyne Spirit'' was commandeered by an aspect of the imprisoned [[Mendicant Bias]] and crashed on the San'Shyuum homeworld. There it would later be found and used by the San'Shyuum, and would later become an integral part of the [[Covenant religion]] as the centerpiece and main power source for the Covenant holy city, [[High Charity]]. Featuring a power generation capacity and shielding unparalleled by human or Covenant technology, the ship was used by the San'Shyuum [[Reformists]] during the [[War of Beginnings]] to dominate their [[Sangheili]] foes in naval combat, and later as the [[flagship]] of the [[Prophet of Truth|High Prophet of Truth]] in the final battles of the [[Human-Covenant War]]. Following the war, it became the home of [[Dhas Bhasvod's Covenant|a]] [[Covenant remnants|Covenant remnant]] that had been stranded on the Ark.{{Ref/Reuse|Enc22P384&385}} | |||
==History== | ==History== | ||
===Prehistory=== | |||
As with the other [[Supernal Spiral-class keyship|''Supernal Spiral''-class]] [[keyship]]s, the ''Anodyne Spirit'' was designed by naval architects [[Grasping-Steady-Firmament]] and [[Lightning-Weaving-Helix]] and manufactured at the [[Ingens Assembler Vats]]. Unlike most [[Forerunner]] [[Forerunner starship|ship]]s, the form of the keyship was fixed, allowing it greater structural integrity at the cost of flexibility. During the final days of the [[Forerunner-Flood war]], the ''Anodyne Spirit''{{'}}s crew would range deep into Flood-controlled territory to locate untouched worlds and [[Conservation Measure|index]] a cross-section of their biodiversity before it could be consumed.{{Ref/Reuse|Warfleet}}{{Ref/Reuse|Enc22P384&385}} | |||
After the [[Great Purification|activation]] of the [[Halo Array]], ''Anodyne Spirit'' and several other keyships were sent out into the galaxy, carrying specimens of many species to countless worlds, ensuring that life would continue within the galaxy. Once their task was complete, the keyships returned to [[Installation 00]]. Centuries later, a fragment of [[Mendicant Bias]] managed to escape containment and infiltrate ''Anodyne Spirit'', activating the vessel and returning it to the galaxy. In an effort to atone for its sins, Mendicant Bias intended to take the keyship to [[Earth]] to help guide [[human]]ity as they [[reclaimer|reclaimed]] the [[Mantle of Responsibility]]. However, an unknown complication occurred and ''Anodyne Spirit'' crashed onto the surface of [[Janjur Qom]], homeworld of the [[San'Shyuum]].<ref>[https://www.halowaypoint.com/en-us/universe/characters/mendicant-bias '''Halo Waypoint''': ''Mendicant Bias'']</ref><ref>'''[[Halo Encyclopedia (2009 edition)]]''', ''page 27'' (2011 edition)</ref>{{Ref/Reuse|Enc22P384&385}} Its impact crater formed an immense sea that would later be known as the [[Great Apothtea]].{{Ref/Reuse|universe}} After the [[Human-Covenant War]], ancient [[Covenant]] records which may contain information on this matter were researched jointly by human and [[Sangheili]] scholars on [[Sanghelios]].{{Ref/Site|URL=https://www.halowaypoint.com/en-us/forums/db05ce78845f4120b062c50816008e5d/topics/catalog-interaction/4c3e1c6f-6519-4ee0-83a4-4bac13bf07a3/posts?page=14|Site=Halo Waypoint Forums|Page=Catalog Interaction|D=21|M=10|Y=2018|LocalArchive=Catalog/Archive/2014#Post_.237}} | |||
===Rediscovery=== | ===Rediscovery=== | ||
{{Main|War of Wills}} | |||
[[File:HM WarOfWills.jpg|thumb|left|250px|The ''Anodyne Spirit'', still partially buried and submerged under the [[Great Apothtea]] during the [[War of Wills]].]] | |||
Over several millennia, the ''Anodyne Spirit'' became partially buried in rock and submerged below the [[Great Apothtea]] off the coast of Janjur Qom's main continent.{{Ref/Reuse|universe}} Early in the history of the San'Shyuum, before [[2200 BCE]], the species discovered and partially uncovered the keyship on their homeworld and began to worship it.<ref name="waypoint qom">[https://www.halowaypoint.com/en-us/universe/locations/janjur-qom '''Halo Waypoint''': ''Janjur Qom'']</ref><ref>'''[[Halo: Broken Circle]]''', ''page 86'' (Google Play edition)</ref> These early worshipers were split over the usage of the ship, as the [[Stoics]] refused to enter the vessel, while the radical [[Reformists]] wished to explore it. The division in San'Shyuum society led to the violent [[San'Shyuum Schism]]. During the climax of the civil war, around one thousand Reformists stormed the ''Anodyne Spirit'' and barricaded themselves inside. The Reformists occasionally raided Stoic territory to collect and stock the ship with plants, wood, seeds, and other goods from the planet, and made preparations to depart Janjur Qom.<ref>'''Halo: Broken Circle''', ''page 57'' (Google Play edition)</ref> Eventually, the Reformists commandeered the keyship and left Janjur Qom, taking a gigantic piece of the planet with them.<ref name="ch262">'''[[Halo: Contact Harvest]]''', ''page 262''</ref> | |||
'' | The massive crater left behind on Janjur Qom was filled in by the Apothtea sea.{{Ref/Reuse|waypoint qom}} The Stoics watched as the Forerunner vessel left them behind, but they were unwilling to fire upon the object of their reverence, and grudgingly allowed the Reformists to leave. Though, the Stoics did send them messages warning them that they would be damned by the "gods" for their theft of the vessel.{{Ref/Reuse|ch262}} Utilizing some of the terminals located onboard the ''Anodyne Spirit'', the San'Shyuum solidified their [[Covenant religion|religion]] and realized the Path to the Great Journey. However, they had mistranslated the terminals and incorrectly believed that activating the Halo Array would initiate the Journey.<ref>'''Halo Encyclopedia: The Definitive Guide to the Halo Universe''', ''page 118'' (2011 edition)</ref> With the help of the Forerunner technology from the keyship, the Reformists were able to survive and travel the galaxy.<ref name="enc120">'''Halo Encyclopedia: The Definitive Guide to the Halo Universe''', ''page 120'' (2011 edition)</ref> Unaware of the ship's Forerunner classification, the San'Shyuum and later the Covenant would come to call the ''Anodyne Spirit'' the Forerunner Dreadnought due to the vessel's unparalleled power.{{Ref/Reuse|Warfleet2}} | ||
===War of Beginnings=== | |||
{{Main|War of Beginnings}} | |||
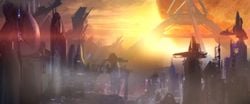
[[File:HM WarOfBeginnings.jpg|thumb|250px|The Forerunner Dreadnought looms over [[Ulgethon]].]] | |||
In [[938 BCE]], the San'Shyuum landed on the [[Sangheili]] [[Sangheili colonies|colony]] of [[Ulgethon]], finding members of the then-unknown species among a repository of Forerunner relics. Their first encounter was tense but amenable, but the Sangheili—who also worshipped the Forerunners, but thought it blasphemy to manipulate their technology—soon discovered the San'Shyuum's intent to excavate the holy relics.{{Ref/Book|Id=Enc22P191|Enc22|Page=191}} Led by [[Arbiter]] [[Vema 'Togad]],{{Ref/Book|Id=Enc22P244|Enc22|Page=244}} the Sangheili slaughtered and beheaded a group of San'Shyuum diplomats, sending their corpses back to the Dreadnought.{{Ref/Reuse|Enc22P191}}<ref>'''[[Halo 2: Anniversary]]''', ''[[Terminal (Halo 2: Anniversary)|Terminal 6]]''</ref> Horrified by this violence, the San'Shyuum immediately took the ''Anodyne Spirit'' into the skies above Ulgethon, where they were met by a blockade of Sangheili warships. Despite being outnumbered, the keyship's resilience was unmatched, ultimately resulting in the defeat of the Sangheili fleet. Then, the San'Shyuum [[Desecration of Ulgethon|laid waste]] to Ulgethon, razing the planet and eradicating its population. This initial conflict led to the decades-long war known as the [[War of Beginnings]].{{Ref/Reuse|Enc22P191}} | |||
During the war, the Sangheili had an early advantage, with each warrior comparable in skill to ten San'Shyuum in battle. However, the San'Shyuum's technological superiority, and possession of the Forerunner Dreadnought, meant that they had the advantage in space.<ref name="ch145">'''Halo: Contact Harvest''', ''pages 145-148''</ref> The San'Shyuum installed a number of weapons on the keyship, powered by the ship's immense power generation capability.<ref name="hbc weapons">'''Halo: Broken Circle''', ''page 12''</ref> The San'Shyuum used the weaponized keyship to great effect in devastating hit-and-run strikes against the Sangheili fleets.<ref>'''Halo Encyclopedia: The Definitive Guide to the Halo Universe''', ''page 30''</ref> Additionally, the San'Shyuum were able to weaponize the Dreadnought's own contingent of [[Aggressor Sentinel]]s to serve them in combat. By the time the war ended, these Sentinels had been wiped out almost entirely, only a select few having been preserved aboard the keyship.<ref>'''Halo: Broken Circle''', ''page 189''</ref> | |||
With the nearly unbeatable keyship in their possession, an eventual San'Shyuum victory seemed inevitable. After losing several [[Sangheili colonies|colonies]] to the Dreadnought, the Sangheili formulated [[Raid at Codisfold|a plan]] to remove the threat it posed. They would sacrifice their world of [[Codisfold]] in hopes that they could use it as bait to board the Dreadnought. When the San'Shyuum arrived at Codisfold, dozens of [[Naval boarding|ship-boring]] machines launched from the planet's rings, carrying elite infiltration teams to the keyship.{{Ref/Book|Id=Enc22P258|Enc22|Page=258}} The Sangheili found their way inside, slaughtering thousands of San'Shyuum and damaging several key components of the vessel. However, a counterattack was organized and the boarding parties were wiped out.{{Ref/Novel|Id=Sacrifice|HSoR|Detail=Adjunct - [[Sacrifice]]}}{{Ref/Reuse|Enc22P258}} In response to the raid, the San'Shyuum ravaged Codisfold, killing millions of Sangheili inhabitants.{{Ref/Reuse|Enc22P258}} While the attack failed to eliminate the Dreadnought, the event proved that the San'Shyuum and their keyship were not invincible.{{Ref/Reuse|Sacrifice}}{{Ref/Reuse|Enc22P191}} | |||
By [[876 BCE]], the Sangheili had begun to employ their own Forerunner weapons against the San'Shyuum, deciding that the only way to ensure the survival of their species would be to reconsider their beliefs that such actions were sacrilege.{{Ref/Reuse|Enc22P191}}<ref>'''Halo: Contact Harvest''', ''page 151''</ref> Upon discovering this, most San'Shyuum softened toward the possibility of a cease-fire, but [[Pervading Stone]]—their leader—only grew more incensed.{{Ref/Reuse|Enc22P191}} During a [[Battle of Anvarl|skirmish]] at [[Anvarl]] in [[860 BCE]], the Dreadnought was used to eliminate Sangheili ground forces from orbit.<ref>'''Halo: Broken Circle''', ''pages 9-13'' (Google Play edition)</ref> Shortly after this battle, Pervading Stone finally took the Dreadnought to Sanghelios in the [[Urs system]], seaking to eradicate the Sangheili once and for all. In [[Battle of Sanghelios|the ensuing battle]], the Dreadnought was used to ravage the Sangheili homeworld and its two [[Natural satellite|moon]]s.{{Ref/Reuse|Enc22P191}} However, the Sangheili would unleash their powerful Forerunner weapons on the Dreadnought, managing to bring it down on [[Suban]] and trap it in place with [[gravity anchor]]s. With the San'Shyuum held captive within their keyship for a time, the Sangheili debated whether to simply destroy the vessel and those within, or to breach it and take the Dreadnought for themselves.{{Ref/Reuse|Enc22P191}} | |||
By [[855 BCE]], while the Dreadnought was still immobilized on Suban, the San'Shyuum known as [[Breaking Shadow]] led a coup against Pervading Stone. Following his death, the San'Shyuum aboard the Dreadnought were united, and Breaking Shadow prepared to at last broach the possibility of peace to the Sangheili. In [[852 BCE]], in order to ensure the survival of both species, an unarmed San'Shyuum delegation was sent to the Sangheili, and a tenuous truce was forged by Breaking Shadow and First Kaidon [[Pelahsar the Strident]]. This alliance would soon lead to the formation of the [[Covenant]].{{Ref/Reuse|Enc22P191}} | |||
The two | ===Centerpiece of High Charity=== | ||
[[File:H2A Terminals - High Charity construction.jpg|thumb|250px|left|High Charity under construction.]] | |||
The two species then penned the [[Writ of Union]], which formally established the Covenant, and decommissioned the Forerunner warship, removing all known weapons, and placing it within the partially completed High Charity. It was then used to power the city, with its engines at partial power.{{Ref/Reuse|Enc22P191}}{{Ref/Reuse|ch145}}<ref name="h2high">'''[[Halo 2]]''', campaign level ''[[High Charity (level)|High Charity]]''</ref> The massive piece of rock taken from Janjur Qom was later refitted into the rocky dome of [[High Charity]], along with the Dreadnought atop it. The Dreadnought then became the purview of the [[Asceticism|ascetic priests]], who studied the vessel's systems and tended to the Oracle, in fact a fragment of the [[Rampancy|rampant]] Forerunner [[ancilla]] 05-032 Mendicant Bias.<ref name="ch269">'''Halo: Contact Harvest''', ''pages 269-271''</ref> | |||
After the [[Taming of the Lekgolo]], the Prophets used the newly incorporated [[Lekgolo]] to explore Forerunner relics, and after ages of experimenting on lesser relics, finally worked up the courage to explore the Dreadnought's pathways. At first, these explorations were slow and deliberate, as the priests feared damaging the Dreadnought or offending the Oracle. But with no response from the Oracle, the priests began to continue the explorations until the practice became common place, often with the aid of [[Huragok]].{{Ref/Reuse|ch269}} One of these [[Huragok]] was [[Drifts Randomly]], who internalized data from the keyship which later allowed it to activate the [[Portal at Voi]] on [[Earth]] in lieu of the keyship itself. Afterwards, at least twenty [[Mgalekgolo]] remained on guard around the Dreadnought.<ref>'''Halo: Contact Harvest''', ''page 267''</ref> | |||
[[File:H2A - Lower districts.jpg|thumb|250px|The keyship gave power to the whole Covenant holy city.]] | |||
Before the start of the Human-Covenant War | Before the start of the [[Human-Covenant War]] the Forerunner Dreadnought, the founding of the Prophet’s religion, would soon become the place where their religion was proven false. During the [[Ages of Doubt|23rd Age of Doubt]] in [[2525]], the [[Prophet of Truth|Minister of Fortitude]], and the [[Prophet of Regret|Vice Minister of Tranquility]] went to the Dreadnought for confirmation of two symbols found on the missionary vessel ''[[Minor Transgression]]''. These two symbols were “Reclamation” and “Oracle”, which were found on what was known to [[human]]ity as [[Harvest]]. After the [[Prophet of Mercy|Philologist]] entered the data into the [[Mendicant Bias|"Oracle"]] inside of the keyship, it began a series of cryptic messages,<ref>'''Halo: Contact Harvest''', ''pages 274–276''</ref> listed below: | ||
<tt> | |||
:FOR EONS I HAVE WATCHED | :FOR EONS I HAVE WATCHED | ||
:LISTENED TO YOU MISINTERPRET | :LISTENED TO YOU MISINTERPRET | ||
| Line 96: | Line 100: | ||
:MY MAKERS ARE MY MASTERS | :MY MAKERS ARE MY MASTERS | ||
:I WILL BRING THEM SAFELY TO THE ARK | :I WILL BRING THEM SAFELY TO THE ARK | ||
</tt> | |||
During this series of messages, the Oracle began a launch sequence, which would rip the | During this series of messages, the Oracle began a launch sequence, which would rip the keyship from High Charity and destroy the Covenant capital with it. Fortunately for the people of High Charity, the Dreadnought was short-circuited by Lekgolo exploring the pathways. The Oracle was soon disconnected, but this caused a spiritual crisis for Fortitude, Tranquility and the Philologist. Through the Oracle’s messages, the Forerunners (or their descendants), were still alive, which would shake the foundations of the Covenant itself to the core: if the masses learned that they might be left behind, then they would revolt against the Prophets. In an attempt to keep the religion itself intact, they covered up the encounter, and would try to eradicate these [[Human|Reclaimers]].<ref>'''Halo: Contact Harvest''', ''pages 379–384''</ref> | ||
===Fall of High Charity=== | |||
When the [[Flood]] attacked High Charity at the end of the [[Battle of Installation 05]], [[John-117]] was on his way to stop the High Prophet of Truth from escaping. He was able to board the ship as Truth uncoupled it from the city's power grid by narrowly making it through a conduit and into the opening it connected to. The Forerunner Dreadnought lifted off, and jumped into slipspace in the midst of a large battle between the Covenant, now commanded by the Jiralhanae and the San'Shyuum [[Prelate]]s, against the ships still under the control of the [[Sangheili]]. As High Charity lost power from the Dreadnought's departure, further chaos ensued in the mobile city as the Flood continued to consume Sangheili and Jiralhanae forces.{{Ref/Reuse|h2high}} | |||
===The | ===Battle for Earth=== | ||
{{Main|Battle for Earth}} | |||
[[File:H2A - Dreadnought.jpg|thumb|250px|The Dreadnought on its way to Earth.]] | |||
Five days after leaving High Charity (infected by the [[Flood]]), the Dreadnought arrived in [[Sol system]].<ref name="bnet">[http://halo.bungie.net/News/content.aspx?type=topnews&cid=16989 '''Bungie.net''': ''Bungie Weekly Update: 01/23/09 '']</ref> While the Dreadnought was passing [[Jupiter]], [[John-117]], on board the ship, was contacted by [[Io Station]], but after going into radio silence, he killed four [[Unggoy]], a pair of [[Kig-Yar]] and then another group of four Unggoy. It is unknown what happened immediately afterward, but soon, the Spartan was found unconscious by a group of [[Jiralhanae]]. The Jiralhanae interrogated him, asking him where the [[Key of Osanalan]] was, but the Spartan managed to escape by sticking his captor with a plasma grenade. | |||
After making his way to the Prophet of Truth’s position, he reported to the UNSC that one [[Hierarchs|Prophet Hierarch]] was on board and that he would transmit more information later. Then, Spartan-117 took aim at Truth with a [[Type-51 Carbine|Carbine]] and fired. Just before the Master Chief could get a good shot at Truth, a Kig-Yar with a Carbine shot and hit the Chief. | |||
Now aware of the immediate threat within his ship, Truth ordered a jump deeper in the system, straight to Earth, where the battle was still raging between the battered remains of the UNSC fleet and Truth's forces.{{Ref/Marketing|Id=LongRoad|Halo Waypoint|The Long Road Home}} As the Dreadnought transitioned from Slipspace, now in range of Earth's [[orbital defense platform]]s, [[Admiral]] [[Terrence Hood|Hood]] was about to give the order to attack the ship. He only stopped because he found out that the Master Chief was aboard. The Keyship, leading the [[Truth's fleet|Covenant loyalist fleet]], eventually broke through Earth's already-weakened defenses, and headed for Earth. | |||
[[File:S117returnstoEarth2552.jpg|thumb|left|225px|The Dreadnought and John-117 entering Earth's atmosphere.]] | |||
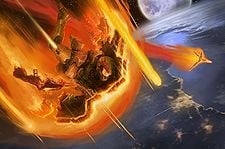
Nine days after the ship's arrival in the system,{{Ref/Reuse|bnet}} the Dreadnought entered Earth's atmosphere. John-117 jumped from the ship as it continued descending, using a hatch as a heat shield, and falling two kilometers into the African jungle near [[Mount Kilimanjaro]]. The Dreadnought continued its descent and landed on the [[Portal at Voi|Portal]] to [[Installation 00|the Ark]], which the Covenant fleet was excavating. | |||
The remaining [[United Nations Space Command|UNSC]] forces in Africa planned to launch a surprise strike on the Keyship to eliminate Truth and stop him from activating the structure they thought to be the Ark. The Master Chief led a [[Battle of Voi|Marine assault]] on a Covenant [[Type-27 Anti-Aircraft Cannon|anti-air battery]] sector in the town of Voi and successfully disabled the battery, giving the UNSC a clear shot at the Keyship. Lord Hood then attacked the ship with multiple squadrons of [[GA-TL1 Longsword|Longsword]] fighters and three [[Charon-class light frigate|UNSC frigates]]. The Dreadnought's advanced Forerunner shielding allowed it to survive multiple MAC rounds and hundreds of Longsword-launched missiles and emerge completely unharmed, and the UNSC attack was halted when the Portal was activated by the Keyship. | |||
{{Clear}} | |||
===The Ark=== | |||
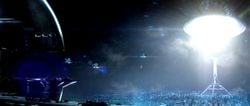
[[File:TSPL.png|250px|thumb|The destruction and incomplete firing of [[Installation 08]] severely damaged everything on the surface of the Ark.]] | |||
After activating the portal, the Dreadnought entered it and landed on the Ark. It did not take part in the [[Battle of Installation 00|battle]], instead flying to the Ark of its own accord.<ref>'''[[Halo 3]]''', campaign level, ''[[The Ark (level)|The Ark]]''</ref> Truth was untroubled by this automated action, but unbeknownst to him the Keyship was reuniting the last fragment of Mendicant Bias' compound mind to the rest of itself kept on the Ark.{{Ref/Game|Id=H3Term|H3|Detail=[[Terminal (Halo 3)|Terminals]]}} The vessel landed amidst a sprawling oceanside city in a region later referred to as [[Mahsko]]. Before Truth disembarked with the intent of activating the rings, he ordered some of his most loyal soldiers to stay behind and guard the holy Keyship.{{Ref/Reuse|Sacrifice}} Throughout the battle on the Ark, Mendicant Bias managed to successfully contact John-117 through a series of [[Terminal (Halo 3)|terminals]], seeking atonement for its part in the Forerunners' downfall.{{Ref/Reuse|H3Term}} | |||
When the incomplete Installation 08 fired and shook itself apart, the surface of the Ark was severely damaged,<ref name="Fortitude">[http://halo.xbox.com/en-us/intel/featured/video/herofortitude/bfe5038b-314a-4f17-a6be-f7613e0e3788 '''Halo Waypoint''', ''Hero-Fortitude'']</ref><ref name="Array">[http://halo.xbox.com/en-us/intel/featured/video/the-halo-array/7ec5ea56-3d8c-4644-a760-5baa8f35166c '''Halo Waypoint:''' ''The Halo Array'']</ref><ref name="Brutes">[http://halo.xbox.com/en-us/intel/theuniverse/characters/video/the-brutes/60f8041d-9d28-47bc-9447-65ba3d133abd?page=1 '''Halo Waypoint:''' ''The Brutes'']</ref><ref name="vis">'''[[Halo: The Essential Visual Guide]]''', ''page 14''</ref> but the ''Anodyne Spirit'' and those within survived unscathed.{{Ref/Reuse|Sacrifice}}{{Ref/Note|According to ''[[Halo: The Essential Visual Guide]]'' (p. 50), the Dreadnought was destroyed along with the Ark when the Master Chief prematurely activated Installation 08. However, this detail has been ignored as many subsequent pieces of media have shown that both the Ark and the Dreadnought survived.}} | |||
By [[2555#March|March 2555]], the UNSC was unsure of where the Dreadnought ended up while discussing reopening the Portal at Voi, noting that the last time the portal was opened, it required the Dreadnought. Lord Hood suggested contacting the [[Sangheili]], suggesting that they might know where the ship ended up or have another idea that they were unaware of.<ref>'''[[Halo: Hunters in the Dark]]''', ''page 44''</ref> Ultimately, without the Dreadnought, the Arbiter sent the [[Huragok]] [[Drifts Randomly]] who had worked on the ship with the ascetic priests. Using the data it had internalized from the Dreadnought, Drifts was able to reopen the portal without the ship.<ref>'''[[Halo: Hunters in the Dark]]'''</ref> By [[2558]], the Forerunner ancilla [[Catalog]] recorded the vessel's last known position as on the Ark on December 11, 2552, using information compiled from various sources including ''Forward Unto Dawn's'' logs.{{Ref/Site|URL=https://www.halowaypoint.com/en-us/forums/db05ce78845f4120b062c50816008e5d/topics/catalog-interaction/4c3e1c6f-6519-4ee0-83a4-4bac13bf07a3/posts?page=23|Site=Halo Waypoint Forums|Page=Catalog Interaction|D=12|M=09|Y=2015|LocalArchive=Catalog/Archive/2014#Post_.238}} | |||
===Reemergence=== | |||
{{Main|Raid on Anodyne Spirit}} | |||
In the midst of the [[Second Ark Conflict]] in [[2559]], [[Atriox]] decided that he would need to return to the galaxy. Hearing that the ''Anodyne Spirit'' held [[Menachite Forerunner crystal|a certain]] [[slipspace]] [[Slipspace flake|flake]], the leader of the [[Banished]] sent a team led by [[Chieftain]] [[Minas]] to recover the crystal and bring it to him so that he could open a [[Slipspace portal|portal]] to [[Reach]]. Nearly seven years after its arrival, the Dreadnought still stood where the Prophet of Truth had abandoned it, among the towers of a seaside city in Mahsko. The region was still uncontested by the [[UNSC Spirit of Fire|UNSC forces]] fighting for control of the Ark.{{Ref/Reuse|Sacrifice}} | |||
== | Upon infiltrating the ''Anodyne Spirit'', the Banished force was ambushed by [[Dhas Bhasvod's Covenant|surviving Covenant]] Jiralhanae and Kig-Yar that had faithfully followed Truth's orders and protected the vessel for years. After fighting through the remnants of the Covenant loyalists, the Banished managed to retrieve the crystal shards from deep within the Dreadnought at the cost of roughly two thirds of their men. Realizing that the surviving Covenant defenders still outnumbered them, they escaped the vessel and returned to Atriox with their prize. Using the crystal, he returned to the galaxy in [[2559#October|October 2559]] via a [[Menachite portal complex|portal facility]] hidden on Reach.{{Ref/Reuse|Sacrifice}} | ||
The Banished raid on the keyship drew out the Covenant forces sheltering there led by [[Prelate]] [[Dhas Bhasvod]]. They subsequently allied with the [[Keepers of the One Freedom]] and [[Intrepid Eye]] to fire the [[Halo Array]], but were defeated. Due to his armor being damaged, the Prelate was unable to call for a ship from ''Anodyne Spirit'' to collect him following the [[Battle of Epsilon Clarion]] until his armor could repair itself.{{Ref/Novel|Id=DW|DW}} | |||
==Production notes== | |||
*Originally, a level referred to as [[forerunnership]]<ref>[http://halo.bungie.net/news/content.aspx?type=topnews&cid=25650 '''Bungie.net''': ''One Final Effort'']</ref> was supposed to take place on the vessel right after defeating [[Tartarus]] in the level ''[[The Great Journey]]'' in ''[[Halo 2]]''. The level was cut due to time constraints.<ref>'''[[Halo 3 Legendary Edition]]''', ''Essentials Disc Two, Halo 2 Cutscene Commentary''</ref> | |||
*In the ''[[Halo: Uprising]]'' comic series, almost every background on the Dreadnought was modeled after a location in ''Halo 2'' or ''Halo 3''. For example, the Dreadnought's hangar bay looks identical to the [[Threshold]] [[Threshold gas mine|gas mine]] hangar bay in ''[[Halo 2]]'', including a docked [[Kai-pattern Seraph|Seraph]]. In addition, areas identical to the [[Valleys of Tears]] as well as the [[High Council Chamber]] in ''High Charity'' can be seen. The bottom level of ''[[Construct]]'' from ''Halo 3'' multiplayer and a hallway from the [[Cartographer]] of [[Installation 00]] in the campaign level ''[[The Ark (level)|The Ark]]'' have also been adapted into the interior of the ship. This may be a case of artistic interpretation by the artist to capture the look of Forerunner and Covenant architectures. | |||
==Gallery== | |||
<gallery> | <gallery> | ||
File:HWF AnodyneSpirit CrossSection.jpg|A cross-section cutaway of ''Anodyne Spirit''. | |||
File:HWF AnodyneSpirit Core CrossSection.jpg|A cutaway of the ship's core. | |||
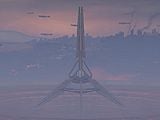
File:H2-ForerunnerDreadnoughtKeyship.png|The ''Anodyne Spirit'' as it appears in ''Halo 2''. | |||
File:Dreadnought inflight.png|The ship on its way to Earth in ''Halo 2''. | |||
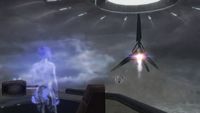
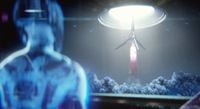
File:Forerunner Ship.jpg|Cortana watches as the ship launches in ''Halo 2''. | |||
File:Dreadnought Interior.jpg|The interior of the ''Anodyne Spirit'' in ''Halo: Uprising''. | |||
File:HU-John-05.jpg|John on board the Dreadnought. | |||
File:Fr_dreadnought_doorpiece.jpg|A part of the vessel that was used by John-117 as a shield when re-entering Earth's atmosphere. | |||
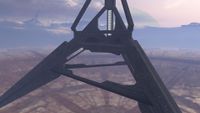
File:H3-DreadnoughtKeyship-02.png|The keyship viewed from another angle in ''Halo 3''. | |||
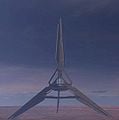
File:Keyship.jpg|The front side of the keyship in ''Halo 3''. | |||
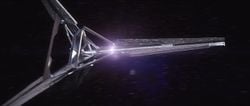
File:H3 Anodyne Spirit emitter details.png|The ''Anodyne Spirit'' opening the portal to the Ark. | |||
File:H3 Anodyne Spirit Emitter-Fullpower.png|The portal emitter at full power. | |||
File:6242554-Full.jpg|The reverse side of the ''Anodyne Spirit'' about to enter the portal. | |||
File:83197315-Full.jpg|A close-up view of the Forerunner Dreadnought. | |||
File:UNSCHitsDreadnought-large.jpg|The UNSC fleet attacks the ''Anodyne Spirit'' at the portal, to absolutely no effect. | |||
File:Storm1.jpg|The Dreadnought entering the portal rift. | |||
File:ForerunnerShip-scale.gif|The ''Anodyne Spirit'' scaled against other Forerunner installations and a {{Pattern|Ket|battlecruiser}}, ''[[Truth and Reconciliation]]''. | |||
File:HighCharity-scale.gif|The ship scaled against High Charity. | |||
File:H2A - Cortana watching dreadnought.jpg|Cortana watches as the ship launches in ''Halo 2: Anniversary''. | |||
File:H2A Terminals - Sangheili before Prophets.png|The Dreadnought in ''Halo 2: Anniversary'' terminals. | |||
File:H2A Terminals - Ancient Arbiter 4.jpg|An Arbiter overlooks the Forerunner Dreadnought on Ulgethon. | |||
File:H5G-Dreadnought worship mural.png|A mural inside the [[Elder Council Chamber]] on [[Sanghelios]] representing Covenant worship of the Dreadnought in ''[[Halo 5: Guardians]]''. | |||
File:H5G-Dreadnoght mural 2.png|Another mural featuring the Dreadnought. | |||
File:HTV_HighCharity_Interior_Concept_1.jpg|Concept art for ''Anodyne Spirit'' inside High Charity in ''[[Halo: The Television Series]]''. | |||
</gallery> | </gallery> | ||
== | ==List of appearances== | ||
* | *''[[Halo 2]]'' {{1st}} | ||
* | *''[[Halo: Uprising]]'' | ||
* | *''[[Halo 3]]'' | ||
*[[ | *''[[Halo: Contact Harvest]]'' | ||
* | *''[[Halo: The Cole Protocol]]'' {{Mo}} | ||
* | *''[[Halo Legends]]'' | ||
* | **''[[Origins]]'' | ||
* | *''[[Halo: Evolutions]]'' | ||
* | **''[[Wages of Sin]]'' | ||
* | *''[[Halo: Broken Circle]]'' | ||
*''[[Halo 2: Anniversary]]'' | |||
**''[[Terminal (Halo 2: Anniversary)|Terminals]]'' | |||
*''[[Halo: Hunters in the Dark]]'' {{Mo}} | |||
*''[[Halo 5: Guardians]]'' {{C|Murals only}} | |||
*''[[Halo: Shadow of Intent]]'' {{Mo}} | |||
*''[[Halo Mythos]]'' | |||
*''[[Halo: Official Spartan Field Manual]]'' | |||
*''[[Halo: Shadows of Reach]]'' {{Mo}} | |||
**''[[Sacrifice]]'' | |||
*''[[Halo: Divine Wind]]'' {{Mo}} | |||
*''[[Halo: The Television Series]]'' | |||
**''[[Contact]]'' | |||
==Notes== | |||
{{Ref/Notes}} | |||
==Sources== | ==Sources== | ||
{{Ref/Sources|2}} | |||
{{ | {{Forerunner|artifacts}} | ||
{{Forerunner|ships}} | |||
[[Category: | {{High Charity Locations}} | ||
[[Category: | [[Category:Forerunner artifacts]] | ||
[[Category:Forerunner ships]] | |||
Latest revision as of 18:04, August 9, 2024
| Anodyne Spirit | |
|---|---|
| |
| Production information | |
|
Naval architects: |
|
|
Manufacturer: |
|
|
Class: |
|
|
Role: |
Activating portals,[3][4] carrying indexed lifeforms,[1] flagship[2] |
| Specifications | |
|
Length: |
10,774 meters (35,348 ft)[5] |
|
Width: |
12,441 meters (40,817 ft)[5] |
|
Height: |
13,120 meters (43,045 ft)[5] |
|
Engine: |
|
|
Slipspace drive: |
Crystal-mediated slipspace core[1] |
|
Armament: |
|
|
Complement: |
|
|
Crew: |
|
| Service information | |
|
Year introduced: |
c. 100,040 BCE[1] |
|
Last sighted: |
|
|
Participated battles: |
|
|
Fleet: |
|
|
Known commanders: |
|
|
Affiliation: |
|
- "My Dreadnought, the vessel that has so long been the focus of our worship, now rests on its true pedestal. Even now, its engines spark greater ones below, relics long without power, yet ready to fulfill their divine purpose. Stand fast! Keep our enemies at bay! Soon, my brothers, we will all have our reward!"
- — Prophet of Truth to his troops during the Battle for Earth.[8]
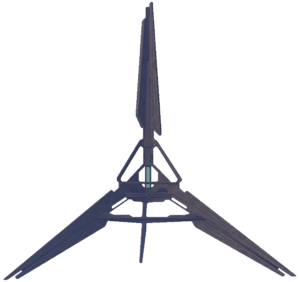
The Anodyne Spirit,[1] known to the Covenant as the Forerunner Dreadnought or simply the Dreadnought,[1][9] is a Forerunner Supernal Spiral-class keyship discovered by the San'Shyuum on their homeworld, Janjur Qom.[10][11][2]
As a keyship, Anodyne Spirit was part of the Forerunner strategy against the Flood, as one of the only vessels capable of activating slipspace portals to reach the Ark. Following the firing of the Halo Array, Anodyne Spirit was commandeered by an aspect of the imprisoned Mendicant Bias and crashed on the San'Shyuum homeworld. There it would later be found and used by the San'Shyuum, and would later become an integral part of the Covenant religion as the centerpiece and main power source for the Covenant holy city, High Charity. Featuring a power generation capacity and shielding unparalleled by human or Covenant technology, the ship was used by the San'Shyuum Reformists during the War of Beginnings to dominate their Sangheili foes in naval combat, and later as the flagship of the High Prophet of Truth in the final battles of the Human-Covenant War. Following the war, it became the home of a Covenant remnant that had been stranded on the Ark.[2]
History[edit]
Prehistory[edit]
As with the other Supernal Spiral-class keyships, the Anodyne Spirit was designed by naval architects Grasping-Steady-Firmament and Lightning-Weaving-Helix and manufactured at the Ingens Assembler Vats. Unlike most Forerunner ships, the form of the keyship was fixed, allowing it greater structural integrity at the cost of flexibility. During the final days of the Forerunner-Flood war, the Anodyne Spirit's crew would range deep into Flood-controlled territory to locate untouched worlds and index a cross-section of their biodiversity before it could be consumed.[1][2]
After the activation of the Halo Array, Anodyne Spirit and several other keyships were sent out into the galaxy, carrying specimens of many species to countless worlds, ensuring that life would continue within the galaxy. Once their task was complete, the keyships returned to Installation 00. Centuries later, a fragment of Mendicant Bias managed to escape containment and infiltrate Anodyne Spirit, activating the vessel and returning it to the galaxy. In an effort to atone for its sins, Mendicant Bias intended to take the keyship to Earth to help guide humanity as they reclaimed the Mantle of Responsibility. However, an unknown complication occurred and Anodyne Spirit crashed onto the surface of Janjur Qom, homeworld of the San'Shyuum.[12][13][2] Its impact crater formed an immense sea that would later be known as the Great Apothtea.[5] After the Human-Covenant War, ancient Covenant records which may contain information on this matter were researched jointly by human and Sangheili scholars on Sanghelios.[14]
Rediscovery[edit]
- Main article: War of Wills
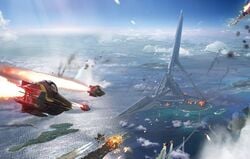
Over several millennia, the Anodyne Spirit became partially buried in rock and submerged below the Great Apothtea off the coast of Janjur Qom's main continent.[5] Early in the history of the San'Shyuum, before 2200 BCE, the species discovered and partially uncovered the keyship on their homeworld and began to worship it.[15][16] These early worshipers were split over the usage of the ship, as the Stoics refused to enter the vessel, while the radical Reformists wished to explore it. The division in San'Shyuum society led to the violent San'Shyuum Schism. During the climax of the civil war, around one thousand Reformists stormed the Anodyne Spirit and barricaded themselves inside. The Reformists occasionally raided Stoic territory to collect and stock the ship with plants, wood, seeds, and other goods from the planet, and made preparations to depart Janjur Qom.[17] Eventually, the Reformists commandeered the keyship and left Janjur Qom, taking a gigantic piece of the planet with them.[18]
The massive crater left behind on Janjur Qom was filled in by the Apothtea sea.[15] The Stoics watched as the Forerunner vessel left them behind, but they were unwilling to fire upon the object of their reverence, and grudgingly allowed the Reformists to leave. Though, the Stoics did send them messages warning them that they would be damned by the "gods" for their theft of the vessel.[18] Utilizing some of the terminals located onboard the Anodyne Spirit, the San'Shyuum solidified their religion and realized the Path to the Great Journey. However, they had mistranslated the terminals and incorrectly believed that activating the Halo Array would initiate the Journey.[19] With the help of the Forerunner technology from the keyship, the Reformists were able to survive and travel the galaxy.[20] Unaware of the ship's Forerunner classification, the San'Shyuum and later the Covenant would come to call the Anodyne Spirit the Forerunner Dreadnought due to the vessel's unparalleled power.[9]
War of Beginnings[edit]
- Main article: War of Beginnings
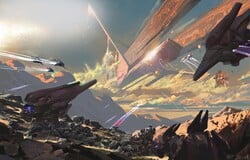
In 938 BCE, the San'Shyuum landed on the Sangheili colony of Ulgethon, finding members of the then-unknown species among a repository of Forerunner relics. Their first encounter was tense but amenable, but the Sangheili—who also worshipped the Forerunners, but thought it blasphemy to manipulate their technology—soon discovered the San'Shyuum's intent to excavate the holy relics.[21] Led by Arbiter Vema 'Togad,[22] the Sangheili slaughtered and beheaded a group of San'Shyuum diplomats, sending their corpses back to the Dreadnought.[21][23] Horrified by this violence, the San'Shyuum immediately took the Anodyne Spirit into the skies above Ulgethon, where they were met by a blockade of Sangheili warships. Despite being outnumbered, the keyship's resilience was unmatched, ultimately resulting in the defeat of the Sangheili fleet. Then, the San'Shyuum laid waste to Ulgethon, razing the planet and eradicating its population. This initial conflict led to the decades-long war known as the War of Beginnings.[21]
During the war, the Sangheili had an early advantage, with each warrior comparable in skill to ten San'Shyuum in battle. However, the San'Shyuum's technological superiority, and possession of the Forerunner Dreadnought, meant that they had the advantage in space.[24] The San'Shyuum installed a number of weapons on the keyship, powered by the ship's immense power generation capability.[25] The San'Shyuum used the weaponized keyship to great effect in devastating hit-and-run strikes against the Sangheili fleets.[26] Additionally, the San'Shyuum were able to weaponize the Dreadnought's own contingent of Aggressor Sentinels to serve them in combat. By the time the war ended, these Sentinels had been wiped out almost entirely, only a select few having been preserved aboard the keyship.[27]
With the nearly unbeatable keyship in their possession, an eventual San'Shyuum victory seemed inevitable. After losing several colonies to the Dreadnought, the Sangheili formulated a plan to remove the threat it posed. They would sacrifice their world of Codisfold in hopes that they could use it as bait to board the Dreadnought. When the San'Shyuum arrived at Codisfold, dozens of ship-boring machines launched from the planet's rings, carrying elite infiltration teams to the keyship.[28] The Sangheili found their way inside, slaughtering thousands of San'Shyuum and damaging several key components of the vessel. However, a counterattack was organized and the boarding parties were wiped out.[6][28] In response to the raid, the San'Shyuum ravaged Codisfold, killing millions of Sangheili inhabitants.[28] While the attack failed to eliminate the Dreadnought, the event proved that the San'Shyuum and their keyship were not invincible.[6][21]
By 876 BCE, the Sangheili had begun to employ their own Forerunner weapons against the San'Shyuum, deciding that the only way to ensure the survival of their species would be to reconsider their beliefs that such actions were sacrilege.[21][29] Upon discovering this, most San'Shyuum softened toward the possibility of a cease-fire, but Pervading Stone—their leader—only grew more incensed.[21] During a skirmish at Anvarl in 860 BCE, the Dreadnought was used to eliminate Sangheili ground forces from orbit.[30] Shortly after this battle, Pervading Stone finally took the Dreadnought to Sanghelios in the Urs system, seaking to eradicate the Sangheili once and for all. In the ensuing battle, the Dreadnought was used to ravage the Sangheili homeworld and its two moons.[21] However, the Sangheili would unleash their powerful Forerunner weapons on the Dreadnought, managing to bring it down on Suban and trap it in place with gravity anchors. With the San'Shyuum held captive within their keyship for a time, the Sangheili debated whether to simply destroy the vessel and those within, or to breach it and take the Dreadnought for themselves.[21]
By 855 BCE, while the Dreadnought was still immobilized on Suban, the San'Shyuum known as Breaking Shadow led a coup against Pervading Stone. Following his death, the San'Shyuum aboard the Dreadnought were united, and Breaking Shadow prepared to at last broach the possibility of peace to the Sangheili. In 852 BCE, in order to ensure the survival of both species, an unarmed San'Shyuum delegation was sent to the Sangheili, and a tenuous truce was forged by Breaking Shadow and First Kaidon Pelahsar the Strident. This alliance would soon lead to the formation of the Covenant.[21]
Centerpiece of High Charity[edit]
The two species then penned the Writ of Union, which formally established the Covenant, and decommissioned the Forerunner warship, removing all known weapons, and placing it within the partially completed High Charity. It was then used to power the city, with its engines at partial power.[21][24][31] The massive piece of rock taken from Janjur Qom was later refitted into the rocky dome of High Charity, along with the Dreadnought atop it. The Dreadnought then became the purview of the ascetic priests, who studied the vessel's systems and tended to the Oracle, in fact a fragment of the rampant Forerunner ancilla 05-032 Mendicant Bias.[32]
After the Taming of the Lekgolo, the Prophets used the newly incorporated Lekgolo to explore Forerunner relics, and after ages of experimenting on lesser relics, finally worked up the courage to explore the Dreadnought's pathways. At first, these explorations were slow and deliberate, as the priests feared damaging the Dreadnought or offending the Oracle. But with no response from the Oracle, the priests began to continue the explorations until the practice became common place, often with the aid of Huragok.[32] One of these Huragok was Drifts Randomly, who internalized data from the keyship which later allowed it to activate the Portal at Voi on Earth in lieu of the keyship itself. Afterwards, at least twenty Mgalekgolo remained on guard around the Dreadnought.[33]
Before the start of the Human-Covenant War the Forerunner Dreadnought, the founding of the Prophet’s religion, would soon become the place where their religion was proven false. During the 23rd Age of Doubt in 2525, the Minister of Fortitude, and the Vice Minister of Tranquility went to the Dreadnought for confirmation of two symbols found on the missionary vessel Minor Transgression. These two symbols were “Reclamation” and “Oracle”, which were found on what was known to humanity as Harvest. After the Philologist entered the data into the "Oracle" inside of the keyship, it began a series of cryptic messages,[34] listed below:
- FOR EONS I HAVE WATCHED
- LISTENED TO YOU MISINTERPRET
- THIS IS NOT RECLAMATION
- THIS IS RECLAIMER
- AND THOSE IT REPRESENTS ARE MY MAKERS
- I WILL REJECT MY BIAS AND MAKE AMENDS
- MY MAKERS ARE MY MASTERS
- I WILL BRING THEM SAFELY TO THE ARK
During this series of messages, the Oracle began a launch sequence, which would rip the keyship from High Charity and destroy the Covenant capital with it. Fortunately for the people of High Charity, the Dreadnought was short-circuited by Lekgolo exploring the pathways. The Oracle was soon disconnected, but this caused a spiritual crisis for Fortitude, Tranquility and the Philologist. Through the Oracle’s messages, the Forerunners (or their descendants), were still alive, which would shake the foundations of the Covenant itself to the core: if the masses learned that they might be left behind, then they would revolt against the Prophets. In an attempt to keep the religion itself intact, they covered up the encounter, and would try to eradicate these Reclaimers.[35]
Fall of High Charity[edit]
When the Flood attacked High Charity at the end of the Battle of Installation 05, John-117 was on his way to stop the High Prophet of Truth from escaping. He was able to board the ship as Truth uncoupled it from the city's power grid by narrowly making it through a conduit and into the opening it connected to. The Forerunner Dreadnought lifted off, and jumped into slipspace in the midst of a large battle between the Covenant, now commanded by the Jiralhanae and the San'Shyuum Prelates, against the ships still under the control of the Sangheili. As High Charity lost power from the Dreadnought's departure, further chaos ensued in the mobile city as the Flood continued to consume Sangheili and Jiralhanae forces.[31]
Battle for Earth[edit]
- Main article: Battle for Earth
Five days after leaving High Charity (infected by the Flood), the Dreadnought arrived in Sol system.[36] While the Dreadnought was passing Jupiter, John-117, on board the ship, was contacted by Io Station, but after going into radio silence, he killed four Unggoy, a pair of Kig-Yar and then another group of four Unggoy. It is unknown what happened immediately afterward, but soon, the Spartan was found unconscious by a group of Jiralhanae. The Jiralhanae interrogated him, asking him where the Key of Osanalan was, but the Spartan managed to escape by sticking his captor with a plasma grenade.
After making his way to the Prophet of Truth’s position, he reported to the UNSC that one Prophet Hierarch was on board and that he would transmit more information later. Then, Spartan-117 took aim at Truth with a Carbine and fired. Just before the Master Chief could get a good shot at Truth, a Kig-Yar with a Carbine shot and hit the Chief.
Now aware of the immediate threat within his ship, Truth ordered a jump deeper in the system, straight to Earth, where the battle was still raging between the battered remains of the UNSC fleet and Truth's forces.[37] As the Dreadnought transitioned from Slipspace, now in range of Earth's orbital defense platforms, Admiral Hood was about to give the order to attack the ship. He only stopped because he found out that the Master Chief was aboard. The Keyship, leading the Covenant loyalist fleet, eventually broke through Earth's already-weakened defenses, and headed for Earth.
Nine days after the ship's arrival in the system,[36] the Dreadnought entered Earth's atmosphere. John-117 jumped from the ship as it continued descending, using a hatch as a heat shield, and falling two kilometers into the African jungle near Mount Kilimanjaro. The Dreadnought continued its descent and landed on the Portal to the Ark, which the Covenant fleet was excavating.
The remaining UNSC forces in Africa planned to launch a surprise strike on the Keyship to eliminate Truth and stop him from activating the structure they thought to be the Ark. The Master Chief led a Marine assault on a Covenant anti-air battery sector in the town of Voi and successfully disabled the battery, giving the UNSC a clear shot at the Keyship. Lord Hood then attacked the ship with multiple squadrons of Longsword fighters and three UNSC frigates. The Dreadnought's advanced Forerunner shielding allowed it to survive multiple MAC rounds and hundreds of Longsword-launched missiles and emerge completely unharmed, and the UNSC attack was halted when the Portal was activated by the Keyship.
The Ark[edit]
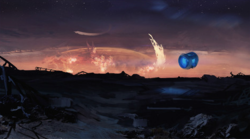
After activating the portal, the Dreadnought entered it and landed on the Ark. It did not take part in the battle, instead flying to the Ark of its own accord.[38] Truth was untroubled by this automated action, but unbeknownst to him the Keyship was reuniting the last fragment of Mendicant Bias' compound mind to the rest of itself kept on the Ark.[39] The vessel landed amidst a sprawling oceanside city in a region later referred to as Mahsko. Before Truth disembarked with the intent of activating the rings, he ordered some of his most loyal soldiers to stay behind and guard the holy Keyship.[6] Throughout the battle on the Ark, Mendicant Bias managed to successfully contact John-117 through a series of terminals, seeking atonement for its part in the Forerunners' downfall.[39]
When the incomplete Installation 08 fired and shook itself apart, the surface of the Ark was severely damaged,[40][41][42][43] but the Anodyne Spirit and those within survived unscathed.[6][Note 1]
By March 2555, the UNSC was unsure of where the Dreadnought ended up while discussing reopening the Portal at Voi, noting that the last time the portal was opened, it required the Dreadnought. Lord Hood suggested contacting the Sangheili, suggesting that they might know where the ship ended up or have another idea that they were unaware of.[44] Ultimately, without the Dreadnought, the Arbiter sent the Huragok Drifts Randomly who had worked on the ship with the ascetic priests. Using the data it had internalized from the Dreadnought, Drifts was able to reopen the portal without the ship.[45] By 2558, the Forerunner ancilla Catalog recorded the vessel's last known position as on the Ark on December 11, 2552, using information compiled from various sources including Forward Unto Dawn's logs.[46]
Reemergence[edit]
- Main article: Raid on Anodyne Spirit
In the midst of the Second Ark Conflict in 2559, Atriox decided that he would need to return to the galaxy. Hearing that the Anodyne Spirit held a certain slipspace flake, the leader of the Banished sent a team led by Chieftain Minas to recover the crystal and bring it to him so that he could open a portal to Reach. Nearly seven years after its arrival, the Dreadnought still stood where the Prophet of Truth had abandoned it, among the towers of a seaside city in Mahsko. The region was still uncontested by the UNSC forces fighting for control of the Ark.[6]
Upon infiltrating the Anodyne Spirit, the Banished force was ambushed by surviving Covenant Jiralhanae and Kig-Yar that had faithfully followed Truth's orders and protected the vessel for years. After fighting through the remnants of the Covenant loyalists, the Banished managed to retrieve the crystal shards from deep within the Dreadnought at the cost of roughly two thirds of their men. Realizing that the surviving Covenant defenders still outnumbered them, they escaped the vessel and returned to Atriox with their prize. Using the crystal, he returned to the galaxy in October 2559 via a portal facility hidden on Reach.[6]
The Banished raid on the keyship drew out the Covenant forces sheltering there led by Prelate Dhas Bhasvod. They subsequently allied with the Keepers of the One Freedom and Intrepid Eye to fire the Halo Array, but were defeated. Due to his armor being damaged, the Prelate was unable to call for a ship from Anodyne Spirit to collect him following the Battle of Epsilon Clarion until his armor could repair itself.[7]
Production notes[edit]
- Originally, a level referred to as forerunnership[47] was supposed to take place on the vessel right after defeating Tartarus in the level The Great Journey in Halo 2. The level was cut due to time constraints.[48]
- In the Halo: Uprising comic series, almost every background on the Dreadnought was modeled after a location in Halo 2 or Halo 3. For example, the Dreadnought's hangar bay looks identical to the Threshold gas mine hangar bay in Halo 2, including a docked Seraph. In addition, areas identical to the Valleys of Tears as well as the High Council Chamber in High Charity can be seen. The bottom level of Construct from Halo 3 multiplayer and a hallway from the Cartographer of Installation 00 in the campaign level The Ark have also been adapted into the interior of the ship. This may be a case of artistic interpretation by the artist to capture the look of Forerunner and Covenant architectures.
Gallery[edit]
The Anodyne Spirit scaled against other Forerunner installations and a Ket-pattern battlecruiser, Truth and Reconciliation.
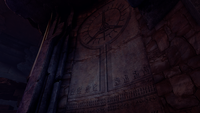
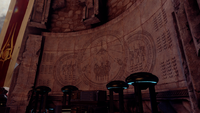
A mural inside the Elder Council Chamber on Sanghelios representing Covenant worship of the Dreadnought in Halo 5: Guardians.
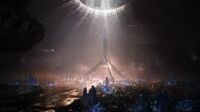
Concept art for Anodyne Spirit inside High Charity in Halo: The Television Series.
List of appearances[edit]
- Halo 2 (First appearance)
- Halo: Uprising
- Halo 3
- Halo: Contact Harvest
- Halo: The Cole Protocol (Mentioned only)
- Halo Legends
- Halo: Evolutions
- Halo: Broken Circle
- Halo 2: Anniversary
- Halo: Hunters in the Dark (Mentioned only)
- Halo 5: Guardians (Murals only)
- Halo: Shadow of Intent (Mentioned only)
- Halo Mythos
- Halo: Official Spartan Field Manual
- Halo: Shadows of Reach (Mentioned only)
- Halo: Divine Wind (Mentioned only)
- Halo: The Television Series
Notes[edit]
- ^ According to Halo: The Essential Visual Guide (p. 50), the Dreadnought was destroyed along with the Ark when the Master Chief prematurely activated Installation 08. However, this detail has been ignored as many subsequent pieces of media have shown that both the Ark and the Dreadnought survived.
Sources[edit]
- ^ a b c d e f g h i j k l m n o p q r s Halo: Warfleet, p. 84-85
- ^ a b c d e f Halo Encyclopedia (2022 edition), page 384-385
- ^ Halo 3, campaign level The Storm
- ^ Halo 3, Terminals
- ^ a b c d e Halo Waypoint: Dreadnought
- ^ a b c d e f g h i j Halo: Shadows of Reach: Adjunct - Sacrifice
- ^ a b c Halo: Divine Wind
- ^ Halo 3, campaign level Tsavo Highway
- ^ a b Halo: Warfleet, p. 90
- ^ Halo 3, Terminal Six
- ^ Halo 3, Terminal Four
- ^ Halo Waypoint: Mendicant Bias
- ^ Halo Encyclopedia (2009 edition), page 27 (2011 edition)
- ^ Halo Waypoint Forums, Catalog Interaction (Retrieved on Oct 21, 2018) [local archive] [external archive]
- ^ a b Halo Waypoint: Janjur Qom
- ^ Halo: Broken Circle, page 86 (Google Play edition)
- ^ Halo: Broken Circle, page 57 (Google Play edition)
- ^ a b Halo: Contact Harvest, page 262
- ^ Halo Encyclopedia: The Definitive Guide to the Halo Universe, page 118 (2011 edition)
- ^ Halo Encyclopedia: The Definitive Guide to the Halo Universe, page 120 (2011 edition)
- ^ a b c d e f g h i j Halo Encyclopedia (2022 edition), page 191
- ^ Halo Encyclopedia (2022 edition), page 244
- ^ Halo 2: Anniversary, Terminal 6
- ^ a b Halo: Contact Harvest, pages 145-148
- ^ Halo: Broken Circle, page 12
- ^ Halo Encyclopedia: The Definitive Guide to the Halo Universe, page 30
- ^ Halo: Broken Circle, page 189
- ^ a b c Halo Encyclopedia (2022 edition), page 258
- ^ Halo: Contact Harvest, page 151
- ^ Halo: Broken Circle, pages 9-13 (Google Play edition)
- ^ a b Halo 2, campaign level High Charity
- ^ a b Halo: Contact Harvest, pages 269-271
- ^ Halo: Contact Harvest, page 267
- ^ Halo: Contact Harvest, pages 274–276
- ^ Halo: Contact Harvest, pages 379–384
- ^ a b Bungie.net: Bungie Weekly Update: 01/23/09
- ^ Halo Waypoint marketing, The Long Road Home
- ^ Halo 3, campaign level, The Ark
- ^ a b Halo 3: Terminals
- ^ Halo Waypoint, Hero-Fortitude
- ^ Halo Waypoint: The Halo Array
- ^ Halo Waypoint: The Brutes
- ^ Halo: The Essential Visual Guide, page 14
- ^ Halo: Hunters in the Dark, page 44
- ^ Halo: Hunters in the Dark
- ^ Halo Waypoint Forums, Catalog Interaction (Retrieved on Sep 12, 2015) [local archive] [external archive]
- ^ Bungie.net: One Final Effort
- ^ Halo 3 Legendary Edition, Essentials Disc Two, Halo 2 Cutscene Commentary
| ||||||||
| |||||||||||||||||||||||||||||
| ||||||||||||||
