Gravemind (level): Difference between revisions
From Halopedia, the Halo wiki
m (Changed Mid Tower location.) |
|||
| (112 intermediate revisions by 51 users not shown) | |||
| Line 1: | Line 1: | ||
{{Title|Gravemind}} | {{Title|Gravemind}} | ||
{{Status|Gameplay}} | |||
{{disambig header|the campaign level|other uses|Gravemind (disambiguation)}} | {{disambig header|the campaign level|other uses|Gravemind (disambiguation)}} | ||
{{Level infobox | {{Level infobox | ||
|prev=''[[ | |pagegamelabel=H2 | ||
|prev=''[[Quarantine Zone]]'' | |||
|next=''[[Uprising]]'' | |next=''[[Uprising]]'' | ||
|name='''''Gravemind''''' | |name='''''Gravemind''''' | ||
|image=[[File: | |image=[[File:H2A Gravemind Loadscreen.png|300px]] | ||
|player=[[ | |game=''[[Halo 2]]'' (<small>''[[Halo 2: Anniversary|Anniversary]]''</small>) | ||
|date= [[2552|November | |devname=<code>07a_highcharity</code>{{Ref/File|Id=H2EK|H2EK|H2EK\tags\scenarios\solo\07a_highcharity\07a_highcharity.scenario}} | ||
|player=[[Master_Chief_(gameplay)#Halo_2|Master Chief]] | |||
|date=[[2552|November 3, 2552]] | |||
|place=Inside ''[[High Charity]]'' | |place=Inside ''[[High Charity]]'' | ||
|objective= Rescue [[UNSC Marine Corps|Marine]] allies and pursue the [[Prophet of Truth]] | |objective=Rescue [[UNSC Marine Corps|Marine]] allies and pursue the [[Prophet of Truth]] | ||
|partime=00:20:00 {{C|''Master Chief Collection''}} | |||
|parscore=11,000 {{C|''Master Chief Collection''}} | |||
}} | }} | ||
{{Article quote|The [[San'Shyuum|Prophets]] have the [[Activation Index|Index]] and plan to use it? Over your dead body.'''}} | |||
'''Gravemind''' is the twelfth [[campaign]] level of ''[[Halo 2]]''. The level takes place within [[High Charity]], after the [[Gravemind]] teleports [[John-117]] there. The [[Prophet of Truth]] has the [[Activation Index|Index]], and the Master Chief must get to him before he leaves for the control room of [[Delta Halo]]. As the player travels through [[High Charity]], they experience the beginning of the [[Great Schism]]. | |||
Strangely enough, apart from the opening cutscene, there is no contact with the [[Gravemind]] or the [[Flood]]. Also, the word "Gravemind" is not mentioned until two levels later in [[High Charity (level)|High Charity]]. This is the first level where Jiralhanae are fought, and is one of only four missions where there are no [[human]] weapons. This is the first level in which you can use the [[Type-25 Grenade Launcher|Brute Shot]] and the [[Kewu R'shi'k-pattern plasma rifle|Brute Plasma Rifle]]. | |||
Strangely enough, apart from the opening cutscene, there is no contact with the [[Gravemind]] or the [[Flood]]. Also, the word "Gravemind" is not mentioned until two levels later in [[High Charity (level)|High Charity]]. This is the first level where Jiralhanae are fought, and is one of only four missions where there are no [[human]] weapons. This is the first level in which you can use the [[Type-25 Grenade Launcher|Brute Shot]] and the [[ | |||
==Transcript== | ==Transcript== | ||
[https://youtu.be/zp9xpE3tKlg '''{''Cutscene''}'''] | |||
[http://www.youtube.com/watch?v=9fiW6S4Lx7s '''{''Anniversary Cutscene''}'''] | |||
[https://www.youtube.com/watch?v=V1Shhg5kDN0 '''{''Anniversary Chinese Cutscene''}'''] | |||
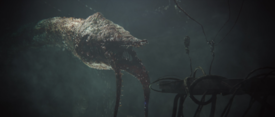
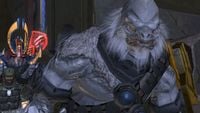
''[[John-117|The Master Chief]] begins to wake up, and sees a red circle of lights on the ceiling of some underground area, and helf aloft by a tentacle. (In the ''Anniversary'' version, he wakes up to himself being wrapped by a huge tentacle dragged along a corridor into a huge chamber.) Eventually, he is brought towards the head of a massive creature: the [[Gravemind]].'' | |||
''[[John-117|The Master Chief]] begins to wake up, and sees a red circle of lights on the ceiling of some underground area. | |||
*'''[[Cortana]]''': "What...is that?" | *'''[[Cortana]]''': "What...is that?" | ||
| Line 32: | Line 35: | ||
*'''[[Gravemind]]''': "I...? I am a monument to all your sins." | *'''[[Gravemind]]''': "I...? I am a monument to all your sins." | ||
''As the Gravemind talks, it breathes out [[Flood spore]]s. Two tentacles bring forth a struggling [[Thel 'Vadam]]ee.'' | ''As the Gravemind talks, it breathes out [[Flood spore]]s. (In the Anniversary version, the Chief looks up and notices he is not alone.) Two tentacles bring forth a struggling [[Thel 'Vadam]]ee, as they are held next to each other.'' | ||
*'''John-117''': "Relax. I'd rather not piss this thing off." | *'''John-117''': "Relax. I'd rather not piss this thing off." | ||
*'''Thel 'Vadamee''': "Demon!" | *'''Thel 'Vadamee''': ''(surprised)'' "Demon!" | ||
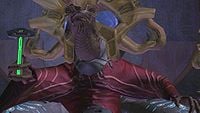
[[File:H2A | [[File:HTMCC-H2A NoSalvationOnThisRing.png|thumb|275px|The Gravemind reveals itself to John-117 and the Arbiter.]] | ||
''The Gravemind makes loud huffing sounds, and indicates the Master Chief.'' | ''The Gravemind makes loud huffing sounds, and indicates the Master Chief (and drags him closer in ''Anniversary'').'' | ||
*'''Gravemind''': "This one is machine and nerve, and has its mind concluded." ''(a tentacle wraps around Master Chief's head, then indicates 'Vadamee)'' "This one is but flesh and faith, and is the more deluded."''( | *'''Gravemind''': "This one is machine and nerve, and has its mind concluded." ''(a tentacle wraps around Master Chief's head in the original, but disturbingly pets the Chief's helmet in ''Anniversary'', then indicates 'Vadamee)'' | ||
''The Gravemind makes another brief huff, before indicating 'Vadamee (and dragging him closer in ''Anniversary'').'' | |||
*'''Gravemind''': "This one is but flesh and faith, and is the more deluded."''(shakes the Arbiter around and turns him upside down)'' | |||
*'''Thel 'Vadamee''': "Kill me or release me, [[Flood|parasite]]. But do not waste my time with talk!" | *'''Thel 'Vadamee''': "Kill me or release me, [[Flood|parasite]]. But do not waste my time with talk!" | ||
| Line 54: | Line 61: | ||
''Regret struggles to speak through his excruciating pain.'' | ''Regret struggles to speak through his excruciating pain.'' | ||
*'''Prophet of Regret''': "And I am the Prophet of Regret, Councilor most High... Hierarch of the [[Covenant Empire|Covenant]]!" | *'''Prophet of Regret''': "And... I am the Prophet of Regret, Councilor most High... Hierarch of the [[Covenant Empire|Covenant]]!" | ||
''2401 Penitent Tangent sees the Master Chief.'' | ''2401 Penitent Tangent sees the Master Chief.'' | ||
| Line 62: | Line 69: | ||
*'''Prophet of Regret''': "Stay where you are! Nothing can be done until my sermon is complete!" | *'''Prophet of Regret''': "Stay where you are! Nothing can be done until my sermon is complete!" | ||
*'''2401 Penitent Tangent''': "Not true. This installation has a successful utilization record of 1.2 trillion simulated and one actual. It is ready to fire on demand." | *'''2401 Penitent Tangent''': "Not true. This installation has a successful utilization record of 1.2 trillion simulated and [[Great Purification|one actual]]. It is ready to fire on demand." | ||
*'''Prophet of Regret''': ''(to the Arbiter)'' "Of all the objects our [[Forerunner|Lords]] left behind, there are none so ''worthless'' as these Oracles!" ''(yells)'' "They know ''nothing'' of the [[Covenant religion|Great Journey]]!" | *'''Prophet of Regret''': ''(to the Arbiter)'' "Of all the objects our [[Forerunner|Lords]] left behind, there are none so ''worthless'' as these Oracles!" ''(yells)'' "They know ''nothing'' of the [[Covenant religion|Great Journey]]!" | ||
*'''2401 Penitent Tangent''': "And ''you'' know nothing about containment! You have demonstrated | *'''2401 Penitent Tangent''': "And ''you'' know nothing about containment! You have demonstrated ''complete'' disregard for even the most basic protocols! | ||
*'''Gravemind''': "This [[2401 Penitent Tangent|one's]] 'containment'..." ''(gives a disgusted huff)'' "And this [[Prophet of Regret|one's]] 'Great Journey'... are the same." | *'''Gravemind''': "This [[2401 Penitent Tangent|one's]] 'containment'..." ''(gives a disgusted huff)'' "And this [[Prophet of Regret|one's]] 'Great Journey'... are the same." | ||
| Line 72: | Line 79: | ||
''It lowers its tentacles, and Regret shrieks in fear.'' | ''It lowers its tentacles, and Regret shrieks in fear.'' | ||
*'''Gravemind''': ''(to 'Vadamee)'' "Your Prophets have promised you freedom from a doomed existence, but you will find no salvation on this [[Halo|ring]]. | *'''Gravemind''': ''(to 'Vadamee)'' "Your Prophets have promised you freedom from a doomed existence, but you will find no salvation on this [[Halo|ring]]. Those who built this place knew what they wrought. Do ''not'' mistake their intent, or all will perish [[Forerunner-Flood War|as they did before]]." | ||
''At this moment, 'Vadamee stops struggling against the tentacles. He stares somewhat curiously at the [[Gravemind]].'' | ''At this moment, 'Vadamee stops struggling against the tentacles. He stares somewhat curiously at the [[Gravemind]].'' | ||
| Line 80: | Line 87: | ||
*'''Thel 'Vadamee''': "Your ignorance already destroyed [[Installation 04|one of the sacred rings]], Demon. It shall not harm another." | *'''Thel 'Vadamee''': "Your ignorance already destroyed [[Installation 04|one of the sacred rings]], Demon. It shall not harm another." | ||
*'''Gravemind''': "If you will not hear the truth, then I will show it to you. There is still time to stop the [[activation Index|key]] from turning, but first it must be found." ''(indicates each in turn)'' "You will search one likely spot, and you will search another. Fate had us meet as foes, but this ring will make us | *'''Gravemind''': "If you will not hear the truth, then I will show it to you. There is still time to stop the [[activation Index|key]] from turning, but first it must be found." ''(indicates each in turn)'' "You will search [[High Charity|one likely spot]], and you will search [[Control Room (Installation 05)|another]]. Fate had us meet as foes, but this ring will make us brothers." | ||
''Master Chief and 'Vadamee disappear in teleportation rings. Fade to black, fade in on [[High Charity]].'' | ''Master Chief and 'Vadamee disappear in teleportation rings. Fade to black, fade in on [[High Charity]].'' | ||
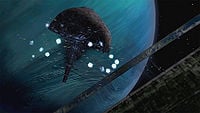
[[File:H2A - Great Schism.jpg|thumb|275px|The beginning stages of the [[Great Schism]].]] | [[File:H2A - Great Schism.jpg|thumb|275px|The beginning stages of the [[Great Schism]].]] | ||
''A swarm of Covenant ships attack each other outside of | ''A swarm of Covenant ships attack each other outside of High Charity. Fade in on the walkway outside the Council Chamber, [[Jiralhanae Honor Guardsman|Jiralhanae Honor Guardsmen]] guard the gates from [[Unggoy]] and [[Kig-yar]] rioters.'' | ||
*'''[[Prophet of Truth]]''': "We are, all of us, gravely concerned." | *'''[[Prophet of Truth]]''': "We are, all of us, gravely concerned." | ||
''Cut to Council Chamber. A line of Jiralhanae Honor Guardsmen stand at attention. An Unggoy cameraman focuses a holographic camera on Truth as he delivers his propaganda, while the [[Prophet of Mercy]] watches from aside.'' | ''Cut to Council Chamber. A line of Jiralhanae Honor Guardsmen stand at attention. An Unggoy cameraman focuses a holographic camera on Truth as he delivers his [[propaganda|speech]], while the [[Prophet of Mercy]] watches from aside.'' | ||
*'''Prophet of Truth''': "The release of the [[Flood|parasite]] was unexpected, unfortunate. But, there is no need to panic. In truth, this is a time to rejoice. A moment that all the Covenant should savor." ''(raises the [[Activation Index|Index]])'' "For the Sacred Icon has been found. With it, our path is clear, our entry into the Divine Beyond guaranteed! The Great Journey is nigh..." ''(the Unggoy notices the Master Chief appearing out of thin air behind him)'' "...and nothing, not even the Flood, can stop it!" | *'''Prophet of Truth''': "The release of the [[Flood|parasite]] was unexpected, unfortunate. But, there is no need to panic. In truth, this is a time to rejoice. A moment that all the Covenant should savor." ''(raises the [[Activation Index|Index]])'' "For the Sacred Icon has been found. With it, our path is clear, our entry into the Divine Beyond guaranteed! The Great Journey is nigh..." ''(the Unggoy notices the Master Chief appearing out of thin air behind him)'' "...and nothing, not even the Flood, can stop it!" | ||
| Line 104: | Line 111: | ||
'''{''Gameplay''}''' | '''{''Gameplay''}''' | ||
===Inside Job=== | ===Inside Job=== | ||
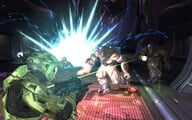
*'''Cortana''': "Brutes! The faster you can kill these Brutes, the better." ''(The Chief kills one Brute.)'' "They don't have shield generators, but take them out before... It's berserking!" | *'''Cortana''': "Brutes! The faster you can kill these Brutes, the better." ''(The Chief kills one Brute.)'' "They don't have shield generators, but take them out before... It's berserking!" | ||
''Several Unggoy emerge from side doors in the chamber to provide support for the Jiralhanae. Soon the Master Chief kills all Covenant in the room.'' | ''Several Unggoy emerge from side doors in the chamber to provide support for the Jiralhanae. Soon the Master Chief kills all Covenant in the room.'' | ||
*''' | *'''Brute (loudspeaker)''': "The Demon has infiltrated the Council Chamber?! Protect the Hierarchs! Seal the exits!" | ||
*'''Cortana''': "Oh, I don't think so." | *'''Cortana''': "Oh, I don't think so." | ||
| Line 129: | Line 135: | ||
*'''Cortana''': "Don't worry. You can pick me up later." | *'''Cortana''': "Don't worry. You can pick me up later." | ||
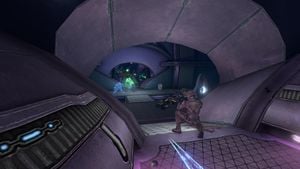
''The Master Chief fights his way through many Jiralhanae and Unggoy, including an [[Unggoy Heavy]] operating a [[ | ''The Master Chief fights his way through many Jiralhanae and Unggoy, including an [[Unggoy Heavy]] operating a [[Shepsu-pattern plasma cannon|plasma turret]] and eventually makes it to the ledge where Thel 'Vadamee was tortured and branded with the [[Mark of Shame]]. Here, more Covenant troops, including Kig-Yar try to stop the Spartan's progress. Reinforcements soon arrive from a gravity lift at the far end of the ledge. Eventually a group of three Jiralhanae arrive, one with a red flag attached to its harness.'' | ||
*'''Cortana (COM)''': "Watch out for the [[Jiralhanae Captain|Captain]], it's got a [[Type-25 | *'''Cortana (COM)''': "Watch out for the [[Jiralhanae Captain|Captain]], it's got a [[Type-25 Brute Shot|Brute Shot]]!" ''(Note that the Brute Captain with the Brute Shot first shows up in the Council Chamber on Legendary.)'' | ||
''The Chief soon kills all Covenant.'' | ''The Chief soon kills all Covenant.'' | ||
| Line 143: | Line 149: | ||
''If the Chief continues to wait around:'' | ''If the Chief continues to wait around:'' | ||
*'''Cortana''': "After that stunt on the ''[[Cairo Station|Cairo]]'', I ''know'' you're not afraid of heights." | *'''Cortana''': "After that stunt on the ''[[Cairo Station (station)|Cairo]]'', I ''know'' you're not afraid of heights." | ||
''If the Chief still stalls:'' | ''If the Chief still stalls:'' | ||
| Line 151: | Line 157: | ||
''The Chief drops down the Gravity Lift, kills a pair of surprised Unggoy and Kig-Yar, and enters another hallway. More Covenant troops appear.'' | ''The Chief drops down the Gravity Lift, kills a pair of surprised Unggoy and Kig-Yar, and enters another hallway. More Covenant troops appear.'' | ||
*''' | *'''Brute (loudspeaker)''': "Reinforce all approaches to the holding pens. Slay the Demon on sight!" | ||
*'''Cortana''': "They're beefing up their patrols. Stay sharp." | *'''Cortana''': "They're beefing up their patrols. Stay sharp." | ||
| Line 167: | Line 173: | ||
*'''Cortana''': "Here, Chief. Jump in." | *'''Cortana''': "Here, Chief. Jump in." | ||
''The Chief takes the gravity lift down. He passes a level, alerting a pair of dozing Unggoy and a Jiralhanae, and continues down. Immediately he passes another level, and catches a glimpse of a dead [[Sangheili]] [[Honor Guard Ultra]] with an [[Type-1 | ''The Chief takes the gravity lift down. He passes a level, alerting a pair of dozing Unggoy and a Jiralhanae, and continues down. Immediately he passes another level, and catches a glimpse of a dead [[Sangheili]] [[Honor Guard Ultra]] with an [[Type-1 energy sword|energy sword]] lying beside it. He finally reaches the bottom, guarded by a Jiralhanae with its back on the Spartan.'' | ||
*'''Cortana (COM)''': "There are two groups of Marines in the detention block. I'll zero in on their locations, you neutralize the guards... quietly." | *'''Cortana (COM)''': "There are two groups of Marines in the detention block. I'll zero in on their locations, you neutralize the guards... quietly." | ||
| Line 217: | Line 223: | ||
*'''Cortana (COM)''': "Excellent! Truth is broadcasting on the move. It'll make him much easier to track." | *'''Cortana (COM)''': "Excellent! Truth is broadcasting on the move. It'll make him much easier to track." | ||
[[File:HTMCC-H2A Three Way Battle.jpg|thumb|300px|Two Marines coming across a battle between Sangheili and Yanme'e.]] | |||
''Three Sangheili run out of a nearby door, under fire from a [[lance]] of [[Yanme'e]]. The team eliminates them and enters through the open door. They continue into a hallway, walk pass another dead Honor Guard Ultra lying on the floor, and encounter a pair of [[Sangheili Honor Guardsman|Sangheili Honor Guardsmen]] fighting several Jiralhanae and another lance of Yanme'e. After all the Covenant are dead, another swarm of Yanme'e emerge from the door and attack the team. The team eliminates them and reach a cross section where a dead [[Mgalekgolo]] lies. The team continue into the next hallway.'' | ''Three Sangheili run out of a nearby door, under fire from a [[lance]] of [[Yanme'e]]. The team eliminates them and enters through the open door. They continue into a hallway, walk pass another dead Honor Guard Ultra lying on the floor, and encounter a pair of [[Sangheili Honor Guardsman|Sangheili Honor Guardsmen]] fighting several Jiralhanae and another lance of Yanme'e. After all the Covenant are dead, another swarm of Yanme'e emerge from the door and attack the team. The team eliminates them and reach a cross section where a dead [[Mgalekgolo]] lies. The team continue into the next hallway.'' | ||
| Line 223: | Line 230: | ||
*'''Cortana (COM)''': "I've got a fix on Truth just outside this tower, Chief. There's an exit nearby - hurry!" | *'''Cortana (COM)''': "I've got a fix on Truth just outside this tower, Chief. There's an exit nearby - hurry!" | ||
''The team enters another corridor, and sees a pair of Jiralhanae and a group of Kig-Yar attacking three Sangheili Honor Guardsmen. They manage to eliminate the warring Covenant and | ''The team enters another corridor, and sees a pair of Jiralhanae and a group of Kig-Yar attacking three Sangheili Honor Guardsmen. They manage to eliminate the warring Covenant and continue onward, passing another dead Mgalekgolo as they leave the area. They enter another area, patrolled by a pair of live Mgalekgolo, who are eventually eliminated by the Chief after a struggle.'' | ||
*'''Prophet of Truth (loudspeaker)''': "With my blessing, the Brutes now lead our [[Covenant fleet|fleets]]! They ask for your [[covenant Empire|allegiance]], and you shall give it." | *'''Prophet of Truth (loudspeaker)''': "With my blessing, the Brutes now lead our [[Covenant fleet|fleets]]! They ask for your [[covenant Empire|allegiance]], and you shall give it." | ||
| Line 229: | Line 236: | ||
*'''Cortana (COM)''': "You wouldn't believe the number of kill-systems the Covenant are throwing down around me. Not to worry, it's pretty sloppy stuff. I guess they never expected a hostile intelligence to penetrate their networks from the ''inside''." | *'''Cortana (COM)''': "You wouldn't believe the number of kill-systems the Covenant are throwing down around me. Not to worry, it's pretty sloppy stuff. I guess they never expected a hostile intelligence to penetrate their networks from the ''inside''." | ||
''The door in front of the team opens, revealing a duel between an energy sword-wielding Sangheili Honor Guardsman and a Jiralhanae on a platform on top floor of the first [[Valley of Tears A|Valley of Tears]]. Eliminating the victor of the duel as well as the [[Kig- | ''The door in front of the team opens, revealing a duel between an energy sword-wielding Sangheili Honor Guardsman and a Jiralhanae on a platform on the top floor of the first [[Valley of Tears A|Valley of Tears]]. Eliminating the victor of the duel as well as the [[Kig-Yar Sniper]]s in the distance, the team continues downwards, finding more Sangheili fighting a Jiralhanae under a [[Covenant watchtower]]. A group of Yanme'e fly down and attack another Mgalekgolo on the lower floor, but are soon intercepted by a pair of [[Sangheili Ranger]]s. The team hikes up and finds a door, guarded by a single Jiralhanae. They eliminate it and exit the Valley. Behind the door reveals a wide and long staircase, splattered with purple [[blood]]. They walk down the slope.'' | ||
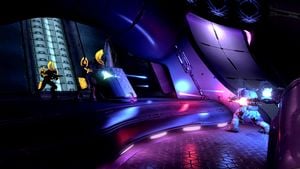
[[File:H2A-Brutes vs Elites.jpg|300px|thumb|A bitter rivalry erupts into all-out war.]] | |||
*'''Cortana (COM)''': "The Covenant [[Great Schism|just destroyed two of their own ships]]! And I'm hearing reports of small arms fire throughout their fleet." | *'''Cortana (COM)''': "The Covenant [[Great Schism|just destroyed two of their own ships]]! And I'm hearing reports of small arms fire throughout their fleet." | ||
| Line 235: | Line 244: | ||
*'''Prophet of Truth (loudspeaker)''': "Creatures of the Covenant: the path is broad, and we shall walk it side by side!" | *'''Prophet of Truth (loudspeaker)''': "Creatures of the Covenant: the path is broad, and we shall walk it side by side!" | ||
''The teams exits and finds a [[gravity conveyor]]. They step into it and begin to convey to the other side. A [[slipspace]] rupture opens on their far left, and '' | ''The teams exits and finds a [[gravity conveyor]]. They step into it and begin to convey to the other side. A [[slipspace]] rupture opens on their far left, and the {{UNSCShip|In Amber Clad}} emerges from it.'' | ||
[[File:H2A-In Amber Clad In High Charity.png|thumb|300px|The {{UNSCShip|In Amber Clad}}, now overrun by the Flood jumps inside ''High Charity'' as the Flood prepare to crash it into the city.]] | |||
*'''Cortana''': "Slipspace rupture... It's ''[[UNSC In Amber Clad|In Amber Clad]]''!" | *'''Cortana''': "Slipspace rupture... It's ''[[UNSC In Amber Clad|In Amber Clad]]''!" | ||
| Line 247: | Line 258: | ||
*'''Cortana''': "Hailing... No response. She crashed into another tower ahead of our position. I'll keep trying to make contact, but I'm not registering any human vital signs." | *'''Cortana''': "Hailing... No response. She crashed into another tower ahead of our position. I'll keep trying to make contact, but I'm not registering any human vital signs." | ||
''A Kig-Yar Sniper notices the team, and they quickly eliminate it. A pair of Unggoy and a pair of Sangheili turns by the corner and attacks the team. Soon two Jiralhanae appear and fire at the Sangheili. The team eliminates the Covenant troops and reaches the [[Hanging Gardens A|first Hanging Gardens]]. Intense fighting between [[Jiralhanae Honor Guardsman|Jiralhanae Honor Guardsmen]] and [[Special Operations Sangheili]] rages over it. The team eliminates the troops and a pair of Sangheili Rangers emerges from the tower. After clearing the area, the team continues and encounters another Gravity conveyor. Several Unggoy and Sangheili appear, one of them wielding an energy sword emerge, and begin to fire at the Kig-Yar led by two Jiralhanae on the other side, who moves to the side the | ''A Kig-Yar Sniper notices the team, and they quickly eliminate it. A pair of Unggoy and a pair of Sangheili turns by the corner and attacks the team. Soon two Jiralhanae appear and fire at the Sangheili. The team eliminates the Covenant troops and reaches the [[Hanging Gardens A|first Hanging Gardens]]. Intense fighting between [[Jiralhanae Honor Guardsman|Jiralhanae Honor Guardsmen]] and [[Special Operations Sangheili]] rages over it. The team eliminates the troops and a pair of Sangheili Rangers emerges from the tower. After clearing the area, the team continues and encounters another Gravity conveyor. Several Unggoy and Sangheili appear, one of them wielding an energy sword emerge, and begin to fire at the Kig-Yar led by two Jiralhanae on the other side, who moves to the side the Sangheili-led forces are on. The team eliminates all the Covenant and enters another door, which leads into the [[Mid Tower]]. A group of Yanme'e fly by the narrow corridor, unaware of the human presence.'' | ||
*'''Prophet of Truth (loudspeaker)''': "At this moment, the Council is gathered on [[Installation 05|Halo]], to see the [[Icon]] secured." | *'''Prophet of Truth (loudspeaker)''': "At this moment, the Council is gathered on [[Installation 05|Halo]], to see the [[Icon]] secured." | ||
*''' | *'''Brute (loudspeaker)''': "Rise, pack brothers! Cast down the [[Sangheili|Elites]]!" | ||
*'''Prophet of Truth (loudspeaker)''': "There are those who said this day would never come. What have they to say now?" | *'''Prophet of Truth (loudspeaker)''': "There are those who said this day would never come. What have they to say now?" | ||
*''' | *'''Brute (loudspeaker)''': "Once the towers are clear, we'll drive them from the lower district!" | ||
''Continuing down the corridor, the team arrives at a small area with a Gravity Lift in the middle of it and plants on the lower level. Yanme'e and Sangheili Rangers fly around the narrow space, firing at each other. A Sangheili Honor Guardsman and Special Operations Sangheili provide support fire, but are soon intercepted by a pair of Jiralhanae and two Kig-Yar. The team clears the area and advances into another narrow corridor. Exiting the Mid Tower, the team find another Gravity Conveyor.'' | ''Continuing down the corridor, the team arrives at a small area with a Gravity Lift in the middle of it and plants on the lower level. Yanme'e and Sangheili Rangers fly around the narrow space, firing at each other. A Sangheili Honor Guardsman and Special Operations Sangheili provide support fire, but are soon intercepted by a pair of Jiralhanae and two Kig-Yar. The team clears the area and advances into another narrow corridor. Exiting the Mid Tower, the team find another Gravity Conveyor.'' | ||
| Line 261: | Line 272: | ||
*'''Prophet of Truth (loudspeaker)''': "I have listened to the Oracle, and it confirmed our deepest hope. The Great Journey begins with [[Halo Array|Halo]]." | *'''Prophet of Truth (loudspeaker)''': "I have listened to the Oracle, and it confirmed our deepest hope. The Great Journey begins with [[Halo Array|Halo]]." | ||
*''' | *'''Brute (loudspeaker)''': "The Elites are falling back to the [[Mausoleum of the Arbiter|Mausoleum]]. Fools! Their Arbiter can do nothing for them now!" | ||
*'''Prophet of Truth (loudspeaker)''': "Who would doubt the Prophets? What have they foretold that has not come to pass?" | *'''Prophet of Truth (loudspeaker)''': "Who would doubt the Prophets? What have they foretold that has not come to pass?" | ||
''They move on to the other side, reaching the second [[Hanging Gardens B|Hanging Gardens]]. Panicking Unggoy run around it, soon coming under attack by a pair of berserking Jiralhanae. The team kills all Covenant present and continues to the next Gravity Conveyor, and enters a door. Now on the bottom of another wide and long staircase, the UNSC forces are attacked by a trio of Jiralhanae, who fill the air with grenades from their [[Type-25 Grenade Launcher|Brute Shots]]. Moving up as they eliminates the Jiralhanae, they reach the door at the top and arrives at the second [[Valley of Tears B|Valley of Tears]]. A single Sangheili defends itself from a Jiralhanae and a Kig-Yar Sniper, while another Jiralhanae attacks a pair of Unggoy near the pond below. Several more Unggoy are present nearby, trying to fend off the Jiralhanae. The opposite door opens, and three Sangheili, one of them an Honor Guardsman, along | ''They move on to the other side, reaching the second [[Hanging Gardens B|Hanging Gardens]]. Panicking Unggoy run around it, soon coming under attack by a pair of berserking Jiralhanae. The team kills all Covenant present and continues to the next Gravity Conveyor, and enters a door. Now on the bottom of another wide and long staircase, the UNSC forces are attacked by a trio of Jiralhanae, who fill the air with grenades from their [[Type-25 Grenade Launcher|Brute Shots]]. Moving up as they eliminates the Jiralhanae, they reach the door at the top and arrives at the second [[Valley of Tears B|Valley of Tears]]. A single Sangheili defends itself from a Jiralhanae and a Kig-Yar Sniper, while another Jiralhanae attacks a pair of Unggoy near the pond below. Several more Unggoy are present nearby, trying to fend off the Jiralhanae. The opposite door opens, and three Sangheili, one of them an Honor Guardsman, along with a [[Type-33 fuel rod gun|fuel rod gun]]-wielding [[Unggoy Heavy]], who proceeds to fire at both the UNSC forces and the Jiralhanae. Scaling the Valley, the team hikes up a slope, meeting two energy sword-wielding [[Stealth Sangheili|camouflaged figures]], followed by several [[Special Operations Unggoy]]. After eliminating the troops, the team enters another door into an area held by the Sangheili-led Covenant. A Sangheili as well as several Unggoy patrol the area.'' | ||
''The team kill the Covenant present, silently or not and continue into the next room, meeting more patrolling Sangheili and Unggoy, who are all Special Operations units. Shortly after, a Jiralhanae and two Kig-Yar launch an attack on the area from the opposite door. Caught in a crossfire, the | ''The team kill the Covenant present, silently or not and continue into the next room, meeting more patrolling Sangheili and Unggoy, who are all Special Operations units. Shortly after, a Jiralhanae and two Kig-Yar launch an attack on the area from the opposite door. Caught in a crossfire, the Sangheili-led forces are wiped out before the humans and Jiralhanae-led Covenant turn their attention to each other. The team eventually emerges victorious and opens the next door. They find a long bridge leading to the Mausoleum of the Arbiter. On the team's side, a pack of Jiralhanae supported by a Kig-Yar Sniper launch an attack on a Sangheili position in the center of the bridge.'' | ||
*'''Cortana (COM)''': "If we're going to catch Truth, we'll need to take a shortcut, straight through the Mausoleum. Look on the bright side: for now, they seem much more interested in [[Great Schism|killing each other]]." | *'''Cortana (COM)''': "If we're going to catch Truth, we'll need to take a shortcut, straight through the Mausoleum. Look on the bright side: for now, they seem much more interested in [[Great Schism|killing each other]]." | ||
| Line 275: | Line 286: | ||
*'''Cortana''': "You might consider sitting this one out." | *'''Cortana''': "You might consider sitting this one out." | ||
''After a long battle, which sees John-117 as the only survivor:'' | ''After a long battle, which sees John-117 as the only survivor (unless the Marines are saved, especially on lower difficulties):'' | ||
*'''Cortana''': "Hang on, I'm picking up two more transponders. It's [[Miranda Keyes|the Commander]] and [[Avery Junior Johnson|Johnson]]! They're closing on Truth's position, Chief! They'll need your help!" | *'''Cortana''': "Hang on, I'm picking up two more transponders. It's [[Miranda Keyes|the Commander]] and [[Avery Junior Johnson|Johnson]]! They're closing on Truth's position, Chief! They'll need your help!" | ||
| Line 283: | Line 294: | ||
*'''Cortana''': "This way, Chief." | *'''Cortana''': "This way, Chief." | ||
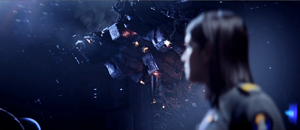
[[File:H2ainambercladcrash.png|300px|thumb | [[File:H2ainambercladcrash.png|300px|thumb|Taken prisoner by Tartarus, Commander Keyes gazes upon the wreckage of the ''UNSC In Amber Clad'' as she is led to a Phantom.]] | ||
''The exit opens, with several Stealth Sangheili (augmented by Sangheili Ultras on higher difficulties) and a sword-wielding [[Honor Guard Councilor]] running out. The Chief kills them and continues through the bridge.'' | ''The exit opens, with several Stealth Sangheili (augmented by Sangheili Ultras on higher difficulties) and a sword-wielding [[Honor Guard Councilor]] running out. The Chief kills them and continues through the bridge.'' | ||
| Line 289: | Line 300: | ||
*'''Cortana (COM)''': "...This isn't good. I’m getting confirmed reports of Flood leaving [[UNSC In Amber Clad|''In Amber Clad'']]'s wreckage. Let's get the Index and find a way out of here, before things get really ugly!" | *'''Cortana (COM)''': "...This isn't good. I’m getting confirmed reports of Flood leaving [[UNSC In Amber Clad|''In Amber Clad'']]'s wreckage. Let's get the Index and find a way out of here, before things get really ugly!" | ||
[http://www.youtube.com/watch?v= | [https://youtu.be/0mPrtsYriw0 '''{''Cutscene''}'''] | ||
[http://www.youtube.com/watch?v=h0BkohXSbBs'''{''Anniversary Cutscene''}'''] | |||
''Tartarus and his Jiralhanae take Keyes, Johnson and [[343 Guilty Spark]] toward a platform where the Prophets of Truth and Mercy wait for them, with three [[ | ''Tartarus and his Jiralhanae take Keyes, Johnson and [[343 Guilty Spark]] toward a platform where the Prophets of Truth and Mercy wait for them, with three [[Kez'katu-pattern Phantom|Phantoms]].'' | ||
*'''Tartarus''': "Split them up. One in each Phantom." | *'''Tartarus''': "Split them up. One in each Phantom." | ||
[[File:H2A - Tartarus smashing Flood.jpg|300px|thumb|Tartarus and the Honor Guards defend the Prophets from a swarm of Pod infectors.]] | |||
''The Jiralhanae do so rather brutishly. Keyes notices ''In Amber Clad'' in the tower before being pushed into the Phantom. The two Phantoms take off. Tartarus kneels before the Prophets.'' | ''The Jiralhanae do so rather brutishly. Keyes notices ''In Amber Clad'' in the tower before being pushed into the Phantom. The two Phantoms take off. Tartarus kneels before the Prophets.'' | ||
| Line 303: | Line 317: | ||
*'''Tartarus''': "My faith is strong. I will not fail." | *'''Tartarus''': "My faith is strong. I will not fail." | ||
''[[Pod infector]]s spring up and rush them. The Jiralhanae spot them and they get ready. Tartarus and the [[Jiralhanae Honor Guardsman|Jiralhanae Honor Guardsmen]] manage to stab or crush most of them, but one gets through and latches itself onto Mercy's throat, knocking him off his throne.'' | |||
''[[ | |||
*'''Prophet of Mercy''': ''(screams in agony)'' | *'''Prophet of Mercy''': ''(screams in agony)'' | ||
''Tartarus reaches to remove the | ''Tartarus reaches to remove the infector.'' | ||
*'''Prophet of Truth''': "Let him be." | *'''Prophet of Truth''': "Let him be." | ||
''Tartarus | ''Tartarus looks at Truth in surprise.'' | ||
[[File:H2A - Reluctant Tartarus.jpg|thumb|300px|The Prophet of Truth betrays Mercy and orders Tartarus to abandon him to the Flood before they flee ''High Charity''.]] | |||
*'''Prophet of Truth''': ''(to Mercy)'' "The [[Covenant religion|Great Journey]] waits for no one, brother… not even you." | *'''Prophet of Truth''': ''(to Mercy)'' "The [[Covenant religion|Great Journey]] waits for no one, brother… not even you." | ||
''Prophet of Truth boards the Phantom and the Jiralhanae Honor Guardsmen follow immediately, but Tartarus hesitates, staring at the dying Prophet of Mercy. He looks at the Index, makes his decision, and | ''Prophet of Truth boards the Phantom and the Jiralhanae Honor Guardsmen follow immediately, but Tartarus hesitates, staring at the dying Prophet of Mercy. He looks at the Index, makes his decision, and walks away.'' | ||
''Level ends.'' | ''Level ends.'' | ||
==Achievements== | |||
The following [[achievement]]s can be unlocked on ''Gravemind'' across the [[Halo 2 (Windows Vista)|Windows Vista]] and ''[[Halo: The Master Chief Collection]]'' editions of ''Halo 2: Anniversary''. The original [[Xbox]] release of ''Halo 2'' did not contain achievement unlocks. | |||
{| class="wikitable" | |||
|- | |||
! scope="col" style="width:135px;text-align:center;" |'''''Halo 2'' (Windows Vista)''' | |||
! scope="col" style="width:135px;text-align:center;" |'''''Halo: MCC'' (Xbox One, Xbox Series X|S)''' | |||
! scope="col" style="width:135px;text-align:center;" |'''''Halo: MCC'' (Steam)''' | |||
! scope="col" style="width:175px;height:20px;text-align:center;" |'''Title''' | |||
! scope="col" style="width:350px;height:20px;text-align:center;" |'''Unlock requirement''' | |||
! scope="col" style="width:200px;height:20px;text-align:center;" |'''Games''' | |||
|- | |||
|[[File:H2V Achievement Gravemind.png|center|64px]] | |||
|[[File:HTMCC H2A Achievement Gravemind.png|center|114px]] | |||
|[[File:HTMCC H2A Achievement Steam Gravemind.jpg|center|64px]] | |||
|<center>'''[[Gravemind (achievement)|Gravemind]]'''</center> | |||
|Beat Gravemind on any difficulty. | |||
|<center>[[Halo 2 (Windows Vista)|''Halo 2'' (Windows Vista)]]<br/>''[[Halo: The Master Chief Collection]]''</center> | |||
|- | |||
|<center>N/A</center> | |||
|[[File:HTMCC H2A Achievement ForceofWill.png|center|114px]] | |||
|[[File:HTMCC H2A Achievement Steam ForceofWill.jpg|center|64px]] | |||
|<center>'''[[Force of Will]]'''</center> | |||
|Beat the par time on Gravemind. | |||
|<center>''[[Halo: The Master Chief Collection]]''</center> | |||
|- | |||
|<center>N/A</center> | |||
|[[File:HTMCC H2A Achievement OfficialBusiness.png|center|114px]] | |||
|[[File:HTMCC H2A Achievement Steam OfficialBusiness.jpg|center|64px]] | |||
|<center>'''[[Official Business]]'''</center> | |||
|Beat the par score on Gravemind. | |||
|<center>''[[Halo: The Master Chief Collection]]''</center> | |||
|- | |||
|<center>N/A</center> | |||
|[[File:HTMCC H2A Achievement Knowledgable.png|center|114px]] | |||
|[[File:HTMCC H2A Achievement Steam Knowledgable.jpg|center|64px]] | |||
|<center>'''[[Knowledgable]]'''</center> | |||
|Activate [[Terminal (Halo 2: Anniversary)|Terminal #10]] on Gravemind. | |||
|<center>''[[Halo: The Master Chief Collection]]''</center> | |||
|- | |||
|<center>N/A</center> | |||
|[[File:HTMCC H2A Achievement SkulltakerAnger.png|center|114px]] | |||
|[[File:HTMCC H2A Achievement Steam SkulltakerAnger.jpg|center|64px]] | |||
|<center>'''[[Skulltaker Halo 2: Anger]]'''</center> | |||
|Find and claim the [[Halo 2 skulls#Anger|Anger Skull]]. | |||
|<center>''[[Halo: The Master Chief Collection]]''</center> | |||
|- | |||
|<center>N/A</center> | |||
|[[File:HTMCC H2A Achievement Don'tMakeaGirlaPromise.png|center|114px]] | |||
|[[File:HTMCC Achievement Don't Make a Girl a Promise Steam.jpg|center|64px]] | |||
|<center>'''[[Don't Make a Girl a Promise]]'''</center> | |||
|Collect the Cortana toy in Gravemind. | |||
|<center>''[[Halo: The Master Chief Collection]]''</center> | |||
|- | |||
|<center>N/A</center> | |||
|[[File:HTMCC H2A Achievement He'sRunningaMarathon.png|center|114px]] | |||
|[[File:HTMCC Achievement He's Running a Marathon... Steam.jpg|center|64px]] | |||
|<center>'''[[He's Running a Marathon...]]'''</center> | |||
|Spot the developer in the opening cutscene of Gravemind on Legendary in Classic Mode. | |||
|<center>''[[Halo: The Master Chief Collection]]''</center> | |||
|- | |||
|} | |||
==Trivia== | ==Trivia== | ||
===Strategies=== | ===Strategies=== | ||
*When playing this level on Heroic or Legendary, the [[Covenant|Brute-led Covenant]] tend to be more of a pain than the | *When playing this level on Heroic or Legendary, the [[Covenant|Brute-led Covenant]] tend to be more of a pain than the Elite-led Covenant and are more likely to wipe the latter out as a result. | ||
*The best weapons to use against [[Jiralhanae|Brutes]] are Plasma Rifles or Needlers for close range, Beam Rifles and Covenant Carbines for headshots, and Brute Shots for crowd control. When fighting Jackals, use the Plasma Rifle or the Brute Shot. Lastly, when facing Drone swarms, don't waste important weapons like Brute Shots, Carbines, Fuel Rod Guns, or Energy Swords. Instead, use dual Plasma Rifles to finish them off quickly. | *The best weapons to use against [[Jiralhanae|Brutes]] are Plasma Rifles or Needlers for close range, Beam Rifles and Covenant Carbines for headshots, and Brute Shots for crowd control. When fighting Jackals, use the Plasma Rifle or the Brute Shot. Lastly, when facing Drone swarms, don't waste important weapons like Brute Shots, Carbines, Fuel Rod Guns, or Energy Swords. Instead, use dual Plasma Rifles to finish them off quickly. | ||
*One of the easiest ways to die is at the hands of a berserking Brute. The best way to prevent this is to have the Master Chief jump on to a scenery object or ledge higher than the berserking Brute. If the Brute is smart, he'll run around the room searching for a new target. If he's dumb, he'll try to melee you, not realizing you're higher than he is, which makes for an easy kill with a dual Plasma Rifle and/or [[Type-33 Guided Munitions Launcher|Needler]] barrage or headshots with the Beam Rifle or Covenant Carbine. | *One of the easiest ways to die is at the hands of a berserking Brute. The best way to prevent this is to have the Master Chief jump on to a scenery object or ledge higher than the berserking Brute. If the Brute is smart, he'll run around the room searching for a new target. If he's dumb, he'll try to melee you, not realizing you're higher than he is, which makes for an easy kill with a dual Plasma Rifle and/or [[Type-33 Guided Munitions Launcher|Needler]] barrage or headshots with the Beam Rifle or Covenant Carbine. Also, they charge in a straight line and have to stop to redirect themselves. | ||
*When facing off against Elite-led Covenant, any weapon will work against Elites or Grunts, but when facing Hunters its best to use dual Plasma Rifles and Brute Shots. Be ready for the other Hunter when it enters a rampant revenge state and charges at you. | *When facing off against Elite-led Covenant, any weapon will work against Elites or Grunts, but when facing Hunters its best to use dual Plasma Rifles and Brute Shots. Be ready for the other Hunter when it enters a rampant revenge state and charges at you. | ||
*An effective way of killing the Hunters in the small rooms with the banisters is to lure one into the niches in the walls under the banisters and having the Marines shoot the Hunter's exposed back with Carbines and Beam Rifles. You are also effectively safe from the other Hunter, who wouldn't dare shoot his bond brother. Your Marines, however, are not as safe. | *An effective way of killing the Hunters in the small rooms with the banisters is to lure one into the niches in the walls under the banisters and having the Marines shoot the Hunter's exposed back with Carbines and Beam Rifles. You are also effectively safe from the other Hunter, who wouldn't dare shoot his bond brother. Your Marines, however, are not as safe. | ||
| Line 334: | Line 410: | ||
*The Grunts in the [[Hanging Gardens B]] area will never attack the player, even when all the Brutes are killed. [[UNSC Marine Corps|Marines]] (if they are still alive) will attack the [[Unggoy|Grunts]]. | *The Grunts in the [[Hanging Gardens B]] area will never attack the player, even when all the Brutes are killed. [[UNSC Marine Corps|Marines]] (if they are still alive) will attack the [[Unggoy|Grunts]]. | ||
*Players may be able to fall on the two beams under the Gravity conveyors, but players may still continue the level. | *Players may be able to fall on the two beams under the Gravity conveyors, but players may still continue the level. | ||
*Sometimes if the player kills a [[Jiralhanae|Brute]] in an [[Sangheili|Elite]]'s presence, the Elite will congratulate the player as if | *Sometimes, if the player kills a [[Jiralhanae|Brute]] in an [[Sangheili|Elite]]'s presence, the Elite will congratulate the player as if they were the [[Thel 'Vadam|Arbiter]]. | ||
*If any of the Gunner Grunts holding portable plasma turrets near the start of the level were killed immediately after it deploys it, sometimes they will drop an undeployed turret even though there is one already deployed. This glitch only works if the Grunt is still operating the turret, and it only works once (even though there are two grunts with turrets). | *If any of the Gunner Grunts holding portable plasma turrets near the start of the level were killed immediately after it deploys it, sometimes they will drop an undeployed turret even though there is one already deployed. This glitch only works if the Grunt is still operating the turret, and it only works once (even though there are two grunts with turrets). | ||
*After rescuing all the marines, if the player drops to the lowest floor at the correct time, the Covenant reinforcements will die when they reach the brig area. | *After rescuing all the marines, if the player drops to the lowest floor at the correct time, the Covenant reinforcements will die when they reach the brig area. | ||
*In the Mausoleum of the Arbiter, if the player walks up the small ramp of the Sarcophagus of the Arbiter Armor and keep walking towards it, the lower half of Master Chief is visible instead of just his legs. | *In the Mausoleum of the Arbiter, if the player walks up the small ramp of the Sarcophagus of the Arbiter Armor and keep walking towards it, the lower half of Master Chief is visible instead of just his legs. | ||
*If a Hunter falls into the area behind the Sarcophagus in the middle of the last room then it won't attack the player, no matter how close | *If a Hunter falls into the area behind the Sarcophagus in the middle of the last room then it won't attack the player, no matter how close they are, although if it is in the more open area of the space behind the Sarcophagus then it will melee the player eventually. | ||
===Mistakes=== | ===Mistakes=== | ||
| Line 344: | Line 420: | ||
*In the beginning cutscene, the Grunt fleeing from the Master Chief ''slides'' away from him instead of run away. | *In the beginning cutscene, the Grunt fleeing from the Master Chief ''slides'' away from him instead of run away. | ||
*At the beginning cutscene there are six Brutes in the Council Chamber: two next to the Prophets (which are fought in gameplay after the cutscene) and four others standing guard in the line. The four on the line disappear once the level begins. This was most likely either an oversight by [[Bungie]], or an attempt to keep the first encounter with Brutes from being too difficult. | *At the beginning cutscene there are six Brutes in the Council Chamber: two next to the Prophets (which are fought in gameplay after the cutscene) and four others standing guard in the line. The four on the line disappear once the level begins. This was most likely either an oversight by [[Bungie]], or an attempt to keep the first encounter with Brutes from being too difficult. | ||
*Any surviving marines at the end of this level will not appear in the level [[High Charity (level)|High Charity]]. | *Any surviving marines at the end of this level will not appear in the level ''[[High Charity (level)|High Charity]]''. They were likely not supposed to have survived in terms of the storyline. | ||
===Easter | ===Easter eggs=== | ||
{{Main|Easter | [[File:HTMCC-H2A Terminal 10.jpg|thumb|300px|The tenth ''Halo 2: Anniversary'' terminal on the wall in the first Valley of Tears.]] | ||
*The [[Halo 2 | {{Main|Easter eggs}} | ||
*When played on Legendary difficulty, one can find the [[Half-Naked Guy|Lonely Soul]] Easter Egg during the beginning cutscene of this level. When the interior of High Charity is first seen, a [[Unggoy|Grunt]] can be seen climbing on a wall. The scene to his right is blurred. But, as it focuses, one can see [[Jason Jones]] floating there in his underwear among the crowd of Grunts | *The [[Halo 2 skulls#Anger|Anger Skull]] can be found on this level. | ||
*When played on Legendary difficulty, one can find the [[Half-Naked Guy|Lonely Soul]] Easter Egg during the beginning cutscene of this level. When the interior of High Charity is first seen, a [[Unggoy|Grunt]] can be seen climbing on a wall. The scene to his right is blurred. But, as it focuses, one can see [[Jason Jones]] floating there in his underwear among the crowd of Grunts. In ''Halo 2: Anniversary'', Jason Jones is replaced with [[Frank O'Connor]], in his role of [[Hamish Beamish]]. | |||
*There is a [[Reversed Messages|Reversed Message]] in this level. | *There is a [[Reversed Messages|Reversed Message]] in this level. | ||
* | * The tenth terminal is a Covenant terminal in the first Valley of Tears. At the top of the cliff on the far side of the valley, near the exit door, on the wall behind where a Kig-Yar Sniper spawns, it can be found on the wall. | ||
===References=== | ===References=== | ||
| Line 358: | Line 435: | ||
*When the player reaches one of the corridors, the [[Prophet of Truth]] says the last known sentence of the [[Sangheili|Elite]] [[Writ of Union]], "Thou, in faith, will keep us safe, whilst we find the path." | *When the player reaches one of the corridors, the [[Prophet of Truth]] says the last known sentence of the [[Sangheili|Elite]] [[Writ of Union]], "Thou, in faith, will keep us safe, whilst we find the path." | ||
*The line that [[Prophet of Truth|Truth]] says in this level - "There are those who said this day would never come... what are they to say now?" was quoted in the ''[[Halo 2]]'' commercial. | *The line that [[Prophet of Truth|Truth]] says in this level - "There are those who said this day would never come... what are they to say now?" was quoted in the ''[[Halo 2]]'' commercial. | ||
*The song "[[Blow Me Away]]" by Breaking Benjamin plays during this level at the point where the [[John-117|Master Chief]] reaches the Mausoleum of The Arbiter. The song is not instrumental, it simply has the voice volume lowered. | *The song "[[Blow Me Away]]" by Breaking Benjamin plays during this level at the point where the [[John-117|Master Chief]] reaches the Mausoleum of The Arbiter. The song is not instrumental, it simply has the voice volume lowered and does not feature the guitar solo, only the intro, outro verses and choruses. | ||
===Miscellaneous=== | ===Miscellaneous=== | ||
*Birds similar to those in the level [[ | *Birds similar to those in the level [[Delta Halo]] can be seen flying around [[High Charity]]. If shot, they will explode into tatters. The only difference is that these birds are white. | ||
*Gravemind has only one chapter name in the whole level, titled "Inside Job" despite the fact that it is the longest level in ''[[Halo 2]]''. | *Gravemind has only one chapter name in the whole level, titled "Inside Job" despite the fact that it is the longest level in ''[[Halo 2]]''. | ||
*The Anti-Gravity generators holding up the spires can be destroyed, allowing them to fall. While it seems at first merely a cosmetic effect, these fallen pillars can provide quick cover and can even kill a [[Jiralhanae|Brute]] or [[Unggoy|Grunt]] if properly knocked over. | *The Anti-Gravity generators holding up the spires can be destroyed, allowing them to fall. While it seems at first merely a cosmetic effect, these fallen pillars can provide quick cover and can even kill a [[Jiralhanae|Brute]] or [[Unggoy|Grunt]] if properly knocked over. | ||
*There are [[Covenant koi]] in the second [[Valleys of Tears]]. | *There are [[Covenant koi]] in the second [[Valleys of Tears]]. | ||
*It is possible to jump up to the roof of the council chambers by jumping into the gravity lift at the right moment as it brings a couple of Brutes in to kill the player. Jump in at the right time and one will fly up to the top. If one lands on the right part of the wall, one won't die, but if one miss, one will fall to | *It is possible to jump up to the roof of the council chambers by jumping into the gravity lift at the right moment as it brings a couple of Brutes in to kill the player. Jump in at the right time and one will fly up to the top. If one lands on the right part of the wall, one won't die, but if one miss, one will fall to their death. | ||
*It is possible to have four Hunters in the Mausoleum fight between the | *It is possible to have four Hunters in the Mausoleum fight between the Elites and Brutes. The player can do so by luring the Hunters at the bridge leading to the Mausoleum. It is suggested to try this on Easy to Heroic, not Legendary. | ||
*If the Brutes are killed before Cortana says "Watch out! It's | *If the Brutes are killed before Cortana says "Watch out! It's berserking!", she will end the dialogue without saying so. | ||
*The Marine who takes a [[Type-51 Carbine|Covenant Carbine]] in the brig will have 120 or 138 rounds instead of the maximum of 72. | *The Marine who takes a [[Type-51 Carbine|Covenant Carbine]] in the brig will have 120 or 138 rounds instead of the maximum of 72. | ||
*This is the first level in the trilogy in which the player fights Brutes and the last level in which the player fights Elites. After this level the Elites | *This level is the first level in the trilogy in which the player fights Brutes and the last level in the game in which the player fights Elites. After this level the Elites are only encountered as allies. | ||
*This level is the only level in ''Halo 2'' where [[Special Operations Sangheili]] are fought as enemies | *This level is the only level in ''Halo 2'' where [[Special Operations Sangheili]] are fought as enemies. In addition, the final battle involving the [[Honor Guard Councilor]] is the only gameplay segment where the Spec-Op Sangheili enemies are cloaked while fighting. | ||
*This level has the largest number of Hunters, a total of 8. | *This level has the largest number of Hunters, a total of 8. This is the number of Hunters in the entirety of ''[[Halo 3]]''. | ||
*This is the only level in the game in which John and Thel interact with each other. | |||
* In the cutscene in the Anniversary version when the infection form leaps at Mercy, he can be seen tapping on the control panel on the arm of his Gravity Throne, possibly attempting to activate the weapon system to defend himself. | |||
* Due to the country's censorship restrictions, Blur had to hide the Gravemind in the Anniversary version of the mission's opening cutscene in Chinese version of the game. | |||
==Gallery== | ==Gallery== | ||
===Halo 2=== | ===Halo 2=== | ||
<gallery | <gallery> | ||
File:H2 header - Gravemind.png| | File:H2 HighCharity EnergyBridge Concept.jpg|Concept art for the energy bridges in the level. | ||
File:H2 LevelGeometry.jpg|Comparison between the Gravemind's chamber at the beginning of the level and the [[Control Room (Installation 04)|control room]] of [[Installation 04]] from ''[[Halo: Combat Evolved]]'', showing a remarkably similar level geometry. | |||
File:H2 header - Gravemind.png|Preview of the level in ''Halo 2'' menu. | |||
File:H2 Gravemind Closeup.png|The Gravemind speaking to John-117 and the Arbiter. | |||
File:FloodProphet01.jpg|The Prophet of Regret, revived and absorbed into the Gravemind. | |||
File:H2-2401PT-J117.jpg|2401 Penitent Tangent recognizes John-117 as a Reclaimer. | |||
File:War.jpg|Jiralhanae and Sangheili ships fighting around ''High Charity''. | File:War.jpg|Jiralhanae and Sangheili ships fighting around ''High Charity''. | ||
File:Master Chief Takes on Brute.jpg|John-117 | File:Truth with Index.jpg|The Prophet of Truth announces the retrieval of the Sacred Icon to the splintering Covenant. | ||
File:H2 CouncilChamber Battle.jpg|John-117 fighting Jiralhanae in the council chamber. | |||
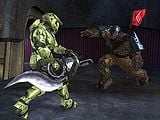
File:Master Chief Takes on Brute.jpg|John-117 encounters a berserk Jiralhanae. | |||
File:Tartarus.jpg|Johnson being held prisoner by Tartarus and his Jiralhanae. | |||
File:Death of Mercy.jpg|The Prophet of Mercy attacked by a Flood pod infector. | |||
</gallery> | </gallery> | ||
===Halo 2 Anniversary=== | |||
<gallery | ===Halo 2: Anniversary=== | ||
File:H2A- | <gallery> | ||
File:H2A - RegretGravemind.jpg|The Prophet of Regret, revived and absorbed into the Gravemind | File:H2A CovenantLamp Concept.jpg|Concept art for a Covenant lamp. | ||
File:HTMCC-H2A ThisRingWillMakeUsBrothers.png|The Gravemind speaking to John-117 and the Arbiter. | |||
File:H2AArbyChief.png|A close-up of Thel 'Vadamee and John-117 in the clutches of the Gravemind. | |||
File:H2A - RegretGravemind.jpg|The Prophet of Regret, revived and absorbed into the Gravemind. | |||
File:H2A2401&Regret.png|2401 argues with an assimilated Regret over the true purpose of the Halo Array. | File:H2A2401&Regret.png|2401 argues with an assimilated Regret over the true purpose of the Halo Array. | ||
File:H2ATruth2.png|The Prophet of Truth announces the retrieval of the Sacred Icon to the splintering Covenant. | File:H2ATruth2.png|The Prophet of Truth announces the retrieval of the Sacred Icon to the splintering Covenant. | ||
File:HTMCC-H2A High Charity Wide Hallway.jpg|One of the numerous wide hallways in ''High Charity''. | |||
File:HTMCC-H2A Curved Hallway.jpg|A curved hallway in ''High Charity''. | |||
File:HTMCC-H2A Junction and Gravity Lift.jpg|A junction with gravity lift in its central area. | |||
File:HTMCC-H2A Detention Block.jpg|The detention center in ''High Charity''. | |||
File:HTMCC-H2A Empty Holding Pen.jpg|An series of empty holding chambers. | |||
File:HTMCC-H2A Marine POW.jpg|A Marine being held prisoner. | |||
File:HTMCC-H2A Sangheili Minors.jpg|Sangheili Minors retreating from the attack of a Yanme'e swarm. | |||
</gallery> | </gallery> | ||
==Sources== | ==Sources== | ||
< | {{Ref/Sources}} | ||
{{Succession box | before = ''[[Quarantine Zone]]'' <br />| title = [[halo 2|''Halo 2'' Campaign Missions]] | years = '''''Gravemind''''' |after = ''[[Uprising]]''}} | |||
{{ | {{Levels|H2}} | ||
Latest revision as of 09:23, November 1, 2024
|
Prev: |
|
|
Next: |
|
| Gravemind | |
|---|---|
| |
|
Game: |
|
|
File name (?): |
|
|
Player: |
|
|
Date: |
|
|
Location: |
Inside High Charity |
|
Objective(s): |
Rescue Marine allies and pursue the Prophet of Truth |
|
Par Time: |
00:20:00 (Master Chief Collection) |
|
Par Score: |
11,000 (Master Chief Collection) |
 |
Halopedia has a walkthrough guide for this level; see Gravemind (level)/Walkthrough. |
| “ | The Prophets have the Index and plan to use it? Over your dead body. | ” |
Gravemind is the twelfth campaign level of Halo 2. The level takes place within High Charity, after the Gravemind teleports John-117 there. The Prophet of Truth has the Index, and the Master Chief must get to him before he leaves for the control room of Delta Halo. As the player travels through High Charity, they experience the beginning of the Great Schism.
Strangely enough, apart from the opening cutscene, there is no contact with the Gravemind or the Flood. Also, the word "Gravemind" is not mentioned until two levels later in High Charity. This is the first level where Jiralhanae are fought, and is one of only four missions where there are no human weapons. This is the first level in which you can use the Brute Shot and the Brute Plasma Rifle.
Transcript[edit]
{Cutscene} {Anniversary Cutscene} {Anniversary Chinese Cutscene}
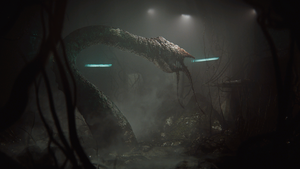
The Master Chief begins to wake up, and sees a red circle of lights on the ceiling of some underground area, and helf aloft by a tentacle. (In the Anniversary version, he wakes up to himself being wrapped by a huge tentacle dragged along a corridor into a huge chamber.) Eventually, he is brought towards the head of a massive creature: the Gravemind.
- Cortana: "What...is that?"
The Master Chief is held in front of the Gravemind's head, a mass of fleshy mandibles. It speaks in a deep, gravelly voice.
- Gravemind: "I...? I am a monument to all your sins."
As the Gravemind talks, it breathes out Flood spores. (In the Anniversary version, the Chief looks up and notices he is not alone.) Two tentacles bring forth a struggling Thel 'Vadamee, as they are held next to each other.
- John-117: "Relax. I'd rather not piss this thing off."
- Thel 'Vadamee: (surprised) "Demon!"
The Gravemind makes loud huffing sounds, and indicates the Master Chief (and drags him closer in Anniversary).
- Gravemind: "This one is machine and nerve, and has its mind concluded." (a tentacle wraps around Master Chief's head in the original, but disturbingly pets the Chief's helmet in Anniversary, then indicates 'Vadamee)
The Gravemind makes another brief huff, before indicating 'Vadamee (and dragging him closer in Anniversary).
- Gravemind: "This one is but flesh and faith, and is the more deluded."(shakes the Arbiter around and turns him upside down)
- Thel 'Vadamee: "Kill me or release me, parasite. But do not waste my time with talk!"
- Gravemind: "There is much talk. And I have listened. Through rock, and metal, and time. Now I shall talk, and you shall listen."
It raises two tentacles, one wrapped around a red Monitor, the other merged with an infected Prophet of Regret.
- 2401 Penitent Tangent: "Greetings! I am 2401 Penitent Tangent. I am the Monitor of Installation 05."
Regret struggles to speak through his excruciating pain.
- Prophet of Regret: "And... I am the Prophet of Regret, Councilor most High... Hierarch of the Covenant!"
2401 Penitent Tangent sees the Master Chief.
- 2401 Penitent Tangent: "A Reclaimer? Here? At last! We have much to do. This facility must be activated if we are to control this outbreak!"
- Prophet of Regret: "Stay where you are! Nothing can be done until my sermon is complete!"
- 2401 Penitent Tangent: "Not true. This installation has a successful utilization record of 1.2 trillion simulated and one actual. It is ready to fire on demand."
- Prophet of Regret: (to the Arbiter) "Of all the objects our Lords left behind, there are none so worthless as these Oracles!" (yells) "They know nothing of the Great Journey!"
- 2401 Penitent Tangent: "And you know nothing about containment! You have demonstrated complete disregard for even the most basic protocols!
- Gravemind: "This one's 'containment'..." (gives a disgusted huff) "And this one's 'Great Journey'... are the same."
It lowers its tentacles, and Regret shrieks in fear.
- Gravemind: (to 'Vadamee) "Your Prophets have promised you freedom from a doomed existence, but you will find no salvation on this ring. Those who built this place knew what they wrought. Do not mistake their intent, or all will perish as they did before."
At this moment, 'Vadamee stops struggling against the tentacles. He stares somewhat curiously at the Gravemind.
- John-117: "This thing is right. Halo is a weapon. Your Prophets are making a big mistake."
- Thel 'Vadamee: "Your ignorance already destroyed one of the sacred rings, Demon. It shall not harm another."
- Gravemind: "If you will not hear the truth, then I will show it to you. There is still time to stop the key from turning, but first it must be found." (indicates each in turn) "You will search one likely spot, and you will search another. Fate had us meet as foes, but this ring will make us brothers."
Master Chief and 'Vadamee disappear in teleportation rings. Fade to black, fade in on High Charity.

A swarm of Covenant ships attack each other outside of High Charity. Fade in on the walkway outside the Council Chamber, Jiralhanae Honor Guardsmen guard the gates from Unggoy and Kig-yar rioters.
- Prophet of Truth: "We are, all of us, gravely concerned."
Cut to Council Chamber. A line of Jiralhanae Honor Guardsmen stand at attention. An Unggoy cameraman focuses a holographic camera on Truth as he delivers his speech, while the Prophet of Mercy watches from aside.
- Prophet of Truth: "The release of the parasite was unexpected, unfortunate. But, there is no need to panic. In truth, this is a time to rejoice. A moment that all the Covenant should savor." (raises the Index) "For the Sacred Icon has been found. With it, our path is clear, our entry into the Divine Beyond guaranteed! The Great Journey is nigh..." (the Unggoy notices the Master Chief appearing out of thin air behind him) "...and nothing, not even the Flood, can stop it!"
The Chief looks down at the shocked Unggoy.
- John-117: "Boo."
The Unggoy yelps, throws up his Needler, and flees. The Master Chief catches the Needler and aims it at Truth. Two Jiralhanae Honor Guardsmen shield the Prophets with their pikes.
- Prophet of Truth: "Kill the Demon!"
The Prophets and some Jiralhanae escape through a gravity lift, leaving two Jiralhanae behind.
{Gameplay}
Inside Job[edit]
- Cortana: "Brutes! The faster you can kill these Brutes, the better." (The Chief kills one Brute.) "They don't have shield generators, but take them out before... It's berserking!"
Several Unggoy emerge from side doors in the chamber to provide support for the Jiralhanae. Soon the Master Chief kills all Covenant in the room.
- Brute (loudspeaker): "The Demon has infiltrated the Council Chamber?! Protect the Hierarchs! Seal the exits!"
- Cortana: "Oh, I don't think so."
Side doors open up, unleashing waves of Jiralhanae and Unggoy upon the Chief. After a protracted battle, the Chief is able to kill all Covenant troops in the room:
- Cortana: "Put me down on one of the pedestals near the door."
If you approach where Truth was sitting before:
- Cortana: "They've locked it from below. There's a door at the other end of the chamber."
The Spartan approaches the door, and Cortana's hologram appears on one of the two pedestals.
- Cortana: "That Prophet, Truth. He has the Index! You've got to take it from him. Let me get these doors. (The doors open) Go! It will be easier to track Truth if I stay in the network."
If the player continues to wait:
- Cortana: "Don't worry. You can pick me up later."
The Master Chief fights his way through many Jiralhanae and Unggoy, including an Unggoy Heavy operating a plasma turret and eventually makes it to the ledge where Thel 'Vadamee was tortured and branded with the Mark of Shame. Here, more Covenant troops, including Kig-Yar try to stop the Spartan's progress. Reinforcements soon arrive from a gravity lift at the far end of the ledge. Eventually a group of three Jiralhanae arrive, one with a red flag attached to its harness.
- Cortana (COM): "Watch out for the Captain, it's got a Brute Shot!" (Note that the Brute Captain with the Brute Shot first shows up in the Council Chamber on Legendary.)
The Chief soon kills all Covenant.
- Cortana: "Truth is moving through the lower levels of the tower. I'll reverse this Grav Lift. Drop down, try to cut him off."
If the player stalls:
- Cortana: "It's safe, really. Just step in."
If the Chief continues to wait around:
- Cortana: "After that stunt on the Cairo, I know you're not afraid of heights."
If the Chief still stalls:
- Cortana: "Fine, I won't watch. Meet you at the bottom, okay?"
The Chief drops down the Gravity Lift, kills a pair of surprised Unggoy and Kig-Yar, and enters another hallway. More Covenant troops appear.
- Brute (loudspeaker): "Reinforce all approaches to the holding pens. Slay the Demon on sight!"
- Cortana: "They're beefing up their patrols. Stay sharp."
The Chief enters a cross section, but with both left and right doors locked, he continues ahead.
- Cortana (COM): "Wait a minute! I'm reading Marine IFF transponders. The signals are originating somewhere below your position."
The Chief defeats another group of Covenant troops in the corridor, along with a trio of Kig-Yar that enter from the cross section the Spartan previously passed.
- Cortana: "There's another lift in the next room."
He exits and finds a two-leveled, large room with a Gravity Lift, guarded by a pack of Jiralhanae with Kig-Yar support. The Master Chief eventually eliminates them and reaches the lift on the lower floor.
- Cortana: "Here, Chief. Jump in."
The Chief takes the gravity lift down. He passes a level, alerting a pair of dozing Unggoy and a Jiralhanae, and continues down. Immediately he passes another level, and catches a glimpse of a dead Sangheili Honor Guard Ultra with an energy sword lying beside it. He finally reaches the bottom, guarded by a Jiralhanae with its back on the Spartan.
- Cortana (COM): "There are two groups of Marines in the detention block. I'll zero in on their locations, you neutralize the guards... quietly."
The Master Chief engages the Covenant soldiers in the room, and succeeds in killing them, as well as several troops that arrived from the lower levels of the detention center.
- Cortana: "Chief, come to the lower level. The Marines are just inside, careful of the guards."
(Note: Some times, Cortana will have you free the Marines in the middle level first)
The Chief drops down two levels lower, clears the guards outside the doors and enters the brig. He encounters a patrolling Jiralhanae with it's back to him and four sleeping Unggoy, the Chief ambushes the unwary Covenant and eliminates them. Once all enemies are dead the brig doors unlatch, and the Marine POWs arm themselves with dropped Covenant weapons.
- Cortana: "Listen up, Marines! The Chief's hunting a Prophet, and you're gonna help him kill it."
- Marine: "Affirmative!"
or
- Marine: "No sense sticking around here!"
- Cortana: "One more group of Marines to go, Chief."
The squad exits the brig and immediately come under attack by more Covenant guards on the mid level.
- Cortana: "Chief, come to the middle level. More guards, get ready."
The team levitates up to the mid level and frees the second group of Marines, who arm themselves, again, with dropped Covenant weapons.
- Cortana: "That's all the Marines, Chief. Good work."
- Cortana (COM): "We'll get out of here the same way we came in - the central Grav Lift."
- Cortana (COM): "Hostile reinforcements coming down the lift!"
A large team of Covenant troops come down the gravity lift, and set up plasma turrets around the platform. The team ascend to the top level and after a struggle manage to kill all of the Covenant.
- Cortana: "The lift is clear. Step on in."
The Marines, one by one, step into the lift and leave the area.
If the player stalls:
- Cortana: "We've got to get after Truth, Chief. Step into the lift."
The Chief enters the lift and is sent to a room with Marines waiting. The dead Honor Guard Ultra Sangheili seen earlier still lies on the ground.
- Prophet of Truth (loudspeaker): "Fear not, my brothers! The Sacred Icon is secure. It was Tartarus and his Brutes who took the Icon from the Flood, and for that they have our thanks."
- Cortana (COM): "Excellent! Truth is broadcasting on the move. It'll make him much easier to track."
Three Sangheili run out of a nearby door, under fire from a lance of Yanme'e. The team eliminates them and enters through the open door. They continue into a hallway, walk pass another dead Honor Guard Ultra lying on the floor, and encounter a pair of Sangheili Honor Guardsmen fighting several Jiralhanae and another lance of Yanme'e. After all the Covenant are dead, another swarm of Yanme'e emerge from the door and attack the team. The team eliminates them and reach a cross section where a dead Mgalekgolo lies. The team continue into the next hallway.
- Prophet of Truth (loudspeaker): "The Elites have failed to protect the Prophets, and in doing so, have put all our lives at risk. Let no warrior forget his oath, 'Thou, in faith, shall keep us safe, whilst we find the Path.'"
- Cortana (COM): "I've got a fix on Truth just outside this tower, Chief. There's an exit nearby - hurry!"
The team enters another corridor, and sees a pair of Jiralhanae and a group of Kig-Yar attacking three Sangheili Honor Guardsmen. They manage to eliminate the warring Covenant and continue onward, passing another dead Mgalekgolo as they leave the area. They enter another area, patrolled by a pair of live Mgalekgolo, who are eventually eliminated by the Chief after a struggle.
- Prophet of Truth (loudspeaker): "With my blessing, the Brutes now lead our fleets! They ask for your allegiance, and you shall give it."
- Cortana (COM): "You wouldn't believe the number of kill-systems the Covenant are throwing down around me. Not to worry, it's pretty sloppy stuff. I guess they never expected a hostile intelligence to penetrate their networks from the inside."
The door in front of the team opens, revealing a duel between an energy sword-wielding Sangheili Honor Guardsman and a Jiralhanae on a platform on the top floor of the first Valley of Tears. Eliminating the victor of the duel as well as the Kig-Yar Snipers in the distance, the team continues downwards, finding more Sangheili fighting a Jiralhanae under a Covenant watchtower. A group of Yanme'e fly down and attack another Mgalekgolo on the lower floor, but are soon intercepted by a pair of Sangheili Rangers. The team hikes up and finds a door, guarded by a single Jiralhanae. They eliminate it and exit the Valley. Behind the door reveals a wide and long staircase, splattered with purple blood. They walk down the slope.
- Cortana (COM): "The Covenant just destroyed two of their own ships! And I'm hearing reports of small arms fire throughout their fleet."
- Prophet of Truth (loudspeaker): "Creatures of the Covenant: the path is broad, and we shall walk it side by side!"
The teams exits and finds a gravity conveyor. They step into it and begin to convey to the other side. A slipspace rupture opens on their far left, and the UNSC In Amber Clad emerges from it.
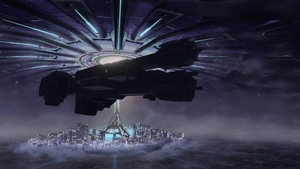
- Cortana: "Slipspace rupture... It's In Amber Clad!"
The In Amber Clad flies by overhead.
- Prophet of Truth (Loudspeaker): "Be glad! A reward for all your toil and all your sacrifices is near at hand."
The team reaches the other side as the sound of In Amber Clad crashing is heard.
- Cortana: "Hailing... No response. She crashed into another tower ahead of our position. I'll keep trying to make contact, but I'm not registering any human vital signs."
A Kig-Yar Sniper notices the team, and they quickly eliminate it. A pair of Unggoy and a pair of Sangheili turns by the corner and attacks the team. Soon two Jiralhanae appear and fire at the Sangheili. The team eliminates the Covenant troops and reaches the first Hanging Gardens. Intense fighting between Jiralhanae Honor Guardsmen and Special Operations Sangheili rages over it. The team eliminates the troops and a pair of Sangheili Rangers emerges from the tower. After clearing the area, the team continues and encounters another Gravity conveyor. Several Unggoy and Sangheili appear, one of them wielding an energy sword emerge, and begin to fire at the Kig-Yar led by two Jiralhanae on the other side, who moves to the side the Sangheili-led forces are on. The team eliminates all the Covenant and enters another door, which leads into the Mid Tower. A group of Yanme'e fly by the narrow corridor, unaware of the human presence.
- Prophet of Truth (loudspeaker): "At this moment, the Council is gathered on Halo, to see the Icon secured."
- Brute (loudspeaker): "Rise, pack brothers! Cast down the Elites!"
- Prophet of Truth (loudspeaker): "There are those who said this day would never come. What have they to say now?"
- Brute (loudspeaker): "Once the towers are clear, we'll drive them from the lower district!"
Continuing down the corridor, the team arrives at a small area with a Gravity Lift in the middle of it and plants on the lower level. Yanme'e and Sangheili Rangers fly around the narrow space, firing at each other. A Sangheili Honor Guardsman and Special Operations Sangheili provide support fire, but are soon intercepted by a pair of Jiralhanae and two Kig-Yar. The team clears the area and advances into another narrow corridor. Exiting the Mid Tower, the team find another Gravity Conveyor.
- Prophet of Truth (loudspeaker): "I have listened to the Oracle, and it confirmed our deepest hope. The Great Journey begins with Halo."
- Brute (loudspeaker): "The Elites are falling back to the Mausoleum. Fools! Their Arbiter can do nothing for them now!"
- Prophet of Truth (loudspeaker): "Who would doubt the Prophets? What have they foretold that has not come to pass?"
They move on to the other side, reaching the second Hanging Gardens. Panicking Unggoy run around it, soon coming under attack by a pair of berserking Jiralhanae. The team kills all Covenant present and continues to the next Gravity Conveyor, and enters a door. Now on the bottom of another wide and long staircase, the UNSC forces are attacked by a trio of Jiralhanae, who fill the air with grenades from their Brute Shots. Moving up as they eliminates the Jiralhanae, they reach the door at the top and arrives at the second Valley of Tears. A single Sangheili defends itself from a Jiralhanae and a Kig-Yar Sniper, while another Jiralhanae attacks a pair of Unggoy near the pond below. Several more Unggoy are present nearby, trying to fend off the Jiralhanae. The opposite door opens, and three Sangheili, one of them an Honor Guardsman, along with a fuel rod gun-wielding Unggoy Heavy, who proceeds to fire at both the UNSC forces and the Jiralhanae. Scaling the Valley, the team hikes up a slope, meeting two energy sword-wielding camouflaged figures, followed by several Special Operations Unggoy. After eliminating the troops, the team enters another door into an area held by the Sangheili-led Covenant. A Sangheili as well as several Unggoy patrol the area.
The team kill the Covenant present, silently or not and continue into the next room, meeting more patrolling Sangheili and Unggoy, who are all Special Operations units. Shortly after, a Jiralhanae and two Kig-Yar launch an attack on the area from the opposite door. Caught in a crossfire, the Sangheili-led forces are wiped out before the humans and Jiralhanae-led Covenant turn their attention to each other. The team eventually emerges victorious and opens the next door. They find a long bridge leading to the Mausoleum of the Arbiter. On the team's side, a pack of Jiralhanae supported by a Kig-Yar Sniper launch an attack on a Sangheili position in the center of the bridge.
- Cortana (COM): "If we're going to catch Truth, we'll need to take a shortcut, straight through the Mausoleum. Look on the bright side: for now, they seem much more interested in killing each other."
A swarm of Yanme'e soon descend from high above, firing at the Sangheili. The team eliminates all hostiles and advance, but are intercepted by more Sangheili-led forces, including a pair of Mgalekgolo. More Yanme'e descend to add to the chaos. After defeating the opposition, the surviving forces enter the Mausoleum and come across a very large fight inside involving Jiralhanae, Yanme'e, a Mgalekgolo pair and three Sangheili Ultras.
- Cortana: "You might consider sitting this one out."
After a long battle, which sees John-117 as the only survivor (unless the Marines are saved, especially on lower difficulties):
- Cortana: "Hang on, I'm picking up two more transponders. It's the Commander and Johnson! They're closing on Truth's position, Chief! They'll need your help!"
Cortana's avatar appears on a pedestal next to the exit.
- Cortana: "This way, Chief."
The exit opens, with several Stealth Sangheili (augmented by Sangheili Ultras on higher difficulties) and a sword-wielding Honor Guard Councilor running out. The Chief kills them and continues through the bridge.
- Cortana (COM): "...This isn't good. I’m getting confirmed reports of Flood leaving In Amber Clad's wreckage. Let's get the Index and find a way out of here, before things get really ugly!"
{Cutscene} {Anniversary Cutscene}
Tartarus and his Jiralhanae take Keyes, Johnson and 343 Guilty Spark toward a platform where the Prophets of Truth and Mercy wait for them, with three Phantoms.
- Tartarus: "Split them up. One in each Phantom."
The Jiralhanae do so rather brutishly. Keyes notices In Amber Clad in the tower before being pushed into the Phantom. The two Phantoms take off. Tartarus kneels before the Prophets.
Prophet of Truth hands Tartarus the Index.
- Tartarus: "My faith is strong. I will not fail."
Pod infectors spring up and rush them. The Jiralhanae spot them and they get ready. Tartarus and the Jiralhanae Honor Guardsmen manage to stab or crush most of them, but one gets through and latches itself onto Mercy's throat, knocking him off his throne.
- Prophet of Mercy: (screams in agony)
Tartarus reaches to remove the infector.
- Prophet of Truth: "Let him be."
Tartarus looks at Truth in surprise.
- Prophet of Truth: (to Mercy) "The Great Journey waits for no one, brother… not even you."
Prophet of Truth boards the Phantom and the Jiralhanae Honor Guardsmen follow immediately, but Tartarus hesitates, staring at the dying Prophet of Mercy. He looks at the Index, makes his decision, and walks away.
Level ends.
Achievements[edit]
The following achievements can be unlocked on Gravemind across the Windows Vista and Halo: The Master Chief Collection editions of Halo 2: Anniversary. The original Xbox release of Halo 2 did not contain achievement unlocks.
| Halo 2 (Windows Vista) | Halo: MCC (Xbox One, Xbox Series X|S) | Halo: MCC (Steam) | Title | Unlock requirement | Games |
|---|---|---|---|---|---|
| Beat Gravemind on any difficulty. | Halo: The Master Chief Collection | ||||
| Beat the par time on Gravemind. | |||||
| Beat the par score on Gravemind. | |||||
| Activate Terminal #10 on Gravemind. | |||||
| Find and claim the Anger Skull. | |||||
| Collect the Cortana toy in Gravemind. | |||||
| Spot the developer in the opening cutscene of Gravemind on Legendary in Classic Mode. |
Trivia[edit]
Strategies[edit]
- When playing this level on Heroic or Legendary, the Brute-led Covenant tend to be more of a pain than the Elite-led Covenant and are more likely to wipe the latter out as a result.
- The best weapons to use against Brutes are Plasma Rifles or Needlers for close range, Beam Rifles and Covenant Carbines for headshots, and Brute Shots for crowd control. When fighting Jackals, use the Plasma Rifle or the Brute Shot. Lastly, when facing Drone swarms, don't waste important weapons like Brute Shots, Carbines, Fuel Rod Guns, or Energy Swords. Instead, use dual Plasma Rifles to finish them off quickly.
- One of the easiest ways to die is at the hands of a berserking Brute. The best way to prevent this is to have the Master Chief jump on to a scenery object or ledge higher than the berserking Brute. If the Brute is smart, he'll run around the room searching for a new target. If he's dumb, he'll try to melee you, not realizing you're higher than he is, which makes for an easy kill with a dual Plasma Rifle and/or Needler barrage or headshots with the Beam Rifle or Covenant Carbine. Also, they charge in a straight line and have to stop to redirect themselves.
- When facing off against Elite-led Covenant, any weapon will work against Elites or Grunts, but when facing Hunters its best to use dual Plasma Rifles and Brute Shots. Be ready for the other Hunter when it enters a rampant revenge state and charges at you.
- An effective way of killing the Hunters in the small rooms with the banisters is to lure one into the niches in the walls under the banisters and having the Marines shoot the Hunter's exposed back with Carbines and Beam Rifles. You are also effectively safe from the other Hunter, who wouldn't dare shoot his bond brother. Your Marines, however, are not as safe.
Glitches[edit]
- A Marine may die when standing beside a Covenant supply case in the Hanging Gardens.
- The Grunts in the Hanging Gardens B area will never attack the player, even when all the Brutes are killed. Marines (if they are still alive) will attack the Grunts.
- Players may be able to fall on the two beams under the Gravity conveyors, but players may still continue the level.
- Sometimes, if the player kills a Brute in an Elite's presence, the Elite will congratulate the player as if they were the Arbiter.
- If any of the Gunner Grunts holding portable plasma turrets near the start of the level were killed immediately after it deploys it, sometimes they will drop an undeployed turret even though there is one already deployed. This glitch only works if the Grunt is still operating the turret, and it only works once (even though there are two grunts with turrets).
- After rescuing all the marines, if the player drops to the lowest floor at the correct time, the Covenant reinforcements will die when they reach the brig area.
- In the Mausoleum of the Arbiter, if the player walks up the small ramp of the Sarcophagus of the Arbiter Armor and keep walking towards it, the lower half of Master Chief is visible instead of just his legs.
- If a Hunter falls into the area behind the Sarcophagus in the middle of the last room then it won't attack the player, no matter how close they are, although if it is in the more open area of the space behind the Sarcophagus then it will melee the player eventually.
Mistakes[edit]
- At the end of this level, the player will run into two cloaked Elites and one "Honor Guard Councilor". A closer look shows that this Elite is actually an Honor Guard Ultra with a Councilor's helmet. This has been confirmed to be a result of incorrect coding.
- In the beginning cutscene, the Grunt fleeing from the Master Chief slides away from him instead of run away.
- At the beginning cutscene there are six Brutes in the Council Chamber: two next to the Prophets (which are fought in gameplay after the cutscene) and four others standing guard in the line. The four on the line disappear once the level begins. This was most likely either an oversight by Bungie, or an attempt to keep the first encounter with Brutes from being too difficult.
- Any surviving marines at the end of this level will not appear in the level High Charity. They were likely not supposed to have survived in terms of the storyline.
Easter eggs[edit]
- Main article: Easter eggs
- The Anger Skull can be found on this level.
- When played on Legendary difficulty, one can find the Lonely Soul Easter Egg during the beginning cutscene of this level. When the interior of High Charity is first seen, a Grunt can be seen climbing on a wall. The scene to his right is blurred. But, as it focuses, one can see Jason Jones floating there in his underwear among the crowd of Grunts. In Halo 2: Anniversary, Jason Jones is replaced with Frank O'Connor, in his role of Hamish Beamish.
- There is a Reversed Message in this level.
- The tenth terminal is a Covenant terminal in the first Valley of Tears. At the top of the cliff on the far side of the valley, near the exit door, on the wall behind where a Kig-Yar Sniper spawns, it can be found on the wall.
References[edit]
- The insects scrambling on the floor near the Central Gravity Lift are rumored to be the grub that are mentioned in Chapter 6 of Contact Harvest due to the fact that Grunts are sleeping all around them.
- Occasionally, the popular "Mario Death Scream" from the Halo 3 Beta can be first heard on this level upon falling to death.
- When the player reaches one of the corridors, the Prophet of Truth says the last known sentence of the Elite Writ of Union, "Thou, in faith, will keep us safe, whilst we find the path."
- The line that Truth says in this level - "There are those who said this day would never come... what are they to say now?" was quoted in the Halo 2 commercial.
- The song "Blow Me Away" by Breaking Benjamin plays during this level at the point where the Master Chief reaches the Mausoleum of The Arbiter. The song is not instrumental, it simply has the voice volume lowered and does not feature the guitar solo, only the intro, outro verses and choruses.
Miscellaneous[edit]
- Birds similar to those in the level Delta Halo can be seen flying around High Charity. If shot, they will explode into tatters. The only difference is that these birds are white.
- Gravemind has only one chapter name in the whole level, titled "Inside Job" despite the fact that it is the longest level in Halo 2.
- The Anti-Gravity generators holding up the spires can be destroyed, allowing them to fall. While it seems at first merely a cosmetic effect, these fallen pillars can provide quick cover and can even kill a Brute or Grunt if properly knocked over.
- There are Covenant koi in the second Valleys of Tears.
- It is possible to jump up to the roof of the council chambers by jumping into the gravity lift at the right moment as it brings a couple of Brutes in to kill the player. Jump in at the right time and one will fly up to the top. If one lands on the right part of the wall, one won't die, but if one miss, one will fall to their death.
- It is possible to have four Hunters in the Mausoleum fight between the Elites and Brutes. The player can do so by luring the Hunters at the bridge leading to the Mausoleum. It is suggested to try this on Easy to Heroic, not Legendary.
- If the Brutes are killed before Cortana says "Watch out! It's berserking!", she will end the dialogue without saying so.
- The Marine who takes a Covenant Carbine in the brig will have 120 or 138 rounds instead of the maximum of 72.
- This level is the first level in the trilogy in which the player fights Brutes and the last level in the game in which the player fights Elites. After this level the Elites are only encountered as allies.
- This level is the only level in Halo 2 where Special Operations Sangheili are fought as enemies. In addition, the final battle involving the Honor Guard Councilor is the only gameplay segment where the Spec-Op Sangheili enemies are cloaked while fighting.
- This level has the largest number of Hunters, a total of 8. This is the number of Hunters in the entirety of Halo 3.
- This is the only level in the game in which John and Thel interact with each other.
- In the cutscene in the Anniversary version when the infection form leaps at Mercy, he can be seen tapping on the control panel on the arm of his Gravity Throne, possibly attempting to activate the weapon system to defend himself.
- Due to the country's censorship restrictions, Blur had to hide the Gravemind in the Anniversary version of the mission's opening cutscene in Chinese version of the game.
Gallery[edit]
Halo 2[edit]
Comparison between the Gravemind's chamber at the beginning of the level and the control room of Installation 04 from Halo: Combat Evolved, showing a remarkably similar level geometry.
Halo 2: Anniversary[edit]
Sources[edit]
- ^ Halo 2 Editing Kit, game file
H2EK\tags\scenarios\solo\07a_highcharity\07a_highcharity.scenario
| Preceded by Quarantine Zone |
Halo 2 Campaign Missions Gravemind |
Succeeded by Uprising |
| |||||||||||||||||||||||||||||||
