User:CIA391/Sandbox5: Difference between revisions
From Halopedia, the Halo wiki
(→Covenant: Added the scarab) |
No edit summary |
||
| Line 7: | Line 7: | ||
|image=[[File:Time to Believe.jpg|300px]] | |image=[[File:Time to Believe.jpg|300px]] | ||
|conflict=[[Human-Covenant War]] | |conflict=[[Human-Covenant War]] | ||
|date=[[2552#October|October 2552]]<ref name=" | |date=[[2552#October|October 2552]]<ref name="HPJC">[https://www.halopedia.org/Archive:Jake_Courage ''Halopedia'', Archive:Jake Courage]</ref> (seven days)<ref name="BM">[https://www.youtube.com/watch?v=_2AFUtuPFJE ''youtube'', Museum]</ref> | ||
|place=[[Mombasa]], [[Kenya]], [[Earth]]<ref name="XJake"/> | |place=[[Mombasa]], [[Kenya]], [[Earth]]<ref name="XJake">[https://web.archive.org/web/20080416221850/http://www.xbox.com:80/en-GB/games/h/halo3/jakecourage.htm ''Xbox.com'', Jake Courage]</ref> | ||
|result=Apparent UNSC victory<ref name="XJake"/> | |result=Apparent UNSC victory<ref name="XJake"/> | ||
|side1=[[United Nations Space Command]] | |side1=[[United Nations Space Command]] | ||
| Line 23: | Line 23: | ||
**[[Kig-Yar]] | **[[Kig-Yar]] | ||
**[[Scarab]] | **[[Scarab]] | ||
|casual1=*Numerous infantry casualties | |casual1=*Numerous infantry casualties<ref name="XJake"/> | ||
|casual2=*Numerous infantry casualties | |casual2=*Numerous infantry casualties<ref name="XJake"/> | ||
|civilian1=*War photographer [[Jake Courage]]<ref name="XJake"/> | |civilian1=*War photographer [[Jake Courage]]<ref name="XJake"/> | ||
|civilian2= | |civilian2= | ||
}} | }} | ||
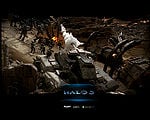
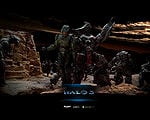
The '''Second Battle of Mombasa''' was a bloody [[seven]]-day engagement between the [[United Nations Space Command]] and the [[Covenant]] in the ruins of the city of [[New Mombasa]], [[Kenya]], on [[Earth | The '''Second Battle of Mombasa'''<ref name="XJake"/> was a bloody [[seven]]-day<ref name="BM"/> engagement starting in [[2552#October|October 2552]] between the [[United Nations Space Command]] and the [[Covenant]] in the ruins and outskirts of the city of [[New Mombasa]], [[Kenya]], on [[Earth]].<ref name="HPJC"/> It took place after the initial [[Battle of Mombasa]] with the remains of the [[Mombasa Tether]] scattered across the battlefield. The battle is depicted by the [[John-117 Monument]] in the [[Museum of Humanity]], completed in [[2610]].<ref name="mombasa">[http://halo3.com/believe/test/shell.html ''Halo 3.com:'' Believe]</ref> | ||
==Background== | ==Background== | ||
On | ===Prelude=== | ||
On October 20, 2552, the [[Prophet of Regret]], having suffered heavy casualties during [[Fleet of Sacred Consecration|his forces]]' invasion of [[Mombasa]], entered [[Slipstream space|slipspace]] from within the city, unleashing a powerful explosion that caused great damage - heavy enough to sever the city's [[Mombasa Tether|space tether]], causing its catastrophic collapse onto the surrounding savanna.<ref name="outskirts">''[[Halo 2]]'', campaign level, [[Outskirts]]</ref><ref name="metropolis">''Halo 2'', campaign level, [[Metropolis]]</ref> The Covenant leadership held the area in great important due to the presence of [[Special Operations Unggoy]].<ref name="mombasa"/> | |||
= | |||
==Battle== | ==Battle== | ||
===Battle for the landing zone=== | ===Battle for the landing zone=== | ||
In October 2552, the battle began on the outskirts of New Mombasa, where UNSC and Covenant forces engaged each other in a bitter fight for control of a landing zone. The UNSC never gained full control of it, always being pushed back by the Covenant whenever they seemed to secure it and vice versa.<ref name="mombasa"/> Before heading into the battle [[Jake Courage]] stated, "‘I hate blood and I hate violence. So what possessed me to choose to be a war photographer? Because I’m drawn to heroes. I’m drawn to the selfless act of someone putting their own life on the line for the sake of humanity. Because amongst the horror and the madness, I like to think I can show that some good can come out of something so horrific.’".<ref name="HPJC">[https://www.halopedia.org/Archive:Jake_Courage ''Halopedia'', Archive:Jake Courage]</ref> | |||
===The UNSC forces status=== | |||
The remaining Covenant and UNSC ground forces surged forward into the city to secure whatever tactical advantage the ruins might have held. Elements from the [[77th Marine Regiment]] battled furiously for the ruins, with snipers from both sides taking a heavy toll upon the enemy.<ref name="mombasa"/> | |||
===The northern bridge falls=== | ===The northern bridge falls=== | ||
Despite a valiant defense by the Marines, they had no means to hold the bridge to the north. With [[Jiralhanae]] forces surging over it and hitting the Marines' vulnerable flanks, there was only one option remaining. | Despite a valiant defense by the Marines, they had no means to hold the bridge to the north. With [[Jiralhanae]] forces surging over it and hitting the Marines' vulnerable flanks, there was only one option remaining. On a 14:00 during a day of the battle, the order came through to destroy the bridge, thus forcing the enemy down into the valley where UNSC trenches lay to slaughter the enemy with fire from elevated positions. However, this was not the case as the Covenant forces had already begun to surge down the trenches with the destruction of the bridge.<ref name="mombasa"/> | ||
===The hill=== | ===The hill=== | ||
The defense of the hill was the most ferocious and bloody engagement of the battle; two thirds of the defending UNSC forces became casualties at this bottleneck. After the second bridge was destroyed, the trenches at the foot of the hill, despite a last-ditch defensive measure, came under heavy attack, garnering heavy Marine casualties. | The defense of the hill was the most ferocious and bloody engagement of the battle; two thirds of the defending UNSC forces became casualties at this bottleneck. After the second bridge was destroyed, the trenches at the foot of the hill, despite a last-ditch defensive measure, came under heavy attack, garnering heavy Marine casualties.<ref name="mombasa"/> | ||
===Snipers=== | ===Snipers=== | ||
Snipers from both sides battled for control, with UNSC snipers fighting on one end of the destroyed southern bridge and Covenant [[Kig-Yar Sniper]]s halting Marines outside the landing zone before being routed by UNSC infantry and tanks. | Snipers from both sides battled for control, with UNSC snipers fighting on one end of the destroyed southern bridge and Covenant [[Kig-Yar Sniper]]s halting Marines outside the landing zone before being routed by UNSC infantry and tanks.<ref name="mombasa"/> | ||
===The | ===The final night=== | ||
During the final night of the engagement [[Lieutenant]] [[John Tippett]]'s platoon was pinned down by Covenant patrols hunting them, leading to them having to go dark, where they waited for 7 hours [[Spartan-II]] [[John-117]] to reach and assist them.<ref>[https://www.youtube.com/watch?v=d1zWeaVZpsM ''Believe'', Hunted]</ref> | |||
=== | ===The seventh day=== | ||
On the seventh day of fighting, the [[506th Tank Regiment]] was tasked with securing the road to the southern bridge span. While outnumbered, they took their objective, leaving a path for the second wave of Marine infantry to follow.<ref name="mombasa"/> | |||
Eventually [[Spartan-II]] [[John-117]] arrived, and on top of "The Hill" John-117 allowed his own capture, arming an [[Type-1 Antipersonnel Grenade|plasma grenade]] while gripped in the hands of a [[Jiralhanae Chieftain]] surrounded by Jiralhanae forces.<ref name="BM"/><ref name="mombasa"/> It was this moment that Jake Courage took his last photo, a photo of John-117s [[MJOLNIR Powered Assault Armor/Mark VI|Mark VI]] helmet up-close.<ref name="XJake"/> During this [[Major]] [[Pawel Czernek]] was in an overturned [[M12 Chaingun Warthog|M12 Warthog]] firing its [[M41 Vulcan]].<ref name="BM"/> | |||
==Aftermath== | ==Aftermath== | ||
===Awards=== | |||
[[Corporal]] [[James Dessen]] despite being killed in action, due to field reports of the 77th Marine Regiment, was posthumously awarded the [[Legion of Honor|UNSC Legion of Honor]].<ref name="mombasa"/> | |||
===John-117s fate=== | ===John-117s fate=== | ||
John-117 was not actually killed during the battle. In reality he was not present at this battle at all being at the [[Battle of Installation 05]] with the {{UNSCShip|In Amber Clad}}, and after returning went missing shortly after the [[Battle of Voi]] in November of 2552. | John-117 was not actually killed during the battle. In reality he was not present at this battle at all being at the [[Battle of Installation 05]] with the {{UNSCShip|In Amber Clad}},<ref name="delta">''Halo 2'', campaign level, [[Delta Halo (level)|Delta Halo]]</ref> and after returning on November 17, 2552,<ref name="arrival">''[[Halo 3]]'', campaign level, [[Arrival]]</ref> went missing shortly after the [[Battle of Voi]] in November of 2552.<ref name="Halo">''Halo 3'', campaign level, [[Halo (Halo 3 level)|Halo]]</ref> | ||
===Legacy=== | ===Legacy=== | ||
This battle would be the subject of numerous interviews in [[2595]] and [[2610]] | The site of this battle would be the location of a ceremonial burial of [[John-117]] in [[2590]], in which the coffin was empty.<ref name="Gravesite">[https://www.youtube.com/watch?v=pOLR4WjJqIs ''Believe'', Gravesite]</ref> This battle would be the subject of numerous interviews, with at least one in [[2595]] at the site itself,<ref name="Gravesite"/> and some at the [[Museum of Humanity]] in [[2610]].<ref name="BM"/> | ||
The battle was also the primary subject of the [[John-117 Monument]]. Which began creation in [[2607]], and was finished in 2610, where the diorama was created using historical records of the battle to make sure it was accurate, created by the hands of humans.<ref>[https://www.youtube.com/watch?v=6cN7Kr0Ji4s ''Believe'', Believe: The John 117 Monument]</ref> | |||
==Participants== | ==Participants== | ||
Revision as of 15:16, October 30, 2019
|
Previous: |
|||||||||||||||||||
|
Concurrent: |
|||||||||||||||||||
| Second Battle of Mombasa | |||||||||||||||||||
|---|---|---|---|---|---|---|---|---|---|---|---|---|---|---|---|---|---|---|---|
| |||||||||||||||||||
|
Conflict: |
|||||||||||||||||||
|
Date: |
October 2552[1] (seven days)[2] | ||||||||||||||||||
|
Location: |
|||||||||||||||||||
|
Outcome: |
Apparent UNSC victory[3] | ||||||||||||||||||
| |||||||||||||||||||
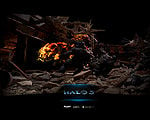
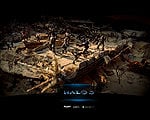
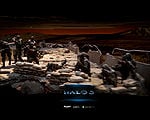
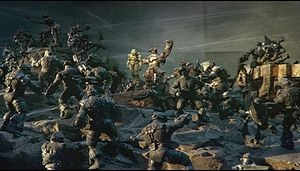
The Second Battle of Mombasa[3] was a bloody seven-day[2] engagement starting in October 2552 between the United Nations Space Command and the Covenant in the ruins and outskirts of the city of New Mombasa, Kenya, on Earth.[1] It took place after the initial Battle of Mombasa with the remains of the Mombasa Tether scattered across the battlefield. The battle is depicted by the John-117 Monument in the Museum of Humanity, completed in 2610.[4]
Background
Prelude
On October 20, 2552, the Prophet of Regret, having suffered heavy casualties during his forces' invasion of Mombasa, entered slipspace from within the city, unleashing a powerful explosion that caused great damage - heavy enough to sever the city's space tether, causing its catastrophic collapse onto the surrounding savanna.[5][6] The Covenant leadership held the area in great important due to the presence of Special Operations Unggoy.[4]
Battle
Battle for the landing zone
In October 2552, the battle began on the outskirts of New Mombasa, where UNSC and Covenant forces engaged each other in a bitter fight for control of a landing zone. The UNSC never gained full control of it, always being pushed back by the Covenant whenever they seemed to secure it and vice versa.[4] Before heading into the battle Jake Courage stated, "‘I hate blood and I hate violence. So what possessed me to choose to be a war photographer? Because I’m drawn to heroes. I’m drawn to the selfless act of someone putting their own life on the line for the sake of humanity. Because amongst the horror and the madness, I like to think I can show that some good can come out of something so horrific.’".[1]
The UNSC forces status
The remaining Covenant and UNSC ground forces surged forward into the city to secure whatever tactical advantage the ruins might have held. Elements from the 77th Marine Regiment battled furiously for the ruins, with snipers from both sides taking a heavy toll upon the enemy.[4]
The northern bridge falls
Despite a valiant defense by the Marines, they had no means to hold the bridge to the north. With Jiralhanae forces surging over it and hitting the Marines' vulnerable flanks, there was only one option remaining. On a 14:00 during a day of the battle, the order came through to destroy the bridge, thus forcing the enemy down into the valley where UNSC trenches lay to slaughter the enemy with fire from elevated positions. However, this was not the case as the Covenant forces had already begun to surge down the trenches with the destruction of the bridge.[4]
The hill
The defense of the hill was the most ferocious and bloody engagement of the battle; two thirds of the defending UNSC forces became casualties at this bottleneck. After the second bridge was destroyed, the trenches at the foot of the hill, despite a last-ditch defensive measure, came under heavy attack, garnering heavy Marine casualties.[4]
Snipers
Snipers from both sides battled for control, with UNSC snipers fighting on one end of the destroyed southern bridge and Covenant Kig-Yar Snipers halting Marines outside the landing zone before being routed by UNSC infantry and tanks.[4]
The final night
During the final night of the engagement Lieutenant John Tippett's platoon was pinned down by Covenant patrols hunting them, leading to them having to go dark, where they waited for 7 hours Spartan-II John-117 to reach and assist them.[7]
The seventh day
On the seventh day of fighting, the 506th Tank Regiment was tasked with securing the road to the southern bridge span. While outnumbered, they took their objective, leaving a path for the second wave of Marine infantry to follow.[4]
Eventually Spartan-II John-117 arrived, and on top of "The Hill" John-117 allowed his own capture, arming an plasma grenade while gripped in the hands of a Jiralhanae Chieftain surrounded by Jiralhanae forces.[2][4] It was this moment that Jake Courage took his last photo, a photo of John-117s Mark VI helmet up-close.[3] During this Major Pawel Czernek was in an overturned M12 Warthog firing its M41 Vulcan.[2]
Aftermath
Awards
Corporal James Dessen despite being killed in action, due to field reports of the 77th Marine Regiment, was posthumously awarded the UNSC Legion of Honor.[4]
John-117s fate
John-117 was not actually killed during the battle. In reality he was not present at this battle at all being at the Battle of Installation 05 with the UNSC In Amber Clad,[8] and after returning on November 17, 2552,[9] went missing shortly after the Battle of Voi in November of 2552.[10]
Legacy
The site of this battle would be the location of a ceremonial burial of John-117 in 2590, in which the coffin was empty.[11] This battle would be the subject of numerous interviews, with at least one in 2595 at the site itself,[11] and some at the Museum of Humanity in 2610.[2]
The battle was also the primary subject of the John-117 Monument. Which began creation in 2607, and was finished in 2610, where the diorama was created using historical records of the battle to make sure it was accurate, created by the hands of humans.[12]
Participants
UNSCThe following are UNSC servicemen and civilians who took part in the battle.
|
CovenantThe following Covenant soldiers are using their EC# classifications, this is due to that being the only name they are given. |
Production notes
The Second Battle of Mombasa was portrayed in the Believe advertising campaign created by Microsoft Studios to promote Halo 3. The game and subsequent media establish that John-117 never returned to Mombasa; instead, the distant city of Voi (around 140 kilometers northwest) serves as the primary battleground for control of the Portal. However, the Museum of Humanity has since been canonized in the Limited and Legendary Editions of Halo: Reach.
Gallery
Sources
- ^ a b c Halopedia, Archive:Jake Courage
- ^ a b c d e youtube, Museum
- ^ a b c d e f g Xbox.com, Jake Courage
- ^ a b c d e f g h i j Halo 3.com: Believe
- ^ Halo 2, campaign level, Outskirts
- ^ Halo 2, campaign level, Metropolis
- ^ Believe, Hunted
- ^ Halo 2, campaign level, Delta Halo
- ^ Halo 3, campaign level, Arrival
- ^ Halo 3, campaign level, Halo
- ^ a b Believe, Gravesite
- ^ Believe, Believe: The John 117 Monument
