High Charity
From Halopedia, the Halo wiki
| This article does not meet the wiki's general standards and/or standards on layouts. You can help by cleaning this article. |
| This article does not have enough inline citations and/or does not adhere to the proper citation format. You can help Halopedia by adding citations. |
Template:Individual Ship Infobox High Charity was the Covenant's center of government and mobile capital city, known as the Holy City of the Covenant or the Prophets' Holy City.[1]
Description
Physical description
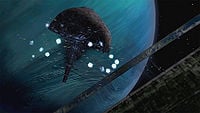
High Charity was a massive mushroom-shaped structure, about 348 kilometers in diameter. It was partially constructed from a chunk of rock that had been blasted away from Janjur Qom by the Forerunner Dreadnought, with the rest of the superstructure being built around it. Inside the hollow dome of the station was a massive multi-leveled city. An "artificial star" at the peak of the dome simulated natural sunlight within the city, and its glow would periodically dim and intensify to simulate day and night cycles. The "stalk" beneath the dome was a mass of towers and antenna-like structures, with branches that likely served as docking bays. High Charity was mobile, and could make jumps through Slipspace.
The station received the majority of its power from the Forerunner Dreadnought, the ship at the center of the city. The city was completely powered by the engines of the decommissioned Forerunner vessel. The Dreadnought's engines were powerful enough to run the city on a fraction of their potential output.[2] However, the station also possessed a set of backup auxiliary reactors that were capable of generating enough power for slipspace travel.[3]
Capital city
In the internal hub of High Charity lay an extremely large capital city. At the center sat the Forerunner Dreadnought, embedded within the city after the formation of the Covenant as a symbol of conviction and peace between the Sangheili and the San 'Shyuum.
The city itself contained many locations sacred to the Covenant such as the Council Chamber, the Sanctum of the Hierarchs and the Mausoleum of the Arbiter. As a construct, High Charity was very similar to the Unyielding Hierophant, a repair & refit station, though it also served as a mobile command post. Unlike many small Covenant vessels and their UNSC counterparts, High Charity contained many courtyards and other non-essential spaces which gave the station a terrestrial feel. The interior of High Charity was filled with the Covenant's unique architecture, of a lighter tone than their naval vessels. All of the structures within the city floated above a methane-rich field in which the millions of High Charity's Unggoy dwelled. The massive towers around the dome were gigantic spires of volcanic rock from the city's base, interwoven with metal supports and covered with decorative alloy. They were used by the San 'Shyuum as offices and private residences.[4]
Protection
- Main article: High Charity Defense Fleet
High Charity was surrounded at all times by its own personal defense fleet, which consisted of hundreds of battleships, carriers and cruisers. Some of the biggest fleets in the entire Covenant armada defended the city, such as the Second Fleet of Homogeneous Clarity and the late Fleet of Particular Justice. As it was the Covenant's major religious center and capital, High Charity was enormously sacred to the Covenant. It was thought that true believers should visit it at least once in one's lifetime, though few of the Covenant could afford to do so. It was full of San 'Shyuum and Sangheili Councilors, and the general leadership of the entire alien hegemony. It can be assumed that High Charity had its own set of powerful energy shields and defensive weapons. Despite its considerable defense assets it was unable to prevent the Flood from infiltrating its interior. The station's shields are most likely why the Flood entered it with the In Amber Clad by a precise Slipspace jump: it allowed them to bypass any and all outer defenses.
Layout
Along the outer wall on the inside of High Charity were several towers, each containing rooms and hallways. Two of these towers were referred to by Cortana as the Mid Tower and the Far Tower. Most of these towers were connected to the two surrounding towers by the Hanging Gardens and the Valleys of Tears, but the towers containing the Council Chamber and the Mausoleum of the Arbiter were both notably only connected to the sections between them. Hanging far above the Mausoleum of the Arbiter was a part of the Sanctum of the Hierarchs, a large chamber decorated with shards of glass from worlds glassed by the Covenant. Below these structures are the lower districts, and the Assembly Forges, factories where Covenant war matériel was produced.[5]
History
Early history
From the Covenant's earliest recorded history, the San 'Shyuum ended their civil war by launching the Forerunner Dreadnought from their home planet Janjur Qom, ripping a huge chunk of rock from the planet in the process. This chunk would later be built into High Charity. The city was erected during the Sangheili-San 'Shyuum War and completed following the war's conclusion. The Forerunner Dreadnought that the San 'Shyuum used in the war was stripped of all known weapons and permanently installed inside High Charity. Because the city is mobile, it is extremely difficult for the lesser creatures of the hegemony to make journeys to the capital, yet it manages to establish a network of slipspace probes to protect its position. Anything larger than a millimeter in diameter that drifted too close was engaged and obliterated, including ships that failed to transmit proper clearance codes within a millisecond of hailing.
Prior to the Human-Covenant War, High Charity was almost destroyed when the Forerunner Dreadnought was powered up by Mendicant Bias, galvanized by the discovery of "Reclaimers" by the Covenant, and attempted to reach Harvest to transport the occupants to the Ark. It was accidentally deactivated by Lekgolo worms as they short circuited the ship.[6]
The Sacred Rings and the Great Journey
Upon the discovery of Installation 04 by the Covenant, High Charity was supposed to perform a slipspace jump to the ring along with its fleet, where the Hierarchs would activate the ring to send the Covenant on the Great Journey.
The Fleet of Particular Justice, led by then Supreme Commander Thel 'Vadamee, had already made its way to the Ring while chasing the Halcyon-class cruiser The Pillar of Autumn, but they did not know about the Flood, and did not expect interference from the UNSC. When High Charity and its fleet arrived at Threshold, they found that both Installation 04 and the Fleet of Particular Justice had been utterly destroyed.
In the early stages of the Battle of Earth, the High Prophet of Regret sent the coordinates of Installation 05 to High Charity. The planetoid and its fleet arrived just in time to watch Master Chief and a group of Marines assassinate the Prophet of Regret. It then held position over Installation 05 until hostilities erupted between the Sangheili and the Jiralhanae, as the Great Schism began in November 2552.
Battle of High Charity
- Main article: Battle of High Charity
During the chaos of the battle, John-117 infiltrated High Charity, by way of teleportation from Gravemind directly into the Council Chambers using Installation 05's teleportation grid.
At the same time, the Flood made their own entrance, using the UNSC In Amber Clad to perform a slipspace jump into the interior of High Charity, bypassing its exterior defenses. Once inside, the Flood used Pelican dropships to spread both combat and Carrier Forms around the city. Within the city a vicious battle ensued among Jiralhanae, Sangheili, and Flood forces, all bent on destroying one another. The unfortunate Master Chief, John-117 was caught in the middle of the quarrel, but managed to escape.
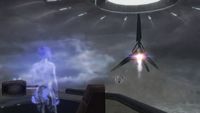
Eventually, the Dreadnought at High Charity's center took off, with both the Prophet of Truth and the Master Chief inside, leaving Cortana behind. Remaining Loyalist and Separatist forces either evacuated from the city (likely to be destroyed by the Sangheili quarantine fleet) or were consumed by the Flood, as they overwhelmed all remaining opposition in the city. The Gravemind took complete control of the Sanctum of the Hierarchs, using the Council Chamber itself as his "throne room".[7]
Quarantine of High Charity
As High Charity and Installation 05 were rapidly falling to the Flood, a massive battle between Sangheili and Jiralhanae held ships continued in the space around the city. The Sangheili Separatists eventually succeeded in driving away the Jiralhanae or they possibly retreated on orders from Truth to assist in the conquest of Earth. But this led to the fall of High Charity to the Flood under the command of the Gravemind, who used this as his second base and gain significant amount of ships. He sent one to infest Africa and from there all of Earth.
The Sangheili fleet formed a large perimeter and quarantined High Charity and Installation 05, attempting to prevent the Flood from infesting any other systems.[1] Presumably all Flood ships except one was destroyed, according to a Sangheili Major that was deployed to assist the Master Chief and the Arbiter. The pursuing Sangheili ships glassed parts of Africa to prevent further contamination.
After the Flood invasion
After the Battle of Earth, a message from Cortana notified the Master Chief that the Gravemind was speeding the infested High Charity toward Earth, and that the Portal leads to the Ark.
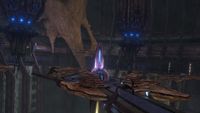
During the Battle of Installation 00 at the Citadel, High Charity appeared through the Portal and narrowly missed colliding with the Sangheili Assault Carrier Shadow of Intent. It disgorged Flood dispersal pods (one of which damaged the carrier) and crashed on the Installation. Covered with Flood biomass and with the interior transformed into a Flood hive, High Charity was almost unrecognizable. The Mausoleum of the Arbiter was one of the few remaining structures still recognizable within the infested city.
Raid on High Charity
- Main article: Raid on High Charity
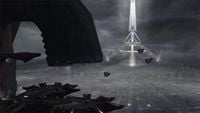
After stopping Truth from activating the rings, John-117 returned to the Flood-infested High Charity on a mission to retrieve Cortana, which he successfully completed. At her recommendation, he overloaded the reactor core, by destroying its pylons, as he maneuvered back through High Charity to meet the Arbiter and re-activate a crashed Pelican dropship to escape the explosion. High Charity was completely destroyed in the resulting explosions, with only the outer structure remaining when Installation 04B was fired, its debris showering the inactive Installation and the Ark below. Unfortunately, however, the Gravemind managed to escape.[8]
Trivia
- High Charity is roughly 1/75 the size of a Halo installation.[citation needed] In the final cutscene of Halo 2, High Charity is shown as a small dot at the upper portion of the ring when Installation 05 deactivates.
- High Charity is said to resemble a Zap-Jelly.[9]
- The multiplayer map Gemini takes place on High Charity.
- On January 18, 2524, a telescope on Mars captured the first known human image of High Charity. A colleague of Dr. Catherine Halsey sent a photograph of High Charity to her, unable to identify it but remarking that it was clearly alien and that it was larger than anything humanity had previously encountered.[10]
- Early concept art by Eddie Smith suggests that High Charity was originally going to be a Covenant flagship.[11]
- There is a slight resemblance between "High Charity" and Omega from the Mass Effect Universe.
Gallery
- High Charity - Concept.png
Concept art of High Charity
- Flood HC 1.jpg
Concept art of the Flood-infested interior of High Charity.
- Flood HC 2.jpg
Concept art of the reactor room.
The Flood-infested High Charity during the Battle of Installation 00.
- 1216870725 HighCharity.jpg
High Charity being destroyed.
A size comparison between High Charity and the Forerunner Dreadnought.
High Charity at the beginning of the Great Schism.
- HC concept.jpg
Early concept art showing High Charity as a flagship.
List of appearances
- Halo 2
- Halo 3
- Halo Wars (Mentioned only)
- Halo: First Strike (First appearance)
- Halo: Ghosts of Onyx
- Halo: Contact Harvest
- Halo: The Cole Protocol (Mentioned only)
- Halo: Evolutions - Essential Tales of the Halo Universe
- Stomping on the Heels of a Fuss (Mentioned only)
- Halo Legends
- Origins
- Odd One Out (Non-canonical appearance)
Notes
Sources
- ^ a b Halo 3, campaign level, Floodgate
- ^ Halo 2, campaign level, Gravemind
- ^ Halo 3, campaign level, Cortana
- ^ Halo: Contact Harvest, page 146
- ^ Halo: The Essential Visual Guide
- ^ Halo: Contact Harvest
- ^ Halo 2, campaign level, Epilogue
- ^ Halo 3, campaign level, Halo
- ^ Halo: Contact Harvest page ??
- ^ Dr. Halsey's personal journal
- ^ Visualatrium, Concept Drawings. Traditional pen and marker. Project: Halo and Halo2
