Battle of Mombasa
From Halopedia, the Halo wiki
- "This is the only place on Earth the Covenant decided to land. That Prophet is going to tell us why."
- — Admiral Terrence Hood
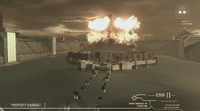
The Battle of Mombasa was a part of the Battle of Earth, taking place in late October 2552. Over the course of the battle, Covenant forces captured the city of Mombasa, Kenya and it was quickly retaken in a matter of hours by the UNSC.[1][2] However, after the Prophet of Regret's retreat, the city was occupied by another, larger Covenant force sent by the Prophet of Truth.[3] In the aftermath of the battle, the Portal to the Ark was eventually found by the Covenant, which would prove to be a major determining factor in the final outcome of the Human-Covenant War.[4][5]
Background
After decrypting Forerunner artifacts, the Prophet of Regret of the Covenant had been given Slipspace coordinates to a Forerunner facility highly important in their concept of the Great Journey. Unknown to Regret, this facility was on the human homeworld, Earth. In his characteristic brash and ambitious manner, the Prophet of Regret, wishing to proceed with securing the facility, took a force of 13 warships to Earth. Though surprised to find not only a human presence on the planet, but a planet more fortified than any previously encountered human-held world, the Prophet deemed his mission important enough to proceed and utilized many tactics to ensure his safe arrival on the surface. The coordinates provided by the Forerunner information indicated that his quarry was around the area of Mombasa, Kenya. Immediately after the Prophet of Truth learned of Regret's move, he sent a massive fleet he had collected in secrecy to pick up where Regret had left off.[5][3]
Beginning
Covenant Invasion
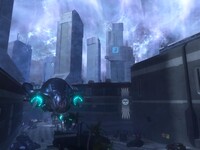
On October 20th, during the opening stages of the Battle of Earth, a single Covenant Carrier (the High Prophet of Regret's flagship) broke through the UNSC Home Fleet's defensive lines and entered Earth's atmosphere.[6][7] The ship hovered stationary above the island city of New Mombasa in Kenya, deploying infantry and mechanized support from the Uplift Nature Reserve.
The city was relatively lightly defended, with only NMPD forces, as well as the city's Colonial Militia and Marines from the 17th Marine Regiment present.[8] Some additional military units had been transferred to the city, along with Earth's other tether cities, following the Fall of Reach to bolster their defenses in case of a Covenant invasion. These included E2-BAG/1/7 as well as some UNSC Army forces.[9]
In the opening stages of the battle, the UNSC activated the city's Colonial Militia, commanded by a Marine officer, to fight the Covenant invaders. The Covenant forces proved to be far superior and the Militia was eliminated.[10] However, this allowed for most of the citizens of New Mombasa to evacuate from the city to Old Mombasa using boats destined for other surrounding cities.[11] While some of the train tunnels collapsed during the attack, a portion of the civilians were able to escape using trains as well.[12] More UNSC Marine Corps and UNSC Army units later poured into the region after the initial attack, including the 405th Marine Infantry Division, arriving from Diego Garcia near India.
UNSC Insertion
Some time after the Covenant insertion to the city and the civilian evacuation, the UNSC Frigate In Amber Clad descended near Mombasa to reinforce the ground troops already present. Intercepted transmission from the Covenant forces lead the UNSC to correctly believe that it was the High Prophet of Regret in command of the opposing force, making his capture their utmost priority. Three Pelicans, one of them with SPARTAN-117 on board, were deployed by the In Amber Clad to reclaim the city and board the Assault Carrier hovering near the New Mombasa Orbital Elevator. However, before they could get near the Carrier, the formation ran across a Type-47 Ultra Heavy Assault Platform which shot down all of the Pelicans. The first was destroyed by the Scarab's main cannon, the second, carrying Gunnery Sergeant Pete Stacker and an ODST squad, was shot down and landed on the beach. A third carrying Sergeant Major Avery J. Johnson and the Master Chief was hit hard, crashing into a building, upside down.[1]
Both teams suffered few casualties from their respective crashes. The Spartan's team moved into a nearby bunker while Stacker's team moved up the beach to the Hotel Zanzibar and set up a command post, eliminating several Covenant units in the process. Both teams then waited in their respective locations for extraction.[1]
Outskirts
After the Covenant made several attempts to eliminate Spartan-117's group including sending in a pair of Hunters, a Pelican found the group and gave them coordinates of an extraction point. Commander Miranda Keyes ordered Johnson to regroup with the In Amber Clad so that he could coordinate further deployment of infantry and armor units while the Spartan continued on foot through the city to find the second squad.[1]
The pinned down ODSTs in Hotel Zanzibar were rescued by the Master Chief, who then organized an offense by destroying Covenant infantry, armor, and Covenant artillery emplacements on the beaches facing New Mombasa.[1]
Assault on the Bridge
John-117 and his makeshift Marine unit entered a blown-out hole in a tunnel and destroyed a Covenant convoy. After the engagement in the tunnels, they advanced towards the bridge connecting Old and New Mombasa. Before the Spartan got there, the Marine unit at the bridge had already exhausted itself fighting the Scarab.[1][2]
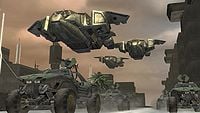
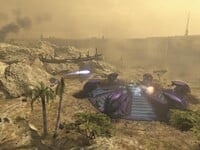
The Master Chief arrived at the bridge to assess the situation while Sergeant Johnson reinforced the Marines with weaponry, including a Scorpion tank. The Chief traveled across the bridge with the armored unit, clearing it of both Covenant armored and mechanized forces. These forces included Ghosts, Wraith Tanks, Phantoms, and Banshees.[2]
Industrial District
After the engagement on the bridge, UNSC forces entered New Mombasa in large numbers. They linked up with various squads of Marines as they moved through the city, eliminating Covenant forces that were setting up positions. The Master Chief's team worked their way into the Kilindini Park Cultural Center through the sewer system, and then towards the city center via Shimanzi Road and Beria Plaza, finding that the Scarab had, likewise, taken a similar path.[13][2]
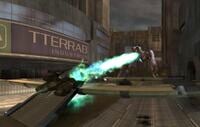
Once in the heart of the industrial zone near the city center, John-117's team found a Marine outpost holed in a corporate building, commanded by Staff Sergeant Marcus Banks of "A" Company under siege by a unit of Wraiths. The UNSC forces, with the help of John-117, destroyed the Wraiths, and secured a landing zone for reinforcements. The Pelicans then dropped a platoon of Marine infantry and a Scorpion Tank.[2]
Destruction of the Scarab
The lumbering Scarab appeared from the other end of the plaza the Marine outpost was facing and the Scorpion tank opened fire on it, with no effect. After the Scarab destroyed the tank with its main gun, Marines opened fire on the walker, but it was unaffected and impervious to the weak rounds and climbed over their position and moved into the canals of the city. However, it soon found itself trapped inside of the walls of the canal, giving the Marines a chance to attack it openly with Pelicans.[2]
The Master Chief and A Company followed the Scarab through the canals and the Spartan boarded the walker. While the Marines provided some cover fire, John defeated the forces manning the Scarab walker. After defeating its command crew, he managed to destroy the Scarab from the inside by damaging either its internal operating systems or the core system. Realizing that they were at a tactical disadvantage, all Covenant forces began retreating to Regret's carrier. The Master Chief was extracted by Sergeant Johnson's Pelican and taken back to In Amber Clad along with the remaining members of A Company.[2]
Regret's Withdrawal
Fleet Admiral Terrence Hood was hesitant to let In Amber Clad engage the High Prophet of Regret's Assault Carrier, still above Mombasa and beside the New Mombasa Orbital Elevator. He instead opted to call in two heavier vessels from the Home Fleet to intercept the Carrier once it returned to Earth orbit. However, when the Carrier initiated its slipspace drive, preparing to jump while still in the atmosphere, Hood recognized that the only ship able to follow was the In Amber Clad and gave the ship the green light to give chase. Another three vessels followed, but were unable to reach the Carrier before it jumped.[2]
The Pelicans carrying Spartan-117 and the Marines entered the In Amber Clad, which followed the Assault Carrier into Slipspace. Just before the Carrier jumped, remaining ships of the UNSC Home Fleet deployed dozens of SOEIVs down to the city in an effort to infiltrate the Carrier, only to be caught by the EMP blast in mid-flight, frying their navigational and safety systems, plunging them and their Orbital Drop Shock Trooper occupants to almost certain death. It is likely that only one Squad survived, having changed their course away from the carrier at the last moment. Many of the city's buildings were heavily damaged but remained standing, including the Orbital Elevator. The rupture also created a large crater in the mainland, north of New Mombasa, revealing a section of the Forerunner Portal.[14]
Occupation
Large numbers of Covenant troops remained in the city even after Regret's withdrawal. While most of Regret's troops evacuated into the Carrier, there was still a significant Covenant presence both on the ground and in orbit. Moments after Regret jumped however, a large fleet of Jiralhanae-led Covenant reinforcements sent by the Prophet of Truth arrived, and seized control over the battle. The remaining Jiralhanae from Regret's forces were simultaneously given orders to execute the Sangheili forces on the ground while the reinforcement fleet would do the same with the remaining Sangheili ships in orbit. During the course of the battle, more and more Covenant reinforcements commanded by the Jiralhanae started arriving at Earth. This was a part of the Prophet of Truth's personal scheme for the Covenant, which would come to its conclusion two weeks later when the Sangheili were officially removed from their positions as the main warrior caste of the Covenant.[5][3]
However, a sizable amount of UNSC Marines and NMPD forces remained. They organized an effective resistance, and fought for control of the city in various battles. The city's Urban Infrastructure AI Superintendent also had a vital role in the defense of the city.
Knocked off their course by the slipspace rupture, two ODST drop pods made rough landings, Buck's pod to Lumumba and Dare's to nearby Tayari Plaza. At this point, the Brutes were already redeploying their forces into the city. Buck fought his way to Tayari Plaza to help Dare, but she had mysteriously disappeared. After the battle, Buck met up with Romeo. As they had no idea of their mission, they decided to find their squad and get out of the city as fast as possible.[15]
Regroup
Around thirty minutes after the slipspace event, the UNSC was beginning to regroup, following the orders of an unnamed Colonel. The Marines' orders were to reach the Colonel's position near the city center, and take control of Regret's carrier's former landing zone in the Uplift Nature Reserve.
Remote-controlled F-99 UCAVs were sent to the city to maintain air supremacy over the Phantoms and Banshees. Meanwhile, Dutch linked up with Marines at the Uplift Reserve, and began to take out Wraiths in the way of them and the Colonel. Eventually, the New Mombasa Orbital Elevator, already damaged by the jump, collapsed, with miles of debris from the tether scattered across East Africa.[16]
ONI Alpha Site
After the UNSC reclaimed the Covenant landing zone in Uplift Reserve, defending the Office of Naval Intelligence's Section 2 building became the top priority. Ninety minutes after the slipspace event, Michael Crespo linked up with a group of retreating Marines, falling back from an advancing Wraith convoy as the Covenant prepared to lay siege to Alpha Base. After clearing out enemy forces in the Boulevard, they then followed an NMPD officer further inside the ONI complex.[17]
Within the ONI compound, the Marines and the NMPD forces destroyed the bridge leading to the base, in hopes of slowing down the advancing Covenant forces. This however, didn't stop the incoming dropships. The human forces fell back to the base's courtyard, which they defended against waves of Covenant attackers, before falling back into the interior of the main building. Again, they fended off multiple waves of Covenant. They then activated explosives inside the complex, to destroy it in order to prevent the Covenant from accessing the Superintendent's data facility deep under the complex. The Marines and the police forces evacuated to the roof, where they were picked up by an NMPD Pelican dropship. They watched as the explosives inside the ONI building went off, completely destroying it.[18]
NMPD Headquarters
While Dutch and Mickey were destroying the Alpha Site, Buck and Romeo made their way to the top floors of the NMPD Headquarters building, where they were to be picked up by the Pelican with Mickey and Dutch already onboard. However, the dropship was shot down before landing, and it crashed on another rooftop killing the pilot on impact. Buck and Romeo fought their way through the rooftops, and eventually reached the crash site, where they fought off waves of attacking Covenant using heavy weapons from the Pelican. Finally, a Jiralhanae Chieftain dropped off from a Phantom, killed a NMPD officer and severely wounded Romeo. The squad managed to kill the Chieftain, after which they decided to evacuate through the train tunnels which led into Old Mombasa.[19]
Flooded City
The squad arrived at Kikowani Station near the city's northeastern seawall, only to realize that the station, as well as its surroundings had been flooded by water, making escape through train tunnels impossible. Romeo's condition was getting worse, so the squad used Biofoam to seal his wound. The squad then decided to hijack a Phantom, in which they succeeded. Buck escorted the rest of the squad through the flooded sections of the city in a Banshee, while Mickey piloted the Phantom. The area was filled with Covenant forces, including a Scarab. They managed to fly out of the city, when Buck suddenly realized he knew where Dare was and decided to go back to find her, inside the Superintendent's Data Center. During the battle, arriving Covenant cruisers started excavating the area around the crater created by the slipspace rupture.[20]
City Streets
Around the same time, a lone ODST only known as "the Rookie", thought dead by the rest of the squad, woke up in his pod, on the edge of a rooftop in Mbaraki. The city was already occupied by the Covenant, with no UNSC resistance left. The Superintendent aided the Rookie to survive in the city and look for clues for what happened to his squad. Upon finding objects related to his squad, he envisioned what had happened to them over the course of the day. After wandering around the city for a while, the Rookie received a distress message from Dare, who was inside the Superintendent's data facility deep under the city. He made his way to a subway entrance, and descended down an elevator shaft, to Sublevel 7 of the data center.[21] At this point, the underground tunnels had become infested with Yanme'e, who had built massive hives in the area.[22]
Extracting the Asset
Eventually, the Rookie managed to meet up with Dare and inside the Superintendent's Data Center. Inside, they discovered a Huragok, who had combined the Superintendent, namely its Vergil subroutine with itself. As the Huragok disconnected from the core, the AI shut itself down, as all of its data had been transferred into the creature. At this point, Buck arrived into the complex and the ODSTs escaped back to the surface through the tunnels filled with Covenant, while protecting the critically important Huragok.[22]
In the dawn of the next day, the area was already full of arriving Covenant capital ships. Buck, Dare and the Rookie made their way to the surface, through a Covenant outpost in the city, and eventually took an elevator to the city's Coastal Highway. They then pushed through the Highway and made a stand at the entrance to Uplift Reserve. The Phantom captured by the rest of the squad arrived eventually and picked them all up, and they made it out just as an Assault Carrier appeared from slipspace and glassed the area.[4]
Aftermath
Immediately after the occupation, more and more Covenant ships started arriving at Earth. They started uncovering the Forerunner structure which would later be revealed to be the Portal to the Ark.[4]
The High Prophet of Regret would arrive upon Installation 05 along with the In Amber Clad. It is possible he acquired the location of the installation over the course of the battle.[23]
The UNSC would not discover the actual purpose of the Covenant's arrival on Earth until two weeks after the Battle of Installation 05; most of the information was presumably received from the Huragok that had absorbed Vergil's data. By this point, the Prophet of Truth had already arrived in Sol System on the Forerunner Dreadnought with the remainder of the Loyalist Fleet with him.[24][25]
The remnants of New Mombasa were likely liberated when Truth's Fleet retreated to the Ark and were subsequently defeated.
Trivia
- With the release of Halo 3: ODST, it soon became apparent that there is a clear conflict between facts. Bungie restructured New Mombasa, removing the canals present in Halo 2.[26] This means that the destruction of the Scarab could not have happened in the manner that it did in Halo 2. Bungie has not provided an explanation for this to any extent.
- The multiplayer levels Turf, Template:Levelname, District in Halo 2 and Template:Levelname in Halo 3 take place during the Battle of Mombasa. The Halo 2 level Template:Levelname apparently takes place after the battle, with the city in ruins.
- There were multiple Scarabs present in the battle. One Scarab being destroyed by the Master Chief and the other one by Marines who made it crash by luring it into the many twists and turns in the city, in the narrow streets of Old Mombasa. Later on, several more were dropped from the ships of the Covenant excavation fleet. The fact that these were of the new, Lekgolo-powered variant and not the ones piloted by other Covenant species suggests that this is around the time that the latter were phased out of combat. This may be due to the fact that the Prophet of Regret did not expect humanity to be present on Earth. This would mean that his fleet may have been equipped only with the original mining platform, rather than combat ready scarabs.
- In the Halo 3: ODST side-story Sadie's Story, the Covenant Carrier arrives via a slipspace rupture. The Carrier's actual descent to the atmosphere is never shown in any other source, but it may have made a short, pinpoint jump to get away from the UNSC forces.
Participants
UNSC
| Name | Rank | Status |
|---|---|---|
| Kojo Agu | Lance Corporal | Survived |
| Marcus Banks | Staff Sergeant | Survived |
| Edward Buck | Gunnery Sergeant | Survived |
| Butkis | Private | Unknown |
| Michael Crespo | Private First Class | Survived |
| Veronica Dare | Captain | Survived |
| John-117 | Master Chief Petty Officer | Survived |
| Avery J. Johnson | Sergeant Major | Survived |
| Jones | Lance Corporal | Unknown |
| Miranda Keyes | Commander | Survived |
| McKenzie | Private | Survived |
| Taylor H. Miles | Corporal | Survived |
| Morton | Lance Corporal | Unknown |
| O'Brian | Private | KIA |
| Palmer | Corporal | Unknown |
| Parisa | Lieutenant | Unknown |
| Perez | Corporal | Survived[note 1] |
| Pete Stacker | Gunnery Sergeant | Survived |
| Unknown | Colonel | KIA |
| "Unknown" | Lance Corporal | Survived |
| Unknown | Lieutenant | KIA |
| Walpole | Private | Unknown |
Covenant
- Prophet of Regret
- Vergil (defected)
Notes
- ^ Perez survival is suggested in Quarantine Zone, where Johnson questions McKenzie and Perez regarding the status of their exit.
Sources
- ^ Jump up to: a b c d e f Halo 2, level Template:Levelname
- ^ Jump up to: a b c d e f g h Halo 2, level Template:Levelname
- ^ Jump up to: a b c Bungie.net: Bungie Weekly Update: 01/23/09
- ^ Jump up to: a b c Halo 3: ODST, Template:Levelname
- ^ Jump up to: a b c Halo Waypoint, "Ten Twenty" history article
- ^ Halo 2, level Template:Levelname
- ^ Halo Graphic Novel, page 90
- ^ Halo Graphic Novel, pages 86 to 98
- ^ Halo: Evolutions - Essential Tales of the Halo Universe, Palace Hotel, page 367
- ^ Halo Graphic Novel, paged 92 and 93
- ^ Halo Graphic Novel, pages 97 and 98
- ^ Halo 3: ODST, Sadie's Story
- ^ Cite error: Invalid
<ref>tag; no text was provided for refs namedpalace - ^ Halo 3: ODST level Template:Levelname
- ^ Halo 3: ODST level Template:Levelname
- ^ Halo 3: ODST level Template:Levelname
- ^ Halo 3: ODST level Template:Levelname
- ^ Halo 3: ODST level Template:Levelname
- ^ Halo 3: ODST level Template:Levelname
- ^ Halo 3: ODST level Template:Levelname
- ^ Halo 3: ODST level Mombasa Streets
- ^ Jump up to: a b Halo 3: ODST level Template:Levelname
- ^ Halo 2 level Template:Levelname
- ^ Halo 3: ODST, Epilogue
- ^ Halo 3
- ^ Image of Mombasa in Halo 3: ODST
| ||

