Battle at Szurdok Ridge: Difference between revisions
From Halopedia, the Halo wiki
m (→Gallery) |
Forerunner (talk | contribs) (I'd upload photographic evidence, but Waypoint won't have their file-share service up and running for another few weeks) |
||
| Line 1: | Line 1: | ||
{{Era|HCW}} | {{Era|HCW}} | ||
{{Rename|Battle of Viery|The hologram of Reach in ''Long Night of Solace'' clearly establishes that the "Viery Territory" described by Auntie Dot in the previous level is in fact an entire continent approximately the size of Africa. The official description of this "battle at Szurdok Ridge" only refers to the events revolving around Noble Team's deployment, and not those involving units hundreds of kilometers away.}} | |||
{{battle | {{battle | ||
|name=Battle at Szurdok Ridge | |name=Battle at Szurdok Ridge | ||
Revision as of 07:19, June 17, 2012
The Battle at Szurdok Ridge[1] was a major engagement between the United Nations Space Command and the Covenant Empire during the Fall of Reach in August 2552.[2]
Background
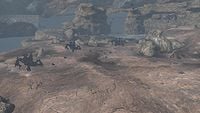
On the night prior to the battle, Spartan Noble Team, split into two splinter groups, Recon Team Alpha and Bravo, conducted a reconnaissance mission at Szurdok Ridge to determine the Covenant force deployments in the area. They discovered a massive ground army amassing in the plain, with three corvettes hovering overhead.[3]
The UNSC responded with a massive ground and air based counterattack the following morning. The overall goal of the UNSC was to blitz the Covenant strike force before the rest of the Covenant fleet arrived, preventing any solid Covenant foothold on Reach. The main target for the UNSC counterattack was to take out the Covenant Spires located along the valley ridge. Upon attacking, UNSC did not yet know what the main purpose of the spires.[2]
The battle
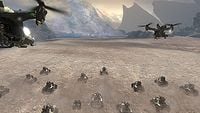
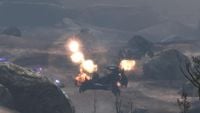
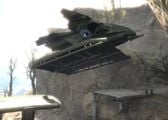
A massive UNSC strike force stormed the Viery plains towards the Covenant-occupied site, attempting to reclaim the land and eliminate all Covenant presence from Reach. The entire assault force was mechanized, as the lack of available cover on the plains prohibited an infantry assault. The UNSC thus resolved to close the distance with the Covenant and engage in an armored battle at close quarters. An advance wave of Warthogs, backed up by Scorpion tanks, as well as Mongooses, formed the ground component of the attack. Air support was provided by a mixture of Falcons and Pelicans. Six and Kat-B320 led the ground attack, while Jorge-052 and Carter-A259 coordinated air support.
The battle begins
As the UNSC force closed on the Covenant landing zone, the Covenant detected the incoming attack and opened fire, hammering the advancing UNSC force with long range plasma mortar fire, supplemented by Banshees, which preformed strafing runs. Although the Covenant bombardment inflicted casualties, the UNSC was undeterred and continued the advance. During the charge, Kat detonated the charge set on the stealth pylon by Jun-A266. Covenant heavy units, including three Scarabs, moved to counterattack the UNSC force. A small group of Warthogs, including Noble Six and Kat, and supported by Falcons, split off from the main assault wave onto a ridge overlooking the main battleground; however, a Wraith mortar shot destroyed a bridge over a large ravine that the group needed to cross to gain access to the ridgeline. Kat successfully managed to jump the gap, but the following Warthog was not so lucky, falling into the ravine below, and the Spartan's Warthog was destroyed by the crash. All of the preceding Warthogs were either destroyed by the destruction of the bridge, or by two Shade, which also forced the Falcons to withdraw.
Clearing the skies
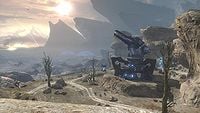
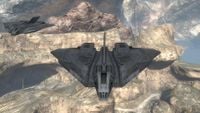
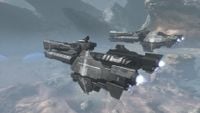
The two Spartans took out the two nearby Covenant Shade emplacements, and cleared the way for a Pelican to deliver a Rocket Warthog. Covenant heavy anti-aircraft artillery, meanwhile, was preventing the UNSC from bringing heavy air support into play. A Covenant anti-aircraft gun with a commanding view of the battlefield was inflicting casualties on the UNSC's airpower, so the two Spartans were assigned to destroy it. The two succeeded, clearing the skies for three Longswords that made a bombing run on the main Covenant force, destroying the three Scarabs serving as the linchpin of the Covenant defense. The strike punched a hole in the Covenant's lines, allowing UNSC Scorpions and Warthogs on the plains to advance upon the rest of the Covenant force. The Paris-class heavy frigates UNSC Grafton and UNSC Saratoga also moved in on the battlefield, supporting ground units with their autocannons. A Pelican placed a deployable bridge to replace a destroyed one near the AA gun, allowing Six and Kat to progress further towards the Covenant lines.
Assault on the spires
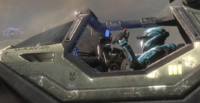
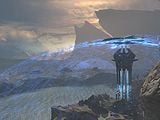
Six and Kat joined a group of Troopers assaulting a Covenant outpost located in a BXR Mining facility. Here, they were forced to abandon their warthog, and press through the facility on foot. They cleared the outpost and killed the Zealot in command of it. Upon passing through the facility, the two Spartans advanced further, destroying a second AA gun. As a result, the UNSC gained air superiority over the battlefield and let the frigates advance closer to the first Spire. After an LZ was cleared, a Pelican dropped off a squad to secure the area and Kat began to set up a forward observation post. ONI required up-close recon on the spires, and it was necessary to fly Noble Six the rest of the way. Jorge therefore picked up Six in a Falcon to fly him to the Spire through a Covenant-fortified canyon. The main UNSC ground force continued their advance, and Six supported them by using the Falcon's grenade launcher turret. The Falcon passed through the electromagnetic shields emitted by the Spire structure to drop off Jorge and Noble Six, but the shield disabled the Falcon, causing it to crash, and killing the crew; however, Jorge and Noble Six were able to make it out in one piece. The pair continued fighting their way into the structure, with Six managing to deactivate the structure's shielding system. Cleared of defenses, the UNSC called in a MAC strike executed by the Grafton to destroy the Spire.
The Long Night of Solace revealed
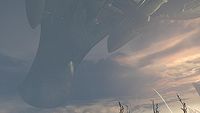
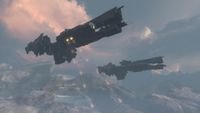
ONI had discovered that the Spire served a dual purpose, serving as a teleportation terminal and projecting a cloaking field, but what the Spire was cloaking, and what its teleporter was linked to, was as yet unrealized. With Nobles Five and Six evacuated by Carter's Falcon, Grafton moved in and destroyed the Spire with its MAC gun. The disruption of the cloaking field revealed a new danger: a Covenant supercarrier, the Long Night of Solace, in low orbit above Reach. With its cloaking shield gone, the supercarrier opened fire, instantly destroying the Grafton with one of its energy projectors. Unable to compete with the sheer firepower of the Covenant warship, the UNSC retreated. The supercarrier withdrew into Covenant held space in orbit above Reach, apparently unwilling to risk being pinned down by Reach's gravity well in its current position.
Aftermath
With the appearance of the supercarrier, the UNSC forces disengaged and fell back. The UNSC were unable to destroy the carrier as all their nuclear weapons were either destroyed or unavailable. Covenant forces deployed from the supercarrier continued to harry UNSC forces on Reach until the launch of Operation: UPPER CUT, which, utilizing a makeshift slipspace bomb, succeeded in destroying the ship at the cost of the Template:UNSCship and its crew, one SPARTAN-II, and a squad of Sabre pilots[4].
Gallery
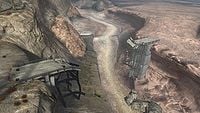
- Viery.jpg
UNSC force deployments in the Viery territory during the battle.
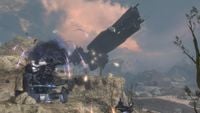
UNSC armored forces engage Covenant Scarabs in the valley.
List of appearances
- Halo: Reach (First appearance)
Sources
- ^ Halo Waypoint Assault on thye Stars 1
- ^ a b Halo: Reach, campaign level Tip of The Spear
- ^ Halo: Reach, campaign level Nightfall
- ^ Halo: Reach, campaign level Long Night of Solace
Related pages
