The Arbiter: Difference between revisions
From Halopedia, the Halo wiki
mNo edit summary |
BaconShelf (talk | contribs) |
||
| (105 intermediate revisions by 43 users not shown) | |||
| Line 1: | Line 1: | ||
{{ | {{Status|Gameplay}} | ||
{{disambig header|the level in Halo 2|other articles | {{disambig header|the level in Halo 2|other articles named "Arbiter"|Arbiter (disambiguation)}} | ||
{{Level infobox | {{Level infobox | ||
|pagegamelabel=H2 | |||
|prev=''[[Metropolis]]'' | |prev=''[[Metropolis]]'' | ||
|next=''[[The Oracle]]'' | |next=''[[The Oracle]]'' | ||
|name='''''The Arbiter''''' | |name='''''The Arbiter''''' | ||
|image=[[File: | |image=[[File:H2A TheArbiter Loadscreen.png|300px]] | ||
| | |game=''[[Halo 2]]'' {{C|''[[Halo 2: Anniversary|Anniversary]]''}} | ||
| | |devname=<code>4a_gasgiant</code>{{Ref/File|Id=H2EK|H2EK|H2EK\tags\scenarios\solo\4a_gasgiant\4a_gasgiant.scenario}} | ||
|place=[[Gas Mine]] | |player=[[Arbiter_(player_character)#Halo_2|Arbiter]] | ||
|date=[[2552#October|October 20, 2552]]<ref>[https://twitter.com/Halo/status/789270384793128960 '''Twitter''' - ''Halo'']</ref> | |||
|place=[[Threshold gas mine|Gas Mine]] inside [[Threshold]]'s atmosphere | |||
|objective=Locate and pursue the [[Sesa 'Refumee|Heretic Leader]]. | |objective=Locate and pursue the [[Sesa 'Refumee|Heretic Leader]]. | ||
|partime=00:15:00 {{C|''Master Chief Collection''}} | |||
|parscore=7,000 {{C|''Master Chief Collection''}} | |||
}} | }} | ||
{{Article | {{Article quote|Infiltrate a [[Forerunner]] [[Threshold gas mine|facility]], quell the [[Heretics|heresy]] within.}} | ||
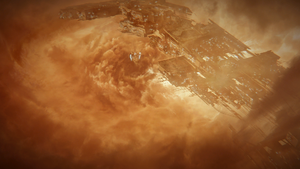
'''The Arbiter''' is | '''The Arbiter''' is the sixth [[campaign]] level of ''[[Halo 2]]'', where the [[Arbiter]] [[Thel 'Vadam]]ee is introduced as a playable character for the first time. You must assassinate the [[Sesa 'Refumee|Heretic Leader]] on a [[Forerunner]] [[Threshold gas mine|gas mine]] in [[Threshold]]'s atmosphere. | ||
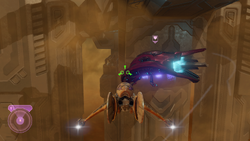
The mission involves neutralizing [[Heretic]] forces. Along the way, the player will have to open a hangar door for reinforcements, fight, for the first time in ''Halo 2'', [[Sentinel]]s, and fly a [[Banshee|Heretic Banshee]] to escort a friendly [[Phantom]] that is looking for where the Heretic Leader escaped to. | The mission involves neutralizing [[Sesa 'Refumee's heretic faction|Heretic]] forces. Along the way, the player will have to open a hangar door for reinforcements, fight, for the first time in ''Halo 2'', [[Sentinel]]s, and fly a [[Banshee|Heretic Banshee]] to escort a friendly [[Phantom]] that is looking for where the Heretic Leader escaped to. | ||
This is also the first time in ''Halo 2'' you are able to use the [[Covenant Carbine]], the [[Sentinel Beam]], and the [[Fuel Rod Gun]]. It is also the first time members of the Covenant aid you. Your allies are [[Special Operations | This is also the first time in ''Halo 2'' you are able to use the [[Covenant Carbine]], the [[Sentinel Beam]], and the [[Fuel Rod Gun]]. It is also the first time members of the Covenant aid you. Your allies are [[Special Operations Officer]] Elites and [[Special Operations Grunts]], meaning that you start off with rather powerful friendly units. | ||
==Transcript== | ==Transcript== | ||
[https://youtu.be/wKh-1LOVWmE '''{''Cutscene''}'''] | |||
[http://www.youtube.com/watch?v=_pGYyocIsBo'''{''Anniversary Cutscene''}'''] | |||
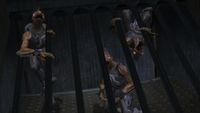
[ | [[File:H2A - Kig-Yar convicts.jpg|thumb|300px|Jailed Jackals reaching out of the cell.]] | ||
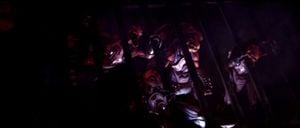
[[ | ''A blurry camera shot focused on the floor, before clearing and focusing on the back of [[Tartarus]]. The shot then changes to show Tartarus walking down a hallway in ''[[High Charity]]'', two [[Jiralhanae]] behind him, carrying Thel 'Vadamee on their shoulders. They are walking through a prison.'' | ||
'' | ---- | ||
'''Anniversary version''' | |||
''Scene opens on a pair of imprisoned [[Kig-Yar]] sticking their heads out of their jail cell, snarling. Camera shifts to the right to show Tartarus walking down the corridor, flanked by two Jiralhanae carrying 'Vadamee on their shoulders.'' | |||
---- | |||
*''' | *'''Jiralhanae 1''': "How much further must we heft this baggage? Any cell will do." | ||
'' | *'''Jiralhanae 2''': "Why not toss him in with this lot?" | ||
''The Jiralhanae pass a cell containing three hungry [[Kig-Yar]], which hiss and growl as they reach out through the bars at the Jiralhanae passing by.'' | |||
*''' | *'''Jiralhanae 2''': "They could use the meat." | ||
*''' | *'''Jiralhanae 1''': "Them? What about ''us''? My belly aches - and his flesh is seared, just the way I like it." | ||
''The | *'''Tartarus''': "Quiet! You two whimper like [[Unggoy|Grunts]] fresh off the [[Food nipple|teat]]. He's not meant for the jails. The [[Hierarchs]] have something special in mind." | ||
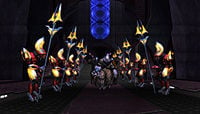
''The Jiralhanae and their cargo move out onto a platform overlooking the [[Mausoleum of the Arbiter]]. They ride a [[gravity lift]] down to the walkway leading up to it and pass dozens of [[Sangheili Honor Guardsman|Sangheili Honor Guardsmen]] standing at attention, [[energy stave]]s ready. They enter the Mausoleum, where the [[Hierarchs|High Prophets]] of [[Prophet of Truth|Truth]] and [[Prophet of Mercy|Mercy]] await. The three Jiralhanae bow, forcing 'Vadamee to do the same.'' | |||
*'''Tartarus''': "Noble Prophets of Truth and Mercy. I have brought the incompetent." | *'''Tartarus''': "Noble Prophets of Truth and Mercy. I have brought the incompetent." | ||
| Line 60: | Line 69: | ||
*'''Tartarus''': "Release the prisoner." | *'''Tartarus''': "Release the prisoner." | ||
''The | ''The Jiralhanae drop 'Vadamee to his knees and rise, leaving the room. The [[Sangheili]] touches the [[Mark of Shame]] on his chest.'' | ||
*'''Prophet of Truth''': "The [[High Council|Council]] decided to have you hung by your entrails and your corpse paraded through the city. But ultimately, the terms of your execution are up to me." | *'''Prophet of Truth''': "The [[High Council|Council]] decided to have you hung by your entrails and your corpse paraded through the city. But ultimately, the terms of your execution are up to me." | ||
| Line 70: | Line 79: | ||
*'''Thel 'Vadamee''': "The Mausoleum of the Arbiter." | *'''Thel 'Vadamee''': "The Mausoleum of the Arbiter." | ||
*'''Prophet of Truth''': "Quite so. Here rests the vanguard of the [[Great Journey]]. Every Arbiter, from first to last. Each one created and consumed in times of extraordinary crisis." | *'''Prophet of Truth''': "Quite so. Here rests the vanguard of the [[Great Journey]]. Every [[Arbiter]], from first to last. Each one created and consumed in times of extraordinary crisis." | ||
*'''Prophet of Mercy''': "The [[Taming of the Hunters]], the [[Unggoy Rebellion|Grunt Rebellion]] - were it not for the Arbiters, the [[ | *'''Prophet of Mercy''': "The [[Taming of the Lekgolo|Taming of the Hunters]], the [[Unggoy Rebellion|Grunt Rebellion]] - were it not for the Arbiters, the [[Covenant]] would have broken long ago!" | ||
*'''Thel 'Vadamee''': "Even on my knees, I do not belong in their presence." | *'''Thel 'Vadamee''': "Even on my knees, I do not belong in their presence." | ||
| Line 78: | Line 87: | ||
*'''Prophet of Truth''': "[[Installation 04|Halo]]'s destruction was your error, and you rightly bear the blame. But the Council was... overzealous. We know you are no heretic. ''This'' is the true face of heresy, one who would subvert our faith and incite rebellion against the High Council." | *'''Prophet of Truth''': "[[Installation 04|Halo]]'s destruction was your error, and you rightly bear the blame. But the Council was... overzealous. We know you are no heretic. ''This'' is the true face of heresy, one who would subvert our faith and incite rebellion against the High Council." | ||
''Truth presses a button on his chair and a miniature hologram of | ''Truth presses a button on his chair and a miniature hologram of a Sangheili in abnormal equipment appears.'' | ||
*'''Sesa 'Refumee (Hologram)''': "Our Prophets are false! Open your eyes, my brothers! They would use the faith of our forefathers to bring ruin to us all! The Great Journey is a-" | *'''[[Sesa 'Refumee]] (Hologram)''': "Our [[San'Shyuum|Prophets]] are false! Open your eyes, my brothers! They would use the faith of our forefathers to bring ruin to us all! The Great Journey is a-" | ||
''Truth cuts off the hologram.'' | ''Truth cuts off the hologram.'' | ||
*'''Prophet of Truth''': "This heretic, and those who follow him, must be silenced." | *'''Prophet of Truth''': "This heretic, and [[Sesa 'Refumee's heretic faction|those who follow him]], must be silenced." | ||
*'''Prophet of Mercy''': "Their slander offends all who walk the Path!" | *'''Prophet of Mercy''': "Their slander offends all who walk the Path!" | ||
| Line 96: | Line 105: | ||
*'''Thel 'Vadamee''': "What of the Council?" | *'''Thel 'Vadamee''': "What of the Council?" | ||
*'''Prophet of Mercy''': "The tasks you must undertake as the Arbiter are perilous, suicidal. You will die, as each Arbiter has before you. The Council | *'''Prophet of Mercy''': "The tasks you must undertake as the Arbiter are perilous, suicidal. You will ''die'', as each Arbiter has before you. The Council will have their corpse." | ||
[[File:MercyTruthArbiter.jpg|thumb|300px|Thel 'Vadmaee being offered the title of Arbiter and the body armor.]] | |||
''Thel 'Vadamee rises and walks toward the armor. He pauses before it, and looks to the pods containing the bodies of the Arbiters who fell before him. He reaches up and takes the helmet of the Arbiter, and places it upon his head. He turns to the Hierarchs.'' | ''Thel 'Vadamee rises and walks toward the armor. He pauses before it, and looks to the pods containing the bodies of the Arbiters who fell before him. He reaches up and takes the helmet of the Arbiter, and places it upon his head. He turns to the Hierarchs.'' | ||
| Line 102: | Line 113: | ||
*'''Thel 'Vadamee''': "What would you have your Arbiter do?" | *'''Thel 'Vadamee''': "What would you have your Arbiter do?" | ||
''The scene changes to show the outside of High Charity, the fleet surrounding it. Three | ''The scene changes to show the outside of High Charity, the fleet surrounding it. Three [[Kez'katu-pattern Phantom|Phantom]]s fly past the camera and swoop past the ruins of [[Installation 04]], a large piece of it still intact and with landscape and clouds still visible. As it flies, the voice of [[Special Operations Commander]] [[Rtas 'Vadum]]ee can be heard.'' | ||
*'''Rtas 'Vadumee''': "When we joined the | *'''Rtas 'Vadumee''': "When we joined the Covenant, we took an [[Writ of Union|oath]]!" | ||
'' | *'''Special Operations Sangheili''': "According to our station! All without exception!" | ||
''The scene cuts to the inside of the center Phantom, where [[Special Operations Sangheili]], along with the [[Thel 'Vadam|new Arbiter]], line the walls, with a line of [[Special Operations Unggoy]] in the center. The white-armored [[Sangheili]] [[Special Operations Commander]] Rtas 'Vadumee, walks among them.'' | |||
*'''Rtas 'Vadumee''': "On the blood of our fathers, on the blood of our sons...we swore to uphold the Covenant!" | *'''Rtas 'Vadumee''': "On the blood of our fathers, on the blood of our sons...we swore to uphold the Covenant!" | ||
*''' | *'''Special Operations Sangheili''': "Even to our dying breath!" | ||
*'''Rtas 'Vadumee''': "Those who would break this oath are Heretics, worthy of neither pity, nor mercy! Even now they use our lords' creations to broadcast their lies!" | *'''Rtas 'Vadumee''': "Those who would break this oath are Heretics, worthy of neither pity, nor mercy! Even now they use our lords' creations to broadcast their lies!" | ||
'' | ''A Sangheili holds up a [[Type-50 particle beam rifle|Particle Beam Rifle]] to his chest, and an [[Unggoy]] fumbles with the [[methane tank]] of the Unggoy in front of him. Some air is released, and the second Unggoy mutters angrily at the first (turning around in the Anniversary version).'' | ||
*''' | *'''Special Operations Sangheili''': "We shall grind them into dust!" | ||
''Note: the Hidden Subtitle appears here. It is "Scrape them as excrement from our boots!"'' | ''Note: the Hidden Subtitle appears here. It is "Scrape them as excrement from our boots!"'' | ||
| Line 128: | Line 139: | ||
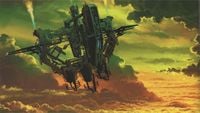
''The Phantoms enter Threshold's atmosphere and come upon a large Forerunner platform.'' | ''The Phantoms enter Threshold's atmosphere and come upon a large Forerunner platform.'' | ||
''Scene fades back to inside lead Phantom. The Spec Ops | ''Scene fades back to inside lead Phantom. The Spec Ops Commander approaches 'Vadamee. They stare each other down.'' | ||
[[File:H2A-Arbiter&Rtas.jpg|thumb|300px|Rtas 'Vadumee and Thel 'Vadamee meet for the first time prior to the assault on the gas mine.]] | |||
*'''Rtas 'Vadumee''': "This armor suits you. But it cannot hide that [[Mark of Shame|mark]]." | *'''Rtas 'Vadumee''': "This armor suits you. But it cannot hide that [[Mark of Shame|mark]]." | ||
| Line 134: | Line 147: | ||
*'''Thel 'Vadamee''': "Nothing ever will." | *'''Thel 'Vadamee''': "Nothing ever will." | ||
*'''Rtas 'Vadumee''': "You are the Arbiter, the will of the | *'''Rtas 'Vadumee''': "You are the Arbiter, the will of the Prophets. But these are ''my'' Elites. Their lives matter to me. Yours does not." | ||
*'''Thel 'Vadamee''': "That makes two of us." | *'''Thel 'Vadamee''': "That makes two of us." | ||
| Line 146: | Line 159: | ||
*'''Rtas 'Vadumee''': "We'll be long gone before it arrives." | *'''Rtas 'Vadumee''': "We'll be long gone before it arrives." | ||
''The Phantoms fly lower, near the top of one of several towers sticking out from the center of the main structure. One deposits a group of | ''The Phantoms fly lower, near the top of one of several towers sticking out from the center of the main structure. One deposits a group of Unggoy and a Sangheili, followed by a second one that drops two Sangheili and 'Vadamee.'' | ||
*'''Rtas 'Vadumee''': "Warriors, prepare for combat!" | *'''Rtas 'Vadumee''': "Warriors, prepare for combat!" | ||
'''Vadamee ignites his [[Energy Sword]] and looks at it.'' | '''Vadamee ignites his [[Type-1 Energy Weapon/Sword|energy sword]] and looks at it, before following his fellow Sangheili in the ''Anniversary'' version.'' | ||
'''{''Gameplay''}''' | '''{''Gameplay''}''' | ||
===A Whisper in the Storm=== | ===A Whisper in the Storm=== | ||
[[File:H2A - SpecOps deployed.jpg|thumb|300px|The Covenant SpecOps team deploys onto the gas mine.]] | |||
*'''Rtas 'Vadumee (COM)''': "We are the arm of the Prophets, Arbiter, and you are the blade. Be silent and swift, and we shall quell this heresy without incident." | *'''Rtas 'Vadumee (COM)''': "We are the arm of the Prophets, Arbiter, and you are the blade. Be silent and swift, and we shall quell [[Sesa 'Refumee's heretic faction|this heresy]] without incident." | ||
*'''SpecOps Elite''': "First [[lance]] in position." | |||
''As Thel approaches the doors where the rest of the team is waiting to enter'' | ''As Thel approaches the doors where the rest of the team is waiting to enter'' | ||
*'''Rtas 'Vadumee (COM)''': "The storm has masked our approach, and it should have their local Battle-net in disarray. We have the element of surprise... for now." | *'''Rtas 'Vadumee (COM)''': "The storm has masked our approach, and it should have their local [[proselytization network|Battle-net]] in disarray. We have the element of surprise... for now." | ||
''Thel enters the airlock beyond, with a team of | ''Thel enters the airlock beyond, with a team of Special Operations Unggoy and Sangheili.'' | ||
*''' | *'''Special Operations Sangheili''': "Engage [[active camouflage]]! Reveal yourselves only after the Arbiter has joined battle with the enemy!" | ||
''The | ''The Unggoy and Sangheili fade into their surroundings as their active camouflage is engaged.'' | ||
*'''Rtas 'Vadumee (COM)''': "You may wish to do the same, Arbiter, but take heed: your armor's system is not as...''new'' as ours. Your camouflage will not last forever." | *'''Rtas 'Vadumee (COM)''': "You may wish to do the same, Arbiter, but take heed: your armor's system is not as...''new'' as ours. Your camouflage will not last forever." | ||
''The team enters the next room under cloak. If the player waits without being seen for a moment, the two Heretic | ''The team enters the next room under cloak, where Heretic Unggoy are asleep and two Heretic Sangheili patrol. If the player waits without being seen for a moment, the two Heretic Sangheili in this room will talk to one another.'' | ||
*'''Heretic | *'''Heretic Sangheili 1''': "Any word on our missing brothers?" | ||
*'''Heretic | *'''Heretic Sangheili 2''': "Still nothing, and given [[Flood|what sleeps here]], I fear they are lost." | ||
*'''Heretic | *'''Heretic Sangheili 1''': "Surely the [[343 Guilty Spark|Oracle]] will protect us..." | ||
*'''Heretic | *'''Heretic Sangheili 2''': "Perhaps. But his Sentinels are too few. Better we protect ourselves!" | ||
''The Arbiter and his team launch their attack, annihilating all the Heretics in the immediate area. Behind a wall | ''The Arbiter and his team launch their attack, annihilating all the Heretics in the immediate area. Behind a wall are a few energy belts carrying [[Gas container]]s into a pit. The team eliminates the patrol in the area, then follows the energy belts to the lower levels.'' | ||
''If the player stalls:'' | ''If the player stalls:'' | ||
| Line 186: | Line 202: | ||
*'''Rtas 'Vadumee (COM)''': "There should be a ship hangar bay directly below you. Find a way down." | *'''Rtas 'Vadumee (COM)''': "There should be a ship hangar bay directly below you. Find a way down." | ||
''The team continues on and enters an elevator. They descend into a hangar containing a [[Seraph]] and a new enemy appears: the familiar [[Sentinels]]. Most of them are patrolling the area, but one can be seen carrying a gas container under it and another firing a green beam at the Seraph, apparently fixing it.'' | ''The team continues on and enters an elevator. They descend into a hangar containing a [[Kai-pattern Seraph]] and a new enemy appears: the familiar [[Aggressor Sentinel|Sentinels]]. Most of them are patrolling the area, but one can be seen carrying a gas container under it and another firing a green beam at the Seraph, apparently fixing it.'' | ||
*''' | *'''Special Operations Sangheili''': "Sentinels, the holy warriors of the [[Halo Array|Sacred Rings]]. Why have they sided with these Heretics?" | ||
*'''Heretic | *'''Heretic Sangheili 3''': ''(upon seeing the SpecOps team)'' "Sentinels, defend us!" | ||
''During the battle in the hangar:'' | ''During the battle in the hangar:'' | ||
*'''Phantom Pilot (COM)''': "Arbiter, clear the hangar and open this door, so I may drop the second [[ | *'''Phantom Pilot (COM)''': "Arbiter, clear the hangar and open this door, so I may drop the second [[lance]]!" | ||
'''Vadamee opens the door.'' | '''Vadamee opens the door.'' | ||
| Line 200: | Line 216: | ||
*'''Phantom Pilot (COM)''': "Hold position, I am making my approach." | *'''Phantom Pilot (COM)''': "Hold position, I am making my approach." | ||
''A friendly Phantom enters the Hangar Bay and deploys additional troops'' | ''A friendly Phantom enters the Hangar Bay and deploys additional troops.'' | ||
''As more Heretics appear from below:'' | ''As more Heretics appear from below:'' | ||
*''' | *'''Special Operations Sangheili''': "More Heretics! In the passage below us!" | ||
''After the Hangar is secure:'' | ''After the Hangar is secure:'' | ||
| Line 210: | Line 226: | ||
*'''Rtas 'Vadumee (COM)''': "Keep heading down. Find the leader of these Heretics." | *'''Rtas 'Vadumee (COM)''': "Keep heading down. Find the leader of these Heretics." | ||
'''Vadamee descends through the facility, fighting more Heretic | '''Vadamee descends through the facility, fighting more Heretic Sangheili, Unggoy and Sentinels.'' | ||
''After clearing another room:'' | ''After clearing another room:'' | ||
*''' | *'''Special Operations Sangheili''': "Shall we keep moving, Arbiter? The Heretic Leader cowers below!" | ||
''Eventually, 'Vadamee enters a room featuring a window looking out onto a landing pad with three Heretic | ''Eventually, 'Vadamee enters a room featuring a window looking out onto a landing pad with three Heretic [[Drailaac-pattern Banshee|Banshee]]s. The Heretic Leader, [[Sesa 'Refumee]] appears.'' | ||
*'''Sesa 'Refumee''': "Deal with him, my brothers! I will defend the Oracle." | *'''Sesa 'Refumee''': "Deal with him, my brothers! I will defend the Oracle." | ||
''He hops | ''He hops into a Heretic Banshee and flies off.'' | ||
*'''Heretic | *'''Heretic Sangheili 4''': "Its truth must not be silenced!" | ||
''The Arbiter and the Spec Ops team defeat the Heretics and Sentinels sent to stop them'' | ''The Arbiter and the Spec Ops team defeat the Heretics and Sentinels sent to stop them.'' | ||
*''' | *'''Special Operations Sangheili''': "Onward, Arbiter! We will secure this section of the station." | ||
===To The Hunt=== | ===To The Hunt=== | ||
[[File:H2A-T26AZHUD.png|thumb|250px|Driving the Banshee.]] | |||
''The Arbiter goes outside and takes one of the remaining Banshees.'' | ''The Arbiter goes outside and takes one of the remaining Banshees.'' | ||
*'''Rtas 'Vadumee (COM)''': "The Heretics are mobilizing their air forces, Arbiter. Get after their leader, but watch your back. I'm sending one of our | *'''Rtas 'Vadumee (COM)''': "The Heretics are mobilizing their air forces, Arbiter. Get after their leader, but watch your back. I'm sending one of our [[Kez'katu-pattern Phantom|Phantom]]s to support you." | ||
''After the first wave of Banshees is eliminated.'' | ''After the first wave of Banshees is eliminated.'' | ||
| Line 238: | Line 254: | ||
*'''Phantom Pilot (COM)''': "The Heretics have weapons emplacements all over the facility, Arbiter. We'll take them out, one by one, until we find the Heretic Leader." | *'''Phantom Pilot (COM)''': "The Heretics have weapons emplacements all over the facility, Arbiter. We'll take them out, one by one, until we find the Heretic Leader." | ||
''If you take too long to head for the final emplacement | ''The Arbiter follows the allied Phantom in his Banshee. As they search for the Heretic Leader, they encounter multiple Heretic Banshees, as well as hostile [[Eeo'Pimu-pattern Shade|Shade]] turrets and Heretic Unggoy armed with [[Pez'tk-pattern fuel rod gun|fuel rod gun]]s.'' | ||
''If you take too long to head for the final emplacement:'' | |||
*'''Rtas 'Vadumee (COM)''': "No sign of the Heretic Leader or his Banshee. We must keep searching!" | *'''Rtas 'Vadumee (COM)''': "No sign of the Heretic Leader or his Banshee. We must keep searching!" | ||
| Line 252: | Line 270: | ||
'''Vadamee nears the final emplacement.'' | '''Vadamee nears the final emplacement.'' | ||
*'''Rtas 'Vadumee (COM)''': "We've tracked the | *'''Rtas 'Vadumee (COM)''': "We've tracked the Heretic Leader to this part of the station. Clear that landing zone and get inside." | ||
''The Arbiter clears the platform and arrives at the door. Fades to white.'' | ''The Arbiter clears the platform and arrives at the door. Fades to white.'' | ||
''Level ends.'' | ''Level ends.'' | ||
==Achievements== | |||
The following [[achievement]]s can be unlocked on ''The Arbiter'' across the [[Halo 2 (Windows Vista)|Windows Vista]] and ''[[Halo: The Master Chief Collection]]'' editions of ''Halo 2: Anniversary''. The original [[Xbox]] release of ''Halo 2'' did not contain achievement unlocks. | |||
{| class="wikitable" | |||
|- | |||
! scope="col" style="width:135px;text-align:center;" |'''''Halo 2'' (Windows Vista)''' | |||
! scope="col" style="width:135px;text-align:center;" |'''''Halo: MCC'' (Xbox One, Xbox Series X|S)''' | |||
! scope="col" style="width:135px;text-align:center;" |'''''Halo: MCC'' (Steam)''' | |||
! scope="col" style="width:175px;height:20px;text-align:center;" |'''Title''' | |||
! scope="col" style="width:350px;height:20px;text-align:center;" |'''Unlock requirement''' | |||
! scope="col" style="width:200px;height:20px;text-align:center;" |'''Games''' | |||
|- | |||
|[[File:H2V Achievement The Arbiter.png|center|64px]] | |||
|[[File:HTMCC H2A Achievement TheArbiter.png|center|114px]] | |||
|[[File:HTMCC H2A Achievement Steam The Arbiter.jpg|center|64px]] | |||
|<center>'''[[The Arbiter (achievement)|The Arbiter]]'''</center> | |||
|Beat The Arbiter on any difficulty. | |||
|<center>[[Halo 2 (Windows Vista)|''Halo 2'' (Windows Vista)]]<br/>''[[Halo: The Master Chief Collection]]''</center> | |||
|- | |||
|<center>N/A</center> | |||
|[[File:HTMCC H2A Achievement YOLOStrats.png|center|114px]] | |||
|[[File:HTMCC H2A Achievement Steam YOLOStrats.jpg|center|64px]] | |||
|<center>'''[[YOLO Strats]]'''</center> | |||
|Beat the par time on The Arbiter. | |||
|<center>''[[Halo: The Master Chief Collection]]''</center> | |||
|- | |||
|<center>N/A</center> | |||
|[[File:HTMCC H2A Achievement HeresyWillNotStayMyFeet.png|center|114px]] | |||
|[[File:HTMCC H2A Achievement Steam HeresyWillNotStayMyFeet.jpg|center|64px]] | |||
|<center>'''[[Heresy Will Not Stay My Feet]]'''</center> | |||
|Beat the par score on The Arbiter. | |||
|<center>''[[Halo: The Master Chief Collection]]''</center> | |||
|- | |||
|<center>N/A</center> | |||
|[[File:HTMCC H2A Achievement Inspector.png|center|114px]] | |||
|[[File:HTMCC H2A Achievement Steam Inspector.jpg|center|64px]] | |||
|<center>'''[[Inspector]]'''</center> | |||
|Activate [[Terminal (Halo 2: Anniversary)|Terminal #4]] on The Arbiter. | |||
|<center>''[[Halo: The Master Chief Collection]]''</center> | |||
|- | |||
|<center>N/A</center> | |||
|[[File:HTMCC H2A Achievement SkulltakerGruntBirthdayParty.png|center|114px]] | |||
|[[File:HTMCC H2A Achievement Steam SkulltakerGruntBirthdayParty.jpg|center|64px]] | |||
|<center>'''[[Skulltaker Halo 2: Grunt Birthday Party]]'''</center> | |||
|Find and claim the [[Halo 2 skulls#Grunt Birthday Party|Grunt Birthday Party Skull]]. | |||
|<center>''[[Halo: The Master Chief Collection]]''</center> | |||
|- | |||
|<center>N/A</center> | |||
|[[File:HTMCC H2A Achievement DirtyBird.png|center|114px]] | |||
|[[File:HTMCC Achievement Dirty Bird Steam.jpg|center|64px]] | |||
|<center>'''[[Dirty Bird]]'''</center> | |||
|Fly the Heretic Banshee. | |||
|<center>''[[Halo: The Master Chief Collection]]''</center> | |||
|- | |||
|} | |||
== Trivia == | == Trivia == | ||
| Line 264: | Line 338: | ||
*The two Elites that drop out of the phantom with you at the beginning of the level will follow you down to the first door, but will not follow further. They will remain at the door. If you attempt to push them into the room, the second door will not open until they leave the room. | *The two Elites that drop out of the phantom with you at the beginning of the level will follow you down to the first door, but will not follow further. They will remain at the door. If you attempt to push them into the room, the second door will not open until they leave the room. | ||
*When you get to the hangar part go to the ledges on the sides of the rooms jump to get on them and when you move around you could hear the sounds of the doors opening. Jump down quick enough and you can get into the rooms where the enemies spawn in. | *When you get to the hangar part go to the ledges on the sides of the rooms jump to get on them and when you move around you could hear the sounds of the doors opening. Jump down quick enough and you can get into the rooms where the enemies spawn in. | ||
*When you open the | *When you open the hangar for the [[Phantom]], you could get on top of it but you will be pulled back into the level because it won't let you leave the boundaries. | ||
*The [[Heretic | *The [[Heretic leader glitch]] can be performed on this level. | ||
*It is possible to make a Grunt invincible if he survives your first encounter with the Heretics, he can accompany you all the way to Heretic Leader's Banshee, push him over the edge onto a small ledge area, and he will be invincible, you can even test him against other enemies by skyjacking a lured Banshee to the ledge area, and kicking him out, resulting in the Grunt fighting the Heretic Elite. Note: If he is given a weaker weapon, and fires at the Heretic, the Heretic's shield will recharge quickly, resulting in a possibly endless battle. | *It is possible to make a Grunt invincible if he survives your first encounter with the Heretics, he can accompany you all the way to Heretic Leader's Banshee, push him over the edge onto a small ledge area, and he will be invincible, you can even test him against other enemies by skyjacking a lured Banshee to the ledge area, and kicking him out, resulting in the Grunt fighting the Heretic Elite. Note: If he is given a weaker weapon, and fires at the Heretic, the Heretic's shield will recharge quickly, resulting in a possibly endless battle. | ||
*If you get your allies to turn against you at the beginning of this level, the Elites will try to kill you, but the Grunts will just stand there waiting for the door to open, even though they are shown as enemies. | *If you get your allies to turn against you at the beginning of this level, the Elites will try to kill you, but the Grunts will just stand there waiting for the door to open, even though they are shown as enemies. | ||
*When you are in the [[Banshee]] you can hop out onto the [[Phantom]]. This is recommended for near the end where you can kill the Heretic Grunts from afar, or destroy Banshees if you have a Fuel Rod Gun. This is not highly recommended however as it is easy to get shot down or simply just fall off the vehicle. | *When you are in the [[Banshee]] you can hop out onto the [[Phantom]]. This is recommended for near the end where you can kill the Heretic Grunts from afar, or destroy Banshees if you have a Fuel Rod Gun. This is not highly recommended however as it is easy to get shot down or simply just fall off the vehicle. | ||
*If you kill the Elite that opens the door before he gets a chance to finish, the door will | *If you kill the Elite that opens the door before he gets a chance to finish, the door will open much faster. | ||
*Going down the lift to the | *Going down the lift to the hangar with the Seraph fighter, you can throw plasma grenades and they will bounce without exploding. However, the grenades do explode when the elevator reaches the ground or if they stick to you or an ally. | ||
*At the beginning of the level, when the Elite is pressing the buttons to open the door, when looking closely at his finger, you can see that it is just slightly moving around the control panel. | *At the beginning of the level, when the Elite is pressing the buttons to open the door, when looking closely at his finger, you can see that it is just slightly moving around the control panel. | ||
*At the beginning of the level, if you kill your allies before the elevator descends, no enemies will appear until you reach the elevator. | *At the beginning of the level, if you kill your allies before the elevator descends, no enemies will appear until you reach the elevator. | ||
*Once you get on a Banshee fly to the right and you will see a small "bridge”, get out of the banshee and look around and you will see a red door that absorbs all shots fired at it (best done with a [[Fuel Rod Gun]] and other explosives). It will also appear in the Oracle but when approached close-up the texture will appear. | *Once you get on a Banshee fly to the right and you will see a small "bridge”, get out of the banshee and look around and you will see a red door that absorbs all shots fired at it (best done with a [[Fuel Rod Gun]] and other explosives). It will also appear in the Oracle but when approached close-up the texture will appear. | ||
*Oddly enough,when the Phantom drops off reinforcements in the hangar, there is a possibility/glitch where it won't drop any or maybe one. | |||
===Easter | ===Easter eggs=== | ||
{{Main|Easter | [[File:HTMCC-H2A Grunt Birthday Party 2.jpg|thumb|Heretic Unggoy dancing around the Grunt Birthday Skull in ''Halo 2: Anniversary''.]] | ||
{{Main|Easter eggs}} | |||
*The [[Grunt Birthday Party Skull]] can be found on this level. | *The [[Grunt Birthday Party Skull]] can be found on this level. | ||
*If you manage to skyjack a Banshee or blow another Banshee up, you will notice the Heretic Elite has a Plasma Rifle equipped, instead of the Covenant Carbine. This could just be a weapon change for the pilot, maybe because he needed a lighter weapon to fly in the Banshee so it doesn't make it too uncomfortable for him. However, there's an equal chance | *If you manage to skyjack a Banshee or blow another Banshee up, you will notice the Heretic Elite has a Plasma Rifle equipped, instead of the Covenant Carbine. This could just be a weapon change for the pilot, maybe because he needed a lighter weapon to fly in the Banshee so it doesn't make it too uncomfortable for him. However, there's an equal chance it's an Easter egg, since not many players would pay attention to the actual dead body. | ||
* The fourth terminal is a Forerunner terminal in the room bisected by two Forerunner gas canister conveyors, at the top of the ramp in the far right of the room. | |||
===References=== | ===References=== | ||
*The | *The soundtrack of the game, "[[Follow]]" by Incubus, can be heard on this level although without any vocals, shortly after the player is able to get in a Banshee. It was replaced by ''[[Follow In Flight]]'' in ''Halo 2: Anniversary''. | ||
*The map [[Colossus]] is also located at the gas mine area, where the storm could be seen. | *The map [[Colossus (map)|Colossus]] is also located at the gas mine area, where the storm could be seen. | ||
*When the [[SpecOps Grunt]] says, "Shh! Me hunting He-wa-tic.", he's making a reference to the famous Looney Tunes quote, "Shh! Be vewy vewy quiet! I'm hunting wabbits!". | *When the [[SpecOps Grunt]] says, "Shh! Me hunting He-wa-tic.", he's making a reference to the famous Looney Tunes quote, "Shh! Be vewy vewy quiet! I'm hunting wabbits!". | ||
| Line 289: | Line 366: | ||
*During the [[Banshee]] part, you can get out of your Banshee and land on the [[Phantom]]. This is hard to balance on, and is recommended to use at the end of the part as there is a high possibility to fall off. | *During the [[Banshee]] part, you can get out of your Banshee and land on the [[Phantom]]. This is hard to balance on, and is recommended to use at the end of the part as there is a high possibility to fall off. | ||
*During the Banshee fight, it is possible to exit your Banshee and immediately board an enemy Heretic Banshee. This however, is quite a difficult tactic. When you do, the Elite inside will have a Plasma Rifle. | *During the Banshee fight, it is possible to exit your Banshee and immediately board an enemy Heretic Banshee. This however, is quite a difficult tactic. When you do, the Elite inside will have a Plasma Rifle. | ||
*Should the player watch the Phantoms that drop off the troops at the beginning of the level when they go out of view zoom in with your binoculars they will fall and spin out of control and hit the lower part of the level. | *Should the player watch the Phantoms that drop off the troops at the beginning of the level when they go out of view zoom in with your binoculars they will fall and spin out of control and hit the lower part of the level. If the player has the Acrophobia skull enabled they can fly out to the Phantoms and will be prompted to flip “Banshee.” This is likely a placeholder as the player cannot pilot a Phantom in Halo 2 through normal means. | ||
*Many of the Grunt dialogue in this level is some of the most strange and humorous, Including ''If we stand here any longer, we be on date!'' and ''Hard to tell, but me no female''. | *Many of the Grunt dialogue in this level is some of the most strange and humorous, Including ''If we stand here any longer, we be on date!'' and ''Hard to tell, but me no female''. It's the first official time you can hear them clearly, and can listen to the strange things they say, because up until now, Grunts have been against you. | ||
*This level has more [[Fuel Rod Gun]]s than any other level in the [[Halo (series)|Halo]] trilogy. | *This level has more [[Fuel Rod Gun]]s than any other level in the [[Halo (series)|Halo]] trilogy. | ||
*If you search around the station, you can find the bridge that leads from the labs to the central part of the station, which is the same that you use in the next level. | *If you search around the station, you can find the bridge that leads from the labs to the central part of the station, which is the same that you use in the next level. | ||
*This is the first level of the Halo series that you can play as the [[ | *This is the first level of the Halo series that you can play as the [[Thel 'Vadam|Arbiter]] and use the Sentinel Beam and the Covenant Carbine. | ||
*This is the first level that includes [[Heretics]]. | *This is the first level that includes [[Heretics]]. | ||
*The music that plays near the end of the level when the Heretic Leader escapes (before you take off in the Banshee) was not included on the [[Halo 2: Original Soundtrack|OST]]. It somewhat resembles the last part of [[Sacred Icon Suite]]. | *The music that plays near the end of the level when the Heretic Leader escapes (before you take off in the Banshee) was not included on the [[Halo 2: Original Soundtrack|OST]]. It somewhat resembles the last part of [[Sacred Icon Suite]]. | ||
*When moving down the elevator, the Elite you are farthest from is the one that will point out the Sentinels. | *When moving down the elevator, the Elite you are farthest from is the one that will point out the Sentinels. | ||
*The large windows in the last room of the level are actually shut outside and you can't see through them even though | *The large windows in the last room of the level are actually shut outside and you can't see through them even though from the inside you can see. Also, on the outside of the window your reticule will still change color between the normal color to green and red between friendlies and enemies even though you can't see through the windows. | ||
*At the part with the Banshee, you can skip the long air battle with the Heretics and go directly to the area where the level ends. | *At the part with the Banshee, you can skip the long air battle with the Heretics and go directly to the area where the level ends. | ||
*At the | *At the Banshee part, more Banshees can be seen on platforms with Heretics on them. If your Banshee is destroyed (by you or the Grunts), then another one spawns when you turn around. This will be infinite. This is probably so that if the player makes it there with the Banshee destroyed, then they won't get stuck. | ||
*If you hide in the hangar and watch the Sentinels, you will see one firing a greenish beam at the Seraph, like the beams of the Constructor Sentinels on the Sacred Icon level. This indicates the Seraph is undergoing repairs. | *If you hide in the hangar and watch the Sentinels, you will see one firing a greenish beam at the Seraph, like the beams of the Constructor Sentinels on the Sacred Icon level. This indicates that the Seraph is undergoing repairs. | ||
===Production notes=== | |||
*Originally, this level was supposed to take place on Threshold's moon, [[Basis]]. | |||
*[[Joseph Staten]] revealed on the ''Halo 3 Legendary Edition'' bonus disk that originally the Heretics including the Heretic Leader were all going to be [[Hunters]]. | |||
*The level's working title was "The Alpha Gas Giant".<ref name="spacejelly">[http://www.ausgamers.com/features/read/3365947 '''AusGamers''': ''AusGamers Destiny Developer Interview with Dave Dunn'']</ref> | |||
*Bungie environment artist [[David Dunn]] experimented on having an ambient lifeform known as the [[space jellyfish]] float in Threshold's atmosphere. However, this concept was eventually abandoned.{{Ref/Reuse|spacejelly}} | |||
==Gallery== | ==Gallery== | ||
<gallery | ===Halo 2=== | ||
File:Homeofarbiter.jpg|The Mausoleum | <gallery> | ||
File:Gasmine.jpg| | File:H2-Concept-ThresholdGasMine-Sketch.jpg|Early concept art of the Threshold gas mine. | ||
File:H2-ThresholdGasMine-Concept.jpg|Concept art of the Threshold gas mine. | |||
File:The Arbiter Official.png|Preview of the level in ''Halo 2'' menu. | |||
File:Caged.jpg|Kig-Yar convicts in ''High Charity''. | |||
File:Brutesarbiter.jpg|Tartarus, his Jiralhanae and Honor Guards outside the Mausoleum of the Arbiter. | |||
File:Homeofarbiter.jpg|The Mausoleum of the Arbiter in ''High Charity''. | |||
File:1225417639 Truth and mercy.jpg|Truth and Mercy in the Mausoleum of the Arbiter. | |||
File:Arby helmet.jpg|Thel 'Vadamee takes on title of Arbiter. | |||
File:Broken Ring.jpg|A section of the destroyed Installation 04. | |||
File:Arbiter and Half-Jaw.jpg|Rtas 'Vadumee speaking to Thel 'Vadamee. | |||
File:Gasmine.jpg|A trio of Phantoms approach the [[Threshold gas mine]]. | |||
File:Spec Ops deployment.jpg|Covenant SpecOps forces are deployed on the gas mine. | |||
</gallery> | </gallery> | ||
{{Succession box | before = ''[[ | ===Halo 2: Anniversary=== | ||
<gallery> | |||
File:H2A GasMine Ledge Concept.jpg|Concept art for an exterior ledge on the level. | |||
File:H2A GasMine ExteriorCover Concept.jpg|Concept art for a cover piece in the gas mine's exterior. | |||
File:H2A GasMine HangarCoverDias Concept.jpg|Concept art for the cover dias' in the hangar bay. | |||
File:H2A - Covenant Honor Guard.jpg|Tartarus, his Jiralhanae and Honor Guards outside the Mausoleum of the Arbiter. | |||
File:H2A - Thel before armor.jpg|Thel 'Vadamee kneeling before the case holding the Arbiter armor. | |||
File:H2A - Arbiter helmet.jpg|Thel 'Vadam accepts his appointment to Arbiter by the Prophets. | |||
File:H2A-Rtas&Co.jpg|Covenant SpecOps soldiers and Rtas 'Vadumee onboard one of the Phantoms. | |||
File:H2A - Threshold gas mine.jpg|A trio of Phantoms approach the [[Threshold gas mine]]. | |||
File:H2ARaidonGasMine.png|Covenant forces battling in the hangar bay of the gas mine. | |||
</gallery> | |||
==Sources== | |||
{{Ref/Sources}} | |||
{{Succession box | before = ''[[Metropolis]]'' <br />| title = [[Halo 2 Campaign|''Halo 2'' Campaign Missions]] | years = '''''The Arbiter''''' |after = ''[[The Oracle]]''}} | |||
{{Levels}} | {{Levels|H2}} | ||
Latest revision as of 05:59, July 13, 2024
|
Prev: |
|
|
Next: |
|
| The Arbiter | |
|---|---|
| |
|
Game: |
|
|
File name (?): |
|
|
Player: |
|
|
Date: |
|
|
Location: |
|
|
Objective(s): |
Locate and pursue the Heretic Leader. |
|
Par Time: |
00:15:00 (Master Chief Collection) |
|
Par Score: |
7,000 (Master Chief Collection) |
 |
Halopedia has a walkthrough guide for this level; see The Arbiter/Walkthrough. |
| “ | Infiltrate a Forerunner facility, quell the heresy within. | ” |
The Arbiter is the sixth campaign level of Halo 2, where the Arbiter Thel 'Vadamee is introduced as a playable character for the first time. You must assassinate the Heretic Leader on a Forerunner gas mine in Threshold's atmosphere.
The mission involves neutralizing Heretic forces. Along the way, the player will have to open a hangar door for reinforcements, fight, for the first time in Halo 2, Sentinels, and fly a Heretic Banshee to escort a friendly Phantom that is looking for where the Heretic Leader escaped to.
This is also the first time in Halo 2 you are able to use the Covenant Carbine, the Sentinel Beam, and the Fuel Rod Gun. It is also the first time members of the Covenant aid you. Your allies are Special Operations Officer Elites and Special Operations Grunts, meaning that you start off with rather powerful friendly units.
Transcript[edit]
{Cutscene} {Anniversary Cutscene}
A blurry camera shot focused on the floor, before clearing and focusing on the back of Tartarus. The shot then changes to show Tartarus walking down a hallway in High Charity, two Jiralhanae behind him, carrying Thel 'Vadamee on their shoulders. They are walking through a prison.
Anniversary version
Scene opens on a pair of imprisoned Kig-Yar sticking their heads out of their jail cell, snarling. Camera shifts to the right to show Tartarus walking down the corridor, flanked by two Jiralhanae carrying 'Vadamee on their shoulders.
- Jiralhanae 1: "How much further must we heft this baggage? Any cell will do."
- Jiralhanae 2: "Why not toss him in with this lot?"
The Jiralhanae pass a cell containing three hungry Kig-Yar, which hiss and growl as they reach out through the bars at the Jiralhanae passing by.
- Jiralhanae 2: "They could use the meat."
- Jiralhanae 1: "Them? What about us? My belly aches - and his flesh is seared, just the way I like it."
- Tartarus: "Quiet! You two whimper like Grunts fresh off the teat. He's not meant for the jails. The Hierarchs have something special in mind."
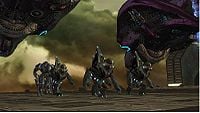
The Jiralhanae and their cargo move out onto a platform overlooking the Mausoleum of the Arbiter. They ride a gravity lift down to the walkway leading up to it and pass dozens of Sangheili Honor Guardsmen standing at attention, energy staves ready. They enter the Mausoleum, where the High Prophets of Truth and Mercy await. The three Jiralhanae bow, forcing 'Vadamee to do the same.
- Tartarus: "Noble Prophets of Truth and Mercy. I have brought the incompetent."
Close-up on the Prophet of Truth's lower jaw.
- Prophet of Truth: "You may leave, Tartarus."
Tartarus looks up, surprised.
- Tartarus: "But...I thought—"
- Prophet of Truth: "And take your Brutes with you."
Tartarus hesitates, and then bows again.
- Tartarus: "Release the prisoner."
The Jiralhanae drop 'Vadamee to his knees and rise, leaving the room. The Sangheili touches the Mark of Shame on his chest.
- Prophet of Truth: "The Council decided to have you hung by your entrails and your corpse paraded through the city. But ultimately, the terms of your execution are up to me."
- Thel 'Vadamee: "I am already dead."
- Prophet of Truth: "Indeed. Do you know where we are?"
- Thel 'Vadamee: "The Mausoleum of the Arbiter."
- Prophet of Truth: "Quite so. Here rests the vanguard of the Great Journey. Every Arbiter, from first to last. Each one created and consumed in times of extraordinary crisis."
- Prophet of Mercy: "The Taming of the Hunters, the Grunt Rebellion - were it not for the Arbiters, the Covenant would have broken long ago!"
- Thel 'Vadamee: "Even on my knees, I do not belong in their presence."
- Prophet of Truth: "Halo's destruction was your error, and you rightly bear the blame. But the Council was... overzealous. We know you are no heretic. This is the true face of heresy, one who would subvert our faith and incite rebellion against the High Council."
Truth presses a button on his chair and a miniature hologram of a Sangheili in abnormal equipment appears.
- Sesa 'Refumee (Hologram): "Our Prophets are false! Open your eyes, my brothers! They would use the faith of our forefathers to bring ruin to us all! The Great Journey is a-"
Truth cuts off the hologram.
- Prophet of Truth: "This heretic, and those who follow him, must be silenced."
- Prophet of Mercy: "Their slander offends all who walk the Path!"
- Thel 'Vadamee: "What use am I? I can no longer command ships, lead troops into battle-"
- Prophet of Truth: "Not as you are, no. But become the Arbiter...and you shall be set loose against this heresy with our blessing."
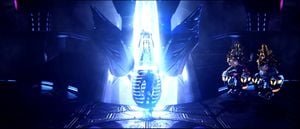
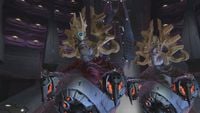
A large pod floats into the center of the room, opening to reveal a suit of ancient armor surrounded by white light. 'Vadamee stares at this for a moment, before turning back to Truth.
- Thel 'Vadamee: "What of the Council?"
- Prophet of Mercy: "The tasks you must undertake as the Arbiter are perilous, suicidal. You will die, as each Arbiter has before you. The Council will have their corpse."
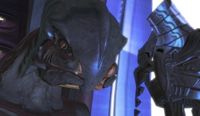
Thel 'Vadamee rises and walks toward the armor. He pauses before it, and looks to the pods containing the bodies of the Arbiters who fell before him. He reaches up and takes the helmet of the Arbiter, and places it upon his head. He turns to the Hierarchs.
- Thel 'Vadamee: "What would you have your Arbiter do?"
The scene changes to show the outside of High Charity, the fleet surrounding it. Three Phantoms fly past the camera and swoop past the ruins of Installation 04, a large piece of it still intact and with landscape and clouds still visible. As it flies, the voice of Special Operations Commander Rtas 'Vadumee can be heard.
- Rtas 'Vadumee: "When we joined the Covenant, we took an oath!"
- Special Operations Sangheili: "According to our station! All without exception!"
The scene cuts to the inside of the center Phantom, where Special Operations Sangheili, along with the new Arbiter, line the walls, with a line of Special Operations Unggoy in the center. The white-armored Sangheili Special Operations Commander Rtas 'Vadumee, walks among them.
- Rtas 'Vadumee: "On the blood of our fathers, on the blood of our sons...we swore to uphold the Covenant!"
- Special Operations Sangheili: "Even to our dying breath!"
- Rtas 'Vadumee: "Those who would break this oath are Heretics, worthy of neither pity, nor mercy! Even now they use our lords' creations to broadcast their lies!"
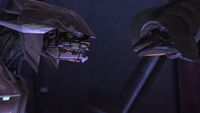
A Sangheili holds up a Particle Beam Rifle to his chest, and an Unggoy fumbles with the methane tank of the Unggoy in front of him. Some air is released, and the second Unggoy mutters angrily at the first (turning around in the Anniversary version).
- Special Operations Sangheili: "We shall grind them into dust!"
Note: the Hidden Subtitle appears here. It is "Scrape them as excrement from our boots!"
'Vadumee turns his head to face the camera, revealing he is missing the mandibles on the left side of his head.
- Rtas 'Vadumee: "And continue our march to glorious salvation!"
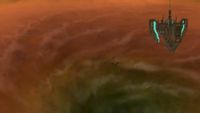
The Phantoms enter Threshold's atmosphere and come upon a large Forerunner platform.
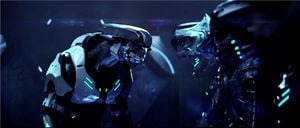
Scene fades back to inside lead Phantom. The Spec Ops Commander approaches 'Vadamee. They stare each other down.
- Rtas 'Vadumee: "This armor suits you. But it cannot hide that mark."
- Thel 'Vadamee: "Nothing ever will."
- Rtas 'Vadumee: "You are the Arbiter, the will of the Prophets. But these are my Elites. Their lives matter to me. Yours does not."
- Thel 'Vadamee: "That makes two of us."
- Rtas 'Vadumee: (respectful) "Hmmm...."
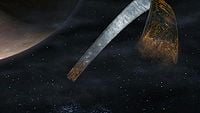
The Phantoms fly over the Forerunner platform and descend toward another structure dangling below it on a long cable, a Gas Mine. An intense storm swirls below the structure.
- Phantom Pilot: "Leader, there is no doubt: the storm will strike the facility!"
- Rtas 'Vadumee: "We'll be long gone before it arrives."
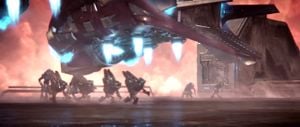
The Phantoms fly lower, near the top of one of several towers sticking out from the center of the main structure. One deposits a group of Unggoy and a Sangheili, followed by a second one that drops two Sangheili and 'Vadamee.
- Rtas 'Vadumee: "Warriors, prepare for combat!"
'Vadamee ignites his energy sword and looks at it, before following his fellow Sangheili in the Anniversary version.
{Gameplay}
A Whisper in the Storm[edit]
- Rtas 'Vadumee (COM): "We are the arm of the Prophets, Arbiter, and you are the blade. Be silent and swift, and we shall quell this heresy without incident."
- SpecOps Elite: "First lance in position."
As Thel approaches the doors where the rest of the team is waiting to enter
- Rtas 'Vadumee (COM): "The storm has masked our approach, and it should have their local Battle-net in disarray. We have the element of surprise... for now."
Thel enters the airlock beyond, with a team of Special Operations Unggoy and Sangheili.
- Special Operations Sangheili: "Engage active camouflage! Reveal yourselves only after the Arbiter has joined battle with the enemy!"
The Unggoy and Sangheili fade into their surroundings as their active camouflage is engaged.
- Rtas 'Vadumee (COM): "You may wish to do the same, Arbiter, but take heed: your armor's system is not as...new as ours. Your camouflage will not last forever."
The team enters the next room under cloak, where Heretic Unggoy are asleep and two Heretic Sangheili patrol. If the player waits without being seen for a moment, the two Heretic Sangheili in this room will talk to one another.
- Heretic Sangheili 1: "Any word on our missing brothers?"
- Heretic Sangheili 2: "Still nothing, and given what sleeps here, I fear they are lost."
- Heretic Sangheili 1: "Surely the Oracle will protect us..."
- Heretic Sangheili 2: "Perhaps. But his Sentinels are too few. Better we protect ourselves!"
The Arbiter and his team launch their attack, annihilating all the Heretics in the immediate area. Behind a wall are a few energy belts carrying Gas containers into a pit. The team eliminates the patrol in the area, then follows the energy belts to the lower levels.
If the player stalls:
- Rtas 'Vadumee (COM): "There should be a ship hangar bay directly below you. Find a way down."
The team continues on and enters an elevator. They descend into a hangar containing a Kai-pattern Seraph and a new enemy appears: the familiar Sentinels. Most of them are patrolling the area, but one can be seen carrying a gas container under it and another firing a green beam at the Seraph, apparently fixing it.
- Special Operations Sangheili: "Sentinels, the holy warriors of the Sacred Rings. Why have they sided with these Heretics?"
- Heretic Sangheili 3: (upon seeing the SpecOps team) "Sentinels, defend us!"
During the battle in the hangar:
- Phantom Pilot (COM): "Arbiter, clear the hangar and open this door, so I may drop the second lance!"
'Vadamee opens the door.
- Phantom Pilot (COM): "Hold position, I am making my approach."
A friendly Phantom enters the Hangar Bay and deploys additional troops.
As more Heretics appear from below:
- Special Operations Sangheili: "More Heretics! In the passage below us!"
After the Hangar is secure:
- Rtas 'Vadumee (COM): "Keep heading down. Find the leader of these Heretics."
'Vadamee descends through the facility, fighting more Heretic Sangheili, Unggoy and Sentinels.
After clearing another room:
- Special Operations Sangheili: "Shall we keep moving, Arbiter? The Heretic Leader cowers below!"
Eventually, 'Vadamee enters a room featuring a window looking out onto a landing pad with three Heretic Banshees. The Heretic Leader, Sesa 'Refumee appears.
- Sesa 'Refumee: "Deal with him, my brothers! I will defend the Oracle."
He hops into a Heretic Banshee and flies off.
- Heretic Sangheili 4: "Its truth must not be silenced!"
The Arbiter and the Spec Ops team defeat the Heretics and Sentinels sent to stop them.
- Special Operations Sangheili: "Onward, Arbiter! We will secure this section of the station."
To The Hunt[edit]
The Arbiter goes outside and takes one of the remaining Banshees.
- Rtas 'Vadumee (COM): "The Heretics are mobilizing their air forces, Arbiter. Get after their leader, but watch your back. I'm sending one of our Phantoms to support you."
After the first wave of Banshees is eliminated.
- Phantom Pilot (COM): "The Heretics have weapons emplacements all over the facility, Arbiter. We'll take them out, one by one, until we find the Heretic Leader."
The Arbiter follows the allied Phantom in his Banshee. As they search for the Heretic Leader, they encounter multiple Heretic Banshees, as well as hostile Shade turrets and Heretic Unggoy armed with fuel rod guns.
If you take too long to head for the final emplacement:
- Rtas 'Vadumee (COM): "No sign of the Heretic Leader or his Banshee. We must keep searching!"
Alternately:
- Phantom Pilot (COM): "That was the last of them - but there are more ahead."
Or
- Phantom Pilot (COM): "These Heretics are dead! Onward!"
'Vadamee nears the final emplacement.
- Rtas 'Vadumee (COM): "We've tracked the Heretic Leader to this part of the station. Clear that landing zone and get inside."
The Arbiter clears the platform and arrives at the door. Fades to white.
Level ends.
Achievements[edit]
The following achievements can be unlocked on The Arbiter across the Windows Vista and Halo: The Master Chief Collection editions of Halo 2: Anniversary. The original Xbox release of Halo 2 did not contain achievement unlocks.
| Halo 2 (Windows Vista) | Halo: MCC (Xbox One, Xbox Series X|S) | Halo: MCC (Steam) | Title | Unlock requirement | Games |
|---|---|---|---|---|---|
| Beat The Arbiter on any difficulty. | Halo: The Master Chief Collection | ||||
| Beat the par time on The Arbiter. | |||||
| Beat the par score on The Arbiter. | |||||
| Activate Terminal #4 on The Arbiter. | |||||
| Find and claim the Grunt Birthday Party Skull. | |||||
| Fly the Heretic Banshee. |
Trivia[edit]
Glitches[edit]
- Main article: Glitches
- At the beginning of the level, there will be an Elite punching buttons to open a door. If you push him away, he will continue to punch buttons in mid air, and when he is done, the door will still open.
- The two Elites that drop out of the phantom with you at the beginning of the level will follow you down to the first door, but will not follow further. They will remain at the door. If you attempt to push them into the room, the second door will not open until they leave the room.
- When you get to the hangar part go to the ledges on the sides of the rooms jump to get on them and when you move around you could hear the sounds of the doors opening. Jump down quick enough and you can get into the rooms where the enemies spawn in.
- When you open the hangar for the Phantom, you could get on top of it but you will be pulled back into the level because it won't let you leave the boundaries.
- The Heretic leader glitch can be performed on this level.
- It is possible to make a Grunt invincible if he survives your first encounter with the Heretics, he can accompany you all the way to Heretic Leader's Banshee, push him over the edge onto a small ledge area, and he will be invincible, you can even test him against other enemies by skyjacking a lured Banshee to the ledge area, and kicking him out, resulting in the Grunt fighting the Heretic Elite. Note: If he is given a weaker weapon, and fires at the Heretic, the Heretic's shield will recharge quickly, resulting in a possibly endless battle.
- If you get your allies to turn against you at the beginning of this level, the Elites will try to kill you, but the Grunts will just stand there waiting for the door to open, even though they are shown as enemies.
- When you are in the Banshee you can hop out onto the Phantom. This is recommended for near the end where you can kill the Heretic Grunts from afar, or destroy Banshees if you have a Fuel Rod Gun. This is not highly recommended however as it is easy to get shot down or simply just fall off the vehicle.
- If you kill the Elite that opens the door before he gets a chance to finish, the door will open much faster.
- Going down the lift to the hangar with the Seraph fighter, you can throw plasma grenades and they will bounce without exploding. However, the grenades do explode when the elevator reaches the ground or if they stick to you or an ally.
- At the beginning of the level, when the Elite is pressing the buttons to open the door, when looking closely at his finger, you can see that it is just slightly moving around the control panel.
- At the beginning of the level, if you kill your allies before the elevator descends, no enemies will appear until you reach the elevator.
- Once you get on a Banshee fly to the right and you will see a small "bridge”, get out of the banshee and look around and you will see a red door that absorbs all shots fired at it (best done with a Fuel Rod Gun and other explosives). It will also appear in the Oracle but when approached close-up the texture will appear.
- Oddly enough,when the Phantom drops off reinforcements in the hangar, there is a possibility/glitch where it won't drop any or maybe one.
Easter eggs[edit]
- Main article: Easter eggs
- The Grunt Birthday Party Skull can be found on this level.
- If you manage to skyjack a Banshee or blow another Banshee up, you will notice the Heretic Elite has a Plasma Rifle equipped, instead of the Covenant Carbine. This could just be a weapon change for the pilot, maybe because he needed a lighter weapon to fly in the Banshee so it doesn't make it too uncomfortable for him. However, there's an equal chance it's an Easter egg, since not many players would pay attention to the actual dead body.
- The fourth terminal is a Forerunner terminal in the room bisected by two Forerunner gas canister conveyors, at the top of the ramp in the far right of the room.
References[edit]
- The soundtrack of the game, "Follow" by Incubus, can be heard on this level although without any vocals, shortly after the player is able to get in a Banshee. It was replaced by Follow In Flight in Halo 2: Anniversary.
- The map Colossus is also located at the gas mine area, where the storm could be seen.
- When the SpecOps Grunt says, "Shh! Me hunting He-wa-tic.", he's making a reference to the famous Looney Tunes quote, "Shh! Be vewy vewy quiet! I'm hunting wabbits!".
Miscellaneous[edit]
- During the starting cutscene if you have subtitles enabled, there is a deleted line of dialogue that is never spoken, but wasn't removed from the subtitles. The line reads: "Scrape them as excrement from our boots".
- During the Banshee part, you can get out of your Banshee and land on the Phantom. This is hard to balance on, and is recommended to use at the end of the part as there is a high possibility to fall off.
- During the Banshee fight, it is possible to exit your Banshee and immediately board an enemy Heretic Banshee. This however, is quite a difficult tactic. When you do, the Elite inside will have a Plasma Rifle.
- Should the player watch the Phantoms that drop off the troops at the beginning of the level when they go out of view zoom in with your binoculars they will fall and spin out of control and hit the lower part of the level. If the player has the Acrophobia skull enabled they can fly out to the Phantoms and will be prompted to flip “Banshee.” This is likely a placeholder as the player cannot pilot a Phantom in Halo 2 through normal means.
- Many of the Grunt dialogue in this level is some of the most strange and humorous, Including If we stand here any longer, we be on date! and Hard to tell, but me no female. It's the first official time you can hear them clearly, and can listen to the strange things they say, because up until now, Grunts have been against you.
- This level has more Fuel Rod Guns than any other level in the Halo trilogy.
- If you search around the station, you can find the bridge that leads from the labs to the central part of the station, which is the same that you use in the next level.
- This is the first level of the Halo series that you can play as the Arbiter and use the Sentinel Beam and the Covenant Carbine.
- This is the first level that includes Heretics.
- The music that plays near the end of the level when the Heretic Leader escapes (before you take off in the Banshee) was not included on the OST. It somewhat resembles the last part of Sacred Icon Suite.
- When moving down the elevator, the Elite you are farthest from is the one that will point out the Sentinels.
- The large windows in the last room of the level are actually shut outside and you can't see through them even though from the inside you can see. Also, on the outside of the window your reticule will still change color between the normal color to green and red between friendlies and enemies even though you can't see through the windows.
- At the part with the Banshee, you can skip the long air battle with the Heretics and go directly to the area where the level ends.
- At the Banshee part, more Banshees can be seen on platforms with Heretics on them. If your Banshee is destroyed (by you or the Grunts), then another one spawns when you turn around. This will be infinite. This is probably so that if the player makes it there with the Banshee destroyed, then they won't get stuck.
- If you hide in the hangar and watch the Sentinels, you will see one firing a greenish beam at the Seraph, like the beams of the Constructor Sentinels on the Sacred Icon level. This indicates that the Seraph is undergoing repairs.
Production notes[edit]
- Originally, this level was supposed to take place on Threshold's moon, Basis.
- Joseph Staten revealed on the Halo 3 Legendary Edition bonus disk that originally the Heretics including the Heretic Leader were all going to be Hunters.
- The level's working title was "The Alpha Gas Giant".[3]
- Bungie environment artist David Dunn experimented on having an ambient lifeform known as the space jellyfish float in Threshold's atmosphere. However, this concept was eventually abandoned.[3]
Gallery[edit]
Halo 2[edit]
A trio of Phantoms approach the Threshold gas mine.
Halo 2: Anniversary[edit]
A trio of Phantoms approach the Threshold gas mine.
Sources[edit]
- ^ Halo 2 Editing Kit, game file
H2EK\tags\scenarios\solo\4a_gasgiant\4a_gasgiant.scenario - ^ Twitter - Halo
- ^ a b AusGamers: AusGamers Destiny Developer Interview with Dave Dunn
| Preceded by Metropolis |
Halo 2 Campaign Missions The Arbiter |
Succeeded by The Oracle |
| |||||||||||||||||||||||||||||||
