Boneyard: Difference between revisions
From Halopedia, the Halo wiki
No edit summary |
|||
| (50 intermediate revisions by 25 users not shown) | |||
| Line 1: | Line 1: | ||
{{ | {{Status|Gameplay}} | ||
{{ | {{Multiplayer map infobox | ||
|pagegamelabel=HR | |||
|name=Boneyard | |name=Boneyard | ||
|image=[[File:HaloReach - Boneyard.jpg|300px]] | |image=[[File:HaloReach - Boneyard.jpg|300px]] | ||
|game=''[[Halo: Reach]]'' | |game=''[[Halo: Reach]]'' | ||
|location=[[ | |devname=<code>70_boneyard</code>{{Ref/File|Id=HREK|HREK|HREK\tags\levels\multi\70_boneyard\70_boneyard.scenario}} | ||
|location=[[Asźod ship breaking yards]], [[Asźod]], [[Ung]], [[Reach]] | |||
|terrain=Human structures, disassembled starship, debris | |terrain=Human structures, disassembled starship, debris | ||
|weapons= | |weapons= | ||
| Line 11: | Line 12: | ||
|equipment= | |equipment= | ||
|power-ups= | |power-ups= | ||
|playernumber=12-16 | |||
|playernumber= | |||
}} | }} | ||
{{Article | {{Article quote|The once formidable Commonwealth awaits its final destination at one of the UNSC's ship breaking facilities.}} | ||
'''Boneyard''' is a multiplayer map in ''[[Halo: Reach]]'' | |||
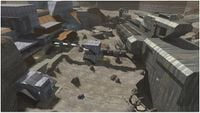
'''Boneyard''' is a [[multiplayer]] map in ''[[Halo: Reach]]''. It is a vehicle-based map and is one of the largest maps in any ''Halo'' game.<ref name="GT">[http://www.gametrailers.com/episode/gametrailers-tv/89&ch=1&sd=0?ep=89&ch=1&sd=0 '''Gametrailers''': ''Gametrailers TV with Geoff Keighley'', 06:39]</ref> | |||
==Universe and lore== | |||
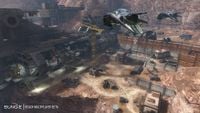
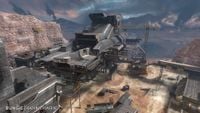
Boneyard is set in a [[SinoViet Heavy Machinery]] [[Asźod ship breaking yards|ship breaking facility]] at [[Asźod]], [[Ung]] where [[Human starship|old starships]] are disassembled and recycled for parts and materials. The map is centered around the partially disassembled [[UNSC frigate]] [[UNSC Commonwealth|''Commonwealth'']], under the process of decommissioning, and a large refinery building.{{Ref/Reuse|GT}} | |||
Outside the confines of the map, in the far valley, lies the scrapped hulls and frames of several {{Class|Halcyon|light cruiser}}s, {{Class|Marathon|heavy cruiser}}s and UNSC frigates. Far away in the distance is [[Mount Törött]], with some {{Pattern|Ket|battlecruiser}}s flying above in the clouds nearby. | |||
==Overview== | ==Overview== | ||
Boneyard is | ===Layout=== | ||
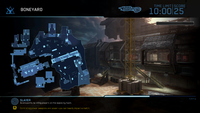
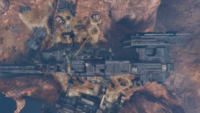
Boneyard is a canyon bisected by the wreckage of a frigate.{{Expand-section}} | |||
<gallery> | |||
File:HMCC_HR_Boneyard_Map.png|Boneyard Map. | |||
</gallery> | |||
====Callouts==== | |||
The following are locations on the map that are so named on the player's [[Heads-up display|HUD]] during gameplay: | |||
*'''Bow''' | |||
*'''Hold''' | |||
*'''The Ship''' | |||
*'''Stern Scaffold''' | |||
*'''Port Scaffold''' | |||
*'''Cliff Scaffold''' | |||
*'''Loading Bay''' | |||
*'''Junk Yard''' | |||
*'''Shop''' | |||
*'''Refinery (1st, 2nd and 3rd floor)''' | |||
*'''Conveyor Belt''' | |||
*'''Abyss''' | |||
*'''Cliff Approach''' | |||
*'''Middle Approach''' | |||
*'''Bridge Approach''' | |||
*'''Bulkheads''' | |||
*'''Low Road''' | |||
===Strategies=== | |||
*This map is enormous. With two major outdoor areas separated by a decommissioned UNSC Frigate running down the middle of the map and a refinery at one end, you will need to make use of vehicles supplied here. The terrain outdoor is rugged desert littered with cranes and multiple small support buildings-some of which can be accessed by players. The ship features several half levels which can be useful for cover, and the refinery has three levels plus roof access. | |||
*While outside, be aware of the many sightlines the enemy may be able to spot you from. Look high, low and far away. Snipers can prove deadly here if they are fast and accurate at distance. Try to make good use of the cranes, bridges and buildings to move from one area to the next. Change up your approach elevation moving from high to medium to low ground and rotate. | |||
*Try to use any available vehicles to get where you need to go in a hurry and do your best to load up vehicles with other players as well to increase your numbers at your final destination. Some vehicles can be used not just for transportation but for offense and defense as well. Even if your opponents happen to have acquired a heavy weapon, the [[Zurdo-pattern Wraith|Wraith]] or [[M808B Main Battle Tank|Scorpion]] can obliterate pedestrian foes quickly and easily. | |||
*The refinery offers a couple of mounted machine guns that players can access via building roofs. You can dismount these weapons and carry them with you. Bear in mind that you will move slowly while wielding these guns, so choose to use them wisely. | |||
* | |||
* | *If you can manage to get up in one of the cranes or other high points on the map and remain undetected, you can call out enemy locations to your team. Sometimes being a team player doesn't mean you have to shoot everything that moves. Try using [[Active camouflage|Active Camo]] ability here to further minimize your visibility from enemies. | ||
* | |||
*There are no underground areas here to sneak through and while much of the fighting takes place at long distance, the frigate and the refinery will provide the close quarters combat. The [[Series 8 jetpack|Jet Pack]] can work wonders here and allow players to access small alcoves and roosts to either snipe from or get the drop on enemy players. | |||
* | |||
*The sheer size of this map means that vehicles will play a large part here. Don't fear respawning way back in your main base since this is where most of the vehicles will appear. Many players will become impatient and continue to spawn in and around where the fighting is taking place. You do not have to succumb to this theory. Spawn back at your base and grab a Scorpion or Wraith and lay waste to the impatient. | |||
* | *Be careful entering the ship and refinery. These structures have limited chokepoints and they are not very wide open. The splash damage from grenades or heavy weapons can be increased due to the tight layout of building interiors. Toss a couple of grenades inside before entering to clear the way. Alternatively, you can make great use of the Hologram to breach through chokepoints. Just send one through and follow it in. | ||
* | |||
*When moving your team throughout this map, try to split up initially and regroup later to become a more opposing force. Starting off going in as a group can be detrimental to your numbers. Try using a vehicle convoy to infiltrate more safely. If you can be patient enough to get all of your teammates into several vehicles at once and follow each other to your destination, you can seriously put the enemy on their heels. | |||
*You may find yourself getting pinned down from you start point from time to time. If this happens, think again about using Active Camo, but also the [[Armor Abilities#Sprint|Sprint]] [[loadout]]. Being able to sprint in short bursts from cover to cover can get you out of enemy sight forcing them to focus in on another. The Armor Lock can also provide some protection here on your way to engagement areas such as the frigate. If you see an enemy vehicle coming at you, don't move, just go into [[Armor lock|Armor Lock]]. | |||
*While inside any structures, try to use the [[Drop shield|Drop Shield]] in locations that need to be defended. This can help keep your team healthy and waste enemy ammunition. The Drop Shield can be passed through but not shot through so be wary of enemy melee attacks when utilizing this ability. The Drop Shield is also vulnerable to plasma and [[Electromagnetic pulse|EMP]] attacks, so don't trust it completely. | |||
*With so many open areas, nooks and crannies, keep your head on a swivel and the advantage is to your side. Use your vehicles, use stealth and use speed to achieve victory in any game mode on this map. | |||
==Production notes== | |||
Boneyard is said to be inspired by current-day ship graveyards in [[Wikipedia:Bangladesh|Bangladesh]] where old seagoing vessels such as oil tankers are disposed of.{{Ref/Site|URL=http://www.ign.com/articles/2010/04/08/halo-reach-the-beta-maps|Site=IGN|Page=Halo: Reach -- The Beta Maps|D=30|M=10|Y=2010}} | |||
Boneyard was featured in [[Halo: Reach Multiplayer Beta|''Halo: Reach'' Beta]]. There it was possible to jump off of the cliff onto the neighboring mountains and survive. This is not possible in the final game. In the beta, The Banshee was able to fly over the death barrier around the frigate, or fly through the opening on top of the frigate; the former is no longer possible in the final game due to an invisible barrier. | |||
==Trivia== | ==Trivia== | ||
*It is possible to position yourself on top of the ship using a Jetpack. This is useful for sniping or scouting the opposing team. | *It is possible to position yourself on top of the ship using a Jetpack. This is useful for sniping or scouting the opposing team. | ||
*It is possible to melee the "wings" off of a Ghost and drive it into the core room. | *It is possible to melee the "wings" off of a Ghost and drive it into the core room. | ||
*In invasion, firing a rocket launcher at the Phantoms could make them drop a usable plasma cannon. Up to two plasma cannons can be obtained this way. | *In invasion, firing a rocket launcher at the Phantoms could make them drop a usable plasma cannon. Up to two plasma cannons can be obtained this way. | ||
*The position of the ''Halcyon''-class cruisers in the distance strikingly resembles the position the ''[[UNSC Pillar of Autumn|Autumn]]'' was during [[The Maw]]. | |||
*The position of the ''Halcyon''-class cruisers in the distance strikingly resembles the position the ''[[UNSC Pillar of Autumn|Autumn]]'' was | |||
==Gallery== | ==Gallery== | ||
<gallery | {{Linkbox|gallery=yes}} | ||
File: | ===Concept art=== | ||
File: | <gallery> | ||
File:Reach mpbeta boneyard 001.jpg| | File:HR_Boneyard_Exterior_Concept.jpg|Exterior concept art of the map. | ||
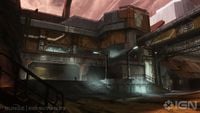
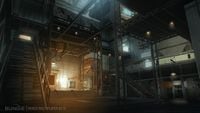
File:HR_Boneyard_Interior_Concept.jpg|Interior concept art of the map. | |||
File:HR BoneyardConstructionConcept.jpg|Concept art of the outside environment. | |||
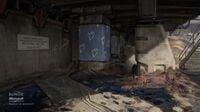
File:HR BoneyardConcept.jpg|Concept art of the dismantled UNSC ''Commonwealth''. | |||
</gallery> | |||
===Development images=== | |||
<gallery> | |||
File:HR_Boneyard_Early.jpg|Boneyard early in its development. | |||
File:Reach mpbeta boneyard 001.jpg|Two Phantoms holding their position near the frigate. | |||
File:Reach mpbeta boneyard_02.jpg|The dismantled UNSC ''Commonwealth''. | |||
File:Boneyard Overview.png|An overhead view of Boneyard. | File:Boneyard Overview.png|An overhead view of Boneyard. | ||
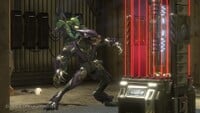
File: Boneyard | File:HR Beta Boneyard Assassination.jpg|A Spartan assassinates a Sangheili while defending the core. | ||
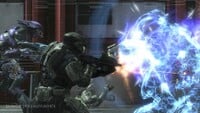
File: | File:HR Beta Boneyard Battle.jpg|A Spartan breaks a Sangheili's energy shields. | ||
File:Halo- Reach Multiplayer Invasion.jpg|A battle at one of the generators in Hold. | |||
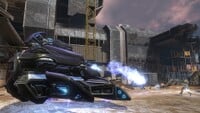
File:HR Beta Boneyard Wraith.jpg|A Wraith fires its mortar. | |||
File:HR Beta Boneyard Warthog.jpg|A Warthog in Junkyard. | |||
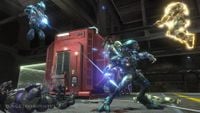
File:HR Beta Boneyard Battle 2.jpg|Two Spartans defending one of the generators in Hold. | |||
</gallery> | |||
===Screenshots=== | |||
<gallery> | |||
File:HR Boneyard Approach.png|Cliff Approach. | |||
File:HR Boneyard Junkyard.png|Junk Yard. | |||
File:HR Boneyard Refinery.png|Refinery. | |||
File:HR Boneyard ConveyorBelt.png|Conveyor Belt. | |||
File:HR Boneyard RefineryInterior.png|Refinery interior. | |||
File: Boneyard Panorama.jpg|Panorama of wreckages in the distance. | |||
</gallery> | </gallery> | ||
==Sources== | ==Sources== | ||
{{Ref/Sources}} | |||
{{Levels}} | {{Levels|HR|mode=yes}} | ||
Latest revision as of 18:15, November 13, 2024
| Boneyard | |
|---|---|
| |
| Map overview | |
|
Game: |
|
|
Map file name (?): |
|
| Lore information | |
|
Location: |
|
| Gameplay overview | |
|
Terrain: |
Human structures, disassembled starship, debris |
|
Recommended number of players: |
12-16 |
| “ | The once formidable Commonwealth awaits its final destination at one of the UNSC's ship breaking facilities. | ” |
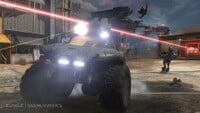
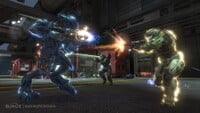
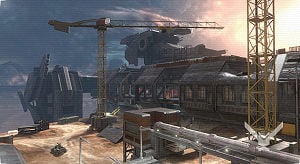
Boneyard is a multiplayer map in Halo: Reach. It is a vehicle-based map and is one of the largest maps in any Halo game.[2]
Universe and lore[edit]
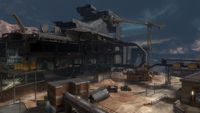
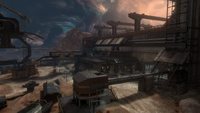
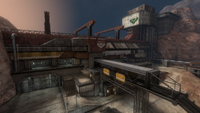
Boneyard is set in a SinoViet Heavy Machinery ship breaking facility at Asźod, Ung where old starships are disassembled and recycled for parts and materials. The map is centered around the partially disassembled UNSC frigate Commonwealth, under the process of decommissioning, and a large refinery building.[2]
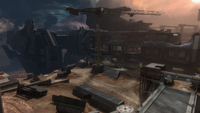
Outside the confines of the map, in the far valley, lies the scrapped hulls and frames of several Halcyon-class light cruisers, Marathon-class heavy cruisers and UNSC frigates. Far away in the distance is Mount Törött, with some Ket-pattern battlecruisers flying above in the clouds nearby.
Overview[edit]
Layout[edit]
Boneyard is a canyon bisected by the wreckage of a frigate.
 This section needs expansion. You can help Halopedia by expanding it.
Callouts[edit]
The following are locations on the map that are so named on the player's HUD during gameplay:
- Bow
- Hold
- The Ship
- Stern Scaffold
- Port Scaffold
- Cliff Scaffold
- Loading Bay
- Junk Yard
- Shop
- Refinery (1st, 2nd and 3rd floor)
- Conveyor Belt
- Abyss
- Cliff Approach
- Middle Approach
- Bridge Approach
- Bulkheads
- Low Road
Strategies[edit]
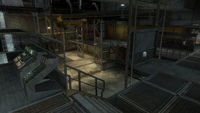
- This map is enormous. With two major outdoor areas separated by a decommissioned UNSC Frigate running down the middle of the map and a refinery at one end, you will need to make use of vehicles supplied here. The terrain outdoor is rugged desert littered with cranes and multiple small support buildings-some of which can be accessed by players. The ship features several half levels which can be useful for cover, and the refinery has three levels plus roof access.
- While outside, be aware of the many sightlines the enemy may be able to spot you from. Look high, low and far away. Snipers can prove deadly here if they are fast and accurate at distance. Try to make good use of the cranes, bridges and buildings to move from one area to the next. Change up your approach elevation moving from high to medium to low ground and rotate.
- Try to use any available vehicles to get where you need to go in a hurry and do your best to load up vehicles with other players as well to increase your numbers at your final destination. Some vehicles can be used not just for transportation but for offense and defense as well. Even if your opponents happen to have acquired a heavy weapon, the Wraith or Scorpion can obliterate pedestrian foes quickly and easily.
- The refinery offers a couple of mounted machine guns that players can access via building roofs. You can dismount these weapons and carry them with you. Bear in mind that you will move slowly while wielding these guns, so choose to use them wisely.
- If you can manage to get up in one of the cranes or other high points on the map and remain undetected, you can call out enemy locations to your team. Sometimes being a team player doesn't mean you have to shoot everything that moves. Try using Active Camo ability here to further minimize your visibility from enemies.
- There are no underground areas here to sneak through and while much of the fighting takes place at long distance, the frigate and the refinery will provide the close quarters combat. The Jet Pack can work wonders here and allow players to access small alcoves and roosts to either snipe from or get the drop on enemy players.
- The sheer size of this map means that vehicles will play a large part here. Don't fear respawning way back in your main base since this is where most of the vehicles will appear. Many players will become impatient and continue to spawn in and around where the fighting is taking place. You do not have to succumb to this theory. Spawn back at your base and grab a Scorpion or Wraith and lay waste to the impatient.
- Be careful entering the ship and refinery. These structures have limited chokepoints and they are not very wide open. The splash damage from grenades or heavy weapons can be increased due to the tight layout of building interiors. Toss a couple of grenades inside before entering to clear the way. Alternatively, you can make great use of the Hologram to breach through chokepoints. Just send one through and follow it in.
- When moving your team throughout this map, try to split up initially and regroup later to become a more opposing force. Starting off going in as a group can be detrimental to your numbers. Try using a vehicle convoy to infiltrate more safely. If you can be patient enough to get all of your teammates into several vehicles at once and follow each other to your destination, you can seriously put the enemy on their heels.
- You may find yourself getting pinned down from you start point from time to time. If this happens, think again about using Active Camo, but also the Sprint loadout. Being able to sprint in short bursts from cover to cover can get you out of enemy sight forcing them to focus in on another. The Armor Lock can also provide some protection here on your way to engagement areas such as the frigate. If you see an enemy vehicle coming at you, don't move, just go into Armor Lock.
- While inside any structures, try to use the Drop Shield in locations that need to be defended. This can help keep your team healthy and waste enemy ammunition. The Drop Shield can be passed through but not shot through so be wary of enemy melee attacks when utilizing this ability. The Drop Shield is also vulnerable to plasma and EMP attacks, so don't trust it completely.
- With so many open areas, nooks and crannies, keep your head on a swivel and the advantage is to your side. Use your vehicles, use stealth and use speed to achieve victory in any game mode on this map.
Production notes[edit]
Boneyard is said to be inspired by current-day ship graveyards in Bangladesh where old seagoing vessels such as oil tankers are disposed of.[3]
Boneyard was featured in Halo: Reach Beta. There it was possible to jump off of the cliff onto the neighboring mountains and survive. This is not possible in the final game. In the beta, The Banshee was able to fly over the death barrier around the frigate, or fly through the opening on top of the frigate; the former is no longer possible in the final game due to an invisible barrier.
Trivia[edit]
- It is possible to position yourself on top of the ship using a Jetpack. This is useful for sniping or scouting the opposing team.
- It is possible to melee the "wings" off of a Ghost and drive it into the core room.
- In invasion, firing a rocket launcher at the Phantoms could make them drop a usable plasma cannon. Up to two plasma cannons can be obtained this way.
- The position of the Halcyon-class cruisers in the distance strikingly resembles the position the Autumn was during The Maw.
Gallery[edit]

|
Browse more images in this article's gallery page. |
Concept art[edit]
Development images[edit]
Screenshots[edit]
Sources[edit]
- ^ Halo: Reach Editing Kit, game file
HREK\tags\levels\multi\70_boneyard\70_boneyard.scenario - ^ a b Gametrailers: Gametrailers TV with Geoff Keighley, 06:39
- ^ IGN, Halo: Reach -- The Beta Maps (Retrieved on Oct 30, 2010) [archive]
| ||||||||||||||||||||||||||||||||||||||||||
