The Pillar of Autumn (Halo: Reach level): Difference between revisions
From Halopedia, the Halo wiki
(→Transcript: added and edited dialogues) |
Tag: Mobile edit |
||
| (242 intermediate revisions by 69 users not shown) | |||
| Line 1: | Line 1: | ||
{{ | {{Title|The Pillar of Autumn}} | ||
{{ | {{Status|Gameplay}} | ||
{{ | {{Center|For more articles of the same name, see [[The Pillar of Autumn|The Pillar of Autumn (disambiguation)]].}} | ||
{{Level infobox | |||
|pagegamelabel=HR | |||
{{Level | |prev=''[[The Package]]'' | ||
| next=*''[[Halo: Reach credits]]'' {{C|''[[Halo: Reach]]''}} | |||
|prev = ''[[ | *''[[Epilogue (Halo: Reach level)|Epilogue]]'' {{C|''[[Halo: The Master Chief Collection|MCC]]''}} | ||
| next = ''[[Halo: Reach | |name='''''The Pillar of Autumn''''' | ||
*''[[ | |image=[[File:HR ThePillarOfAutumn Loadscreen.png|300px]] | ||
| | |game=''[[Halo: Reach]]'' | ||
|name = '''''The Pillar of Autumn''''' | |devname=<code>m70</code>{{Ref/File|Id=HREK|HREK|HREK\tags\levels\solo\m70\m70.scenario}} | ||
|image = [[File: | |player=[[Spartan_(multiplayer)#Campaign_and_Firefight|Noble Six]] | ||
|player = [[ | |date=[[2552#August|August 30, 2552]] | ||
|date = August 30, | |place=[[SinoViet Heavy Machinery|SinoViet]] [[Asźod ship breaking yards|ship breaking facility]], [[Asźod]], [[Reach]] | ||
|place = [[ | |objective=Deliver the [[armored matrix|Package]] to the {{UNSCShip|Pillar of Autumn}}, then shoot down the Covenant {{Pattern|Ket|battlecruiser}} so that the ''Autumn'' can escape. | ||
| | |partime=00:20:00 {{C|''Master Chief Collection''}} | ||
|parscore=25,000 {{C|''Master Chief Collection''}}<br/>20,000 {{C|''Halo: Reach''}} | |||
}} | }} | ||
{{Article quote|Deliver Halsey's data package to the ''Pillar of Autumn''.}} | |||
'''The Pillar of Autumn''' is the tenth campaign level of ''[[Halo: Reach]]''. The level takes place on [[2552#August|August 30, 2552]], near and in the [[Asźod ship breaking yards|ship-breaking yards]] at [[Asźod]]. | |||
==Summary== | |||
The level opens with the remainder of [[Noble Team]] onboard a [[D77-TC Pelican]], on their way to deliver [[Cortana]] to the dry-docked {{UNSCShip|Pillar of Autumn}}. The Pelican is critically damaged and [[Carter-A259]] is badly wounded. Carter orders [[SPARTAN-B312]] and [[Emile-A239]] to complete the courier mission without him, while he lures the Covenant away from the pair by using the Pelican as a decoy. Emile-A239 and SPARTAN-B312 execute a low-altitude jump from the Pelican outside of the dockyard and are forced to fight their way to the facility. After battling through several Covenant outposts, the two SPARTAN-IIIs are forced to continue their journey through a cave system to circumvent a large group of Covenant forces. Upon reaching the other side, however, they are confronted by a Scarab. Realizing that the Scarab's presence prevents Emile and Noble Six from moving on, Carter rams it with the Pelican, knocking it off a cliff and sacrificing himself in the process. The two SPARTAN-IIIs continue their journey and eventually reach the Asźod ship breaking facility. | |||
The Pelican | |||
The two SPARTAN-IIIs are then hailed by [[Captain (Navy)|Captain]] [[Jacob Keyes]], whose [[Halcyon-class Cruiser|cruiser]], the ''Pillar of Autumn'', is moored at the facility, and are ordered to clear a landing zone for the Captain, who will use a Pelican to retrieve [[armored matrix|the Package]] himself. Emile mans the facility's [[15cm Mark/2488 1.1GJ MAC|mass driver]] to provide covering fire against incoming Covenant [[Kez'katu-pattern Phantom|Phantoms]], while Noble Six and surviving [[UNSC Marine Corps|Marines]] engage the Covenant on the ground. Once cleared, Keyes' Pelican arrives and Captain Keyes retrieves the Package from Noble Six. As the package is handed over, a {{Pattern|Ket|battlecruiser}} is revealed to be moving in on the ''Pillar of Autumn''. Keyes orders Emile to fire on the advancing battlecruiser, however, before Emile can oblige a Phantom attacks the landing zone, destroying one Pelican and deploying a group of Sangheili warriors onto the mass driver. Emile successfully kills one of the Sangheili with his [[M45 Tactical Shotgun|shotgun]] before a second sneaks up behind him and impales him with an [[Type-1 energy sword|energy sword]]. Emile manages to draw his [[Combat knife|kukri]] and fatally stab the Sangheili in the neck before he expires. | |||
Keyes returns to the landing platform and offers Noble Six transportation to safety. The SPARTAN-III refuses and offers to defend the Captain as he heads towards his ship. Using the mass driver, Six defends the site and shoots down the Covenant battlecruiser just as it is about to glass the area. After successfully halting the battlecruiser's attack, Noble Six looks on as the ''Pillar of Autumn'' takes off and heads towards space to escape Reach, leaving Noble Six stranded with no way off of the planet. | |||
==Transcript== | ==Transcript== | ||
[http:// | [http://youtu.be/vLgApQjP1MI '''{''Cutscene''}'''] | ||
''[[Auntie Dot]]'s satellite view shows Noble Team's [[Dropship | ''[[Auntie Dot]]'s satellite view shows [[Noble Team]]'s [[D77-TC Pelican Dropship|Pelican]] being pursued by two [[Banshee]]s and a [[Kez'katu-pattern Phantom|Phantom]].'' | ||
''' | '''Asźod, Eposz''' | ||
'''August 30, 2552 16:52 Hours''' | '''August 30, 2552 16:52 Hours''' | ||
*'''Auntie Dot (COM)''': "Noble Leader, seek immediate medical attention." | *'''Auntie Dot ([[COM]])''': "Noble Leader, seek immediate medical attention." | ||
''The view zooms in and follows the Pelican.'' | ''The view zooms in and follows the Pelican.'' | ||
| Line 109: | Line 43: | ||
*'''Auntie Dot (COM)''': "Noble Leader, please respond." | *'''Auntie Dot (COM)''': "Noble Leader, please respond." | ||
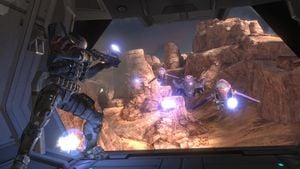
''Cuts to the cockpit of the Pelican, with Noble Six moving closer to the pilot seat. Suddenly, several plasma bolts hit the Pelican, impacting Noble Six, flickering the | [[File:Halo Reach - A Spartan Will Rise-2.jpg|thumb|300px|Emile in combat with Covenant aircrafts in pursuit.]] | ||
''Cuts to the cockpit of the Pelican, with [[SPARTAN-B312|Noble Six]] moving closer to the pilot seat. Suddenly, several plasma bolts hit the Pelican, impacting Noble Six, flickering the Spartan's shields. The view turns to the troop bay of the Pelican, and [[Emile-A239]] is seen firing his [[M319 Individual Grenade Launcher|Grenade Launcher]] at the two Banshees. Emile concentrates fire on a single Banshee. The grenade detonates close by, and the [[EMP]] disables the Banshee, which swoops up and crashes into its wingman. Both are taken out, but the Phantom still pursues. The view switches back to the cockpit, and moves in front of Six. Carter, critically wounded but still in the pilot seat, takes off his helmet and throws it onto the ground. Blood splatters cover the cockpit window.'' | |||
*'''Auntie Dot (COM)''': "Please respond, Sierra Two-Five-Nine. You are alarming me." | *'''Auntie Dot (COM)''': "''Please'' respond, Sierra Two-Five-Nine. You are alarming me." | ||
''Carter-A259 turns back to Noble Six. His face is bloodied, and his armor is charred from plasma fire.'' | ''Carter-A259 turns back to Noble Six. His face is bloodied, and his armor is charred from [[Plasma weaponry|plasma]] fire.'' | ||
*'''[[Commander]] Carter-A259''': "Not sure how long she's gonna stay together. Skies are jammed up anyways. Gotta get you off | *'''[[Commander]] [[Carter-A259]]''': ''(strained but calm)'' "Not sure how long she's gonna stay together. Skies are jammed up anyways. Gotta get you off here, Lieutenant." | ||
'' | ''The view faces a critically injured Carter. Noble Six, grabbing the pilot chair, looks up.'' | ||
*''' | *'''SPARTAN-B312''': "Sir, you-" | ||
*'''Carter-A259''': "Don't wanna hear it. Get the Package to the ''Autumn''." | *'''Carter-A259''': "Don't wanna hear it. Get the Package to the ''Autumn''." | ||
*''' | *'''SPARTAN-B312''': "Done." | ||
*'''Carter-A259''': "Not yet, it's not... Emile, go with him/her. It's a ground game now." | *'''Carter-A259''': "Not yet, it's not... Emile, go with him/her. It's a ground game now." | ||
''The view switches to Emile, | ''The view switches to Emile, who drops his emptied Grenade Launcher and makes a fist-to-chest salute. In the background, two more Banshees appear.'' | ||
*'''[[Warrant Officer]] Emile-A239''': "It's been an honor, sir." | *'''[[Warrant Officer]] Emile-A239''': "It's been an honor, sir." | ||
| Line 133: | Line 68: | ||
*'''Carter-A259''': "Likewise... I'll do what I can to draw their fire." | *'''Carter-A259''': "Likewise... I'll do what I can to draw their fire." | ||
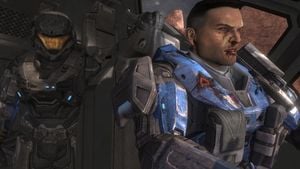
[[File:Six Carter.jpg|thumb|300px|Carter gives Six his parting words.]] | |||
''Six turns and walks to the troop bay.'' | ''Six turns and walks to the troop bay.'' | ||
*'''Carter-A259''': "Six. That AI chose you... She made the right choice." | *'''Carter-A259''': "Six. [[Cortana|That AI]] chose ''you''... She made the right choice." | ||
''The Pelican turns and make the pursuing aircraft out of sight. Six and Emile position at the Pelican's tail, ready to jump off. Holding the AI | ''The Pelican turns and make the pursuing aircraft out of sight. Six and Emile position at the Pelican's tail, ready to jump off. Holding the AI [[Armored matrix|Package]] tight, Six crouches down as Emile grips the Pelican. Carter counts down with his fingers.'' | ||
*'''Carter-A259''': "On my mark | *'''Carter-A259''': "On my mark." | ||
''Carter counts down to zero.'' | ''Carter counts down to zero.'' | ||
| Line 145: | Line 81: | ||
*'''Carter-A259''': "Mark!" | *'''Carter-A259''': "Mark!" | ||
''Six and Emile jump | ''Six and Emile jump out, and the view switches to Six's point of view. They slide down a canyon, energy shields depleting. They come to a rough stop by impacting the ground. Six looks up as their and Emile's shields recharge. Carter's Pelican flies over them, Banshees in hot pursuit. Six turns back, checks the armored matrix for damage, then places the AI data storage unit on their back. They look up to the road ahead.'' | ||
'''{''Gameplay''}''' | '''{''Gameplay''}''' | ||
===Once More unto the Breach=== | ===Once More unto the Breach=== | ||
'''''Take the package and deliver it to the Pillar of Autumn while Carter covers you from the air.''''' | |||
''Six and Emile continue through the narrow crack until they reach a cliff edge, overlooking a large area.'' | ''Six and Emile continue through the narrow crack until they reach a cliff edge, overlooking a large area. Two Banshees are still in pursuit of the Pelican. Far in the distance, the {{UNSCShip|Pillar of Autumn}} can be seen.'' | ||
*'''Emile-A239''': "Still with us, Commander?" | *'''Emile-A239''': "Still with us, Commander?" | ||
*'''Carter-A259 (COM):''' "Stay low, let me draw the heat. You just deliver that Package." | *'''Carter-A259 (COM):''' "Stay low, let me draw the heat. You just deliver that Package." | ||
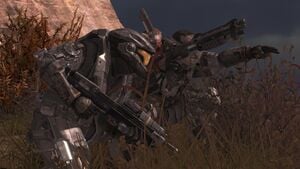
[[File:HR Six&EmileCliff.jpg|thumb|300px|Emile points at the ''Autumn''.]] | |||
''Emile indicates the ship in the distance.'' | |||
*'''Emile-A239''': "There's our destination, Six: ''Pillar of Autumn''. Race you to her." | *'''Emile-A239''': "There's our destination, Six: ''Pillar of Autumn''. Race you to her." | ||
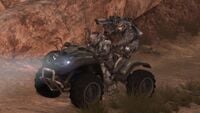
''Carter's Pelican, still being pursued by Banshees, | ''Carter's Pelican, still being pursued by Banshees, flies out of sight. After killing the distracted Covenant troops, Emile and Six come upon a pair of [[Mongoose]]s.'' | ||
*'''Emile-A239:''' "Got transport. | *'''Emile-A239:''' "Got transport." | ||
''After traveling a short distance, the | ''If the player stalls:'' | ||
*'''Emile-A239:''' "You think we got time to ''walk'' over there?" | |||
*'''Emile-A239:''' "Jump on that Mongoose. Let's kick some dirt!" | |||
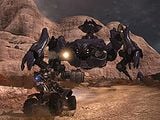
''After traveling a short distance, the Spartans reach another open area. [[Covenant drop pod|Covenant troop deployment pods]] drop and Covenant troops emerge from them. To make the situation worse, a [[Deutoros-pattern Scarab|Scarab]] drops from the sky.'' | |||
''If Six is driving their own Mongoose rather than riding shotgun on Emile's:'' | |||
*'''Emile-A239''': "Scarab! Do ''not'' engage! Gun it, Six!" | *'''Emile-A239''': "Scarab! Do ''not'' engage! Gun it, Six!" | ||
''If the player dismounts their Mongoose:'' | |||
*'''Emile-A239''': "Six! Get back on to the Mon!" | *'''Emile-A239''': "Six! Get back on to the Mon'!" | ||
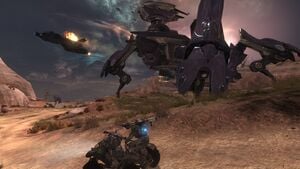
[[File:HR ScarabPelicanMongoose.jpg|thumb|300px|Carter's Pelican return briefly and fires its chin-mounted gun at a Scarab.]] | |||
''Carter's Pelican reappears and distracts the Scarab by shooting its back.'' | ''Carter's Pelican reappears and distracts the Scarab by shooting its back.'' | ||
*'''Carter-A259 (COM)''': "Get the Package out of there | *'''Carter-A259 (COM)''': "Get the Package out of there! Remember your objective!" | ||
''More [[Orbital Insertion Pod]]s drop, and another Scarab falls from the sky as the first one walks over the cliff. After fleeing from the battlefield, the | ''More [[Orbital Insertion Pod]]s drop, and another Scarab falls from the sky as the first one walks over the cliff. After fleeing from the battlefield, the Spartans come upon a broken [[Bridge (structure)|bridge]].'' | ||
*'''Emile-A239''': "The bridge ahead is out, Six. We're gonna have to jump it!" | *'''Emile-A239''': "The bridge ahead is out, Six. We're gonna have to jump it!" | ||
''or, with the IWHBYD Skull activated:'' | |||
*'''Emile-A239''': "Put your hands up, Six! We're gonna have to jump it!" | |||
''If the player heads to the right of the bridge:'' | |||
*'''Emile-A239''': "Looks like we can climb around to the south." | |||
*'''Emile-A239''': "Wraith! Heading our way!" | *'''Emile-A239''': "Wraith! Heading our way!" | ||
''A Phantom flies overhead as the Mongoose | ''A Phantom flies overhead as the Spartans cross the chasm, on a Mongoose or not. Barricades block the vehicle's way. Emile and Noble Six dismount and continue on foot.'' | ||
===This Town Isn't Big Enough=== | ===This Town Isn't Big Enough=== | ||
*'''Carter-A259 (COM)''': "Noble, enemy forces blocking the road up ahead." | |||
*'''Emile-A239''': "Got a [[Wraith]]! Southeast side!" | |||
*'''Emile-A239''': "Got a Wraith! Southeast side!" | |||
''After clearing or rushing through the area, Six and Emile go through a cave.'' | ''After clearing or rushing through the area, Six and Emile go through a cave. They draw closer to the exit.'' | ||
*'''Carter-A259 (COM):''' "Noble! You got a...situation." | *'''Carter-A259 (COM):''' "Noble! You got a...situation." | ||
[http:// | [http://youtu.be/IZzgQd67qn0 '''{''Cutscene''}'''] | ||
'' | ''Another Scarab suddenly walks down in front of Emile and Six, who are stuck at the cave exit. '' | ||
*'''Emile-A239''': "Mother... We can get past it, sir!" | *'''Emile-A239''': "Mother... We can get past it, sir!" | ||
''Emile | ''Emile steps back in hesitation.'' | ||
*'''Carter-A259 (COM)''': "No you can't. Not without help." | *'''Carter-A259 (COM)''': "No, you can't. Not without help." | ||
*'''Emile-A239''': "Commander, you don't have the firepower!" | *'''Emile-A239''': "Commander, you don't have the firepower!" | ||
''After noticing the two Spartans, the Scarab charges its | [[File:Carter Death.jpg|thumb|300px|Carter's Pelican ramming the Scarab.]] | ||
''After noticing the two Spartans, the Scarab takes aim at Six and Emile as it charges its cannon. Carter's Pelican flies over and strafes it. The Scarab is distracted and stops charging its cannon.'' | |||
*'''Carter-A259 (COM)''': "I've got the mass." | *'''Carter-A259 (COM)''': "I've got the mass." | ||
*'''Emile-A239''': "Solid copy. Hit 'em hard, boss." | *'''Emile-A239''': "Solid copy. Hit 'em hard, boss." | ||
''Carter brings the Pelican around and starts a ballistic trajectory, directly towards the Scarab.'' | |||
*'''Carter-A259 (COM)''': "You're on your own, Noble... Carter out." | *'''Carter-A259 (COM)''': "You're on your own, Noble... Carter out." | ||
'' | ''The Pelican slams into the Scarab's side and explodes as the walker charges its main cannon again. The Scarab's side bursts into flames, explosions rocking within it. The Scarab lets out a dying "scream" and struggles to stay standing. More explosions rock it and it falls down the cliff. A loud explosion is heard indicating its destruction. The view switches back to the two SPARTAN-IIIs, all that remains of Noble Team.'' | ||
*'''Emile-A239''': "Crevice to the east. Let's go." | *'''Emile-A239''': "Crevice to the east. Let's go." | ||
''Six nods | ''Noble Six nods.'' | ||
'''{Gameplay}''' | '''{Gameplay}''' | ||
''Emile and Six enter another cave. The bodies of dead | ''Emile and Six enter another cave. The bodies of dead Marines litter the cave.'' | ||
*'''Emile-A239''': "Buggers. Go quiet." | *'''Emile-A239''': "Buggers. Go quiet." | ||
'' | [[File:HR Six&EmileAgainstDrones.jpg|thumb|300px|Emile and Six encounter Yanme'e in the cave.]] | ||
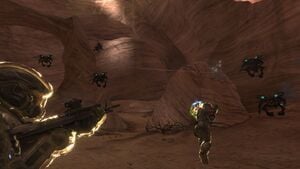
''[[Yanme'e|Drone]]s attack the duo, but with skill and superior firepower, the Spartans take the Covenant troops down. After taking down several [[Skirmisher]]s, Emile and Six find the cave's exit. The [[SinoViet Heavy Machinery|SinoViet]] facility is seen, with the grounded and scrapped UNSC frigate'' [[Commonwealth]] ''being an enormous battlefield between UNSC and Covenant troops.'' | |||
'''''The Pillar draws closer, and Keyes is awaiting delivery of the package.''''' | |||
*'''[[Captain (Navy)|Captain]] [[Jacob Keyes]] (COM)''': "This is Captain Keyes of the ''Pillar of Autumn''. We are tracking you, Noble, but we've begun our launch sequence. Proceed to dry dock, [[Platform Delta|Platform D]]. I'll be on it myself to receive the Package." | |||
*'''Emile-A239''': "We'll be there, sir." | |||
*'''Keyes (COM)''': "You'd better be, soldier, because my countdown has no abort." | |||
*'''Emile-A239''': "Understood. We've got to get to the dry dock - Priority One." | |||
''The Spartans link up with some surviving UNSC Marines.'' | |||
*'''Marine #1''': "Spartans! Over here!" | |||
*'''Marine #1''': "It's not looking good, sir. Covies have taken the whole shipyard." | |||
*'''Marine #1''': "Keep heading east. ''(to the other Marines)'' Marines, push them back!" | |||
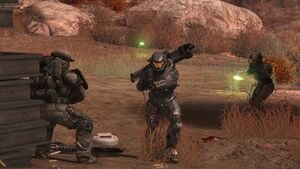
[[File:HR Six&Troopers.jpg|thumb|300px|Six joins two Marines in the ship-breaking yard.]] | |||
''They clear the front of the shipyards and proceed into the facility. Soon they link up with some UNSC Marines fighting another mass of Covenant.'' | |||
*'''Marine #2''': "Ah, Sierra, you made it!" | |||
*'''Emile-A239''': "So far. TAC eval?" | |||
*''' | *'''Marine #2''': "They got this facility covered from all angles. We'll give you covering fire. Take the flank, there has to be a way around." | ||
*'''Emile-A239''': " | *'''Emile-A239''': "We'll find it. You just keep 'em busy." | ||
*''' | *'''Marine #2''': "You got it, sir." | ||
''If Six stalls:'' | |||
*''' | *'''Emile-A239''': "Come on, Six! We gotta move through that facility ahead!" | ||
'' | ''or'' | ||
*''' | *'''Emile-A239''': "''Autumn'' can't wait forever. Let's go, Six!" | ||
''Six and Emile penetrate deeper into the facility, fighting past numerous Covenant soldiers. Along the way, they encounter a pair of [[UNSC Marine Corps|Marines]].'' | |||
*''' | *'''Marine #3''': "Spartans! Drydock's through that structure across the way. Punch through, we'll back you up." | ||
''A Phantom approaches and drops off enemy troops.'' | |||
*''' | *'''Emile-A239''': "Watch that Phantom!" | ||
''Six and Emile | ''Six and Emile deal with the reinforcements and continue outside. They head down a walkway and arrive outside a warehouse guarded by Skirmishers and a pair of Hunters. The Spartans quickly kill the Skirmishers, and after a prolonged battle, bring down the Hunters as well.'' | ||
*''' | *'''Emile-A239''': "Go to the east! Keep moving!" | ||
'' | ''They enter the warehouse, where Marines on the ground floor are exchanging fire with Kig-Yar infantry occupying the facility's upper level. As the Spartans approach a flight of stairs, a sword-wielding Sangheili Ultra charges at them. The Spartans eliminate it, head upstairs and kill the remaining Covenant troops, before moving on.'' | ||
''As | ''As Noble Six moves up another flight of stairs:'' | ||
*''' | *'''Keyes (COM)''': "Keyes to Noble Team. We're running out of time here, Spartans." | ||
*'''Emile-A239''': "Solid copy, sir. | *'''Emile-A239''': "Solid copy, sir. We're close. ''(to Six)'' Last push, Lieutenant." | ||
'' | ''Six and Emile meet up with another team of Marines engaged in a firefight with a small lance of Grunts and Kig-Yar. After dealing with these enemies, the Spartans finally exit the warehouse and see the massive ''Autumn'' in view, firing its [[Point-defense gun|50mm Autocannons]] at various Covenant crafts in the area.'' | ||
===Keyes=== | ===Keyes=== | ||
'''''Keep heading east, no matter what they throw at you.''''' | |||
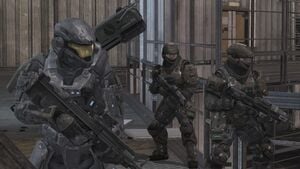
[[File:HR Six&Marines.jpg|thumb|300px|Six joins two Marines at Platform Delta.]] | |||
''Noble Six and Emile link up with a Marine squad outside the warehouse.'' | |||
*'''Emile-A239''': "What's the situation?" | *'''Emile-A239''': "What's the situation?" | ||
*''' | *'''Marine #4''': "We rigged the [[Mark 2488 Onager|mass driver]] up top. We lose that, the ''Autumn'' will have no covering fire. She'll ''never'' make orbit." | ||
*'''Emile-A239''': "Noble to Keyes: we're at the pad." | *'''Emile-A239''': "Noble to Keyes: we're at the pad." | ||
*''' | *'''Keyes (COM)''': "Copy, Noble. My Pelican's ready. Clear an LZ, and I'll meet you there." | ||
*'''Emile-A239''': "Will do, sir. All right, Six... This is it. I'll man the big gun. You just get to the platform and deliver that Package." | *'''Emile-A239''': "Will do, sir. All right, Six... This is it. I'll man the big gun. You just get to the platform and deliver that Package." | ||
''Noble Six | ''Noble Six prepares to engage the approaching Phantoms, while Emile gets to the mass driver.'' | ||
*'''Emile-A239 (COM)''': | *'''Emile-A239 (COM)''': "I'm in position! I'll take out as many dropships as I can." | ||
''Though Emile shoots down as many Covenant dropships as he can with the enormous coilgun, numerous Phantoms reach the landing pad and drop off dozens of Covenant soldiers, including Brutes, Jackals, and Grunts.'' | |||
*'''Emile-A239 (COM)''': " | *'''Emile-A239 (COM)''': "Hold them off until Keyes gets here!" | ||
*''' | ''More Phantoms show up.'' | ||
*'''Emile-A239 (COM)''': "Take 'em out, Lieutenant! Clear the zone!" | |||
''Despite the odds, Noble Six and surviving Marines manage to fight them all off, eventually clearing the platform for Keyes.'' | |||
*'''Emile-A239 (COM)''': "Noble to Keyes: pad is clear." | |||
*'''Keyes (COM)''': "On my way." | |||
*'''Emile-A239 (COM)''': "Six, time for you to leave. Get the Package to the pad...and get your ass off this planet. I've got your back." | |||
*'''Keyes (COM)''': "This is Keyes, on hot approach to Platform Delta." | |||
''Keyes' Pelican approaches the platform.'' | ''Keyes' Pelican approaches the platform.'' | ||
*''' | *'''Keyes (COM)''': "Ready to take possession of the Package, Noble." | ||
''Noble Six reaches the platform in time to meet the Pelican.'' | |||
[http://youtu.be/x_1PRPcl6jQ '''{''Cutscene''}'''] | |||
''Captain Keyes steps off the Pelican and meets up with Noble Six. Marines from the Pelican secure the pad.'' | |||
'' | *'''Keyes''': "Good to see you, Spartan. [[Catherine Halsey|Halsey]] assured me I could count on you." | ||
[ | ---- | ||
''or, on [[Legendary]]:'' | |||
'' | *'''Keyes''': "Good to see you, Spartan. Catherine assured me I could count on you." | ||
---- | |||
[[File:NobleSix Keyes.jpg|thumb|300px|Keyes receives the Package from Noble Six.]] | |||
''Noble Six hands the Package to Captain Keyes.'' | |||
*''' | *'''SPARTAN-B312''': "Not just me, sir..." | ||
''Keyes puts a reassuring hand on Six's shoulder.'' | |||
'' | *'''Keyes''': "[[NOBLE Team|They'll]] be remembered." | ||
''Keyes turns back to re-enter the Pelican but stops short as a massive shadow appears in the sky. A {{Pattern|Ket|battlecruiser}} pushes through the clouds, advancing towards the ''Pillar of Autumn''.'' | |||
''Keyes | *'''Keyes''': "Cruiser, adjusting heading for the ''Autumn''! Noble Four, I need fire on that cruiser or we're ''not'' getting out of here! Do you copy?" | ||
''Emile begins to rotate the mass driver to face the advancing cruiser.'' | |||
*'''Emile-A239 (COM)''': "You'll have your window, sir." | *'''Emile-A239 (COM)''': "You'll have your window, sir." | ||
*''' | ''Jacob Keyes and the Marines enter the Pelican.'' | ||
*'''Keyes:''' "Bridge, this is the Captain. We have the Package. Returning to the ''Autumn'', over." | |||
*''' | *'''Bridge officer (COM):''' "Copy that." | ||
'' | ''Noble Six, about to board the Pelican, is alarmed by the sudden sound of a Phantom and draws their [[Designated Marksman Rifle]]. A Phantom appears close by, and fires plasma bolts from its forward turret at the two Pelicans. The Pelican escorting Keyes' is shot down and crashes on the platform Noble Six is standing on. Six dives away from the burning wreck and barely avoids being crushed. Keyes' Pelican shifts as the Phantom flies over it. Six readies their weapon and turns as the Phantom wheels overhead towards the mass driver, but is forced to duck as the starboard door gunner fires a barrage of plasma at the Spartan. The Phantom drops off a pair of [[Zealot]]s of the [[Devoted Sentries]] by the Mass Driver. One Zealot is visible to Noble Six, the second is concealed by the Mass Driver. Emile yells in surprise. The first Zealot raises an Energy Sword, but Emile fires his shotgun through the canopy, shattering the glass and knocking the Elite to the deck. Emile stands, raises his shotgun, and fires again point-blank into the fallen Zealot's chest, killing it.'' | ||
*'''Emile-A239''': " Who's next?!" | *'''Emile-A239''': "Who's next?!" | ||
' | [[File:Reach 947096 Medium.jpg|thumb|300px|Emile's demise.]] | ||
''The second Zealot impales Emile from behind with an Energy Sword, then pulls the mortally-wounded Spartan off the blade, holding Emile by the throat.'' | |||
'' | *'''Emile-A239''': ''(defiantly)'' "I'm ready! How 'bout you?!" | ||
''Still alive, Emile pulls out his kukri from his shoulder pauldron sheath and stabs the Zealot in the throat before dragging them both to the floor and out of sight. Keyes' Pelican returns to Platform Delta. One of the Marines holds out his hand, gesturing for Noble Six to join them.'' | |||
*''' | *'''Marine #5''': "Lieutenant, get on board! We gotta get the hell out of here!" | ||
*'''SPARTAN-B312''': ''(determined)'' "Negative. I have the gun. ''(to Keyes)'' Good luck, sir." | |||
''Six turns away from the Pelican.'' | ''Six turns away from the Pelican.'' | ||
*''' | *'''Keyes''': "...Good luck to you, Spartan." | ||
''Keyes' Pelican leaves. Noble Six's only chance to escape Reach leaves with it.'' | |||
'' | '''{Gameplay}''' | ||
''' | *'''Keyes (COM)''': "Noble Six, get on that mass driver and clear me a path." | ||
''If the player stalls:'' | |||
'' | *'''Keyes (COM)''': "Spartan, do you copy? Heat up that gun, we've got multiple craft bearing down on us!" | ||
''If the player stalls even more:'' | |||
'' | *'''Keyes (COM)''': "We ''need'' you on that gun, Noble. Or the ''Autumn''{{'}}s sitting in her grave." | ||
''If the player continues to stall:'' | |||
'' | *'''Keyes (COM)''': "You're going to have to take down that cruiser, Spartan!" | ||
[[File:HR SixAgainstFieldMarshal.jpg|thumb|300px|Noble Six in combat against a Sangheili Field Marshal.]] | |||
''Six moves towards the building housing the mass driver, but is confronted by an [[Sangheili|Elite]] [[Sangheili Field Marshal|Field Marshal]] and an accompanying squad of three Zealots, all Devoted Sentries. The four Elites in turn are guarded by multiple [[Special Operations Unggoy]] and an Engineer (on higher difficulties). Noble Six fights their way through and mans the mass driver.'' | |||
'' | *'''Keyes (COM):''' "Cruiser, moving into position. I need it dead!" | ||
''Waves of Phantoms and Banshees attack the mass driver, but Six fends them off.'' | |||
'' | *'''Keyes (COM):''' "Mass driver won't crack those shields! Steady, Spartan!" | ||
''The cruiser begins to charge its ventral energy projector, dropping its ventral shield around the projector.'' | |||
'' | *'''Keyes (COM)''': "Fire ''now'', Lieutenant! Hit her in the gut!" | ||
''If the player stalls:'' | |||
*'''Keyes (COM)''': "You have to fire ''now'', Spartan! We won't survive another hit!" | |||
''If the player stalls even more:'' | |||
'' | *'''Keyes (COM):''' "Aim for the glassing port!" | ||
''Noble Six fires. The mass driver slug hits the ventral energy projector on the cruiser.'' | |||
'' | ''If Noble Six still stalls, the cruiser fires its beam down, there is a bright flash, and the game reverts to the last checkpoint.'' | ||
''''' | [http://youtu.be/yZwFvarIV1Q '''{''Cutscene''}'''] | ||
[[File:HR PoAThrusters.jpg|thumb|300px|Noble Six remains on Reach and watches the ''Pillar of Autumn'' escape.]] | |||
''The magnetic fields guiding the plasma destabilize, causing a massive explosion that rocks the ship.'' | |||
*''' | *'''Keyes (COM)''': "Good guns, Spartan. All stations: brace for cast-off." | ||
'' | ''The Pelican docks just in time, as a few Marines run by the troop bay.'' | ||
'' | '''''Easter Egg''': At this point, if the right thumbstick is held to the right, one can see [[John-117]] [[John-117 in cryo|inside a cryo-chamber]].'' | ||
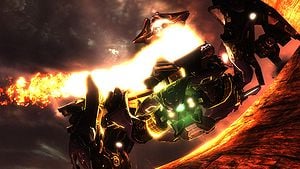
'' | ''Noble Six climbs down the ladder leading to the mass driver as the ''Pillar of Autumn'' launches into the sky using [[R7 thrust coupling]]s. The Covenant cruiser crashes down in the background. The ''Pillar of Autumn'' pitches up and ejects its rocket pods as it flies toward space.'' | ||
''' | *'''Keyes (COM)''': "This is the ''Pillar of Autumn''. We're away. And the Package is with us." | ||
''Six walks down the valley as the ''Autumn'' flies off into space. As Noble Six takes out a DMR, the view pans down to the Spartan's legs and the destroyed cruiser.'' | |||
''Fades to black.'' | |||
'' | ''Level ends.'' | ||
'' | ==Achievements== | ||
The following [[achievement]]s can be unlocked on The Pillar of Autumn across the [[Xbox 360]] and ''[[Halo: The Master Chief Collection]]'' editions of ''Halo: Reach''. | |||
{| class="wikitable" | |||
|- | |||
! scope="col" style="text-align:center;" |'''''Halo: Reach'' (Xbox 360)''' | |||
! scope="col" style="text-align:center;" |'''''Halo: MCC'' (Xbox One)''' | |||
! scope="col" style="width:135px;text-align:center;" |'''''Halo: MCC'' (Steam)''' | |||
! scope="col" style="width:175px;height:20px;text-align:center;" |'''Title''' | |||
! scope="col" style="width:350px;height:20px;text-align:center;" |'''Unlock requirement''' | |||
! scope="col" style="width:200px;height:20px;text-align:center;" |'''Games''' | |||
|- | |||
|[[File:HR Achievement Send Me Out with a Bang.png|center|64px]] | |||
|[[File:HTMCC HR Achievement SendMeOutWithABang.png|center|114px]] | |||
|[[File:HTMCC HR Achievement Send Me Out With A Bang (Steam).jpg|center|64px]] | |||
|<center>'''[[Send Me Out... with a Bang]]'''</center> | |||
|Beat The Pillar of Autumn on [[Normal]] difficulty or harder. | |||
|<center>''[[Halo: Reach]]''<br/>''[[Halo: The Master Chief Collection]]''</center> | |||
|- | |||
|<center>N/A</center> | |||
|[[File:HTMCC HR Achievement WaitHowdtheShipGetDownHere.png|center|114px]] | |||
|[[File:HTMCC HR Achievement WaitHowdtheShipGetDownHere Steam.jpg|center|64px]] | |||
|<center>'''[[Wait, How'd the Ship Get Down Here?]]'''</center> | |||
|Beat the par time on The Pillar of Autumn. | |||
|<center>''[[Halo: The Master Chief Collection]]''</center> | |||
|- | |||
|<center>N/A</center> | |||
|[[File:HTMCC HR Achievement Precious Cargo.png|center|114px]] | |||
|[[File:HTMCC HR Achievement PreciousCargo Steam.jpg|center|64px]] | |||
|<center>'''[[Precious Cargo]]'''</center> | |||
|Beat the par score on The Pillar of Autumn. | |||
|<center>''[[Halo: The Master Chief Collection]]''</center> | |||
|- | |||
|<center>N/A</center> | |||
|[[File:HTMCC HR Achievement Digital Destinies.png|center|114px]] | |||
|[[File:HTMCC HR Achievement DigitalDestinies Steam.jpg|center|64px]] | |||
|<center>'''[[Digital Destinies]]'''</center> | |||
|Find [[Data pads|Data Pad 9]] on The Pillar of Autumn. | |||
|<center>''[[Halo: The Master Chief Collection]]''</center> | |||
|- | |||
|<center>N/A</center> | |||
|[[File:HTMCC HR Achievement AssembledtheMajority.png|center|114px]] | |||
|[[File:HTMCC HR Achievement AssembledtheMajority Steam.jpg|center|64px]] | |||
|<center>'''[[Assembled the Majority]]'''</center> | |||
|Find [[Data pads|Data Pad 18]] on The Pillar of Autumn on [[Legendary]] difficulty | |||
|<center>''[[Halo: The Master Chief Collection]]''</center> | |||
|- | |||
|<center>N/A</center> | |||
|[[File:HTMCC HR Achievement Collection Eligibility Confirmed.png|center|114px]] | |||
|[[File:HTMCC Achievement Collection Eligibility Confirmed Steam.jpg|center|64px]] | |||
|<center>'''[[Collection Eligibility Confirmed]]'''</center> | |||
|See, he IS in the game! | |||
|<center>''[[Halo: The Master Chief Collection]]''</center> | |||
|} | |||
==Trivia== | ==Trivia== | ||
===Easter | ===Easter eggs=== | ||
* | *The [[Hidden weapons on The Pillar of Autumn]] easter egg can be found on this level. | ||
*By using [[Panoramic | *By using [[Panoramic camera mode|Pan Cam]], it is possible to see [[Spartan In The Autumn easter egg|a hidden Spartan]] in one of the ''Autumn'''s hangar bays. [[Bungie]] confirmed this to be a glitch.<ref>http://halo.bungie.net/Forums/posts.aspx?postID=55454181</ref> | ||
*When Keyes' Pelican docks with the ''Autumn'' in the end cutscene, [[John-117 in cryo|one can see a SPARTAN-II inside a cryo-chamber]]. In the November 2010 issue of GameInformer, an interview with [[Marcus Lehto]] confirmed that the Spartan is in fact [[John-117]]. | |||
* | |||
===Glitches=== | ===Glitches=== | ||
*If Emile drives the Mongoose over the broken bridge, he may not always go fast enough to clear the gap. However, he is scripted to abnormally lurch forward should he not go fast enough. This can still cause Emile to miss the bridge completely and fall into the canyon. | *If Emile drives the Mongoose over the broken bridge, he may not always go fast enough to clear the gap. However, he is scripted to abnormally lurch forward should he not go fast enough. This can still cause Emile to miss the bridge completely and fall into the canyon. | ||
*Emile's shields are curiously still intact after death, similar to the Elites next to him (which he killed). They will flare up and drain, but only one of the | *Players can [[Using Onager early|get to the Onager]] before they are needed to do so. | ||
*Emile's shields are curiously still intact after death, similar to the Elites next to him (which he killed). They will flare up and drain, but only one of the Elites' shields will recharge. See [[Dead shielded Emile]]. | |||
=== | ===References=== | ||
*The opening chapter of the level is a reference to the first ''Halo: Reach'' ViDoc released, ''[[Halo: Reach ViDoc: Once More Unto the Breach|Once More Unto the Breach]]''. | *The opening chapter of the level is a reference to the first ''Halo: Reach'' ViDoc released, ''[[Halo: Reach ViDoc: Once More Unto the Breach|Once More Unto the Breach]]''. | ||
*The second chapter of the level is a reference to the chapter ''This Town Ain't Big Enough for Both of Us'', from ''Halo 2'''s level, [[Metropolis]]. | *The second chapter of the level is a reference to the chapter ''This Town Ain't Big Enough for Both of Us'', from ''Halo 2'''s level, [[Metropolis]], which is the first time in any Halo game in which the player could engage a Scarab in combat, whereas the first chapter of ''The Pillar of Autumn'' is the last. | ||
*The last chapter of the level is a reference to the [[Halo: Combat Evolved]] level of [[Keyes (Level)|the same name]]. | *The last chapter of the level is a reference to the ''[[Halo: Combat Evolved]]'' level of [[Keyes (Level)|the same name]]. | ||
*It should also be noticed that the amount of thrusters on the back of the ''Pillar of Autumn'' differ from the amount in ''[[Halo: Combat Evolved]]'', with the ''Reach'' version having 14, and the ''Combat Evolved'' version having 10. This is another 7 reference: 14/2=7. | *It should also be noticed that the amount of thrusters on the back of the ''Pillar of Autumn'' differ from the amount in ''[[Halo: Combat Evolved]]'', with the ''Reach'' version having 14, and the ''Combat Evolved'' version having 10. This is another 7 reference: 14/2=7. | ||
===Mistakes=== | ===Mistakes=== | ||
* | *In the beginning cutscene, Emile was at Six's left after they landed on the ground. Once the gameplay begins, however, Emile is on the player's right. | ||
*In the objective description, visible in the game's pause menu, the ''Pillar of Autumn'' is referred to as "The Pillar", whereas in all other media, she is referred to as "The Autumn" or by her full name. | |||
===Miscellaneous=== | ===Miscellaneous=== | ||
*The maps [[Holdout (level)|Holdout]] and [[Boneyard (Level)|Boneyard]] are based on this level. | *The maps ''[[Holdout (level)|Holdout]]'' and ''[[Boneyard (Level)|Boneyard]]'' are based on this level. | ||
* | *You can bring a Ghost into most of the level after you reach the Boneyard area. However, it is nearly impossible to bring it through the rest of the mission. | ||
*There are Cargo Trucks and 18-Wheeler | *There are [[HuCiv HC1500|Cargo Trucks and 18-Wheeler tractors]] that can be driven with or without Emile at the beginning of the level. While the tractor can fully make the jump across the bridge, the cargo truck will only get its nose across, forcing the player to either aim for the slope to the right or leap out before the truck is dragged into the chasm by its own weight. | ||
*The troops on-board Captain Keyes' Pelican are [[UNSC Marines]]. This marks a rare appearance of Marines in the game, which centers on the battles of Noble Team supporting the [[UNSC Army]] on Reach. | *The Marathon symbol engraved on the side of the ''Autumn'' is nowhere to be seen. However, there is now a [[Seventh Column]] symbol painted on the hull. | ||
*When clearing the platform for Keyes and when using the mass driver cannon, the player can see two Scarabs alongside Wraiths and Ghosts fighting Warthogs and Scorpions in the background. | *The troops on-board Captain Keyes' Pelican are [[UNSC Marine Corps|UNSC Marines]]. This marks a rare appearance of Marines in the game, which centers on the battles of Noble Team supporting the [[UNSC Army]] on Reach. | ||
*If | *When clearing the platform for Keyes and when using the mass driver cannon, the player can see two Scarabs alongside Wraiths and Ghosts fighting Warthogs and Scorpions in the background. The Scorpions seem to be moving faster than normal. | ||
* | *If playing on [[Mythic]] difficulty, the {{Pattern|Ket|battlecruiser}} will receive a health boost and thus take two shots to destroy instead of just one. | ||
* | *This level has the most [[Spartan Laser]]s in the ''Halo'' series, with 3 of them available on solo, and an additional 3 of them near the ''Onager'' on co-op. | ||
*This is | *There is a [[McFarlane Toys|McFarlane]] [[McFarlane Toys/Halo: Reach Vehicle Series#Pillar of Autumn Mongoose|vehicle set]] based on the events of this level. The set consists of a Noble Six figure with an M6G Pistol replica, the Package replica and a model of a Mongoose. | ||
*The partially destroyed house right after the Mongoose jump and during the Wraith encounter is reused in the following level ''[[Lone Wolf]]''. | |||
*In the area after the jump, there is a power node which looks identical to the ones from the ''[[Halo Wars]]'' level ''[[Scarab (level)|Scarab]]''. | |||
*This is the only level where a [[Sangheili Field Marshal]] is encountered as an enemy, and only one is fought. Noble Team has had [[Winter Contingency|several]] [[New Alexandria|encounters]] with a Field Marshal before, and possibly all being the same individual. | |||
==Gallery== | ==Gallery== | ||
<gallery | ===Concept art=== | ||
File: | <gallery> | ||
File:Covenant_Fleet_Aszod.jpg| | File:HTMCC HR Achievement EnemiesEverywhere.png|Concept art of a Covenant fleet holding position near the ship-breaking yards. | ||
File: | File:HR ShipBreakingConcept.jpg|Concept art of the interiors of the ship-breaking facility. | ||
File:HaloReach - John117.png|The [[ | File:HR PoALoadingDockConcept.jpg|More interior concept art of the facility. | ||
File:HaloReach - PoA.png|''The Pillar of Autumn'', using [[ | File:HR PoAConcept.jpg|Concept art of part of the facility's exterior. | ||
File:HR Boneyard BaseLeft Concept.jpg|Concept art for the shipbreaking facility. | |||
File:HTMCC HR Achievement UnsolvedMysteries.png|Concept art of ship-breaking yard's drydock. | |||
File:HR_Autumn_Launch_Concept.jpg|Concept art of the ''Pillar of Autumn'' in drydock. | |||
File:HR_Autumn_Launch_Concept_2.jpg|Concept art of the ''Pillar of Autumn'' in drydock. | |||
File:Reach-Concept-Autumn-Depart.jpg|Concept art of the ''Pillar of Autumn'' leaving Reach. | |||
</gallery> | |||
===Screenshots=== | |||
<gallery> | |||
File:Level - PoA.jpg|Preview of the level in ''Halo: Reach'' menu. | |||
File:TPoA_Header.jpg|A view of Azsod's skyline. | |||
File:HR DistantPoA.jpg|Emile and Six watch Carter's Pelican pursued by Banshees. | |||
File:HR Six&EmileMongoose.jpg|Emile and Six on a Mongoose. | |||
File:ScarabNoble.jpg|Noble Six and Emile driving a Mongoose toward a Scarab. | |||
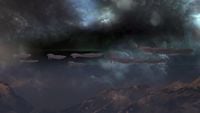
File:Covenant_Fleet_Aszod.jpg|The Covenant fleet above Asźod. | |||
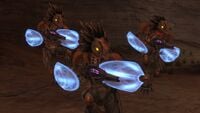
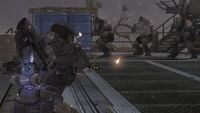
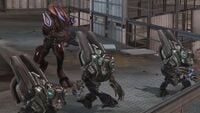
File:HR SkirmisherMurmillones.jpg|Three Skirmisher Murmillones in the caverns. | |||
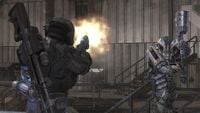
File:HR BoneyardBattle1.jpg|Emile and Six in combat against Covenant troops at the ship-breaking yards. | |||
File:HR BoneyardBattle2.jpg|Six fires his Spartan Laser at a Ghost. | |||
File:HR SixAssassinatesUltra.jpg|Six prepares to assassinate a Sangheili Ultra. | |||
File:HR MarinesTrio.jpg|A trio of Marines fighting Covenant in the ship-breaking facility. | |||
File:HR DryDockBattle.jpg|Six defending Platform Delta from Jiralhanae Minors. | |||
File:HR SixAgainstChieftain.jpg|Six fires his pistol at a Jiralhanae Chieftain. | |||
File:HR Zealot&SpecOpsGrunts.jpg|A Sangheili Zealot leading three SpecOps Unggoy. | |||
File:Reach 5602750 Full.jpg|The Sangheili Field Marshal fires its fuel rod gun. | |||
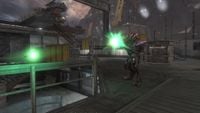
File:HaloReach - MACrusher.jpg|Noble Six disabling the battlecruiser with the Onager. | |||
File:HaloReach - John117.png|The [[John-117 in cryo]] easter egg in the ''Pillar of Autumn''{{'}}s hangar bay. | |||
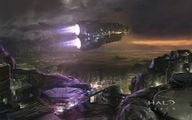
File:HaloReach - PoA.png|''The Pillar of Autumn'', using [[R7 thrust coupling]]s, escapes. | |||
</gallery> | </gallery> | ||
==Sources== | |||
{{Ref/Sources}} | |||
{{ | {{Succession box | before = ''[[The Package]]'' <br />| title = ''Halo: Reach'' Campaign Missions | years = '''''The Pillar of Autumn''''' |after = ''[[Lone Wolf]]''}} | ||
{{Levels|HR}} | |||
Latest revision as of 20:59, August 19, 2024
|
Prev: |
|
|
Next: |
|
| The Pillar of Autumn | |
|---|---|
| |
|
Game: |
|
|
File name (?): |
|
|
Player: |
|
|
Date: |
|
|
Location: |
|
|
Objective(s): |
Deliver the Package to the UNSC Pillar of Autumn, then shoot down the Covenant Ket-pattern battlecruiser so that the Autumn can escape. |
|
Par Time: |
00:20:00 (Master Chief Collection) |
|
Par Score: |
25,000 (Master Chief Collection) |
 |
Halopedia has a walkthrough guide for this level; see The Pillar of Autumn (Halo: Reach level)/Walkthrough. |
| “ | Deliver Halsey's data package to the Pillar of Autumn. | ” |
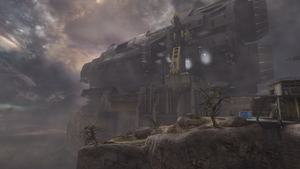
The Pillar of Autumn is the tenth campaign level of Halo: Reach. The level takes place on August 30, 2552, near and in the ship-breaking yards at Asźod.
Summary[edit]
The level opens with the remainder of Noble Team onboard a D77-TC Pelican, on their way to deliver Cortana to the dry-docked UNSC Pillar of Autumn. The Pelican is critically damaged and Carter-A259 is badly wounded. Carter orders SPARTAN-B312 and Emile-A239 to complete the courier mission without him, while he lures the Covenant away from the pair by using the Pelican as a decoy. Emile-A239 and SPARTAN-B312 execute a low-altitude jump from the Pelican outside of the dockyard and are forced to fight their way to the facility. After battling through several Covenant outposts, the two SPARTAN-IIIs are forced to continue their journey through a cave system to circumvent a large group of Covenant forces. Upon reaching the other side, however, they are confronted by a Scarab. Realizing that the Scarab's presence prevents Emile and Noble Six from moving on, Carter rams it with the Pelican, knocking it off a cliff and sacrificing himself in the process. The two SPARTAN-IIIs continue their journey and eventually reach the Asźod ship breaking facility.
The two SPARTAN-IIIs are then hailed by Captain Jacob Keyes, whose cruiser, the Pillar of Autumn, is moored at the facility, and are ordered to clear a landing zone for the Captain, who will use a Pelican to retrieve the Package himself. Emile mans the facility's mass driver to provide covering fire against incoming Covenant Phantoms, while Noble Six and surviving Marines engage the Covenant on the ground. Once cleared, Keyes' Pelican arrives and Captain Keyes retrieves the Package from Noble Six. As the package is handed over, a Ket-pattern battlecruiser is revealed to be moving in on the Pillar of Autumn. Keyes orders Emile to fire on the advancing battlecruiser, however, before Emile can oblige a Phantom attacks the landing zone, destroying one Pelican and deploying a group of Sangheili warriors onto the mass driver. Emile successfully kills one of the Sangheili with his shotgun before a second sneaks up behind him and impales him with an energy sword. Emile manages to draw his kukri and fatally stab the Sangheili in the neck before he expires.
Keyes returns to the landing platform and offers Noble Six transportation to safety. The SPARTAN-III refuses and offers to defend the Captain as he heads towards his ship. Using the mass driver, Six defends the site and shoots down the Covenant battlecruiser just as it is about to glass the area. After successfully halting the battlecruiser's attack, Noble Six looks on as the Pillar of Autumn takes off and heads towards space to escape Reach, leaving Noble Six stranded with no way off of the planet.
Transcript[edit]
Auntie Dot's satellite view shows Noble Team's Pelican being pursued by two Banshees and a Phantom.
Asźod, Eposz
August 30, 2552 16:52 Hours
- Auntie Dot (COM): "Noble Leader, seek immediate medical attention."
The view zooms in and follows the Pelican.
- Auntie Dot (COM): "Noble Leader, please respond."
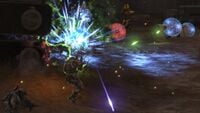
Cuts to the cockpit of the Pelican, with Noble Six moving closer to the pilot seat. Suddenly, several plasma bolts hit the Pelican, impacting Noble Six, flickering the Spartan's shields. The view turns to the troop bay of the Pelican, and Emile-A239 is seen firing his Grenade Launcher at the two Banshees. Emile concentrates fire on a single Banshee. The grenade detonates close by, and the EMP disables the Banshee, which swoops up and crashes into its wingman. Both are taken out, but the Phantom still pursues. The view switches back to the cockpit, and moves in front of Six. Carter, critically wounded but still in the pilot seat, takes off his helmet and throws it onto the ground. Blood splatters cover the cockpit window.
- Auntie Dot (COM): "Please respond, Sierra Two-Five-Nine. You are alarming me."
Carter-A259 turns back to Noble Six. His face is bloodied, and his armor is charred from plasma fire.
- Commander Carter-A259: (strained but calm) "Not sure how long she's gonna stay together. Skies are jammed up anyways. Gotta get you off here, Lieutenant."
The view faces a critically injured Carter. Noble Six, grabbing the pilot chair, looks up.
- SPARTAN-B312: "Sir, you-"
- Carter-A259: "Don't wanna hear it. Get the Package to the Autumn."
- SPARTAN-B312: "Done."
- Carter-A259: "Not yet, it's not... Emile, go with him/her. It's a ground game now."
The view switches to Emile, who drops his emptied Grenade Launcher and makes a fist-to-chest salute. In the background, two more Banshees appear.
- Warrant Officer Emile-A239: "It's been an honor, sir."
- Carter-A259: "Likewise... I'll do what I can to draw their fire."
Six turns and walks to the troop bay.
- Carter-A259: "Six. That AI chose you... She made the right choice."
The Pelican turns and make the pursuing aircraft out of sight. Six and Emile position at the Pelican's tail, ready to jump off. Holding the AI Package tight, Six crouches down as Emile grips the Pelican. Carter counts down with his fingers.
- Carter-A259: "On my mark."
Carter counts down to zero.
- Carter-A259: "Mark!"
Six and Emile jump out, and the view switches to Six's point of view. They slide down a canyon, energy shields depleting. They come to a rough stop by impacting the ground. Six looks up as their and Emile's shields recharge. Carter's Pelican flies over them, Banshees in hot pursuit. Six turns back, checks the armored matrix for damage, then places the AI data storage unit on their back. They look up to the road ahead.
{Gameplay}
Once More unto the Breach[edit]
Take the package and deliver it to the Pillar of Autumn while Carter covers you from the air.
Six and Emile continue through the narrow crack until they reach a cliff edge, overlooking a large area. Two Banshees are still in pursuit of the Pelican. Far in the distance, the UNSC Pillar of Autumn can be seen.
- Emile-A239: "Still with us, Commander?"
- Carter-A259 (COM): "Stay low, let me draw the heat. You just deliver that Package."
Emile indicates the ship in the distance.
- Emile-A239: "There's our destination, Six: Pillar of Autumn. Race you to her."
Carter's Pelican, still being pursued by Banshees, flies out of sight. After killing the distracted Covenant troops, Emile and Six come upon a pair of Mongooses.
- Emile-A239: "Got transport."
If the player stalls:
- Emile-A239: "You think we got time to walk over there?"
- Emile-A239: "Jump on that Mongoose. Let's kick some dirt!"
After traveling a short distance, the Spartans reach another open area. Covenant troop deployment pods drop and Covenant troops emerge from them. To make the situation worse, a Scarab drops from the sky.
If Six is driving their own Mongoose rather than riding shotgun on Emile's:
- Emile-A239: "Scarab! Do not engage! Gun it, Six!"
If the player dismounts their Mongoose:
- Emile-A239: "Six! Get back on to the Mon'!"
Carter's Pelican reappears and distracts the Scarab by shooting its back.
- Carter-A259 (COM): "Get the Package out of there! Remember your objective!"
More Orbital Insertion Pods drop, and another Scarab falls from the sky as the first one walks over the cliff. After fleeing from the battlefield, the Spartans come upon a broken bridge.
- Emile-A239: "The bridge ahead is out, Six. We're gonna have to jump it!"
or, with the IWHBYD Skull activated:
- Emile-A239: "Put your hands up, Six! We're gonna have to jump it!"
If the player heads to the right of the bridge:
- Emile-A239: "Looks like we can climb around to the south."
- Emile-A239: "Wraith! Heading our way!"
A Phantom flies overhead as the Spartans cross the chasm, on a Mongoose or not. Barricades block the vehicle's way. Emile and Noble Six dismount and continue on foot.
This Town Isn't Big Enough[edit]
- Carter-A259 (COM): "Noble, enemy forces blocking the road up ahead."
- Emile-A239: "Got a Wraith! Southeast side!"
After clearing or rushing through the area, Six and Emile go through a cave. They draw closer to the exit.
- Carter-A259 (COM): "Noble! You got a...situation."
Another Scarab suddenly walks down in front of Emile and Six, who are stuck at the cave exit.
- Emile-A239: "Mother... We can get past it, sir!"
Emile steps back in hesitation.
- Carter-A259 (COM): "No, you can't. Not without help."
- Emile-A239: "Commander, you don't have the firepower!"
After noticing the two Spartans, the Scarab takes aim at Six and Emile as it charges its cannon. Carter's Pelican flies over and strafes it. The Scarab is distracted and stops charging its cannon.
- Carter-A259 (COM): "I've got the mass."
- Emile-A239: "Solid copy. Hit 'em hard, boss."
Carter brings the Pelican around and starts a ballistic trajectory, directly towards the Scarab.
- Carter-A259 (COM): "You're on your own, Noble... Carter out."
The Pelican slams into the Scarab's side and explodes as the walker charges its main cannon again. The Scarab's side bursts into flames, explosions rocking within it. The Scarab lets out a dying "scream" and struggles to stay standing. More explosions rock it and it falls down the cliff. A loud explosion is heard indicating its destruction. The view switches back to the two SPARTAN-IIIs, all that remains of Noble Team.
- Emile-A239: "Crevice to the east. Let's go."
Noble Six nods.
{Gameplay}
Emile and Six enter another cave. The bodies of dead Marines litter the cave.
- Emile-A239: "Buggers. Go quiet."
Drones attack the duo, but with skill and superior firepower, the Spartans take the Covenant troops down. After taking down several Skirmishers, Emile and Six find the cave's exit. The SinoViet facility is seen, with the grounded and scrapped UNSC frigate Commonwealth being an enormous battlefield between UNSC and Covenant troops.
The Pillar draws closer, and Keyes is awaiting delivery of the package.
- Captain Jacob Keyes (COM): "This is Captain Keyes of the Pillar of Autumn. We are tracking you, Noble, but we've begun our launch sequence. Proceed to dry dock, Platform D. I'll be on it myself to receive the Package."
- Emile-A239: "We'll be there, sir."
- Keyes (COM): "You'd better be, soldier, because my countdown has no abort."
- Emile-A239: "Understood. We've got to get to the dry dock - Priority One."
The Spartans link up with some surviving UNSC Marines.
- Marine #1: "Spartans! Over here!"
- Marine #1: "It's not looking good, sir. Covies have taken the whole shipyard."
- Marine #1: "Keep heading east. (to the other Marines) Marines, push them back!"
They clear the front of the shipyards and proceed into the facility. Soon they link up with some UNSC Marines fighting another mass of Covenant.
- Marine #2: "Ah, Sierra, you made it!"
- Emile-A239: "So far. TAC eval?"
- Marine #2: "They got this facility covered from all angles. We'll give you covering fire. Take the flank, there has to be a way around."
- Emile-A239: "We'll find it. You just keep 'em busy."
- Marine #2: "You got it, sir."
If Six stalls:
- Emile-A239: "Come on, Six! We gotta move through that facility ahead!"
or
- Emile-A239: "Autumn can't wait forever. Let's go, Six!"
Six and Emile penetrate deeper into the facility, fighting past numerous Covenant soldiers. Along the way, they encounter a pair of Marines.
- Marine #3: "Spartans! Drydock's through that structure across the way. Punch through, we'll back you up."
A Phantom approaches and drops off enemy troops.
- Emile-A239: "Watch that Phantom!"
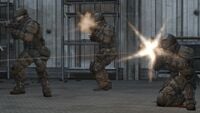
Six and Emile deal with the reinforcements and continue outside. They head down a walkway and arrive outside a warehouse guarded by Skirmishers and a pair of Hunters. The Spartans quickly kill the Skirmishers, and after a prolonged battle, bring down the Hunters as well.
- Emile-A239: "Go to the east! Keep moving!"
They enter the warehouse, where Marines on the ground floor are exchanging fire with Kig-Yar infantry occupying the facility's upper level. As the Spartans approach a flight of stairs, a sword-wielding Sangheili Ultra charges at them. The Spartans eliminate it, head upstairs and kill the remaining Covenant troops, before moving on.
As Noble Six moves up another flight of stairs:
- Keyes (COM): "Keyes to Noble Team. We're running out of time here, Spartans."
- Emile-A239: "Solid copy, sir. We're close. (to Six) Last push, Lieutenant."
Six and Emile meet up with another team of Marines engaged in a firefight with a small lance of Grunts and Kig-Yar. After dealing with these enemies, the Spartans finally exit the warehouse and see the massive Autumn in view, firing its 50mm Autocannons at various Covenant crafts in the area.
Keyes[edit]
Keep heading east, no matter what they throw at you.
Noble Six and Emile link up with a Marine squad outside the warehouse.
- Emile-A239: "What's the situation?"
- Marine #4: "We rigged the mass driver up top. We lose that, the Autumn will have no covering fire. She'll never make orbit."
- Emile-A239: "Noble to Keyes: we're at the pad."
- Keyes (COM): "Copy, Noble. My Pelican's ready. Clear an LZ, and I'll meet you there."
- Emile-A239: "Will do, sir. All right, Six... This is it. I'll man the big gun. You just get to the platform and deliver that Package."
Noble Six prepares to engage the approaching Phantoms, while Emile gets to the mass driver.
- Emile-A239 (COM): "I'm in position! I'll take out as many dropships as I can."
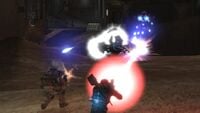
Though Emile shoots down as many Covenant dropships as he can with the enormous coilgun, numerous Phantoms reach the landing pad and drop off dozens of Covenant soldiers, including Brutes, Jackals, and Grunts.
- Emile-A239 (COM): "Hold them off until Keyes gets here!"
More Phantoms show up.
- Emile-A239 (COM): "Take 'em out, Lieutenant! Clear the zone!"
Despite the odds, Noble Six and surviving Marines manage to fight them all off, eventually clearing the platform for Keyes.
- Emile-A239 (COM): "Noble to Keyes: pad is clear."
- Keyes (COM): "On my way."
- Emile-A239 (COM): "Six, time for you to leave. Get the Package to the pad...and get your ass off this planet. I've got your back."
- Keyes (COM): "This is Keyes, on hot approach to Platform Delta."
Keyes' Pelican approaches the platform.
- Keyes (COM): "Ready to take possession of the Package, Noble."
Noble Six reaches the platform in time to meet the Pelican.
Captain Keyes steps off the Pelican and meets up with Noble Six. Marines from the Pelican secure the pad.
- Keyes: "Good to see you, Spartan. Halsey assured me I could count on you."
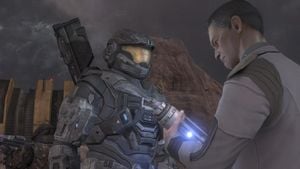
or, on Legendary:
- Keyes: "Good to see you, Spartan. Catherine assured me I could count on you."
Noble Six hands the Package to Captain Keyes.
- SPARTAN-B312: "Not just me, sir..."
Keyes puts a reassuring hand on Six's shoulder.
- Keyes: "They'll be remembered."
Keyes turns back to re-enter the Pelican but stops short as a massive shadow appears in the sky. A Ket-pattern battlecruiser pushes through the clouds, advancing towards the Pillar of Autumn.
- Keyes: "Cruiser, adjusting heading for the Autumn! Noble Four, I need fire on that cruiser or we're not getting out of here! Do you copy?"
Emile begins to rotate the mass driver to face the advancing cruiser.
- Emile-A239 (COM): "You'll have your window, sir."
Jacob Keyes and the Marines enter the Pelican.
- Keyes: "Bridge, this is the Captain. We have the Package. Returning to the Autumn, over."
- Bridge officer (COM): "Copy that."
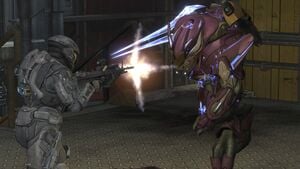
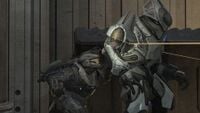
Noble Six, about to board the Pelican, is alarmed by the sudden sound of a Phantom and draws their Designated Marksman Rifle. A Phantom appears close by, and fires plasma bolts from its forward turret at the two Pelicans. The Pelican escorting Keyes' is shot down and crashes on the platform Noble Six is standing on. Six dives away from the burning wreck and barely avoids being crushed. Keyes' Pelican shifts as the Phantom flies over it. Six readies their weapon and turns as the Phantom wheels overhead towards the mass driver, but is forced to duck as the starboard door gunner fires a barrage of plasma at the Spartan. The Phantom drops off a pair of Zealots of the Devoted Sentries by the Mass Driver. One Zealot is visible to Noble Six, the second is concealed by the Mass Driver. Emile yells in surprise. The first Zealot raises an Energy Sword, but Emile fires his shotgun through the canopy, shattering the glass and knocking the Elite to the deck. Emile stands, raises his shotgun, and fires again point-blank into the fallen Zealot's chest, killing it.
- Emile-A239: "Who's next?!"
The second Zealot impales Emile from behind with an Energy Sword, then pulls the mortally-wounded Spartan off the blade, holding Emile by the throat.
- Emile-A239: (defiantly) "I'm ready! How 'bout you?!"
Still alive, Emile pulls out his kukri from his shoulder pauldron sheath and stabs the Zealot in the throat before dragging them both to the floor and out of sight. Keyes' Pelican returns to Platform Delta. One of the Marines holds out his hand, gesturing for Noble Six to join them.
- Marine #5: "Lieutenant, get on board! We gotta get the hell out of here!"
- SPARTAN-B312: (determined) "Negative. I have the gun. (to Keyes) Good luck, sir."
Six turns away from the Pelican.
- Keyes: "...Good luck to you, Spartan."
Keyes' Pelican leaves. Noble Six's only chance to escape Reach leaves with it.
{Gameplay}
- Keyes (COM): "Noble Six, get on that mass driver and clear me a path."
If the player stalls:
- Keyes (COM): "Spartan, do you copy? Heat up that gun, we've got multiple craft bearing down on us!"
If the player stalls even more:
- Keyes (COM): "We need you on that gun, Noble. Or the Autumn's sitting in her grave."
If the player continues to stall:
- Keyes (COM): "You're going to have to take down that cruiser, Spartan!"
Six moves towards the building housing the mass driver, but is confronted by an Elite Field Marshal and an accompanying squad of three Zealots, all Devoted Sentries. The four Elites in turn are guarded by multiple Special Operations Unggoy and an Engineer (on higher difficulties). Noble Six fights their way through and mans the mass driver.
- Keyes (COM): "Cruiser, moving into position. I need it dead!"
Waves of Phantoms and Banshees attack the mass driver, but Six fends them off.
- Keyes (COM): "Mass driver won't crack those shields! Steady, Spartan!"
The cruiser begins to charge its ventral energy projector, dropping its ventral shield around the projector.
- Keyes (COM): "Fire now, Lieutenant! Hit her in the gut!"
If the player stalls:
- Keyes (COM): "You have to fire now, Spartan! We won't survive another hit!"
If the player stalls even more:
- Keyes (COM): "Aim for the glassing port!"
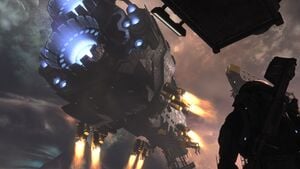
Noble Six fires. The mass driver slug hits the ventral energy projector on the cruiser.
If Noble Six still stalls, the cruiser fires its beam down, there is a bright flash, and the game reverts to the last checkpoint.
The magnetic fields guiding the plasma destabilize, causing a massive explosion that rocks the ship.
- Keyes (COM): "Good guns, Spartan. All stations: brace for cast-off."
The Pelican docks just in time, as a few Marines run by the troop bay.
Easter Egg: At this point, if the right thumbstick is held to the right, one can see John-117 inside a cryo-chamber.
Noble Six climbs down the ladder leading to the mass driver as the Pillar of Autumn launches into the sky using R7 thrust couplings. The Covenant cruiser crashes down in the background. The Pillar of Autumn pitches up and ejects its rocket pods as it flies toward space.
- Keyes (COM): "This is the Pillar of Autumn. We're away. And the Package is with us."
Six walks down the valley as the Autumn flies off into space. As Noble Six takes out a DMR, the view pans down to the Spartan's legs and the destroyed cruiser.
Fades to black.
Level ends.
Achievements[edit]
The following achievements can be unlocked on The Pillar of Autumn across the Xbox 360 and Halo: The Master Chief Collection editions of Halo: Reach.
| Halo: Reach (Xbox 360) | Halo: MCC (Xbox One) | Halo: MCC (Steam) | Title | Unlock requirement | Games |
|---|---|---|---|---|---|
| Beat The Pillar of Autumn on Normal difficulty or harder. | Halo: The Master Chief Collection | ||||
| Beat the par time on The Pillar of Autumn. | |||||
| Beat the par score on The Pillar of Autumn. | |||||
| Find Data Pad 9 on The Pillar of Autumn. | |||||
| Find Data Pad 18 on The Pillar of Autumn on Legendary difficulty | |||||
| See, he IS in the game! |
Trivia[edit]
Easter eggs[edit]
- The Hidden weapons on The Pillar of Autumn easter egg can be found on this level.
- By using Pan Cam, it is possible to see a hidden Spartan in one of the Autumn's hangar bays. Bungie confirmed this to be a glitch.[2]
- When Keyes' Pelican docks with the Autumn in the end cutscene, one can see a SPARTAN-II inside a cryo-chamber. In the November 2010 issue of GameInformer, an interview with Marcus Lehto confirmed that the Spartan is in fact John-117.
Glitches[edit]
- If Emile drives the Mongoose over the broken bridge, he may not always go fast enough to clear the gap. However, he is scripted to abnormally lurch forward should he not go fast enough. This can still cause Emile to miss the bridge completely and fall into the canyon.
- Players can get to the Onager before they are needed to do so.
- Emile's shields are curiously still intact after death, similar to the Elites next to him (which he killed). They will flare up and drain, but only one of the Elites' shields will recharge. See Dead shielded Emile.
References[edit]
- The opening chapter of the level is a reference to the first Halo: Reach ViDoc released, Once More Unto the Breach.
- The second chapter of the level is a reference to the chapter This Town Ain't Big Enough for Both of Us, from Halo 2's level, Metropolis, which is the first time in any Halo game in which the player could engage a Scarab in combat, whereas the first chapter of The Pillar of Autumn is the last.
- The last chapter of the level is a reference to the Halo: Combat Evolved level of the same name.
- It should also be noticed that the amount of thrusters on the back of the Pillar of Autumn differ from the amount in Halo: Combat Evolved, with the Reach version having 14, and the Combat Evolved version having 10. This is another 7 reference: 14/2=7.
Mistakes[edit]
- In the beginning cutscene, Emile was at Six's left after they landed on the ground. Once the gameplay begins, however, Emile is on the player's right.
- In the objective description, visible in the game's pause menu, the Pillar of Autumn is referred to as "The Pillar", whereas in all other media, she is referred to as "The Autumn" or by her full name.
Miscellaneous[edit]
- The maps Holdout and Boneyard are based on this level.
- You can bring a Ghost into most of the level after you reach the Boneyard area. However, it is nearly impossible to bring it through the rest of the mission.
- There are Cargo Trucks and 18-Wheeler tractors that can be driven with or without Emile at the beginning of the level. While the tractor can fully make the jump across the bridge, the cargo truck will only get its nose across, forcing the player to either aim for the slope to the right or leap out before the truck is dragged into the chasm by its own weight.
- The Marathon symbol engraved on the side of the Autumn is nowhere to be seen. However, there is now a Seventh Column symbol painted on the hull.
- The troops on-board Captain Keyes' Pelican are UNSC Marines. This marks a rare appearance of Marines in the game, which centers on the battles of Noble Team supporting the UNSC Army on Reach.
- When clearing the platform for Keyes and when using the mass driver cannon, the player can see two Scarabs alongside Wraiths and Ghosts fighting Warthogs and Scorpions in the background. The Scorpions seem to be moving faster than normal.
- If playing on Mythic difficulty, the Ket-pattern battlecruiser will receive a health boost and thus take two shots to destroy instead of just one.
- This level has the most Spartan Lasers in the Halo series, with 3 of them available on solo, and an additional 3 of them near the Onager on co-op.
- There is a McFarlane vehicle set based on the events of this level. The set consists of a Noble Six figure with an M6G Pistol replica, the Package replica and a model of a Mongoose.
- The partially destroyed house right after the Mongoose jump and during the Wraith encounter is reused in the following level Lone Wolf.
- In the area after the jump, there is a power node which looks identical to the ones from the Halo Wars level Scarab.
- This is the only level where a Sangheili Field Marshal is encountered as an enemy, and only one is fought. Noble Team has had several encounters with a Field Marshal before, and possibly all being the same individual.
Gallery[edit]
Concept art[edit]
Screenshots[edit]
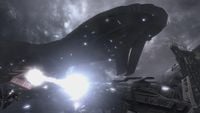
The John-117 in cryo easter egg in the Pillar of Autumn's hangar bay.
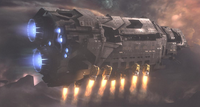
The Pillar of Autumn, using R7 thrust couplings, escapes.
Sources[edit]
- ^ Halo: Reach Editing Kit, game file
HREK\tags\levels\solo\m70\m70.scenario - ^ http://halo.bungie.net/Forums/posts.aspx?postID=55454181
| Preceded by The Package |
Halo: Reach Campaign Missions The Pillar of Autumn |
Succeeded by Lone Wolf |
| ||||||||||||||||||||||||||||||||||||||||||
