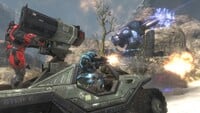
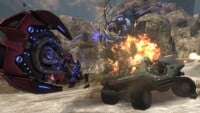
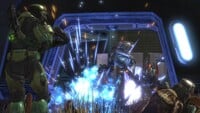
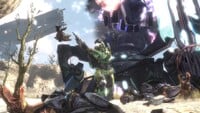
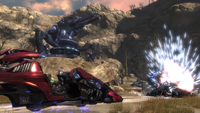
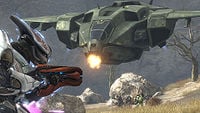
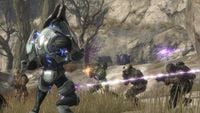
Tip of the Spear: Difference between revisions
From Halopedia, the Halo wiki
Datadeleter (talk | contribs) |
No edit summary |
||
| (321 intermediate revisions by more than 100 users not shown) | |||
| Line 1: | Line 1: | ||
{{ | {{Status|Gameplay}} | ||
{{disambig header|the level|the soundtrack|Tip of the Spear (music)}} | |||
{{Level infobox | |||
{{disambig header|the level|the | |pagegamelabel=HR | ||
{{Level | |prev=''[[Nightfall]]'' | ||
|prev = ''[[Nightfall]]'' | |next=''[[Long Night of Solace (level)|Long Night of Solace]]'' | ||
|next = ''[[Long Night of Solace (level)|Long Night of Solace | |name='''''Tip of the Spear''''' | ||
|image=[[File:HR TipOfTheSpear Loadscreen.png|300px]] | |||
|name = '''''Tip of | |game=''[[Halo: Reach]]'' | ||
|image = [[File: | |devname=<code>m35</code>{{Ref/File|Id=HREK|HREK|HREK\tags\levels\solo\m35\m35.scenario}} | ||
| | |player=[[Spartan_(multiplayer)#Campaign_and_Firefight|Noble Six]] | ||
| | |date=[[2552#August|August 12, 2552]] | ||
| | |place=[[Szurdok Ridge]], [[Ütközet]], [[Reach]] | ||
| | |objective=Neutralize [[Covenant]] [[Cheru-pattern Tyrant|AA cannons]] and disable [[Spire One]]'s [[Energy shielding|shield]]. | ||
|partime=00:15:00 {{C|''Master Chief Collection''}} | |||
|parscore=30,000 {{C|''Master Chief Collection''}}<br/>15,000 {{C|''Halo: Reach''}} | |||
| | |||
| | |||
}} | }} | ||
{{Article quote|Two massive armies clash! Time to go to war against the Covenant.}} | |||
"'''Tip of the Spear'''" is the fifth [[Campaign]] level in ''[[Halo: Reach]]''.{{Ref/Site|D=01|M=6|Y=2020|URL=http://xbox360.ign.com/articles/110/1109806p1.html|Site=IGN|Page=Deep Into the Halo: Reach Campaign}}{{Ref/Site|D=01|M=6|Y=2020|URL=http://www.gamespot.com/xbox360/action/haloreach/video/6272121/halo-reach-interview--campaign|Site=Gamespot|Page=Halo: Reach}} | |||
==Summary== | |||
The level opens with [[Auntie Dot]] briefing [[Noble Team]] on the situation: A large Covenant invasion force has been discovered in the [[Viery Territory]], and a [[Order of battle (Viery, Reach)|joint UNSC military force]] has been mobilized to counter them across the continent. Noble Team's mission is to destroy [[Spire One]], one of many [[Deployment spire|large towers]] the Covenant have placed around their landing zone. [[SPARTAN-B312|Noble Six]] and [[Catherine-B320]] lead the charge at the Covenant positions, and destroy two [[Cheru-pattern Tyrant|Covenant anti-air guns]]. Noble Six, manning a Falcon's gunner seat, then joins [[Jorge-052]] as they make their way to the Spire. As their Falcon passes through the Spire's [[Energy shielding|energy shield]], the craft is disabled by an [[Electromagnetic pulse|EMP]] which sends it crashing to the ground, killing the crew and forcing the Spartans to continue on foot. Jorge and Six eventually make their way to the Spire, where the installation is revealed to be a [[Slipspace translocation|teleportation terminal]], used by the Covenant to transport troops to the ground from a yet-unknown source. After deactivating Spire One's energy shield, Six leaves the area on a Falcon accompanied by [[Carter-A259]] and Jorge-052 as the {{UNSCShip|Grafton}} destroys the Spire. Immediately after the tower collapses, the ''Grafton'' is destroyed by the previously cloaked [[Sh'wada-pattern supercarrier|Covenant ''CSO''-class supercarrier]] ''[[Long Night of Solace]]''. | |||
==Transcript== | ==Transcript== | ||
'''{''Cutscene''}''' | [http://youtu.be/syXSr5yoDC4 '''{''Cutscene''}'''] | ||
'''[[Szurdok Ridge]], [[Ütközet]]''' | '''[[Szurdok Ridge]], [[Ütközet]]''' | ||
| Line 42: | Line 29: | ||
'''August 12, 2552 08:00 Hours''' | '''August 12, 2552 08:00 Hours''' | ||
''A convoy of | ''A convoy of more than thirty [[M12 Warthog|Warthogs]], a [[M274R Mongoose|Mongoose]], four [[M808C Scorpion|Scorpion]]s, along with several [[UH-144 Falcon|Falcons]] and two [[D77-TC Pelican|Pelicans]] advance across a bare plain.'' | ||
'''[[Auntie Dot]]''': "It appears that Noble Team's discovery last night was not an anomaly. Large Covenant deployments have occurred undetected, and we are now under attack across the Viery territory, including orbital defenses. As per the Winter Contingency, we are countering on every front. Noble's reconnaissance has also identified sophisticated Covenant army hiding canopies, and has been | *'''[[Auntie Dot]]''': "It appears that Noble Team's discovery last night was not an anomaly. Large Covenant deployments have occurred undetected, and we are now under attack across the Viery territory, including orbital defenses. As per the Winter Contingency, we are countering on every front. Noble's reconnaissance has also identified sophisticated Covenant army hiding canopies, and has been pinpointed what's believed to be a landing zone for additional Covenant forces, the origin of which is yet to be determined." | ||
''The Warthogs, led by Kat and Noble Six, charge towards the Covenant landing zone | [[File:reach 5016792 Full.jpg|thumb|300px|A large UNSC convoy, about to engage Covenant ground forces.]] | ||
''The Warthogs, led by Kat and Noble Six, charge towards the Covenant landing zone, followed by a group of Falcons. Carter is revealed to be on board a Falcon overlooking the Warthog driven by Kat. Noble Six rides shotgun in Kat's Warthog.'' | |||
'''[[Carter-A259]]''': "That landing zone has been tagged by UNSC command as a Priority One target." | *'''[[Commander]] [[Carter-A259]] (COM)''': "That landing zone has been tagged by UNSC command as a Priority One target." | ||
*'''[[Warrant Officer]] [[Jun-A266]] (COM)''': "Det-charge link is loud and clear!" | |||
''' | '''''Note:''' At this point, the subtitles show Jun saying, "Time to bake that cake we made last night!" The dialogue was confirmed by Bungie to have been a last-minute change.{{Ref/YouTube|Id=CamPre|FTQwXVgNHLo|Bungie|Halo: Reach Campaign Preview}}'' | ||
'' | *'''[[Lieutenant Commander]] [[Catherine-B320]]''': "Copy that. Acquiring signal lock on the [[Stealth pylon|pylon]]. Detonating in three, two..." | ||
'' | ''Kat detonates the [[Unidentified UNSC explosive|charge]] that was planted on the pylon in the previous mission by Jun, which is seen far to the right of the advancing Warthog strike force. The pylon is destroyed.'' | ||
'' | ''[[Banshees]] swoop down on the convoy and open fire, while Wraiths lob mortar rounds from a distance. The gunners on the Warthogs retaliate, firing at the Banshees. {{Pattern|Zurdo|Wraith}} mortar rounds tear into the convoy and destroy several of the advancing vehicles. Kat and Noble Six dodge the mortar fire, and turn towards a [[Bridge (structure)|bridge]] across a deep chasm, but as they prepare to cross, a plasma mortar destroys the bridge.'' | ||
'' | *'''SPARTAN-B312''': "Incoming!" | ||
*'''Kat-B320''': "Might want to hold onto something!" | |||
''Kat accelerates and the Warthog manages to jump the gap in the destroyed bridge, but crashes violently on the other side, (presumably) killing the gunner and sending Kat and Noble Six flying.'' | |||
''Kat accelerates and the Warthog manages to jump the gap in the destroyed bridge, but crashes violently on the other side, killing the gunner and sending Kat and Noble Six flying.'' | |||
''Fade to white.'' | ''Fade to white.'' | ||
''Fade back to Noble Six's point of view, which is hazy. The SPARTAN is lying | ''Fade back to Noble Six's point of view, which is hazy. The SPARTAN is lying facedown after the crash, with an [[M319 Individual Grenade Launcher]] lying several feet away. Vision clears, and Six glances towards the destroyed bridge. A second Warthog attempts to clear the gap in the bridge but fails, and the troopers inside fall screaming into the canyon below.'' | ||
''' | *'''Kat-B320''': "Six! Can you hear me? Six, you alright? I could use some help!" | ||
''Six | ''Six gets up, grabbing the grenade launcher along the way.'' | ||
''' | *'''SPARTAN-B312''': "On my way." | ||
'''{''Gameplay''}''' | '''{''Gameplay''}''' | ||
===Tempest Perimeter=== | ===Tempest Perimeter=== | ||
'''''Push up the hill and secure a landing zone.''''' | |||
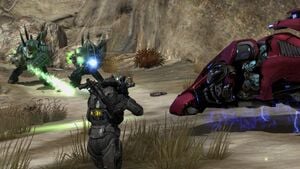
[[File:HR WarthogExplosion.jpg|thumb|300px|Noble Six fires his grenade launcher at the Banshees that destroyed the Warthog.]] | |||
''Kat activates her [[Armor Lock]] as the Warthog she is using for cover explodes after being shot by two Banshees. A Spirit drops down troops and flies away. A Falcon flies overhead and engages a few Covenant troops before being shot down. On the adjacent plateau across the river, dozens of Warthogs and Ghosts are clashing.'' | |||
*'''Carter-A259 (COM)''': "Kat, Six, what's your status?" | |||
*'''Kat-B320''': "Pylons are down, we're pushing up the hill." | |||
''Kat and Six encounter heavy resistance as they move up the hill, including two Fuel Rod Shade variants. After eliminating the enemy forces in the area, a Pelican shows up with a [[M12R Light Anti-Armor Vehicle|Missile Warthog]].'' | |||
*'''Carter-A259 (COM)''': "Kat, be advised: [[Office of Naval Intelligence|ONI]] has ID'd two hostile [[Cheru-pattern Tyrant|anti-aircraft guns]] southwest of your location." | |||
*'''Kat-B320''': "Copy, Commander. New targets, Six. Go shut down those AA guns." | |||
*'''Kat-B320''': "Commandeer that Warthog, get us there in one piece." | |||
'' | ''If the player stalls:'' | ||
*'''Kat-B320''': "Commandeer that Warthog, Six." | |||
'' | ''Kat and Six drive a short distance before arriving at the AA gun. A Falcon flies above the Covenant infantry, engaging them before being shot down by the AA gun. '' | ||
''' | *'''Carter-A259 (COM)''': "Six, AA gun should be in visual range." | ||
*'''[[2 Lima 4]] (COM)''': "2 Lima 4 to Noble One, those guns are pounding us with high-velocity plasma shells!" | |||
*'''Auntie Dot (COM)''': "Which would mean a strike by the [[UNSC frigate|frigate]] ''[[UNSC Grafton|Grafton]]'' is also out of the question." | |||
*'''Carter-A259 (COM)''': "Noble Six, all our birds are stuck out of range unless you can do something about those guns." | |||
'' | ''As they approach the gun, a furious battle can be seen in the valley below. Three [[Deutoros-pattern Scarab|Scarab]]s and multiple {{Pattern|Karo'etba|Ghost}}s, Wraiths, and Banshees are exchanging fire with a large group of Warthogs, Scorpions, and Falcons.'' | ||
'' | ''Kat and Six proceed to the AA gun, encountering resistance along the way.'' | ||
''' | *'''Carter-A259 (COM)''': "New intel, Six. Looks like normal weapons won't dent those AA guns." | ||
*'''Auntie Dot (COM)''': "I would suggest neutralizing the internal fuel cells, [[Lieutenant]]." | |||
''Kat and Six | [[File:HR WarthogAttacksTyrant.jpg|thumb|300px|Six's Warthog charges into the Covenant infantry guarding the Tyrant.]] | ||
''Kat and Noble Six eliminate the Covenant troops in the area. Six then goes into the base of the AA gun and destroys its power core. They make a quick exit as the gun begins to overload.'' | |||
''' | *'''2 Lima 4 (COM)''': "Control, 2 Lima 4: permission to commence bombing run, heading 224.6, over." | ||
''' | ''After the AA cannon explodes, three [[Longsword]]s and two heavy frigates, the {{UNSCShip|Grafton}} and the {{UNSCShip|Saratoga}}, fly overhead. A Covenant Phantom arrives but is quickly annihilated by the frigates' guns.'' | ||
''' | *'''Carter-A259 (COM)''': "Good work, Noble Six. UNSC air support: skies are clear." | ||
*'''Control (COM)''': "Copy. 2 Lima 4, bombing run, heading 224.6, permission granted - out." | |||
'' | ''The frigates open fire on the Covenant forces in the valley, as the Longswords commence a bombing run on the three Scarabs, destroying two of them and disabling the third, which detonates seconds later.'' | ||
'' | ---- | ||
''If the player proceeds without Kat on their Warthog:'' | |||
''Kat | *'''Kat-B320 (COM)''': "Commander, I'm going to set up a forward observation post here." | ||
*'''Carter-A259 (COM)''': "Copy that, I'm waiting on new intel. See what you can see, Carter out." | |||
---- | |||
''' | *'''Kat-B320''': "Six, take that south road and see if can you have a better view at the Spires. I'll be on [[COM]]s." | ||
'' | ''Kat and Six proceed on, soon driving under a partially destroyed bridge. They head up the slope, encountering a T-26 AGC Wraith and a group of Skirmishers.'' | ||
''' | *'''Kat-B320''': "Six, Pelican inbound with deployable bridge. Once the bridge is down, head over to the southwest side." | ||
'' | ''A Pelican, while under fire from a Phantom, drops off a [[deployable bridge]], allowing NOBLE Team to continue.'' | ||
'' | *'''Kat-B320''': "Bridge in position, Six, move on to the other side." | ||
'' | ''They cross the bridge and continue down the valley, soon arriving at a mining facility that is across a canyon.'' | ||
===Hand Over Fist=== | ===Hand Over Fist=== | ||
'''''Progress through the facility and destroy the second cannon.''''' | |||
'''Carter-A259''': "Noble Six, there's a mining facility near your location | [[File:HR BXRApproach.jpg|thumb|300px|The Warthogs arrives at the BXR mining facility.]] | ||
*'''Carter-A259 (COM)''': "Noble Six, there's a mining facility near your location. Covenant are using it as a command outpost. Troopers on site have already engaged." | |||
'' | ''The Spartans arrive at a bridge over the canyon. Several Army troopers are under fire from Covenant troops and a [[Shade]] turret, which are soon neutralized. The Spartans and troopers advance on the [[BXR Mining]] facility.'' | ||
'''Carter-A259''': "Eyes on the prize, Noble. Take out that Zealot if you get the chance, but keep movin' towards the spires." | *'''Auntie Dot (COM)''': "New intelligence: friendly forces near the Covenant outpost have sighted a high value target. An [[Sangheili Zealot|Elite Zealot]], in fact." | ||
*'''Kat-B320''': "A Zealot? We're onto something big, Commander." | |||
*'''Carter-A259 (COM)''': "Eyes on the prize, Noble. Take out that Zealot if you get the chance, but keep movin' towards the spires." | |||
''They move into the facility, encountering resistance as they go.'' | ''They move into the facility, encountering resistance as they go.'' | ||
''' | *'''Kat-B320''': "No visual on target." | ||
''The Spartans move farther into the facility, eventually finding the Zealot.'' | ''The Spartans move farther into the facility, eventually finding the Zealot - one of the [[Devoted Sentries]].'' | ||
''If | ''If the player eliminates the Zealot:'' | ||
*'''Kat-B320''': "High value target has been neutralized. Impressive, Six." | |||
'' | ''After eliminating the enemy forces in the area:'' | ||
'' | *'''Kat-B320''': "Mining facility secured, Six. Move on at your discretion." | ||
'' | ''Kat and Six move outside to find two [[Unggoy]], three Ghosts, and a [[Rizvum-pattern Revenant|Revenant]]. When Noble Six exits the mining facility, the two Grunts attempt to escape in the Ghosts but are quickly eliminated. Six and Kat commandeer the Revenant (or continue on foot) and proceed down the trail, encountering Covenant forces as they go.'' | ||
'' | *'''Carter-A259 (COM)''': "Update, Six: scans show another Covenant AA gun ahead of your location. I want you to neutralize that gun, by any means necessary." | ||
'' | [[File:HR RevenantAgainstHunters.jpg|thumb|300px|Kat and Six fighting a pair of Mgalekgolo at the second Tyrant.]] | ||
''Kat and Six arrive at the second AA cannon and engage a large amount of Covenant forces, including two Wraiths, a [[Mgalekgolo]] pair, and a swarm of [[Drones]]. A Falcon flies overhead and assists in clearing the area before suffering the same consequence the previous Falcon did near the first AA cannon; shot down by the AA cannon.'' | |||
'' | ''If the player takes too long to disable the AA cannon:'' | ||
*'''Carter-A259 (COM)''': "Noble Six, I need that AA gun offline ''now''!" | |||
'' | ''After neutralizing the Covenant forces in the area, Six proceeds inside the cannon and destroys the gun's power core. The gun soon overloads and explodes. A Phantom arrives to drop off reinforcements, which are soon defeated.'' | ||
'' | ''A Pelican arrives soon after, dropping off troopers.'' | ||
'' | *'''Carter-A259 (COM)''': "Well done, Six. ONI needs up-close recon on those spires, we're gonna fly you the rest of the way." | ||
*'''Kat-B320''': "Jorge has a Falcon inbound to your position, Lieutenant. Highlighting the LZ now." | |||
''' | ''A navpoint appears on Noble Six's [[HUD]].'' | ||
'''Carter-A259''': "Copy that, I'm waiting on new intel. See what you can see, Carter out." | ---- | ||
''If Kat has accompanied the player to this point:'' | |||
*'''Kat-B320 (COM)''': "Commander, I'm going to set up a forward observation post here." | |||
*'''Carter-A259 (COM)''': "Copy that, I'm waiting on new intel. See what you can see, Carter out." | |||
---- | |||
''The Falcon arrives | ''The Falcon arrives.'' | ||
'''Jorge-052''': "Need a lift, Spartan?" | *'''[[Warrant Officer|Chief Warrant Officer]] [[Jorge-052]]''': "Need a lift, Spartan?" | ||
''' | ''Noble Six mans one of the Falcon's [[M460 automatic grenade launcher]]s.'' | ||
'''Falcon Pilot''': "I'll call out targets as we go." | *'''Jorge-052''': "Spotted some nasty business in the canyon on the way down." | ||
*'''Falcon Pilot (COM)''': "I'll call out targets as we go." | |||
===The Spire=== | ===The Spire=== | ||
'' | '''''Reach the top of the spire and prepare for evac.''''' | ||
'' | ''The Falcon flies along the river. It eventually reaches a bridge, with Covenant forces attempting to cross it.'' | ||
*'''Falcon Pilot (COM)''': "Top of the canyon, dead ahead." | |||
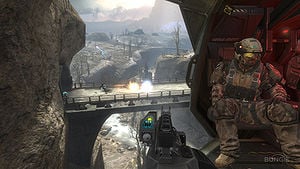
[[File:Halo Reach - ToTS gunner.jpg|thumb|300px|A first-person view of the turret aboard the Falcon.]] | |||
''Six eliminates the forces on the bridge. Jorge and Six encounter more resistance further down the canyon, but Six eliminates them as well.'' | ''Six eliminates the forces on the bridge. Jorge and Six encounter more resistance further down the canyon, but Six eliminates them as well.'' | ||
'''Falcon Pilot''': "Nice shooting, Spartan." | *'''Falcon Pilot (COM)''': "Nice shooting, Spartan." | ||
*'''Jorge-052''': "Stay sharp, Six. We're not out of the canyon yet." | |||
'' | ''The Falcon approaches a [[Spire One|spire]] with an enormous, visible energy shield.'' | ||
*'''Falcon Pilot (COM)''': "There's the spire." | |||
*'''Carter-A259 (COM)''': "Solid copy. Dot?" | |||
'''Falcon Pilot''': "There's the spire." | *'''Auntie Dot (COM)''': "Latest intel suggests these spires may be projecting electromagnetic cloaking shields." | ||
'''Carter-A259''': "Solid copy | |||
'''Auntie Dot''': "Latest intel suggests these spires may be projecting electromagnetic cloaking shields." | |||
''They arrive at the edge of the shield. The pilot hesitates, hovering just outside it.'' | ''They arrive at the edge of the shield. The pilot hesitates, hovering just outside it.'' | ||
'''Jorge-052''': "Priority One, pilot. Gotta know what's in there." | *'''Jorge-052''': "Priority One, pilot. Gotta know what's in there." | ||
*'''Falcon Pilot (COM)''': "Affirmative, sir... Here we go." | |||
'''Falcon Pilot''': "Affirmative, sir... Here we go." | |||
''The Falcon flies towards the shield | ''The Falcon flies towards the shield and the screen flashes white.'' | ||
'''{''Cutscene''}''' | [http://youtu.be/b7HkDrI4Cn8 '''{''Cutscene''}'''] | ||
''The Falcon | ''Cuts to Noble Six's point of view as the Falcon spins out of control, scratching the rock wall in the process. The grenade launcher retracts, and Six holds on to the side of the Falcon. Six looks at Jorge, who is also holding on to the side of the Falcon.'' | ||
'''Falcon Pilot''': "We just lost all power. We're going down | *'''Falcon Pilot (COM)''': "We just lost all power. We're going down!" | ||
*'''Jorge-052''': "Lock your armor, Spartan!" | |||
*'''Falcon Pilot (COM)''': "Brace for a hard landing!" | |||
'' | ''The Falcon crashes. Six is thrown a short distance from the Falcon. Jorge emerges from the Falcon, tossing out equipment. Six grabs an assault rifle on the ground and stands up. After looking around briefly, Jorge picks up his [[M247H Heavy Machine Gun|gun]].'' | ||
*'''Jorge-052''': "Crew's dead. We shouldn't stay here." | |||
'''Jorge-052''': Crew's dead. We shouldn't stay here. | |||
'''{''Gameplay''}''' | '''{''Gameplay''}''' | ||
'''Jorge-052''': "I'm showing hostiles all over the place, we gotta move." | *'''Jorge-052''': "I'm showing hostiles all over the place, we gotta move." | ||
'' | ''Skirmishers and Unggoy are seen moving downhill towards the crash site.'' | ||
'''Jorge-052''': "Commander, we got eyes on the spire. Looks like a staging area". | *'''Jorge-052''': "Commander, we got eyes on the spire. Looks like a staging area." | ||
*'''Carter-A259 (COM)''': "Copy, we have your visual. Dot's working the problem, stand by." | |||
'' | ''Jorge and Six move across the river, encountering minor Covenant resistance, composed of only Unggoy, Kig-Yar and Skirmishers. The two Spartans arrive at a small cliff overlooking the base of the Spire as the Spire comes into full view. A Phantom seemingly appears out of nowhere in the Spire's midsection, and flies away, outside the dome-shaped energy shield.'' | ||
'''Auntie Dot''': "Noble Five, ONI believes those spires to be teleportation terminals." | *'''Auntie Dot (COM)''': "Noble Five, ONI believes those spires to be teleportation terminals." | ||
*'''Jorge-052''': "Teleporters? Linked to ''what?''" | |||
*'''Carter-A259 (COM)''': "Frigate ''Grafton'' is on station, ready to kill that spire, but first we need to power down its shields." | |||
*'''Jorge-052''': "Understood. Six, I'll hold these bastards off. You find a way to the top of the spire." | |||
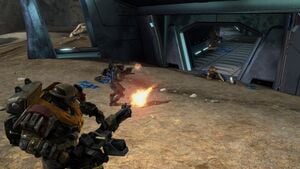
''' | [[File:HR SpireAssault2.jpg|thumb|300px|Six and Jorge fighting a group of Unggoy at the Spire's entrance.]] | ||
''Noble Six eventually makes it to one of the gravity lifts, sending them up to the top of the spire.'' | |||
''' | ''Alternatively, Six can hijack a Banshee and fly it to the spire's top.'' | ||
'''Jorge-052''': " | *'''Jorge-052 (COM)''': "Noble Leader, Six is on his/her way up." | ||
*'''Carter-A259 (COM)''': "Get in there. Take out that shield, Lieutenant." | |||
'' | ''Six arrives at the top of the Spire.'' | ||
'''Jorge-052''': " | *'''Carter-A259 (COM)''': "Spartans, I'm en route with a Falcon. We'll pick you up as soon as you knock out power to that shield." | ||
*'''Jorge-052 (COM)''': "Ready when you are, Six." | |||
'' | ''Noble Six proceeds to engage the Covenant forces at the top of the spire. A [[Sangheili Ultra]], seen manning the controls of the spire, draws his [[Energy Sword]] as soon as Noble Six engages him.'' | ||
'''Carter-A259''': " | *'''Carter-A259 (COM)''': "Hurry, Lieutenant. We got a frigate inbound to blow that spire as soon as the shield is powered down." | ||
'' | ''Noble Six eliminates the hostiles in the spire and proceeds to the spire controls.'' | ||
*'''Carter-A259 (COM)''': "Lieutenant, drop the shield and get out of there!" | |||
'''Carter-A259''': "Lieutenant, drop the shield and get out of there | |||
''Six powers down the shield.'' | ''Six powers down the shield.'' | ||
'''{''Cutscene''}''' | [http://youtu.be/DlOVqVapN8I '''{''Cutscene''}'''] | ||
''The shield dissipates. Six | ''The shield dissipates. Six sprints for the outer edge of the top floor, where Carter and Jorge are waiting in a hovering Falcon. Without slowing down, Noble Six leaps off the spire and is caught by Jorge, who pulls Six up into the Falcon.'' | ||
'''Carter-A259''': "Get us outta here | *'''Carter-A259''': "Get us outta here!" | ||
''The Falcon begins to pull away from the spire.'' | ''The Falcon begins to pull away from the spire.'' | ||
'''Carter-A259''': "Control? This is Noble One. Spire One is green and you're free to engage. Have a nice day." | *'''Carter-A259''': "Control? This is Noble One. Spire One is green, and you're free to engage. Have a nice day." | ||
*'''Air Control (COM)''': "Copy that, Noble One. Be advised, all ground units: Frigate Three-One-Eight heavy is inbound, and [[MAC]] rounds have been authorized." | |||
''' | ''Noble Team's Falcon continues to fly away from the Spire, joining a larger group of Falcons.'' | ||
'''Jorge-052''': "MAC rounds? ''In atmosphere?''" | *'''Jorge-052''': "MAC rounds? ''In atmosphere?''" | ||
*'''Carter-A259''': "One way to get their attention! Hang on to your teeth, people!" | |||
''' | ''The UNSC ''Grafton'', in a shallow dive, moves towards the spire past the Falcon with Six, Carter, and Jorge. The Spartans brace themselves.'' | ||
''The | ''The ''Grafton'' continues to move towards the spire, and, with a bright flash, fires its MAC cannon, hitting the Spire and shattering it. Jorge, satisfied, turns back and nods at Carter and Six, failing to notice a purple glow illuminating the sky above the ''Grafton''. Moments later, an [[energy projector]] beam streaks down from the sky and hits ''Grafton''<nowiki>'</nowiki>s bow section, instantly gutting the ship. Secondary explosions blossom along the hull, and the ''Grafton'' begins to plummet towards the ground.'' | ||
*'''Auntie Dot (COM)''': "New contact. High-tonnage." | |||
'''Auntie Dot''': "New contact. High-tonnage." | |||
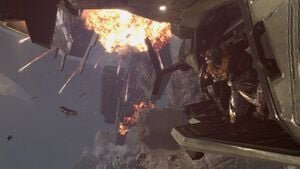
[[File:Grafton Destroyed.jpg|thumb|300px|Jorge looks out from the Falcon as a massive explosion rocks the hull of the ''Grafton''.]] | |||
''The Spartans watch as the aft section of the ''Grafton'' explodes. The forward section crashes to the ground.'' | ''The Spartans watch as the aft section of the ''Grafton'' explodes. The forward section crashes to the ground.'' | ||
'''Jorge-052''': "No. ''No!'' Somebody tell me this ain't happening!" | *'''Jorge-052''': ''(shocked)'' "No. ''No!'' Somebody tell me this ain't happening!" | ||
'' | ''As Six looks out to watch the frigate fall, Air Control calls in.'' | ||
'''Carter-A259''': ''Grafton'' is dust! We need to get out of here, ''now'' | *'''Air Control (COM)''': "UNSC Frigate ''Grafton'', do you copy?" | ||
*'''Carter-A259''': "''Grafton'' is dust! We need to get out of here, ''now!''" | |||
''As the shattered UNSC ''Grafton'' falls | ''The Falcon flees the scene. As the shattered UNSC ''Grafton'' falls to the ground, a [[Covenant supercarrier]], the ''[[Long Night of Solace]]'', is revealed to be holding position over the destroyed Spire.'' | ||
''Fade to black.'' | ''Fade to black.'' | ||
''Level ends.'' | ''Level ends.'' | ||
==Achievements== | |||
The following [[achievement]]s can be unlocked on Tip of the Spear across the [[Xbox 360]] and ''[[Halo: The Master Chief Collection]]'' editions of ''Halo: Reach''. | |||
{| class="wikitable" | |||
|- | |||
! scope="col" style="text-align:center;" |'''''Halo: Reach'' (Xbox 360)''' | |||
! scope="col" style="text-align:center;" |'''''Halo: MCC'' (Xbox One)''' | |||
! scope="col" style="width:135px;text-align:center;" |'''''Halo: MCC'' (Steam)''' | |||
! scope="col" style="width:175px;height:20px;text-align:center;" |'''Title''' | |||
! scope="col" style="width:350px;height:20px;text-align:center;" |'''Unlock requirement''' | |||
! scope="col" style="width:200px;height:20px;text-align:center;" |'''Games''' | |||
|- | |||
|[[File:HR Achievement To War.png|40px|center|65px]] | |||
|[[File:HTMCC HR Achievement ToWar.png|center|114px]] | |||
|[[File:HTMCC HR Achievement To War (Steam).jpg|center|64px]] | |||
|<center>'''[[To War]]'''</center> | |||
|Beat Tip of the Spear on [[Normal]] difficulty or harder. | |||
|<center>''[[Halo: Reach]]''<br/>''[[Halo: The Master Chief Collection]]''</center> | |||
|- | |||
|[[File:HR Achievement Your Heresy Will Stay Your Feet.png|center|64px]] | |||
|[[File:HTMCC HR Achievement YourHeresyWillStayYourFeet.png|center|114px]] | |||
|[[File:HTMCC Achievement Your Heresy Will Stay Your Feet Steam.jpg|center|64px]] | |||
|<center>'''[[Your Heresy Will Stay Your Feet]]'''</center> | |||
|Kill the [[Sangheili Zealot]] on Tip of the Spear. | |||
|<center>''[[Halo: Reach]]''<br/>''[[Halo: The Master Chief Collection]]''</center> | |||
|- | |||
|<center>N/A</center> | |||
|[[File:HTMCC HR Mind the Skill Gap.png|center|114px]] | |||
|[[File:HTMCC Achievement Mind the Skill Gap Steam.jpg|center|64px]] | |||
|<center>'''[[Mind the Skill Gap]]'''</center> | |||
|Observe the logo of a buttoned-up mining company. | |||
|<center>''[[Halo: The Master Chief Collection]]''</center> | |||
|- | |||
|<center>N/A</center> | |||
|[[File:HTMCC HR Achievement GenerousTipper.png|center|114px]] | |||
|[[File:HTMCC HR Achievement GenerousTipper Steam.jpg|center|64px]] | |||
|<center>'''[[Generous Tipper]]'''</center> | |||
|Beat the par time on Tip of the Spear. | |||
|<center>''[[Halo: The Master Chief Collection]]''</center> | |||
|- | |||
|<center>N/A</center> | |||
|[[File:HTMCC HR Achievement BakeThatCake.png|center|114px]] | |||
|[[File:HTMCC HR Achievement BakeThatCake Steam.jpg|center|64px]] | |||
|<center>'''[[Bake That Cake]]'''</center> | |||
|Beat the par score on Tip of the Spear. | |||
|<center>''[[Halo: The Master Chief Collection]]''</center> | |||
|- | |||
|<center>N/A</center> | |||
|[[File:HTMCC HR Achievement RampantSpeculation.png|center|114px]] | |||
|[[File:HTMCC HR Achievement RampantSpeculation Steam.jpg|center|64px]] | |||
|<center>'''[[Rampant Speculation]]'''</center> | |||
|Find [[Data pads|Data Pad 4]] on Tip of the Spear. | |||
|<center>''[[Halo: The Master Chief Collection]]''</center> | |||
|- | |||
|<center>N/A</center> | |||
|[[File:HTMCC HR Achievement MeddlingandMadness.png|center|114px]] | |||
|[[File:HTMCC HR Achievement MeddlingandMadness Steam.jpg|center|64px]] | |||
|<center>'''[[Meddling and Madness]]'''</center> | |||
|Find [[Data pads|Data Pad 13]] on Tip of the Spear on [[Legendary]] difficulty. | |||
|<center>''[[Halo: The Master Chief Collection]]''</center> | |||
|} | |||
==Trivia== | ==Trivia== | ||
* | ===Glitches=== | ||
*Tip of the Spear | *Kat can sometimes be heard saying lines of dialogue out of sequence throughout the level. | ||
* | *Sometimes a Banshee will randomly boost into the ground at the beginning of the level, destroying itself. | ||
*It is possible for the player to kill himself/herself during the [[cutscene]] after the Falcon goes through the Spire by continuously firing the grenade launcher at the shield. When the player goes through the shield, they will hear their shields collapse and will be brought back to the previous checkpoint. In Co-op, the player who shot the shield will die instantly once the gameplay starts again in the crash site. | |||
*The | *The "[[Tip of the Spear vacation]]" can be done on this level. | ||
* | |||
* | ===Mistakes=== | ||
*It is possible to | *In the opening cutscene, when the machine guns on the Warthogs fire on the attacking Banshees, their barrels do not spin. | ||
*The | *The Warthog that fails the jump at the beginning cutscene is nowhere to be seen in the canyon below. It (or its remains if it did not survive the fall) may have floated off with the river. | ||
*This is the | *The Shade turrets that the player engages when on the Falcon do not have operators. | ||
*The | *When the Falcon loses power after going through the shield, it spirals out of control before crashing, like a modern-day helicopter would. It would likely not spin after losing power, as the Falcon does not have a tail rotor as most modern VTOL craft do. During gameplay, Falcons that are affected by an electromagnetic pulse simply drop straight down. | ||
<!--As seen in the level Dome of Light in Halo Wars, Covenant aircraft are immune to the electromagnetic pulse produced by energy shield domes. Do not add this to the article, as it is not a mistake.--> | |||
*During the final chapter ''The Spire'', if the player wields the left grenade launcher of the Falcon (opposite of an army trooper), the cutscene following will still show Six on the right side of the Falcon (opposite of Jorge-052). | |||
*In the cutscene in which the Falcon crashed, Noble Six looks to their left, and sees the damaged rotor of the second crashed Falcon over the small hill to their left. When gameplay starts however, it cannot be seen. In fact, the second Falcon's crash site is too far to be seen from the first Falcon's crash site. | |||
*After the Falcon crash, the player starts with two-thirds of their total health, reflecting injury from the crash. If the player had only one third of their health left before entering the Falcon, though, they will have two-thirds after the crash anyway, meaning the crash somehow increased their health. | |||
===References=== | |||
*The famous "[[Wikipedia:Wilhelm scream|Wilhelm Scream]]" is featured in the opening cinematic of this level on the Normal difficulty. The screams of the falling troopers vary on each difficulty. | |||
*The mining facility in this level is run by the [[BXR Mining]] company, a reference to the [[BXR]] button combination. | |||
*The player must clear the top of the spire which is loaded with Grunts led by an Ultra Sangheili, resembling ''Halo 2''<nowiki>'s</nowiki> campaign level "[[Metropolis]]", where the inside of the Scarab is also led by an Ultra Sangheili. | |||
===Miscellaneous=== | |||
*''Tip of the Spear'' was alluded to in a [[Bungie Weekly Update]] before the release of ''Halo: Reach''; Campaign Design Lead Chris Opdahl hinted at a level with the initials "TotS" likely becoming an instant favorite among fans.{{Ref/Site|URL=http://www.bungie.net/News/content.aspx?type=topnews&cid=27328|Site=Bungie.net|Page=Bungie Weekly Update: 07.16.10|D=25|M=07|Y=2010}} | |||
*This is the first level of ''Halo: Reach'' in which Yanme'e are encountered. They're found behind the second Tyrant gun. | |||
*There was an early bug in development where the gunner of the Warthog that falls into the chasm in the beginning cutscene will fire at Kat's hips as the Warthogs crashes into the cliff.{{Ref/Reuse|Id=CamPre}} | |||
*This is the third of four levels (the others being "[[Winter Contingency]]", "[[ONI: Sword Base]]", and "[[The Pillar of Autumn (Halo: Reach level)|The Pillar of Autumn]]") where the [[MA37 Individual Combat Weapon System|assault rifle]] has more than the usual 288 rounds; in this case, it carries 568 rounds on both solo and [[Cooperative Play]]. | |||
*It is possible to use the grenade launcher's secondary fire to disable a Banshee at the beginning of the level. However, these Banshees cannot be hijacked and it is possible that their momentum when EMPed will cause them to fall forward and ram into the player. | |||
*The musical track that plays when the player travels to the first Tyrant is not present in the [[Halo: Reach Original Soundtrack]]. The track itself has the same percussion beat as the [[Halo Theme]], and [[Martin O'Donnell]] humorously called it the "Halo Driving Music".{{Ref/Reuse|Id=CamPre}} | |||
*This level marks the first appearance of the [[Deutoros-pattern Scarab|Scarab]] in ''Halo: Reach'', although it is not fought by the player. The Scarabs in the distance have a single looping walking animation, but they do not move anywhere. When the Longswords bomb them, the Scarabs are destroyed but do not have a destruction animation. | |||
*Due to the range at which they are engaging Covenant forces, the Scorpions in the background battles fire their shells in an curved trajectory, indicating the shells are being affected by gravity. | |||
*The Covenant Spire that Noble Six destroys is the central location for the multiplayer Invasion map ''[[Spire (map)|Spire]]''. | |||
*The Spires in the distance are actually merged bitmaps and are only a quarter as tall as Spire One's in-game geometry. Similarly, a player that escapes the map can discover that they are not solid and the projected shields do not block any shots, inside or out. | |||
*In the final cutscene, all of the Falcons, with exception of the one NOBLE Team is riding on, are used with the rough models used in background battles. | |||
*No matter what weapons Noble Six carries before mounting the Falcon, their loadout will be changed to [[MA37 Individual Combat Weapon System|assault rifle]] and [[DMR]] after the Falcon crashes. | |||
*You are able to destroy all {{Pattern|Cheru|Tyrant}} Batteries without entering its lower level and destroying the core. With enough external damage using heavy firepower, such as the [[M12G1 Gauss Warthog]] or the {{Pattern|Rizvum|Revenant}}, the {{Pattern|Cheru|Tyrant}} will begin to leak plasma from its joints and explode, rendering the weapon useless. This method may be safer, although it has the drawback of taking longer periods of time. | |||
==Gallery== | ==Gallery== | ||
<gallery | ===Concept art=== | ||
File: | <gallery> | ||
File: | File:HR_WarthogCharge_Concept_1.jpg|Early concept art of the level's opening scene. | ||
File:Halo Reach - | File:HR_WarthogCharge_Concept_2.jpg|Finalized concept art of the level's opening scene. | ||
File: | File:HR_TipOfTheSpear_Concept.jpg|Concept art of the level's first playable area. | ||
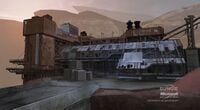
File: | File:HR MiningFacilityConcept.jpg|Concept art of the BXR mining facility. | ||
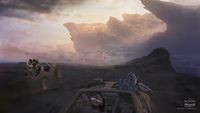
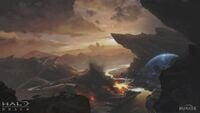
File:Halo Reach - | File:HR TotSSpireConcept.jpg|Concept art of the Spire at the end of the level, also used as the campaign menu background for the level in ''Halo: Reach''. | ||
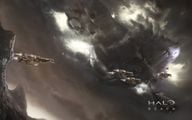
File: | File:Reach-Concept-ToTS-Supercarrier.jpg|Concept art of the ''[[Long Night of Solace]]''. | ||
</gallery> | |||
===Promotional images=== | |||
<gallery> | |||
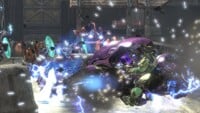
File:HR TotS CovDefenses.jpg|Banshees and a Spirit flying above Covenant ground forces. | |||
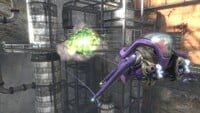
File:HR TotS Uphill.jpg|A Falcon draws attention from Covenant ground forces. | |||
File:HR TotS Uphill 2.jpg|Two Banshees flying overhead. | |||
File:Reach TotS Env.jpg|The Tyrant, defended by Kig-Yar and Unggoy. | |||
File:Reach TotS RocketHog.jpg|The Rocket Warthog's gunner firing at a Ghost. | |||
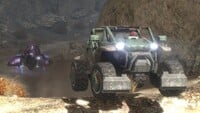
File:Reach-Rocket Warthog.jpg|Front view of the Rocket Warthog. | |||
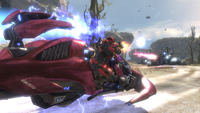
File:HR TotS RocketHogVsRevenant.jpg|The Rocket Warthog faces off against a Revenant. | |||
File:HR TotS RocketHogVsRevenant 2.jpg|The Revenant speeds past the Warthog. | |||
File:HR ToTS TyrantDoorway.jpg|A battle at the Tyrant's doorway. | |||
File:HR TotS TyrantBoom.jpg|The Tyrant's explosion. | |||
File:HR TotS TyrantDestruction.jpg|First-person view of the Tyrant's explosion. | |||
File:Reach TotS FP02.jpg|First-person view while a Phantom arrives at the destroyed Tyrant. | |||
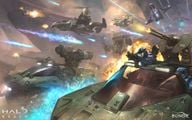
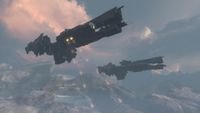
File:HaloReach - Frigates.png|{{UNSCShip|Grafton}} and {{UNSCShip|Saratoga}} supporting UNSC ground forces. | |||
File:HR TotS Spade.jpg|The Spade mid-air. | |||
File:HR TotS Ghost.jpg|A heavily damaged Ghost in combat. | |||
File:HR TotS Banshee.jpg|A Banshee flies past the BXR facility, leaving a fuel rod cannon blast in its path. | |||
File:HR TotS Pursuit.jpg|A Spade pursued by a Ghost. | |||
File:Revenant - Gameplay01.png|The Revenant battles a Wraith. | |||
File:Revenant - Gameplay02.png|The Revenant destroys a Wraith. | |||
File:Halo Reach - TotS Pelican.jpg|A [[D77-TC Pelican Dropship|Pelican]] fires its nose-mounted gun at a Sangheili Ultra. | |||
File:tipofthespear2.JPG|UNSC Army troopers fighting a Sangheili Ultra. | |||
</gallery> | |||
===Screenshots=== | |||
<gallery> | |||
File:Level - ToTS.jpg|Preview of the level in ''Halo: Reach'' menu. | |||
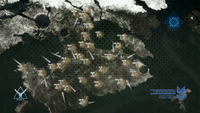
File:HR-TipOfTheSpear-Viery.png|[[Order of battle (Viery, Reach)]]. | |||
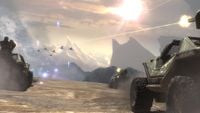
File:Fall of Reach Ground Battle.jpg|The Warthogs firing at Banshees. | |||
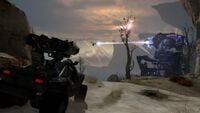
File:HR TyrantApproach.jpg|Kat and Six approaching the first Tyrant as it fires a plasma bolt at a Falcon. | |||
File:reach_5016770_Full.jpg|The {{UNSCShip|Grafton}} and {{UNSCShip|Saratoga}} firing their point defense guns. | |||
File:reach_5016777_Full.jpg|UNSC Warthogs and Scorpions fighting multiple Scarabs. | |||
File:HR BXRBridgeAssault.jpg|Covenant troops defending the bridge leading into the BXR mining facility. | |||
File:HR BXRBattle.jpg|Kat and Six clearing the mining facility of Covenant troops. | |||
File:HR SpireAssault1.jpg|Six fighting a Sangheili Minor at the base of the Spire. | |||
File:HR SpireAssault3.jpg|Six clearing the top floor of the Spire. | |||
File:Spire MAC'd.jpg|UNSC ''Grafton'' destroys the Spire with a MAC round. | |||
File:ToTS_Ending.jpg|The decloaked ''Long Night of Solace'' reveals itself. | |||
</gallery> | </gallery> | ||
{{clear}} | {{clear}} | ||
==Sources== | ==Sources== | ||
< | {{Ref/Sources}} | ||
{{Succession box | |||
|before = ''[[Nightfall]]'' <br /> | |||
|title = ''Halo: Reach'' Campaign Missions | |||
|years = '''''Tip of the Spear''''' | |||
|after = ''[[Long Night of Solace (level)|Long Night of Solace]] | |||
}} | |||
{{Levels}} | {{Levels|HR}} | ||
Latest revision as of 13:01, November 22, 2024
|
Prev: |
|
|
Next: |
|
| Tip of the Spear | |
|---|---|
| |
|
Game: |
|
|
File name (?): |
|
|
Player: |
|
|
Date: |
|
|
Location: |
|
|
Objective(s): |
Neutralize Covenant AA cannons and disable Spire One's shield. |
|
Par Time: |
00:15:00 (Master Chief Collection) |
|
Par Score: |
30,000 (Master Chief Collection) |
 |
Halopedia has a walkthrough guide for this level; see Tip of the Spear/Walkthrough. |
| “ | Two massive armies clash! Time to go to war against the Covenant. | ” |
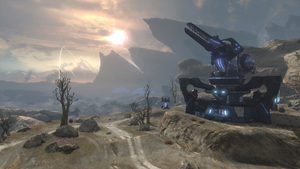
"Tip of the Spear" is the fifth Campaign level in Halo: Reach.[2][3]
Summary[edit]
The level opens with Auntie Dot briefing Noble Team on the situation: A large Covenant invasion force has been discovered in the Viery Territory, and a joint UNSC military force has been mobilized to counter them across the continent. Noble Team's mission is to destroy Spire One, one of many large towers the Covenant have placed around their landing zone. Noble Six and Catherine-B320 lead the charge at the Covenant positions, and destroy two Covenant anti-air guns. Noble Six, manning a Falcon's gunner seat, then joins Jorge-052 as they make their way to the Spire. As their Falcon passes through the Spire's energy shield, the craft is disabled by an EMP which sends it crashing to the ground, killing the crew and forcing the Spartans to continue on foot. Jorge and Six eventually make their way to the Spire, where the installation is revealed to be a teleportation terminal, used by the Covenant to transport troops to the ground from a yet-unknown source. After deactivating Spire One's energy shield, Six leaves the area on a Falcon accompanied by Carter-A259 and Jorge-052 as the UNSC Grafton destroys the Spire. Immediately after the tower collapses, the Grafton is destroyed by the previously cloaked Covenant CSO-class supercarrier Long Night of Solace.
Transcript[edit]
August 12, 2552 08:00 Hours
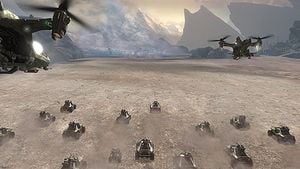
A convoy of more than thirty Warthogs, a Mongoose, four Scorpions, along with several Falcons and two Pelicans advance across a bare plain.
- Auntie Dot: "It appears that Noble Team's discovery last night was not an anomaly. Large Covenant deployments have occurred undetected, and we are now under attack across the Viery territory, including orbital defenses. As per the Winter Contingency, we are countering on every front. Noble's reconnaissance has also identified sophisticated Covenant army hiding canopies, and has been pinpointed what's believed to be a landing zone for additional Covenant forces, the origin of which is yet to be determined."
The Warthogs, led by Kat and Noble Six, charge towards the Covenant landing zone, followed by a group of Falcons. Carter is revealed to be on board a Falcon overlooking the Warthog driven by Kat. Noble Six rides shotgun in Kat's Warthog.
- Commander Carter-A259 (COM): "That landing zone has been tagged by UNSC command as a Priority One target."
- Warrant Officer Jun-A266 (COM): "Det-charge link is loud and clear!"
Note: At this point, the subtitles show Jun saying, "Time to bake that cake we made last night!" The dialogue was confirmed by Bungie to have been a last-minute change.[4]
- Lieutenant Commander Catherine-B320: "Copy that. Acquiring signal lock on the pylon. Detonating in three, two..."
Kat detonates the charge that was planted on the pylon in the previous mission by Jun, which is seen far to the right of the advancing Warthog strike force. The pylon is destroyed.
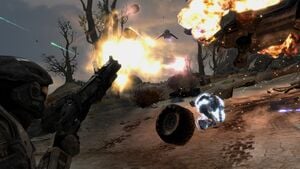
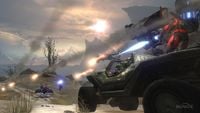
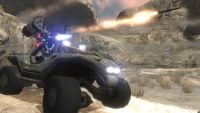
Banshees swoop down on the convoy and open fire, while Wraiths lob mortar rounds from a distance. The gunners on the Warthogs retaliate, firing at the Banshees. Zurdo-pattern Wraith mortar rounds tear into the convoy and destroy several of the advancing vehicles. Kat and Noble Six dodge the mortar fire, and turn towards a bridge across a deep chasm, but as they prepare to cross, a plasma mortar destroys the bridge.
- SPARTAN-B312: "Incoming!"
- Kat-B320: "Might want to hold onto something!"
Kat accelerates and the Warthog manages to jump the gap in the destroyed bridge, but crashes violently on the other side, (presumably) killing the gunner and sending Kat and Noble Six flying.
Fade to white.
Fade back to Noble Six's point of view, which is hazy. The SPARTAN is lying facedown after the crash, with an M319 Individual Grenade Launcher lying several feet away. Vision clears, and Six glances towards the destroyed bridge. A second Warthog attempts to clear the gap in the bridge but fails, and the troopers inside fall screaming into the canyon below.
- Kat-B320: "Six! Can you hear me? Six, you alright? I could use some help!"
Six gets up, grabbing the grenade launcher along the way.
- SPARTAN-B312: "On my way."
{Gameplay}
Tempest Perimeter[edit]
Push up the hill and secure a landing zone.
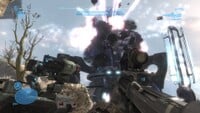
Kat activates her Armor Lock as the Warthog she is using for cover explodes after being shot by two Banshees. A Spirit drops down troops and flies away. A Falcon flies overhead and engages a few Covenant troops before being shot down. On the adjacent plateau across the river, dozens of Warthogs and Ghosts are clashing.
- Carter-A259 (COM): "Kat, Six, what's your status?"
- Kat-B320: "Pylons are down, we're pushing up the hill."
Kat and Six encounter heavy resistance as they move up the hill, including two Fuel Rod Shade variants. After eliminating the enemy forces in the area, a Pelican shows up with a Missile Warthog.
- Carter-A259 (COM): "Kat, be advised: ONI has ID'd two hostile anti-aircraft guns southwest of your location."
- Kat-B320: "Copy, Commander. New targets, Six. Go shut down those AA guns."
- Kat-B320: "Commandeer that Warthog, get us there in one piece."
If the player stalls:
- Kat-B320: "Commandeer that Warthog, Six."
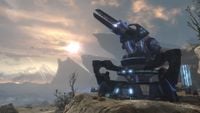
Kat and Six drive a short distance before arriving at the AA gun. A Falcon flies above the Covenant infantry, engaging them before being shot down by the AA gun.
- Carter-A259 (COM): "Six, AA gun should be in visual range."
- 2 Lima 4 (COM): "2 Lima 4 to Noble One, those guns are pounding us with high-velocity plasma shells!"
- Auntie Dot (COM): "Which would mean a strike by the frigate Grafton is also out of the question."
- Carter-A259 (COM): "Noble Six, all our birds are stuck out of range unless you can do something about those guns."
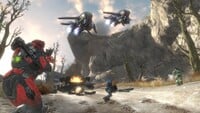
As they approach the gun, a furious battle can be seen in the valley below. Three Scarabs and multiple Karo'etba-pattern Ghosts, Wraiths, and Banshees are exchanging fire with a large group of Warthogs, Scorpions, and Falcons.
Kat and Six proceed to the AA gun, encountering resistance along the way.
- Carter-A259 (COM): "New intel, Six. Looks like normal weapons won't dent those AA guns."
- Auntie Dot (COM): "I would suggest neutralizing the internal fuel cells, Lieutenant."
Kat and Noble Six eliminate the Covenant troops in the area. Six then goes into the base of the AA gun and destroys its power core. They make a quick exit as the gun begins to overload.
- 2 Lima 4 (COM): "Control, 2 Lima 4: permission to commence bombing run, heading 224.6, over."
After the AA cannon explodes, three Longswords and two heavy frigates, the UNSC Grafton and the UNSC Saratoga, fly overhead. A Covenant Phantom arrives but is quickly annihilated by the frigates' guns.
- Carter-A259 (COM): "Good work, Noble Six. UNSC air support: skies are clear."
- Control (COM): "Copy. 2 Lima 4, bombing run, heading 224.6, permission granted - out."
The frigates open fire on the Covenant forces in the valley, as the Longswords commence a bombing run on the three Scarabs, destroying two of them and disabling the third, which detonates seconds later.
If the player proceeds without Kat on their Warthog:
- Kat-B320 (COM): "Commander, I'm going to set up a forward observation post here."
- Carter-A259 (COM): "Copy that, I'm waiting on new intel. See what you can see, Carter out."
- Kat-B320: "Six, take that south road and see if can you have a better view at the Spires. I'll be on COMs."
Kat and Six proceed on, soon driving under a partially destroyed bridge. They head up the slope, encountering a T-26 AGC Wraith and a group of Skirmishers.
- Kat-B320: "Six, Pelican inbound with deployable bridge. Once the bridge is down, head over to the southwest side."
A Pelican, while under fire from a Phantom, drops off a deployable bridge, allowing NOBLE Team to continue.
- Kat-B320: "Bridge in position, Six, move on to the other side."
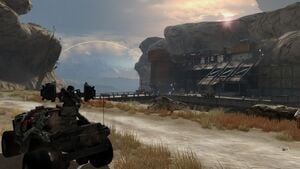
They cross the bridge and continue down the valley, soon arriving at a mining facility that is across a canyon.
Hand Over Fist[edit]
Progress through the facility and destroy the second cannon.
- Carter-A259 (COM): "Noble Six, there's a mining facility near your location. Covenant are using it as a command outpost. Troopers on site have already engaged."
The Spartans arrive at a bridge over the canyon. Several Army troopers are under fire from Covenant troops and a Shade turret, which are soon neutralized. The Spartans and troopers advance on the BXR Mining facility.
- Auntie Dot (COM): "New intelligence: friendly forces near the Covenant outpost have sighted a high value target. An Elite Zealot, in fact."
- Kat-B320: "A Zealot? We're onto something big, Commander."
- Carter-A259 (COM): "Eyes on the prize, Noble. Take out that Zealot if you get the chance, but keep movin' towards the spires."
They move into the facility, encountering resistance as they go.
- Kat-B320: "No visual on target."
The Spartans move farther into the facility, eventually finding the Zealot - one of the Devoted Sentries.
If the player eliminates the Zealot:
- Kat-B320: "High value target has been neutralized. Impressive, Six."
After eliminating the enemy forces in the area:
- Kat-B320: "Mining facility secured, Six. Move on at your discretion."
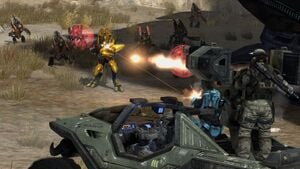
Kat and Six move outside to find two Unggoy, three Ghosts, and a Revenant. When Noble Six exits the mining facility, the two Grunts attempt to escape in the Ghosts but are quickly eliminated. Six and Kat commandeer the Revenant (or continue on foot) and proceed down the trail, encountering Covenant forces as they go.
- Carter-A259 (COM): "Update, Six: scans show another Covenant AA gun ahead of your location. I want you to neutralize that gun, by any means necessary."
Kat and Six arrive at the second AA cannon and engage a large amount of Covenant forces, including two Wraiths, a Mgalekgolo pair, and a swarm of Drones. A Falcon flies overhead and assists in clearing the area before suffering the same consequence the previous Falcon did near the first AA cannon; shot down by the AA cannon.
If the player takes too long to disable the AA cannon:
- Carter-A259 (COM): "Noble Six, I need that AA gun offline now!"
After neutralizing the Covenant forces in the area, Six proceeds inside the cannon and destroys the gun's power core. The gun soon overloads and explodes. A Phantom arrives to drop off reinforcements, which are soon defeated.
A Pelican arrives soon after, dropping off troopers.
- Carter-A259 (COM): "Well done, Six. ONI needs up-close recon on those spires, we're gonna fly you the rest of the way."
- Kat-B320: "Jorge has a Falcon inbound to your position, Lieutenant. Highlighting the LZ now."
A navpoint appears on Noble Six's HUD.
If Kat has accompanied the player to this point:
- Kat-B320 (COM): "Commander, I'm going to set up a forward observation post here."
- Carter-A259 (COM): "Copy that, I'm waiting on new intel. See what you can see, Carter out."
The Falcon arrives.
- Chief Warrant Officer Jorge-052: "Need a lift, Spartan?"
Noble Six mans one of the Falcon's M460 automatic grenade launchers.
- Jorge-052: "Spotted some nasty business in the canyon on the way down."
- Falcon Pilot (COM): "I'll call out targets as we go."
The Spire[edit]
Reach the top of the spire and prepare for evac.
The Falcon flies along the river. It eventually reaches a bridge, with Covenant forces attempting to cross it.
- Falcon Pilot (COM): "Top of the canyon, dead ahead."
Six eliminates the forces on the bridge. Jorge and Six encounter more resistance further down the canyon, but Six eliminates them as well.
- Falcon Pilot (COM): "Nice shooting, Spartan."
- Jorge-052: "Stay sharp, Six. We're not out of the canyon yet."
The Falcon approaches a spire with an enormous, visible energy shield.
- Falcon Pilot (COM): "There's the spire."
- Carter-A259 (COM): "Solid copy. Dot?"
- Auntie Dot (COM): "Latest intel suggests these spires may be projecting electromagnetic cloaking shields."
They arrive at the edge of the shield. The pilot hesitates, hovering just outside it.
- Jorge-052: "Priority One, pilot. Gotta know what's in there."
- Falcon Pilot (COM): "Affirmative, sir... Here we go."
The Falcon flies towards the shield and the screen flashes white.
Cuts to Noble Six's point of view as the Falcon spins out of control, scratching the rock wall in the process. The grenade launcher retracts, and Six holds on to the side of the Falcon. Six looks at Jorge, who is also holding on to the side of the Falcon.
- Falcon Pilot (COM): "We just lost all power. We're going down!"
- Jorge-052: "Lock your armor, Spartan!"
- Falcon Pilot (COM): "Brace for a hard landing!"
The Falcon crashes. Six is thrown a short distance from the Falcon. Jorge emerges from the Falcon, tossing out equipment. Six grabs an assault rifle on the ground and stands up. After looking around briefly, Jorge picks up his gun.
- Jorge-052: "Crew's dead. We shouldn't stay here."
{Gameplay}
- Jorge-052: "I'm showing hostiles all over the place, we gotta move."
Skirmishers and Unggoy are seen moving downhill towards the crash site.
- Jorge-052: "Commander, we got eyes on the spire. Looks like a staging area."
- Carter-A259 (COM): "Copy, we have your visual. Dot's working the problem, stand by."
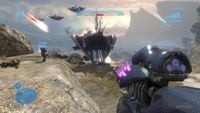
Jorge and Six move across the river, encountering minor Covenant resistance, composed of only Unggoy, Kig-Yar and Skirmishers. The two Spartans arrive at a small cliff overlooking the base of the Spire as the Spire comes into full view. A Phantom seemingly appears out of nowhere in the Spire's midsection, and flies away, outside the dome-shaped energy shield.
- Auntie Dot (COM): "Noble Five, ONI believes those spires to be teleportation terminals."
- Jorge-052: "Teleporters? Linked to what?"
- Carter-A259 (COM): "Frigate Grafton is on station, ready to kill that spire, but first we need to power down its shields."
- Jorge-052: "Understood. Six, I'll hold these bastards off. You find a way to the top of the spire."
Noble Six eventually makes it to one of the gravity lifts, sending them up to the top of the spire.
Alternatively, Six can hijack a Banshee and fly it to the spire's top.
- Jorge-052 (COM): "Noble Leader, Six is on his/her way up."
- Carter-A259 (COM): "Get in there. Take out that shield, Lieutenant."
Six arrives at the top of the Spire.
- Carter-A259 (COM): "Spartans, I'm en route with a Falcon. We'll pick you up as soon as you knock out power to that shield."
- Jorge-052 (COM): "Ready when you are, Six."
Noble Six proceeds to engage the Covenant forces at the top of the spire. A Sangheili Ultra, seen manning the controls of the spire, draws his Energy Sword as soon as Noble Six engages him.
- Carter-A259 (COM): "Hurry, Lieutenant. We got a frigate inbound to blow that spire as soon as the shield is powered down."
Noble Six eliminates the hostiles in the spire and proceeds to the spire controls.
- Carter-A259 (COM): "Lieutenant, drop the shield and get out of there!"
Six powers down the shield.
The shield dissipates. Six sprints for the outer edge of the top floor, where Carter and Jorge are waiting in a hovering Falcon. Without slowing down, Noble Six leaps off the spire and is caught by Jorge, who pulls Six up into the Falcon.
- Carter-A259: "Get us outta here!"
The Falcon begins to pull away from the spire.
- Carter-A259: "Control? This is Noble One. Spire One is green, and you're free to engage. Have a nice day."
- Air Control (COM): "Copy that, Noble One. Be advised, all ground units: Frigate Three-One-Eight heavy is inbound, and MAC rounds have been authorized."
Noble Team's Falcon continues to fly away from the Spire, joining a larger group of Falcons.
- Jorge-052: "MAC rounds? In atmosphere?"
- Carter-A259: "One way to get their attention! Hang on to your teeth, people!"
The UNSC Grafton, in a shallow dive, moves towards the spire past the Falcon with Six, Carter, and Jorge. The Spartans brace themselves.
The Grafton continues to move towards the spire, and, with a bright flash, fires its MAC cannon, hitting the Spire and shattering it. Jorge, satisfied, turns back and nods at Carter and Six, failing to notice a purple glow illuminating the sky above the Grafton. Moments later, an energy projector beam streaks down from the sky and hits Grafton's bow section, instantly gutting the ship. Secondary explosions blossom along the hull, and the Grafton begins to plummet towards the ground.
- Auntie Dot (COM): "New contact. High-tonnage."
The Spartans watch as the aft section of the Grafton explodes. The forward section crashes to the ground.
- Jorge-052: (shocked) "No. No! Somebody tell me this ain't happening!"
As Six looks out to watch the frigate fall, Air Control calls in.
- Air Control (COM): "UNSC Frigate Grafton, do you copy?"
- Carter-A259: "Grafton is dust! We need to get out of here, now!"
The Falcon flees the scene. As the shattered UNSC Grafton falls to the ground, a Covenant supercarrier, the Long Night of Solace, is revealed to be holding position over the destroyed Spire.
Fade to black.
Level ends.
Achievements[edit]
The following achievements can be unlocked on Tip of the Spear across the Xbox 360 and Halo: The Master Chief Collection editions of Halo: Reach.
| Halo: Reach (Xbox 360) | Halo: MCC (Xbox One) | Halo: MCC (Steam) | Title | Unlock requirement | Games |
|---|---|---|---|---|---|
| Beat Tip of the Spear on Normal difficulty or harder. | Halo: The Master Chief Collection | ||||
| Kill the Sangheili Zealot on Tip of the Spear. | Halo: The Master Chief Collection | ||||
| Observe the logo of a buttoned-up mining company. | |||||
| Beat the par time on Tip of the Spear. | |||||
| Beat the par score on Tip of the Spear. | |||||
| Find Data Pad 4 on Tip of the Spear. | |||||
| Find Data Pad 13 on Tip of the Spear on Legendary difficulty. |
Trivia[edit]
Glitches[edit]
- Kat can sometimes be heard saying lines of dialogue out of sequence throughout the level.
- Sometimes a Banshee will randomly boost into the ground at the beginning of the level, destroying itself.
- It is possible for the player to kill himself/herself during the cutscene after the Falcon goes through the Spire by continuously firing the grenade launcher at the shield. When the player goes through the shield, they will hear their shields collapse and will be brought back to the previous checkpoint. In Co-op, the player who shot the shield will die instantly once the gameplay starts again in the crash site.
- The "Tip of the Spear vacation" can be done on this level.
Mistakes[edit]
- In the opening cutscene, when the machine guns on the Warthogs fire on the attacking Banshees, their barrels do not spin.
- The Warthog that fails the jump at the beginning cutscene is nowhere to be seen in the canyon below. It (or its remains if it did not survive the fall) may have floated off with the river.
- The Shade turrets that the player engages when on the Falcon do not have operators.
- When the Falcon loses power after going through the shield, it spirals out of control before crashing, like a modern-day helicopter would. It would likely not spin after losing power, as the Falcon does not have a tail rotor as most modern VTOL craft do. During gameplay, Falcons that are affected by an electromagnetic pulse simply drop straight down.
- During the final chapter The Spire, if the player wields the left grenade launcher of the Falcon (opposite of an army trooper), the cutscene following will still show Six on the right side of the Falcon (opposite of Jorge-052).
- In the cutscene in which the Falcon crashed, Noble Six looks to their left, and sees the damaged rotor of the second crashed Falcon over the small hill to their left. When gameplay starts however, it cannot be seen. In fact, the second Falcon's crash site is too far to be seen from the first Falcon's crash site.
- After the Falcon crash, the player starts with two-thirds of their total health, reflecting injury from the crash. If the player had only one third of their health left before entering the Falcon, though, they will have two-thirds after the crash anyway, meaning the crash somehow increased their health.
References[edit]
- The famous "Wilhelm Scream" is featured in the opening cinematic of this level on the Normal difficulty. The screams of the falling troopers vary on each difficulty.
- The mining facility in this level is run by the BXR Mining company, a reference to the BXR button combination.
- The player must clear the top of the spire which is loaded with Grunts led by an Ultra Sangheili, resembling Halo 2's campaign level "Metropolis", where the inside of the Scarab is also led by an Ultra Sangheili.
Miscellaneous[edit]
- Tip of the Spear was alluded to in a Bungie Weekly Update before the release of Halo: Reach; Campaign Design Lead Chris Opdahl hinted at a level with the initials "TotS" likely becoming an instant favorite among fans.[5]
- This is the first level of Halo: Reach in which Yanme'e are encountered. They're found behind the second Tyrant gun.
- There was an early bug in development where the gunner of the Warthog that falls into the chasm in the beginning cutscene will fire at Kat's hips as the Warthogs crashes into the cliff.[4]
- This is the third of four levels (the others being "Winter Contingency", "ONI: Sword Base", and "The Pillar of Autumn") where the assault rifle has more than the usual 288 rounds; in this case, it carries 568 rounds on both solo and Cooperative Play.
- It is possible to use the grenade launcher's secondary fire to disable a Banshee at the beginning of the level. However, these Banshees cannot be hijacked and it is possible that their momentum when EMPed will cause them to fall forward and ram into the player.
- The musical track that plays when the player travels to the first Tyrant is not present in the Halo: Reach Original Soundtrack. The track itself has the same percussion beat as the Halo Theme, and Martin O'Donnell humorously called it the "Halo Driving Music".[4]
- This level marks the first appearance of the Scarab in Halo: Reach, although it is not fought by the player. The Scarabs in the distance have a single looping walking animation, but they do not move anywhere. When the Longswords bomb them, the Scarabs are destroyed but do not have a destruction animation.
- Due to the range at which they are engaging Covenant forces, the Scorpions in the background battles fire their shells in an curved trajectory, indicating the shells are being affected by gravity.
- The Covenant Spire that Noble Six destroys is the central location for the multiplayer Invasion map Spire.
- The Spires in the distance are actually merged bitmaps and are only a quarter as tall as Spire One's in-game geometry. Similarly, a player that escapes the map can discover that they are not solid and the projected shields do not block any shots, inside or out.
- In the final cutscene, all of the Falcons, with exception of the one NOBLE Team is riding on, are used with the rough models used in background battles.
- No matter what weapons Noble Six carries before mounting the Falcon, their loadout will be changed to assault rifle and DMR after the Falcon crashes.
- You are able to destroy all Cheru-pattern Tyrant Batteries without entering its lower level and destroying the core. With enough external damage using heavy firepower, such as the M12G1 Gauss Warthog or the Rizvum-pattern Revenant, the Cheru-pattern Tyrant will begin to leak plasma from its joints and explode, rendering the weapon useless. This method may be safer, although it has the drawback of taking longer periods of time.
Gallery[edit]
Concept art[edit]
Concept art of the Long Night of Solace.
Promotional images[edit]
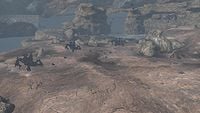
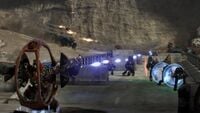
UNSC Grafton and UNSC Saratoga supporting UNSC ground forces.
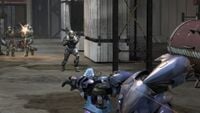
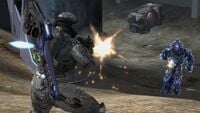
A Pelican fires its nose-mounted gun at a Sangheili Ultra.
Screenshots[edit]
The UNSC Grafton and UNSC Saratoga firing their point defense guns.
Sources[edit]
- ^ Halo: Reach Editing Kit, game file
HREK\tags\levels\solo\m35\m35.scenario - ^ IGN, Deep Into the Halo: Reach Campaign (Retrieved on Jun 1, 2020) [archive]
- ^ Gamespot, Halo: Reach (Retrieved on Jun 1, 2020) [archive]
- ^ a b c YouTube - Bungie, Halo: Reach Campaign Preview
- ^ Bungie.net, Bungie Weekly Update: 07.16.10 (Retrieved on Jul 25, 2010) [archive]
| Preceded by Nightfall |
Halo: Reach Campaign Missions Tip of the Spear |
Succeeded by Long Night of Solace |
| ||||||||||||||||||||||||||||||||||||||||||
