Mombasa Streets: Difference between revisions
From Halopedia, the Halo wiki
m (→Trivia) |
|||
| (151 intermediate revisions by 62 users not shown) | |||
| Line 1: | Line 1: | ||
{{ | {{Status|Gameplay}} | ||
{{Level infobox | {{Level infobox | ||
| | |pagegamelabel=ODST | ||
|prev=''[[Prepare To Drop | |prev=''[[Prepare To Drop]]'' | ||
|next=''[[ | |concurrent=*''[[Tayari Plaza]]'' | ||
''[[ | *''[[Uplift Reserve]]'' | ||
*''[[Kizingo Boulevard]]'' | |||
*''[[ONI Alpha Site]]'' | |||
*''[[NMPD HQ]]'' | |||
*''[[Kikowani Station]]'' | |||
|next=''[[Data Hive]]'' | |||
|name='''''Mombasa Streets''''' | |||
|image=[[File:H3ODST MombasaStreets Loadscreen.png|300px]] | |||
|game=''[[Halo 3: ODST]]'' | |game=''[[Halo 3: ODST]]'' | ||
| | |devname=<code>h100</code>{{Ref/File|Id=H3ODSTEK|H3ODSTEK|H3ODSTEK\tags\levels\atlas\h100\h100.scenario}} | ||
|player=[[ | |player=*[[ODST_(player_character)#Rookie|Rookie]] (player 1) | ||
|date=[[2552 #October|October 20, 2552]] | *[[ODST_(player_character)|ODST]] (co-op) | ||
|place=[[New Mombasa]], [[ | |date=[[2552#October|October 20, 2552]], 2206 hours | ||
|place=Sectors [[New Mombasa Sector 0|0]], [[New Mombasa Sector 3|3]], [[New Mombasa Sector 4|4]], [[New Mombasa Sector 5|5]], [[New Mombasa Sector 9|9]], and [[New Mombasa Sector 10|10]] in [[New Mombasa]], [[Kenya]], [[Earth]] | |||
|objective=Explore the city and find the respective beacons leading to each flashback levels. | |||
|parscore=100,000 {{C|''Halo 3: ODST''}} | |||
}} | }} | ||
'''Mombasa Streets''' is the second campaign level of ''[[Halo 3: ODST]]'', and serves as "the hub", an open-world environment used to access flashback missions. It is set in the city of [[New Mombasa]]. | {{Article quote|Explore the city, find your ODST team.}} | ||
'''Mombasa Streets''' is the second campaign level of ''[[Halo 3: ODST]]'', and serves as "the hub", an open-world environment used to access flashback missions. It is set in the city of [[New Mombasa]]. | |||
== Summary == | ==Summary== | ||
Unique as a Halo game level, this level is an open world environment | Unique as a ''Halo'' game level, this level is an open-world environment which contains "beacons", and objects left by or noted by the [[The Rookie|Rookie]]'s [[Dare's Shock Trooper Squad|squad]] members, which trigger "flashback" levels, explaining previous events. In addition to the beacons, the level also has additional content, such as [[Audio log (Halo 3: ODST)|Audio log]]s and [[Supply Cache]]s. | ||
The city map provided by the [[Superintendent (Construct)|Superintendent]] highlights points of interest, such as the "beacon" objects. The Superintendent also guides the player into the right direction using the city's plentiful digital signs and billboards. | The city map provided by the [[Superintendent (Construct)|Superintendent]] highlights points of interest, such as the "beacon" objects. The Superintendent also guides the player into the right direction using the city's plentiful digital signs and billboards. | ||
During the first playthrough, some areas in the city are inaccessible, and the player is forced to play the flashbacks in chronological order. Completing flashbacks unlocks more areas in the city, allowing the player to progress to the next beacon. Once game is completed, the city is fully unlocked for exploration. | During the first playthrough, some areas in the city are inaccessible, and the player is forced to play the first three flashbacks in chronological order. Completing flashbacks unlocks more areas in the city, allowing the player to progress to the next beacon. Once the game is completed, the city is fully unlocked for exploration. | ||
==Plot== | |||
The level starts six hours after the Squad's [[Operation: BUMRUSH|failed orbital insertion]], in the occupied [[New Mombasa City Center]]. Some time after [[the Rookie]] wakes up, exits his [[M8900 drop pod|pod]] and starts to explore the city, the [[Superintendent (Construct)|Superintendent]] will contact him via a public phone and upload a map of the city to his [[Visual Intelligence System, Reconnaissance|VISR]] navigation database. After finding the final beacon and completing the last flashback level, the Rookie will receive a distress signal from [[Captain (Navy)|Captain]] [[Veronica Dare|Dare]], who is pinned down in the data center under the city. At this point, the city will be mostly locked, with only a way to the nearest underground entrance, where the Rookie will descend into the depths of the city underground. | |||
==Transcript== | |||
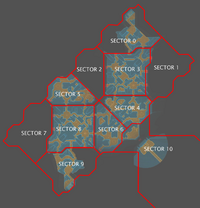
[[File:NM sectors.png|thumb|Map of the level, showing the city's sectors.]] | |||
== Transcript == | |||
[[File:NM sectors.png|thumb | |||
'''THE ROOKIE''' | '''THE ROOKIE''' | ||
| Line 45: | Line 45: | ||
'''6 hours after drop''' | '''6 hours after drop''' | ||
'' | ''The Rookie slowly opens his eyes in his pod. There is static interference in his visor, and multiple cracks in his pod's windows. The screens that are still working are filled with static. Two Covenant [[Ru'swum-pattern Phantom|Phantom]]s fly in the background.'' | ||
''Shortly after the dropships pass, the Rookie activates four explosive bolts to release his pod door open. The pod is on the edge of a short building, but, having no other choice, the Rookie hops out, only to fall about 15 feet to ground, injuring him slightly. If the game is being played in cooperative mode, the bolts section is skipped, and the hatch is popped automatically, as is the Rookie jumping out.'' | |||
''{ | [http://youtu.be/L_06qyawQTk '''{''Tayari Plaza Intro''}'''] | ||
''The Rookie finds the Recon Helmet embedded in a monitor. He removes it from the screen. Changes to one of the Superintendent's camera, focusing on an SOEIV pod.'' | |||
'' | *'''Superintendent''' ''(on-screen)'': MOTOR-VEHICLE CRASH! SEARCHING [[New Mombasa Police Department|N.M.P.D]] DATABASE... NO MATCH! | ||
The camera then focuses on the window that the Rookie is standing at. | |||
*'''Superintendent''' ''(on-screen)'': LOST-AND-FOUND ITEM! | |||
''The view switches back to the Rookie, looking out of the window.'' | |||
'' | *'''[[Lance Corporal]] [[Kojo Agu|Kojo "Romeo" Agu]]''' (flashback): "You're going to tell us her name, Gunny?" | ||
*'''Buck''' '' | *'''[[Gunnery Sergeant]] [[Edward Buck]]''' ''(flashback)'': "Ms. Naval Intelligence. Our new boss." | ||
*'''Mickey''' '' | *'''[[Private First Class]] [[Michael Crespo|Michael "Mickey" Crespo]]''' ''(flashback)'': "Oh, brother..." | ||
*'''Buck''' '' | *'''Buck''' ''(flashback)'': "So check your mouths, find your chairs... And get ''set'' for a combat drop!" | ||
'' | ''Fades to black. [[Tayari Plaza]] begins.'' | ||
[http:// | [http://youtu.be/U5Cmf4U3IYM '''{''Tayari Plaza Outro''}'''] | ||
'' | ''The Rookie taps the broken Recon helmet, then puts it down on the floor. He peers out of the window. Several advertisement panels change to "KEEP RIGHT" signs, pointing at an open blast door. The Rookie readies his Silenced SMG.'' | ||
'''{''First Huragok Encounter, Sector 8''}''' | '''{''First Huragok Encounter, Sector 8''}''' | ||
'' | ''Under a walkway in Sector 8, a [[Brute Captain]] is holding the explosive charge for a [[Huragok]], while two [[Brute Minor]]s are struggling to held the Huragok down.'' | ||
*'''Brute Captain''': "Arrgh! Hold the creature still!" | *'''Brute Captain''': "Arrgh! Hold the creature still!" | ||
| Line 81: | Line 83: | ||
*'''Brute Minor''': "Place the charge, before I lose my grip!" | *'''Brute Minor''': "Place the charge, before I lose my grip!" | ||
'' | ''The Brute Captain forcefully inserts the charge into the Huragok's explosive armor. The Huragok gives out a high-pitched wail.'' | ||
*'''Brute Minor''': "It's | *'''Brute Minor''': "It's armed!" | ||
*'''Brute Captain''': "And ready to explode, in case any human comes too close!" | *'''Brute Captain''': "And ready to explode, in case any human comes too close!" | ||
*'''Brute Captain''': "Let it roam! Let it do the | *'''Brute Captain''': "Let it roam! Let it do the Prophets' work!" | ||
'' | ''The Brute Minors release the Huragok.'' | ||
[http:// | [http://youtu.be/jw6JU_LmAI4 '''{''Uplift Reserve Intro''}'''] | ||
'' | ''The Rookie crouches down to the Optics Package. Some sparks flies out of it, and the camera twitches. Switch to the Package's camera, which shows the Rookie's face. Switch to a overview of the area.'' | ||
*'''Buck''' '' | *'''Buck''' ''(flashback)'': "You heard from Mickey? Dutch?" | ||
*'''Romeo''' '' | *'''Romeo''' ''(flashback)'': "Negative." | ||
*'''Buck''' '' | *'''Buck''' ''(flashback)'': "We need to get above this crap, link up with the bee-net. One of our drones must have seen where they hit." | ||
'' | ''Fades to black. [[Uplift Reserve]] begins.'' | ||
[http:// | [http://youtu.be/kzDyCpxrkz4 '''{''Uplift Reserve Outro''}'''] | ||
'' | ''The Rookie drops the Optics Package, which falls to the ground with a dull thud. He stands up and turns around, Silenced SMG at the ready.'' | ||
[http:// | [http://youtu.be/bhp1cLAOIzE '''{''Kizingo Boulevard Intro''}'''] | ||
'' | ''The Rookie pulls himself up to the ruined Gauss Turret. He looks through the damaged electronic scope, down to the plaza below.'' | ||
*''' | *'''[[Unnamed UNSC Colonel|Colonel]] (COM)''' ''(flashback)'': "Where's the rest of your team, trooper?" | ||
*'''Dutch''' '' | *'''Lance Corporal [[Taylor H. Miles|Taylor "Dutch" Miles]]''' ''(flashback)'': "Scattered, dead, I don't know." | ||
*''' | *'''Colonel (COM)''' ''(flashback)'': "That's too bad. We're gonna need all the men we can get!" | ||
'' | ''Fades to black. [[Kizingo Boulevard]] begins.'' | ||
[http://www.youtube.com/watch?v=wKMMnVSbQyo '''{''Kizingo Boulevard Outro''}'''] | [http://www.youtube.com/watch?v=wKMMnVSbQyo '''{''Kizingo Boulevard Outro''}'''] | ||
'' | ''The Rookie releases the turret, then pats it. He jumps off the turret's base.'' | ||
[http:// | [http://youtu.be/XC_eMbEHKZA '''{''ONI Alpha Site Intro''}'''] | ||
'' | ''The Rookie crouches down to the Remote Detonator, then picks it up.'' | ||
*'''Dare''' '' | *'''[[Captain (Navy)|Captain]] [[Veronica Dare]] (COM)''' ''(flashback)'': "Stand by to adjust trajectory. On my mark." | ||
'' | ''The Rookie spins the Detonator'' | ||
*'''Dutch''' '' | *'''Dutch (COM)''' ''(flashback)'': "What did she just say?" | ||
*'''Dare''' '' | *'''Dare (COM)''' ''(flashback)'': "Mark!" | ||
'' | ''The Rookie looks up at the smoldering, cube-shaped building in the background.'' | ||
*'''Mickey''' '' | *'''Mickey (COM)''' ''(flashback)'': "We're way off course!" | ||
*'''Dare''' '' | *'''Dare (COM)''' ''(flashback)'': "We're heading exactly were I need to go." | ||
'' | ''Fades to black. [[ONI Alpha Site]] begins.'' | ||
[http:// | [http://youtu.be/sqa1io3qE-o '''{''ONI Alpha Site Outro''}'''] | ||
'' | ''The Rookie looks at the burning ONI building. He stands up, then tosses the Remote Detonator into the water. It skips a few times, then sinks.'' | ||
[http:// | [http://youtu.be/f9uPcytuKqU '''{''NMPD HQ Intro''}'''] | ||
'' | ''The Rookie looks up at a bent Sniper Rifle hanging over a power line. It is too high for him to reach. He picks up a metal pole, and uses it to push the Rifle down to the ground. He tries to straighten it, to no avail. He then looks up at the skyscrapers above him.'' | ||
*'''Buck''' '' | *'''Buck (COM)''' ''(flashback)'': "We're in the Police HQ." | ||
*'''Dutch''' '' | *'''Dutch''' ''(flashback)'': "Can you take us there?" | ||
*''' | *'''[[NMPD|NMPD Officer]]''' ''(flashback)'': "Affirmative!" | ||
*'''Buck''' '' | *'''Buck (COM)''' ''(flashback)'': "All right. Meet you up top!" | ||
'' | ''Fades to black. [[NMPD HQ]] begins.'' | ||
[http:// | [http://youtu.be/YgiB_H06XSY '''{''NMPD HQ Outro''}'''] | ||
'' | ''Dust falls down to the Rookie, who is still trying to straighten the Sniper Rifle. He finally gives up, and tosses it to the ground.'' | ||
[http:// | [http://youtu.be/4QPj944HYK4 '''{''Kikowani Station Intro''}'''] | ||
'' | ''The Rookie crouches down to pick up the Biofoam Canister, then examines it. He then turns to see a not fully closed shutter.'' | ||
*'''Buck''' '' | *'''Buck''' ''(flashback)'': "How bad?" | ||
*'''Romeo''' '' | *'''Romeo''' ''(flashback)'': ''(gasping)'' "Not good." | ||
*'''Mickey''' '' | *'''Mickey''' ''(flashback)'': "We're gonna get you outta here." | ||
*'''Romeo''' '' | *'''Romeo''' ''(flashback)'': "Arrgh!" | ||
'' | ''Fades to black. [[Kikowani Station]] begins.'' | ||
[http:// | [http://youtu.be/Omp2D-tcQJ0 '''{''Kikowani Station Outro/Dare Transmission''}'''] | ||
'' | ''The Rookie shakes the Biofoam Canister, then squeezes some biofoam out of it. Seeing that it's empty, he tosses it to the ground. Suddenly, he picks up a transmission:'' | ||
*''' | *'''Dare (COM)''': "Can anyone hear me? This is Captain Veronica Dare!" | ||
''The Rookie puts his hand to the comlink on his helmet.'' | ''The Rookie puts his hand to the comlink on his helmet.'' | ||
*'''Dare''' | *'''Dare (COM)''': "My beacon is active - need immediate assistance! Someone, please respond!" | ||
''The Rookie looks up to see a Phantom passing by and activating its searchlight. He then readies his Silenced SMG and moves out.'' | ''The Rookie looks up to see a Phantom passing by and activating its searchlight. He then readies his Silenced SMG and moves out.'' | ||
| Line 193: | Line 195: | ||
''After the cutscene, the rest of the sectors in the level will be locked down, and the nearest underground entrance will be marked with a beacon.'' | ''After the cutscene, the rest of the sectors in the level will be locked down, and the nearest underground entrance will be marked with a beacon.'' | ||
[http:// | [http://youtu.be/Q6nLviyhNAM '''{''Data Hive Intro''}'''] | ||
''The Rookie enters the underground tunnel and stops at the edge of an empty [[Lift|elevator]] shaft leading deep underground. He glances down to see just how deep the shaft is, holsters his SMG | ''The Rookie enters the underground tunnel and stops at the edge of an empty [[Lift|elevator]] shaft leading deep underground. He glances down to see just how deep the shaft is, then holsters his SMG and jumps over the shaft to grab an elevator support cable. He hesitates for a moment but soon begins to slowly rappel down.'' | ||
'' | ''Fade to black. [[Data Hive]] begins.'' | ||
== Beacons == | ==Beacons== | ||
There are six beacons around the level, each an object related to a squadmate. The following is a list of the locations of these beacons, and the flashback levels they trigger, in chronological order. | There are six beacons around the level, each an object related to a squadmate. The following is a list of the locations of these beacons, and the flashback levels they trigger, in chronological order. | ||
{| | {| class="wikitable" | ||
! '''Location''' | |||
! '''Object''' | |||
! '''Character''' | |||
! '''Level''' | |||
! '''Time''' | |||
|- | |- | ||
|[[New Mombasa Sector 5|Sector 5]], room overlooking [[Tayari Plaza]] | |[[New Mombasa Sector 5|Sector 5]], room overlooking [[Tayari Plaza (location)|Tayari Plaza]] | ||
|Dare's [[ODST Ballistic Battle Armor#Recon|Recon | |align="center" width="225px" | [[File:H3ODST Beacon Tayari Plaza.jpg|225px]]<br/>Dare's [[ODST Ballistic Battle Armor#Recon|Recon Helmet]] | ||
|[[Edward Buck|Buck]] | |[[Edward Buck|Buck]] | ||
|[[ | |[[Tayari Plaza]] | ||
|Immediately after drop (16:06) | |Immediately after drop (16:06) | ||
|- | |- | ||
|[[New Mombasa Sector 9|Sector 9]], in front of [[New Mombasa Uplift]] building | |[[New Mombasa Sector 9|Sector 9]], in front of [[New Mombasa Uplift]] building | ||
|Damaged [[F-99 | |align="center" width="225px" | [[File:H3ODST Beacon Uplift Reserve.jpg|225px]]<br/>Damaged [[F-99 Wombat|F-99 Drone]] Optics Package | ||
|[[Taylor H. Miles|Dutch]] | |[[Taylor H. Miles|Dutch]] | ||
|[[ | |[[Uplift Reserve]] | ||
|30 minutes after drop (16:36) | |30 minutes after drop (16:36) | ||
|- | |- | ||
|[[New Mombasa Sector 4|Sector 4]], building overlooking [[Kizingo Boulevard ( | |[[New Mombasa Sector 4|Sector 4]], building overlooking [[Kizingo Boulevard (location)|Kizingo Boulevard]] | ||
|Destroyed [[M68 Gauss Cannon|Gauss | |align="center" width="225px" | [[File:H3ODST Beacon Kizingo Boulevard.jpg|225px]]<br/>Destroyed [[M68 Gauss Cannon|Gauss Turret]] | ||
|[[Michael Crespo|Mickey]] | |[[Michael Crespo|Mickey]] | ||
|[[ | |[[Kizingo Boulevard]] | ||
|90 minutes after drop (17:36) | |90 minutes after drop (17:36) | ||
|- | |- | ||
|[[New Mombasa Sector 10|Sector 10]], near destroyed bridge to [[ONI Alpha Site]] | |[[New Mombasa Sector 10|Sector 10]], near destroyed bridge to [[ONI Alpha Site (location)|ONI Alpha Site]] | ||
|Remote | |align="center" width="225px" | [[File:H3ODST Beacon ONI Alpha Site.jpg|225px]]<br/>Remote Detonator | ||
|Dutch | |Dutch | ||
|[[ | |[[ONI Alpha Site]] | ||
|2 hours after drop (18:10) | |2 hours after drop (18:10) | ||
|- | |- | ||
|[[New Mombasa Sector 3|Sector 3]] | |[[New Mombasa Sector 3|Sector 3]], hanging from a power line | ||
|[[ | |align="center" width="225px" | [[File:H3ODST Beacon NMPD HQ.jpg|225px]]<br/>[[SRS99D-S2 AM sniper rifle|Sniper Rifle]] | ||
|[[Kojo Agu|Romeo]] | |[[Kojo Agu|Romeo]] | ||
|[[ | |[[NMPD HQ]] | ||
|3 hours after drop (19:14) | |3 hours after drop (19:14) | ||
|- | |- | ||
|[[New Mombasa Sector 0|Sector 0]], entrance to [[Kikowani Station]] | |[[New Mombasa Sector 0|Sector 0]], entrance to [[Kikowani Station (location)|Kikowani Station]] | ||
|[[Biofoam]] | |align="center" width="225px" | [[File:H3ODST Beacon Kikowani Station.jpg|225px]]<br/>[[Biofoam]] Canister | ||
|Buck | |Buck | ||
|[[ | |[[Kikowani Station]] | ||
|5 hours after drop (21:01) | |5 hours after drop (21:01) | ||
|} | |} | ||
{{clear}} | |||
== | ==Achievements== | ||
The following [[achievement]]s can be unlocked on Mombasa Streets across the [[Xbox 360]] and ''[[Halo: The Master Chief Collection]]'' editions of ''Halo 3: ODST''. | |||
*On this level, there are several graffiti | {| class="wikitable" | ||
*After entering the building next to the first locked weapons cache, search the floor surrounding the door leading to the first courtyard. When searching the floor, | |- | ||
! scope="col" style="width:135px;text-align:center;" |'''''Halo: 3: ODST'' (Xbox 360)''' | |||
! scope="col" style="width:135px;text-align:center;" |'''''Halo: MCC'' (Xbox One)''' | |||
! scope="col" style="width:135px;text-align:center;" |'''''Halo: MCC'' (Steam)''' | |||
! scope="col" style="width:175px;height:20px;text-align:center;" |'''Title''' | |||
! scope="col" style="width:350px;height:20px;text-align:center;" |'''Unlock requirement''' | |||
! scope="col" style="width:200px;height:20px;text-align:center;" |'''Games''' | |||
|- | |||
|[[File:H3ODST Achievement Tourist.png|center|64px]] | |||
|<center>N/A</center> | |||
|<center>N/A</center> | |||
|<center>'''[[Tourist]]'''</center> | |||
|Access and download the city map to your VISR. | |||
|<center>''[[Halo 3: ODST]]''</center> | |||
|- | |||
|[[File:H3ODST Achievement Junior Detective.png|center|64px]] | |||
|[[File:Junior Detective MCC.jpg|center|114px]] | |||
|[[File:HTMCC Achievement JuniorDetective Steam.jpg|center|64px]] | |||
|<center>'''[[Junior Detective]]'''</center> | |||
|Find the First clue to unravel the mystery of the squad in the Campaign. | |||
|<center>''[[Halo 3: ODST]]''<br/>''[[Halo: The Master Chief Collection]]''</center> | |||
|- | |||
|<center>N/A</center> | |||
|[[File:Investigator.jpg|center|114px]] | |||
|[[File:HTMCC Achievement Investigator Steam.jpg|center|64px]] | |||
|<center>'''[[Investigator]]'''</center> | |||
|Find the Second clue to unravel the mystery of the squad in the Campaign. | |||
|<center>''[[Halo: The Master Chief Collection]]''</center> | |||
|- | |||
|[[File:H3ODST Achievement Gumshoe.png|center|64px]] | |||
|[[File:Gumshoe.jpg|center|114px]] | |||
|[[File:HTMCC Achievement Gumshoe Steam.jpg|center|64px]] | |||
|<center>'''[[Gumshoe]]'''</center> | |||
|Find the Third clue to unravel the mystery of the squad in the Campaign. | |||
|<center>''[[Halo 3: ODST]]''<br/>''[[Halo: The Master Chief Collection]]''</center> | |||
|- | |||
|<center>N/A</center> | |||
|[[File:Bloodhound.jpg|center|114px]] | |||
|[[File:HTMCC Achievement Bloodhound Steam.jpg|center|64px]] | |||
|<center>'''[[Bloodhound]]'''</center> | |||
|Find the Fourth clue to unravel the mystery of the squad in the Campaign. | |||
|<center>''[[Halo: The Master Chief Collection]]''</center> | |||
|- | |||
|<center>N/A</center> | |||
|[[File:Private Eye.jpg|center|114px]] | |||
|[[File:HTMCC Achievement PrivateEye Steam.jpg|center|64px]] | |||
|<center>'''[[Private Eye]]'''</center> | |||
|Find the Fifth clue to unravel the mystery of the squad in the Campaign. | |||
|<center>''[[Halo: The Master Chief Collection]]''</center> | |||
|- | |||
|[[File:H3ODST Achievement Super Sleuth.png|center|64px]] | |||
|<center>N/A</center> | |||
|<center>N/A</center> | |||
|<center>'''[[Super Sleuth]]'''</center> | |||
|rowspan="2"|Find the Sixth and Final clue to unravel the mystery of the squad in the Campaign. | |||
|<center>''[[Halo 3: ODST]]''</center> | |||
|- | |||
|<center>N/A</center> | |||
|[[File:Secret Agent.jpg|center|114px]] | |||
|[[File:HTMCC Achievement SecretAgent Steam.jpg|center|64px]] | |||
|<center>'''[[Secret Agent ]]'''</center> | |||
|<center>''[[Halo: The Master Chief Collection]]''</center> | |||
|- | |||
|[[File:H3ODST Achievement Listener.png|center|64px]] | |||
|[[File:Listener.jpg|center|114px]] | |||
|[[File:HTMCC H3ODST Achievement Listener Steam.jpg|center|64px]] | |||
|<center>'''[[Listener]]'''</center> | |||
|Find the first Audio Log. {{C|''Halo 3: ODST''}}<br/>Find the First Audio Log in the Campaign. {{C|''Halo: The Master Chief Collection''}} | |||
|<center>''[[Halo 3: ODST]]''<br/>''[[Halo: The Master Chief Collection]]''</center> | |||
|- | |||
|<center>N/A</center> | |||
|[[File:An Ear Full.jpg|center|114px]] | |||
|[[File:HTMCC H3ODST Achievement AnEarFull Steam.jpg|center|64px]] | |||
|<center>'''[[An Ear Full]]'''</center> | |||
|Find the 2nd Audio Log in the Campaign. | |||
|<center>''[[Halo: The Master Chief Collection]]''</center> | |||
|- | |||
|[[File:H3ODST Achievement Tuned In.png|center|64px]] | |||
|[[File:Tuned In.jpg|center|114px]] | |||
|[[File:HTMCC H3ODST Achievement TunedIn Steam.jpg|center|64px]] | |||
|<center>'''[[Tuned In]]'''</center> | |||
|Find 3 Audio Logs, alone or with another ODST. {{C|''Halo 3: ODST''}}<br/>Find the 3rd Audio Log in the Campaign. {{C|''Halo: The Master Chief Collection''}} | |||
|<center>''[[Halo 3: ODST]]''<br/>''[[Halo: The Master Chief Collection]]''</center> | |||
|- | |||
|<center>N/A</center> | |||
|[[File:Do Tell.jpg|center|114px]] | |||
|[[File:HTMCC H3ODST Achievement DoTell Steam.jpg|center|64px]] | |||
|<center>'''[[Do Tell]]'''</center> | |||
|Find the 4th Audio Log in the Campaign. | |||
|<center>''[[Halo: The Master Chief Collection]]''</center> | |||
|- | |||
|<center>N/A</center> | |||
|[[File:Hear Me Out.jpg|center|114px]] | |||
|[[File:HTMCC H3ODST Achievement HearMeOut Steam.jpg|center|64px]] | |||
|<center>'''[[Hear Me Out]]'''</center> | |||
|Find the 5th Audio Log in the Campaign. | |||
|<center>''[[Halo: The Master Chief Collection]]''</center> | |||
|- | |||
|<center>N/A</center> | |||
|[[File:Eavesdropping.jpg|center|114px]] | |||
|[[File:HTMCC H3ODST Achievement Eavesdropping Steam.jpg|center|64px]] | |||
|<center>'''[[Eavesdropping]]'''</center> | |||
|Find the 6th Audio Log in the Campaign. | |||
|<center>''[[Halo: The Master Chief Collection]]''</center> | |||
|- | |||
|<center>N/A</center> | |||
|[[File:Auditor.jpg|center|114px]] | |||
|[[File:HTMCC H3ODST Achievement Auditor Steam.jpg|center|64px]] | |||
|<center>'''[[Auditor]]'''</center> | |||
|Find the 7th Audio Log in the Campaign. | |||
|<center>''[[Halo: The Master Chief Collection]]''</center> | |||
|- | |||
|<center>N/A</center> | |||
|[[File:Overheard.jpg|center|114px]] | |||
|[[File:HTMCC H3ODST Achievement Overheard Steam.jpg|center|64px]] | |||
|<center>'''[[Overheard]]'''</center> | |||
|Find the 8th Audio Log in the Campaign. | |||
|<center>''[[Halo: The Master Chief Collection]]''</center> | |||
|- | |||
|<center>N/A</center> | |||
|[[File:Wiretapping.jpg|center|114px]] | |||
|[[File:HTMCC H3ODST Achievement Wiretapping Steam.jpg|center|64px]] | |||
|<center>'''[[Wiretapping]]'''</center> | |||
|Find the 9th Audio Log in the Campaign. | |||
|<center>''[[Halo: The Master Chief Collection]]''</center> | |||
|- | |||
|<center>N/A</center> | |||
|[[File:Monitored.jpg|center|114px]] | |||
|[[File:HTMCC H3ODST Achievement Monitored Steam.jpg|center|64px]] | |||
|<center>'''[[Monitored]]'''</center> | |||
|Find the 10th Audio Log in the Campaign. | |||
|<center>''[[Halo: The Master Chief Collection]]''</center> | |||
|- | |||
|<center>N/A</center> | |||
|[[File:Hang Onto My Words.jpg|center|114px]] | |||
|[[File:HTMCC H3ODST Achievement HangOntoMyWords Steam.jpg|center|64px]] | |||
|<center>'''[[Hang Onto My Words]]'''</center> | |||
|Find the 11th Audio Log in the Campaign. | |||
|<center>''[[Halo: The Master Chief Collection]]''</center> | |||
|- | |||
|<center>N/A</center> | |||
|[[File:Give Heed.jpg|center|114px]] | |||
|[[File:HTMCC H3ODST Achievement GiveHeed Steam.jpg|center|64px]] | |||
|<center>'''[[Give Heed]]'''</center> | |||
|Find the 12ve Audio Log in the Campaign. | |||
|<center>''[[Halo: The Master Chief Collection]]''</center> | |||
|- | |||
|<center>N/A</center> | |||
|[[File:Get A Load.jpg|center|114px]] | |||
|[[File:HTMCC H3ODST Achievement GetALoad Steam.jpg|center|64px]] | |||
|<center>'''[[Get A Load]]'''</center> | |||
|Find the 13th Audio Log in the Campaign. | |||
|<center>''[[Halo: The Master Chief Collection]]''</center> | |||
|- | |||
|<center>N/A</center> | |||
|[[File:Snoop Troop.jpg|center|114px]] | |||
|[[File:HTMCC H3ODST Achievement SnoopTroop Steam.jpg|center|64px]] | |||
|<center>'''[[Snoop Troop]]'''</center> | |||
|Find the 14th Audio Log in the Campaign. | |||
|<center>''[[Halo: The Master Chief Collection]]''</center> | |||
|- | |||
|[[File:H3ODST Achievement All Ears.png|center|64px]] | |||
|[[File:All Ears.jpg|center|114px]] | |||
|[[File:HTMCC H3ODST Achievement AllEars Steam.jpg|center|64px]] | |||
|<center>'''[[All Ears]]'''</center> | |||
|Find 15 Audio Logs, alone or with another ODST. {{C|''Halo 3: ODST''}}<br/>Find the 15th Audio Log in the Campaign. {{C|''Halo: The Master Chief Collection''}} | |||
|<center>''[[Halo 3: ODST]]''<br/>''[[Halo: The Master Chief Collection]]''</center> | |||
|- | |||
|<center>N/A</center> | |||
|[[File:Ear Bender.jpg|center|114px]] | |||
|[[File:HTMCC H3ODST Achievement EarBender Steam.jpg|center|64px]] | |||
|<center>'''[[Ear Bender]]'''</center> | |||
|Find the 16th Audio Log in the Campaign. | |||
|<center>''[[Halo: The Master Chief Collection]]''</center> | |||
|- | |||
|<center>N/A</center> | |||
|[[File:Plugged In.jpg|center|114px]] | |||
|[[File:HTMCC H3ODST Achievement Plugged In Steam.jpg|center|64px]] | |||
|<center>'''[[Plugged In]]'''</center> | |||
|Find the 17th Audio Log in the Campaign. | |||
|<center>''[[Halo: The Master Chief Collection]]''</center> | |||
|- | |||
|<center>N/A</center> | |||
|[[File:Attentive.jpg|center|114px]] | |||
|[[File:HTMCC H3ODST Achievement Attentive Steam.jpg|center|64px]] | |||
|<center>'''[[Attentive]]'''</center> | |||
|Find the 18th Audio Log in the Campaign. | |||
|<center>''[[Halo: The Master Chief Collection]]''</center> | |||
|- | |||
|<center>N/A</center> | |||
|[[File:Watchful.jpg|center|114px]] | |||
|[[File:HTMCC H3ODST Achievement Watchful Steam.jpg|center|64px]] | |||
|<center>'''[[Watchful]]'''</center> | |||
|Find the 19th Audio Log in the Campaign. | |||
|<center>''[[Halo: The Master Chief Collection]]''</center> | |||
|- | |||
|<center>N/A</center> | |||
|[[File:Observant.jpg|center|114px]] | |||
|[[File:HTMCC H3ODST Achievement Observant Steam.jpg|center|64px]] | |||
|<center>'''[[Observant]]'''</center> | |||
|Find the 20th Audio Log in the Campaign. | |||
|<center>''[[Halo: The Master Chief Collection]]''</center> | |||
|- | |||
|<center>N/A</center> | |||
|[[File:Scout.jpg|center|114px]] | |||
|[[File:HTMCC H3ODST Achievement Scout Steam.jpg|center|64px]] | |||
|<center>'''[[Scout (achievement)|Scout]]'''</center> | |||
|Find the 21st Audio Log in the Campaign. | |||
|<center>''[[Halo: The Master Chief Collection]]''</center> | |||
|- | |||
|<center>N/A</center> | |||
|[[File:Adventurer.jpg|center|114px]] | |||
|[[File:HTMCC H3ODST Achievement Adventurer Steam.jpg|center|64px]] | |||
|<center>'''[[Adventurer]]'''</center> | |||
|Find the 22nd Audio Log in the Campaign. | |||
|<center>''[[Halo: The Master Chief Collection]]''</center> | |||
|- | |||
|<center>N/A</center> | |||
|[[File:Spotter.jpg|center|114px]] | |||
|[[File:HTMCC H3ODST Achievement Spotter Steam.jpg|center|64px]] | |||
|<center>'''[[Spotter]]'''</center> | |||
|Find the 23rd Audio Log in the Campaign. | |||
|<center>''[[Halo: The Master Chief Collection]]''</center> | |||
|- | |||
|<center>N/A</center> | |||
|[[File:Considerate.jpg|center|114px]] | |||
|[[File:HTMCC H3ODST Achievement Considerate Steam.jpg|center|64px]] | |||
|<center>'''[[Considerate]]'''</center> | |||
|Find the 24th Audio Log in the Campaign. | |||
|<center>''[[Halo: The Master Chief Collection]]''</center> | |||
|- | |||
|<center>N/A</center> | |||
|[[File:On Your Toes.jpg|center|114px]] | |||
|[[File:HTMCC H3ODST Achievement OnYourToes Steam.jpg|center|64px]] | |||
|<center>'''[[On Your Toes]]'''</center> | |||
|Find the 25th Audio Log in the Campaign. | |||
|<center>''[[Halo: The Master Chief Collection]]''</center> | |||
|- | |||
|<center>N/A</center> | |||
|[[File:Archivist.jpg|center|114px]] | |||
|[[File:HTMCC H3ODST Achievement Archivist Steam.jpg|center|64px]] | |||
|<center>'''[[Archivist]]'''</center> | |||
|Find the 26th Audio Log in the Campaign. | |||
|<center>''[[Halo: The Master Chief Collection]]''</center> | |||
|- | |||
|<center>N/A</center> | |||
|[[File:Your Attention Please.jpg|center|114px]] | |||
|[[File:HTMCC H3ODST Achievement YourAttentionPlease Steam.jpg|center|64px]] | |||
|<center>'''[[Wiretapping]]'''</center> | |||
|Find the 27th Audio Log in the Campaign. | |||
|<center>''[[Halo: The Master Chief Collection]]''</center> | |||
|- | |||
|<center>N/A</center> | |||
|[[File:Catching On.jpg|center|114px]] | |||
|[[File:HTMCC H3ODST Achievement CatchingOn Steam.jpg|center|64px]] | |||
|<center>'''[[Catching On]]'''</center> | |||
|Find the 28th Audio Log in the Campaign. | |||
|<center>''[[Halo: The Master Chief Collection]]''</center> | |||
|- | |||
|<center>N/A</center> | |||
|[[File:Wisening Up.jpg|center|114px]] | |||
|[[File:HTMCC H3ODST Achievement WiseningUp Steam.jpg|center|64px]] | |||
|<center>'''[[Wisening Up]]'''</center> | |||
|Find the 29th Audio Log in the Campaign. | |||
|<center>''[[Halo: The Master Chief Collection]]''</center> | |||
|- | |||
|<center>N/A</center> | |||
|[[File:Saturday Morning Cartoon.jpg|center|114px]] | |||
|[[File:HTMCC Achievement Saturday Morning Cartoons Steam.jpg|center|64px]] | |||
|<center>'''[[Saturday Morning Cartoon]]'''</center> | |||
|Is there a toy inside? | |||
|<center>''[[Halo: The Master Chief Collection]]''</center> | |||
|- | |||
|<center>N/A</center> | |||
|[[File:Catch 'Em Napping.jpg|center|114px]] | |||
|[[File:HTMCC Achievement Catch 'Em Napping Steam.jpg|center|64px]] | |||
|<center>'''[[Catch 'Em Napping]]'''</center> | |||
|Kill 5 sleeping Grunts on Mombasa Streets. | |||
|<center>''[[Halo: The Master Chief Collection]]''</center> | |||
|} | |||
==Easter eggs== | |||
*On this level, there are several graffiti tags reading "BELIEVE", perhaps a reference to the extensive marketing campaign for ''[[Halo 3]]'' [[Believe|of the same name]]. There is other graffiti in the city, some of which read "YOU LOOT, I SHOOT", "HELL ON EARTH", "TWILIGHT OF MAN", "KINSLER IZ A THUG", "UNSC=LIARS", "FASCISTS", "REMEMBER REACH", "MILITIA AIN'T WORTH SPIT!", and "GLASS THIS!". | |||
*After entering the building next to the first locked weapons cache, search the floor surrounding the door leading to the first courtyard. When searching the floor, players may find a box of cereal labeled, ''Web-O's''. The mascot on the front of the box is a picture of a gorilla with a cowboy hat. This character is recognized by Bungie employees and Bungie.net members as "The Webmaster" (one of Bungie's many inside jokes). In the right corner below him the phrase, "Your mom LOVES 'em!" can be seen. | |||
*On the left side of the second floor of ONI Building's lobby, there are two photo IDs on the floor in the mess of papers. The photos on the two IDs are of [[Martin O'Donnell]] and [[Shi Kai Wang]]. In addition, the ID inside the front door entrance has a photo of [[Shishka]]. In fact, all of the IDs found laying around in the lobby on both the first and second floor are of [[Bungie]] employees that served a major role in ''ODST's'' development. | *On the left side of the second floor of ONI Building's lobby, there are two photo IDs on the floor in the mess of papers. The photos on the two IDs are of [[Martin O'Donnell]] and [[Shi Kai Wang]]. In addition, the ID inside the front door entrance has a photo of [[Shishka]]. In fact, all of the IDs found laying around in the lobby on both the first and second floor are of [[Bungie]] employees that served a major role in ''ODST's'' development. | ||
*The entire BSP (the level geometry itself) is not rendered at once because of engine limitations - this is why Bungie put in blast doors and walls in between sectors. Furthermore, some of the BSPs are identical - Sectors 4 and 5 | *In several of the buildings, there are [[AMG Transport Dynamics|Asklon]] [[:File:Asklon Tablet.jpg|business line charts]] going from December to "Infinity". This is a reference to Bungie's ''[[Marathon|Marathon Infinity]]''. | ||
*At the ATM which gives the player an audio log, money can be seen being dispensed randomly. The coins, Kenyan shillings, dispensed from this ATM each have the face of [[Jason Jones]], the co-founder of Bungie, on one side.<ref>[http://halo.bungie.net/Online/Halo3UserContentDetails.aspx?h3fileid=102995824 ''Screenshot of one side of the coin'']</ref> | |||
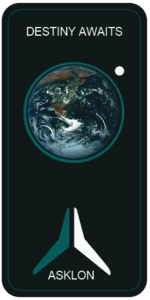
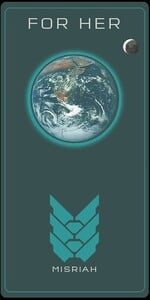
*Certain buildings' interior have [[AMG Transport Dynamics|Asklon]] posters depicting Earth with a white sphere (Luna) in orbit, captioned with "Destiny Awaits". This was later revealed as a teaser for [[Bungie]]'s then-upcoming video game ''[[wikipedia:Destiny (video game)|Destiny]]'', as the white sphere resembled the [[destinypedia:Traveler|Traveler]]. In ''[[Halo: The Master Chief Collection]]'', the posters were replaced by [[Misriah Armory]] posters depicting Earth with a crescent moon, captioned with "For Her". The replacement poster is likely a reference to a similar poster that was first seen on the [[bulletin board]] onboard {{UNSCShip|Pillar of Autumn}} in the ''[[Halo: Combat Evolved]]'' campaign level ''[[The Pillar of Autumn (Halo: Combat Evolved level)|The Pillar of Autumn]]''. | |||
<gallery class=center heights="300px"> | |||
File:Ad Asklon Destiny Awaits.png|The original "Destiny Awaits" poster in ''Halo 3: ODST''. | |||
File:HTMCC H3ODST ForHerPoster.jpg|The replacement "For Her" poster in ''Halo: The Master Chief Collection''. | |||
</gallery> | |||
==Trivia== | |||
===Glitch=== | |||
*There is a glitch at the beginning of this level in Theater mode. When the Rookie jumps out of his SOEIV, right after he gets his Silenced SMG out, viewers can press Y once and they can be able to fly wherever they want, even up to the Space Elevator, in a way similar to pan-cam. | |||
*There is a glitch in four player co-op that causes one of the players to be killed while still in his pod by a [[Kig-yar Sniper]]. This is because the sniper spawns on a building right next to the player's pod. | |||
===Mistakes=== | |||
*After the player completes ''[[Uplift Reserve]]'', the cutscene depicts Rookie putting down the Optic Package, and taking out his holstered M7S from his ''back'', even though in normal gameplay the M7S is holstered on the character's right thigh. | |||
*After the player completes ''[[Kikowani Station]]'' and returns to Mombasa Streets, the positions of the vehicles in the area have changed. Most noticeably, a bus has appeared at the end of the street. If the player drove a vehicle to get to the Kikowani Station beacon, a brand-new, undamaged vehicle of the same type will be parked in front of the bus. | |||
===Miscellaneous=== | |||
*This is the first non-linear open-world level ever in a Halo game, and the largest open environment Bungie has ever created to this date. Additionally, this level is the only level in ''Halo 3: ODST'' which does not unlock an [[achievement]] upon beating it on [[Normal]] or above. This is probably because of the fact that this is a free-roaming level. | |||
**It even has the most loadout points, exclusively in ''Halo: The Master Chief Collection''. | |||
**This level also does not feature any par time and par scores. | |||
*The location of the beacon the player uses to access the city underground and ''[[Data Hive]]'' will vary depending on which beacon the player accessed last. If the player follows the correct chronological order and completes ''[[Kikowani Station]]'' last, the beacon will be in Sector 0 at the top of the map. If the player completes ''[[NMPD HQ]]'' last, the beacon will be in the center of Sector 3. If ''[[ONI Alpha Site]]'' is completed last, the beacon will be in Sector 10, and if the player completes ''[[Kizingo Boulevard]]'' last, it is in Sector 4. Each area features similar resistance. Regardless of which elevator shaft the player accesses, Data Hive will always begin in the same location. | |||
*The entire BSP (the level geometry itself) is not rendered at once because of engine limitations - this is why Bungie put in blast doors and walls in between sectors. Furthermore, some of the BSPs are identical - Sectors 4 and 5, 3 and 8, and 0 and 9.{{Ref/Game|H3ODST|[[:File:NM sectors.png|VISR database - New Mombasa map]]}} The only noticeable difference is that players cannot enter the building in Sector 4 as they did the one in Sector 5, and another being the [[Uplift Nature Reserve]] in Sector 9. Also, when the player opens a blast door, the BSP loads, but, for example, if the player enters Sector 8, it will load the Sector 3 BSP since they are one and the same. Note that scenery items are not included in the BSP, since no part of the BSP is movable. | |||
*When the player is in Sector 10, Sector 10's map in the VISR database also shows the bridge, which was destroyed already. The player can also explore the map of ONI Alpha Site. | |||
*At certain points of the level, players can see objects that hint at the past presence of the fellow squadmates. A [[M12 Warthog|Warthog]] wreckage (presumably driven by Miles) can be found in the same plaza where the optics package is. A [[M808C Scorpion]] (presumed commandeered by Crespo) and a [[Zurdo-pattern Wraith|Wraith]], both destroyed, can be found near the gate that separates Sector 4 and Sector 10. In Sector 4, an SOEIV (presumed that of Agu's or Crespo's) can be found in a courtyard, with a silenced SMG beside it. | |||
*In many parts of the level, the Huragok have marked areas of interest by mysterious symbols which are highlighted when the VISR is turned on. Most of these symbols are geometric glyphs similar to those used by the Forerunners, commonly arranged around a "Y"-shape. Some of the symbols depict the Superintendent's avatar, hinting at cooperation between the Huragok and the Superintendent. | |||
==Gallery== | |||
===Concept art=== | |||
<gallery widths="175"> | |||
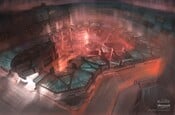
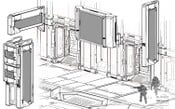
File:H3ODST_MombasaStreets_EarlyLayout.jpg|An early sketch of the hub's layout, including plans for VFX and art. The areas marked "SC100" etc are the locations of the single-player missions.{{Ref/Twitter|vicdeleon|1175909611695726592 |Vic DeLeon|Quote=Atmosphere & mood were a priority and here’s the general Env Art and VFX layout that helped us track all the SP levels (SC100-140), along with a couple early shots staging the look for the Hub at night.}} | |||
File:H3ODST_MombasaStreets_Early_WIP.jpg|Work-in-progress screenshots of the level. | |||
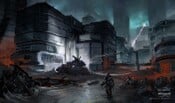
File:H3ODST_MombasaStreets_Mood_Concept.jpg|Concept art of the level's environment. The sign on the right for "Makura Body" does not appear in the final game. | |||
File:H3ODST_MombasaStreets_Wraith_Concept.jpg|Concept of the aftermath of the fighting. | |||
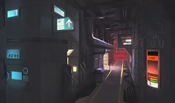
File:H3ODST_MombasaStreets_Tunnel_Concept.png|A concept of one of the interior spaces accessible in the level. | |||
File:H3ODST_MombasaStreets_Courtyard_Concept.jpg|A concept piece of a courtyard within the level. | |||
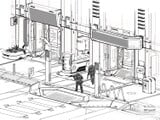
File:H3ODST_MombasaStreets_Props_Concept_1.jpg|Concept art of props and assets found within the level. | |||
File:H3ODST_MombasaStreets_Props_Concept_2.jpg|Concept art of props and assets found within the level. | |||
File:H3ODST_MombasaStreets_Props_Concept_3.jpg|Concept art of props and assets found within the level. | |||
File:H3ODST_MombasaStreets_Props_Concept_4.jpg|Concept art of props and assets found within the level. | |||
File:H3ODST_MombasaStreets_Props_Concept_5.jpg|Concept art of props and assets found within the level. | |||
File:H3ODST_OfficeDesk_Concept.jpg|Concept art of props and assets found within the level. | |||
File:H3ODST_Kiosks_Concept.jpg|Concept art for the kiosk props in the streets. | |||
</gallery> | |||
===Promotional images=== | |||
<gallery> | |||
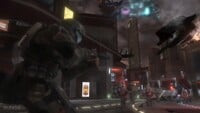
File:H3ODST PK MombasaStreets 1.jpg|The Rookie encounters a Covenant patrol. | |||
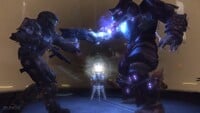
File:H3ODST PK MombasaStreets 2.jpg|The Rookie fighting a [[Jiralhanae Captain]] at close range. | |||
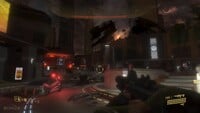
File:H3ODST PK MombasaStreets 3.jpg|First-person view of a deserted street. | |||
File:H3ODST PK MombasaStreets 4.jpg|First-person view of a Covenant patrol approaching while VISR is activated. | |||
File:H3ODST PK MombasaStreets 5.jpg|The Mombasa space elevator burning in the distance. | |||
</gallery> | |||
===Screenshots=== | |||
<gallery> | |||
File:H3ODST Menu 02 Mombasa Streets.png|Preview of the level in ''Halo 3: ODST'' menu. | |||
File:H3ODST NewMombasa.jpg|A view of New Mombasa Sector 5, near where the Rookie's SOEIV has landed. | |||
File:RookieAwakes.jpg|Rookie exits his drop pod. | |||
File:H3ODST SignsGuidance.jpg|Superintendent using signage to guide Rookie. | |||
File:H3ODST GardenSOEIV.jpg|An SOIEV inside a garden in Sector 4. | |||
File:H3ODST-Rookie&Mongoose.png|Rookie driving an [[M274 Mongoose]] in Sector 10. | |||
File:H3ODST Rookie&ReconHelmet.jpg|Rookie inspecting Dare's damaged Recon helmet. | |||
File:H3ODST Rookie&DroneOptics.jpg|Rookie holding an F-99 Wombat's discarded optic package. | |||
File:H3ODST Rookie&GaussCannon.jpg|Rookie inspecting the destroyed Gauss cannon. | |||
File:H3ODST Rookie&ExplosiveRemains.png|Rookie holding the remains of an [[M168 Demolition Charge]]. | |||
File:H3ODST Rookie&SniperRifle.jpg|Rookie finds Romeo's bent sniper rifle dangling from a power line. | |||
File:H3ODST Rookie&BiofoamCanister.jpg|Rookie inspecting an emptied biofoam canister. | |||
</gallery> | |||
==Sources== | ==Sources== | ||
{{Ref/Sources}} | |||
{{Levels}} | {{Levels|ODST}} | ||
Latest revision as of 16:09, September 26, 2024
|
Prev: |
|
|
Concurrent: |
|
|
Next: |
|
| Mombasa Streets | |
|---|---|
| |
|
Game: |
|
|
File name (?): |
|
|
Player: |
|
|
Date: |
October 20, 2552, 2206 hours |
|
Location: |
|
|
Objective(s): |
Explore the city and find the respective beacons leading to each flashback levels. |
|
Par Score: |
100,000 (Halo 3: ODST) |
 |
Halopedia has a walkthrough guide for this level; see Mombasa Streets/Walkthrough. |
| “ | Explore the city, find your ODST team. | ” |
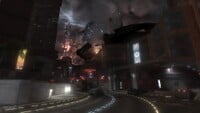
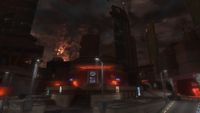
Mombasa Streets is the second campaign level of Halo 3: ODST, and serves as "the hub", an open-world environment used to access flashback missions. It is set in the city of New Mombasa.
Summary[edit]
Unique as a Halo game level, this level is an open-world environment which contains "beacons", and objects left by or noted by the Rookie's squad members, which trigger "flashback" levels, explaining previous events. In addition to the beacons, the level also has additional content, such as Audio logs and Supply Caches.
The city map provided by the Superintendent highlights points of interest, such as the "beacon" objects. The Superintendent also guides the player into the right direction using the city's plentiful digital signs and billboards.
During the first playthrough, some areas in the city are inaccessible, and the player is forced to play the first three flashbacks in chronological order. Completing flashbacks unlocks more areas in the city, allowing the player to progress to the next beacon. Once the game is completed, the city is fully unlocked for exploration.
Plot[edit]
The level starts six hours after the Squad's failed orbital insertion, in the occupied New Mombasa City Center. Some time after the Rookie wakes up, exits his pod and starts to explore the city, the Superintendent will contact him via a public phone and upload a map of the city to his VISR navigation database. After finding the final beacon and completing the last flashback level, the Rookie will receive a distress signal from Captain Dare, who is pinned down in the data center under the city. At this point, the city will be mostly locked, with only a way to the nearest underground entrance, where the Rookie will descend into the depths of the city underground.
Transcript[edit]
THE ROOKIE
Occupied city center
6 hours after drop
The Rookie slowly opens his eyes in his pod. There is static interference in his visor, and multiple cracks in his pod's windows. The screens that are still working are filled with static. Two Covenant Phantoms fly in the background.
Shortly after the dropships pass, the Rookie activates four explosive bolts to release his pod door open. The pod is on the edge of a short building, but, having no other choice, the Rookie hops out, only to fall about 15 feet to ground, injuring him slightly. If the game is being played in cooperative mode, the bolts section is skipped, and the hatch is popped automatically, as is the Rookie jumping out.
The Rookie finds the Recon Helmet embedded in a monitor. He removes it from the screen. Changes to one of the Superintendent's camera, focusing on an SOEIV pod.
- Superintendent (on-screen): MOTOR-VEHICLE CRASH! SEARCHING N.M.P.D DATABASE... NO MATCH!
The camera then focuses on the window that the Rookie is standing at.
- Superintendent (on-screen): LOST-AND-FOUND ITEM!
The view switches back to the Rookie, looking out of the window.
- Lance Corporal Kojo "Romeo" Agu (flashback): "You're going to tell us her name, Gunny?"
- Gunnery Sergeant Edward Buck (flashback): "Ms. Naval Intelligence. Our new boss."
- Private First Class Michael "Mickey" Crespo (flashback): "Oh, brother..."
- Buck (flashback): "So check your mouths, find your chairs... And get set for a combat drop!"
Fades to black. Tayari Plaza begins.
The Rookie taps the broken Recon helmet, then puts it down on the floor. He peers out of the window. Several advertisement panels change to "KEEP RIGHT" signs, pointing at an open blast door. The Rookie readies his Silenced SMG.
{First Huragok Encounter, Sector 8}
Under a walkway in Sector 8, a Brute Captain is holding the explosive charge for a Huragok, while two Brute Minors are struggling to held the Huragok down.
- Brute Captain: "Arrgh! Hold the creature still!"
- Brute Minor: "Place the charge, before I lose my grip!"
The Brute Captain forcefully inserts the charge into the Huragok's explosive armor. The Huragok gives out a high-pitched wail.
- Brute Minor: "It's armed!"
- Brute Captain: "And ready to explode, in case any human comes too close!"
- Brute Captain: "Let it roam! Let it do the Prophets' work!"
The Brute Minors release the Huragok.
The Rookie crouches down to the Optics Package. Some sparks flies out of it, and the camera twitches. Switch to the Package's camera, which shows the Rookie's face. Switch to a overview of the area.
- Buck (flashback): "You heard from Mickey? Dutch?"
- Romeo (flashback): "Negative."
- Buck (flashback): "We need to get above this crap, link up with the bee-net. One of our drones must have seen where they hit."
Fades to black. Uplift Reserve begins.
The Rookie drops the Optics Package, which falls to the ground with a dull thud. He stands up and turns around, Silenced SMG at the ready.
The Rookie pulls himself up to the ruined Gauss Turret. He looks through the damaged electronic scope, down to the plaza below.
- Colonel (COM) (flashback): "Where's the rest of your team, trooper?"
- Lance Corporal Taylor "Dutch" Miles (flashback): "Scattered, dead, I don't know."
- Colonel (COM) (flashback): "That's too bad. We're gonna need all the men we can get!"
Fades to black. Kizingo Boulevard begins.
The Rookie releases the turret, then pats it. He jumps off the turret's base.
The Rookie crouches down to the Remote Detonator, then picks it up.
- Captain Veronica Dare (COM) (flashback): "Stand by to adjust trajectory. On my mark."
The Rookie spins the Detonator
- Dutch (COM) (flashback): "What did she just say?"
- Dare (COM) (flashback): "Mark!"
The Rookie looks up at the smoldering, cube-shaped building in the background.
- Mickey (COM) (flashback): "We're way off course!"
- Dare (COM) (flashback): "We're heading exactly were I need to go."
Fades to black. ONI Alpha Site begins.
The Rookie looks at the burning ONI building. He stands up, then tosses the Remote Detonator into the water. It skips a few times, then sinks.
The Rookie looks up at a bent Sniper Rifle hanging over a power line. It is too high for him to reach. He picks up a metal pole, and uses it to push the Rifle down to the ground. He tries to straighten it, to no avail. He then looks up at the skyscrapers above him.
- Buck (COM) (flashback): "We're in the Police HQ."
- Dutch (flashback): "Can you take us there?"
- NMPD Officer (flashback): "Affirmative!"
- Buck (COM) (flashback): "All right. Meet you up top!"
Fades to black. NMPD HQ begins.
Dust falls down to the Rookie, who is still trying to straighten the Sniper Rifle. He finally gives up, and tosses it to the ground.
The Rookie crouches down to pick up the Biofoam Canister, then examines it. He then turns to see a not fully closed shutter.
- Buck (flashback): "How bad?"
- Romeo (flashback): (gasping) "Not good."
- Mickey (flashback): "We're gonna get you outta here."
- Romeo (flashback): "Arrgh!"
Fades to black. Kikowani Station begins.
{Kikowani Station Outro/Dare Transmission}
The Rookie shakes the Biofoam Canister, then squeezes some biofoam out of it. Seeing that it's empty, he tosses it to the ground. Suddenly, he picks up a transmission:
- Dare (COM): "Can anyone hear me? This is Captain Veronica Dare!"
The Rookie puts his hand to the comlink on his helmet.
- Dare (COM): "My beacon is active - need immediate assistance! Someone, please respond!"
The Rookie looks up to see a Phantom passing by and activating its searchlight. He then readies his Silenced SMG and moves out.
After the cutscene, the rest of the sectors in the level will be locked down, and the nearest underground entrance will be marked with a beacon.
The Rookie enters the underground tunnel and stops at the edge of an empty elevator shaft leading deep underground. He glances down to see just how deep the shaft is, then holsters his SMG and jumps over the shaft to grab an elevator support cable. He hesitates for a moment but soon begins to slowly rappel down.
Fade to black. Data Hive begins.
Beacons[edit]
There are six beacons around the level, each an object related to a squadmate. The following is a list of the locations of these beacons, and the flashback levels they trigger, in chronological order.
| Location | Object | Character | Level | Time |
|---|---|---|---|---|
| Sector 5, room overlooking Tayari Plaza | Dare's Recon Helmet |
Buck | Tayari Plaza | Immediately after drop (16:06) |
| Sector 9, in front of New Mombasa Uplift building | Damaged F-99 Drone Optics Package |
Dutch | Uplift Reserve | 30 minutes after drop (16:36) |
| Sector 4, building overlooking Kizingo Boulevard | Destroyed Gauss Turret |
Mickey | Kizingo Boulevard | 90 minutes after drop (17:36) |
| Sector 10, near destroyed bridge to ONI Alpha Site | Remote Detonator |
Dutch | ONI Alpha Site | 2 hours after drop (18:10) |
| Sector 3, hanging from a power line | Sniper Rifle |
Romeo | NMPD HQ | 3 hours after drop (19:14) |
| Sector 0, entrance to Kikowani Station | Biofoam Canister |
Buck | Kikowani Station | 5 hours after drop (21:01) |
Achievements[edit]
The following achievements can be unlocked on Mombasa Streets across the Xbox 360 and Halo: The Master Chief Collection editions of Halo 3: ODST.
| Halo: 3: ODST (Xbox 360) | Halo: MCC (Xbox One) | Halo: MCC (Steam) | Title | Unlock requirement | Games |
|---|---|---|---|---|---|
| Access and download the city map to your VISR. | |||||
| Find the First clue to unravel the mystery of the squad in the Campaign. | Halo: The Master Chief Collection | ||||
| Find the Second clue to unravel the mystery of the squad in the Campaign. | |||||
| Find the Third clue to unravel the mystery of the squad in the Campaign. | Halo: The Master Chief Collection | ||||
| Find the Fourth clue to unravel the mystery of the squad in the Campaign. | |||||
| Find the Fifth clue to unravel the mystery of the squad in the Campaign. | |||||
| Find the Sixth and Final clue to unravel the mystery of the squad in the Campaign. | |||||
| Find the first Audio Log. (Halo 3: ODST) Find the First Audio Log in the Campaign. (Halo: The Master Chief Collection) |
Halo: The Master Chief Collection | ||||
| Find the 2nd Audio Log in the Campaign. | |||||
| Find 3 Audio Logs, alone or with another ODST. (Halo 3: ODST) Find the 3rd Audio Log in the Campaign. (Halo: The Master Chief Collection) |
Halo: The Master Chief Collection | ||||
| Find the 4th Audio Log in the Campaign. | |||||
| Find the 5th Audio Log in the Campaign. | |||||
| Find the 6th Audio Log in the Campaign. | |||||
| Find the 7th Audio Log in the Campaign. | |||||
| Find the 8th Audio Log in the Campaign. | |||||
| Find the 9th Audio Log in the Campaign. | |||||
| Find the 10th Audio Log in the Campaign. | |||||
| Find the 11th Audio Log in the Campaign. | |||||
| Find the 12ve Audio Log in the Campaign. | |||||
| Find the 13th Audio Log in the Campaign. | |||||
| Find the 14th Audio Log in the Campaign. | |||||
| Find 15 Audio Logs, alone or with another ODST. (Halo 3: ODST) Find the 15th Audio Log in the Campaign. (Halo: The Master Chief Collection) |
Halo: The Master Chief Collection | ||||
| Find the 16th Audio Log in the Campaign. | |||||
| Find the 17th Audio Log in the Campaign. | |||||
| Find the 18th Audio Log in the Campaign. | |||||
| Find the 19th Audio Log in the Campaign. | |||||
| Find the 20th Audio Log in the Campaign. | |||||
| Find the 21st Audio Log in the Campaign. | |||||
| Find the 22nd Audio Log in the Campaign. | |||||
| Find the 23rd Audio Log in the Campaign. | |||||
| Find the 24th Audio Log in the Campaign. | |||||
| Find the 25th Audio Log in the Campaign. | |||||
| Find the 26th Audio Log in the Campaign. | |||||
| Find the 27th Audio Log in the Campaign. | |||||
| Find the 28th Audio Log in the Campaign. | |||||
| Find the 29th Audio Log in the Campaign. | |||||
| Is there a toy inside? | |||||
| Kill 5 sleeping Grunts on Mombasa Streets. |
Easter eggs[edit]
- On this level, there are several graffiti tags reading "BELIEVE", perhaps a reference to the extensive marketing campaign for Halo 3 of the same name. There is other graffiti in the city, some of which read "YOU LOOT, I SHOOT", "HELL ON EARTH", "TWILIGHT OF MAN", "KINSLER IZ A THUG", "UNSC=LIARS", "FASCISTS", "REMEMBER REACH", "MILITIA AIN'T WORTH SPIT!", and "GLASS THIS!".
- After entering the building next to the first locked weapons cache, search the floor surrounding the door leading to the first courtyard. When searching the floor, players may find a box of cereal labeled, Web-O's. The mascot on the front of the box is a picture of a gorilla with a cowboy hat. This character is recognized by Bungie employees and Bungie.net members as "The Webmaster" (one of Bungie's many inside jokes). In the right corner below him the phrase, "Your mom LOVES 'em!" can be seen.
- On the left side of the second floor of ONI Building's lobby, there are two photo IDs on the floor in the mess of papers. The photos on the two IDs are of Martin O'Donnell and Shi Kai Wang. In addition, the ID inside the front door entrance has a photo of Shishka. In fact, all of the IDs found laying around in the lobby on both the first and second floor are of Bungie employees that served a major role in ODST's development.
- In several of the buildings, there are Asklon business line charts going from December to "Infinity". This is a reference to Bungie's Marathon Infinity.
- At the ATM which gives the player an audio log, money can be seen being dispensed randomly. The coins, Kenyan shillings, dispensed from this ATM each have the face of Jason Jones, the co-founder of Bungie, on one side.[2]
- Certain buildings' interior have Asklon posters depicting Earth with a white sphere (Luna) in orbit, captioned with "Destiny Awaits". This was later revealed as a teaser for Bungie's then-upcoming video game Destiny, as the white sphere resembled the Traveler. In Halo: The Master Chief Collection, the posters were replaced by Misriah Armory posters depicting Earth with a crescent moon, captioned with "For Her". The replacement poster is likely a reference to a similar poster that was first seen on the bulletin board onboard UNSC Pillar of Autumn in the Halo: Combat Evolved campaign level The Pillar of Autumn.
Trivia[edit]
Glitch[edit]
- There is a glitch at the beginning of this level in Theater mode. When the Rookie jumps out of his SOEIV, right after he gets his Silenced SMG out, viewers can press Y once and they can be able to fly wherever they want, even up to the Space Elevator, in a way similar to pan-cam.
- There is a glitch in four player co-op that causes one of the players to be killed while still in his pod by a Kig-yar Sniper. This is because the sniper spawns on a building right next to the player's pod.
Mistakes[edit]
- After the player completes Uplift Reserve, the cutscene depicts Rookie putting down the Optic Package, and taking out his holstered M7S from his back, even though in normal gameplay the M7S is holstered on the character's right thigh.
- After the player completes Kikowani Station and returns to Mombasa Streets, the positions of the vehicles in the area have changed. Most noticeably, a bus has appeared at the end of the street. If the player drove a vehicle to get to the Kikowani Station beacon, a brand-new, undamaged vehicle of the same type will be parked in front of the bus.
Miscellaneous[edit]
- This is the first non-linear open-world level ever in a Halo game, and the largest open environment Bungie has ever created to this date. Additionally, this level is the only level in Halo 3: ODST which does not unlock an achievement upon beating it on Normal or above. This is probably because of the fact that this is a free-roaming level.
- It even has the most loadout points, exclusively in Halo: The Master Chief Collection.
- This level also does not feature any par time and par scores.
- The location of the beacon the player uses to access the city underground and Data Hive will vary depending on which beacon the player accessed last. If the player follows the correct chronological order and completes Kikowani Station last, the beacon will be in Sector 0 at the top of the map. If the player completes NMPD HQ last, the beacon will be in the center of Sector 3. If ONI Alpha Site is completed last, the beacon will be in Sector 10, and if the player completes Kizingo Boulevard last, it is in Sector 4. Each area features similar resistance. Regardless of which elevator shaft the player accesses, Data Hive will always begin in the same location.
- The entire BSP (the level geometry itself) is not rendered at once because of engine limitations - this is why Bungie put in blast doors and walls in between sectors. Furthermore, some of the BSPs are identical - Sectors 4 and 5, 3 and 8, and 0 and 9.[3] The only noticeable difference is that players cannot enter the building in Sector 4 as they did the one in Sector 5, and another being the Uplift Nature Reserve in Sector 9. Also, when the player opens a blast door, the BSP loads, but, for example, if the player enters Sector 8, it will load the Sector 3 BSP since they are one and the same. Note that scenery items are not included in the BSP, since no part of the BSP is movable.
- When the player is in Sector 10, Sector 10's map in the VISR database also shows the bridge, which was destroyed already. The player can also explore the map of ONI Alpha Site.
- At certain points of the level, players can see objects that hint at the past presence of the fellow squadmates. A Warthog wreckage (presumably driven by Miles) can be found in the same plaza where the optics package is. A M808C Scorpion (presumed commandeered by Crespo) and a Wraith, both destroyed, can be found near the gate that separates Sector 4 and Sector 10. In Sector 4, an SOEIV (presumed that of Agu's or Crespo's) can be found in a courtyard, with a silenced SMG beside it.
- In many parts of the level, the Huragok have marked areas of interest by mysterious symbols which are highlighted when the VISR is turned on. Most of these symbols are geometric glyphs similar to those used by the Forerunners, commonly arranged around a "Y"-shape. Some of the symbols depict the Superintendent's avatar, hinting at cooperation between the Huragok and the Superintendent.
Gallery[edit]
Concept art[edit]
An early sketch of the hub's layout, including plans for VFX and art. The areas marked "SC100" etc are the locations of the single-player missions.[4]
Promotional images[edit]
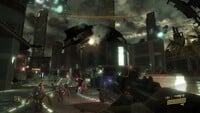
The Rookie fighting a Jiralhanae Captain at close range.
Screenshots[edit]
Rookie driving an M274 Mongoose in Sector 10.
Rookie holding the remains of an M168 Demolition Charge.
Sources[edit]
- ^ Halo 3: ODST Editing Kit, game file
H3ODSTEK\tags\levels\atlas\h100\h100.scenario - ^ Screenshot of one side of the coin
- ^ Halo 3: ODST, VISR database - New Mombasa map
- ^ Twitter, Vic DeLeon (@vicdeleon): "Atmosphere & mood were a priority and here’s the general Env Art and VFX layout that helped us track all the SP levels (SC100-140), along with a couple early shots staging the look for the Hub at night."
| |||||||||||||||||


![An early sketch of the hub's layout, including plans for VFX and art. The areas marked "SC100" etc are the locations of the single-player missions.[4]](https://halo.wiki.gallery/images/thumb/6/6a/H3ODST_MombasaStreets_EarlyLayout.jpg/86px-H3ODST_MombasaStreets_EarlyLayout.jpg)


