Battle Canyon: Difference between revisions
From Halopedia, the Halo wiki
NightHammer (talk | contribs) mNo edit summary |
No edit summary |
||
| (30 intermediate revisions by 13 users not shown) | |||
| Line 1: | Line 1: | ||
{{ | {{Status|Gameplay}} | ||
{{Multiplayer | {{Multiplayer map infobox | ||
|pagegamelabel=HR | |||
|name=Battle Canyon | |name=Battle Canyon | ||
|image=[[File:Battle canyon.jpg|300px]] | |image=[[File:Battle canyon.jpg|300px]] | ||
|game=''[[Halo: | |game=''[[Halo: Reach]]'' | ||
*''[[Anniversary Map Pack]]'' | |||
|devname=<code>cex_beavercreek</code>{{Ref/File|Id=HREK|HREK|HREK\tags\levels\dlc\cex_beavercreek\cex_beavercreek.scenario}} | |||
|playernumber=2-8 | |playernumber=2-8 | ||
|location=[[Halo Array|Unidentified Halo ring]] | |location=[[Halo Array|Unidentified Halo ring]] | ||
|terrain=Canyon | |terrain=Canyon | ||
|gametypes=*[[Team Slayer]] | |gametypes=*[[Team Slayer]] | ||
*[[ | *[[Capture the Flag]] | ||
*[[Assault]] | |||
*[[Stockpile]] | |||
*[[Slayer]] | *[[Slayer]] | ||
}} | }} | ||
{{Article | {{Article quote|The telemetry spires in these canyons help manage the Halo ring’s vast translocation grid.}} | ||
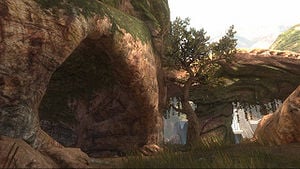
'''Battle Canyon''' is a [[multiplayer]] map included in ''[[Halo: Combat Evolved Anniversary]]'' for ''[[Halo Reach]]''. | '''Battle Canyon''' is a [[multiplayer]] map included in ''[[Halo: Combat Evolved Anniversary]]'' and the [[Anniversary Map Pack]] for ''[[Halo Reach]]''. It is a remake of ''[[Halo: Combat Evolved]]''<nowiki/>'s ''[[Battle Creek]]'' and ''[[Halo 2]]''{{'}}s ''[[Beaver Creek]]''. | ||
== | ==Universe and lore== | ||
The map is set on a [[Halo Array|Halo ring]], within a rocky canyon housing two Forerunner telemetry spire structures which serve as the bases. The spires are key components of the ring's [[Teleportation grid|translocation grid]]. | The map is set on a [[Halo Array|Halo ring]], within a rocky canyon housing two Forerunner telemetry spire structures which serve as the bases. The spires are key components of the ring's [[Teleportation grid|translocation grid]]. The rocky warrens of this part of Halo provide the ideal environment for an array of impressive telemetry clusters. These spires’ synchronization conduits ensure that the ring’s translocation grid is always fully operational, part of a remarkably powerful system which allows near-instant transportation across the full ten thousand kilometers that span the installation.{{Ref/Site|Id=info|URL=http://halo.xbox.com/Blogs/Headlines/post/2011/11/10/The-Halo-Bulletin-11911-.aspx|Site=Halo Waypoint|Page=The Halo Bulletin: 11/9/11|D=20|M=11|Y=2011}}{{Ref/Site|URL=https://www.halowaypoint.com/en-us/games/haloreach/maps|Site=Halo Waypoint|Page=Halo: Reach maps - Battle Canyon|D=12|M=10|Y=2014}} | ||
== | ==Overview== | ||
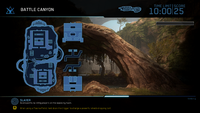
===Layout=== | |||
<gallery> | |||
File:HR BattleCanyon Overhead.png|An overhead view of the map. | |||
File:HMCC_HR_Battle_Canyon_Map.png|Battle Canyon map in ''Halo: The Master Chief Collection''. | |||
</gallery> | |||
====Callouts==== | |||
The following are locations on the map that are so named on the player's [[heads-up display]] during gameplay: | The following are locations on the map that are so named on the player's [[heads-up display]] during gameplay: | ||
*East Terrain | *East Terrain | ||
| Line 35: | Line 45: | ||
*Rock Arch | *Rock Arch | ||
==Variants== | |||
[[File:Beaver creek.jpg|thumb|200px|[[Forge]] remake of Beaver Creek.]] | |||
===Beaver Creek=== | |||
A forge variant with [[Beaver Creek|similar title to the ''Halo 2'' version]] is also available for those who prefer the classic multiplayer map. | |||
{{Clear}} | |||
==Trivia== | ==Trivia== | ||
*The celestial object seen in the sky is actually Reach's moon [[Csodaszarvas]]. | *The celestial object seen in the sky is actually Reach's moon, [[Csodaszarvas]]. This is likely due to asset reuse of existing ''Halo: Reach'' textures. | ||
*Above the Blue Base's teleport there is a [[GRD dolls Easter egg|GRD doll]]. It cannot be picked up in [[Forge]], but explosives and projectiles will dislodge it. | *Above the Blue Base's teleport, there is a [[GRD dolls Easter egg|GRD doll]]. It cannot be picked up in [[Forge]], but explosives and projectiles will dislodge it. | ||
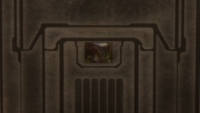
*A [[Original map screenshot Easter egg|screenshot of ''Beaver Creek'']] can be found on the bottom of the structure protruding from the top of Red Base | *A [[Original map screenshot Easter egg|screenshot of ''Beaver Creek'']] can be found on the bottom of the structure protruding from the top of Red Base, at the end of the long red light. | ||
==Gallery== | ==Gallery== | ||
{{Linkbox|gallery=yes}} | |||
<gallery> | <gallery> | ||
File: | File:HR_BattleCanyon_Concept.jpg|Concept art of the map. | ||
File: | File:HR BattleCanyon Base Concept.jpg|Concept art of bases on the map. | ||
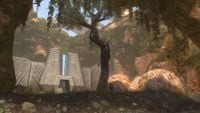
File:Beaver creek 02.jpg | File:Beaver creek 02.jpg|Rock Arch. | ||
File:HA - Battle Canyon | File:HA - Beavercreek.jpg|Blue Base. | ||
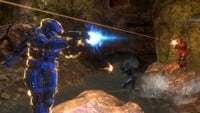
File:HR BattleCanyon Battle.jpg|A battle in the Creek. | |||
File:HR EE Screenshot Battle Canyon.png|A screenshot of Beaver Creek on the Forerunner structure above Red Base. | |||
</gallery> | </gallery> | ||
==Sources== | ==Sources== | ||
{{Ref/Sources}} | |||
{{Levels| | {{Levels|CEA|mode=yes}} | ||
[[Category:Halo: Reach multiplayer maps]] | |||
Latest revision as of 17:42, December 29, 2024
| Battle Canyon | |
|---|---|
| |
| Map overview | |
|
Game: |
|
|
Map file name (?): |
|
| Lore information | |
|
Location: |
|
| Gameplay overview | |
|
Terrain: |
Canyon |
|
Recommended number of players: |
2-8 |
|
Recommended gametype(s): |
|
| “ | The telemetry spires in these canyons help manage the Halo ring’s vast translocation grid. | ” |
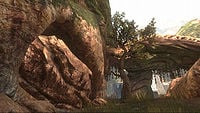
Battle Canyon is a multiplayer map included in Halo: Combat Evolved Anniversary and the Anniversary Map Pack for Halo Reach. It is a remake of Halo: Combat Evolved's Battle Creek and Halo 2's Beaver Creek.
Universe and lore[edit]
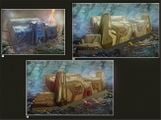
The map is set on a Halo ring, within a rocky canyon housing two Forerunner telemetry spire structures which serve as the bases. The spires are key components of the ring's translocation grid. The rocky warrens of this part of Halo provide the ideal environment for an array of impressive telemetry clusters. These spires’ synchronization conduits ensure that the ring’s translocation grid is always fully operational, part of a remarkably powerful system which allows near-instant transportation across the full ten thousand kilometers that span the installation.[2][3]
Overview[edit]
Layout[edit]
Callouts[edit]
The following are locations on the map that are so named on the player's heads-up display during gameplay:
- East Terrain
- Blue Roof
- Blue Base
- Blue Teleporter
- South Perch
- South Cave
- North Cave
- North Perch
- West Terrain
- Red Roof
- Red Base
- Red Teleporter
- Creek
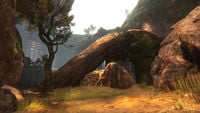
- Rock Arch
Variants[edit]
Beaver Creek[edit]
A forge variant with similar title to the Halo 2 version is also available for those who prefer the classic multiplayer map.
Trivia[edit]
- The celestial object seen in the sky is actually Reach's moon, Csodaszarvas. This is likely due to asset reuse of existing Halo: Reach textures.
- Above the Blue Base's teleport, there is a GRD doll. It cannot be picked up in Forge, but explosives and projectiles will dislodge it.
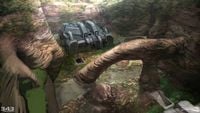
- A screenshot of Beaver Creek can be found on the bottom of the structure protruding from the top of Red Base, at the end of the long red light.
Gallery[edit]

|
Browse more images in this article's gallery page. |
Sources[edit]
- ^ Halo: Reach Editing Kit, game file
HREK\tags\levels\dlc\cex_beavercreek\cex_beavercreek.scenario - ^ Halo Waypoint, The Halo Bulletin: 11/9/11 (Retrieved on Nov 20, 2011) [archive]
- ^ Halo Waypoint, Halo: Reach maps - Battle Canyon (Retrieved on Oct 12, 2014) [archive]

