Installation 04 (map): Difference between revisions
From Halopedia, the Halo wiki
No edit summary |
|||
| (45 intermediate revisions by 19 users not shown) | |||
| Line 1: | Line 1: | ||
{{ | {{Status|Gameplay}} | ||
{{disambig header|the | {{disambig header|the Firefight map|other uses|Installation 04 (disambiguation)}} | ||
{{Multiplayer | {{Multiplayer map infobox | ||
|image =[[File:Installation04Panorama.png| | |pagelabel=Firefight map | ||
|pagegamelabel=HR | |||
|image =[[File:Installation04Panorama.png|300px]] | |||
|name = Installation 04 | |name = Installation 04 | ||
|game = ''[[Halo | |game = ''[[Halo Reach]]'' | ||
*[[Anniversary Map Pack]]<ref name="Halo - Installation Flythrough">[http://www.ign.com/videos/2011/08/26/halo-anniversary-installation-04-flythrough ''IGN.com: Halo - Installation 04 Flythrough'']</ref> | |||
|devname=<code>cex_ff_halo</code>{{Ref/File|Id=HREK|HREK|HREK\tags\levels\dlc\cex_ff_halo\cex_ff_halo.scenario}} | |||
|playernumber=1-4 players | |playernumber=1-4 players | ||
|location = [[Installation 04]] | |location = [[Installation 04]] | ||
| Line 10: | Line 14: | ||
|gametypes = [[Firefight]] | |gametypes = [[Firefight]] | ||
}} | }} | ||
{{Article quote|Fight for survival around mysterious Forerunner structures on Installation 04.}} | |||
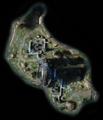
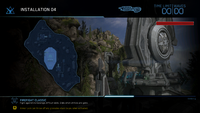
'''Installation 04''' is a [[Firefight]] map included in | '''Installation 04''' is a [[Firefight]] map included in the [[Anniversary Map Pack]] for ''[[Halo: Reach]]''. The level is based on the cliff edge section of the [[campaign]] level [[Halo (Halo: Combat Evolved level)|Halo]] from ''[[Halo: Combat Evolved]]''. Friendly AI — [[Orbital Drop Shock Trooper|ODST]]s — will aid the player in both solo and [[cooperative play]]; this is the first time that friendly NPCs have appeared in a Firefight map. | ||
== | ==Universe and lore== | ||
Set on one of the many cliff sides of Alpha Halo, this [[beacon tower]] served as a rendezvous point for survivors of the Covenant attack on the {{UNSCShip|Pillar of Autumn}}. These survivors, including the legendary Orbital Drop Shock Troopers, were forced to stave off numerous [[Covenant]] attacks until rescue finally came.{{Ref/Site|Id=THB11911|URL=http://blogs.halowaypoint.com/Headlines/post/2011/11/09/The-Halo-Bulletin-11911-.aspx|Site=Halo Waypoint|Page=The Halo Bulletin: 11.9.11|D=30|M=04|Y=2013}} | |||
==Layout== | |||
{{Expand-section}} | |||
<gallery> | |||
File:HR Installation04 Overhead.png|An overhead view of the map. | |||
File:HMCC_HR_Installation_04_Map.png|Installation 04 map in ''Halo: The Master Chief Collection''. | |||
</gallery> | |||
===Callouts=== | |||
The following are locations on the map that are so named on the player's [[heads-up display]] during gameplay: | The following are locations on the map that are so named on the player's [[heads-up display]] during gameplay: | ||
*Landslide | *Landslide | ||
| Line 29: | Line 43: | ||
*East Ramp | *East Ramp | ||
*Upper Deck | *Upper Deck | ||
==Friendly AI== | |||
== | [[File:HR Installation04 ODSTs 1.png|thumb|300px|ODSTs defending the beam emitter from Covenant attackers.]] | ||
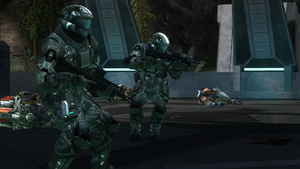
Installation 04 is the first and - to date - only Firefight map to contain friendly AI alongside enemy counterparts. These allies take the form of a squad of four Orbital Drop Shock Troopers. The ODSTs spawn in the top of the structure and will not leave unless pushed off, or the difficulty is set to [[Easy]]. ODSTs will only enter vehicles such as the [[Warthog]] when the Warthog is spawned in via [[D77-TC Pelican]] dropship. Elite players in Firefight Versus are unable to perform assassination animations against the ODSTs; they can only perform the traditional one-hit kill from behind. | |||
==Trivia== | ==Trivia== | ||
* | ===Production notes=== | ||
*While selecting maps for inclusion in the Anniversary map pack had been difficult, choosing a Firefight map was a relatively straightforward process. Both the teams at [[Certain Affinity]] and [[343 Industries]] independently came up with the idea to base a level around the "Halo" mission from ''Halo: Combat Evolved'', as the level featured Firefight-esque locales already - defendable bases and Covenant wave defense. The cliffside was chosen as the location to model due to the space to maneuver for AI and players.{{Ref/Site|Id=bulletin|URL=http://halo.xbox.com/en-us/news/headline/the-halo-bulletin-9811-/230739|Site=Halo Waypoint|Page=The Halo Bulletin: 9.8.11|D=26|M=09|Y=2011}} | |||
*The design of the Forerunner [[ | *The idea of including friendly NPCs originated when Certain Affinity was developing the [[Defiant Map Pack]]. They had experimented with the idea of adding friendly AI units to ''[[Unearthed]]'' but did not have time to implement them into the final map.{{Ref/Reuse|bulletin}} | ||
===Miscellaneous=== | |||
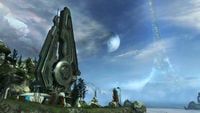
*The design of the Forerunner [[Beacon tower]] found on this level is noticeably different from the one seen in the remastered campaign. Rather than have the beams of energy shoot out of the structure from underground, they are emitted by a large turbine-like structure which emits bursts of energy upon reaching high enough speeds. | |||
*Due to the fact that AI is almost never present at the same time as Man Cannons, the AI tend to hesitate before entering them. | *Due to the fact that AI is almost never present at the same time as Man Cannons, the AI tend to hesitate before entering them. | ||
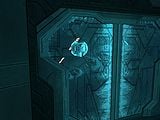
*At the part of the map where in the [[Halo (Halo: Combat Evolved level)|campaign level]] the marines are hiding, [[343 Guilty Spark]] can be seen flying back and forth between the two doors | *At the part of the map where in the [[Halo (Halo: Combat Evolved level)|campaign level]] the marines are hiding, [[343 Guilty Spark]] can be seen flying back and forth between the two doors. | ||
**In some cases, one may see a (non-functional) prompt to exchange weapons with Spark, who is shown as holding a [[Focus Rifle]].<ref name="spark-with-rifle">[http://www.youtube.com/watch?v=XFCokLAZs_4 | **In some cases, one may see a (non-functional) prompt to exchange weapons with Spark, who is shown as holding a [[Focus Rifle]].<ref name="spark-with-rifle">[http://www.youtube.com/watch?v=XFCokLAZs_4 ''YouTube: Halo: CEA - 343 Guilty Spark Easter Egg on Installation 04'']</ref> This seems to be related to a [[Forge]] bug involving [[Monitors]], desyncs, and Focus Rifle beams. | ||
*The radio set found on this level is indestructible. | *The radio set found on this level is indestructible. | ||
*This is the only map in which one of the weapon drops is a Warthog. This Warthog is brought in by a Pelican. | *This is the only map in which one of the weapon drops is a Warthog. This Warthog is brought in by a Pelican. | ||
*If pan cam is used, the player will find the [[GA-TL1 Longsword]] that performs the supply drop at the edge of the map. Curiously enough, even when supply drops are disabled, the Longsword will still spawn, but will be frozen and remain where it is. The Longsword is not a physical object however, and is not fully textured. | |||
==Gallery== | ==Gallery== | ||
===Concept art=== | |||
{{Linkbox|gallery=yes|gallerypage=Images of Installation 04 (level)}} | |||
<gallery> | |||
File:HR Installation04 BeamEmitter Concept.jpg|Concept art of the beam emitter on the map. | |||
File:HR_Installation04_Concept.jpg|Concept art of the map. | |||
</gallery> | |||
===Screenshots=== | |||
<gallery> | <gallery> | ||
File:Inst04 02.jpg|Another view of the map. | File:Inst04 02.jpg|Another view of the map. | ||
File:HR Installation04 Beacon.jpg|The beacon tower fires a pulse. | |||
File:HR Installation04 Dropships.jpg|Spirits around the beacon tower. | |||
File:Screenshot10.jpg|A Kig-Yar near by a [[man cannon]]. | |||
File:HR Installation04 Gunner.jpg|A Warthog's ODST gunner firing at a Jackal. | |||
File:HR Installation04 Warthog.jpg|A Warthog running through Covenant troops. | |||
File:HR Installation04 Hunter.jpg|A Spartan fighting a Mgalekgolo. | |||
File:HR Installation04 Boom.jpg|A Kig-Yar thrown into air by an explosion. | |||
File:HR Installation04 M247H.jpg|A Spartan firing an M247H machine gun. | |||
File:HR Installation04 Elite.jpg|A Spartan firing an M41 SPNKr at a Sangheili Officer. | |||
File:HR Installation04 Platform.jpg|A Sangheili Officer near the ammunition crate. | |||
File:HaloInstallation04.jpg|The structures comprising the map. | File:HaloInstallation04.jpg|The structures comprising the map. | ||
File: | File:Insti04ff.png|Another shot of the beacon tower. | ||
File: | File:HR_Installation04_Landscape.png|A landscape view of the map. | ||
File:Inst04 01.JPG|A Spartan and an ODST riding a Mongoose. | File:Inst04 01.JPG|A Spartan and an ODST riding a Mongoose. | ||
File:Monitor Installation04.jpg|The [[343 Guilty Spark]] Easter egg in the tunnels. | |||
File:Monitor Installation04.jpg|The [[343 Guilty Spark]] Easter egg | |||
File:Reach ODST Firefight.jpg|An ODST gunning a Warthog. | File:Reach ODST Firefight.jpg|An ODST gunning a Warthog. | ||
</gallery> | </gallery> | ||
==Sources== | ==Sources== | ||
{{Ref/Sources}} | |||
{{Levels}} | {{Levels|CEA|mode=yes}} | ||
[[Category: | [[Category:Halo: Reach multiplayer maps]] | ||
[[Category:Halo: Reach Firefight maps]] | |||
Latest revision as of 09:38, December 19, 2024
| Installation 04 | |
|---|---|
| |
| Map overview | |
|
Game: |
|
|
Map file name (?): |
|
| Lore information | |
|
Location: |
|
| Gameplay overview | |
|
Terrain: |
Woods, hills, and Forerunner structures on a cliff edge. |
|
Recommended number of players: |
1-4 players |
|
Recommended gametype(s): |
|
| “ | Fight for survival around mysterious Forerunner structures on Installation 04. | ” |
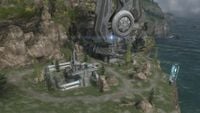
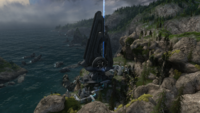
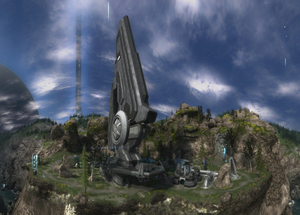
Installation 04 is a Firefight map included in the Anniversary Map Pack for Halo: Reach. The level is based on the cliff edge section of the campaign level Halo from Halo: Combat Evolved. Friendly AI — ODSTs — will aid the player in both solo and cooperative play; this is the first time that friendly NPCs have appeared in a Firefight map.
Universe and lore[edit]
Set on one of the many cliff sides of Alpha Halo, this beacon tower served as a rendezvous point for survivors of the Covenant attack on the UNSC Pillar of Autumn. These survivors, including the legendary Orbital Drop Shock Troopers, were forced to stave off numerous Covenant attacks until rescue finally came.[3]
Layout[edit]
 This section needs expansion. You can help Halopedia by expanding it.
Callouts[edit]
The following are locations on the map that are so named on the player's heads-up display during gameplay:
- Landslide
- North Drop Zone
- Field
- Station 1
- Station 1 Interior
- East Drop Zone
- Station 2
- Station 2 Interior
- Gateway
- South Drop Zone
- West Drop Zone
- West Ramp
- East Ramp
- Upper Deck
Friendly AI[edit]
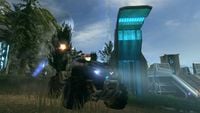
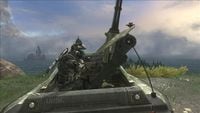
Installation 04 is the first and - to date - only Firefight map to contain friendly AI alongside enemy counterparts. These allies take the form of a squad of four Orbital Drop Shock Troopers. The ODSTs spawn in the top of the structure and will not leave unless pushed off, or the difficulty is set to Easy. ODSTs will only enter vehicles such as the Warthog when the Warthog is spawned in via D77-TC Pelican dropship. Elite players in Firefight Versus are unable to perform assassination animations against the ODSTs; they can only perform the traditional one-hit kill from behind.
Trivia[edit]
Production notes[edit]
- While selecting maps for inclusion in the Anniversary map pack had been difficult, choosing a Firefight map was a relatively straightforward process. Both the teams at Certain Affinity and 343 Industries independently came up with the idea to base a level around the "Halo" mission from Halo: Combat Evolved, as the level featured Firefight-esque locales already - defendable bases and Covenant wave defense. The cliffside was chosen as the location to model due to the space to maneuver for AI and players.[4]
- The idea of including friendly NPCs originated when Certain Affinity was developing the Defiant Map Pack. They had experimented with the idea of adding friendly AI units to Unearthed but did not have time to implement them into the final map.[4]
Miscellaneous[edit]
- The design of the Forerunner Beacon tower found on this level is noticeably different from the one seen in the remastered campaign. Rather than have the beams of energy shoot out of the structure from underground, they are emitted by a large turbine-like structure which emits bursts of energy upon reaching high enough speeds.
- Due to the fact that AI is almost never present at the same time as Man Cannons, the AI tend to hesitate before entering them.
- At the part of the map where in the campaign level the marines are hiding, 343 Guilty Spark can be seen flying back and forth between the two doors.
- In some cases, one may see a (non-functional) prompt to exchange weapons with Spark, who is shown as holding a Focus Rifle.[5] This seems to be related to a Forge bug involving Monitors, desyncs, and Focus Rifle beams.
- The radio set found on this level is indestructible.
- This is the only map in which one of the weapon drops is a Warthog. This Warthog is brought in by a Pelican.
- If pan cam is used, the player will find the GA-TL1 Longsword that performs the supply drop at the edge of the map. Curiously enough, even when supply drops are disabled, the Longsword will still spawn, but will be frozen and remain where it is. The Longsword is not a physical object however, and is not fully textured.
Gallery[edit]
Concept art[edit]

|
Browse more images in this article's gallery page. |
Screenshots[edit]
A Kig-Yar near by a man cannon.
The 343 Guilty Spark Easter egg in the tunnels.
Sources[edit]
- ^ IGN.com: Halo - Installation 04 Flythrough
- ^ Halo: Reach Editing Kit, game file
HREK\tags\levels\dlc\cex_ff_halo\cex_ff_halo.scenario - ^ Halo Waypoint, The Halo Bulletin: 11.9.11 (Retrieved on Apr 30, 2013) [archive]
- ^ a b Halo Waypoint, The Halo Bulletin: 9.8.11 (Retrieved on Sep 26, 2011) [archive]
- ^ YouTube: Halo: CEA - 343 Guilty Spark Easter Egg on Installation 04
