Overlook: Difference between revisions
From Halopedia, the Halo wiki
(→Gallery: MCC map.) |
|||
| (25 intermediate revisions by 9 users not shown) | |||
| Line 1: | Line 1: | ||
{{ | {{Status|Gameplay}} | ||
{{Multiplayer | {{Multiplayer map infobox | ||
|image = [[File:Halo-reach-20100722115045477.jpg| | |pagelabel=Firefight map | ||
|name = Overlook | |pagegamelabel=HR | ||
|game = ''[[Halo: Reach]]'' | |image=[[File:Halo-reach-20100722115045477.jpg|300px]] | ||
|location = [[Visegrad]], [[Reach]] | |name=Overlook | ||
|terrain = Rugged mountain, grassland | |game=''[[Halo: Reach]]'' | ||
|devname=<code>ff10_prototype</code>{{Ref/File|Id=HREK|HREK|HREK\tags\levels\firefight\ff10_prototype\ff10_prototype.scenario}} | |||
|location=[[Visegrad]], [[Reach]] | |||
|terrain=Rugged mountain, grassland | |||
|gametypes=[[Firefight]] | |gametypes=[[Firefight]] | ||
}} | }} | ||
{{Article | {{Article quote|Fight for fertile ground on a deserted farmyard.}} | ||
'''Overlook''' is a [[Firefight]] map in ''[[Halo: Reach]]''. Centered around a [[kiva]] farm building in [[Visegrad]], it is based on the [[campaign]] level, ''[[ | '''Overlook''' is a [[Firefight]] map in ''[[Halo: Reach]]''. Centered around a [[kiva]] farm building in [[Visegrad]], it is based on the [[campaign]] level, ''[[Winter Contingency]]''. | ||
==Overview== | ==Overview== | ||
| Line 16: | Line 19: | ||
==Tactics== | ==Tactics== | ||
*When fighting in the area labelled "Yard", watch out for the Wraith's mortar shots. | *When fighting in the area labelled "Yard", watch out for the [[Wraith]]'s mortar shots. | ||
*Due to the large area of this map, commandeering the Wraith is quite a good idea, just be careful when troops with heavy weapons are deployed. | *Due to the large area of this map, commandeering the Wraith is quite a good idea, just be careful when troops with heavy weapons are deployed. | ||
*Use the Target Locator when both Phantoms drop the Covenant troops on the opposite side. Not only would this give one Multi-kill [[Halo: Reach Medals|medals]], but also reward a lot of points. | *Use the [[Target Locator]] when both [[Phantoms]] drop the [[Covenant]] troops on the opposite side. Not only would this give one Multi-kill [[Halo: Reach Medals|medals]], but also reward a lot of points. | ||
*If this is more than one player, one of them can give sniper support in the higher ground while the other fights on the ground. | *If this is more than one player, one of them can give sniper support in the higher ground while the other fights on the ground. | ||
*The ammunition crates are both inside the building, so conserve ammo if necessary. | *The ammunition crates are both inside the building, so conserve ammo if necessary. | ||
| Line 28: | Line 31: | ||
*Yard | *Yard | ||
*Rocks | *Rocks | ||
*River | |||
*Bridge | *Bridge | ||
*Waterfall | |||
*Hill | *Hill | ||
==Trivia== | ==Trivia== | ||
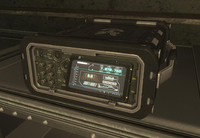
[[File: | [[File:HR Overlook Radio.png|thumb|The radio on this map.]] | ||
*Overlook was the only map in the [[Halo: Reach Multiplayer Beta]] to feature a gametype known as [[Generator Defense]]. | *Overlook was the only map in the [[Halo: Reach Multiplayer Beta]] to feature a gametype known as [[Generator Defense]].{{Ref/Site|URL=http://www.ign.com/articles/2010/04/08/halo-reach-the-beta-maps|Site=IGN|Page=Halo: Reach -- The Beta Maps|D=30|M=10|Y=2010}} Some minor visual changes have taken place since the beta, most notably the addition of a large [[Wind turbine|vertical axis wind turbine]], changing the lighting and weather conditions and rearrangement of items in the courtyard.{{Ref/YouTube|XBTwAdvfnXg|Halo|Halo: Reach Overlook Firefight Versus Gameplay|D=26|M=7|Y=2010}} | ||
*There is [[Halo: Reach radio conversations#Overlook|a radio conversation]] between UNSC personnel located in the human facility. | |||
*There is a glitch were if the player falls inbetween a rock and two walls, it will say they are out of bounds, but if they player falls in the same place twice it does not always say they are out of bounds. | *There is a glitch were if the player falls inbetween a rock and two walls, it will say they are out of bounds, but if they player falls in the same place twice it does not always say they are out of bounds. | ||
*The hazard on this map is the | *The hazard on this map is the {{Pattern|Zurdo|Wraith}}. | ||
==Gallery== | ==Gallery== | ||
{{Linkbox|gallery=yes}} | |||
===Development images=== | |||
<gallery> | <gallery> | ||
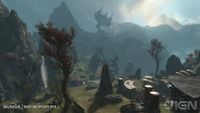
File:Overlook.jpg|A view of the mountains in the distance from Yard. | |||
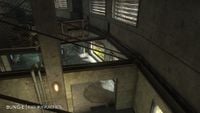
File:Reach MPBeta Overlook02.jpg|Barn High. | |||
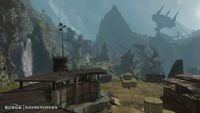
File:Reach MPBeta Overlook01.jpg|Yard. | |||
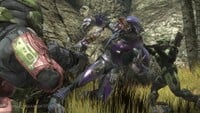
File:HR Beta Overlook Battle 2.jpg|Two Spartans defeat a Sangheili. | |||
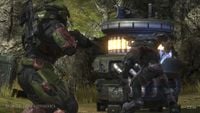
File:Generator Defense.jpg|A Spartan defends a generator from a Sangheili. | |||
File:Overlook Generator Defense.jpg|A Sangheili kills a Spartan. | |||
File:HR Beta Overlook Battle.jpg|A Sangheili is killed by a Spartan. | |||
File:HaloReach - MultiplayerScreen.jpg|Two Spartans in Yard. | |||
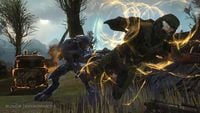
File:HR Beta Overlook Battle 3.jpg|A Sangheili kills a Spartan using an energy sword. | |||
</gallery> | |||
===Screenshots=== | |||
<gallery> | |||
File:Reach_FF_Overlook04.jpg|Yard. | |||
File:Reach_FF_Overlook01.jpg|First-person view of a Spartan using the needle rifle. | |||
File:Reach Firefight Versus1.jpg|First-person view of a Sangheili with a needle rifle on Firefight Versus. | |||
File:HR Overlook DMR.jpg|First-person view of a Spartan using the DMR. | |||
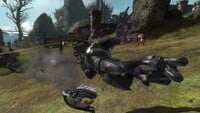
File:HR Overlook Versus.jpg|Two Sangheili players meeting a Spartan inside the barn. | |||
File:HR Firefight Gruntpocalypse.jpg|Various Unggoy ranks. | |||
File:Skirmisher Ranks.jpg|Various Skirmisher ranks. | |||
File:Heatmapovlook.jpg|A heatmap of Overlook. | |||
File:HMCC_HR_Overlook_Map.png|Overlook Map. | File:HMCC_HR_Overlook_Map.png|Overlook Map. | ||
</gallery> | </gallery> | ||
==Sources== | ==Sources== | ||
{{Ref/Sources}} | |||
{{Levels|HR}} | {{Levels|HR|mode=yes}} | ||
[[Category:Halo: Reach multiplayer maps]] | [[Category:Halo: Reach multiplayer maps]] | ||
[[Category:Halo: Reach Firefight maps]] | |||
Latest revision as of 05:17, November 18, 2024
| Overlook | |
|---|---|
| |
| Map overview | |
|
Game: |
|
|
Map file name (?): |
|
| Lore information | |
|
Location: |
|
| Gameplay overview | |
|
Terrain: |
Rugged mountain, grassland |
|
Recommended gametype(s): |
|
| “ | Fight for fertile ground on a deserted farmyard. | ” |
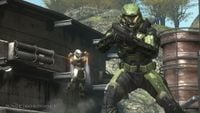
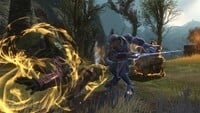
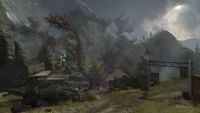
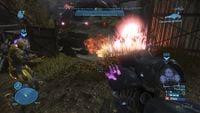
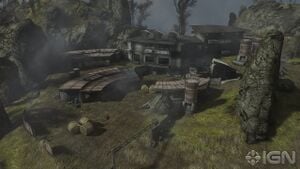
Overlook is a Firefight map in Halo: Reach. Centered around a kiva farm building in Visegrad, it is based on the campaign level, Winter Contingency.
Overview[edit]
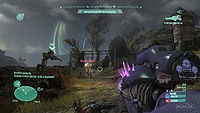
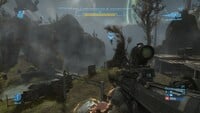
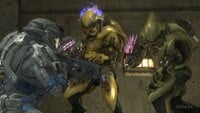
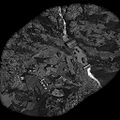
Overlook is a medium-large sized Firefight map. The map is divided into three sections, the barn, the yard, and the enemy drop zone. The yard and the enemy drop zone are divided by a shallow river with a covered bridge and narrow walkway at the edge where the river starts to descend into the canyon. The enemy drop zone is filled with Covenant supply crates and roadblocks and is one of the main sections where the enemies will land. The yard is composed of two parts: the barn's fenced-in courtyard and the center section which extends into the forest. The forest is a small wooded area with numerous rocks and trees and is divided by a small fence from the main section. The main section spans from the river below to the left side of the barn, and has numerous large rocks in the center. To the right is the barn's courtyard, an area filled with crates, hay bales, a hay baler and three sheds. The area also has a large tower which can be accessed with a jetpack and can be used for sniping. The last section, the barn, has two levels: an upper one divided into multiple rooms (the back room which is where the players would enter the barn in the campaign, a middle hallway that leads to the stairs down to the second floor and a smaller room to the right of the hallway that contains a radio and multiple ammo boxes) and a lower room accessed by a stairway from the upper part. The lower floor links to the barn's courtyard and to the center section to the left.
Tactics[edit]
- When fighting in the area labelled "Yard", watch out for the Wraith's mortar shots.
- Due to the large area of this map, commandeering the Wraith is quite a good idea, just be careful when troops with heavy weapons are deployed.
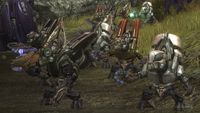
- Use the Target Locator when both Phantoms drop the Covenant troops on the opposite side. Not only would this give one Multi-kill medals, but also reward a lot of points.
- If this is more than one player, one of them can give sniper support in the higher ground while the other fights on the ground.
- The ammunition crates are both inside the building, so conserve ammo if necessary.
Locations[edit]
The following are locations on the map that are so named on the player's heads-up display during gameplay:
- Barn High
- Barn Low
- Yard
- Rocks
- River
- Bridge
- Waterfall
- Hill
Trivia[edit]
- Overlook was the only map in the Halo: Reach Multiplayer Beta to feature a gametype known as Generator Defense.[2] Some minor visual changes have taken place since the beta, most notably the addition of a large vertical axis wind turbine, changing the lighting and weather conditions and rearrangement of items in the courtyard.[3]
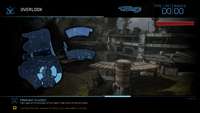
- There is a radio conversation between UNSC personnel located in the human facility.
- There is a glitch were if the player falls inbetween a rock and two walls, it will say they are out of bounds, but if they player falls in the same place twice it does not always say they are out of bounds.
- The hazard on this map is the Zurdo-pattern Wraith.
Gallery[edit]

|
Browse more images in this article's gallery page. |
Development images[edit]
Screenshots[edit]
Sources[edit]
- ^ Halo: Reach Editing Kit, game file
HREK\tags\levels\firefight\ff10_prototype\ff10_prototype.scenario - ^ IGN, Halo: Reach -- The Beta Maps (Retrieved on Oct 30, 2010) [archive]
- ^ YouTube - Halo, Halo: Reach Overlook Firefight Versus Gameplay (Retrieved on Jul 26, 2010)
| ||

