Lockout: Difference between revisions
From Halopedia, the Halo wiki
m (Lockout (Level) moved to Lockout) |
m (Reverted edits by 76.90.146.219 (talk) to last revision by BaconShelf) Tags: Rollback Mobile edit Advanced mobile edit |
||
| (360 intermediate revisions by more than 100 users not shown) | |||
| Line 1: | Line 1: | ||
< | {{Status|Gameplay}} | ||
{{Multiplayer map infobox | |||
[[ | |name=Lockout | ||
|image=[[File:H2 Lockout.jpg|300px]] | |||
|game=''[[Halo 2]]'' | |||
|devname=<code>lockout</code>{{Ref/File|Id=H2EK|H2EK|H2EK\tags\scenarios\multi\lockout\lockout.scenario}} | |||
|map=War Games Map_Set/: 036-8{{Ref/Site|Id=HU|URL=https://www.halowaypoint.com/en-us/universe/locations/delta-halo|Site=Halo Waypoint|Page=Delta Halo|D=27|M=10|Y=2015}} | |||
|location=[[Flood research facility]], [[Installation 05]] | |||
|terrain=Forerunner structure, ice, snow | |||
|symmetry=Asymmetrical | |||
|playernumber=2-8 | |||
|gametypes=*[[Slayer]] | |||
*[[1 Flag CTF]] | |||
*[[Assault|1 Bomb Assault]] | |||
*[[Juggernaut]] | |||
|pagegamelabel=H2 | |||
}} | |||
{{Article quote|Some believe this remote facility was once used to study the [[Flood]]. But few clues remain amidst the snow and ice.}} | |||
'''Lockout''' is an asymmetrical ''[[Halo 2]]'' multiplayer map. It was remade as [[Blackout]] in ''[[Halo 3]]'', Shutout using [[Forge]] in ''[[Halo 4]]'', and as [[Lockdown]] in ''[[Halo 2: Anniversary]]''. | |||
==Universe and lore== | |||
Although the {{UNSCShip|In Amber Clad}} was [[Battle of Installation 05|destroyed]] during [[Installation 05|Delta Halo]]’s [[Flood]] outbreak, the [[Stalwart-class light frigate|frigate's]] data nodes had already transmitted extensive details of various sites on the ring's surface to the [[John-117|Master Chief]]. One of these – a derelict structure fixed to the ledge of a distant mountain - was the source of considerable scientific debate after his return. Subsequent analysis indicates it may have been a Forerunner [[Flood research facility|research site]] used to research the parasite, but the findings remain inconclusive.{{Ref/Reuse|HU}} | |||
==Layout== | |||
Lockout consists of three levels. The focus of the map is a central square platform, with four buildings surrounding the platform. Through the use of connecting ramps and bridges, two buildings on each end of the platform connect together to form a rough figure eight shape. Each building, including the central platform, contains three levels, interconnected through gravity lifts and ramps. | |||
A small room exists on the bottom floor | Most of the fighting occurs around the center of the map, either the upper or lower level. A small room exists on the bottom floor with small, damaged, green-glowing chambers and at the end there is a [[gravity lift]] back to the upper deck near the center. The towers abutting the center arena are used to get a better view of the upper level, as well as surprise attacks for people beneath them. | ||
Lockout is, overall, a very straightforward map hence its popularity among MLG players, and the map default weapons are generally close-quarters minded with longer range weapons acting as power selections, if used correctly. | |||
* | ===Territories=== | ||
* | [[File:H2 Lockout Overview.png|thumb|300px|An overview of Lockout.]] | ||
* | *Gravity lift/Top of gravity lift rower | ||
* | *Center/underneath Center | ||
* | *[[Sniper]] Tower (right side when coming up gravity lift) | ||
*Battle rifle tower (left side when coming up gravity lift) | |||
*Elbow (connects the lower lift room to Sniper Tower) | |||
== | ===Weapons on map=== | ||
#[[BR55 battle rifle|Battle rifle]] | |||
#[[M7 SMG|SMG]] | |||
#[[M6C magnum|Magnum]] | |||
#[[M90 Shotgun|Shotgun]] | |||
#[[SRS99C-S2 AM sniper rifle|Sniper rifle]] | |||
#[[Okarda'phaa-pattern plasma rifle|Plasma Rifle]] | |||
#[[Vostu-pattern carbine|Carbine]] | |||
#[[Type-1 energy sword|Energy sword]] | |||
#[[Type-33 needler|Needler]] | |||
== Tactics == | |||
*If playing CTF, a [[Type-25 Brute Shot|Brute Shot]] jump will carry a player from the base at the top of the battle rifle tower to the Elbow; unless the player has uncommonly good aim with such jumps, the only way to avoid dying is to lunge at a player on the catwalk with an [[Type-1 energy sword|energy sword]]. | |||
*There is a common [[Super bouncing]] on this map, used to get on top of the gravity lift tower. Be aware of its existence and predominance in the game. Snipers will use it ad infinitum, and are hard to pick off due to the natural cover that it provides. | |||
*There is also a lesser known Superbounce on this map, used to get on top of the Sniper Tower. Not everyone uses it, but make sure you know that it is easy and probable that you may run into someone who can snipe you from up there. Also, if hiding in the right spot, it is easy for anyone to avoid danger, so the best way to eliminate someone using this bounce is with a [[SRS99C-S2 AM sniper rifle|sniper rifle]], someone else or you super-bounce up there, or [[Anskum-pattern plasma grenade|plasma grenades]]. It is easy to be a [[Juggernaut]] on the battlefield when up there. You can also [[Sword flying|butterfly]] to any high location. | |||
*In the bottom floor, underneath the center panel of the top level, you can hide in the corners and remain stationary, and surprise and kill anyone whom walks in with a [[M90 shotgun|shotgun]]. This can be countered by clearing the room with a grenade before entering it; if anyone survives the blast, you will hear static from the player's shield. | |||
*In Sniper matches, it is common practice to stand at the far end of the course, on the lower level, and snipe people across the level. Since the hall is continuous, there isn't much chance to react to a good sniper. This has given this hallway the nickname 'Sniper Alley'. | |||
*The default place for the sniper rifle to spawn is at the top of the Sniper Tower. You can easily kill anybody standing up there trying to snipe people by blowing up the explosive barrels at the back of the platform. This will also kill anyone in the turret on the platform. | |||
*By default, the battle rifle spawns on the top section of the gravity lift tower, and on the tower opposite the Sniper Tower. Remember it, since in Map Default games, mostly populated by [[dual wielding]], distance can give you the win. | |||
*A good way to kill an enemy is to ambush them when they float up from the gravity lif. But make sure you hide near the "drop-down-holes" and when they're just about to touchdown, assassinate them. | |||
*Be constantly alert for the player wielding the energy sword or anyone trying to take it from you. | |||
*If you don't have the energy sword, use the shotgun. If the sword-wielder lunges, you have a fraction of a second in which you can kill your opponent with a single blast to the chest before your opponent kills you. | |||
*A good player can use only the sniper rifle and the energy sword and win with a score more than double of the player coming in second. Stay on the tower that the sniper rifle spawns on. From there, you can hit people all across the map. Just remember to alternate at different times what level of the tower you are on to avoid being sniped back. If anyone tries to invade your tower, slash him or her. | |||
*When traveling, search the room you are walking into. Use your motion tracker and slightly angle yourself to have better luck getting someone ambushing you. If you have [[M9 fragmentation grenade|frag grenades]], throw one (two if you are entering a large room) to kill any enemies in the room or to alert yourself to their presence. In team games, always keep your teammates posted on where you are to prevent being betrayed in this way. | |||
*When you're playing on this map, if you use a rifle or a single dual-wielding weapon, don't enter enclosed spaces. In close-quarters fights, Shotguns, Energy Swords and dual combos nearly always win against rifles. | |||
*Remember what is above and below you. You can take vertical shortcuts and avoid being ambushed in this way. | |||
*The first and second floors of the Sniper Tower are the hottest section of the map. Avoid going here unless you are sure that all resistance has been eliminated. There are two good ways to attack players on the Sniper Tower: | |||
**Crouch-jump from below the sniper spawn to the landing of the ramp just below if you have a close-quarters weapon or a dual combo. | |||
**If you have a rifle, attack from the top of the battle rifle tower. | |||
==Trivia== | |||
===Glitches=== | |||
{{Main|Glitches}} | |||
*[[ | *It is possible to [[Super jumping|super jump]] to a tower, which is a very good sniping place.<ref>[http://youtube.com/watch?v=7B-JmED0C4o&NR=1 '''YouTube Guide''': ''Super jumps'']</ref> | ||
*It is also possible to get your body stuck to the ceiling of the level.<ref>[http://youtube.com/watch?v=vx3LASjHfRE&feature=related '''YouTube Guide''': ''Stuck Body On Ceiling'']</ref> | |||
*The first recorded sight of a [[Ghosts of Halo|Ghost of Halo]] was on Lockout. | |||
*[ | |||
*[[ | |||
== | ===Production notes=== | ||
*Lockout was directly inspired by [[Wikipedia:Quake (video game)|''Quake'']] map {{Plain|[https://quake.fandom.com/wiki/DM6:_The_Dark_Zone DM6: The Dark Zone]}} for it's three-level layout where every path fed back into the middle.<ref>[https://www.pcgamer.com/the-story-of-halo-2s-iconic-multiplayer-maps-tight-deadlines-a-tiny-team-and-a-visit-from-napoleon-dynamite/ PC Gamer] - ''It is directly influenced by a Quake map called DM6. DM6 was this three-level map that folded back in on itself, that also had a similar characteristic where everything fed back into the middle.''</ref> | |||
*Lockout was originally named "The Cage" and was intended to be released with ''[[Halo: Combat Evolved]]''. However, it didn't make the cut and instead made its debut in ''[[Halo 2]]'', albeit with some significant changes since initial development. The original version of [[The Cage]] appears in ''[[Halo: Reach]]'' as a [[Forge World]] map variant shipped with the game.<ref>[http://halo.bungie.net/News/content.aspx?type=topnews&link=BWU_072310 '''Bungie.net''': ''Bungie Weekly Update 07.23.10'']</ref> Lockout was the smallest map of the original set of nine small-scale "arena" maps designed for ''Halo 2'' by [[Max Hoberman]] and [[Chris Carney]] and was originally envisioned as a one-on-one map for players without [[Xbox LIVE]].<ref name="pax">[https://www.youtube.com/watch?v=PGn4YXXZyDo '''YouTube''': ''Halo and the Journey of the Master Chief- PAX Prime 2014'']</ref><ref>[https://twitter.com/MaxHoberman/status/1074631642088701952 Max Hoberman on Twitter] - ''If you enjoyed Lockout from Halo 2 you might also enjoy seeing our original design doc for it. I'd forgotten that this was initially intended as our 1x1 level, designed for poor split screen souls without Internet access or a LAN party to call home.''</ref> | |||
**Lockout was designed in 3D and never had any 2D paper layout sketches (with the exception of some layout work done for ''Combat Evolved''), unlike other maps in ''Halo 2''. The map was designed by [[Chris Carney]].<ref>[https://twitter.com/MaxHoberman/status/1072497011046400000 Max Hoberman on Twitter]</ref> | |||
*The hallway with the shotgun and the green pods was inspired by a section of the ''[[Marathon]]'' multiplayer map {{Plain|[http://marathon.bungie.org/spoiler/m1/27.shtml Mars Needs Women]}}.{{Ref/Reuse|pax}} | |||
*The ''[[Halo 3]]'' map [[Guardian (map)|Guardian]] is similar to Lockout in terms of design because they both share the 'green Shotgun hallway', two main central levels of the map and four bases branching off of the main section. They also both have a main large gravity lift. These similarities have been confirmed by [[Bungie]] to be purposely put in the game. | |||
*Lockout was originally planned to be featured as a map variant on ''[[Halo: Reach]]''<nowiki />'s [[Forge World]] and to be near the waterfalls. However, the map was never finalized and was eventually removed from the final game.<ref name="reach">[http://carnage.bungie.org/haloforum/halo.forum.pl?read=1097235 '''halo.bungie.org''': ''So, the 'official' Lockout remake DID exist.'']</ref> | |||
*''[[Halo 4]]'' [[Forge]] remake of the map, Shutout, made by Big Papa SaLoT and based on [[Ravine]] map, was featured in matchmaking Community Forge Test playlist in January 2013. | |||
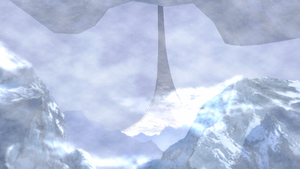
Lockout | [[File:H2 Lockout Skybox.png|thumb|300px|The view of Installation 05 from Lockout.]] | ||
===Miscellaneous=== | |||
*The only way one can get a good view of Installation 05 is by [[Sword Canceling]] from down below to someone jumping on a pillar above, flinging you to the top of the level. Once atop the huge structure, drop down at the first part and keep walking down the slope until you reach the back. There, the material of the floor seems to turn bluer, and if you look at the landscape, you see a lot of snow, mountains, and the Halo. | |||
*The beings in the green, cryo-like chambers resemble [[Spartans]] wearing [[Mark V]] armor. If you look at the particles on the tanks, they look like the Flik'ta from the ''[[Marathon]]'' series. They can also be seen on the level [[The Oracle]] in the chamber where you first encounter the [[Flood]] on the level. One of the green chambers is open, which could mean something escaped or broke out of the chamber, similar to the broken cases on [[Cold Storage]]. | |||
*If one looks at the mountains, the texture looks like it has a face on it. | |||
*If you throw a grenade into the gravity lift (even a frag) there will sometimes be a slight electrical discharge. | |||
==Gallery== | |||
{{Linkbox|gallery=yes}} | |||
<gallery> | |||
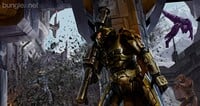
File:H2 ConceptArt LockoutBattle.jpg|Concept art of a battle on Lockout. | |||
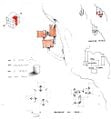
File:H2 Lockout Concept 1.jpg|The first drawing of Lockout produced by designer Chris Carney. This drawing was later re-used as inspiration for the ''Halo: Reach'' map [[The Cage]]. | |||
File:H2_Lockout_Concept.jpg|Concept art for Lockout. | |||
File:H2 Lockout Blockout 1.jpg|Initial 3D blockout for Lockout. | |||
File:H2 Lockout Blockout 2.jpg|Passover of the initial blockout by Max Hoberman, with additional detail, to illustrate bringing the rear and roof of the building into play. | |||
File:H2 Lockout Early Design.jpg|Early design featuring the ladder in the rear which was eventually removed. | |||
File:H2 Lockout Concept Overhead.jpg|Overhead concept art of Lockout. | |||
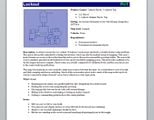
File:H2 Lockout DesignDoc.jpg|The design document for Lockout. | |||
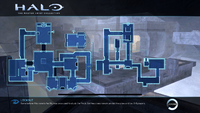
File:HMCC H2 Lockout Map.png|Lockout Map. | |||
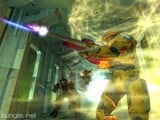
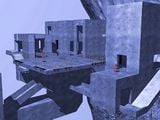
File:H2_Lockout_GrenadeToss.jpg|A promotional screenshot for Lockout. This image was later described by Bungie employee [[Michael Wu]] as "one of the worst ones in history" due to the amount of environment art bugs that were left in the image.<ref>[http://halo.bungie.net/News/content.aspx?type=topnews&cid=25650 '''Bungie.net''': ''One Final Effort''] - ''By the way, that screenshot below is one of the worst ones in history. Are you blind? Can’t you see all the environment art bugs we shipped in that shot? Jeebus, you’re killing me Urk.''</ref> | |||
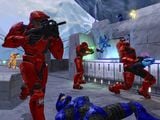
File:H2 Lockout Battle.jpg|A team battle on Lockout. | |||
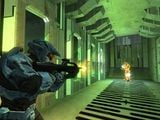
File:H2_Lockout_Hallway.jpg|The energy sword hallway. | |||
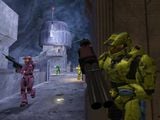
File:H2 mp lockout rocket-GI.jpg|A player hiding behind a corner armed with a [[M41 SPNKR]] in a free for all game. | |||
File:H2MP Beta LockoutHall.jpg|A battle in the green hall. | |||
File:H2_Lockout_Stasis.png|The stasis pods on Lockout. | |||
File:H2_Lockout_StasisHall.png|The green hallway on Lockout. One of the stasis pods has been broken out of. | |||
</gallery> | |||
{{ | ==Sources== | ||
{{Ref/Sources}} | |||
[[ | ==External links== | ||
*[http://halo.bungie.net/Games/Halo2/page.aspx?section=Guides&subsection=MPMaps&page=Lockout1 '''Bungie.net''': ''Lockout Guide''] ([https://web.archive.org/web/20050305165723/www.bungie.net/Games/Halo2/page.aspx?section=Guides&subsection=MPMaps&page=Lockout1 Archive]) | |||
{{Levels|H2|mode=yes}} | |||
Latest revision as of 07:57, November 13, 2024
| Lockout | |
|---|---|
| |
| Map overview | |
|
Game: |
|
|
Map file name (?): |
|
| Lore information | |
|
Map designation (?): |
War Games Map_Set/: 036-8[2] |
|
Location: |
|
| Gameplay overview | |
|
Terrain: |
Forerunner structure, ice, snow |
|
Map layout: |
Asymmetrical |
|
Recommended number of players: |
2-8 |
|
Recommended gametype(s): |
|
| “ | Some believe this remote facility was once used to study the Flood. But few clues remain amidst the snow and ice. | ” |
Lockout is an asymmetrical Halo 2 multiplayer map. It was remade as Blackout in Halo 3, Shutout using Forge in Halo 4, and as Lockdown in Halo 2: Anniversary.
Universe and lore[edit]
Although the UNSC In Amber Clad was destroyed during Delta Halo’s Flood outbreak, the frigate's data nodes had already transmitted extensive details of various sites on the ring's surface to the Master Chief. One of these – a derelict structure fixed to the ledge of a distant mountain - was the source of considerable scientific debate after his return. Subsequent analysis indicates it may have been a Forerunner research site used to research the parasite, but the findings remain inconclusive.[2]
Layout[edit]
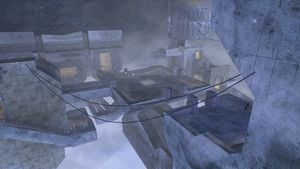
Lockout consists of three levels. The focus of the map is a central square platform, with four buildings surrounding the platform. Through the use of connecting ramps and bridges, two buildings on each end of the platform connect together to form a rough figure eight shape. Each building, including the central platform, contains three levels, interconnected through gravity lifts and ramps.
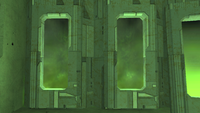
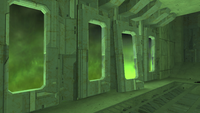
Most of the fighting occurs around the center of the map, either the upper or lower level. A small room exists on the bottom floor with small, damaged, green-glowing chambers and at the end there is a gravity lift back to the upper deck near the center. The towers abutting the center arena are used to get a better view of the upper level, as well as surprise attacks for people beneath them.
Lockout is, overall, a very straightforward map hence its popularity among MLG players, and the map default weapons are generally close-quarters minded with longer range weapons acting as power selections, if used correctly.
Territories[edit]
- Gravity lift/Top of gravity lift rower
- Center/underneath Center
- Sniper Tower (right side when coming up gravity lift)
- Battle rifle tower (left side when coming up gravity lift)
- Elbow (connects the lower lift room to Sniper Tower)
Weapons on map[edit]
Tactics[edit]
- If playing CTF, a Brute Shot jump will carry a player from the base at the top of the battle rifle tower to the Elbow; unless the player has uncommonly good aim with such jumps, the only way to avoid dying is to lunge at a player on the catwalk with an energy sword.
- There is a common Super bouncing on this map, used to get on top of the gravity lift tower. Be aware of its existence and predominance in the game. Snipers will use it ad infinitum, and are hard to pick off due to the natural cover that it provides.
- There is also a lesser known Superbounce on this map, used to get on top of the Sniper Tower. Not everyone uses it, but make sure you know that it is easy and probable that you may run into someone who can snipe you from up there. Also, if hiding in the right spot, it is easy for anyone to avoid danger, so the best way to eliminate someone using this bounce is with a sniper rifle, someone else or you super-bounce up there, or plasma grenades. It is easy to be a Juggernaut on the battlefield when up there. You can also butterfly to any high location.
- In the bottom floor, underneath the center panel of the top level, you can hide in the corners and remain stationary, and surprise and kill anyone whom walks in with a shotgun. This can be countered by clearing the room with a grenade before entering it; if anyone survives the blast, you will hear static from the player's shield.
- In Sniper matches, it is common practice to stand at the far end of the course, on the lower level, and snipe people across the level. Since the hall is continuous, there isn't much chance to react to a good sniper. This has given this hallway the nickname 'Sniper Alley'.
- The default place for the sniper rifle to spawn is at the top of the Sniper Tower. You can easily kill anybody standing up there trying to snipe people by blowing up the explosive barrels at the back of the platform. This will also kill anyone in the turret on the platform.
- By default, the battle rifle spawns on the top section of the gravity lift tower, and on the tower opposite the Sniper Tower. Remember it, since in Map Default games, mostly populated by dual wielding, distance can give you the win.
- A good way to kill an enemy is to ambush them when they float up from the gravity lif. But make sure you hide near the "drop-down-holes" and when they're just about to touchdown, assassinate them.
- Be constantly alert for the player wielding the energy sword or anyone trying to take it from you.
- If you don't have the energy sword, use the shotgun. If the sword-wielder lunges, you have a fraction of a second in which you can kill your opponent with a single blast to the chest before your opponent kills you.
- A good player can use only the sniper rifle and the energy sword and win with a score more than double of the player coming in second. Stay on the tower that the sniper rifle spawns on. From there, you can hit people all across the map. Just remember to alternate at different times what level of the tower you are on to avoid being sniped back. If anyone tries to invade your tower, slash him or her.
- When traveling, search the room you are walking into. Use your motion tracker and slightly angle yourself to have better luck getting someone ambushing you. If you have frag grenades, throw one (two if you are entering a large room) to kill any enemies in the room or to alert yourself to their presence. In team games, always keep your teammates posted on where you are to prevent being betrayed in this way.
- When you're playing on this map, if you use a rifle or a single dual-wielding weapon, don't enter enclosed spaces. In close-quarters fights, Shotguns, Energy Swords and dual combos nearly always win against rifles.
- Remember what is above and below you. You can take vertical shortcuts and avoid being ambushed in this way.
- The first and second floors of the Sniper Tower are the hottest section of the map. Avoid going here unless you are sure that all resistance has been eliminated. There are two good ways to attack players on the Sniper Tower:
- Crouch-jump from below the sniper spawn to the landing of the ramp just below if you have a close-quarters weapon or a dual combo.
- If you have a rifle, attack from the top of the battle rifle tower.
Trivia[edit]
Glitches[edit]
- Main article: Glitches
- It is possible to super jump to a tower, which is a very good sniping place.[3]
- It is also possible to get your body stuck to the ceiling of the level.[4]
- The first recorded sight of a Ghost of Halo was on Lockout.
Production notes[edit]
- Lockout was directly inspired by Quake map DM6: The Dark Zone for it's three-level layout where every path fed back into the middle.[5]
- Lockout was originally named "The Cage" and was intended to be released with Halo: Combat Evolved. However, it didn't make the cut and instead made its debut in Halo 2, albeit with some significant changes since initial development. The original version of The Cage appears in Halo: Reach as a Forge World map variant shipped with the game.[6] Lockout was the smallest map of the original set of nine small-scale "arena" maps designed for Halo 2 by Max Hoberman and Chris Carney and was originally envisioned as a one-on-one map for players without Xbox LIVE.[7][8]
- Lockout was designed in 3D and never had any 2D paper layout sketches (with the exception of some layout work done for Combat Evolved), unlike other maps in Halo 2. The map was designed by Chris Carney.[9]
- The hallway with the shotgun and the green pods was inspired by a section of the Marathon multiplayer map Mars Needs Women.[7]
- The Halo 3 map Guardian is similar to Lockout in terms of design because they both share the 'green Shotgun hallway', two main central levels of the map and four bases branching off of the main section. They also both have a main large gravity lift. These similarities have been confirmed by Bungie to be purposely put in the game.
- Lockout was originally planned to be featured as a map variant on Halo: Reach's Forge World and to be near the waterfalls. However, the map was never finalized and was eventually removed from the final game.[10]
- Halo 4 Forge remake of the map, Shutout, made by Big Papa SaLoT and based on Ravine map, was featured in matchmaking Community Forge Test playlist in January 2013.
Miscellaneous[edit]
- The only way one can get a good view of Installation 05 is by Sword Canceling from down below to someone jumping on a pillar above, flinging you to the top of the level. Once atop the huge structure, drop down at the first part and keep walking down the slope until you reach the back. There, the material of the floor seems to turn bluer, and if you look at the landscape, you see a lot of snow, mountains, and the Halo.
- The beings in the green, cryo-like chambers resemble Spartans wearing Mark V armor. If you look at the particles on the tanks, they look like the Flik'ta from the Marathon series. They can also be seen on the level The Oracle in the chamber where you first encounter the Flood on the level. One of the green chambers is open, which could mean something escaped or broke out of the chamber, similar to the broken cases on Cold Storage.
- If one looks at the mountains, the texture looks like it has a face on it.
- If you throw a grenade into the gravity lift (even a frag) there will sometimes be a slight electrical discharge.
Gallery[edit]

|
Browse more images in this article's gallery page. |
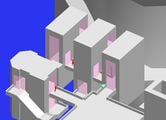
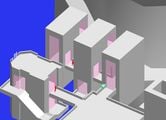
The first drawing of Lockout produced by designer Chris Carney. This drawing was later re-used as inspiration for the Halo: Reach map The Cage.
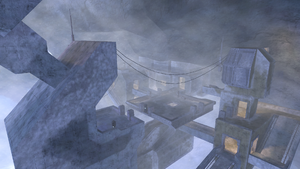
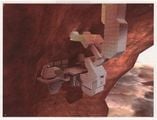
A promotional screenshot for Lockout. This image was later described by Bungie employee Michael Wu as "one of the worst ones in history" due to the amount of environment art bugs that were left in the image.[11]
A player hiding behind a corner armed with a M41 SPNKR in a free for all game.
Sources[edit]
- ^ Halo 2 Editing Kit, game file
H2EK\tags\scenarios\multi\lockout\lockout.scenario - ^ a b Halo Waypoint, Delta Halo (Retrieved on Oct 27, 2015) [archive]
- ^ YouTube Guide: Super jumps
- ^ YouTube Guide: Stuck Body On Ceiling
- ^ PC Gamer - It is directly influenced by a Quake map called DM6. DM6 was this three-level map that folded back in on itself, that also had a similar characteristic where everything fed back into the middle.
- ^ Bungie.net: Bungie Weekly Update 07.23.10
- ^ a b YouTube: Halo and the Journey of the Master Chief- PAX Prime 2014
- ^ Max Hoberman on Twitter - If you enjoyed Lockout from Halo 2 you might also enjoy seeing our original design doc for it. I'd forgotten that this was initially intended as our 1x1 level, designed for poor split screen souls without Internet access or a LAN party to call home.
- ^ Max Hoberman on Twitter
- ^ halo.bungie.org: So, the 'official' Lockout remake DID exist.
- ^ Bungie.net: One Final Effort - By the way, that screenshot below is one of the worst ones in history. Are you blind? Can’t you see all the environment art bugs we shipped in that shot? Jeebus, you’re killing me Urk.
External links[edit]
| |||||||||||||||||||||||||||||||

![A promotional screenshot for Lockout. This image was later described by Bungie employee Michael Wu as "one of the worst ones in history" due to the amount of environment art bugs that were left in the image.[11]](https://halo.wiki.gallery/images/thumb/a/af/H2_Lockout_GrenadeToss.jpg/160px-H2_Lockout_GrenadeToss.jpg)
