Outpost: Difference between revisions
From Halopedia, the Halo wiki
m (Text replacement - "{{Era\|([^}]+)}} {{Title\|([^}]+)}}" to "{{Title|$2}} {{Era|$1}}") |
m (→Tactics: link removed) Tag: Mobile edit |
||
| (21 intermediate revisions by 6 users not shown) | |||
| Line 1: | Line 1: | ||
{{Title|Outpost}} | {{Title|Outpost}} | ||
{{ | {{Status|Gameplay}} | ||
{{Center|'''''Outpost''' redirects here. For the Covenant base facility, see [[Covenant citadel]]''.}} | {{Center|'''''Outpost''' redirects here. For the Covenant base facility, see [[Covenant citadel]]''.}} | ||
{{Article | {{Article quote|Fight for survival amidst the smoldering ruins.}} | ||
{{Multiplayer | {{Multiplayer map infobox | ||
|pagelabel=Firefight map | |pagelabel=Firefight map | ||
|pagegamelabel=HR | |pagegamelabel=HR | ||
| Line 9: | Line 9: | ||
|image=[[File:Reach Outpost Firefight.jpg|300px]] | |image=[[File:Reach Outpost Firefight.jpg|300px]] | ||
|game=''[[Halo: Reach]]'' | |game=''[[Halo: Reach]]'' | ||
|devname=<code>ff60_airview</code>{{Ref/File|Id=HREK|HREK|HREK\tags\levels\firefight\ff60_airview\ff60_airview.scenario}} | |||
|location=[[Airview Base]], [[Sword Base]], [[Babd Catha Ice Shelf]], [[Reach]] | |location=[[Airview Base]], [[Sword Base]], [[Babd Catha Ice Shelf]], [[Reach]] | ||
|terrain=Rocky glacial hillside, wreckage and debris | |terrain=Rocky glacial hillside, wreckage and debris | ||
| Line 17: | Line 18: | ||
==Overview== | ==Overview== | ||
Outpost is a medium sized Firefight map with plenty of wide open spaces and lots of cover such as boulders, pieces of vehicles and containers that are scattered throughout the field. At one end there is a base and sitting on the left and right of it are two [[ | Outpost is a medium sized Firefight map with plenty of wide open spaces and lots of cover such as boulders, pieces of vehicles and containers that are scattered throughout the field. At one end there is a base and sitting on the left and right of it are two [[Cheru-pattern Tyrant|"Tyrant" Cannons]], one destroyed and one active. The base has an ammo supply inside and a [[M247H Heavy Machine Gun|Turret]] mounted on the roof. The only vehicle dropped on the map is the {{Pattern|Karo'etba|Ghost}}. | ||
==Locations== | ==Locations== | ||
| Line 29: | Line 30: | ||
==Tactics== | ==Tactics== | ||
*The building labelled "Deck" is the best camping spot. It has only one way leading to the roof: the stairs. All enemies except for [[Skirmishers]] and [[Sangheili Ranger]]s have to climb the stairs to get to the player(s). This strategy also compensates for the effect of the [[Halo 3 | *The building labelled "Deck" is the best camping spot. It has only one way leading to the roof: the stairs. All enemies except for [[Skirmishers]] and [[Sangheili Ranger]]s have to climb the stairs to get to the player(s). This strategy also compensates for the effect of the [[Halo 3 skulls#Black Eye|Black Eye Skull]], since the player(s) will most likely use melee attacks on the enemy in close range. However, if you drop a dmr on the deck, the game will think it is empty. | ||
**Furthermore, the [[health pack]]s are located at the first floor and back of the building, making it easier to recover health. Also, the [[M9 High-Explosive Dual-Purpose Grenade|frag grenades]] are spawned on the left side of the roof top while a [[M247H Heavy Machine Gun|turret]] is deployed on the right side. | **Furthermore, the [[health pack]]s are located at the first floor and back of the building, making it easier to recover health. Also, the [[M9 High-Explosive Dual-Purpose Grenade|frag grenades]] are spawned on the left side of the roof top while a [[M247H Heavy Machine Gun|turret]] is deployed on the right side. | ||
**The wall beside the staircase provides cover from the [[ | **The wall beside the staircase provides cover from the [[Kez'katu-pattern Phantom|Phantom]]'s [[Heavy plasma cannon|turret]] fire. There is also a [[combat barrier]] at the front of the rooftop, which the player(s) can use to shield themselves from sniper fire by crouching in it. | ||
**Players can replenish their weapons from the ammunition crate located along the building's left wall, the back of the building. | **Players can replenish their weapons from the ammunition crate located along the building's left wall, the back of the building. | ||
*The hazard on this map is the [[Type-32 Rapid Assault Vehicle|Ghost]], which can move around fast in the large map. Either use the [[H-165 FOM|Target Locator]] or the [[M41 Surface-to-Surface Rocket Medium Anti-Vehicle/Assault Weapon|Rocket Launcher]] to destroy it. | *The hazard on this map is the [[Type-32 Rapid Assault Vehicle|Ghost]], which can move around fast in the large map. Either use the [[H-165 FOM|Target Locator]] or the [[M41 Surface-to-Surface Rocket Medium Anti-Vehicle/Assault Weapon|Rocket Launcher]] to destroy it. | ||
==Gallery== | ==Gallery== | ||
{{Linkbox|gallery=yes|gallerypage=Images of Outpost (level)}} | |||
<gallery> | <gallery> | ||
File:HMCC_HR_Outpost_Map.png|Outpost Map. | File:HMCC_HR_Outpost_Map.png|Outpost Map. | ||
| Line 43: | Line 45: | ||
==Sources== | ==Sources== | ||
{{Ref/Sources}} | |||
{{Levels|HR}} | {{Levels|HR|mode=yes}} | ||
[[Category:Halo: Reach multiplayer maps]] | [[Category:Halo: Reach multiplayer maps]] | ||
[[Category:Halo: Reach Firefight maps]] | [[Category:Halo: Reach Firefight maps]] | ||
Latest revision as of 21:16, August 29, 2024
| “ | Fight for survival amidst the smoldering ruins. | ” |
| Outpost | |
|---|---|

| |
| Map overview | |
|
Game: |
|
|
Map file name (?): |
|
| Lore information | |
|
Location: |
|
| Gameplay overview | |
|
Terrain: |
Rocky glacial hillside, wreckage and debris |
|
Recommended number of players: |
1-4 |
|
Recommended gametype(s): |
|
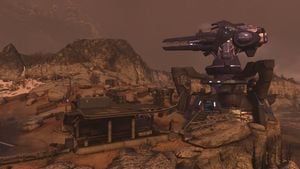
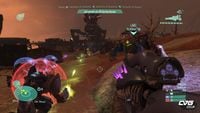
Outpost is a Firefight map in Halo: Reach. It is set near Sword Base and the Babd Catha Ice Shelf, largely melted due to the Covenant's glassing of the area. The layout of Outpost is based on the campaign level The Package.[2]
Overview[edit]
Outpost is a medium sized Firefight map with plenty of wide open spaces and lots of cover such as boulders, pieces of vehicles and containers that are scattered throughout the field. At one end there is a base and sitting on the left and right of it are two "Tyrant" Cannons, one destroyed and one active. The base has an ammo supply inside and a Turret mounted on the roof. The only vehicle dropped on the map is the Karo'etba-pattern Ghost.
Locations[edit]
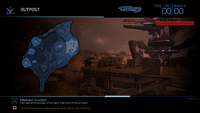
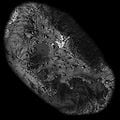
The following are known locations on the map that are so named on the player's HUD during gameplay:
- ONI Road
- Deck
- Base Front
- Central Fire Zone
- Wrecked gun
- Active Gun
Tactics[edit]
- The building labelled "Deck" is the best camping spot. It has only one way leading to the roof: the stairs. All enemies except for Skirmishers and Sangheili Rangers have to climb the stairs to get to the player(s). This strategy also compensates for the effect of the Black Eye Skull, since the player(s) will most likely use melee attacks on the enemy in close range. However, if you drop a dmr on the deck, the game will think it is empty.
- Furthermore, the health packs are located at the first floor and back of the building, making it easier to recover health. Also, the frag grenades are spawned on the left side of the roof top while a turret is deployed on the right side.
- The wall beside the staircase provides cover from the Phantom's turret fire. There is also a combat barrier at the front of the rooftop, which the player(s) can use to shield themselves from sniper fire by crouching in it.
- Players can replenish their weapons from the ammunition crate located along the building's left wall, the back of the building.
- The hazard on this map is the Ghost, which can move around fast in the large map. Either use the Target Locator or the Rocket Launcher to destroy it.
Gallery[edit]

|
Browse more images in this article's gallery page. |
Sources[edit]
- ^ Halo: Reach Editing Kit, game file
HREK\tags\levels\firefight\ff60_airview\ff60_airview.scenario - ^ CVG: Halo: Reach screenshot avalanche
| ||||||||||||||||||||||||||||||||||||||||||


