Delta Halo: Difference between revisions
From Halopedia, the Halo wiki
m (Text replacement - "==Related links==" to "==See also==") |
BaconShelf (talk | contribs) mNo edit summary |
||
| (31 intermediate revisions by 13 users not shown) | |||
| Line 1: | Line 1: | ||
{{ | {{Status|Gameplay}} | ||
{{Center| '''Delta Halo''' redirects here. For the Halo installation, see [[Installation 05]]. For the achievement, see [[Delta Halo (achievement)]].}} | {{Center| '''Delta Halo''' redirects here. For the Halo installation, see [[Installation 05]]. For the achievement, see [[Delta Halo (achievement)]].}} | ||
{{Level infobox | {{Level infobox | ||
|pagegamelabel=H2 | |pagegamelabel=H2 | ||
|prev = ''[[The Oracle]]'' | |prev=''[[The Oracle]]'' | ||
|next=''[[Regret (Halo 2 level)|Regret]]'' | |||
|next = ''[[Regret (Halo 2 level)|Regret]]'' | |name='''''Delta Halo''''' | ||
|game = ''[[Halo 2]]'' | |image=[[File:H2A DeltaHalo Loadscreen.png|300px]] | ||
| | |game=''[[Halo 2]]'' {{C|''[[Halo 2: Anniversary|Anniversary]]''}} | ||
| | |devname=<code>05a_deltaapproach</code>{{Ref/File|Id=H2EK|H2EK|H2EK\tags\scenarios\solo\05a_deltaapproach\05a_deltaapproach.scenario}} | ||
|player = [[ | |player=[[Master_Chief_(gameplay)#Halo_2|Master Chief]] | ||
|date = [[2552#November | |date=[[2552#November|November 2, 2552]] | ||
|place = The surface of [[Installation 05]] | |place=The surface of [[Installation 05]] | ||
|objective= Progress through the old ruins and jungle to reach the towers at the lake | |objective=Progress through the old ruins and jungle to reach the towers at the lake | ||
|partime=00:15:00 {{C|''Master Chief Collection''}} | |partime=00:15:00 {{C|''Master Chief Collection''}} | ||
|parscore= 10,000 {{C|''Master Chief Collection''}} | |parscore=10,000 {{C|''Master Chief Collection''}} | ||
}} | }} | ||
{{Article quote|A Covenant army stands between you and Regret. Get to work. | {{Article quote|A Covenant army stands between you and Regret. Get to work.}} | ||
'''Delta Halo''' is the eighth [[campaign]] level of ''[[Halo 2]]''. | '''Delta Halo''' is the eighth [[campaign]] level of ''[[Halo 2]]''. | ||
| Line 22: | Line 22: | ||
==Summary== | ==Summary== | ||
After helljumping onto Halo in an [[ | After helljumping onto Halo in an [[M8823 drop pod|HEV]], [[John-117]] fought his way through [[Covenant]] forces to reach the temple where the [[Prophet of Regret]] resides. This is the only ''Halo 2'' level where the player will be aided by [[Orbital Drop Shock Trooper|ODSTs]] and is also the first level that the [[Sangheili Honor Guardsman|Sangheili Honor Guardsmen]] are fought. | ||
==Transcript== | ==Transcript== | ||
| Line 28: | Line 28: | ||
[http://www.youtube.com/watch?v=AE4Zyqny5bw'''{Anniversary Cutscene}'''] | [http://www.youtube.com/watch?v=AE4Zyqny5bw'''{Anniversary Cutscene}'''] | ||
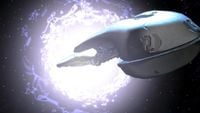
[[File:H2A - Solemn Penance exiting slipspace.jpg|thumb | [[File:H2A - Solemn Penance exiting slipspace.jpg|thumb|300px|The Prophet of Regret's flagship exits slipspace near Delta Halo with a debris field and the ''UNSC In Amber Clad'' following in its wake.]] | ||
''A [[Slipstream space|Slipspace]] rupture appears in space. ''[[Solemn Penance]]'' comes out, followed by some debris from [[New Mombasa]] and the {{UNSCShip|In Amber Clad}}.'' | ''A [[Slipstream space|Slipspace]] rupture appears in space. ''[[Solemn Penance]]'' comes out, followed by some debris from [[New Mombasa]] and the {{UNSCShip|In Amber Clad}}.'' | ||
| Line 42: | Line 42: | ||
*'''Commander Keyes''': "Do it, and find out where we are." | *'''Commander Keyes''': "Do it, and find out where we are." | ||
''Pan over to a room lined with [[ | ''Pan over to a room lined with [[M8823 drop pod]]s:'' | ||
*'''Commander Keyes (COM)''': "Sorry for the quick jump, [[Sergeant Major|Sergeant]]. You in one piece?" | *'''Commander Keyes (COM)''': "Sorry for the quick jump, [[Sergeant Major|Sergeant]]. You in one piece?" | ||
| Line 64: | Line 64: | ||
*'''Sergeant Johnson''': ''(chokes)'' "Say what?!" | *'''Sergeant Johnson''': ''(chokes)'' "Say what?!" | ||
*'''Commander Keyes''': "So this is what my [[Jacob Keyes|father]] found... " ''(gazes at Halo)'' "I thought [[Halo]] was some sort of superweapon." | *'''Commander Keyes''': "So this is what my [[Jacob Keyes|father]] found... " ''(gazes at Halo)'' "I thought [[Halo Array|Halo]] was some sort of superweapon." | ||
*'''Cortana (COM)''': "It is. If activated, this ring will cause destruction on a ''galactic'' scale." | *'''Cortana (COM)''': "It is. If activated, this ring will cause destruction on a ''galactic'' scale." | ||
| Line 98: | Line 98: | ||
*'''Cortana''': ''(as the parachute deploys)'' "Mind the bump." | *'''Cortana''': ''(as the parachute deploys)'' "Mind the bump." | ||
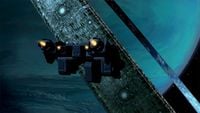
[[File:H2A - HEVs over Delta Halo.jpg|thumb | [[File:H2A - HEVs over Delta Halo.jpg|thumb|300px|First Platoon deploys onto Installation 05.]] | ||
''On Halo, an [[Unggoy]] and a [[Kig-Yar]] notice the pods flaming and streaking down towards them. The Kig-Yar snarls in alarm. He flicks his wrist, and his [[kig-yar point defense gauntlet|energy shield]] snaps on. The Unggoy boards a [[ | ''On Halo, an [[Unggoy]] and a [[Kig-Yar]] notice the pods flaming and streaking down towards them. The Kig-Yar snarls in alarm. He flicks his wrist, and his [[kig-yar point defense gauntlet|energy shield]] snaps on. The Unggoy boards a [[Eeo'Pimu-pattern Shade|Shade]] turret and shoots at the pods, and soon another Shade starts firing. The pods land, John-117 breaks the cover open on his pod, scanning the area with an [[M7 SMG|SMG]].'' | ||
*'''Cortana''': "Could we ''possibly'' make any more noise?!" | *'''Cortana''': "Could we ''possibly'' make any more noise?!" | ||
''John-117 takes | ''John-117 takes a [[M41 SPNKR|Rocket Launcher]] out of his pod and hefts it.'' | ||
*'''Cortana''': "I guess so." | *'''Cortana''': "I guess so." | ||
| Line 127: | Line 127: | ||
*'''Sergeant Johnson (COM)''': "I hear ya. Starting our approach - hang tight." | *'''Sergeant Johnson (COM)''': "I hear ya. Starting our approach - hang tight." | ||
*'''Cortana''': "Easier said than done. Inbound [[ | *'''Cortana''': "Easier said than done. Inbound [[Kez'katu-pattern Phantom|Phantoms]], Chief." | ||
''A Phantom drops off troops. The Chief eliminates them.'' | ''A Phantom drops off troops. The Chief eliminates them.'' | ||
*'''Cortana''': "Another Phantom, on approach." | *'''Cortana''': "Another Phantom, on approach." | ||
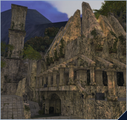
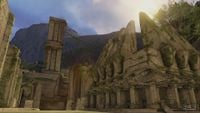
[[File: | [[File:H2A DeltaStructure.png|thumb|300px|The first [[Forerunner]] structure.]] | ||
''A second Phantom drops off troops. John-117 eliminates them as well.'' | ''A second Phantom drops off troops. John-117 eliminates them as well.'' | ||
| Line 140: | Line 140: | ||
*'''Cortana''': "Hold here until the Pelican arrives, Chief." | *'''Cortana''': "Hold here until the Pelican arrives, Chief." | ||
''If the player stays and waits for the [[M12 | ''If the player stays and waits for the [[M12 Warthog|Warthog]]:'' | ||
*'''Dubbo or Cortana''': "Here comes our ride!" | *'''Dubbo or Cortana''': "Here comes our ride!" | ||
| Line 172: | Line 172: | ||
*'''Cortana''': "The Covenant have control of the bridge ahead. They're going to try to bottle us up on this side of the gorge. The controls to extend the bridge should be in this structure." | *'''Cortana''': "The Covenant have control of the bridge ahead. They're going to try to bottle us up on this side of the gorge. The controls to extend the bridge should be in this structure." | ||
*'''Dubbo or Cortana''': "Watch out, Chief! [[ | *'''Dubbo or Cortana''': "Watch out, Chief! [[Muz-pattern Wraith|Wraiths]] on the far side!" | ||
''Several Shade turrets open fire on the team and [[ | ''Several Shade turrets open fire on the team and [[Karo'etba-pattern Ghost|Ghosts]] soon appear to provide support. Eventually the team eliminate all hostiles, including a lance of [[Kig-Yar]]. They enter a structure and eliminate another [[lance]] of Covenant in the main room. A [[holography|hologram]] of Regret hovers above the center. The Chief activates the switch and the bridge extends over the gorge.'' | ||
*'''Dubbo or Cortana''': "Good, the bridge is down. Now about those Wraiths..." | *'''Dubbo or Cortana''': "Good, the bridge is down. Now about those Wraiths..." | ||
| Line 194: | Line 194: | ||
*'''[[Prophet of Regret]] (Hologram)''': "The Forerunners, our most exalted lords, used the seven sacred rings to flee a doomed existence, to escape their [[Forerunner-Flood War|endless struggle against the Flood]]. Long ago, the Prophets and Elites fought an [[Sangheili-San 'Shyuum War|equally fruitless war]]. Indeed, I suspect we would still be at each others' throats had the Prophets not found evidence of the Forerunners and their Great Journey." | *'''[[Prophet of Regret]] (Hologram)''': "The Forerunners, our most exalted lords, used the seven sacred rings to flee a doomed existence, to escape their [[Forerunner-Flood War|endless struggle against the Flood]]. Long ago, the Prophets and Elites fought an [[Sangheili-San 'Shyuum War|equally fruitless war]]. Indeed, I suspect we would still be at each others' throats had the Prophets not found evidence of the Forerunners and their Great Journey." | ||
''Another Pelican approaches, carrying a [[UE8-14|Scorpion]] [[M808B | ''Another Pelican approaches, carrying a [[UE8-14|Scorpion]] [[M808B Scorpion|Tank]].'' | ||
''If the player chooses to go on foot, Warthog, or Ghost:'' | ''If the player chooses to go on foot, Warthog, or Ghost:'' | ||
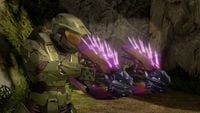
[[File: | [[File:H2A WraithsGuardingBridge.png|thumb|300px|A pair of [[Muz-pattern Wraith|Wraiths]] across a bridge.]] | ||
*'''Cortana''': "You don't want the | *'''Cortana''': "You don't want the tank? Okay, we'll leave it for the others." | ||
''John-117 eliminates the Wraiths as well as a group of [[ | ''John-117 eliminates the Wraiths as well as a group of [[Oghal-pattern Banshee|Banshee]]s and Ghosts and passes through a multitude of [[Forerunner]] ruins. Large numbers of Shade turrets, Ghosts and Covenant infantry fall to the Spartan's onslaught. Eventually the Chief emerges from the ruins.'' | ||
===You Break It, You Buy It=== | ===You Break It, You Buy It=== | ||
| Line 237: | Line 237: | ||
*'''Cortana''': "Transcendence, huh? More like mass suicide." | *'''Cortana''': "Transcendence, huh? More like mass suicide." | ||
''The team press on, engaging another pair of [[Type-51 Carbine|carbine]] wielding Sangheili and a lance of Unggoy and Kig-Yar. | ''The team press on, engaging another pair of [[Type-51 Carbine|carbine]] wielding Sangheili and a lance of Unggoy and Kig-Yar.'' | ||
===Off The Rock, Through The Bush, Nothing But Jackal=== | ===Off The Rock, Through The Bush, Nothing But Jackal=== | ||
| Line 244: | Line 244: | ||
*'''Cortana''': "You always bring me to such nice places." | *'''Cortana''': "You always bring me to such nice places." | ||
''The team take the Covenant troops by surprise and easily mow them down. Several [[Kig-Yar Sniper]]s and a swarm of [[Yanme'e]] try to stop the UNSC forces, but fail. A final pair of Sangheili defend the | ''The team take the Covenant troops by surprise and easily mow them down. Several [[Kig-Yar Sniper]]s and a swarm of [[Yanme'e]] try to stop the UNSC forces, but fail. A final pair of Sangheili defend the approach to the next area, but they too are killed. The team continues through a narrow crack. They eventually reach the first series of structures in the lake.'' | ||
*'''Cortana''': "Good, still no word about ''In Amber Clad'' on the Covenant [[ | *'''Cortana''': "Good, still no word about ''In Amber Clad'' on the Covenant [[proselytization network|battlenet]]. It's odd, the Covenant knew we made landfall, but they don't seem to consider us a very serious threat. Boy, are they in for a big surprise." | ||
''The main structure's upper walkways are patrolled by a pair of Kig-Yar Snipers. A swarm of Yanme'e attempt to stop the humans, but all Covenant troops eventually fall to the Chief and his team. | ''The main structure's upper walkways are patrolled by a pair of Kig-Yar Snipers. A swarm of Yanme'e attempt to stop the humans, but all Covenant troops eventually fall to the Chief and his team. | ||
| Line 261: | Line 261: | ||
''Level ends.'' | ''Level ends.'' | ||
==Achievements== | |||
The following [[achievement]]s can be unlocked on ''Delta Halo'' across the [[Halo 2 (Windows Vista)|Windows Vista]] and ''[[Halo: The Master Chief Collection]]'' editions of ''Halo 2: Anniversary''. The original [[Xbox]] release of ''Halo 2'' did not contain achievement unlocks. | |||
{| class="wikitable" | |||
|- | |||
! scope="col" style="width:135px;text-align:center;" |'''''Halo 2'' (Windows Vista)''' | |||
! scope="col" style="width:135px;text-align:center;" |'''''Halo: MCC'' (Xbox One, Xbox Series X|S)''' | |||
! scope="col" style="width:135px;text-align:center;" |'''''Halo: MCC'' (Steam)''' | |||
! scope="col" style="width:175px;height:20px;text-align:center;" |'''Title''' | |||
! scope="col" style="width:350px;height:20px;text-align:center;" |'''Unlock requirement''' | |||
! scope="col" style="width:200px;height:20px;text-align:center;" |'''Games''' | |||
|- | |||
|[[File:H2V Achievement Delta Halo.png|center|64px]] | |||
|[[File:HTMCC H2A Achievement DeltaHalo.png|center|114px]] | |||
|[[File:HTMCC H2A Achievement Steam Delta Halo.jpg|center|64px]] | |||
|<center>'''[[Delta Halo (achievement)|Delta Halo]]'''</center> | |||
|Beat Delta Halo on any difficulty. | |||
|<center>[[Halo 2 (Windows Vista)|''Halo 2'' (Windows Vista)]]<br/>''[[Halo: The Master Chief Collection]]''</center> | |||
|- | |||
|<center>N/A</center> | |||
|[[File:HTMCC H2A Achievement SoYouDon'tWanttheTank.png|center|114px]] | |||
|[[File:HTMCC H2A Achievement Steam SoYouDon'tWanttheTank.jpg|center|64px]] | |||
|<center>'''[[So You Don't Want the Tank?]]'''</center> | |||
|Beat the par time on Delta Halo. | |||
|<center>''[[Halo: The Master Chief Collection]]''</center> | |||
|- | |||
|<center>N/A</center> | |||
|[[File:HTMCC H2A Achievement Boundless.png|center|114px]] | |||
|[[File:HTMCC H2A Achievement Steam Boundless.jpg|center|64px]] | |||
|<center>'''[[Boundless]]'''</center> | |||
|Beat the par score on Delta Halo. | |||
|<center>''[[Halo: The Master Chief Collection]]''</center> | |||
|- | |||
|<center>N/A</center> | |||
|[[File:HTMCC H2A Achievement Enchanted.png|center|114px]] | |||
|[[File:HTMCC H2A Achievement Steam Enchanted.jpg|center|64px]] | |||
|<center>'''[[Enchanted]]'''</center> | |||
|Activate [[Terminal (Halo 2: Anniversary)|Terminal #6]] on Delta Halo. | |||
|<center>''[[Halo: The Master Chief Collection]]''</center> | |||
|- | |||
|<center>N/A</center> | |||
|[[File:HTMCC H2A Achievement SkulltakerEnvy.png|center|114px]] | |||
|[[File:HTMCC H2A Achievement Steam SkulltakerEnvy.jpg|center|64px]] | |||
|<center>'''[[Skulltaker Halo 2: Envy]]'''</center> | |||
|Find and claim the [[Halo 2 skulls#Envy|Envy Skull]]. | |||
|<center>''[[Halo: The Master Chief Collection]]''</center> | |||
|- | |||
|<center>N/A</center> | |||
|[[File:HTMCC H2A Achievement AndSoItBegins.png|center|114px]] | |||
|[[File:HTMCC Achievement And So It Begins... Steam.jpg|center|64px]] | |||
|<center>'''[[And So It Begins...]]'''</center> | |||
|Collect the Master Chief toy in Delta Halo. | |||
|<center>''[[Halo: The Master Chief Collection]]''</center> | |||
|- | |||
|<center>N/A</center> | |||
|[[File:HTMCC H2A Achievement HeNeverGetsMeAnything.png|center|114px]] | |||
|[[File:HTMCC Achievement HeNeverGetsMeAnything Steam.jpg|center|64px]] | |||
|<center>'''[[He Never Gets Me Anything]]'''</center> | |||
|Complete Delta Halo without entering a vehicle on Heroic or Legendary. | |||
|<center>''[[Halo: The Master Chief Collection]]''</center> | |||
|- | |||
|} | |||
==Skull== | ==Skull== | ||
{{Main|Skull}} | {{Main|Skull}} | ||
The [[Halo 2 | The [[Halo 2 skulls#Envy|Envy Skull]] is found on this level. | ||
''Note'': this is similar to the Hidden [[ | ''Note'': this is similar to the Hidden [[Sniper_Rifle#Halo_2_and_Halo_2:_Anniversary|Sniper Rifle]], which can also be found on Delta Halo. Near the end of the level, after the area with the waterfall and snipers, you will go through a tunnel and come out onto an open ledge. There will be several buildings in the distance and if you still have a Sniper Rifle or [[Type-50 particle beam rifle|Beam Rifle]], you can pick off several Unggoy, Kig-Yar, and Sangheili. Below the ledge you are standing on is the main ledge which has weapon drop pods, however if you turn right and go along the wall, you'll reach a point where you can jump up and walk along above the main ledge. This will deposit you on a hidden ledge covered in thick vegetation. On the ledge is a dead ODST and a Sniper Rifle. | ||
==Trivia== | ==Trivia== | ||
| Line 272: | Line 334: | ||
{{Main|Glitches}} | {{Main|Glitches}} | ||
*Because Delta Halo is the first part of a two-part level, your weapons will carry over to [[Regret (Halo 2 level)|Regret]], unless one of your weapons is a Rocket Launcher or a pistol. If you finish Delta Halo with a Rocket Launcher or pistol you will start Regret with a Beam Rifle and an SMG. | *Because Delta Halo is the first part of a two-part level, your weapons will carry over to [[Regret (Halo 2 level)|Regret]], unless one of your weapons is a Rocket Launcher or a pistol. If you finish Delta Halo with a Rocket Launcher or pistol you will start Regret with a Beam Rifle and an SMG. | ||
*Using the [[Halo 2 | *Using the [[Halo 2 skulls|Sputnik]] skull, it is possible to jump into Regret and find ''The Gate'', which is a switch located where the first Gondola would arrive. Upon opening it you will hear the noise the Gondola makes when you start it up. It has been highly controversial between ''Halo'' fans because no one knows its purpose although it is most likely to be a place holder for the Gondola itself. | ||
*At the beginning of the level, when you clear the Covenant from the first structure, move on to the bridge area, and get the Scorpion. If you do this, the game will act as if you did not go get the Scorpion, and will spawn a Warthog. Cortana will also say "Let's wait for the Warthog, unless you'd rather walk" on your way back through with the tank. | *At the beginning of the level, when you clear the Covenant from the first structure, move on to the bridge area, and get the Scorpion. If you do this, the game will act as if you did not go get the Scorpion, and will spawn a Warthog. Cortana will also say "Let's wait for the Warthog, unless you'd rather walk" on your way back through with the tank. | ||
*When looking directly at the holographic projections of Regret, press the "melee button" and John will charge towards the projection as if you were actually about to melee an enemy unit. This is because, to save time, an alternate model of Regret with no collision model is used for holograms. This also occurs on the holograms viewing the Heretic Leader at the beginning of the level The Oracle, and The Prophet of Truth on the ''Halo 3'' | *When looking directly at the holographic projections of Regret, press the "melee button" and John will charge towards the projection as if you were actually about to melee an enemy unit. This is because, to save time, an alternate model of Regret with no collision model is used for holograms. This also occurs on the holograms viewing the Heretic Leader at the beginning of the level The Oracle, and The Prophet of Truth on the ''Halo 3'' level [[The Covenant (level)|The Covenant]]. | ||
*At the starting of the level when you hold the Temple with the Helljumpers where the Kig-Yar and the Unggoy were in the cinematic, climb up the hill, walk around until it says ''Loading...done''. After that, go somewhere low that you can get to the ground without dying. There will be no enemies for the whole level, but you'll also be unable to get to the next level because a door will be locked. Also, all holograms of the High Prophet of Regret will just be of his [[Gravity throne|Gravity Throne]], with no Prophet sitting in it. In addition, at the set of buildings before the last checkpoint, you can drive a Ghost up to the area of gondolas in the next level. There will be no enemies. However, this area is inaccessible. You will fall and die instantly. | *At the starting of the level when you hold the Temple with the Helljumpers where the Kig-Yar and the Unggoy were in the cinematic, climb up the hill, walk around until it says ''Loading...done''. After that, go somewhere low that you can get to the ground without dying. There will be no enemies for the whole level, but you'll also be unable to get to the next level because a door will be locked. Also, all holograms of the High Prophet of Regret will just be of his [[Gravity throne|Gravity Throne]], with no Prophet sitting in it. In addition, at the set of buildings before the last checkpoint, you can drive a Ghost up to the area of gondolas in the next level. There will be no enemies. However, this area is inaccessible. You will fall and die instantly. | ||
*When you reach the temple where you must clear a Landing Zone for the Pelican and its drop pods, after you eliminate all enemies that exit the temple, about half the time all surviving ODSTs (only a maximum of 3) will suddenly vanish. Rarely, only one or two will vanish. The Marine reinforcement(s) will never disappear, only the Helljumpers. | *When you reach the temple where you must clear a Landing Zone for the Pelican and its drop pods, after you eliminate all enemies that exit the temple, about half the time all surviving ODSTs (only a maximum of 3) will suddenly vanish. Rarely, only one or two will vanish. The Marine reinforcement(s) will never disappear, only the Helljumpers. | ||
| Line 280: | Line 342: | ||
*It is possible to enter the next level (Regret) without activating the cut scene. The Sputnik Skull is not required for this glitch, though it does help. First, go through the level on any difficulty until you reach the part where you are on the bridge with the Weapon Pods that the In Amber Clad dropped for you. Instead of going into the tower, grenade jump on the side of the entrance to the platform above. Kill all the [[Kig-yar|Jackal]] Snipers. Then, find your way around and jump down. You will be on the other side. There will be Covenant soldiers with most of the [[Unggoy|Grunts]] sleeping. They will act as if you were not there unless you bump into them.Continue to where the gondola is and you will see what appears to be a Zanzibar gate switch hovering off the coast of your platform. | *It is possible to enter the next level (Regret) without activating the cut scene. The Sputnik Skull is not required for this glitch, though it does help. First, go through the level on any difficulty until you reach the part where you are on the bridge with the Weapon Pods that the In Amber Clad dropped for you. Instead of going into the tower, grenade jump on the side of the entrance to the platform above. Kill all the [[Kig-yar|Jackal]] Snipers. Then, find your way around and jump down. You will be on the other side. There will be Covenant soldiers with most of the [[Unggoy|Grunts]] sleeping. They will act as if you were not there unless you bump into them.Continue to where the gondola is and you will see what appears to be a Zanzibar gate switch hovering off the coast of your platform. | ||
*The first hologram of Regret in the courtyard like area in the structure that you come to has a part where you can stand on it as if it was a solid object. | *The first hologram of Regret in the courtyard like area in the structure that you come to has a part where you can stand on it as if it was a solid object. | ||
*This is one of the few levels in the game where the [[Permanent | *This is one of the few levels in the game where the [[Permanent invisibility]] glitch can be performed. | ||
===Easter | ===Easter eggs=== | ||
{{Main|Easter eggs}} | {{Main|Easter eggs}} | ||
*The Envy Skull is found on this level. | *The Envy Skull is found on this level. | ||
| Line 293: | Line 355: | ||
*Around the area of where the Envy skull is found, in the room where there's a giant block covering the doorway, there is a way of getting in the room and finding two energy swords and two dead Grunts. Just go as if you were going to get the Envy skull, and drop down the right side of the building. In the dark room, there should be two dead Grunts, and two energy swords. And you should also be able to see the block covering up the initial doorway. The block can be removed through the use of grenades. | *Around the area of where the Envy skull is found, in the room where there's a giant block covering the doorway, there is a way of getting in the room and finding two energy swords and two dead Grunts. Just go as if you were going to get the Envy skull, and drop down the right side of the building. In the dark room, there should be two dead Grunts, and two energy swords. And you should also be able to see the block covering up the initial doorway. The block can be removed through the use of grenades. | ||
*A screen displaying orbital defense platforms can be seen on ''In Amber Clad'''s bridge. The same screen is also seen on ''[[The Armory]]'', ''[[Cairo Station]]'', and ''[[Elongation]]''. | *A screen displaying orbital defense platforms can be seen on ''In Amber Clad'''s bridge. The same screen is also seen on ''[[The Armory]]'', ''[[Cairo Station]]'', and ''[[Elongation]]''. | ||
* The sixth terminal is a Covenant terminal in the room of the Forerunner structure contains the first hologram of Prophet of Regret and the switch which extends the bridge. | |||
===References=== | ===References=== | ||
*''[[The Babysitter]]'' from ''[[Halo: Legends]]'' pays homage to this level. Both the level and the episode depict a Spartan and a team of ODSTs in their attempt to kill a Prophet. | *''[[The Babysitter]]'' from ''[[Halo: Legends]]'' pays homage to this level. Both the level and the episode depict a Spartan and a team of ODSTs in their attempt to kill a Prophet. | ||
| Line 308: | Line 370: | ||
*This is the only level by default in ''Halo 2'' that you start with a Rocket Launcher. | *This is the only level by default in ''Halo 2'' that you start with a Rocket Launcher. | ||
*You can see the [[Sentinel Wall]] in the distance, implying that the area is pretty close to the [[Library (Installation 05)|Library]]. | *You can see the [[Sentinel Wall]] in the distance, implying that the area is pretty close to the [[Library (Installation 05)|Library]]. | ||
*This is the last level where John-117 will have the opportunity to drive a vehicle. | *This is the last level where John-117 will have the opportunity to drive a vehicle in ''Halo 2''. | ||
*If you kill the first three Honor Guards inside the building, the beginning cut-scene for Regret will begin. If any are killed outside it, a fourth one will be on the second level, to the right. | *If you kill the first three Honor Guards inside the building, the beginning cut-scene for Regret will begin. If any are killed outside it, a fourth one will be on the second level, to the right. | ||
*It is possible that Sergeant Stacker and Sergeant Banks appear as both an ODST and a Marine in this level. | *It is possible that Sergeant Stacker and Sergeant Banks appear as both an ODST and a Marine in this level. | ||
*For the first time in a game, you can see a [[Kig-yar|Kig-Yar]] using a [[ | *For the first time in a game, you can see a [[Kig-yar|Kig-Yar]] using a [[Okarda'phaa-pattern plasma rifle|Plasma Rifle]] against you. | ||
*When you have cleared the landing zone and the Pelican has arrived with a Warthog and two Marines, one can hear a piece of music that doesn't appear on the soundtrack. | *When you have cleared the landing zone and the Pelican has arrived with a Warthog and two Marines, one can hear a piece of music that doesn't appear on the soundtrack. | ||
*While looking through the caves in the area with the waterfall and creeks, you will see the body of a lone ODST that was armed only with two pistols which may seem somewhat strange since there isn't any evidence of HEVs other than the ones that landed alongside you in the beginning of the level. | *While looking through the caves in the area with the waterfall and creeks, you will see the body of a lone ODST that was armed only with two pistols which may seem somewhat strange since there isn't any evidence of HEVs other than the ones that landed alongside you in the beginning of the level. | ||
| Line 317: | Line 379: | ||
*If you are playing on Legendary, at the beginning of the level, a third Phantom will drop off a squad of four Sangheili. All have active camo, and one is a dark brown Stealth Sangheili. | *If you are playing on Legendary, at the beginning of the level, a third Phantom will drop off a squad of four Sangheili. All have active camo, and one is a dark brown Stealth Sangheili. | ||
*On lower difficulties, a Phantom will drop off some Elites. One will be a Minor Elite with an Energy Sword. | *On lower difficulties, a Phantom will drop off some Elites. One will be a Minor Elite with an Energy Sword. | ||
*If the player does not approach the entrance to the inner structure at the end of the section with the Scorpion, a nav point will eventually appear at the doorway. Grunts will also infinitely spawn during this time. Sitting in the Scorpion and shooting them down for a few minutes is an easy way to beat the par score for this level. | |||
**A group of Grunts and Elites will spawn once the player proceeds toward the doorway. | |||
==Gallery== | ==Gallery== | ||
| Line 324: | Line 388: | ||
File:Ship3.jpg|''Solemn Penance'' comes out of [[Slipstream space|Slipspace]]. | File:Ship3.jpg|''Solemn Penance'' comes out of [[Slipstream space|Slipspace]]. | ||
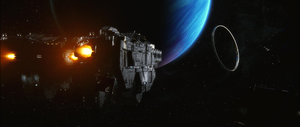
File:Deltahalo.jpg|The ''In Amber Clad'' approaches Installation 05. | File:Deltahalo.jpg|The ''In Amber Clad'' approaches Installation 05. | ||
File:HEV Deployment.jpg|''In Amber Clad''{{'}}s drop pods preparing to launch. | |||
File:Old HW drop pod 2.png|The drop pods burning up in the atmosphere. | |||
File:Old HW drop pod 3.png|HEVs falling onto Delta Halo. | |||
File:H2 Hard Drop.jpg|Shades firing at HEVs as UNSC forces make landfall. | File:H2 Hard Drop.jpg|Shades firing at HEVs as UNSC forces make landfall. | ||
File:Temple on Delta Halo.jpg|A view of the lake, with ''Solemn Penance'' and the Sentinel wall in the distance. | File:Temple on Delta Halo.jpg|A view of the lake, with ''Solemn Penance'' and the Sentinel wall in the distance. | ||
| Line 337: | Line 404: | ||
File:H2A - Make More Noise.jpg|John-117 with an M41 rocket launcher after exiting his HEV. | File:H2A - Make More Noise.jpg|John-117 with an M41 rocket launcher after exiting his HEV. | ||
File:H2AShade.jpg|John-117 engaging Covenant at the landing zone. | File:H2AShade.jpg|John-117 engaging Covenant at the landing zone. | ||
File:H2A-ODSTs.png|Two ODSTs securing landing zone. | File:H2A-ODSTs.png|Two ODSTs securing the landing zone. | ||
File:H2ABridge.jpg|The bridge and the structure that contains its control panel. | File:H2ABridge.jpg|The bridge and the structure that contains its control panel. | ||
File:H2A-ODSTsWarthog.png|ODSTs on a Warthog while the Pelican prepares to deploy a Scorpion. | File:H2A-ODSTsWarthog.png|ODSTs on a Warthog while the Pelican prepares to deploy a Scorpion. | ||
File:H2A - Delta Halo.jpg|The Forerunner ruins leading to | File:H2A - Delta Halo.jpg|The Forerunner ruins leading to the newer structures. | ||
File:H2A-JohnNeedlers.jpg|John-117 dual-wielding Needlers during battle. | File:H2A-JohnNeedlers.jpg|John-117 dual-wielding Needlers during battle. | ||
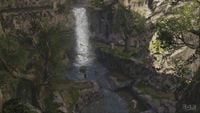
File:H2AWaterfall.jpg|A waterfall in the canyon leading to the newer structures. | File:H2AWaterfall.jpg|A waterfall in the canyon leading to the newer structures. | ||
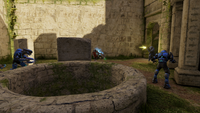
File:H2A ODSTAttack.png|ODSTs fighting several Grunts and Elites. | |||
</gallery> | </gallery> | ||
| Line 349: | Line 417: | ||
==See also== | ==See also== | ||
*[[Delta Halo | *[[Delta Halo vacation]] | ||
*[[Mystery of the Gate|Floating Switch]] | *[[Mystery of the Gate|Floating Switch]] | ||
Latest revision as of 07:07, July 4, 2024
|
Prev: |
|
|
Next: |
|
| Delta Halo | |
|---|---|
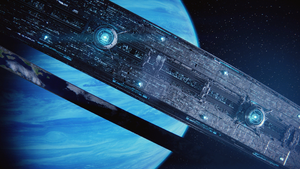
| |
|
Game: |
|
|
File name (?): |
|
|
Player: |
|
|
Date: |
|
|
Location: |
The surface of Installation 05 |
|
Objective(s): |
Progress through the old ruins and jungle to reach the towers at the lake |
|
Par Time: |
00:15:00 (Master Chief Collection) |
|
Par Score: |
10,000 (Master Chief Collection) |
 |
Halopedia has a walkthrough guide for this level; see Delta Halo/Walkthrough. |
| “ | A Covenant army stands between you and Regret. Get to work. | ” |
Delta Halo is the eighth campaign level of Halo 2.
In Halo 2 for Windows Vista, upon completing this level on Normal or higher will reward the player "Delta Halo" Achievement and 30 Gamerscore.
Summary[edit]
After helljumping onto Halo in an HEV, John-117 fought his way through Covenant forces to reach the temple where the Prophet of Regret resides. This is the only Halo 2 level where the player will be aided by ODSTs and is also the first level that the Sangheili Honor Guardsmen are fought.
Transcript[edit]
{Cutscene} {Anniversary Cutscene}
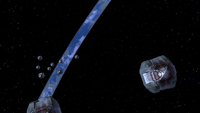
A Slipspace rupture appears in space. Solemn Penance comes out, followed by some debris from New Mombasa and the UNSC In Amber Clad.
Cuts to the bridge of In Amber Clad:
- Commander Miranda Keyes: (lurches forward, grunts) "Report!"
- Remi: "Both engine cores have spun to zero. We're drifting."
- Pascal: "Archer pods are cold. I'll need to re-key the system."
- Commander Keyes: "Do it, and find out where we are."
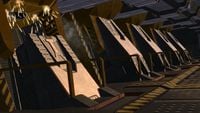
Pan over to a room lined with M8823 drop pods:
- Commander Keyes (COM): "Sorry for the quick jump, Sergeant. You in one piece?"
Johnson is inside a HEV pod, smoking a smashed cigar.
- Sergeant Major Avery Junior Johnson: "I'm good. Chief?"
Cuts to John-117 in another pod.
- Cortana (COM): "We're fine."
- Remi: "Ma'am, there's an object. Coming into view now."
- Commander Keyes: (stares in amazement) "Cortana, what exactly am I looking at?"
In Amber Clad approaches a familiar-looking ringworld.
- Cortana: "That... is another Halo."
- Sergeant Johnson: (chokes) "Say what?!"
- Commander Keyes: "So this is what my father found... " (gazes at Halo) "I thought Halo was some sort of superweapon."
- Cortana (COM): "It is. If activated, this ring will cause destruction on a galactic scale."
In the pod, John-117 looks at Halo on his viewscreen.
- Commander Keyes (COM): "I want all the information you've got on the first Halo. Schematics, topography, whatever. I don't care if I have the clearance or not."
- Cortana (COM): "Yes, ma'am."
- Commander Keyes: "Where's our target?"
- Pascal: "The enemy ship has stopped above the ring, ma'am. We're going to pass right over it."
- Commander Keyes: "Perfect. Given what we know about this ring, it's even more important that we capture the Prophet of Regret. Find out why he came to Earth, why he came here. (COM) Chief, take first platoon. Hard drop, secure a landing zone. Sergeant, load up two flights of Pelicans and follow them in."
- Sergeant Johnson: "Aye aye, ma'am."
Johnson exits his pod.
- Commander Miranda Keyes: "Until I can move and fight, I'm going to keep a low profile. Once you leave the ship, you're on your own."
Johnson knocks twice on the hatch of John's pod as he is walking by, John-117 pounds back in acknowledgment.
- Master Chief Petty Officer John-117: "Understood."
- Pascal: "Over the target in five..."
- Cortana: "Hang on to your helmet!"
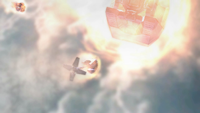
The pods drop, and they hell-jump onto Halo.
- Cortana: (as the parachute deploys) "Mind the bump."
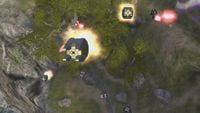
On Halo, an Unggoy and a Kig-Yar notice the pods flaming and streaking down towards them. The Kig-Yar snarls in alarm. He flicks his wrist, and his energy shield snaps on. The Unggoy boards a Shade turret and shoots at the pods, and soon another Shade starts firing. The pods land, John-117 breaks the cover open on his pod, scanning the area with an SMG.
- Cortana: "Could we possibly make any more noise?!"
John-117 takes a Rocket Launcher out of his pod and hefts it.
- Cortana: "I guess so."
{Gameplay}
Helljumpers[edit]
The team comes under fire from the Shades.
- Private First Class Chips Dubbo: "Sir, we gotta neutralize those turrets!"
The team destroys the Shades.
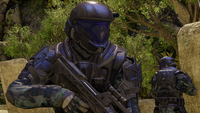
- Gunnery Sergeant Stacker: "Clear this landing zone! The Pelicans are right behind us!"
or
- Staff Sergeant Banks: "Clear this LZ! The Pelicans are right behind us!"
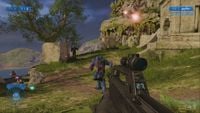
The team attack the Covenant troops around a nearby structure, which includes several Sangheili and a Kig-Yar Sniper. Eventually they clear all hostiles and hold position in the ancient structure.
- Cortana (COM): "Artillery disabled, Sergeant. Landing zone secure... for the moment."
- Sergeant Johnson (COM): "I hear ya. Starting our approach - hang tight."
- Cortana: "Easier said than done. Inbound Phantoms, Chief."
A Phantom drops off troops. The Chief eliminates them.
- Cortana: "Another Phantom, on approach."
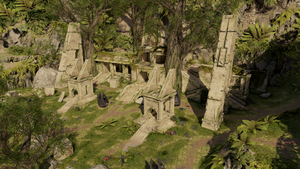
A second Phantom drops off troops. John-117 eliminates them as well.
On Legendary, a third Phantom drops off a squad of three Stealth Sangheili.
- Cortana: "Hold here until the Pelican arrives, Chief."
If the player stays and waits for the Warthog:
- Dubbo or Cortana: "Here comes our ride!"
A Pelican arrives, carrying a Warthog and two Marines, if the ODSTs have been killed.
If the player proceeds up the path without waiting for the Pelican to arrive:
- Cortana: "Let's wait here until our Warthog arrives...unless you'd prefer to walk."
- Sergeant Johnson (COM): "I got a good view comin' in. There's a big building in the middle of this island's lake."
- Cortana (COM): "I saw it too. It looks like a temple. If I were a megalomaniac--and I'm not--that's where I'd be."
The Pelican drops off the Warthog.
- ODST Sergeant (Stacker or Banks): "All right saddle up! We're movin' out!"
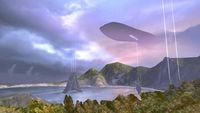
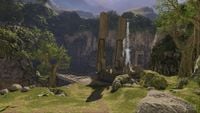
They cross a ridge to reveal a panoramic vista of a lake with the Temple in the middle of it.
- Private First Class Chips Dubbo: "Whoa...it's like a postcard! 'Dear Sarge: kicking ass in outer space, wish you were here.'"
- Sergeant Johnson (COM): "I heard that...jackass!"
Later, John-117 comes across a bridge held by the Covenant.
- Cortana: "The Covenant have control of the bridge ahead. They're going to try to bottle us up on this side of the gorge. The controls to extend the bridge should be in this structure."
- Dubbo or Cortana: "Watch out, Chief! Wraiths on the far side!"
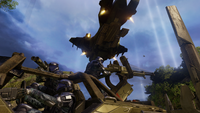
Several Shade turrets open fire on the team and Ghosts soon appear to provide support. Eventually the team eliminate all hostiles, including a lance of Kig-Yar. They enter a structure and eliminate another lance of Covenant in the main room. A hologram of Regret hovers above the center. The Chief activates the switch and the bridge extends over the gorge.
- Dubbo or Cortana: "Good, the bridge is down. Now about those Wraiths..."
- Sergeant Johnson (COM): "Roger that. Armor's on the way."
If the player stares at Regret's hologram, then walks up to the ODST:
- ODST #2: "Isn't that our target? What's he doing? Giving a speech?"
- Cortana: "A sermon, actually. I've been listening to it since we landed. So far, some standard Covenant literature, but I'll translate if he says anything interesting."
If the player keeps staring at the hologram:
- Cortana: "Regret's giving a speech. A sermon, to be exact. So far it's the standard Covenant liturgy, but I'll translate if he says anything interesting."
If you keep staring at Regret's hologram:
- Prophet of Regret (Hologram): "The Forerunners, our most exalted lords, used the seven sacred rings to flee a doomed existence, to escape their endless struggle against the Flood. Long ago, the Prophets and Elites fought an equally fruitless war. Indeed, I suspect we would still be at each others' throats had the Prophets not found evidence of the Forerunners and their Great Journey."
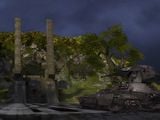
Another Pelican approaches, carrying a Scorpion Tank.
If the player chooses to go on foot, Warthog, or Ghost:
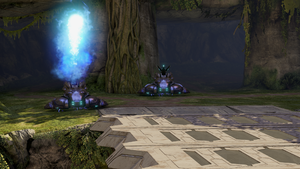
- Cortana: "You don't want the tank? Okay, we'll leave it for the others."
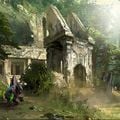
John-117 eliminates the Wraiths as well as a group of Banshees and Ghosts and passes through a multitude of Forerunner ruins. Large numbers of Shade turrets, Ghosts and Covenant infantry fall to the Spartan's onslaught. Eventually the Chief emerges from the ruins.
You Break It, You Buy It[edit]
- Cortana or Marine: "Careful. We're coming up to another structure."
More Shades, Ghosts and ground troops attack the team, but are repelled. As the Chief and his team attack the structure:
- ODST #2: "We got a Pelican coming in! Let's clear a landing zone!"
or
- Dubbo: "Got a Pelican coming in! Let's clear an LZ!"
or
- Cortana: "Pelican inbound! Let's clear a landing zone!"
The Pelican drops some Ordnance pods for the team, as well as at least one Marine. In response to the human presence, more Covenant troops begin to emerge from inside the structure.
- Dubbo or Cortana: "They're all pouring out of the middle! Let's get in there."
A massive battle is fought between the human attackers and the Covenant defenders, but with the help of the Master Chief, the UNSC forces are victorious.
- Cortana: "The Covenant are holed up in the middle of this structure. We need to clear them out."
If the player lingers outside the structure:
- Cortana: "There must be some way to get through this rubble."
As they progress into the building, they eliminate several more Covenant troops. The team soon come across another hologram of the Prophet of Regret.
- Prophet of Regret (Hologram): "In a gesture of peace and reconciliation, the Prophets promised to find the means of the Forerunners' transcendence, and to share this knowledge with the Elites. The Elites promised to defend the Prophets as they searched. A simple arrangement, that has become our binding Covenant!"
- Cortana: "Transcendence, huh? More like mass suicide."
The team press on, engaging another pair of carbine wielding Sangheili and a lance of Unggoy and Kig-Yar.
Off The Rock, Through The Bush, Nothing But Jackal[edit]
The team continues through a narrow cave, and finds more Covenant troops patrolling near a waterfall flowing into a creek.
- Cortana: "You always bring me to such nice places."
The team take the Covenant troops by surprise and easily mow them down. Several Kig-Yar Snipers and a swarm of Yanme'e try to stop the UNSC forces, but fail. A final pair of Sangheili defend the approach to the next area, but they too are killed. The team continues through a narrow crack. They eventually reach the first series of structures in the lake.
- Cortana: "Good, still no word about In Amber Clad on the Covenant battlenet. It's odd, the Covenant knew we made landfall, but they don't seem to consider us a very serious threat. Boy, are they in for a big surprise."
The main structure's upper walkways are patrolled by a pair of Kig-Yar Snipers. A swarm of Yanme'e attempt to stop the humans, but all Covenant troops eventually fall to the Chief and his team.
If the player waits or backtracks:
- Cortana: "This tower cluster should connect to other towers around the lake. Let's get inside."
John-117 enters the main structure, encountering two Sangheili Honor Guardsmen standing next to another hologram of Regret.
- Cortana: "Watch yourself! Honor Guards!"
John-117 kills the Honor Guardsmen (on higher difficulties, more may appear). Fades to white.
Level ends.
Achievements[edit]
The following achievements can be unlocked on Delta Halo across the Windows Vista and Halo: The Master Chief Collection editions of Halo 2: Anniversary. The original Xbox release of Halo 2 did not contain achievement unlocks.
| Halo 2 (Windows Vista) | Halo: MCC (Xbox One, Xbox Series X|S) | Halo: MCC (Steam) | Title | Unlock requirement | Games |
|---|---|---|---|---|---|
| Beat Delta Halo on any difficulty. | Halo: The Master Chief Collection | ||||
| Beat the par time on Delta Halo. | |||||
| Beat the par score on Delta Halo. | |||||
| Activate Terminal #6 on Delta Halo. | |||||
| Find and claim the Envy Skull. | |||||
| Collect the Master Chief toy in Delta Halo. | |||||
| Complete Delta Halo without entering a vehicle on Heroic or Legendary. |
Skull[edit]
- Main article: Skull
The Envy Skull is found on this level.
Note: this is similar to the Hidden Sniper Rifle, which can also be found on Delta Halo. Near the end of the level, after the area with the waterfall and snipers, you will go through a tunnel and come out onto an open ledge. There will be several buildings in the distance and if you still have a Sniper Rifle or Beam Rifle, you can pick off several Unggoy, Kig-Yar, and Sangheili. Below the ledge you are standing on is the main ledge which has weapon drop pods, however if you turn right and go along the wall, you'll reach a point where you can jump up and walk along above the main ledge. This will deposit you on a hidden ledge covered in thick vegetation. On the ledge is a dead ODST and a Sniper Rifle.
Trivia[edit]
Glitches[edit]
- Main article: Glitches
- Because Delta Halo is the first part of a two-part level, your weapons will carry over to Regret, unless one of your weapons is a Rocket Launcher or a pistol. If you finish Delta Halo with a Rocket Launcher or pistol you will start Regret with a Beam Rifle and an SMG.
- Using the Sputnik skull, it is possible to jump into Regret and find The Gate, which is a switch located where the first Gondola would arrive. Upon opening it you will hear the noise the Gondola makes when you start it up. It has been highly controversial between Halo fans because no one knows its purpose although it is most likely to be a place holder for the Gondola itself.
- At the beginning of the level, when you clear the Covenant from the first structure, move on to the bridge area, and get the Scorpion. If you do this, the game will act as if you did not go get the Scorpion, and will spawn a Warthog. Cortana will also say "Let's wait for the Warthog, unless you'd rather walk" on your way back through with the tank.
- When looking directly at the holographic projections of Regret, press the "melee button" and John will charge towards the projection as if you were actually about to melee an enemy unit. This is because, to save time, an alternate model of Regret with no collision model is used for holograms. This also occurs on the holograms viewing the Heretic Leader at the beginning of the level The Oracle, and The Prophet of Truth on the Halo 3 level The Covenant.
- At the starting of the level when you hold the Temple with the Helljumpers where the Kig-Yar and the Unggoy were in the cinematic, climb up the hill, walk around until it says Loading...done. After that, go somewhere low that you can get to the ground without dying. There will be no enemies for the whole level, but you'll also be unable to get to the next level because a door will be locked. Also, all holograms of the High Prophet of Regret will just be of his Gravity Throne, with no Prophet sitting in it. In addition, at the set of buildings before the last checkpoint, you can drive a Ghost up to the area of gondolas in the next level. There will be no enemies. However, this area is inaccessible. You will fall and die instantly.
- When you reach the temple where you must clear a Landing Zone for the Pelican and its drop pods, after you eliminate all enemies that exit the temple, about half the time all surviving ODSTs (only a maximum of 3) will suddenly vanish. Rarely, only one or two will vanish. The Marine reinforcement(s) will never disappear, only the Helljumpers.
- After Cortana says "The controls to extend the bridge should be in this structure", drive your Warthog onto where the bridge extends. When the Wraith comes out and shoots at you go forward very slightly so that the Wraith shot will hit the back of the 'Hog. You will go flying over the gorge and land on the other side. However, even on Easy, you will die upon impact of landing. For a better view, after the Wraith hits the back of your Warthog, get out of it. You'll die the moment you get out, but you'll get a much better view, and sometimes, you'll fly over the next structure. If you are in a Ghost, and haven't yet extended the bridge, if you go where the bridge would be, and the wraith's mortar hits you, its possible that you will be flung over the gorge, and hopefully stay alive. You can continue the level if this happens.
- It is possible to enter the next level (Regret) without activating the cut scene. The Sputnik Skull is not required for this glitch, though it does help. First, go through the level on any difficulty until you reach the part where you are on the bridge with the Weapon Pods that the In Amber Clad dropped for you. Instead of going into the tower, grenade jump on the side of the entrance to the platform above. Kill all the Jackal Snipers. Then, find your way around and jump down. You will be on the other side. There will be Covenant soldiers with most of the Grunts sleeping. They will act as if you were not there unless you bump into them.Continue to where the gondola is and you will see what appears to be a Zanzibar gate switch hovering off the coast of your platform.
- The first hologram of Regret in the courtyard like area in the structure that you come to has a part where you can stand on it as if it was a solid object.
- This is one of the few levels in the game where the Permanent invisibility glitch can be performed.
Easter eggs[edit]
- Main article: Easter eggs
- The Envy Skull is found on this level.
- There are three hidden Rocket Launchers in this level; one on the top of the first structure, which to get to you have to go to the balcony, look to the right, walk on the side of the structure, then crouch jump on top. The second is at the chapter "You Break It, You Buy It." Go to where the swirling ramp is and try to park your Scorpion in a way that you can reach the ledge with the trees. In the trees, there will be a dead ODST with a rocket launcher. The third one is at the structure where the first Pelican drops in reinforcements. You have to go to the corner that is through the tunnel of where the Envy skull is. You have to grenade jump up that corner, walk across the "balcony", and look to the left after the giant piece of broken wall. There is a Marine corpse with a Rocket Launcher.
- The Unggoy with Toys Easter Egg can be found on this level.
- There is a Tri-Gate outside the level.
- If you managed to reach the bridges at the last structure of the level, you can walk up to any of the Covenant forces in that area and none of them will attack you. Instead they will simply stare at you, make a random comment and run off. The Sputnik Skull may be required to achieve this task.
- It is possible to go outside the boundaries of the map near the very beginning. You can explore the entire level up to the part when you get on the gondola, from outside the valley the level takes place in.
- At the Checkpoint "Over The Rock, Through The Bush, Nothing But Jackal", there is a hidden energy sword if you follow the stream from the waterfall.
- Around the area of where the Envy skull is found, in the room where there's a giant block covering the doorway, there is a way of getting in the room and finding two energy swords and two dead Grunts. Just go as if you were going to get the Envy skull, and drop down the right side of the building. In the dark room, there should be two dead Grunts, and two energy swords. And you should also be able to see the block covering up the initial doorway. The block can be removed through the use of grenades.
- A screen displaying orbital defense platforms can be seen on In Amber Clad's bridge. The same screen is also seen on The Armory, Cairo Station, and Elongation.
- The sixth terminal is a Covenant terminal in the room of the Forerunner structure contains the first hologram of Prophet of Regret and the switch which extends the bridge.
References[edit]
- The Babysitter from Halo: Legends pays homage to this level. Both the level and the episode depict a Spartan and a team of ODSTs in their attempt to kill a Prophet.
Mistakes[edit]
- The HEV the player starts from has the interior facing the cliff. It would be impossible for the Chief to jump out from the pod.
Miscellaneous[edit]
- The opening cut scene plays in two parts. If you skip the first part of the cut scene then the music which normally plays as the SOEIV's land (part of Delta Halo Suite) will not play and the cut scene will finish without music. This is likely because normally the music is triggered in the first part of the cut scene and carries over into the second.
- In the first cutscene, the various debris that comes out of the Slipspace portal are actually parts of buildings from New Mombasa that were pulled in during the jump. This is more apparent in the remastered cutscene in the Anniversary edition.
- The Quadwings flying around (at the beginning where the Wraiths are) can be killed with a Beam Rifle, Battle Rifle, Covenant Carbine, or the Scorpion's machine gun; and they will explode into a blur of red blood and die. There are more of these birds in the level Regret and they can also be seen on the Halo 3 multiplayer levels Guardian and Epitaph.
- Originally, Bungie had planned for the level to begin while the Master Chief was still in the Orbital Drop Pod. Two Pelicans would fly by a window in the pod, which the player would then have to save from the turrets seen in the opening cut scene. However, this feature was cut due to bugs and a time shortage.[2]
- This is the only level by default in Halo 2 that you start with a Rocket Launcher.
- You can see the Sentinel Wall in the distance, implying that the area is pretty close to the Library.
- This is the last level where John-117 will have the opportunity to drive a vehicle in Halo 2.
- If you kill the first three Honor Guards inside the building, the beginning cut-scene for Regret will begin. If any are killed outside it, a fourth one will be on the second level, to the right.
- It is possible that Sergeant Stacker and Sergeant Banks appear as both an ODST and a Marine in this level.
- For the first time in a game, you can see a Kig-Yar using a Plasma Rifle against you.
- When you have cleared the landing zone and the Pelican has arrived with a Warthog and two Marines, one can hear a piece of music that doesn't appear on the soundtrack.
- While looking through the caves in the area with the waterfall and creeks, you will see the body of a lone ODST that was armed only with two pistols which may seem somewhat strange since there isn't any evidence of HEVs other than the ones that landed alongside you in the beginning of the level.
- When Regret's hologram is encountered throughout the level, it seems that he is chanting something similar to the Halo theme.
- If you are playing on Legendary, at the beginning of the level, a third Phantom will drop off a squad of four Sangheili. All have active camo, and one is a dark brown Stealth Sangheili.
- On lower difficulties, a Phantom will drop off some Elites. One will be a Minor Elite with an Energy Sword.
- If the player does not approach the entrance to the inner structure at the end of the section with the Scorpion, a nav point will eventually appear at the doorway. Grunts will also infinitely spawn during this time. Sitting in the Scorpion and shooting them down for a few minutes is an easy way to beat the par score for this level.
- A group of Grunts and Elites will spawn once the player proceeds toward the doorway.
Gallery[edit]
Halo 2[edit]
Solemn Penance comes out of Slipspace.
Halo 2: Anniversary[edit]
Sources[edit]
- ^ Halo 2 Editing Kit, game file
H2EK\tags\scenarios\solo\05a_deltaapproach\05a_deltaapproach.scenario - ^ Halo 3 Essentials: Disc 2; Halo 2 Cinematics Commentary.
See also[edit]
| Preceded by The Oracle |
Halo 2 Campaign Missions Delta Halo |
Succeeded by Regret |
| |||||||||||||||||||||||||||||||
