Help:Images: Difference between revisions
From Halopedia, the Halo wiki
m (Text replacement - "\|(right|thumb)(\|[^\]\n]+)?\|(right|thumb)" to "|thumb$2") |
|||
| (14 intermediate revisions by 5 users not shown) | |||
| Line 1: | Line 1: | ||
{{Status|Halopedia}} | |||
This Help page will provide instruction on how to add an image into a Halopedia article. | This Help page will provide instruction on how to add an image into a Halopedia article. | ||
''NOTE: Please make sure your image lines up with Halopedia's [[Halopedia:Media | ''NOTE: Please make sure your image lines up with Halopedia's [[Halopedia:Media policy|media policy]] before you upload it.'' | ||
==Uploading pictures== | |||
All pictures are uploaded to the Halopedia site by using this page, [[Special:Upload]] (You have to have an account and be logged in to upload an image). Pictures should be under 5 megabytes in size. Just press the browse button and find the picture that you've saved on your computer. Select and if possible choose the correct copyright license. Then press the "Upload File" button. The page will take a while to load depending on your internet connection. You can add a summary if you want to, however it is optional. | |||
while | |||
Please avoid uploading copies of images that are already on the wiki. When uploading, you should receive a notification if your image is already on the wiki. | |||
==Adding an image to an article== | ==Adding an image to an article== | ||
===Simplest form=== | |||
[[File:Grunt Ultra H3.jpg]] | |||
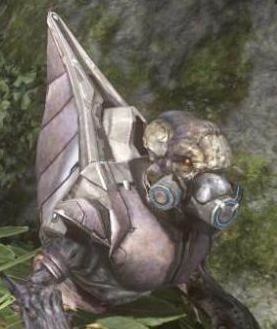
Above is an image of an [[Unggoy]]. To put your own image into an article you just need to add this code: | |||
<pre><nowiki>[[File:Grunt Ultra H3.jpg]]</nowiki></pre> | |||
< | |||
< | |||
< | |||
===Standard image format=== | |||
However the above code offers no formatting options and so all images should follow the [[wikipedia:Extended image syntax|wiki image markup language]]. The wiki markup language will only work if no capital letters are used. Most images on Halopedia should follow this Wiki format: | |||
<pre><nowiki>[[File:Grunt Ultra H3.jpg|thumb|Example image caption.]]</nowiki></pre> | |||
[[File:Grunt Ultra H3.jpg|thumb|Example image caption.]] | |||
<pre><nowiki>[[File:Grunt Ultra H3.jpg|thumb | |||
[[File:Grunt Ultra H3.jpg|thumb | |||
This code will create the image to the right. Looking at the code above we can see that: | This code will create the image to the right. Looking at the code above we can see that: | ||
*[[:File:Grunt Ultra H3.jpg|Grunt Ultra H3.jpg]] is the image file name. When you upload a file a different name will be given to when you use this page to [[Special:Upload|upload]] a file | *[[:File:Grunt Ultra H3.jpg|Grunt Ultra H3.jpg]] is the image file name. When you upload a file a different name will be given to when you use this page to [[Special:Upload|upload]] a file | ||
*'''thumb''': Using "thumb" forces the creation of a thumbnail or smaller picture. | *'''thumb''': Using "thumb" forces the creation of a thumbnail or smaller picture. | ||
*''' | *'''location''' : 'right' (default), 'left', 'center' or 'none'. Determines placement of the image on the page. | ||
*''' | *'''caption''' : The image should always have a short description which would replace the "Example image caption" text on your image | ||
===Advanced image formatting=== | |||
Options can be combined, and vertical bars ("|") are used to separate options from each other. The options can be put in any order. An unknown option is taken as the caption text, but this seems to appear only if <tt>thumb</tt> is specified. If there are two or more unknown options, the last one upstages the rest. | Options can be combined, and vertical bars ("|") are used to separate options from each other. The options can be put in any order. An unknown option is taken as the caption text, but this seems to appear only if <tt>thumb</tt> is specified. If there are two or more unknown options, the last one upstages the rest. | ||
| Line 623: | Line 35: | ||
; <tt>right</tt> | ; <tt>right</tt> | ||
: [[File:Grunt Ultra H3.jpg|right|70px | : [[File:Grunt Ultra H3.jpg|right|70px]]The image is right-aligned, and text floats to the left of the image: <tt><nowiki>[[File:Grunt Ultra H3.jpg|right|70px]]</nowiki></tt> (shown on the right). | ||
; <tt>left</tt> | ; <tt>left</tt> | ||
: [[File:Grunt Ultra H3.jpg|left|70px | : [[File:Grunt Ultra H3.jpg|left|70px]]The image is left aligned, and text floats to the right of the image: <tt><nowiki>[[File:Westminstpalace.jpg|left|70px]]</nowiki></tt> (shown on the left). | ||
; <tt>center</tt> | ; <tt>center</tt> | ||
: The image is centered, and...[[File:Grunt Ultra H3.jpg|center|70px | : The image is centered, and...[[File:Grunt Ultra H3.jpg|center|70px]]the text following the image starts below it: <tt><nowiki>[[File:Grunt Ultra H3.jpg|center|70px]]</nowiki></tt> (shown above). | ||
; <tt>none</tt> | ; <tt>none</tt> | ||
: The image is put at the left, and...[[File:Grunt Ultra H3.jpg|none|70px | : The image is put at the left, and...[[File:Grunt Ultra H3.jpg|none|70px]]the text following does not float to the right (or to the left, obviously), and starts below it: <tt><nowiki>[[File:Grunt Ultra H3.jpg|none|70px]]</nowiki></tt> (shown above). | ||
: [[File:Grunt Ultra H3.jpg|right|50px | : [[File:Grunt Ultra H3.jpg|right|50px]]This option renders a version of the image that's ''[size]'' pixels wide (e.g. <tt><nowiki>[[File:Grunt Ultra H3.jpg|right|50px]]</nowiki></tt> shown on the right). Height is computed to keep [[wikipedia:aspect ratio (image)|aspect ratio]] (i.e. the shape of the image). You can also constrain both dimensions by typing something like ''100x100px''. | ||
; <tt>''size''px</tt> | ; <tt>''size''px</tt> | ||
====Last vertical bar law==== | |||
[[File:Grunt Ultra H3.jpg|70px|right]]What is between the last vertical bar and the closing brackets ("]]"), void or not, is taken as the last option, and works as usual. For instance, when the last option is <tt>right</tt>, the image is right-aligned, and text floats to the left: <tt><nowiki>[[File:Grunt Ultra H3.jpg|70px|right]]</nowiki></tt> (shown on the right). | [[File:Grunt Ultra H3.jpg|70px|right]]What is between the last vertical bar and the closing brackets ("]]"), void or not, is taken as the last option, and works as usual. For instance, when the last option is <tt>right</tt>, the image is right-aligned, and text floats to the left: <tt><nowiki>[[File:Grunt Ultra H3.jpg|70px|right]]</nowiki></tt> (shown on the right). | ||
[[File:Grunt Ultra H3.jpg|thumb|This text is not displayed.|70px|left|]][[File:Grunt Ultra H3.jpg|thumb|This text is displayed.|70px | [[File:Grunt Ultra H3.jpg|thumb|This text is not displayed.|70px|left|]][[File:Grunt Ultra H3.jpg|thumb|This text is displayed.|70px]]In particular, if the last option is the void text (that is, if there is nothing between the last vertical bar and the closing brackets), the caption is not displayed: <tt><nowiki>[[File:Grunt Ultra H3.jpg|thumb|This text is not displayed.|70px|left|]]</nowiki></tt> (shown on the left) and <tt><nowiki>[[File:Grunt Ultra H3.jpg|thumb|This text is displayed.|70px]]</nowiki></tt> (shown on the right). | ||
{{clear}} | |||
====Frame option==== | ====Frame option==== | ||
If you specify a "frame" option the image will not be scaled, and no size specifiers will be in the HTML. The image will be rendered at full size | If you specify a "frame" option the image will not be scaled, and no size specifiers will be in the HTML. The image will be rendered at full size | ||
: [[File:Grunt Ultra H3.jpg|frame| | : [[File:Grunt Ultra H3.jpg|frame|thumb|50px|Grunt.]]With this option, the embedded image is shown with its actual size enclosed by a frame, regardless of the "thumb" or "size" attribute, and the caption, if any, is visible in the frame. Without the options <tt>left</tt>, <tt>center</tt>, and <tt>none</tt>, the image is normally on the right: <tt><nowiki>[[File:Grunt Ultra H3.jpg|frame|thumb|50px|Grunt]]</nowiki></tt>. | ||
; <tt>frame</tt> | ; <tt>frame</tt> | ||
====Inline | ====Inline images==== | ||
With none of the options other than <tt>''size''px</tt> and <tt>''alternate (caption) text''</tt>, an embedded image is rendered inline. | With none of the options other than <tt>''size''px</tt> and <tt>''alternate (caption) text''</tt>, an embedded image is rendered inline. | ||
| Line 660: | Line 71: | ||
[[File:Grunt Ultra H3.jpg|150px|Grunt Ultra]]text text texttext text text text text text [[File:Flood infection.jpg|100px|This is a globe.]] text text text text text text text text text texttext text text text text texttext text text text text texttext text text text text texttext text text text text texttext text text text text text | [[File:Grunt Ultra H3.jpg|150px|Grunt Ultra]]text text texttext text text text text text [[File:Flood infection.jpg|100px|This is a globe.]] text text text text text text text text text texttext text text text text texttext text text text text texttext text text text text texttext text text text text texttext text text text text text | ||
==Image with caption in the center== | ===Image with caption in the center=== | ||
[[File:Grunt Ultra H3.jpg | [[File:Grunt Ultra H3.jpg|thumb|175px|<center>Grunt.</center>]] | ||
Use '''<nowiki>[[File:image name|alignment|type|size|< | Use '''<nowiki>[[File:image name|alignment|type|size|<center>Caption</center>]]</nowiki>''' | ||
For example, '''<nowiki>[[File:Grunt Ultra H3.jpg | For example, '''<nowiki>[[File:Grunt Ultra H3.jpg|thumb|100px|<center>Grunt</center>]]</nowiki>''' produces a caption in the center .'' However, this syntax is not recommended for long captions (for example, captions involving long, descriptive sentences running more than one line), for which the regular image syntax should be used.'' You can also specify the color of the border, like "border:solid grey". | ||
{{clear}} | |||
===Linking to the image description page=== | ===Linking to the image description page=== | ||
If you want to make a link to the description page for an image, use a leading colon before "File:" in an intra-wiki link, like this: <nowiki>[[:File:Grunt Ultra H3.jpg|Grunt]]</nowiki> which yields: [[:File:Grunt Ultra H3.jpg|Grunt]] | If you want to make a link to the description page for an image, use a leading colon before "File:" in an intra-wiki link, like this: <nowiki>[[:File:Grunt Ultra H3.jpg|Grunt]]</nowiki> which yields: [[:File:Grunt Ultra H3.jpg|Grunt]] | ||
| Line 681: | Line 91: | ||
File:Wiki.png|[[John-117|Links]] can be put in captions. | File:Wiki.png|[[John-117|Links]] can be put in captions. | ||
File:Wiki.png | File:Wiki.png | ||
File:Wiki.png|Full MediaWiki<br | File:Wiki.png|Full MediaWiki<br>[[syntax]] can be used… | ||
</gallery> | </gallery> | ||
</pre> | </pre> | ||
| Line 693: | Line 103: | ||
File:Wiki.png|[[John-117|Links]] can be put in captions. | File:Wiki.png|[[John-117|Links]] can be put in captions. | ||
File:Wiki.png | File:Wiki.png | ||
File:Wiki.png|Full MediaWiki<br | File:Wiki.png|Full MediaWiki<br>syntax can be used… | ||
</gallery> | </gallery> | ||
| Line 699: | Line 109: | ||
==Images with links== | ==Images with links== | ||
:'' | :''This does not work in articles!'' | ||
You can alternatively use a link address to post | You can alternatively use a link address to post images in your [[Halopedia:User space|user space]]. You can do this by finding the image you want to use, and then copying the image address and posting it on the page. | ||
*http://lindyspringsystems.com/wp-content/uploads/2014/01/test.jpg - <nowiki>http://lindyspringsystems.com/wp-content/uploads/2014/01/test.jpg</nowiki> | *http://lindyspringsystems.com/wp-content/uploads/2014/01/test.jpg - <nowiki>http://lindyspringsystems.com/wp-content/uploads/2014/01/test.jpg</nowiki> | ||
{{Halopedia HAGP}} | {{Halopedia HAGP}} | ||
[[Category:Help]] | |||
[[Category:Help | |||
Revision as of 13:54, April 12, 2023
This Help page will provide instruction on how to add an image into a Halopedia article.
NOTE: Please make sure your image lines up with Halopedia's media policy before you upload it.
Uploading pictures
All pictures are uploaded to the Halopedia site by using this page, Special:Upload (You have to have an account and be logged in to upload an image). Pictures should be under 5 megabytes in size. Just press the browse button and find the picture that you've saved on your computer. Select and if possible choose the correct copyright license. Then press the "Upload File" button. The page will take a while to load depending on your internet connection. You can add a summary if you want to, however it is optional.
Please avoid uploading copies of images that are already on the wiki. When uploading, you should receive a notification if your image is already on the wiki.
Adding an image to an article
Simplest form

Above is an image of an Unggoy. To put your own image into an article you just need to add this code:
[[File:Grunt Ultra H3.jpg]]
Standard image format
However the above code offers no formatting options and so all images should follow the wiki image markup language. The wiki markup language will only work if no capital letters are used. Most images on Halopedia should follow this Wiki format:
[[File:Grunt Ultra H3.jpg|thumb|Example image caption.]]
This code will create the image to the right. Looking at the code above we can see that:
- Grunt Ultra H3.jpg is the image file name. When you upload a file a different name will be given to when you use this page to upload a file
- thumb: Using "thumb" forces the creation of a thumbnail or smaller picture.
- location : 'right' (default), 'left', 'center' or 'none'. Determines placement of the image on the page.
- caption : The image should always have a short description which would replace the "Example image caption" text on your image
Advanced image formatting
Options can be combined, and vertical bars ("|") are used to separate options from each other. The options can be put in any order. An unknown option is taken as the caption text, but this seems to appear only if thumb is specified. If there are two or more unknown options, the last one upstages the rest.
Here is the description of the options other than the caption text:
- right
- The image is right-aligned, and text floats to the left of the image: [[File:Grunt Ultra H3.jpg|right|70px]] (shown on the right).

- left
- The image is left aligned, and text floats to the right of the image: [[File:Westminstpalace.jpg|left|70px]] (shown on the left).
- center
- The image is centered, and...the text following the image starts below it: [[File:Grunt Ultra H3.jpg|center|70px]] (shown above).
- none
- The image is put at the left, and...the text following does not float to the right (or to the left, obviously), and starts below it: [[File:Grunt Ultra H3.jpg|none|70px]] (shown above).
- This option renders a version of the image that's [size] pixels wide (e.g. [[File:Grunt Ultra H3.jpg|right|50px]] shown on the right). Height is computed to keep aspect ratio (i.e. the shape of the image). You can also constrain both dimensions by typing something like 100x100px.

- sizepx
Last vertical bar law
What is between the last vertical bar and the closing brackets ("]]"), void or not, is taken as the last option, and works as usual. For instance, when the last option is right, the image is right-aligned, and text floats to the left: [[File:Grunt Ultra H3.jpg|70px|right]] (shown on the right).
In particular, if the last option is the void text (that is, if there is nothing between the last vertical bar and the closing brackets), the caption is not displayed: [[File:Grunt Ultra H3.jpg|thumb|This text is not displayed.|70px|left|]] (shown on the left) and [[File:Grunt Ultra H3.jpg|thumb|This text is displayed.|70px]] (shown on the right).
Frame option
If you specify a "frame" option the image will not be scaled, and no size specifiers will be in the HTML. The image will be rendered at full size
- With this option, the embedded image is shown with its actual size enclosed by a frame, regardless of the "thumb" or "size" attribute, and the caption, if any, is visible in the frame. Without the options left, center, and none, the image is normally on the right: [[File:Grunt Ultra H3.jpg|frame|thumb|50px|Grunt]].
 Grunt.
 - frame
Inline images
With none of the options other than sizepx and alternate (caption) text, an embedded image is rendered inline.
text text text text text text text text text text text text text
[[File:Grunt Ultra H3.jpg|150px|Grunt Ultra]]
text text text text text text text text text text texttext text
[[File:Flood infection.jpg|100px|This is a globe.]]
text text text text text text text text text texttext text text
gives
text text texttext text text text text text  text text text text text text text text text texttext text text text text texttext text text text text texttext text text text text texttext text text text text texttext text text text text text
Image with caption in the center
Use [[File:image name|alignment|type|size|<center>Caption</center>]]
For example, [[File:Grunt Ultra H3.jpg|thumb|100px|<center>Grunt</center>]] produces a caption in the center . However, this syntax is not recommended for long captions (for example, captions involving long, descriptive sentences running more than one line), for which the regular image syntax should be used. You can also specify the color of the border, like "border:solid grey".
Linking to the image description page
If you want to make a link to the description page for an image, use a leading colon before "File:" in an intra-wiki link, like this: [[:File:Grunt Ultra H3.jpg|Grunt]] which yields: Grunt
Image galleries
To make a gallery of Images you can use the following code:
<gallery>
File:Wiki.png
File:Wiki.png|Captioned
File:Wiki.png
File:Wiki.png|[[John-117|Links]] can be put in captions.
File:Wiki.png
File:Wiki.png|Full MediaWiki<br>[[syntax]] can be used…
</gallery>
Which produces:
Captioned
Links can be put in captions.
Full MediaWiki
syntax can be used…

Notice that there are no brackets except for links within captions. Captions are optional. Images are separated by new lines.
Images with links
- This does not work in articles!
You can alternatively use a link address to post images in your user space. You can do this by finding the image you want to use, and then copying the image address and posting it on the page.
 - http://lindyspringsystems.com/wp-content/uploads/2014/01/test.jpg
| |||||||||||