Complex
From Halopedia, the Halo wiki
Template:Multiplayer Map Infobox Template:Article Quote
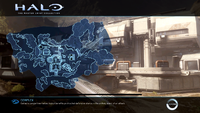
Complex is a multiplayer map featured in Halo 4. It is a medium-sized asymmetrical map, well-suited for both 4v4 and Big Team Battle matches, and it supports a number of objective gametypes in addition to Slayer.
Universe and lore
- Main article: Galileo Base
Formally titled "War Games Map_Set/: 615-3", Complex is holographic reconstruction of Galileo Base, used during UNSC War Games combat simulations. Galileo itself was a makeshift UNSC research facility located on the northeastern coastline of Requiem's largest continent. With the presence of numerous hostile entities on Requiem, ONI rigidly enforced a "Persistent Field Resilience" mandate requiring that all science detachments (1) maintain onsite weapon caches, (2) optimize the site's layout to meet ONI spec for defensive emergencies, and (3) retain an escort of well-trained military personnel.
The base was built around a Forerunner artifact that was in the process of being excavated. The base's central structure is a multilevel building with a tall Forerunner object in the center. The facility appears damaged in at least one location (the building in the center of the map contains broken monitors). Lots of flora are present, the most prominent being the almost asparagus-like trees and the pink-red ferns.
Galileo Base was a critical site during Infinity’s protracted ground campaign on Requiem, against Jul 'Mdama's Covenant in 2558. Although this location was intended to be solely a science facility, ONI's "Persistent Field Resilience" mandate proved well-founded, as the Covenant laid siege to Galileo numerous times, spurring multiple Spartan IV Fireteams into action.[1]
Overview
Layout
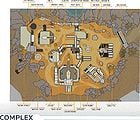
Complex is a mid-to-large asymmetrical map with an emphasis on ranged combat and long sight-lines. The base itself is a compound made up of three large buildings, a half-dozen or so small rooms, and numerous corridors and open walkways. In addition to these, there is another human structure that provides three pillars for cover. The only natural "structure" is a rocky, enclosed tunnel. The map has only one side exposed to the nearby ocean, which players may fall into if they are not paying attention or are knocked off. No large vehicles are present, but a small quantity of Mongooses and Ghosts are provided to the players.
The energy sword and Scattershot are located near the center, by the "Factory". Two sniper rifles spawn at each team's base. The Ghosts and Mongooses spawn at both team's spawn bases.
Strategies
- Be careful while you are on rooftops, as there is rarely any available cover.
- The DMR or battle rifle is advantageous on the map, as they can be used to eliminate enemy snipers from afar and effectively defend the player in close-quarters situations.
- The "Factory" is a good location to snipe, due to its high position.
- Players should avoid driving around the center area, because you become an easy target to snipers.
- Active camo is very useful on this map, as it allows players to avoid snipers or hide while sniping.
- When sniping, constantly move locations before the enemy teams figure out your location.
- A shotgun is effective in the "Factory" location due to the area's close-quarters set-up and tight corners.
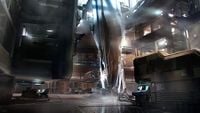
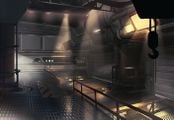
Gallery
Complex Map.
Overhead view of the map.
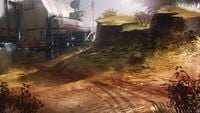
Concept art of Complex.
Concept art of Complex.
More concept art.
More concept art.
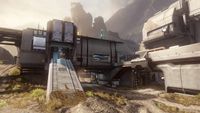
Another view of Complex.

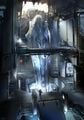
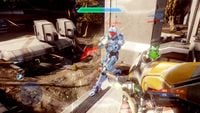
An indoor area on Complex. Note the Forerunner artifact in the background.

A team of SPARTAN-IVs competing in War Games on Complex.
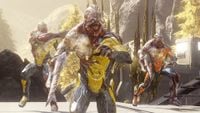
Spartan combat forms in the Flood gametype.
Another area on Complex.


|
Browse more images in this article's gallery page. |


