Ghost of Gbraakon: Difference between revisions
From Halopedia, the Halo wiki
No edit summary |
mNo edit summary |
||
| Line 72: | Line 72: | ||
===Concept art=== | ===Concept art=== | ||
<gallery> | <gallery> | ||
File:HINF_ScrapPileConcept.jpg|Concept art of scrap in the ''Ghost of Gbraakon''{{'}}s | File:HINF_ScrapPileConcept.jpg|Concept art of scrap in the ''Ghost of Gbraakon''{{'}}s hangar bay. | ||
File:HINF Concept GbraakonCargoHold.jpg|More concept art of the | File:HINF Concept GbraakonCargoHold.jpg|More concept art of the hangar bay. | ||
File:HINF Concept ScrapSorter.jpg|Concept art of a scrap sorting device in the | File:HINF Concept ScrapSorter.jpg|Concept art of a scrap sorting device in the hangar bay. | ||
File:HINF_BaseDeploymentConcept.jpg|Concept art of the ''Gbraakon''{{'}}s massive deployment bay. | File:HINF_BaseDeploymentConcept.jpg|Concept art of the ''Gbraakon''{{'}}s massive deployment bay. | ||
File:HINF Concept BaseDrop.jpg|Concept art of prefabricated structured being deployed from the bay. | File:HINF Concept BaseDrop.jpg|Concept art of prefabricated structured being deployed from the bay. | ||
| Line 100: | Line 100: | ||
===Screenshots=== | ===Screenshots=== | ||
<gallery> | <gallery> | ||
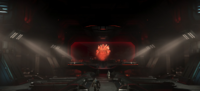
File:HINF Warship G Mission Start.png| | File:HINF Warship G Mission Start.png|Hangar One of the ''Gbraakon''. | ||
File:HINF Banished Drop Pods.png|The ''Gbraakon''{{'}}s deployment bay. | File:HINF Banished Drop Pods.png|The ''Gbraakon''{{'}}s deployment bay. | ||
File:HINF DreadnoughtDropBayHolo.png|A hologram displaying the ''Gbraakon''{{'}}s deployment bay. | File:HINF DreadnoughtDropBayHolo.png|A hologram displaying the ''Gbraakon''{{'}}s deployment bay. | ||
File:HINF DreadnoughtResearch.png|The MA40 assault rifle being studied onboard the ''Gbraakon''. | File:HINF DreadnoughtResearch.png|The MA40 assault rifle being studied onboard the ''Gbraakon''. | ||
File:HINF Ghost Bridge.png|The bridge of the ''Gbraakon''. | File:HINF Ghost Bridge.png|The bridge of the ''Gbraakon''. | ||
File:HINF Warship Gbraakon.png| | File:HINF Warship Gbraakon.png|Escharum watches a hologram of ''Ghost of Gbraakon''{{'}}s destruction. | ||
</gallery> | </gallery> | ||
Latest revision as of 05:18, June 22, 2024
| Ghost of Gbraakon | |||||||||||||||||||
|---|---|---|---|---|---|---|---|---|---|---|---|---|---|---|---|---|---|---|---|
 A hologram of Gbraakon. A hologram of Gbraakon.
| |||||||||||||||||||
| Ship history | |||||||||||||||||||
| Banished | |||||||||||||||||||
|
Class: |
|||||||||||||||||||
|
Namesake: |
|||||||||||||||||||
|
Operator: |
|||||||||||||||||||
|
Naval architect: |
|||||||||||||||||||
|
Status: |
Destroyed c. May 28, 2560[4] | ||||||||||||||||||
| |||||||||||||||||||
The Ghost of Gbraakon was a Banished dreadnought in service during the Battle for Zeta Halo.[1]
Operational history[edit]
Battle for Zeta Halo[edit]
- Main article: Battle for Zeta Halo
In late May of 2560, the Ghost of Gbraakon captured Pelican Echo 216 in its stasis beam shortly after Fernando Esparza rescued Master Chief Petty Officer John-117 from where he has been floating in space for six months. As the Pelican was pulled into the Banished warship's interior, the Master Chief jumped out and made his way aboard with the intention of disabling the ship's stasis beam and freeing the Pelican.[3]
Fighting his way through the Ghost of Gbraakon, the Master Chief eventually made his way to the bridge, where he attempted to deactivate the stasis beam. However, he discovered that the system was locked down and that he couldn't disable it without performing a hack into the nearby terminals, which he was unable to do, lacking the skills or an AI companion to help him. Instead, the Master Chief decided to destroy the Ghost of Gbraakon by taking out the two cooling manifolds to the engines, which caused them to overheat. Fighting through more Banished forces, the Master Chief managed to take out the pipes before firing the engines, instantly causing them to overload and the ship began to explode. War Chief Escharum contacted the vessel, demanding to know what's going on, only to be amused to discover that the Master Chief was still alive and responsible. Escharum told him to destroy the ship if he must, but that the Banished would still defeat him in the end. As the ship exploded around him, the Master Chief raced back to the hangar bay where Echo 216, now freed of the stasis beam, was thrown into space when the hangar's security barrier went down. The Master Chief was knocked into space, where the Pelican collected him soon afterwards.[3]
During that time, Escharum and Tremonius watched a hologram of the Ghost of Gbraakon being wracked by explosions as Tremonius was furious about this turn of events as the Master Chief was supposed to be dead, but Escharum felt invigorated instead.[6]
Gallery[edit]

|
Browse more images in this article's gallery page. |
Concept art[edit]
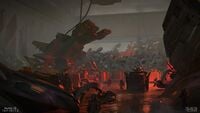
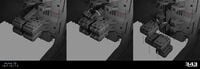
Concept art of scrap in the Ghost of Gbraakon's hangar bay.
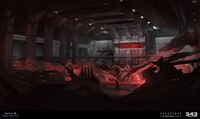
More concept art of the hangar bay.
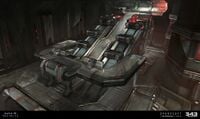
Concept art of a scrap sorting device in the hangar bay.
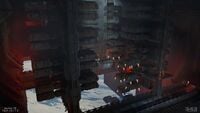
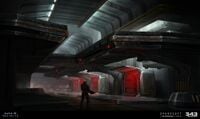
Concept art of the Gbraakon's massive deployment bay.
Concept art of prefabricated structured being deployed from the bay.
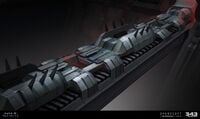
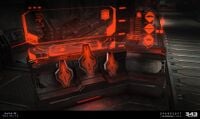
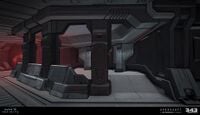
Concept art of a support structure in the deployment bay.
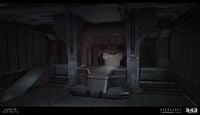
Concept art of the Gbraakon's bridge.
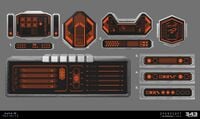
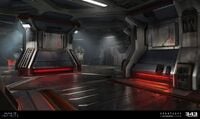
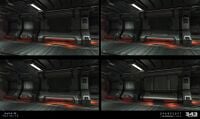
Concept art of various displays seen on the vessel.
Concept art of a console with a holographic display.
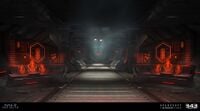
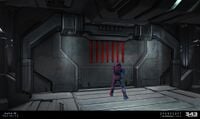
Concept art of a hallway flanked by two holographic displays.
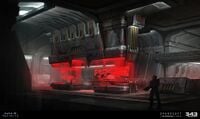
Concept art of a pair of holotanks being used to study various Banished weapons.
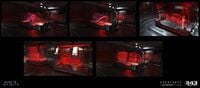
Concept art of various hologram designs for holotanks on the vessel.
More hologram concepts.
Concept art of a room where storage containers are prepared for deploypment.
Concept art of hologram of Atriox on the Ghost of Gbraakon.
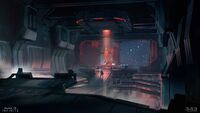
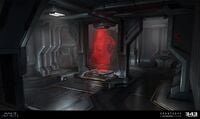
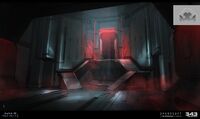
Concept art of the hologram room.
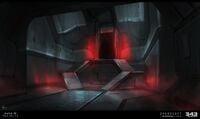
Concept art of the entrance to the hologram room.
Concept art of a door on the vessel.
Concept art of a hallway on the Ghost of Gbraakon.
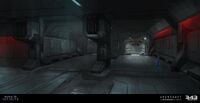
More hallway concept art.
More hallway concept art.
More hallway concept art.
Concept art of a room on the Ghost of Gbraakon that did not make it into the game.
More concept art of this room.


Screenshots[edit]
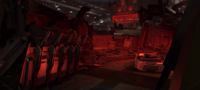
Hangar One of the Gbraakon.
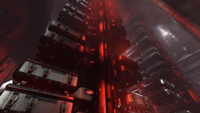
The Gbraakon's deployment bay.
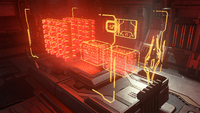
A hologram displaying the Gbraakon's deployment bay.
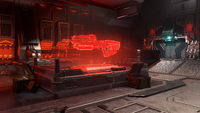
The MA40 assault rifle being studied onboard the Gbraakon.
The bridge of the Gbraakon.
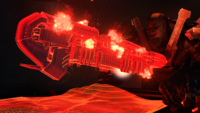
Escharum watches a hologram of Ghost of Gbraakon's destruction.


List of appearances[edit]
- Halo Infinite (First appearance)
Sources[edit]
- ^ a b Halo Waypoint, Canon Fodder - Legendary Endings (Retrieved on Dec 13, 2021) [archive]
- ^ a b c d e f Halo Encyclopedia (2022 edition), page 462
- ^ a b c d Halo Infinite, campaign mission Ringfall: Warship Gbraakon
- ^ Halo Infinite Campaign Gameplay Premiere
- ^ Halo Infinite, Dreadnought in-game model
- ^ Halo Infinite, campaign mission Ringfall: Foundation


