Gephyrophobia: Difference between revisions
From Halopedia, the Halo wiki
BurnerMeen (talk | contribs) m (added category box) |
mNo edit summary |
||
| (36 intermediate revisions by 25 users not shown) | |||
| Line 1: | Line 1: | ||
{{Multiplayer | {{Status|Gameplay}} | ||
{{Multiplayer map infobox | |||
|name=Gephyrophobia | |name=Gephyrophobia | ||
|image=[[File:Halopc gephyrophobia.jpg|300px]] | |image=[[File:Halopc gephyrophobia.jpg|300px]] | ||
|game=''[[Halo PC|Halo: Combat Evolved]]'' | |game=''[[Halo: Combat Evolved (PC port)|Halo: Combat Evolved (PC)]]'' | ||
|devname=<code>gephyrophobia</code>{{Ref/File|Id=HCEEK|HCEEK|HCEEK\tags\levels\test\gephyrophobia\gephyrophobia.scenario}} | |||
|map= | |||
|location=[[Installation 04]] | |location=[[Installation 04]] | ||
|terrain=[[Forerunner]] Bridge | |terrain=[[Forerunner]] Bridge | ||
| | |symmetry=Symmetrical | ||
|playernumber=*4-12 | |||
| | |||
* | |||
|gametypes= | |gametypes= | ||
*CTF | *CTF | ||
*Team Slayer | *Team Slayer | ||
| | |pagegamelabel=CE | ||
}} | }} | ||
{{Article | {{Article quote|Scary, huh?}} | ||
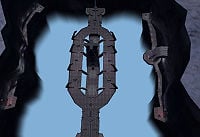
'''Gephyrophobia''' is a [[multiplayer]] map originally exclusive to ''[[Halo: Combat Evolved (PC port)|''Halo: Combat Evolved'' for PC]]'' and ''Halo Mac''. It is included in [[Halo: The Master Chief Collection|''The Master Chief Collection'']]. The map bears some similarities to the ''[[Halo: Combat Evolved]]'' campaign level [[Assault on the Control Room]]. It consists of a large two-level metal bridge expanding over a misty pit, with platforms dug into the canyon walls on either side. | |||
==Overview== | |||
[[File:Halo CE Gephyrophobia.jpg|An overview of the map.|thumb|left]] | |||
This map consists of three levels of play area: the bottom floor of the bridge, the upper floor of the bridge and the two ledges on the side of the canyon overlooking the bridge (connected by [[teleporter]]s which is accessible in each base). In the middle of this map is the main support tower for the bridge. By default, the map provides an array of [[Karo'etba-pattern Ghost|Ghost]]s, [[M12 Warthog|Warthogs]] and [[Type-26 Banshee|Banshee]]s on each of these levels to maneuver around the map. [[Health pack]]s are plentiful, placed strategically around the map to replenish player's health as they fight their way to the opposing team's base. | |||
The level emphasizes control of long-range and power weapons. For example, [[sniping]] and the use of rocket launchers and fuel rods are quite common to repel players and eliminate enemy vehicles. Snipers often make use of the ledges to navigate around and pick their targets. Shotguns are often used in close quarters in an engagement inside a base. | |||
[[ | |||
Popular gametypes played in this map are [[Capture the Flag]], [[Slayer]] and [[Race]]. | |||
== Tactics == | |||
*A common tactic is to rush for the sniper rifles as soon as the match starts, and focus on the ledges to remove opposing snipers. Once so, it would allow the team to advance safely to the opposing team's base (for CTF) or it would provide a good area of control for the sniper's team to dominate a match. | |||
*Another common tactic in CTF is to rush for the Ghost on the lower level of the bridge, infiltrate the opposing team's base with the Ghost, take the flag and run off with the Ghost to score a point. It is best to do this when the base has little to no resistance. If there is resistance, have the rest of the team to distract players out of their base. | |||
*In Race gametype, it is best to take a Warthog over a Ghost for reasons that a Warthog can carry up to three players whereas a Ghost is limited to one. Scoring a lap in a fully-occupied Warthog would net the team three points, whereas a Ghost-driven player would only score one point. Additionally, a Warthog with a gunner can quickly remove Ghost-driven player easily. | |||
*It is possible to land a Banshee on the top of the center support tower, which is an excellent sniping location and has a medkit situated in the center. However, should someone knock off the Banshee while you are on the tower, you will be trapped, unless the shield setting is on 400% then you could climb down the beams connected to the tower and jump to the lower slope connecting the lower bridge to the upper level. Note that it is important to crouch before hitting the slope itself, or you will not survive the fall. | |||
==Trivia== | ==Trivia== | ||
*Gephyrophobia means "fear of bridges". | *Gephyrophobia means "fear of bridges". | ||
*Gephyrophobia is far larger | *Gephyrophobia is far larger than its successor, [[Narrows]], although it shares many similarities. | ||
*The energy beams that reside in and out of the bridge, though seemingly just light, are solid and can be climbed.When shot these beams emit purple electricity. | *The energy beams that reside in and out of the bridge, though seemingly just light, are solid and can be climbed. When shot, these beams emit purple electricity. | ||
==Gallery== | |||
{{Linkbox|gallery=yes}} | |||
<gallery> | |||
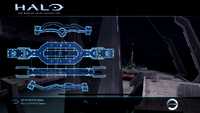
File:HMCC HCE Gephyrophobia Map.png|Gephyrophobia Map. | |||
File:Gephyrophia Red Sniper.png|The Red sniper. | |||
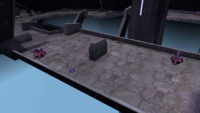
File:Gephyrophobia Shades Sobreescudo.png|[[Mamua'uda-pattern Shade|Shade turrets]] and an [[Overshield]]. | |||
File:Gephyrophobia Banshee Azul.png|The edge of the [[Type-26 Banshee|Banshee]] next to a [[SRS99C-S2 AM sniper rifle|Sniper rifle]]. | |||
File:Gephyrophobia Blue Warthogs.png|A [[M12 Chaingun Warthog|Warthog]] and a [[M12A1 Rocket Warthog|Rocket warthog]] on the blue base. | |||
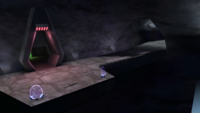
File:Gephyrophobia Blue Base.png|The blue base. | |||
File:Gephyrobia Red Base.png| The red base. | |||
</gallery> | |||
==Sources== | |||
{{Ref/Sources}} | |||
{{ | {{Levels|H1|mode=yes}} | ||
Latest revision as of 08:56, June 30, 2024
| Gephyrophobia | |
|---|---|
| |
| Map overview | |
|
Game: |
|
|
Map file name (?): |
|
| Lore information | |
|
Location: |
|
| Gameplay overview | |
|
Terrain: |
Forerunner Bridge |
|
Map layout: |
Symmetrical |
|
Recommended number of players: |
|
|
Recommended gametype(s): |
|
| “ | Scary, huh? | ” |
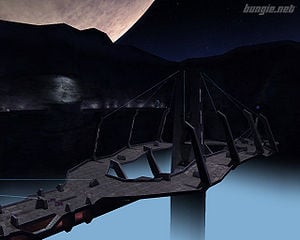
Gephyrophobia is a multiplayer map originally exclusive to Halo: Combat Evolved for PC and Halo Mac. It is included in The Master Chief Collection. The map bears some similarities to the Halo: Combat Evolved campaign level Assault on the Control Room. It consists of a large two-level metal bridge expanding over a misty pit, with platforms dug into the canyon walls on either side.
Overview[edit]
This map consists of three levels of play area: the bottom floor of the bridge, the upper floor of the bridge and the two ledges on the side of the canyon overlooking the bridge (connected by teleporters which is accessible in each base). In the middle of this map is the main support tower for the bridge. By default, the map provides an array of Ghosts, Warthogs and Banshees on each of these levels to maneuver around the map. Health packs are plentiful, placed strategically around the map to replenish player's health as they fight their way to the opposing team's base.
The level emphasizes control of long-range and power weapons. For example, sniping and the use of rocket launchers and fuel rods are quite common to repel players and eliminate enemy vehicles. Snipers often make use of the ledges to navigate around and pick their targets. Shotguns are often used in close quarters in an engagement inside a base.
Popular gametypes played in this map are Capture the Flag, Slayer and Race.
Tactics[edit]
- A common tactic is to rush for the sniper rifles as soon as the match starts, and focus on the ledges to remove opposing snipers. Once so, it would allow the team to advance safely to the opposing team's base (for CTF) or it would provide a good area of control for the sniper's team to dominate a match.
- Another common tactic in CTF is to rush for the Ghost on the lower level of the bridge, infiltrate the opposing team's base with the Ghost, take the flag and run off with the Ghost to score a point. It is best to do this when the base has little to no resistance. If there is resistance, have the rest of the team to distract players out of their base.
- In Race gametype, it is best to take a Warthog over a Ghost for reasons that a Warthog can carry up to three players whereas a Ghost is limited to one. Scoring a lap in a fully-occupied Warthog would net the team three points, whereas a Ghost-driven player would only score one point. Additionally, a Warthog with a gunner can quickly remove Ghost-driven player easily.
- It is possible to land a Banshee on the top of the center support tower, which is an excellent sniping location and has a medkit situated in the center. However, should someone knock off the Banshee while you are on the tower, you will be trapped, unless the shield setting is on 400% then you could climb down the beams connected to the tower and jump to the lower slope connecting the lower bridge to the upper level. Note that it is important to crouch before hitting the slope itself, or you will not survive the fall.
Trivia[edit]
- Gephyrophobia means "fear of bridges".
- Gephyrophobia is far larger than its successor, Narrows, although it shares many similarities.
- The energy beams that reside in and out of the bridge, though seemingly just light, are solid and can be climbed. When shot, these beams emit purple electricity.
Gallery[edit]

|
Browse more images in this article's gallery page. |
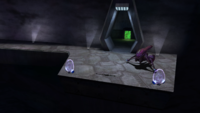
Shade turrets and an Overshield.
The edge of the Banshee next to a Sniper rifle.
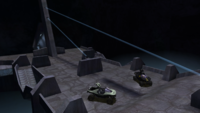
A Warthog and a Rocket warthog on the blue base.
Sources[edit]
- ^ Halo: Combat Evolved Editing Kit, game file
HCEEK\tags\levels\test\gephyrophobia\gephyrophobia.scenario
| |||||||||||||||||||||||
