Halo (Halo: Combat Evolved level): Difference between revisions
From Halopedia, the Halo wiki
No edit summary |
CMDR RileySV (talk | contribs) |
||
| (586 intermediate revisions by more than 100 users not shown) | |||
| Line 1: | Line 1: | ||
{{ | {{Title|Halo}} | ||
{{Status|Gameplay}} | |||
{{ | {{Center|''For other uses of the word Halo, see [[Halo (disambiguation)|here]].''}} | ||
{{ | |||
{{Level infobox | {{Level infobox | ||
|prev=[[The Pillar of Autumn ( | |pagegamelabel=CE | ||
|next=[[Truth and Reconciliation | |prev=''[[The Pillar of Autumn (Halo: Combat Evolved level)|The Pillar of Autumn]]'' | ||
|next=''[[The Truth and Reconciliation]]'' | |||
|name='''''Halo''''' | |name='''''Halo''''' | ||
|image=[[ | |image=[[File:HCEA Halo Loadscreen.png|300px]] | ||
|player=[[Master Chief]] | |game=''[[Halo: Combat Evolved]]'' {{C|''[[Halo: Combat Evolved Anniversary|Anniversary]]''}} | ||
|date= [[2552#19 | |devname=<code>a30</code>{{Ref/File|Id=HCEEK|HCEEK|HCEEK\tags\levels\a30\a30.scenario}} | ||
|player=[[Master_Chief_(gameplay)#Halo:_Combat_Evolved|Master Chief]] | |||
|date= [[2552#September 19, 2552|September 19, 2552]] | |||
|place= On the surface of [[Installation 04]] | |place= On the surface of [[Installation 04]] | ||
| | |objective=Search for other [[Bumblebee escape pod|lifeboats]] and protect the survivors until extraction arrives | ||
|partime=00:20:00 {{C|''Master Chief Collection''-only}} | |||
|parscore=12,000 {{C|''Master Chief Collection''-only}} | |||
'' | |||
| | |||
}} | }} | ||
== | {{Article quote|Seek out surviving Marines and help them fight the Covenant.}} | ||
'''Halo''' is the second [[campaign]] level in ''[[Halo: Combat Evolved]]''. Set on the morning of [[2552#September|September 19, 2552]], it gives the player the first "on the ground" view of [[Installation 04]]. As the only survivor from the [[Bumblebee escape pod]] crash, [[John-117]] fights against the marauding Covenant forces, while searching for and rescuing other survivors from the ''Pillar of Autumn''. This is the first level in the game in which [[Kig-yar]] and [[Type-26 Banshee|Banshees]] are encountered. | |||
==Transcript== | |||
===Flawless Cowboy=== | |||
[http://www.youtube.com/watch?v=jLs-kxs0pek '''{''Original Cutscene''}'''] | |||
[http://www.youtube.com/watch?v=YYR0SVWJPmA '''{Anniversary ''Cutscene''}'''] | |||
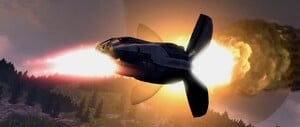
[[File:1207190798 Lp-airbrakes1.jpg|thumb|300px|[[Bumblebee]] lifeboat [[Lima Foxtrot Alpha 43|LFA-43]], moments before crashing.]] | |||
*'''[[Cortana]] (COM)''': "We're coming in too fast!" | |||
''The Bumblebee flies over a cliff, trailing smoke. Switch to [[John-117]]'s point of view as he watches from inside as the craft heads towards the ground at an alarming rate.'' | |||
*'''Bumblebee Pilot''': "Damn! Air brake failure! They blew too early! I'm losin' her. Brace for impact!" | |||
''A violent crash is heard. Fade to white.'' | |||
'''{''Gameplay''}''' | |||
*'''Cortana''': "Chief? Chief! Can you hear me? At last! Are you alright? Can you move?"'' | |||
''All of the Marines sit dead on their chairs. A few of the bodies rest outside of the lifepod. Weapons and ammunition scatter around the pod's exit. The Master Chief exits the [[bumblebee escape pod|lifepod]].'' | |||
*'''Cortana''': ''(quietly)'' "The others...the impact. There's nothing we can do." | |||
* | |||
''If the player heads to the waterfall's direction:'' | |||
*'''Cortana''': "I'm reading thousands of types of flora. The ring's ecosystem is incredibly sophisticated." | |||
''The Chief approaches the bridge, the only way deeper into the valley:'' | |||
*'''Cortana''': "Warning! I've detected multiple [[Taaku Xur-pattern Spirit|Covenant drop ships]] on approach. I recommend moving into those hills. If we're lucky, the [[Covenant Empire|Covenant]] will believe that everyone aboard this lifeboat died in the crash." | |||
''As the Chief reach the other side of the bridge, a Spirit dropship flies over him.'' | |||
*'''Cortana''': "Alert! Covenant Dropship inbound! They must be looking for survivors. I recommend immediate evasion!" | |||
''If the player lingers near the crashed lifepod:'' | |||
*'''Cortana''': "Alert! Covenant dropship has detected us, here they come." | |||
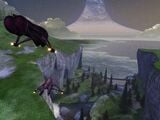
''A Covenant Spirit dropship lands and drops off a Covenant [[lance]]. Two [[Type-26 Banshee|Banshee]] fighters patrol the area. The Chief either eliminates or evades the dropped Covenant troops and proceeds through a canyon.'' | |||
*'''Cortana''': "I'm reading a lifeboat beacon over the next hill. We should check to see if there are any survivors." | |||
''The Chief approaches a large structure where a group of stranded [[UNSC Marine Corps|Marines]] are battling the Covenant. He assists the struggling Marines and eliminates the Covenant troops. Two Marines approach him.'' | |||
*'''[[Private]] [[Bisenti]]''': "Good to see you, sir! Welcome to the party!" | |||
''or'' | |||
*'''Private Bisenti''': "Good to see you, sir! I thought we were the only ones to make it off of the ''[[UNSC Pillar of Autumn|Pillar of Autumn]]''!" | |||
''or'' | |||
*'''Private Bisenti''': "Thank God you're here, Master Chief. I thought we were in real trouble." | |||
*'''[[Staff Sergeant]] [[Avery Junior Johnson]]''': ''(sighs)'' "It's a mess, sir. We're scattered all over this valley. We called for evac, but until you showed up, I thought we were cooked." | |||
*'''Cortana''': "Don't worry, Sergeant. We'll stay here until evac arrives." | |||
*'''Private [[Manuel Mendoza]] (COM)''': "Heads up! I got a Covenant dropship headin' in, over here!" | |||
''The Chief heads behind the structure to deal with the Covenant forces.'' | |||
*'''Mendoza (COM)''': "Look sharp! Covenant dropship on approach! I could use some help over here!" | |||
''The UNSC forces deal with the next wave.'' | |||
*'''Mendoza (COM)''': "Uh-oh, another bandit droppin' in behind us! They're tryin' to flank us!" | |||
''If all of the Marines are dead:'' | |||
*'''Cortana''': "We couldn't save them... I recommend to stay here and wait for extraction." | |||
''If the player begin to leave the area:'' | |||
*'''Cortana''': "Where are you going? The lifeboat beacon is our only chance to getting reunited with the rest of the crew, we need to stay with it." | |||
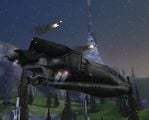
''After a few more waves of Covenant, a Pelican dropship appears from the cliffs.'' | |||
*'''Flight Captain [[Carol Rawley]] ([[COM]])''': "This is [[D77-TC Pelican|Pelican]] [[Echo 419]]. Anybody read me? Repeat: any [[United Nations Space Command|UNSC]] personnel, respond." | |||
*'''Marine or Cortana (COM)''': "Roger, Echo 419. This is [[Fire Team Charlie]]. We read you. Is that you, Foehammer?" | |||
''Or'' | |||
*'''Johnson (COM)''': "Roger, Echo 419. This is [[Fire Team Charlie]]. We read you, five by five. Is that you, Foehammer?" | |||
*'''Rawley (COM)''': "Roger, Fire Team Charlie. Good to hear from ya!" | |||
*'''Marine or Johnson (COM)''': "If you're not too busy, Foehammer, we could use a lift. We have survivors to transport to the [[Command Shuttle]]." | |||
''Or'' | |||
*'''Cortana (COM)''': "Foehammer, we need transportation to the Command Shuttle." | |||
''' | *'''Rawley (COM)''': "I'm on my way." | ||
''' | *'''Cortana''': "Look, more lifeboats! They're coming in fast. If those lifeboats make it down, the Covenant are going to be right on top of them. (COM) Foehammer, we need you to disengage your [[M12 Light Reconnaissance Vehicle|Warthog]]. The Master Chief and I are going to see if we can save some soldiers." | ||
''The Pelican deploys its Warthog.'' | |||
''' | *'''Rawley (COM)''': "Roger, Cortana. Okay, Charlie Team, Warthog deployed. Saddle up and give 'em hell!" | ||
( | *'''Cortana (COM)''': "Roger, Foehammer. Stand by to evac survivors and transport them to safety." | ||
''' | *'''Rawley (COM)''': "That's affirmative. Echo 419 staying on station. Foehammer out." | ||
'' | *'''Cortana''': "The Master Chief and I need some backup, can you spare a few men?" | ||
''' | *'''Johnson''': "Sure, Cortana. All right ladies, volunteers step up on the double! The rest of you, get to the dropship." | ||
'' | ''Or'' | ||
''' | *'''[[Private First Class|PFC]] [[M. Fitzgerald]]''': "Sure, Cortana. All right, who's in? Volunteers step up on the double! The rest of you, get to the dropship." | ||
'' | ''One marine stays behind to accompany the Chief. The other survivors get aboard the Pelican which takes off.'' | ||
'' | ''If the player walks away from the dropped Warthog towards the distant cave:'' | ||
'' | *'''Cortana''': "We'll need that Warthog if we want to get to the other lifeboats in time." | ||
'' | ''If the player explores the area on foot or delays for more than five minutes:'' | ||
'' | *'''Cortana''': "Survivors would probably stick close to their emergency beacons." | ||
'' | ''A [[Navigation point]] appears on the distant cave.'' | ||
''' | *'''Cortana''': "We need to find where each lifeboat has landed." | ||
''' | ''The Chief's Warthog approaches a large cave structure.'' | ||
'' | *'''Cortana''': "This cave is not a natural formation. [[Forerunner|Someone]] built it, so it must lead somewhere." | ||
''' | ''The Chief drives into the cave.'' | ||
'' | *'''Cortana''': "I've hacked into the [[proselytization network|Covenant battlenet]]. They're actually broadcasting tactical data on unencrypted channels! We should show them who they're dealing with. Master Chief, I'm going to use your [[MJOLNIR Powered Assault Armor|suit]]'s transponder system to monitor their chatter." | ||
'' | ''After navigating the tunnels, the Chief emerges in a large cavern, with a chasm dividing the floor into two halves. There is no visible way to cross. Covenant forces occupy his side of the cavern. He kills all the Covenant present.'' | ||
'' | *'''Cortana''': "There must be some mechanism to cross this cavern. Look for a control panel or switch." | ||
'' | ''The Chief ascends to a balcony, kills the [[Sangheili]] he encounters, finds a control panel, and activates it.'' | ||
''' | [http://www.youtube.com/watch?v=geOTzgRmcqQ '''{''Original Cutscene''}'''] | ||
[http://www.youtube.com/watch?v=_2RHz5T4G2A '''{Anniversary ''Cutscene''}'''] | |||
'' | ''When the Chief engages the panel, four giant silver beam-generating structures extend across the chasm, and an energy bridge slowly fades into coherence.'' | ||
''' | ('''Note''': The cutscene mentioned will not occur unless the player kills all of the enemies in the area. However, the energy bridge will still activate in gameplay.) | ||
''' | '''{''Gameplay''}''' | ||
'' | ''The Chief crosses the bridge, and navigates through more tunnels.'' | ||
'''Cortana:''' | *'''Cortana''': "New traffic on the Covenant battlenet... a lot more crew made it off the ''Autumn'' than I had predicted - the Captain really gave them hell! If we can find [[Captain (Navy)|Captain]] [[Jacob Keyes|Keyes]] and other survivors, we have a chance to coordinate an effective resistance." | ||
'' | ''The Chief arrives at the exit to the cave.'' | ||
===Reunion Tour=== | |||
[[File:BeamEmitterAnniversary.jpg|thumb|300px|A [[Beacon tower]] in one of Halo's valleys.]] | |||
'' | ''There are three crash sites, and different lines of dialogue are said depending on the order the player visit them in. The conversation between Cortana and Rawley is always said in the order shown here, irrelevant as to which order the player visits the sites in.'' | ||
'' | ''The Chief approaches the rock slide crash site. There are up to [[seven]] Marines that can be saved there.'' | ||
'' | *'''Cortana''': "Survivors detected. Marines are concealed in those rocks." | ||
''' | *'''Marine Sharpshooter''': "Contact! Covenant drop ship, down there!" | ||
'' | ''If the Covenant charges into the rocks:'' | ||
''' | *'''Marine''': "Fall back! Fall back!" | ||
'' | ''Marines will all get on top of the highest rock, where the sniper is.'' | ||
'' | ''If the player leaves the area before evac arrives:'' | ||
'' | *'''Cortana''': "Where are you going? We need to stay with the Marines." | ||
'' | ''The Chief fends off a few waves of Covenant forces.'' | ||
''' | *'''Rawley (COM)''': "''Echo 419'' to Cortana, come in." | ||
*'''Cortana (COM)''': "We read you, ''Echo 419''. We have survivors and need immediate dust-off." | |||
''( | |||
'' | ''This line changes to reflect which two pods the player haven't yet found:'' | ||
'''Cortana:''' | *'''Rawley (COM)''': "Roger, Cortana. On my way. I've spotted additional lifeboats in your area. One near the cliff edge, and another near the head of the river. (''If the player takes first priority to the Rock Slide'') | ||
''or''<br/> | |||
*'''Rawley (COM)''': "One near the rock slide, and another near the head of the river." (''If the player takes the first priority to the Cliff Edge'') | |||
''or'' | |||
*'''Rawley (COM)''': "One near the rock slide, and another near the cliff edge." (''If the player takes first priority to the Head of the River'') | |||
*'''Rawley (COM)''': "Hard to see from my altitude, but it looks like there are more survivors." | |||
''' | *'''Cortana (COM)''': "Acknowledged. We're on our way." | ||
'' | ''If all of the Marines are killed:'' | ||
''' | *'''Cortana''': "No survivors..." | ||
'' | ''If the player dawdles:'' | ||
''' | *'''Cortana''': "We need to find the other two lifeboats." | ||
''' | ''The Chief approaches the river head crash site.'' | ||
'' | *'''Cortana''': "There are some Marines, hiding in the hills above the structure." | ||
''' | ''The Chief makes his way up into the hills where the four live Marines are.'' | ||
'' | *'''Marine''': "You're a sight for sore eyes, Chief. We're in a bad way. We've got wounded here." | ||
'''Cortana | *'''Cortana''': "I'll call in a dropship to pick them up." | ||
'' | ''The Chief defends the survivors from more waves of Covenant drop ships.'' | ||
''' | *'''Rawley (COM)''': "''Echo 419'' to Cortana, Foehammer's on station and ready for another pickup." | ||
''( | *'''Cortana (COM)''': "Affirmative, Foehammer. We're ready for dust off, approach when ready. We're going to look for the last lifeboat, Echo 419, good luck." | ||
'' | ''If all Marines are killed:'' | ||
'''Cortana:''' | *'''Cortana''': ''(bitterly)'' "They're all dead." | ||
[[File:WarthogRescueCEA.jpg|thumb|300px|The Chief engages Covenant infantry on a [[M12 Force Application Vehicle|Warthog]].]] | |||
'' | ''The Chief leaves the second lifeboat, searching for the third and the last lifeboat.'' | ||
'' | *'''Cortana''': "Warning! I've picked up reports that the Covenant have located and secured the ''Pillar of Autumn's'' crash site. The good news is the Captain's still alive. The bad news is that the Covenant has captured the entire surviving command crew. Let's hurry and find the final lifeboat, so we can link up with the rest of the survivors." | ||
'' | ''The Chief approaches a lifeboat near the river. There are no bodies nearby.'' | ||
''' | *'''Cortana''': "Lifeboat detected. No sign of survivors..." | ||
'' | *'''Fitzgerald''': "This lifeboat is trashed, Chief. There are weapons and supplies but...no bodies." | ||
''' | ''or'' | ||
'' | *'''Fitzgerald''': "The lifeboat's totaled, sir. There are weapons and supplies everywhere, but I can't find any bodies. Maybe somebody made it out of here alive." | ||
''' | ''or'' | ||
'' | *'''Fitzgerald''': "What a mess! The weapons lockers must have broken open. There are weapons and supplies all over the place. Where's the bodies, though?" | ||
'' | ''The Chief crests a hill and sees a structure on the cliff's edge.'' | ||
'' | *'''Cortana''': "Maybe they took cover in that structure. Let's check it out." | ||
'' | ''If the player leaves the area before finding the survivors:'' | ||
'' | *'''Cortana''': "We should search the interior of those structures before we leave." | ||
'' | ''The Chief locates a way into the structure, where he finds up to five Marines and naval crewmen battling the Covenant. He assists them in killing the Covenant forces.'' | ||
''' | *'''Cortana''': "I've called for evac." | ||
'' | *'''Marine''': "Roger that. Marines! Assemble for evac, pronto!" | ||
'' | ''If all of the Marines and techs are killed:'' | ||
''' | *'''Cortana''': ''(sadly)'' "We weren't able to save any of the Marines. A one hundred percent casualty rate." | ||
''' | ''or'' | ||
'' | *'''Cortana''': "Dead. They're all dead. Get to the drop ship and let's get back to base." | ||
'' | ''If there are still Covenant in the area when the player emerges from the structure:'' | ||
''' | *'''Cortana''': "We should secure the area before the drop ship arrives." | ||
'' | ''The Chief mops up the last of the Covenant in the immediate area.'' | ||
'''Cortana | *'''Cortana (COM)''': "That's the last of them." | ||
*'''Rawley (COM)''': "Roger that. I'm on my way." | |||
'' | *'''Cortana''': "New traffic on the Covenant battlenet. I've found Captain Keyes! He's being held on a Covenant [[Ket-pattern battlecruiser|cruiser]], the ''[[Truth and Reconciliation]]'', a ship I disabled before we abandoned the ''Autumn''. The ''Truth and Reconciliation'' touched down on a desert plateau roughly three hundred kilometers up-spin." | ||
''I | |||
''Echo 419 arrives.'' | |||
*'''Cortana''': "There's our ride. Get aboard, and let's get out of here." | |||
*'''Rawley (COM)''': "Welcome aboard, Master Chief. Ready for dust-off." | |||
''The Chief climbs on board the Pelican.'' | |||
*'''Cortana''': "We should move out, [[Lieutenant]]. And then we'll need your help on our rescue mission." | |||
[[File:PelicanCliffCEA.png|thumb|300px|''[[Echo 419]]'' evacuates survivors from the valleys of Halo.]] | |||
[http://www.youtube.com/watch?v=nVW-t1L9Cmo '''{''Original Cutscene w/ All Alternatives''}'''] | |||
[http://www.youtube.com/watch?v=l4HgwCrdvfk '''{Anniversary ''Cutscene Alternative 1''}'''] | |||
[http://www.youtube.com/watch?v=dyquzMuvktI '''{Anniversary ''Cutscene Alternative 2''}'''] | |||
[http://www.youtube.com/watch?v=0_VoMl6FD3A '''{Anniversary ''Cutscene Alternative 3''}'''] | |||
Echo 419 ''flies away from the area.'' | |||
''Fade to black.'' | |||
''Level ends.'' | |||
==Achievements== | |||
The following [[achievement]]s can be unlocked on Halo across the [[Xbox 360]] and ''[[Halo: The Master Chief Collection]]'' editions of ''Halo: Combat Evolved Anniversary''. The original [[Xbox]] and [[Halo: Combat Evolved (PC port)|PC]] and [[Halo: Combat Evolved for Macintosh|Macintosh]] releases of ''Halo: Combat Evolved'' did not contain achievement unlocks. | |||
{| class="wikitable" | |||
|- | |||
! scope="col" style="width:135px;text-align:center;" |'''''Halo: Combat Evolved Anniversary'' (Xbox 360)''' | |||
! scope="col" style="width:135px;text-align:center;" |'''''Halo: MCC'' (Xbox One, Xbox Series X|S)''' | |||
! scope="col" style="width:135px;text-align:center;" |'''''Halo: MCC'' (Steam)''' | |||
! scope="col" style="width:175px;height:20px;text-align:center;" |'''Title''' | |||
! scope="col" style="width:350px;height:20px;text-align:center;" |'''Unlock requirement''' | |||
! scope="col" style="width:200px;height:20px;text-align:center;" |'''Games''' | |||
|- | |||
|[[File:HCEA Achievement Halo.png|center|64px]] | |||
|[[File:HTMCC HCEA Achievement Halo.png|center|114px]] | |||
|[[File:HTMCC HCEA Achievement Steam Halo.jpg|center|64px]] | |||
|<center>'''[[Halo (achievement)|Halo]]'''</center> | |||
|Beat Halo on any difficulty. | |||
|<center>''[[Halo: Combat Evolved Anniversary]]''<br/>''[[Halo: The Master Chief Collection]]''</center> | |||
|- | |||
|[[File:HR Achievement No-Fly Zone.png|center|64px]] | |||
|[[File:HTMCC HCEA Achievement No-FlyZone.png|center|114px]] | |||
|[[File:HTMCC Achievement No Fly Zone Steam.jpg|center|64px]] | |||
|<center>'''[[No-Fly Zone]]'''</center> | |||
|Destroy three of the four Banshees on Halo. | |||
|<center>''[[Halo: Combat Evolved Anniversary]]''<br/>''[[Halo: The Master Chief Collection]]''</center> | |||
|- | |||
|[[File:HR Achievement How Pedestrian.png|center|64px]] | |||
|[[File:HTMCC HCEA Achievement HowPedestrian.png|center|114px]] | |||
|[[File:HTMCC Achievement HowPedestrian Steam.jpg|center|64px]] | |||
|<center>'''[[How Pedestrian]]'''</center> | |||
|Complete Halo without entering a vehicle. | |||
|<center>''[[Halo: Combat Evolved Anniversary]]''<br/>''[[Halo: The Master Chief Collection]]''</center> | |||
|- | |||
|<center>N/A</center> | |||
|[[File:HTMCC HCEA Achievement FlyoverCountry.png|center|114px]] | |||
|[[File:HTMCC HCEA Achievement Steam FlyerCountry.jpg|center|64px]] | |||
|<center>'''[[Flyover Country]]'''</center> | |||
|Beat the par time on Halo. | |||
|<center>''[[Halo: The Master Chief Collection]]''</center> | |||
|- | |||
|<center>N/A</center> | |||
|[[File:HTMCC HCEA Achievement GiantHulaHoop.png|center|114px]] | |||
|[[File:HTMCC HCEA Achievement Steam GiantHulaHoop.jpg|center|64px]] | |||
|<center>'''[[Giant Hula Hoop]]'''</center> | |||
|Beat the par score on Halo. | |||
|<center>''[[Halo: The Master Chief Collection]]''</center> | |||
|- | |||
|<center>N/A</center> | |||
|[[File:HTMCC HCEA Achievement Sacrifice.png|center|114px]] | |||
|[[File:HTMCC HCEA Achievement Steam Sacrifice.jpg|center|64px]] | |||
|<center>'''[[Sacrifice (achievement)|Sacrifice]]'''</center> | |||
|Activate [[Terminal (Halo: Combat Evolved Anniversary)|Terminal]] 2 on Halo. | |||
|<center>''[[Halo: The Master Chief Collection]]''</center> | |||
|- | |||
|<center>N/A</center> | |||
|[[File:HTMCC HCEA Achievement SkulltakerMythic.png|center|114px]] | |||
|[[File:HTMCC HCEA Achievement Steam SkulltakerMythic.jpg|center|64px]] | |||
|<center>'''[[Skulltaker Halo: CE: Mythic]]'''</center> | |||
|Find the [[Halo: Combat Evolved Anniversary skulls#Mythic|Mythic Skull]] on Halo. | |||
|<center>''[[Halo: The Master Chief Collection]]''</center> | |||
|- | |||
|<center>N/A</center> | |||
|[[File:HTMCC HCEA Achievement SkulltakerBoom.png|center|114px]] | |||
|[[File:HTMCC HCEA Achievement Steam SkulltakerBoom.jpg|center|64px]] | |||
|<center>'''[[Skulltaker Halo: CE: Boom]]'''</center> | |||
|Find the [[Halo: Combat Evolved Anniversary skulls#Mythic|Boom Skull]] on Halo. | |||
|<center>''[[Halo: The Master Chief Collection]]''</center> | |||
|} | |||
==Production notes== | |||
[[File:HCE BackToBack.jpg|thumb|right|200px|Promotional image of John and a Marine, back-to-back on an early version of the level.]] | |||
{{Main|Development of Halo: Combat Evolved}} | |||
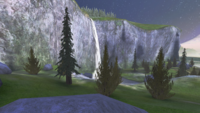
Art Director [[Marcus Lehto]] led the art design of the campaign level ''Halo''. Lehto cited [[wikipedia:Snoqualmie Falls|Snoqualmie Falls]] in Seattle as a major inspiration for the level's natural landscape, especially the first waterfall upon exiting the lifeboat.{{Ref/Film|Id=ReachCommentary|[[Halo: Reach Legendary Edition|''Halo: Reach'' Legendary Edition]] Developer Commentary}} The second half of the level was inspired by the terrain seen in the [[Halo announcement trailer|MacWorld ''Halo'' announcement trailer]]. According to [[Paul Bertone]], the level design determined the direction for the game engine, which needed to support the wide-open terrain and high density of gameplay. Artist Chris Lee modelled the beam emitters seen throughout the level. Designer [[Jaime Griesemer]] was responsible for the level design.{{Ref/YouTube|Id=IGN|9ndZbg8Mr-Q|IGN|Halo: Combat Evolved Devs React to Speedrun (Martin O’Donnell, Marcus Lehto)}} | |||
[[Jen Taylor]], the voice actress of Cortana, also voiced the lifeboat pilot at the beginning of the level.{{Ref/Film|Id=Commentary|[[Halo 3 Legendary Edition|''Halo 3'' Legendary Edition]], Halo: Combat Evolved developer commentary}} | |||
== | Cortana's line "This cave is not a natural formation" is ridiculed by many members of [[Bungie]] and many fans due to its blatant obviousness.{{Ref/Reuse|Id=Commentary}} Originally, the cave to which Cortana refers looked natural, though Cortana could tell that it was not; due to time constraints, the cave was changed to look artificial near the end of the level's development, and the line was kept.{{Ref/Reuse|Id=ReachCommentary}} (Ultimately, the line would be ridiculous regardless of how the cave looked; since it was located on a clearly artificial megastructure, no geological features upon its surface would be natural.) The statement serves as the namesake of a chapter title in the ''[[Halo: Reach]]'' level ''[[The Package]]'', in which [[Noble Team]] retrieves a fragment of Cortana from a [[Babd Catha Forerunner complex|subterranean Forerunner complex]]. The dialogue would be referenced in other Microsoft games. In the ''[[Gearsofwar:Gears of War 2|Gears of War 2]]'' level ''Disturbing Revelations'', upon approaching a subterranean Locust structure, [[Gearsofwar:Dominic Santiago|Dominic Santiago]] says, "I think it's safe to say that's not a natural cave formation." In ''[[Wikipedia:Forza Horizon 4|Forza Horizon 4]]'', upon approaching a tunnel in the Pillar of Autumn showcase race, Cortana says, "This cave is not a natural formation." | ||
In addition to introducing [[M. Fitzgerald]] as the Marine manning the Warthog dropped off by ''Echo 419'', the release of ''[[Halo: The Flood]]'' has also introduced two minor discrepancies into the canon: | |||
*During the initial dialogue exchange with Foehammer, Cortana mentions a command shuttle to Foehammer, though the actual meeting point for the UNSC forces is [[Alpha Base (Installation 04)|Alpha Base]], though it is possible that she was referring to the command crew's lifeboat. | |||
*At the end of the level, Cortana says, "We should move out, Lieutenant", even though Carol Rawley is a captain. It is possible that she was talking to Rawley's copilot, [[Frye|Lieutenant Frye]], though this seems inconsistent with the rest of the game, as Cortana exclusively communicates with Captain Rawley aboard ''Echo 419''. | |||
Designer Paul Bertone considered this level as the iconic ''Halo'' level which defined the sense of mystery and explorative feeling.{{Ref/Reuse|Id=IGN}} The environment of this level would be referenced in the later games. The environment of this level served as inspiration for the ''Halo 3'' multiplayer map ''[[Valhalla]]'' and ''[[Halo: Reach]]'' map ''[[Forge World]]'', both of which featured similar terrains with beam emitters and waterfalls. ''Valhalla'' was also remade into ''[[Ragnarok]]'' in ''[[Halo 4]]''. Furthermore, the cliff edge section of this level was recreated as the [[Firefight]] map ''[[Installation 04 (map)|Installation 04]]'' in ''Halo: Reach'' ''[[Anniversary Map Pack]]''. In ''[[Halo 5: Guardians]]'', the [[Forge]] canvas ''[[Alpine]]'' also featured a similar terrain. Justin Dinges, the Campaign Art Lead on ''[[Halo Infinite]]'', cited the [[wikipedia:Pacific Northwest|Pacific Northwest]] forest biome as an inspiration for the environment on [[Installation 07]], but noted the biome was chosen as "a deliberate ode to the past" in an allusion to the environment in this ''Halo: Combat Evolved'' level.{{Ref/Site|URL=https://www.halowaypoint.com/en-us/news/inside-infinite-february-2021|Site=Halo Waypoint|Page=Inside Infinite - February 2021}} | |||
==Trivia== | |||
===Easter eggs=== | |||
*In ''Anniversary'', the [[Halo: Combat Evolved Anniversary skulls#Mythic skull|Mythic skull]] can be found behind the large boulder on the right of the waterfall. The [[Halo: Combat Evolved Anniversary skulls#Boom skull|Boom skull]] can be found on the top of the Forerunner tunnel's entrance. | |||
*The [[Terminal (Halo: Combat Evolved Anniversary)#The Terminals|second Terminal]] in ''Anniversary'' can be found in the Forerunner tunnel, at the end of a small alcove under the space that can only be cleared by a jump. | |||
===Glitches=== | |||
*If the player stands under ''Echo 419'' when it lands near the cliff edge, the player will come up through the floor inside the Pelican. The player can then jump through the floor and walk around inside the troop bay, though he will die when the dropship flies away. | |||
*All the Marines and Navy personnel rescued by ''Echo 419'' hold their arms as if they are carrying MA5Bs, even if they are armed with M6Ds or nothing at all. | |||
*Although the Pelican has ten seats, only a total of six Marines will ever board it at a time. The others will stay outside and wander around. | |||
*There is a rarely encountered glitch that causes the Marines at the hillside complex or the rock formation to not board the Pelican. However, the mission will still proceed as though they had. | |||
*Often, at the first lifeboat after ''Echo 419'' comes in to pick up the survivors, at least one of the surviving crew members or marines will simply run into the Pelican and continue to move as if nothing's blocking his path, rather than boarding the Pelican properly as the other AI do. | |||
===Mistakes=== | |||
*Johnson asks for volunteers to accompany the Chief, but sometimes he is the volunteer. | |||
*Because the models for Johnson and [[Stacker]] are used for Marine sergeants in the game, in this level it is possible to have two Johnson or Stacker NPCs accompany the player in the Warthog. | |||
*On this level the model used for the Halo ring in the far distance does not actually meet the terrain. If the player looks at the bottom of the ring, (where it should flow into the ground below the cliffs), the player can see the sky between the ring and the ground, indicating a gap. This can be best seen with the scope on the pistol or sniper rifle found on this level when climbing the hill next to the cliff edge structure. | |||
*In the ''Halo: Combat Evolved Anniversary'' version of the previous level, John pulls a marine with a bandana into the Bumblebee. However, the bandana-wearing marine is nowhere to be found amongst the bodies of the escape pod wreckage. | |||
*While protecting the Marines at the river head crash site, the first Spirit bumps into a cliff as it leaves the area. | |||
*In both versions of the game, only seven bodies, including that of the pilot, are found inside the Bumblebee after the crash. In actuality, nine bodies should have been present. | |||
*On rare occasions, the "Search for last survivors" mission objective will repeatedly show up on the screen and flash. This is common if the player is playing on an Xbox 360. | |||
The | ===References=== | ||
*The level in its entirety was recreated in the [[Halo Mash-Up: Minecraft Evolved]].{{Ref/Site|URL=https://www.halowaypoint.com/en-us/news/halo-mash-up-pack-available-now|Site=Halo Waypoint|Page=Halo Mash-Up Pack Available Now}} | |||
===Miscellaneous=== | |||
*If the player makes any Marines on board Echo 419 turn on him at the end, the player will not be able to board the Pelican until the Marines are all dead or when they start trusting him again. | |||
*If the player goes elsewhere instead of boarding Echo 419 when the last group of Marines have been rescued, the cutscene will soon play regardless the player's location. | |||
*If the player manages to carry out with the level without ever using a Warthog (including the one in the beginning of the level), some of the scripted dialogue and music cues such as the one triggered upon exiting the underground tunnel will not trigger. These instances can be noticed when trying to unlock the "How Pedestrian" achievement. | |||
*If the player enters the structure near the cliff edge and jumps down the shaft that shoots blue energy straight up, or uses a flycam, they will see a blue ball hovering in air when reaching the bottom. This object is used in scripting to generate the energy pulse. | |||
*In the structure near the cliff edge, inside the inner rooms, Marines may accidentally fall into the shaft when crossing the bridge and die. | |||
*Sometimes, a Spirit dropship can be seen in cutscenes if the player did not go through where the Spirit lands and deploys troops during gameplay. | |||
*If the player somehow gets on top of the cliffs during the first part of the level (departing the Bumblebee until entering the underground tunnels), there is a unique scripted trigger volume that activates called "gotohell", which disables all player input permanently, including opening the menu and leaving the game. This is the only area in the entire game that uses this method of preventing the player from escaping the level.{{Ref/File|Halo Editing Kit|Mission\Game data\Trigger volumes\gotohell}} | |||
== | ==Gallery== | ||
===Development images=== | |||
<gallery> | |||
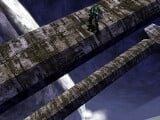
File:HCE TwoBeams.jpg|John on the two beams over the waterfall. | |||
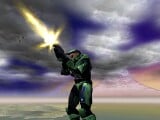
File:HCE ChiefFiringAR Vista.jpg|John fires his [[Assault Rifle (gameplay)|assault rifle]] in front of the vista of the ring. | |||
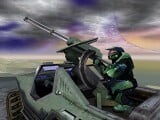
File:HCE ChiefWarthogGunner.jpg|John in a Warthog, in front of the vista of the ring. | |||
File:HCE BackToBack.jpg|John and a Marine on a beacon. | |||
File:HCE ChiefVsJackalMinors.jpg|John fighting the Covenant. | |||
File:HCE ChiefVsGrunt.jpg|John fires at an Unggoy. | |||
File:HCE BeaconCombat.jpg|John fighting the Covenant from a beacon. | |||
File:HCE ChiefFiringAR Beacon.jpg|John being fired upon. | |||
</gallery> | |||
===''Halo: Combat Evolved''=== | |||
<gallery> | |||
File:HCE Menu 02 Halo.png|Preview of the level in ''Halo: Combat Evolved'' menu. | |||
File:HCE-AlphaHalo-BridgeStructure.jpg|A view of the bridges in the opening canyon. | |||
File:HCE SKT-9 Bumblebee Air Brakes.jpg|John's Bumblebee enter Halo's atmosphere. | |||
File:CE Screenshot Halo-PacificNorthwest.png|The canyon in which the level begins. | |||
File:Forkdropship.jpg|A Covenant dropship approaches the Bumblebee crash site. | |||
File:HCE Halo Banshees.jpg|Two Banshees above the canyon. | |||
File:HCE - Halo.jpg|The first beam emitter's location. | |||
File:HCE BeaconTower Firing.jpg|John looking at a beacon tower. | |||
File:Halo final alt1 th.jpg|''[[Echo 419]]'' drops a Warthog for the Chief, as two lifeboats are soaring across the sky. | |||
File:HCE Bumblebees.jpg|Bumblebees crash landing. | |||
File:HCE Chief&Warthog&Pelican.jpg|John standing in front of ''Echo 419'' and a Warthog. | |||
File:HCE Chief&Warthog.jpg|John and a Warthog in a canyon. | |||
File:HCE EliteMajors.jpg|Two Sangheili Majors guarding the underground tunnel. | |||
File:HCE-BridgeControlPanel-screen.png|John activates a light bridge. | |||
File:HCE-HardLightEnergyBridge-screen.jpg|The light bridge in the underground tunnel network. | |||
File:HCE EliteMajor Splatter.jpg|The Warthog splatters a Sangheili Major. | |||
File:Johnson-warthog.jpg|Johnson firing at Covenant on the Warthog turret. | |||
File:Fitzgerald Shooting.jpg|A Banshee swoops down on John's Warthog. | |||
File:HCE WarthogTurret Firing.jpg|UNSC Marines mounted on a Warthog. | |||
</gallery> | |||
===''Halo: Combat Evolved Anniversary''=== | |||
<gallery> | |||
File:HTMCC HCEA Achievement BirthofaSpartan.png|Concept art of the level for ''Halo: Combat Evolved Anniversary''. | |||
File:HCEA Menu 02 Halo.png|Preview of the level in ''Halo: Combat Evolved Anniversary'' menu. | |||
File:HCEA-AlphaHalo-BridgeStructure.jpg|A view of the bridges in the opening canyon. | |||
File:HTMCC-HCEA BumblebeeLFA43.png|The Master Chief's Bumblebee on the surface of the ring. | |||
File:HCEA FireTeamCharlieVsCovies.png|Johnson's fireteam and crewmen defending a beacon tower. | |||
File:HCEA-JackalMinor.png|A Kig-Yar Minor on the surface of the ring. | |||
File:HCEA-Johnson on Halo.jpg|Johnson wielding an assault rifle. | |||
File:AnniversaryHalo.jpg|A Spirit dropship over the first valley. | |||
File:HCEA ChiefGeas.png|John activates a light bridge. | |||
File:Energy Bridge.jpg|The light bridge in the underground tunnel network. | |||
</gallery> | |||
{{ | ==Sources== | ||
{{Ref/Sources}} | |||
== | {{succession box | before = ''[[The Pillar of Autumn (Halo: Combat Evolved level)|The Pillar of Autumn]]'' <br />| title = [[Halo: Combat Evolved|''Halo CE'' Campaign Levels]] | years = '''''Halo''''' |after = ''[[The Truth and Reconciliation]]''}} | ||
{{Levels|H1}} | |||
Latest revision as of 02:38, November 9, 2024
|
Prev: |
|
|
Next: |
|
| Halo | |
|---|---|
| |
|
Game: |
|
|
File name (?): |
|
|
Player: |
|
|
Date: |
|
|
Location: |
On the surface of Installation 04 |
|
Objective(s): |
Search for other lifeboats and protect the survivors until extraction arrives |
|
Par Time: |
00:20:00 (Master Chief Collection-only) |
|
Par Score: |
12,000 (Master Chief Collection-only) |
 |
Halopedia has a walkthrough guide for this level; see Halo (Halo: Combat Evolved level)/Walkthrough. |
| “ | Seek out surviving Marines and help them fight the Covenant. | ” |
Halo is the second campaign level in Halo: Combat Evolved. Set on the morning of September 19, 2552, it gives the player the first "on the ground" view of Installation 04. As the only survivor from the Bumblebee escape pod crash, John-117 fights against the marauding Covenant forces, while searching for and rescuing other survivors from the Pillar of Autumn. This is the first level in the game in which Kig-yar and Banshees are encountered.
Transcript[edit]
Flawless Cowboy[edit]
{Original Cutscene} {Anniversary Cutscene}
- Cortana (COM): "We're coming in too fast!"
The Bumblebee flies over a cliff, trailing smoke. Switch to John-117's point of view as he watches from inside as the craft heads towards the ground at an alarming rate.
- Bumblebee Pilot: "Damn! Air brake failure! They blew too early! I'm losin' her. Brace for impact!"
A violent crash is heard. Fade to white.
{Gameplay}
- Cortana: "Chief? Chief! Can you hear me? At last! Are you alright? Can you move?"
All of the Marines sit dead on their chairs. A few of the bodies rest outside of the lifepod. Weapons and ammunition scatter around the pod's exit. The Master Chief exits the lifepod.
- Cortana: (quietly) "The others...the impact. There's nothing we can do."
If the player heads to the waterfall's direction:
- Cortana: "I'm reading thousands of types of flora. The ring's ecosystem is incredibly sophisticated."
The Chief approaches the bridge, the only way deeper into the valley:
- Cortana: "Warning! I've detected multiple Covenant drop ships on approach. I recommend moving into those hills. If we're lucky, the Covenant will believe that everyone aboard this lifeboat died in the crash."
As the Chief reach the other side of the bridge, a Spirit dropship flies over him.
- Cortana: "Alert! Covenant Dropship inbound! They must be looking for survivors. I recommend immediate evasion!"
If the player lingers near the crashed lifepod:
- Cortana: "Alert! Covenant dropship has detected us, here they come."
A Covenant Spirit dropship lands and drops off a Covenant lance. Two Banshee fighters patrol the area. The Chief either eliminates or evades the dropped Covenant troops and proceeds through a canyon.
- Cortana: "I'm reading a lifeboat beacon over the next hill. We should check to see if there are any survivors."
The Chief approaches a large structure where a group of stranded Marines are battling the Covenant. He assists the struggling Marines and eliminates the Covenant troops. Two Marines approach him.
or
- Private Bisenti: "Good to see you, sir! I thought we were the only ones to make it off of the Pillar of Autumn!"
or
- Private Bisenti: "Thank God you're here, Master Chief. I thought we were in real trouble."
- Staff Sergeant Avery Junior Johnson: (sighs) "It's a mess, sir. We're scattered all over this valley. We called for evac, but until you showed up, I thought we were cooked."
- Cortana: "Don't worry, Sergeant. We'll stay here until evac arrives."
- Private Manuel Mendoza (COM): "Heads up! I got a Covenant dropship headin' in, over here!"
The Chief heads behind the structure to deal with the Covenant forces.
- Mendoza (COM): "Look sharp! Covenant dropship on approach! I could use some help over here!"
The UNSC forces deal with the next wave.
- Mendoza (COM): "Uh-oh, another bandit droppin' in behind us! They're tryin' to flank us!"
If all of the Marines are dead:
- Cortana: "We couldn't save them... I recommend to stay here and wait for extraction."
If the player begin to leave the area:
- Cortana: "Where are you going? The lifeboat beacon is our only chance to getting reunited with the rest of the crew, we need to stay with it."
After a few more waves of Covenant, a Pelican dropship appears from the cliffs.
- Flight Captain Carol Rawley (COM): "This is Pelican Echo 419. Anybody read me? Repeat: any UNSC personnel, respond."
- Marine or Cortana (COM): "Roger, Echo 419. This is Fire Team Charlie. We read you. Is that you, Foehammer?"
Or
- Johnson (COM): "Roger, Echo 419. This is Fire Team Charlie. We read you, five by five. Is that you, Foehammer?"
- Rawley (COM): "Roger, Fire Team Charlie. Good to hear from ya!"
- Marine or Johnson (COM): "If you're not too busy, Foehammer, we could use a lift. We have survivors to transport to the Command Shuttle."
Or
- Cortana (COM): "Foehammer, we need transportation to the Command Shuttle."
- Rawley (COM): "I'm on my way."
- Cortana: "Look, more lifeboats! They're coming in fast. If those lifeboats make it down, the Covenant are going to be right on top of them. (COM) Foehammer, we need you to disengage your Warthog. The Master Chief and I are going to see if we can save some soldiers."
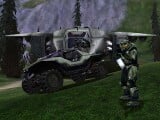
The Pelican deploys its Warthog.
- Rawley (COM): "Roger, Cortana. Okay, Charlie Team, Warthog deployed. Saddle up and give 'em hell!"
- Cortana (COM): "Roger, Foehammer. Stand by to evac survivors and transport them to safety."
- Rawley (COM): "That's affirmative. Echo 419 staying on station. Foehammer out."
- Cortana: "The Master Chief and I need some backup, can you spare a few men?"
- Johnson: "Sure, Cortana. All right ladies, volunteers step up on the double! The rest of you, get to the dropship."
Or
- PFC M. Fitzgerald: "Sure, Cortana. All right, who's in? Volunteers step up on the double! The rest of you, get to the dropship."
One marine stays behind to accompany the Chief. The other survivors get aboard the Pelican which takes off.
If the player walks away from the dropped Warthog towards the distant cave:
- Cortana: "We'll need that Warthog if we want to get to the other lifeboats in time."
If the player explores the area on foot or delays for more than five minutes:
- Cortana: "Survivors would probably stick close to their emergency beacons."
A Navigation point appears on the distant cave.
- Cortana: "We need to find where each lifeboat has landed."
The Chief's Warthog approaches a large cave structure.
- Cortana: "This cave is not a natural formation. Someone built it, so it must lead somewhere."
The Chief drives into the cave.
- Cortana: "I've hacked into the Covenant battlenet. They're actually broadcasting tactical data on unencrypted channels! We should show them who they're dealing with. Master Chief, I'm going to use your suit's transponder system to monitor their chatter."
After navigating the tunnels, the Chief emerges in a large cavern, with a chasm dividing the floor into two halves. There is no visible way to cross. Covenant forces occupy his side of the cavern. He kills all the Covenant present.
- Cortana: "There must be some mechanism to cross this cavern. Look for a control panel or switch."
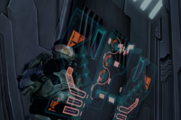
The Chief ascends to a balcony, kills the Sangheili he encounters, finds a control panel, and activates it.
{Original Cutscene} {Anniversary Cutscene}
When the Chief engages the panel, four giant silver beam-generating structures extend across the chasm, and an energy bridge slowly fades into coherence.
(Note: The cutscene mentioned will not occur unless the player kills all of the enemies in the area. However, the energy bridge will still activate in gameplay.)
{Gameplay}
The Chief crosses the bridge, and navigates through more tunnels.
- Cortana: "New traffic on the Covenant battlenet... a lot more crew made it off the Autumn than I had predicted - the Captain really gave them hell! If we can find Captain Keyes and other survivors, we have a chance to coordinate an effective resistance."
The Chief arrives at the exit to the cave.
Reunion Tour[edit]
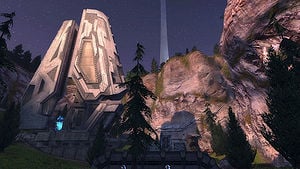
There are three crash sites, and different lines of dialogue are said depending on the order the player visit them in. The conversation between Cortana and Rawley is always said in the order shown here, irrelevant as to which order the player visits the sites in.
The Chief approaches the rock slide crash site. There are up to seven Marines that can be saved there.
- Cortana: "Survivors detected. Marines are concealed in those rocks."
- Marine Sharpshooter: "Contact! Covenant drop ship, down there!"
If the Covenant charges into the rocks:
- Marine: "Fall back! Fall back!"
Marines will all get on top of the highest rock, where the sniper is.
If the player leaves the area before evac arrives:
- Cortana: "Where are you going? We need to stay with the Marines."
The Chief fends off a few waves of Covenant forces.
- Rawley (COM): "Echo 419 to Cortana, come in."
- Cortana (COM): "We read you, Echo 419. We have survivors and need immediate dust-off."
This line changes to reflect which two pods the player haven't yet found:
- Rawley (COM): "Roger, Cortana. On my way. I've spotted additional lifeboats in your area. One near the cliff edge, and another near the head of the river. (If the player takes first priority to the Rock Slide)
or
- Rawley (COM): "One near the rock slide, and another near the head of the river." (If the player takes the first priority to the Cliff Edge)
or
- Rawley (COM): "One near the rock slide, and another near the cliff edge." (If the player takes first priority to the Head of the River)
- Rawley (COM): "Hard to see from my altitude, but it looks like there are more survivors."
- Cortana (COM): "Acknowledged. We're on our way."
If all of the Marines are killed:
- Cortana: "No survivors..."
If the player dawdles:
- Cortana: "We need to find the other two lifeboats."
The Chief approaches the river head crash site.
- Cortana: "There are some Marines, hiding in the hills above the structure."
The Chief makes his way up into the hills where the four live Marines are.
- Marine: "You're a sight for sore eyes, Chief. We're in a bad way. We've got wounded here."
- Cortana: "I'll call in a dropship to pick them up."
The Chief defends the survivors from more waves of Covenant drop ships.
- Rawley (COM): "Echo 419 to Cortana, Foehammer's on station and ready for another pickup."
- Cortana (COM): "Affirmative, Foehammer. We're ready for dust off, approach when ready. We're going to look for the last lifeboat, Echo 419, good luck."
If all Marines are killed:
- Cortana: (bitterly) "They're all dead."
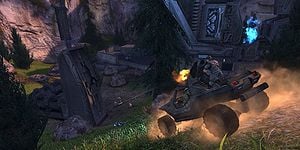
The Chief leaves the second lifeboat, searching for the third and the last lifeboat.
- Cortana: "Warning! I've picked up reports that the Covenant have located and secured the Pillar of Autumn's crash site. The good news is the Captain's still alive. The bad news is that the Covenant has captured the entire surviving command crew. Let's hurry and find the final lifeboat, so we can link up with the rest of the survivors."
The Chief approaches a lifeboat near the river. There are no bodies nearby.
- Cortana: "Lifeboat detected. No sign of survivors..."
- Fitzgerald: "This lifeboat is trashed, Chief. There are weapons and supplies but...no bodies."
or
- Fitzgerald: "The lifeboat's totaled, sir. There are weapons and supplies everywhere, but I can't find any bodies. Maybe somebody made it out of here alive."
or
- Fitzgerald: "What a mess! The weapons lockers must have broken open. There are weapons and supplies all over the place. Where's the bodies, though?"
The Chief crests a hill and sees a structure on the cliff's edge.
- Cortana: "Maybe they took cover in that structure. Let's check it out."
If the player leaves the area before finding the survivors:
- Cortana: "We should search the interior of those structures before we leave."
The Chief locates a way into the structure, where he finds up to five Marines and naval crewmen battling the Covenant. He assists them in killing the Covenant forces.
- Cortana: "I've called for evac."
- Marine: "Roger that. Marines! Assemble for evac, pronto!"
If all of the Marines and techs are killed:
- Cortana: (sadly) "We weren't able to save any of the Marines. A one hundred percent casualty rate."
or
- Cortana: "Dead. They're all dead. Get to the drop ship and let's get back to base."
If there are still Covenant in the area when the player emerges from the structure:
- Cortana: "We should secure the area before the drop ship arrives."
The Chief mops up the last of the Covenant in the immediate area.
- Cortana (COM): "That's the last of them."
- Rawley (COM): "Roger that. I'm on my way."
- Cortana: "New traffic on the Covenant battlenet. I've found Captain Keyes! He's being held on a Covenant cruiser, the Truth and Reconciliation, a ship I disabled before we abandoned the Autumn. The Truth and Reconciliation touched down on a desert plateau roughly three hundred kilometers up-spin."
Echo 419 arrives.
- Cortana: "There's our ride. Get aboard, and let's get out of here."
- Rawley (COM): "Welcome aboard, Master Chief. Ready for dust-off."
The Chief climbs on board the Pelican.
- Cortana: "We should move out, Lieutenant. And then we'll need your help on our rescue mission."
{Original Cutscene w/ All Alternatives}
{Anniversary Cutscene Alternative 1}
{Anniversary Cutscene Alternative 2}
{Anniversary Cutscene Alternative 3}
Echo 419 flies away from the area.
Fade to black.
Level ends.
Achievements[edit]
The following achievements can be unlocked on Halo across the Xbox 360 and Halo: The Master Chief Collection editions of Halo: Combat Evolved Anniversary. The original Xbox and PC and Macintosh releases of Halo: Combat Evolved did not contain achievement unlocks.
| Halo: Combat Evolved Anniversary (Xbox 360) | Halo: MCC (Xbox One, Xbox Series X|S) | Halo: MCC (Steam) | Title | Unlock requirement | Games |
|---|---|---|---|---|---|
| Beat Halo on any difficulty. | Halo: The Master Chief Collection | ||||
| Destroy three of the four Banshees on Halo. | Halo: The Master Chief Collection | ||||
| Complete Halo without entering a vehicle. | Halo: The Master Chief Collection | ||||
| Beat the par time on Halo. | |||||
| Beat the par score on Halo. | |||||
| Activate Terminal 2 on Halo. | |||||
| Find the Mythic Skull on Halo. | |||||
| Find the Boom Skull on Halo. |
Production notes[edit]
- Main article: Development of Halo: Combat Evolved
Art Director Marcus Lehto led the art design of the campaign level Halo. Lehto cited Snoqualmie Falls in Seattle as a major inspiration for the level's natural landscape, especially the first waterfall upon exiting the lifeboat.[2] The second half of the level was inspired by the terrain seen in the MacWorld Halo announcement trailer. According to Paul Bertone, the level design determined the direction for the game engine, which needed to support the wide-open terrain and high density of gameplay. Artist Chris Lee modelled the beam emitters seen throughout the level. Designer Jaime Griesemer was responsible for the level design.[3]
Jen Taylor, the voice actress of Cortana, also voiced the lifeboat pilot at the beginning of the level.[4]
Cortana's line "This cave is not a natural formation" is ridiculed by many members of Bungie and many fans due to its blatant obviousness.[4] Originally, the cave to which Cortana refers looked natural, though Cortana could tell that it was not; due to time constraints, the cave was changed to look artificial near the end of the level's development, and the line was kept.[2] (Ultimately, the line would be ridiculous regardless of how the cave looked; since it was located on a clearly artificial megastructure, no geological features upon its surface would be natural.) The statement serves as the namesake of a chapter title in the Halo: Reach level The Package, in which Noble Team retrieves a fragment of Cortana from a subterranean Forerunner complex. The dialogue would be referenced in other Microsoft games. In the Gears of War 2 level Disturbing Revelations, upon approaching a subterranean Locust structure, Dominic Santiago says, "I think it's safe to say that's not a natural cave formation." In Forza Horizon 4, upon approaching a tunnel in the Pillar of Autumn showcase race, Cortana says, "This cave is not a natural formation."
In addition to introducing M. Fitzgerald as the Marine manning the Warthog dropped off by Echo 419, the release of Halo: The Flood has also introduced two minor discrepancies into the canon:
- During the initial dialogue exchange with Foehammer, Cortana mentions a command shuttle to Foehammer, though the actual meeting point for the UNSC forces is Alpha Base, though it is possible that she was referring to the command crew's lifeboat.
- At the end of the level, Cortana says, "We should move out, Lieutenant", even though Carol Rawley is a captain. It is possible that she was talking to Rawley's copilot, Lieutenant Frye, though this seems inconsistent with the rest of the game, as Cortana exclusively communicates with Captain Rawley aboard Echo 419.
Designer Paul Bertone considered this level as the iconic Halo level which defined the sense of mystery and explorative feeling.[3] The environment of this level would be referenced in the later games. The environment of this level served as inspiration for the Halo 3 multiplayer map Valhalla and Halo: Reach map Forge World, both of which featured similar terrains with beam emitters and waterfalls. Valhalla was also remade into Ragnarok in Halo 4. Furthermore, the cliff edge section of this level was recreated as the Firefight map Installation 04 in Halo: Reach Anniversary Map Pack. In Halo 5: Guardians, the Forge canvas Alpine also featured a similar terrain. Justin Dinges, the Campaign Art Lead on Halo Infinite, cited the Pacific Northwest forest biome as an inspiration for the environment on Installation 07, but noted the biome was chosen as "a deliberate ode to the past" in an allusion to the environment in this Halo: Combat Evolved level.[5]
Trivia[edit]
Easter eggs[edit]
- In Anniversary, the Mythic skull can be found behind the large boulder on the right of the waterfall. The Boom skull can be found on the top of the Forerunner tunnel's entrance.
- The second Terminal in Anniversary can be found in the Forerunner tunnel, at the end of a small alcove under the space that can only be cleared by a jump.
Glitches[edit]
- If the player stands under Echo 419 when it lands near the cliff edge, the player will come up through the floor inside the Pelican. The player can then jump through the floor and walk around inside the troop bay, though he will die when the dropship flies away.
- All the Marines and Navy personnel rescued by Echo 419 hold their arms as if they are carrying MA5Bs, even if they are armed with M6Ds or nothing at all.
- Although the Pelican has ten seats, only a total of six Marines will ever board it at a time. The others will stay outside and wander around.
- There is a rarely encountered glitch that causes the Marines at the hillside complex or the rock formation to not board the Pelican. However, the mission will still proceed as though they had.
- Often, at the first lifeboat after Echo 419 comes in to pick up the survivors, at least one of the surviving crew members or marines will simply run into the Pelican and continue to move as if nothing's blocking his path, rather than boarding the Pelican properly as the other AI do.
Mistakes[edit]
- Johnson asks for volunteers to accompany the Chief, but sometimes he is the volunteer.
- Because the models for Johnson and Stacker are used for Marine sergeants in the game, in this level it is possible to have two Johnson or Stacker NPCs accompany the player in the Warthog.
- On this level the model used for the Halo ring in the far distance does not actually meet the terrain. If the player looks at the bottom of the ring, (where it should flow into the ground below the cliffs), the player can see the sky between the ring and the ground, indicating a gap. This can be best seen with the scope on the pistol or sniper rifle found on this level when climbing the hill next to the cliff edge structure.
- In the Halo: Combat Evolved Anniversary version of the previous level, John pulls a marine with a bandana into the Bumblebee. However, the bandana-wearing marine is nowhere to be found amongst the bodies of the escape pod wreckage.
- While protecting the Marines at the river head crash site, the first Spirit bumps into a cliff as it leaves the area.
- In both versions of the game, only seven bodies, including that of the pilot, are found inside the Bumblebee after the crash. In actuality, nine bodies should have been present.
- On rare occasions, the "Search for last survivors" mission objective will repeatedly show up on the screen and flash. This is common if the player is playing on an Xbox 360.
References[edit]
- The level in its entirety was recreated in the Halo Mash-Up: Minecraft Evolved.[6]
Miscellaneous[edit]
- If the player makes any Marines on board Echo 419 turn on him at the end, the player will not be able to board the Pelican until the Marines are all dead or when they start trusting him again.
- If the player goes elsewhere instead of boarding Echo 419 when the last group of Marines have been rescued, the cutscene will soon play regardless the player's location.
- If the player manages to carry out with the level without ever using a Warthog (including the one in the beginning of the level), some of the scripted dialogue and music cues such as the one triggered upon exiting the underground tunnel will not trigger. These instances can be noticed when trying to unlock the "How Pedestrian" achievement.
- If the player enters the structure near the cliff edge and jumps down the shaft that shoots blue energy straight up, or uses a flycam, they will see a blue ball hovering in air when reaching the bottom. This object is used in scripting to generate the energy pulse.
- In the structure near the cliff edge, inside the inner rooms, Marines may accidentally fall into the shaft when crossing the bridge and die.
- Sometimes, a Spirit dropship can be seen in cutscenes if the player did not go through where the Spirit lands and deploys troops during gameplay.
- If the player somehow gets on top of the cliffs during the first part of the level (departing the Bumblebee until entering the underground tunnels), there is a unique scripted trigger volume that activates called "gotohell", which disables all player input permanently, including opening the menu and leaving the game. This is the only area in the entire game that uses this method of preventing the player from escaping the level.[7]
Gallery[edit]
Development images[edit]
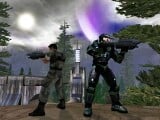
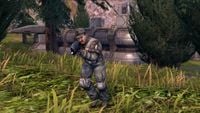
John fires his assault rifle in front of the vista of the ring.
Halo: Combat Evolved[edit]
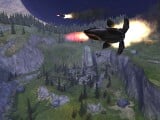
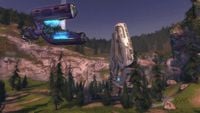
Echo 419 drops a Warthog for the Chief, as two lifeboats are soaring across the sky.
Halo: Combat Evolved Anniversary[edit]
Sources[edit]
- ^ Halo: Combat Evolved Editing Kit, game file
HCEEK\tags\levels\a30\a30.scenario - ^ a b Halo: Reach Legendary Edition Developer Commentary
- ^ a b YouTube - IGN, Halo: Combat Evolved Devs React to Speedrun (Martin O’Donnell, Marcus Lehto)
- ^ a b Halo 3 Legendary Edition, Halo: Combat Evolved developer commentary
- ^ Halo Waypoint, Inside Infinite - February 2021
- ^ Halo Waypoint, Halo Mash-Up Pack Available Now
- ^ Halo Editing Kit, game file
Mission\Game data\Trigger volumes\gotohell
| Preceded by The Pillar of Autumn |
Halo CE Campaign Levels Halo |
Succeeded by The Truth and Reconciliation |
| |||||||||||||||||||||||
