Deutoros-pattern Scarab: Difference between revisions
From Halopedia, the Halo wiki
ZodiacReborn (talk | contribs) m (→Introduction) |
BaconShelf (talk | contribs) m (→Halo 3 design) |
||
| Line 1: | Line 1: | ||
{{ | {{Title|''Deutoros''-pattern Scarab}} | ||
{{ | {{Status|Canon}} | ||
{{ | {{Disambig header|the Scarab model introduced in [[Halo 3]]|other types of Scarab|Scarab (disambiguation)}} | ||
{{ | {{Vehicle infobox | ||
|image=[[ | |name=''Deutoros''-pattern Fortress Breaker | ||
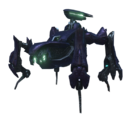
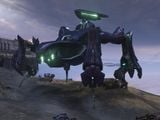
| | |image=[[File:HReach-T47ScarabUHAP.png|250px]]<br/>[[File:ScarabHW.png|250px]]<br/>Two alternate chassis' for the Scarab. | ||
|manufacturer= | |manufacturer=[[Assembly Forges]]{{Ref/Book|Id=HVG|EVG|Page=163}}{{Ref/Book|Id=Enc22|Enc22|Page=279}} | ||
| | |line=[[Excavator]] tier-four{{Ref/Site|Id=universe|URL=https://www.halowaypoint.com/en-us/universe/vehicles/scarab|Site=Halo Waypoint|Page=Scarab|D=30|M=06|Y=2021}} | ||
| | |model=[[Scarab]]{{Ref/Reuse|universe}} | ||
| | |cost= | ||
| | |length={{Convert|159.5|ft|m|disp=flip|sp=us}}{{Ref/Reuse|universe}}{{Ref/Reuse|Enc22}}{{Ref/Book|Id=ENC254|Enc11|Page=254-255}} | ||
|width={{Convert|158.4|ft|m|disp=flip|sp=us}}{{Ref/Reuse|universe}}{{Ref/Reuse|Enc22}} | |||
| | |height={{Convert|126.8|ft|m|disp=flip|sp=us}}{{Ref/Reuse|universe}}{{Ref/Reuse|Enc22}} | ||
| | |mass={{Convert|171.8|MT}}{{Ref/Reuse|universe}}{{Ref/Reuse|Enc22}} | ||
| | |max speed={{Convert|76|km/h|mph}}{{Ref/Reuse|universe}} | ||
| | |engine= | ||
| | |hull= | ||
| | |armament= | ||
| | *1 ultra-heavy [[focus cannon]]{{Ref/Reuse|HVG}}{{Ref/Reuse|universe}}{{Ref/Reuse|Enc22}} | ||
| | *1 [[Heavy plasma cannon|ultra-heavy plasma cannon]]{{Ref/Reuse|HVG}}{{Ref/Reuse|universe}}{{Ref/Reuse|Enc22}} | ||
| | *3 {{Pattern|Pek|plasma cannon}}s{{Ref/Reuse|HVG}}{{Ref/Reuse|Enc22}} | ||
| | |crew= | ||
| | *1 supervisor{{Ref/Reuse|HVG}}{{Ref/Reuse|universe}}{{Ref/Reuse|Enc22}} | ||
| | *[[Rhulolekgolo]] operators{{Ref/Reuse|Enc22}} | ||
| | |complement=*12 security personnel{{Ref/Reuse|HVG}}{{Ref/Reuse|universe}}{{Ref/Reuse|Enc22}} | ||
| | |||
| | |||
| | |||
| | |||
|armament=* | |||
* | |||
| | |||
|crew=*1 | |||
* | |||
| | |||
| | |||
| | |||
|consumables= | |consumables= | ||
|othersystems= | |othersystems= | ||
|firstuse= | |firstuse= | ||
|role=Heavy | |service= | ||
| | *[[Human-Covenant War]] | ||
|affiliation=[[Covenant]] | *[[Great Schism]] | ||
| | |role= | ||
*Heavy assault platform{{Ref/Reuse|ENC254}} | |||
*Deep excavation{{Ref/Reuse|ENC254}} | |||
*Mobile command base{{Ref/Reuse|ENC254}} | |||
|affiliation=[[Covenant]]{{Ref/Reuse|ENC254}} | |||
}} | }} | ||
{{Quote|Pro tip: Shoot them in the legs first. And it's okay to cheer when you blow one of them up. You deserve it.|Spartan Edward Buck, offering advice on how to destroy a ''Deutoros''-pattern Scarab{{Ref/Reuse|NB8}}}} | |||
The '''''Deutoros''-pattern Fortress Breaker'''{{Ref/Reuse|Enc22}} {{Type|47B|Deutoros|Ultra-Heavy Assault Platform|UHAP}},{{Ref/Site|Id=Waypoint|URL=http://halo.xbox.com/en-us/intel/theuniverse/tech/gallery/scarab/ea02cb6c-58ae-44e2-aacf-3eadd73fb6f9|Site=Halo Waypoint|Page=Scarab|D=14|M=03|Y=2011|LocalArchive=Archive:Halo Waypoint/2009 to 2014/Universe/Vehicles#Scarab}} or '''Scarab''', is a large, heavily armored, all-terrain, quadrupedal walker. Classified as a tier-four [[Excavator]], the ''Deutoros''-pattern Scarab was employed by the [[Covenant]] as a [[Wikipedia:siegeworks|siegeworks]] ultra-heavy artillery assault platform.{{Ref/Reuse|universe}} | |||
Originally designed strictly for mining operations and deep excavations on widely varied terrain,{{Ref/Reuse|HVG}}{{Ref/Reuse|Waypoint}} the ''Deutoros''-pattern Scarab has since been repurposed for combat.{{Ref/Reuse|ENC254}} The walker is used to attack heavily defended structures and emplacements and to provide nearly-unstoppable combat support for Covenant ground forces. A heavily-fortified and dexterous mobile platform that boasts impressive levels of firepower, the Scarab is known for striking fear into its opponents.{{Ref/Reuse|Waypoint}} | |||
== | ==Overview== | ||
===Design details=== | |||
{{Quote|It's a tank the size of a building that walks around on four legs bent like a spider's, and it bristles with enough weaponry to qualify as a mobile demolition platform.|[[Spartan Operations|Spartan]] [[Edward Buck]], referring to a ''Deutoros''-pattern Scarab{{Ref/Novel|Id=NB8|HNB|Chapter=8}}}} | |||
[[File:Lekgolo-scarab.jpg|thumb|200px|left|Exposed Rhulolekgolo in a ''Deutoros''-pattern Scarab's core.]] | |||
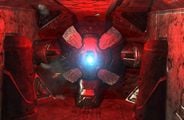
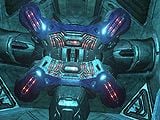
Like other patterns of Scarab, the body of the ''Deutoros''-pattern Scarab rests atop four powerful legs. Its main body features an interior bay and command center, where many of the vehicle's essential functionaries are accessible. An infantry platform that surrounds the enclosed bay allows the defensive personnel of the Scarab to fire upon hostiles from above or eliminate other threats.{{Ref/Reuse|HVG}}{{Ref/Reuse|Waypoint}} Although the ''Deutoros''-pattern Scarab appears to be a traditional vehicle, it is actually a bio-mechanical construct that makes extensive use of [[Rhulolekgolo]].{{Ref/Reuse|HVG}} Hundreds of Rhulolekgolo swarm beneath the Scarab's battle plate, acting as a gestalt intelligence, interfacing with its exoskeleton and control systems,{{Ref/Reuse|Enc22}} though the gestalt is seldom given complete control of the entire Scarab. The Lekgolo meta-colonies that inhabit these Scarabs are often populated by particularly unruly Lekgolo individuals that can not be trusted with total control over the vehicle without causing undesired chaos.{{Ref/Reuse|universe}} A central power junction located inside the Scarab's interior bay is one of the only locations on the walker where the Lekgolo are exposed.{{Ref/Reuse|Waypoint}} Due to the Scarab's reliance on the Lekgolo and their ability to operate independently, the weapons platform was never formally categorized as a vehicle by the [[Covenant]], instead being classified as a single, ultra-heavy infantry unit by the Covenant.{{Ref/Reuse|HVG}}{{Ref/Reuse|universe}} The chassis of the Scarab is built in specialized, cavernous assemblies, such as the [[Assembly Forges]] on the now-destroyed Covenant capital city of ''[[High Charity]]''. At these facilities, Rhulolekgolo are fused into the carapace and appendages,{{Ref/Reuse|Waypoint}} and bound to the control systems.{{Ref/Reuse|universe}} Like many Covenant vehicles, the ''Deutoros''-pattern Scarab is modularly crafted on an assembly line, where its various pieces are combined then activated.{{Ref/Reuse|Waypoint}} | |||
While they are known to be particularly robust, ''Deutoros''-pattern Scarabs are not without their weaknesses. A Scarab will be temporarily stalled if its legs sustain enough damage,{{Ref/Reuse|NB8}} causing the walker lower into a crouch-like position and allowing potential [[Naval boarding|boarder]]s to jump into the vehicle's troop bay. The central power junction is protected only by the vehicle's external armor and the exposed Rhulolekgolo are susceptible to weapon fire,{{Ref/Reuse|HVG}} so attacking the junction is relatively easy for hostile boarders. Once the core is destroyed, the Rhulolekgolo gestalt's tissue tears and a chain reaction will occur, which will quickly destroy the Scarab.{{Ref/Reuse|Waypoint}} | |||
===Mobility=== | |||
[[File:Scarab deployment.jpg|thumb|250px|A Scarab slowing itself from its low-orbital deployment on Installation 00.]] | |||
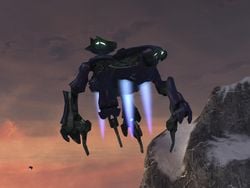
Unlike most vehicles deployed by the Covenant, the ''Deutoros''-pattern Scarab does not employ [[Anti-gravity technology|anti-gravity propulsion]] to move; instead, it uses a quadrupedal leg assembly for locomotion. These jointed legs are very powerful, strong enough to even withstand the shock of low-orbital drop.{{Ref/Level|Id=The Covenant|H3|The Covenant (level)|The Covenant}}{{Ref/Level|Id=TPoA|HR|The Pillar of Autumn (Halo: Reach level)|The Pillar of Autumn}} Scarabs are equipped with several underside thrusters that allow the vehicle to slow its descent during its initial deployment.{{Ref/Reuse|The Covenant}}{{Ref/Reuse|Enc22}} The Scarab can move at a relatively fast speed, with a maximum speed at 76 kilometers per hour (47 miles per hour).{{Ref/Reuse|universe}} | |||
The | The articulated legs and the spiked "feet" of a ''Deutoros''-pattern Scarab allow the vehicle to sturdily grip the ground, climb over obstacles, and even kneel down.{{Ref/Reuse|ENC254}} The legs are also very nimble, affording the Scarab a surprising degree of maneuverability. For example, ''Deutoros''-pattern Scarabs have been observed mantling inclines in excess of forty-five degrees{{Ref/Level|Id=Highway|H3ODST|Coastal Highway}} and they can attempt to right themselves if knocked off balance.{{Ref/Reuse|TPoA}} The ''Deutoros''-pattern Scarab is capable of carrying out excavations and assaults in varied terrains and rough environments,{{Ref/Reuse|HVG}}{{Ref/Reuse|Waypoint}} and it is even capable of operating underwater, if only for brief periods.{{Ref/Reuse|Highway}} | ||
The Scarab | |||
== | ===Crew and complement=== | ||
The ''Deutoros''-pattern Scarab is occasionally used as a mobile command base, and rarely as a large-scale troop transport vehicle.{{Ref/Reuse|ENC254}} An officer of the [[Covenant military]] serves as a supervisor and [[pilot]] aboard the Scarab. Rather than steer the walker themselves, the Scarab's supervisor "guides" the direction of the machine and occasionally directs the artillery when needed. The Scarab's Rhulolekgolo complement manages and carries out most of the walker's functions and processes.{{Ref/Reuse|Waypoint}} The supervisor may operate the ''Deutoros''-pattern Scarab's weaponry when increased precision is needed, as the Rhulolekgolo have no fine control over the armaments.{{Ref/Reuse|universe}} | |||
Scarabs | As ''Deutoros''-pattern Scarabs were too valuable to operate without support, the Covenant would often supply the walker with at least twelve security personnel when deployed in the field.{{Ref/Reuse|universe}}{{Ref/Reuse|Enc22}} The accompanying infantry and supervisory personnel aboard a Scarab serve to prevent boarders from destroying the vehicle from within or from attempting to seize the walker for themselves. The security personnel aboard a Scarab were additionally charged with eliminating any hostiles that were able to survive the vehicle's bombardment of a location.{{Ref/Reuse|ENC254}} The security personnel of ''Deutoros''-pattern Scarabs typically consisted of [[lance]]s of [[Unggoy]] and [[Kig-Yar]], as well as some [[Jiralhanae]] and [[Sangheili]].{{Ref/Game|Id=h3|H3|Scarab in-game enemy}} | ||
== | ===Armaments=== | ||
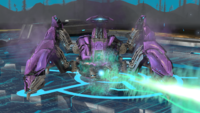
The Scarab has | The primary armament of the ''Deutoros''-pattern Scarab is an ultra-heavy [[focus cannon]] mounted beneath the head end of the infantry platform.{{Ref/Reuse|HVG}}{{Ref/Reuse|Enc22}} The focus cannon is typically affixed towards the end of the Scarab's production process.{{Ref/Reuse|Waypoint}} The weapon fires a stream of superheated [[plasma]] and is a nearly [[capital ship]]-scale [[energy projector]] capable of both mass destruction and delicate stratigraphic excavation, depending on the weapon's tuning and the operator's expertise.{{Ref/Reuse|universe}} The cannon is capable of melting through five feet of concrete, with one Scarab having enough firepower to level a small city.{{Ref/Reuse|ENC254}} The cannon is housed in a cradle that is protected by flaps, which open before firing. The focus cannon has a relatively low rate of fire and is typically discharged in brief bursts. As the weapon is fired, it releases a green-glowing liquid, which may be coolant.{{Ref/Reuse|The Covenant}} The ultra-heavy focus cannon is useful for uncovering artifacts during excavation operations.{{Ref/Reuse|Waypoint}} Additionally, the focus cannon is capable of being replaced—a delicate process that requires calibrating all the coolant subsystems, as any heat spike from the core can pose a serious threat to the Rhulolekgolo gestalt.{{Ref/Generic|Id=Site|[[Halo Wars Launch Site]]|Covenant Side|Detail=ENGINEERING REP\STAT}} | ||
The secondary armament of the ''Deutoros''-pattern is an [[Heavy plasma cannon|ultra-heavy plasma cannon]],{{Ref/Reuse|Enc22}} which is mounted atop the back of the Scarab. This armament serves primarily as an anti-aircraft weapon, having a greater effective range than the focus cannon possessing a 360° field-of-fire.{{Ref/Reuse|ENC254}} | |||
[[ | |||
{{ | Additionally, the ''Deutoros''-pattern Scarab carries three mounted {{Pattern|Pek|plasma cannon}}s, each manually operated by the Scarab's security personnel.{{Ref/Reuse|Waypoint}}{{Ref/Reuse|Enc22}} These are used primarily in an anti-infantry role,{{Ref/Reuse|ENC254}} but can also be effective against light ground vehicles and, to a lesser extent, light aircraft such as [[AV-14 Hornet]]s. The Scarab's crew often utilize these weapons to repel boarders and to provide covering fire.{{Ref/Reuse|HVG}}{{Ref/Reuse|universe}} | ||
===Variants=== | |||
Two major variants of the ''Deutoros''{{'}} design have been encountered. The more-commonly encountered version was heavily used throughout the war, particularly in its final battles. | |||
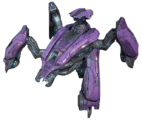
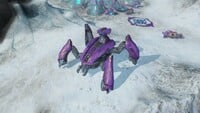
During the [[Harvest campaign]] and [[Battle of Trove]], the Covenant fielded a variant of the ''Deutoros''-pattern Scarab with an altered chassis. The altered design features a more compact design without the walkways extending around the side of the vehicle, alongside a completely enclosed rear section. This design of the Scarab appears to be in some way able to be piloted by a non-Lekgolo operator - demonstrated by [[Red Team]] during the engagement on Trove.{{Ref/Reuse|hw beach}} | |||
<gallery> | |||
File:ScarabHW.png|The ''Deutoros''-pattern Scarab with the altered chassis. | |||
</gallery> | |||
=== | ==Operational history== | ||
[[ | ===Human-Covenant War=== | ||
[[File:ScarabNoble.jpg|thumb|250px|left|A Scarab under attack during the Fall of Reach.]] | |||
Despite being encountered as early as [[2527]] and officially observed in [[2529]], the [[UNSC]] did not fully catalog the ''Deutoros''-pattern Scarab until [[2547]].{{Ref/Reuse|universe}} During the later stages of the [[Battle of Trove]], the Covenant [[Fleet of Glorious Interdiction]] deployed a number of ''Deutoros''-pattern Scarabs in efforts to stop not only the crew of the {{UNSCShip|Spirit of Fire}} but also the [[Flood]] and [[Sentinel]]s that inhabited the [[shield world]]. During the battle, the Flood made an attempt to capture at least one Scarab, with Flood [[Flood root|roots]] erupting out of the ground around the walker and ensnaring it, forcing nearby Covenant infantry to flee. Before they could commandeer the Scarab, they were attacked by UNSC forces who eliminated the roots allowing a [[SPARTAN-II program|SPARTAN-II]] to take control of the walker. The captured Scarab provided a significant combat advantage for the UNSC as they fought to destroy several Covenant [[Covenant citadel|citadels]] which would provide them with a staging area in order to assault the [[Apex Site]]. Another ''Deutoros''-pattern Scarab along with a contingent of [[Sangheili]] [[Sangheili Honor Guardsman|Honor Guardsmen]] were stationed at the final Covenant citadel but the UNSC forces, with the aid of their captured Scarab, were able to eliminate all Covenant forces.{{Ref/Level|Id=hw beach|HW|Beachhead (Halo Wars level)|Beachhead}} At least one ''Deutoros''-pattern Scarab attempted to halt the UNSC's assault on the Apex Site but fell to the human's determined assault.{{Ref/Level|HW|Reactor (Halo Wars level)|Reactor}} A number of ''Deutoros''-pattern Scarabs were deployed around the portal that would allow the ''Spirit of Fire'' to escape the shield world, both to counter the human forces, as well as a large Flood presence as well as hostile [[Forerunner]] constructs. They were ultimately unsuccessful in preventing the departure of the ''Spirit of Fire'' from the Etran Harborage.{{Ref/Level|HW|Escape (Halo Wars level)|Escape}} | |||
''Deutoros''-pattern Scarabs were rarely employed by the Covenant during the sieges on the [[Outer Colonies]], though they saw increased field deployment in large numbers near the end of the [[Human-Covenant War]] to crush UNSC fortifications on well-defended [[Inner Colonies|Inner Colony]] worlds.{{Ref/Reuse|universe}} Unprecedented numbers of ''Deutoros''-pattern Scarabs were used by the Covenant during the [[Fall of Reach]].{{Ref/Reuse|universe}} During their initial incursions on Reach, the [[Fleet of Valiant Prudence]] deployed significant Covenant ground forces, including at least three ''Deutoros''-pattern Scarabs at [[Szurdok Ridge]], hiding their presence from the UNSC using several [[deployment spire]]. When the site was [[Battle at Szurdok Ridge|attacked]] by the UNSC on August 12, 2552, these three Scarabs provided support for Covenant ground forces as the two massive armies clashed at the landing zone.{{Ref/Level|HR|Tip of the Spear}} Towards the end of the Fall of Reach, ''Deutoros''-pattern Scarabs and other Covenant heavy armor were deployed to stop UNSC forces from escaping from the doomed planet.{{Ref/Reuse|TPoA}} | |||
[[ | |||
During the final hours of the [[Battle of Installation 04]], the Covenant deployed a ''Deutoros''-pattern Scarab to combat swarming Flood forces in the arid badlands around the downed {{UNSCShip|Pillar of Autumn}}. During the battle, remaining UNSC personnel on the ringworld launched an assault on the Covenant forces, with the objective of drawing them away from the ''Autumn'' while [[SPARTAN-II program|SPARTAN]] [[John-117]] boarded the cruiser. However when the Chief's commandeered [[Type-26 Banshee|Banshee]] approached the ship, the Scarab soon took notice and moved to ambush the Spartan. [[Fireteam Raven]] was quick to act, boarding a [[UH-144 Falcon|Falcon]] and proceeding to pursue the walker. Despite its best efforts, the team of [[Orbital Drop Shock Trooper|ODSTs]] was able to successfully board the Scarab, wiping out its entire complement of soldiers and destroying the core.{{Ref/Level|HFR|Last Stand (Halo: Fireteam Raven level)|Last Stand}} | |||
When the [[Prophet of Regret|High Prophet of Regret]] [[Battle of Earth|invaded]] [[Earth]] in October, 2552, he deployed at least five Scarabs to [[Mombasa]], [[Africa]], with at least one of them being a ''Deutoros''.{{Ref/Site|URL=https://www.halowaypoint.com/en-us/news/canon-fodder-scarab-tactics|Site=Halo Waypoint|Page=Canon Fodder - Scarab Tactics|D=23|M=12|Y=2019}} Two Scarabs were placed in [[New Mombasa]], while another three were deployed in [[Old Mombasa]]. One of the Scarabs in New Mombasa was apparently charged with destroying the [[Mombasa Tether]].{{Ref/Anthology|Evo|Palace Hotel}} Shortly after ''Solemn Penance''{{'}}s retreat, one of these was stationed in the partially-flooded [[Kikowani Station (location)|Kikowani Station]], where it was engaged and neutralized by [[Alpha-Nine]].{{Ref/Level|H3ODST|Kikowani Station (Level)|Kikowani Station}} | |||
On the morning of October 21 when the [[Prophet of Truth|High Prophet of Truth]]'s [[Jiralhanae]]-led reinforcements arrived over Kenya,{{Ref/Site|Id=waypointvergil|URL=https://www.halowaypoint.com/en-us/news/canon-fodder-vergil-reality|Site=Halo Waypoint|Page=Canon Fodder - Vergil Reality|D=15|M=06|Y=2021}}{{Ref/Generic|Id=Oct20|[[Ten Twenty]]}}{{Ref/Level|Id=CoastalHighway|Game=Halo 3: ODST|Level=Coastal Highway}} as Alpha-Nine members [[Edward Buck]], [[Veronica Dare]] and [[the Rookie]] escorted a high-value asset: the defecting Covenant [[Huragok]] [[Quick to Adjust]] containing information from a [[Vergil|subroutine]] of the city's [[Superintendant]] [[artificial intelligence]], they witnessed several Scarabs being deployed by the massing Covenant warships. While most of them ignored or didn't notice the humans, one of the Scarabs did take notice and opened fire on the [[Olifant]] containing the Huragok with its [[focus cannon]], heavily damaging the vehicle and forcing the team to abandon it outside of the [[Uplift Nature Reserve]].{{Ref/Reuse|Highway}} | |||
[[ | During the [[Battle of Voi]], a ''Deutoros''-pattern Scarab was deployed into a lake bed near [[Traxus Factory Complex 09]] after all of the Covenant [[Ogab'd-pattern anti-aircraft Wraith|Anti-Aircraft]] defences in the area were cleared by a mounted UNSC assault force. John-117 was able to eventually bring down the walker, allowing the human forces to regroup and push on to their final objective, a Covenant [[Skar'wa-pattern Mantis|Anti-Aircraft Cannon]].{{Ref/Level|H3|The Storm}} The [[Prophet of Truth]] deployed multiple ''Deutoros''-pattern Scarabs during the [[Battle of Installation 00|Battle]] of [[Installation 00]]. Outside Installation 00's [[Cartographer]], John-117, with the assistance of a UNSC [[M808 Scorpion|armored]] unit, destroyed a ''Deutoros''-pattern Scarab. During the battle outside the [[Installation 00 Citadel|Citadel]], a pair of ''Deutoros''-pattern Scarabs were deployed as a last-ditch effort by the Covenant to prevent the UNSC-[[Sangheili]] forces from reaching the Prophet of Truth. Despite their best efforts, both Scarabs were neutralized by the Master Chief, and with the death of the final Prophet [[Hierarch]] shortly later, the Covenant was brought to an end.{{Ref/Reuse|The Covenant}} | ||
=== Halo | ==Gameplay== | ||
===''Halo 3'', ''Halo 3: ODST'', and ''Halo: Reach''=== | |||
[[File:69504874-Full.jpg|thumb|250px|A Scarab attacking a Scorpion in ''Halo 3''.]] | |||
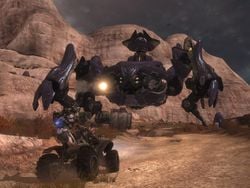
The ''Deutoros''-pattern Scarabs encountered in ''[[Halo 3]]'' have far more destructible parts than the {{Pattern|Protos|Scarab}} seen in ''[[Halo 2]]''. Destructible armor covers each joint of a Scarab's legs, and doing enough damage to the legs will cause the Scarab to go into lockdown, making it stop moving altogether. The flaps covering the main gun can be destroyed, though this does not affect the gun's operation. The crest on and around the rear anti-air turret can be completely blown off, slowing the turret's rate of fire and reducing the size of its plasma bolts. Two side door panels near the bottom of the Scarab's back can be torn off, allowing entry onto the vehicle. | |||
A Scarab's rear armor possesses a glowing red circle; inflicting enough damage upon this circle will detach the armor, leaving the Scarab's core exposed. The core itself can be destroyed; its destruction will trigger a massive explosion that blows the Scarab into pieces, leaving few intact parts. | |||
If one can successfully manage to board the Scarab in ''[[Halo: Reach]]'', they will find that only the core of the Scarab can be destroyed. All other parts of the Scarab, including Plasma Cannons, cannot be destroyed. Destroying the core of the Scarab will also not destroy the Scarab itself. Instead, it will expose a hole in the Scarab, which bleeds orange Lekgolo blood if shot.{{Ref/Reuse|TPoA}} | |||
== | ===''Halo Wars''=== | ||
[[ | [[File:Two Scarabs.jpg|thumb|250px|left|Two Scarabs, assisted by two Locusts and an infantry lance, engage UNSC forces in ''Halo Wars''.]] | ||
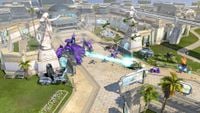
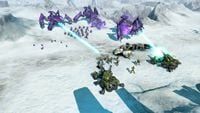
''[[Halo Wars]]'' features the ''Deutoros''-pattern Scarab as a playable unit in [[Skirmish]] and multiplayer modes for Covenant leaders, though it is smaller for the sake of gameplay. Each Scarab costs {{HWResources|3,000}} [[resources]] and {{HWPop|20}} population in Skirmish, with no upgrades available due to their cost and is built at the [[Covenant citadel]]. Up to two can be spawned at a time in a [[Standard]] mode and four in [[Deathmatch (Halo Wars)|Deathmatch]] mode. ''Halo Wars''{{'}} [[Halo Wars Title Updates|Title Update #4]] enhanced the Scarab by providing an additional 25% hitpoints and a 25% damage increase, and is now capable of surviving four direct MAC blasts as a result of the improved hitpoints. | |||
The Scarabs excel at attacking vehicles and infantry with their powerful weapons, though aircraft take longer for the Scarab to take down. Scarabs are very mobile, being able to climb over most obstacles. Only certain obstructions, like craters or fire, can block them. In the campaign level Beachhead, the player may use a [[SPARTAN-II program|Spartan]] to commandeer an abandoned Scarab. Commandeering this Scarab and using it to destroy twenty-five enemy units unlocks the achievement [[Beaming With Pride]]. | |||
Scarabs are extremely difficult to destroy. Overwhelming it with a massive attack force works well, particularly when using anti-vehicle units like the [[SP42 Cobra]] or some [[Hunters]], but a significant portion of the attack force will be lost in the process. An upgraded [[Magnetic Accelerator Cannon#Halo Wars gameplay|MAC blast]] or [[carpet bomb]] can destroy a Scarab rather quickly, as can a group of [[AC-220 Vulture]]s using their missile barrages. Covenant leader units' special abilities can inflict massive damage on a Scarab, with the [[Prophet of Regret]]'s cleansing beam being a good example. | |||
Winning a Skirmish game with two Scarabs unlocks the [[2 Bugs Are Better Than 1]] achievement. | |||
== | ==Trivia== | ||
{{Linkbox|gallery=yes|gallerypage=Images of Scarabs}} | |||
===General=== | |||
*Early in the development of ''Halo: Reach'', there was to be a level between "[[New Alexandria]]" and "[[The Package]]" in which the player would navigate a Scarab through the ruins of [[New Alexandria (location)|New Alexandria]]. According to [[Marcus Lehto]], the level was cut because it was ''"a little crazy"''.{{Ref/YouTube|inIxRwTzajc|Sacharified|Halo Reach Legendary Edition - Developer Commentary Part 6|D=06|M=01|Y=2024}} | |||
*On three occasions in ''Halo: Reach'', Scarabs come within dangerous proximity to the player character, yet the player is unable to fight or board them. [[Martin O'Donnell]] refers to these moments as "Scarab teases."{{Ref/YouTube|eLmtVh_bmhs|Sacharified|Halo Reach Legendary Edition - Developer Commentary Part 4|D=06|M=01|Y=2024}} | |||
*The ''Deutoros''-pattern Scarab was recreated for use in ''[[Halo ActionClix]]''; it is the largest figure ever made by WizKids, the game's creator. A battle-damaged version was released at the 2007 San Diego Comic-Con for $250, which included the Scarab, two outdoor maps, an indoor map (representing the Scarab's interior), four character cards, and rules for both the Scarab and the game itself. A normal model was also released at select retailers in November 2007. | |||
==== | ===Glitches=== | ||
*In ''Halo 3'' and ''Halo 3: ODST'', if the player jumps onto one of the legs of a Scarab, and the leg rises up, it will cause the player to fly through the air for a considerable distance and finally die after a while, possibly after hitting a barrier. | |||
*On the ''Halo 3'' level "The Ark", a glitch can be used to create an "undead Scarab".{{Ref/YouTube|0YDSTSD3mTM|CMNeir|Halo 3 Tricks: Episode 62 *Undead Scarab*|D=06|M=01|Y=2024}} When the level's Scarab first appears, it walks past the player and behind a cliff face; when the player makes it to the end of the area, it walks back in. If a player uses a Ghost to board the Scarab while it walks behind the cliff face, he can destroy the Scarab prematurely. From there, another player must simply get to the end of that section, triggering the Scarab's return. The damaged front half of the destroyed Scarab will walk out and then stay still. | |||
*In ''Halo 3'', the player can steer a Scarab. To do this, a player must board the Scarab, go to the front of the lower deck, and run into either the left or right wall. The Scarab will go in that direction, possibly because the Scarab attempts to reorient itself in order to get a clear shot at the player. | |||
*On the ''Halo 3'' level "The Covenant", if a player manages to kill a Scarab before its landing animation is finished, the Scarab will briefly go underground and launch everyone on board across the level. | |||
==Gallery== | |||
===''Halo 3'' design=== | |||
<gallery> | |||
File:Halo3-Scarab1.png|A view of the ''Halo 3'' Scarab, facing right. | |||
File:Halo3-Scarab2.png|Another view of the Scarab in ''Halo 3''. | |||
File:ScarabH3.png|A Scarab in ''Halo 3''. | |||
File:H3 Storm Scarab.jpg|A Scarab in [[Voi]], [[Kenya]]. | |||
==== | File:1217438400 Core.jpg|A close up of a ''Deutoros''-pattern Scarab's core. | ||
File:Scarabcore.jpg|A view of a Scarab's damaged core. | |||
File:1216050538 Scarab.jpg|A ''Deutoros''-pattern Scarab firing its main cannon. | |||
File:Scarab_Walk.jpg|A ''Deutoros''-pattern Scarab landing on Installation 00. | |||
File:H3ODST_GaussBanshees.jpg|A Scarab on the Mombasa Coastal Highway in ''Halo 3: ODST''. | |||
File:HR Scarab Render.jpg|An in-game render of a Scarab from ''Halo: Reach''. | |||
File:Halo Reach Scarab.png|A Scarab on [[Reach]] being harassed by [[Carter-A259]]'s [[D77-TC Pelican]]. | |||
File:HaloReach-Scarab-Angle.png|A ''Deutoros''-pattern Scarab in ''Halo: Reach''. | |||
File:HR-T47ScarabUHAP-RefChart.jpg|A turnaround reference of the Scarab in ''Halo: Reach''. | |||
File:HW2_KnowYourEnemy_Concept_2.jpg|Concept art of two Scarabs for ''[[Know Your Enemy]]''. | |||
File:HW2C-Scarabs.png|Another revision of the previous concept piece. | |||
File:HFR Scarab.jpg|A ''Deutoros''-pattern Scarab in ''[[Halo: Fireteam Raven]]''. | |||
File:HINF Concept EarlyZetaBattle.jpg|''Halo Infinite'' concept art depicting a ''Deutoros''-pattern Scarab firing on a [[Banished]] spacecraft. | |||
</gallery> | |||
''' | |||
A | |||
[[ | |||
===''Halo Wars''=== | |||
<gallery> | |||
File:HW DeutorosScarab Concept.jpg|Concept art of the ''Deutoros''-pattern Scarab for ''Halo Wars''. | |||
File:HW PirthCityScarab.jpg|A Scarab in [[Pirth City]]. | |||
File:HW ChasmsScarabs.jpg|A trio of Scarabs on Harvest. | |||
File:HW Scarab Screenshot.jpg|A Scarab in ''Halo Wars''. | |||
File:HW ScarabFiring.png|The Scarab firing its focus cannon. | |||
File:HW Scarab&Locusts.png|A Scarab alongside two ''Shua'ee''-pattern Locusts. | |||
</gallery> | |||
==List of appearances== | |||
{{Col-begin}} | |||
{{Col-2}} | |||
*''[[Halo: Uprising]]'' {{1st}} | |||
*''[[Halo 3]]'' | |||
*''[[Halo Wars]]'' | |||
*''[[Halo 3: ODST]]'' | |||
*''[[Halo Legends]]'' | |||
**''[[Origins]]'' | |||
{{Col-2}} | |||
*''[[Halo: Reach]]'' | |||
*''[[Halo 4]]'' {{Mo}} | |||
*''[[Halo: Spartan Assault]]'' | |||
*''[[Halo: New Blood]]'' | |||
*''[[Halo: Spartan Strike]]'' | |||
*''[[Halo: Hunters in the Dark]]'' | |||
*''[[Halo: Fireteam Raven]]'' | |||
{{Col-end}} | |||
==Sources== | ==Sources== | ||
{{Ref/Sources|2}} | |||
{{ | |||
{{Covenant Ground Vehicles}} | |||
[[Category: | [[Category:Excavators|Scarab, Type-47A 'Deutoros']] | ||
Latest revision as of 04:55, December 5, 2024
| Deutoros-pattern Fortress Breaker | |
|---|---|
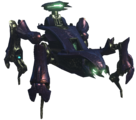
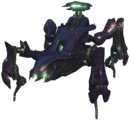
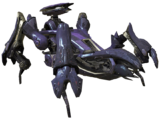
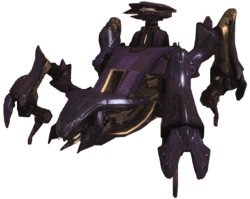 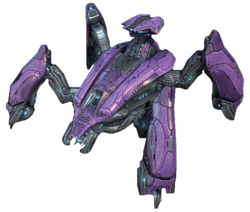 Two alternate chassis' for the Scarab. | |
| Production information | |
|
Manufacturer: |
|
|
Product line: |
|
|
Model: |
|
| Technical specifications | |
|
Length: |
|
|
Width: |
|
|
Height: |
|
|
Mass: |
|
|
Maximum speed: |
76 kilometres per hour (47 mph)[3] |
|
Armament: |
|
|
Crew: |
|
|
Complement: |
|
| Usage | |
|
In service: |
|
|
Role(s): |
|
|
Affiliation: |
|
- "Pro tip: Shoot them in the legs first. And it's okay to cheer when you blow one of them up. You deserve it."
- — Spartan Edward Buck, offering advice on how to destroy a Deutoros-pattern Scarab[5]
The Deutoros-pattern Fortress Breaker[2] (UNSC Type classification: Type-47B Deutoros, T-47B Ultra-Heavy Assault Platform),[6] or Scarab, is a large, heavily armored, all-terrain, quadrupedal walker. Classified as a tier-four Excavator, the Deutoros-pattern Scarab was employed by the Covenant as a siegeworks ultra-heavy artillery assault platform.[3]
Originally designed strictly for mining operations and deep excavations on widely varied terrain,[1][6] the Deutoros-pattern Scarab has since been repurposed for combat.[4] The walker is used to attack heavily defended structures and emplacements and to provide nearly-unstoppable combat support for Covenant ground forces. A heavily-fortified and dexterous mobile platform that boasts impressive levels of firepower, the Scarab is known for striking fear into its opponents.[6]
Overview[edit]
Design details[edit]
- "It's a tank the size of a building that walks around on four legs bent like a spider's, and it bristles with enough weaponry to qualify as a mobile demolition platform."
- — Spartan Edward Buck, referring to a Deutoros-pattern Scarab[5]
Like other patterns of Scarab, the body of the Deutoros-pattern Scarab rests atop four powerful legs. Its main body features an interior bay and command center, where many of the vehicle's essential functionaries are accessible. An infantry platform that surrounds the enclosed bay allows the defensive personnel of the Scarab to fire upon hostiles from above or eliminate other threats.[1][6] Although the Deutoros-pattern Scarab appears to be a traditional vehicle, it is actually a bio-mechanical construct that makes extensive use of Rhulolekgolo.[1] Hundreds of Rhulolekgolo swarm beneath the Scarab's battle plate, acting as a gestalt intelligence, interfacing with its exoskeleton and control systems,[2] though the gestalt is seldom given complete control of the entire Scarab. The Lekgolo meta-colonies that inhabit these Scarabs are often populated by particularly unruly Lekgolo individuals that can not be trusted with total control over the vehicle without causing undesired chaos.[3] A central power junction located inside the Scarab's interior bay is one of the only locations on the walker where the Lekgolo are exposed.[6] Due to the Scarab's reliance on the Lekgolo and their ability to operate independently, the weapons platform was never formally categorized as a vehicle by the Covenant, instead being classified as a single, ultra-heavy infantry unit by the Covenant.[1][3] The chassis of the Scarab is built in specialized, cavernous assemblies, such as the Assembly Forges on the now-destroyed Covenant capital city of High Charity. At these facilities, Rhulolekgolo are fused into the carapace and appendages,[6] and bound to the control systems.[3] Like many Covenant vehicles, the Deutoros-pattern Scarab is modularly crafted on an assembly line, where its various pieces are combined then activated.[6]
While they are known to be particularly robust, Deutoros-pattern Scarabs are not without their weaknesses. A Scarab will be temporarily stalled if its legs sustain enough damage,[5] causing the walker lower into a crouch-like position and allowing potential boarders to jump into the vehicle's troop bay. The central power junction is protected only by the vehicle's external armor and the exposed Rhulolekgolo are susceptible to weapon fire,[1] so attacking the junction is relatively easy for hostile boarders. Once the core is destroyed, the Rhulolekgolo gestalt's tissue tears and a chain reaction will occur, which will quickly destroy the Scarab.[6]
Mobility[edit]
Unlike most vehicles deployed by the Covenant, the Deutoros-pattern Scarab does not employ anti-gravity propulsion to move; instead, it uses a quadrupedal leg assembly for locomotion. These jointed legs are very powerful, strong enough to even withstand the shock of low-orbital drop.[7][8] Scarabs are equipped with several underside thrusters that allow the vehicle to slow its descent during its initial deployment.[7][2] The Scarab can move at a relatively fast speed, with a maximum speed at 76 kilometers per hour (47 miles per hour).[3]
The articulated legs and the spiked "feet" of a Deutoros-pattern Scarab allow the vehicle to sturdily grip the ground, climb over obstacles, and even kneel down.[4] The legs are also very nimble, affording the Scarab a surprising degree of maneuverability. For example, Deutoros-pattern Scarabs have been observed mantling inclines in excess of forty-five degrees[9] and they can attempt to right themselves if knocked off balance.[8] The Deutoros-pattern Scarab is capable of carrying out excavations and assaults in varied terrains and rough environments,[1][6] and it is even capable of operating underwater, if only for brief periods.[9]
Crew and complement[edit]
The Deutoros-pattern Scarab is occasionally used as a mobile command base, and rarely as a large-scale troop transport vehicle.[4] An officer of the Covenant military serves as a supervisor and pilot aboard the Scarab. Rather than steer the walker themselves, the Scarab's supervisor "guides" the direction of the machine and occasionally directs the artillery when needed. The Scarab's Rhulolekgolo complement manages and carries out most of the walker's functions and processes.[6] The supervisor may operate the Deutoros-pattern Scarab's weaponry when increased precision is needed, as the Rhulolekgolo have no fine control over the armaments.[3]
As Deutoros-pattern Scarabs were too valuable to operate without support, the Covenant would often supply the walker with at least twelve security personnel when deployed in the field.[3][2] The accompanying infantry and supervisory personnel aboard a Scarab serve to prevent boarders from destroying the vehicle from within or from attempting to seize the walker for themselves. The security personnel aboard a Scarab were additionally charged with eliminating any hostiles that were able to survive the vehicle's bombardment of a location.[4] The security personnel of Deutoros-pattern Scarabs typically consisted of lances of Unggoy and Kig-Yar, as well as some Jiralhanae and Sangheili.[10]
Armaments[edit]
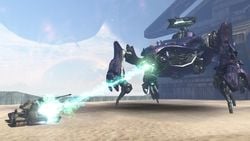
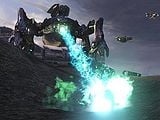
The primary armament of the Deutoros-pattern Scarab is an ultra-heavy focus cannon mounted beneath the head end of the infantry platform.[1][2] The focus cannon is typically affixed towards the end of the Scarab's production process.[6] The weapon fires a stream of superheated plasma and is a nearly capital ship-scale energy projector capable of both mass destruction and delicate stratigraphic excavation, depending on the weapon's tuning and the operator's expertise.[3] The cannon is capable of melting through five feet of concrete, with one Scarab having enough firepower to level a small city.[4] The cannon is housed in a cradle that is protected by flaps, which open before firing. The focus cannon has a relatively low rate of fire and is typically discharged in brief bursts. As the weapon is fired, it releases a green-glowing liquid, which may be coolant.[7] The ultra-heavy focus cannon is useful for uncovering artifacts during excavation operations.[6] Additionally, the focus cannon is capable of being replaced—a delicate process that requires calibrating all the coolant subsystems, as any heat spike from the core can pose a serious threat to the Rhulolekgolo gestalt.[11]
The secondary armament of the Deutoros-pattern is an ultra-heavy plasma cannon,[2] which is mounted atop the back of the Scarab. This armament serves primarily as an anti-aircraft weapon, having a greater effective range than the focus cannon possessing a 360° field-of-fire.[4]
Additionally, the Deutoros-pattern Scarab carries three mounted Pek-pattern plasma cannons, each manually operated by the Scarab's security personnel.[6][2] These are used primarily in an anti-infantry role,[4] but can also be effective against light ground vehicles and, to a lesser extent, light aircraft such as AV-14 Hornets. The Scarab's crew often utilize these weapons to repel boarders and to provide covering fire.[1][3]
Variants[edit]
Two major variants of the Deutoros' design have been encountered. The more-commonly encountered version was heavily used throughout the war, particularly in its final battles.
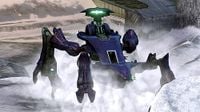
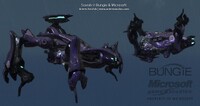
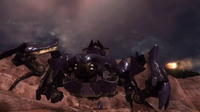
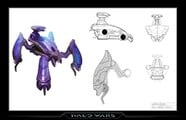
During the Harvest campaign and Battle of Trove, the Covenant fielded a variant of the Deutoros-pattern Scarab with an altered chassis. The altered design features a more compact design without the walkways extending around the side of the vehicle, alongside a completely enclosed rear section. This design of the Scarab appears to be in some way able to be piloted by a non-Lekgolo operator - demonstrated by Red Team during the engagement on Trove.[12]
Operational history[edit]
Human-Covenant War[edit]
Despite being encountered as early as 2527 and officially observed in 2529, the UNSC did not fully catalog the Deutoros-pattern Scarab until 2547.[3] During the later stages of the Battle of Trove, the Covenant Fleet of Glorious Interdiction deployed a number of Deutoros-pattern Scarabs in efforts to stop not only the crew of the UNSC Spirit of Fire but also the Flood and Sentinels that inhabited the shield world. During the battle, the Flood made an attempt to capture at least one Scarab, with Flood roots erupting out of the ground around the walker and ensnaring it, forcing nearby Covenant infantry to flee. Before they could commandeer the Scarab, they were attacked by UNSC forces who eliminated the roots allowing a SPARTAN-II to take control of the walker. The captured Scarab provided a significant combat advantage for the UNSC as they fought to destroy several Covenant citadels which would provide them with a staging area in order to assault the Apex Site. Another Deutoros-pattern Scarab along with a contingent of Sangheili Honor Guardsmen were stationed at the final Covenant citadel but the UNSC forces, with the aid of their captured Scarab, were able to eliminate all Covenant forces.[12] At least one Deutoros-pattern Scarab attempted to halt the UNSC's assault on the Apex Site but fell to the human's determined assault.[13] A number of Deutoros-pattern Scarabs were deployed around the portal that would allow the Spirit of Fire to escape the shield world, both to counter the human forces, as well as a large Flood presence as well as hostile Forerunner constructs. They were ultimately unsuccessful in preventing the departure of the Spirit of Fire from the Etran Harborage.[14]
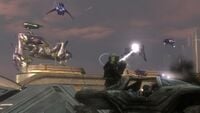
Deutoros-pattern Scarabs were rarely employed by the Covenant during the sieges on the Outer Colonies, though they saw increased field deployment in large numbers near the end of the Human-Covenant War to crush UNSC fortifications on well-defended Inner Colony worlds.[3] Unprecedented numbers of Deutoros-pattern Scarabs were used by the Covenant during the Fall of Reach.[3] During their initial incursions on Reach, the Fleet of Valiant Prudence deployed significant Covenant ground forces, including at least three Deutoros-pattern Scarabs at Szurdok Ridge, hiding their presence from the UNSC using several deployment spire. When the site was attacked by the UNSC on August 12, 2552, these three Scarabs provided support for Covenant ground forces as the two massive armies clashed at the landing zone.[15] Towards the end of the Fall of Reach, Deutoros-pattern Scarabs and other Covenant heavy armor were deployed to stop UNSC forces from escaping from the doomed planet.[8]
During the final hours of the Battle of Installation 04, the Covenant deployed a Deutoros-pattern Scarab to combat swarming Flood forces in the arid badlands around the downed UNSC Pillar of Autumn. During the battle, remaining UNSC personnel on the ringworld launched an assault on the Covenant forces, with the objective of drawing them away from the Autumn while SPARTAN John-117 boarded the cruiser. However when the Chief's commandeered Banshee approached the ship, the Scarab soon took notice and moved to ambush the Spartan. Fireteam Raven was quick to act, boarding a Falcon and proceeding to pursue the walker. Despite its best efforts, the team of ODSTs was able to successfully board the Scarab, wiping out its entire complement of soldiers and destroying the core.[16]
When the High Prophet of Regret invaded Earth in October, 2552, he deployed at least five Scarabs to Mombasa, Africa, with at least one of them being a Deutoros.[17] Two Scarabs were placed in New Mombasa, while another three were deployed in Old Mombasa. One of the Scarabs in New Mombasa was apparently charged with destroying the Mombasa Tether.[18] Shortly after Solemn Penance's retreat, one of these was stationed in the partially-flooded Kikowani Station, where it was engaged and neutralized by Alpha-Nine.[19]
On the morning of October 21 when the High Prophet of Truth's Jiralhanae-led reinforcements arrived over Kenya,[20][21][22] as Alpha-Nine members Edward Buck, Veronica Dare and the Rookie escorted a high-value asset: the defecting Covenant Huragok Quick to Adjust containing information from a subroutine of the city's Superintendant artificial intelligence, they witnessed several Scarabs being deployed by the massing Covenant warships. While most of them ignored or didn't notice the humans, one of the Scarabs did take notice and opened fire on the Olifant containing the Huragok with its focus cannon, heavily damaging the vehicle and forcing the team to abandon it outside of the Uplift Nature Reserve.[9]
During the Battle of Voi, a Deutoros-pattern Scarab was deployed into a lake bed near Traxus Factory Complex 09 after all of the Covenant Anti-Aircraft defences in the area were cleared by a mounted UNSC assault force. John-117 was able to eventually bring down the walker, allowing the human forces to regroup and push on to their final objective, a Covenant Anti-Aircraft Cannon.[23] The Prophet of Truth deployed multiple Deutoros-pattern Scarabs during the Battle of Installation 00. Outside Installation 00's Cartographer, John-117, with the assistance of a UNSC armored unit, destroyed a Deutoros-pattern Scarab. During the battle outside the Citadel, a pair of Deutoros-pattern Scarabs were deployed as a last-ditch effort by the Covenant to prevent the UNSC-Sangheili forces from reaching the Prophet of Truth. Despite their best efforts, both Scarabs were neutralized by the Master Chief, and with the death of the final Prophet Hierarch shortly later, the Covenant was brought to an end.[7]
Gameplay[edit]
Halo 3, Halo 3: ODST, and Halo: Reach[edit]
The Deutoros-pattern Scarabs encountered in Halo 3 have far more destructible parts than the Protos-pattern Scarab seen in Halo 2. Destructible armor covers each joint of a Scarab's legs, and doing enough damage to the legs will cause the Scarab to go into lockdown, making it stop moving altogether. The flaps covering the main gun can be destroyed, though this does not affect the gun's operation. The crest on and around the rear anti-air turret can be completely blown off, slowing the turret's rate of fire and reducing the size of its plasma bolts. Two side door panels near the bottom of the Scarab's back can be torn off, allowing entry onto the vehicle.
A Scarab's rear armor possesses a glowing red circle; inflicting enough damage upon this circle will detach the armor, leaving the Scarab's core exposed. The core itself can be destroyed; its destruction will trigger a massive explosion that blows the Scarab into pieces, leaving few intact parts.
If one can successfully manage to board the Scarab in Halo: Reach, they will find that only the core of the Scarab can be destroyed. All other parts of the Scarab, including Plasma Cannons, cannot be destroyed. Destroying the core of the Scarab will also not destroy the Scarab itself. Instead, it will expose a hole in the Scarab, which bleeds orange Lekgolo blood if shot.[8]
Halo Wars[edit]
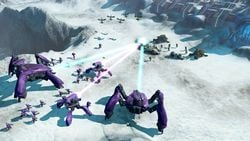
Halo Wars features the Deutoros-pattern Scarab as a playable unit in Skirmish and multiplayer modes for Covenant leaders, though it is smaller for the sake of gameplay. Each Scarab costs ![]() 3,000 resources and
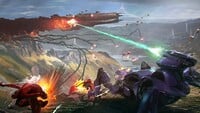
3,000 resources and ![]() 20 population in Skirmish, with no upgrades available due to their cost and is built at the Covenant citadel. Up to two can be spawned at a time in a Standard mode and four in Deathmatch mode. Halo Wars' Title Update #4 enhanced the Scarab by providing an additional 25% hitpoints and a 25% damage increase, and is now capable of surviving four direct MAC blasts as a result of the improved hitpoints.
20 population in Skirmish, with no upgrades available due to their cost and is built at the Covenant citadel. Up to two can be spawned at a time in a Standard mode and four in Deathmatch mode. Halo Wars' Title Update #4 enhanced the Scarab by providing an additional 25% hitpoints and a 25% damage increase, and is now capable of surviving four direct MAC blasts as a result of the improved hitpoints.
The Scarabs excel at attacking vehicles and infantry with their powerful weapons, though aircraft take longer for the Scarab to take down. Scarabs are very mobile, being able to climb over most obstacles. Only certain obstructions, like craters or fire, can block them. In the campaign level Beachhead, the player may use a Spartan to commandeer an abandoned Scarab. Commandeering this Scarab and using it to destroy twenty-five enemy units unlocks the achievement Beaming With Pride.
Scarabs are extremely difficult to destroy. Overwhelming it with a massive attack force works well, particularly when using anti-vehicle units like the SP42 Cobra or some Hunters, but a significant portion of the attack force will be lost in the process. An upgraded MAC blast or carpet bomb can destroy a Scarab rather quickly, as can a group of AC-220 Vultures using their missile barrages. Covenant leader units' special abilities can inflict massive damage on a Scarab, with the Prophet of Regret's cleansing beam being a good example.
Winning a Skirmish game with two Scarabs unlocks the 2 Bugs Are Better Than 1 achievement.
Trivia[edit]

|
Browse more images in this article's gallery page. |
General[edit]
- Early in the development of Halo: Reach, there was to be a level between "New Alexandria" and "The Package" in which the player would navigate a Scarab through the ruins of New Alexandria. According to Marcus Lehto, the level was cut because it was "a little crazy".[24]
- On three occasions in Halo: Reach, Scarabs come within dangerous proximity to the player character, yet the player is unable to fight or board them. Martin O'Donnell refers to these moments as "Scarab teases."[25]
- The Deutoros-pattern Scarab was recreated for use in Halo ActionClix; it is the largest figure ever made by WizKids, the game's creator. A battle-damaged version was released at the 2007 San Diego Comic-Con for $250, which included the Scarab, two outdoor maps, an indoor map (representing the Scarab's interior), four character cards, and rules for both the Scarab and the game itself. A normal model was also released at select retailers in November 2007.
Glitches[edit]
- In Halo 3 and Halo 3: ODST, if the player jumps onto one of the legs of a Scarab, and the leg rises up, it will cause the player to fly through the air for a considerable distance and finally die after a while, possibly after hitting a barrier.
- On the Halo 3 level "The Ark", a glitch can be used to create an "undead Scarab".[26] When the level's Scarab first appears, it walks past the player and behind a cliff face; when the player makes it to the end of the area, it walks back in. If a player uses a Ghost to board the Scarab while it walks behind the cliff face, he can destroy the Scarab prematurely. From there, another player must simply get to the end of that section, triggering the Scarab's return. The damaged front half of the destroyed Scarab will walk out and then stay still.
- In Halo 3, the player can steer a Scarab. To do this, a player must board the Scarab, go to the front of the lower deck, and run into either the left or right wall. The Scarab will go in that direction, possibly because the Scarab attempts to reorient itself in order to get a clear shot at the player.
- On the Halo 3 level "The Covenant", if a player manages to kill a Scarab before its landing animation is finished, the Scarab will briefly go underground and launch everyone on board across the level.
Gallery[edit]
Halo 3 design[edit]
A Scarab on Reach being harassed by Carter-A259's D77-TC Pelican.
Concept art of two Scarabs for Know Your Enemy.
A Deutoros-pattern Scarab in Halo: Fireteam Raven.
Halo Infinite concept art depicting a Deutoros-pattern Scarab firing on a Banished spacecraft.
Halo Wars[edit]
A Scarab in Pirth City.
List of appearances[edit]
|
Sources[edit]
- ^ a b c d e f g h i j k l m n Halo: The Essential Visual Guide, page 163
- ^ a b c d e f g h i j k l m n o p q r Halo Encyclopedia (2022 edition), page 279
- ^ a b c d e f g h i j k l m n o p q r s t u v w Halo Waypoint, Scarab (Retrieved on Jun 30, 2021) [archive]
- ^ a b c d e f g h i j k l Halo Encyclopedia (2011 edition), page 254-255
- ^ a b c Halo: New Blood, chapter 8
- ^ a b c d e f g h i j k l m Halo Waypoint, Scarab (Retrieved on Mar 14, 2011) [local archive] [external archive]
- ^ a b c d Halo 3, campaign level The Covenant
- ^ a b c d Halo: Reach, campaign level The Pillar of Autumn
- ^ a b c Halo 3: ODST, campaign level Coastal Highway
- ^ Halo 3, Scarab in-game enemy
- ^ Halo Wars Launch Site, Covenant Side: ENGINEERING REP\STAT
- ^ a b Halo Wars, campaign level Beachhead
- ^ Halo Wars, campaign level Reactor
- ^ Halo Wars, campaign level Escape
- ^ Halo: Reach, campaign level Tip of the Spear
- ^ Halo: Fireteam Raven, campaign level Last Stand
- ^ Halo Waypoint, Canon Fodder - Scarab Tactics (Retrieved on Dec 23, 2019) [archive]
- ^ Halo: Evolutions - Palace Hotel
- ^ Halo 3: ODST, campaign level Kikowani Station
- ^ Halo Waypoint, Canon Fodder - Vergil Reality (Retrieved on Jun 15, 2021) [archive]
- ^ Ten Twenty
- ^ Halo 3: ODST, campaign level Coastal Highway
- ^ Halo 3, campaign level The Storm
- ^ YouTube - Sacharified, Halo Reach Legendary Edition - Developer Commentary Part 6 (Retrieved on Jan 6, 2024)
- ^ YouTube - Sacharified, Halo Reach Legendary Edition - Developer Commentary Part 4 (Retrieved on Jan 6, 2024)
- ^ YouTube - CMNeir, Halo 3 Tricks: Episode 62 *Undead Scarab* (Retrieved on Jan 6, 2024)
| ||||||||||||||||||||||||||||||||
