|
|
| Line 1: |
Line 1: |
| {{Cleanup}} | | {{Title|''Deutoros''-pattern Scarab}} |
| {{era|H2|H3|HW|FS|GOO|HGN|UP}} | | {{Status|Canon}} |
| {{Ratings}} | | {{Disambig header|the Scarab model introduced in [[Halo 3]]|other types of Scarab|Scarab (disambiguation)}} |
| {{Ship | | {{Vehicle infobox |
| |image=[[Image:StormScarab.jpg|300px]] | | |name=''Deutoros''-pattern Fortress Breaker |
| |name=Scarab | | |image=[[File:HReach-T47ScarabUHAP.png|250px]]<br/>[[File:ScarabHW.png|250px]]<br/>Two alternate chassis' for the Scarab. |
| |manufacturer= | | |manufacturer=[[Assembly Forges]]{{Ref/Book|Id=HVG|EVG|Page=163}}{{Ref/Book|Id=Enc22|Enc22|Page=279}} |
| |line= | | |line=[[Excavator]] tier-four{{Ref/Site|Id=universe|URL=https://www.halowaypoint.com/en-us/universe/vehicles/scarab|Site=Halo Waypoint|Page=Scarab|D=30|M=06|Y=2021}} |
| |model=Type-47 Ultra Heavy Assault Platform | | |model=[[Scarab]]{{Ref/Reuse|universe}} |
| |class= | | |cost= |
| |length=64.9 meters (213 feet) | | |length={{Convert|159.5|ft|m|disp=flip|sp=us}}{{Ref/Reuse|universe}}{{Ref/Reuse|Enc22}}{{Ref/Book|Id=ENC254|Enc11|Page=254-255}} |
| |width=88.7 meters (291 feet)
| | |width={{Convert|158.4|ft|m|disp=flip|sp=us}}{{Ref/Reuse|universe}}{{Ref/Reuse|Enc22}} |
| |height=55 meters (180 feet) | | |height={{Convert|126.8|ft|m|disp=flip|sp=us}}{{Ref/Reuse|universe}}{{Ref/Reuse|Enc22}} |
| |mass= | | |mass={{Convert|171.8|MT}}{{Ref/Reuse|universe}}{{Ref/Reuse|Enc22}} |
| |max accel= | | |max speed={{Convert|76|km/h|mph}}{{Ref/Reuse|universe}} |
| |max speed space= | | |engine= |
| |max speed air= | | |hull= |
| |engine=Onboard reactor<ref>''[[Halo: Ghosts of Onyx]]'', page 209</ref> | | |armament= |
| |slipspace drive=None | | *1 ultra-heavy [[focus cannon]]{{Ref/Reuse|HVG}}{{Ref/Reuse|universe}}{{Ref/Reuse|Enc22}} |
| |slipspace speed=N/A | | *1 [[Heavy plasma cannon|ultra-heavy plasma cannon]]{{Ref/Reuse|HVG}}{{Ref/Reuse|universe}}{{Ref/Reuse|Enc22}} |
| |poweroutput= | | *3 {{Pattern|Pek|plasma cannon}}s{{Ref/Reuse|HVG}}{{Ref/Reuse|Enc22}} |
| |power=Engine Core | | |crew= |
| |shield gen=Energy shield around core only | | *1 supervisor{{Ref/Reuse|HVG}}{{Ref/Reuse|universe}}{{Ref/Reuse|Enc22}} |
| |hull= | | *[[Rhulolekgolo]] operators{{Ref/Reuse|Enc22}} |
| |sensor= | | |complement=*12 security personnel{{Ref/Reuse|HVG}}{{Ref/Reuse|universe}}{{Ref/Reuse|Enc22}} |
| |target= | |
| |navigation= | |
| |avionics= | |
| |countermeasures=Explosive devices. | |
| |armament=*Main Cannon (1) | |
| :Firing Arc: Forward
| |
| *Anti-Aircraft Turrets | |
| (2 in Halo 2, 1 in Halo 3) Firing Arc:
| |
| Peripheral in Halo 2 and 360° in Halo 3
| |
| *3 anti-infantry [[Plasma Cannon]]s
| |
| (Halo 3 only)
| |
| |complement= | |
| |crew=*1 Commanding Officer | |
| *Numerous Crewman and Security Personnel | |
| |skeleton= | |
| |passengers= | |
| |capacity= | |
| |consumables= | | |consumables= |
| |othersystems= | | |othersystems= |
| |firstuse=[[2535]] | | |firstuse= |
| |role=Heavy Assault Vehicle/mobile base and mining | | |service= |
| |era=Human-Covenant War | | *[[Human-Covenant War]] |
| |affiliation=[[Covenant]] | | *[[Great Schism]] |
| |hidep=true | | |role= |
| | *Heavy assault platform{{Ref/Reuse|ENC254}} |
| | *Deep excavation{{Ref/Reuse|ENC254}} |
| | *Mobile command base{{Ref/Reuse|ENC254}} |
| | |affiliation=[[Covenant]]{{Ref/Reuse|ENC254}} |
| }} | | }} |
| {{Quote|We've all run the simulations. They're tough, but they ain't invincible!| Sergeant Major Avery J. Johnson, referencing the Scarab in the [[Metropolis]] open cut-scene}} | | {{Quote|Pro tip: Shoot them in the legs first. And it's okay to cheer when you blow one of them up. You deserve it.|Spartan Edward Buck, offering advice on how to destroy a ''Deutoros''-pattern Scarab{{Ref/Reuse|NB8}}}} |
| | The '''''Deutoros''-pattern Fortress Breaker'''{{Ref/Reuse|Enc22}} {{Type|47B|Deutoros|Ultra-Heavy Assault Platform|UHAP}},{{Ref/Site|Id=Waypoint|URL=http://halo.xbox.com/en-us/intel/theuniverse/tech/gallery/scarab/ea02cb6c-58ae-44e2-aacf-3eadd73fb6f9|Site=Halo Waypoint|Page=Scarab|D=14|M=03|Y=2011|LocalArchive=Archive:Halo Waypoint/2009 to 2014/Universe/Vehicles#Scarab}} or '''Scarab''', is a large, heavily armored, all-terrain, quadrupedal walker. Classified as a tier-four [[Excavator]], the ''Deutoros''-pattern Scarab was employed by the [[Covenant]] as a [[Wikipedia:siegeworks|siegeworks]] ultra-heavy artillery assault platform.{{Ref/Reuse|universe}} |
|
| |
|
| The '''Type-47 Ultra Heavy Assault Platform''' (abbreviated '''Type-47 UHAP'''), more commonly known as the '''Scarab''', is a [[Covenant]] ground based heavy assault walker.
| | Originally designed strictly for mining operations and deep excavations on widely varied terrain,{{Ref/Reuse|HVG}}{{Ref/Reuse|Waypoint}} the ''Deutoros''-pattern Scarab has since been repurposed for combat.{{Ref/Reuse|ENC254}} The walker is used to attack heavily defended structures and emplacements and to provide nearly-unstoppable combat support for Covenant ground forces. A heavily-fortified and dexterous mobile platform that boasts impressive levels of firepower, the Scarab is known for striking fear into its opponents.{{Ref/Reuse|Waypoint}} |
|
| |
|
| == Introduction == | | ==Overview== |
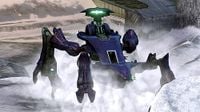
| The '''Scarab''', is a towering [[Covenant]] walker, upheld on four large mechanical legs. This differs from all the other Covenant's ground-based vehicles, such as the [[Wraith]], [[Ghost (Vehicle)|Ghost]], or [[Spectre]] which are all propelled by gravity boosters. The Scarab uses plasma, as its main weapon against their enemies.
| | ===Design details=== |
| | {{Quote|It's a tank the size of a building that walks around on four legs bent like a spider's, and it bristles with enough weaponry to qualify as a mobile demolition platform.|[[Spartan Operations|Spartan]] [[Edward Buck]], referring to a ''Deutoros''-pattern Scarab{{Ref/Novel|Id=NB8|HNB|Chapter=8}}}} |
| | [[File:Lekgolo-scarab.jpg|thumb|200px|left|Exposed Rhulolekgolo in a ''Deutoros''-pattern Scarab's core.]] |
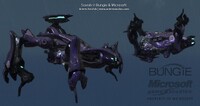
| | Like other patterns of Scarab, the body of the ''Deutoros''-pattern Scarab rests atop four powerful legs. Its main body features an interior bay and command center, where many of the vehicle's essential functionaries are accessible. An infantry platform that surrounds the enclosed bay allows the defensive personnel of the Scarab to fire upon hostiles from above or eliminate other threats.{{Ref/Reuse|HVG}}{{Ref/Reuse|Waypoint}} Although the ''Deutoros''-pattern Scarab appears to be a traditional vehicle, it is actually a bio-mechanical construct that makes extensive use of [[Rhulolekgolo]].{{Ref/Reuse|HVG}} Hundreds of Rhulolekgolo swarm beneath the Scarab's battle plate, acting as a gestalt intelligence, interfacing with its exoskeleton and control systems,{{Ref/Reuse|Enc22}} though the gestalt is seldom given complete control of the entire Scarab. The Lekgolo meta-colonies that inhabit these Scarabs are often populated by particularly unruly Lekgolo individuals that can not be trusted with total control over the vehicle without causing undesired chaos.{{Ref/Reuse|universe}} A central power junction located inside the Scarab's interior bay is one of the only locations on the walker where the Lekgolo are exposed.{{Ref/Reuse|Waypoint}} Due to the Scarab's reliance on the Lekgolo and their ability to operate independently, the weapons platform was never formally categorized as a vehicle by the [[Covenant]], instead being classified as a single, ultra-heavy infantry unit by the Covenant.{{Ref/Reuse|HVG}}{{Ref/Reuse|universe}} The chassis of the Scarab is built in specialized, cavernous assemblies, such as the [[Assembly Forges]] on the now-destroyed Covenant capital city of ''[[High Charity]]''. At these facilities, Rhulolekgolo are fused into the carapace and appendages,{{Ref/Reuse|Waypoint}} and bound to the control systems.{{Ref/Reuse|universe}} Like many Covenant vehicles, the ''Deutoros''-pattern Scarab is modularly crafted on an assembly line, where its various pieces are combined then activated.{{Ref/Reuse|Waypoint}} |
|
| |
|
| It makes use of four large, mechanical legs for mobility, instead of a Boosted Gravity Propulsion Drive, utilized by most other Covenant vehicles. This is an advantage that allows it to climb over obstacles that may have impeded other Covenant vehicles.
| | While they are known to be particularly robust, ''Deutoros''-pattern Scarabs are not without their weaknesses. A Scarab will be temporarily stalled if its legs sustain enough damage,{{Ref/Reuse|NB8}} causing the walker lower into a crouch-like position and allowing potential [[Naval boarding|boarder]]s to jump into the vehicle's troop bay. The central power junction is protected only by the vehicle's external armor and the exposed Rhulolekgolo are susceptible to weapon fire,{{Ref/Reuse|HVG}} so attacking the junction is relatively easy for hostile boarders. Once the core is destroyed, the Rhulolekgolo gestalt's tissue tears and a chain reaction will occur, which will quickly destroy the Scarab.{{Ref/Reuse|Waypoint}} |
|
| |
|
| It is the largest known Covenant, ground-based vehicle, as well as the most resistant to damage. Its innards, though, are extremely vulnerable and easily destroyed, making it very vulnerable to boarding actions, as demonstrated in the [[Battle of New Mombasa]] and the [[Second Battle of Earth]].<ref>''[[Halo 3 E3 2007 Trailer]]''</ref>
| | ===Mobility=== |
| | [[File:Scarab deployment.jpg|thumb|250px|A Scarab slowing itself from its low-orbital deployment on Installation 00.]] |
| | Unlike most vehicles deployed by the Covenant, the ''Deutoros''-pattern Scarab does not employ [[Anti-gravity technology|anti-gravity propulsion]] to move; instead, it uses a quadrupedal leg assembly for locomotion. These jointed legs are very powerful, strong enough to even withstand the shock of low-orbital drop.{{Ref/Level|Id=The Covenant|H3|The Covenant (level)|The Covenant}}{{Ref/Level|Id=TPoA|HR|The Pillar of Autumn (Halo: Reach level)|The Pillar of Autumn}} Scarabs are equipped with several underside thrusters that allow the vehicle to slow its descent during its initial deployment.{{Ref/Reuse|The Covenant}}{{Ref/Reuse|Enc22}} The Scarab can move at a relatively fast speed, with a maximum speed at 76 kilometers per hour (47 miles per hour).{{Ref/Reuse|universe}} |
|
| |
|
| The Scarab holds squads of [[Grunts]] and [[Jackals]], as well as a few [[Brutes]] or [[Elites]] to protect it from it being boarded, if anything manages to even get close enough. They have been used in many battles against enemies , such as on [[Reach]] before it was glassed and on [[Earth]] where the [[Spartans]], encountered a few in different locations.[[Image:1210318610 1185489032.jpg|200px|thumb|A Halo 3 battle damaged Scarab figure model.]] | | The articulated legs and the spiked "feet" of a ''Deutoros''-pattern Scarab allow the vehicle to sturdily grip the ground, climb over obstacles, and even kneel down.{{Ref/Reuse|ENC254}} The legs are also very nimble, affording the Scarab a surprising degree of maneuverability. For example, ''Deutoros''-pattern Scarabs have been observed mantling inclines in excess of forty-five degrees{{Ref/Level|Id=Highway|H3ODST|Coastal Highway}} and they can attempt to right themselves if knocked off balance.{{Ref/Reuse|TPoA}} The ''Deutoros''-pattern Scarab is capable of carrying out excavations and assaults in varied terrains and rough environments,{{Ref/Reuse|HVG}}{{Ref/Reuse|Waypoint}} and it is even capable of operating underwater, if only for brief periods.{{Ref/Reuse|Highway}} |
|
| |
|
| == Features == | | ===Crew and complement=== |
| | The ''Deutoros''-pattern Scarab is occasionally used as a mobile command base, and rarely as a large-scale troop transport vehicle.{{Ref/Reuse|ENC254}} An officer of the [[Covenant military]] serves as a supervisor and [[pilot]] aboard the Scarab. Rather than steer the walker themselves, the Scarab's supervisor "guides" the direction of the machine and occasionally directs the artillery when needed. The Scarab's Rhulolekgolo complement manages and carries out most of the walker's functions and processes.{{Ref/Reuse|Waypoint}} The supervisor may operate the ''Deutoros''-pattern Scarab's weaponry when increased precision is needed, as the Rhulolekgolo have no fine control over the armaments.{{Ref/Reuse|universe}} |
|
| |
|
| Scarabs are quite notable for their intimidating, scorpion-like appearance and enormous size. Each of a Scarab's legs is at least 90 feet tall. These legs are surprisingly swift and accurate for their size, and are even able to find holds in narrow places, such as a canyon on [[Installation 05]] or the streets of [[Mombasa]]. These legs can also be used for weapons, as a monstrous pointed leg will impale anything that gets in its way. Situated on top of these legs is a large, flat platform, with further pieces of machinery protruding up from it. | | As ''Deutoros''-pattern Scarabs were too valuable to operate without support, the Covenant would often supply the walker with at least twelve security personnel when deployed in the field.{{Ref/Reuse|universe}}{{Ref/Reuse|Enc22}} The accompanying infantry and supervisory personnel aboard a Scarab serve to prevent boarders from destroying the vehicle from within or from attempting to seize the walker for themselves. The security personnel aboard a Scarab were additionally charged with eliminating any hostiles that were able to survive the vehicle's bombardment of a location.{{Ref/Reuse|ENC254}} The security personnel of ''Deutoros''-pattern Scarabs typically consisted of [[lance]]s of [[Unggoy]] and [[Kig-Yar]], as well as some [[Jiralhanae]] and [[Sangheili]].{{Ref/Game|Id=h3|H3|Scarab in-game enemy}} |
|
| |
|
| Because of the Scarab's size and weight, they are not able to climb tall walls and buildings (Though they can crawl over or smash smaller walls with ease) , and are not skilled at making sharp turns, as evident in Mombasa. As seen in [[Turf]], particularly small and twisting city streets can overwhelm and crash Scarabs.
| | ===Armaments=== |
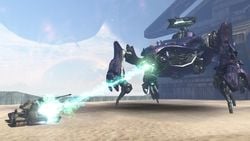
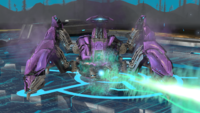
| | The primary armament of the ''Deutoros''-pattern Scarab is an ultra-heavy [[focus cannon]] mounted beneath the head end of the infantry platform.{{Ref/Reuse|HVG}}{{Ref/Reuse|Enc22}} The focus cannon is typically affixed towards the end of the Scarab's production process.{{Ref/Reuse|Waypoint}} The weapon fires a stream of superheated [[plasma]] and is a nearly [[capital ship]]-scale [[energy projector]] capable of both mass destruction and delicate stratigraphic excavation, depending on the weapon's tuning and the operator's expertise.{{Ref/Reuse|universe}} The cannon is capable of melting through five feet of concrete, with one Scarab having enough firepower to level a small city.{{Ref/Reuse|ENC254}} The cannon is housed in a cradle that is protected by flaps, which open before firing. The focus cannon has a relatively low rate of fire and is typically discharged in brief bursts. As the weapon is fired, it releases a green-glowing liquid, which may be coolant.{{Ref/Reuse|The Covenant}} The ultra-heavy focus cannon is useful for uncovering artifacts during excavation operations.{{Ref/Reuse|Waypoint}} Additionally, the focus cannon is capable of being replaced—a delicate process that requires calibrating all the coolant subsystems, as any heat spike from the core can pose a serious threat to the Rhulolekgolo gestalt.{{Ref/Generic|Id=Site|[[Halo Wars Launch Site]]|Covenant Side|Detail=ENGINEERING REP\STAT}} |
|
| |
|
| To defend itself from aerial attacks, the Scarab sports secondary turrets; two in Halo 2 that shoot large red plasma bolts and one larger turret in Halo 3 that shoots large "blue" bolts. The Scarab also has three mounted plasma cannons, one on the left, on the right right, and on the back, all three of which can be ripped off like the human machine gun turret.
| | The secondary armament of the ''Deutoros''-pattern is an [[Heavy plasma cannon|ultra-heavy plasma cannon]],{{Ref/Reuse|Enc22}} which is mounted atop the back of the Scarab. This armament serves primarily as an anti-aircraft weapon, having a greater effective range than the focus cannon possessing a 360° field-of-fire.{{Ref/Reuse|ENC254}} |
|
| |
|
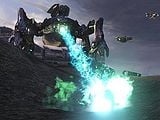
| The Scarab's most deadly weapon; however, is a large, forward-firing main cannon that projects a massive green beam of plasma. This beam can rip apart armoured vehicles such as the [[Scorpion Tank]] or [[Pelican]] upon glancing impact, and is even able to destroy a heavily fortified, [[Forerunner]]-crafted [[Control Room]] door. The beam's drawbacks are its inability to move across an area quickly and the very long period of time that it requires to warm up and cool back down.
| | Additionally, the ''Deutoros''-pattern Scarab carries three mounted {{Pattern|Pek|plasma cannon}}s, each manually operated by the Scarab's security personnel.{{Ref/Reuse|Waypoint}}{{Ref/Reuse|Enc22}} These are used primarily in an anti-infantry role,{{Ref/Reuse|ENC254}} but can also be effective against light ground vehicles and, to a lesser extent, light aircraft such as [[AV-14 Hornet]]s. The Scarab's crew often utilize these weapons to repel boarders and to provide covering fire.{{Ref/Reuse|HVG}}{{Ref/Reuse|universe}} |
|
| |
|
| It should also be noted that when the Scarab is firing its cannon, some type of liquid drips from the gun platform (possibly coolant or excess plasma). In ''[[Halo 3]]'' this cannon has been downgraded, as the player can withstand a direct shot and survive enough time to escape from the blast. If the cannon is shot with an explosive weapon, it will quit its firing stage immediately in order to ascertain the amount of damage it has sustained. This method of stopping the Scarab from firing seems to work any number of times.
| | ===Variants=== |
| | Two major variants of the ''Deutoros''{{'}} design have been encountered. The more-commonly encountered version was heavily used throughout the war, particularly in its final battles. |
|
| |
|
| This cannon is also somewhat reminiscent of a larger version of the [[Gravity Cannon]] on the [[Prophets]]' thrones or the [[Assault Cannon]]s wielded by [[Hunters]].
| | During the [[Harvest campaign]] and [[Battle of Trove]], the Covenant fielded a variant of the ''Deutoros''-pattern Scarab with an altered chassis. The altered design features a more compact design without the walkways extending around the side of the vehicle, alongside a completely enclosed rear section. This design of the Scarab appears to be in some way able to be piloted by a non-Lekgolo operator - demonstrated by [[Red Team]] during the engagement on Trove.{{Ref/Reuse|hw beach}} |
| [[Image:ScarabFires.jpg|200px|thumb|A Scarab firing at the [[Control Room]] door on Installation 05 with its main cannon.]]
| | <gallery> |
| | File:ScarabHW.png|The ''Deutoros''-pattern Scarab with the altered chassis. |
| | </gallery> |
|
| |
|
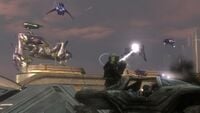
| In Halo 2, the Scarab seems to be captained by [[Ultra Elites]], and is piloted by [[Major Domo Elite]]s. While the Scarab in [[Mombasa]] had two pilots operating it, the one on [[The Great Journey (Level)|The Great Journey]], was operated by three [[Marine]]s, [[Sergeant Major|Sergeant Major]] [[Avery Johnson|Johnson]], [[Gunnery Sergeant|Gunnery Sergeant]] [[Pete Stacker|Stacker]], and [[Staff Sergeant|Staff Sergeant]] [[Marcus Banks|Banks]].
| | ==Operational history== |
| | ===Human-Covenant War=== |
| | [[File:ScarabNoble.jpg|thumb|250px|left|A Scarab under attack during the Fall of Reach.]] |
| | Despite being encountered as early as [[2527]] and officially observed in [[2529]], the [[UNSC]] did not fully catalog the ''Deutoros''-pattern Scarab until [[2547]].{{Ref/Reuse|universe}} During the later stages of the [[Battle of Trove]], the Covenant [[Fleet of Glorious Interdiction]] deployed a number of ''Deutoros''-pattern Scarabs in efforts to stop not only the crew of the {{UNSCShip|Spirit of Fire}} but also the [[Flood]] and [[Sentinel]]s that inhabited the [[shield world]]. During the battle, the Flood made an attempt to capture at least one Scarab, with Flood [[Flood root|roots]] erupting out of the ground around the walker and ensnaring it, forcing nearby Covenant infantry to flee. Before they could commandeer the Scarab, they were attacked by UNSC forces who eliminated the roots allowing a [[SPARTAN-II program|SPARTAN-II]] to take control of the walker. The captured Scarab provided a significant combat advantage for the UNSC as they fought to destroy several Covenant [[Covenant citadel|citadels]] which would provide them with a staging area in order to assault the [[Apex Site]]. Another ''Deutoros''-pattern Scarab along with a contingent of [[Sangheili]] [[Sangheili Honor Guardsman|Honor Guardsmen]] were stationed at the final Covenant citadel but the UNSC forces, with the aid of their captured Scarab, were able to eliminate all Covenant forces.{{Ref/Level|Id=hw beach|HW|Beachhead (Halo Wars level)|Beachhead}} At least one ''Deutoros''-pattern Scarab attempted to halt the UNSC's assault on the Apex Site but fell to the human's determined assault.{{Ref/Level|HW|Reactor (Halo Wars level)|Reactor}} A number of ''Deutoros''-pattern Scarabs were deployed around the portal that would allow the ''Spirit of Fire'' to escape the shield world, both to counter the human forces, as well as a large Flood presence as well as hostile [[Forerunner]] constructs. They were ultimately unsuccessful in preventing the departure of the ''Spirit of Fire'' from the Etran Harborage.{{Ref/Level|HW|Escape (Halo Wars level)|Escape}} |
|
| |
|
| Inside the Scarab there is also a small group of [[Ultra Grunt]]s to guard the pilots. On the outer deck of the Scarab can be found any number of [[Minor Elite|Minor]] or Major [[Elites]], [[Minor Grunt|Minor]] or [[Major Grunt|Major]] [[Grunts]], and [[Minor Jackal|Minor]], [[Major Jackal|Major]], or [[Sniper Jackal|Sniper]] [[Jackals]].
| | ''Deutoros''-pattern Scarabs were rarely employed by the Covenant during the sieges on the [[Outer Colonies]], though they saw increased field deployment in large numbers near the end of the [[Human-Covenant War]] to crush UNSC fortifications on well-defended [[Inner Colonies|Inner Colony]] worlds.{{Ref/Reuse|universe}} Unprecedented numbers of ''Deutoros''-pattern Scarabs were used by the Covenant during the [[Fall of Reach]].{{Ref/Reuse|universe}} During their initial incursions on Reach, the [[Fleet of Valiant Prudence]] deployed significant Covenant ground forces, including at least three ''Deutoros''-pattern Scarabs at [[Szurdok Ridge]], hiding their presence from the UNSC using several [[deployment spire]]. When the site was [[Battle at Szurdok Ridge|attacked]] by the UNSC on August 12, 2552, these three Scarabs provided support for Covenant ground forces as the two massive armies clashed at the landing zone.{{Ref/Level|HR|Tip of the Spear}} Towards the end of the Fall of Reach, ''Deutoros''-pattern Scarabs and other Covenant heavy armor were deployed to stop UNSC forces from escaping from the doomed planet.{{Ref/Reuse|TPoA}} |
| [[Image:Jets.png|thumb|200 px|Scarab using its boosters to ease the impact of a fall.]]
| |
| However, the [[Halo 3]] Scarab does not appear to have any crew at all. The troops on board the Scarab appear to be just defending it, rather than commanding it. One theory suggests that the Scarab is controlled by [[Lekgolo]] worms. The following evidence supports this:
| |
| *The core appears to be surrounded by pulsating cables that look similar to [[Lekgolo]] worms.
| |
| *When you shoot the core, it bleeds orange blood resembling that of the Lekgolo.
| |
| *If you board a Scarab and kill all of its crew, it will keep moving.
| |
| *On the level [[The Storm]], when assigned to eliminate the Scarab the words "Kill the Scarab Tank" are used (rather than "Destroy the Scarab Tank"), possibly hinting that the Scarab is in fact living. However, on [[The Covenant]] a Marine says that you need to kill a [[wraith]], and wraiths are most certainly not living, so this probably means nothing. You are frequently instructed to "kill" vehicles throughout the Halo series, so the fact that you must "kill" a Scarab should not be taken too seriously.
| |
| *The vulnerable part of the Scarab appears on your motion tracker.
| |
| *The Scarab's Gun resembles the [[Hunter]]s [[Assault Cannon]] as they both need to charge and they both fire a kind of electric looking green ray.
| |
| *It has been theorized, that its function is as an excavator, though there is no accurate information to prove this. These theories are based on similarly shaped machines seen during the [[Battle of Reach]]. It has been speculated that it either uses its legs to excavate by digging or that it uses its main gun to carve its way through soil, rock or concrete, as the Covenant have used their plasma and energy weapons in a similar fashion before. The reason for using Lekgolo worms instead of the Elite pilots (as seen in [[Halo 2]]) could be interpreted as the Covenant's reaction to Sergeant Johnson capturing a Scarab during the final part of the game, thereby preventing such an event from ever reoccurring. This hypothesis may not be true, as the Covenant have displayed a tendency not to adapt their security measures.(i.e., [[Spartans]] and [[Marines]] have infiltrated [[Covenant]] warships several times, but after each time, little or no new security measures seem to be employed.) Although it is likely that the weapons are still controlled by Brutes or Elites and it is captained by Brutes or Elites.
| |
|
| |
|
| == Appearances ==
| | During the final hours of the [[Battle of Installation 04]], the Covenant deployed a ''Deutoros''-pattern Scarab to combat swarming Flood forces in the arid badlands around the downed {{UNSCShip|Pillar of Autumn}}. During the battle, remaining UNSC personnel on the ringworld launched an assault on the Covenant forces, with the objective of drawing them away from the ''Autumn'' while [[SPARTAN-II program|SPARTAN]] [[John-117]] boarded the cruiser. However when the Chief's commandeered [[Type-26 Banshee|Banshee]] approached the ship, the Scarab soon took notice and moved to ambush the Spartan. [[Fireteam Raven]] was quick to act, boarding a [[UH-144 Falcon|Falcon]] and proceeding to pursue the walker. Despite its best efforts, the team of [[Orbital Drop Shock Trooper|ODSTs]] was able to successfully board the Scarab, wiping out its entire complement of soldiers and destroying the core.{{Ref/Level|HFR|Last Stand (Halo: Fireteam Raven level)|Last Stand}} |
|
| |
|
| === [[Battle of Harvest]] ===
| | When the [[Prophet of Regret|High Prophet of Regret]] [[Battle of Earth|invaded]] [[Earth]] in October, 2552, he deployed at least five Scarabs to [[Mombasa]], [[Africa]], with at least one of them being a ''Deutoros''.{{Ref/Site|URL=https://www.halowaypoint.com/en-us/news/canon-fodder-scarab-tactics|Site=Halo Waypoint|Page=Canon Fodder - Scarab Tactics|D=23|M=12|Y=2019}} Two Scarabs were placed in [[New Mombasa]], while another three were deployed in [[Old Mombasa]]. One of the Scarabs in New Mombasa was apparently charged with destroying the [[Mombasa Tether]].{{Ref/Anthology|Evo|Palace Hotel}} Shortly after ''Solemn Penance''{{'}}s retreat, one of these was stationed in the partially-flooded [[Kikowani Station (location)|Kikowani Station]], where it was engaged and neutralized by [[Alpha-Nine]].{{Ref/Level|H3ODST|Kikowani Station (Level)|Kikowani Station}} |
|
| |
|
| ''"Well, this is new, and scary..."'' | | On the morning of October 21 when the [[Prophet of Truth|High Prophet of Truth]]'s [[Jiralhanae]]-led reinforcements arrived over Kenya,{{Ref/Site|Id=waypointvergil|URL=https://www.halowaypoint.com/en-us/news/canon-fodder-vergil-reality|Site=Halo Waypoint|Page=Canon Fodder - Vergil Reality|D=15|M=06|Y=2021}}{{Ref/Generic|Id=Oct20|[[Ten Twenty]]}}{{Ref/Level|Id=CoastalHighway|Game=Halo 3: ODST|Level=Coastal Highway}} as Alpha-Nine members [[Edward Buck]], [[Veronica Dare]] and [[the Rookie]] escorted a high-value asset: the defecting Covenant [[Huragok]] [[Quick to Adjust]] containing information from a [[Vergil|subroutine]] of the city's [[Superintendant]] [[artificial intelligence]], they witnessed several Scarabs being deployed by the massing Covenant warships. While most of them ignored or didn't notice the humans, one of the Scarabs did take notice and opened fire on the [[Olifant]] containing the Huragok with its [[focus cannon]], heavily damaging the vehicle and forcing the team to abandon it outside of the [[Uplift Nature Reserve]].{{Ref/Reuse|Highway}} |
|
| |
|
| —[[Spirit of Fire]] AI, [[Serina]] upon seeing the Scarab
| | During the [[Battle of Voi]], a ''Deutoros''-pattern Scarab was deployed into a lake bed near [[Traxus Factory Complex 09]] after all of the Covenant [[Ogab'd-pattern anti-aircraft Wraith|Anti-Aircraft]] defences in the area were cleared by a mounted UNSC assault force. John-117 was able to eventually bring down the walker, allowing the human forces to regroup and push on to their final objective, a Covenant [[Skar'wa-pattern Mantis|Anti-Aircraft Cannon]].{{Ref/Level|H3|The Storm}} The [[Prophet of Truth]] deployed multiple ''Deutoros''-pattern Scarabs during the [[Battle of Installation 00|Battle]] of [[Installation 00]]. Outside Installation 00's [[Cartographer]], John-117, with the assistance of a UNSC [[M808 Scorpion|armored]] unit, destroyed a ''Deutoros''-pattern Scarab. During the battle outside the [[Installation 00 Citadel|Citadel]], a pair of ''Deutoros''-pattern Scarabs were deployed as a last-ditch effort by the Covenant to prevent the UNSC-[[Sangheili]] forces from reaching the Prophet of Truth. Despite their best efforts, both Scarabs were neutralized by the Master Chief, and with the death of the final Prophet [[Hierarch]] shortly later, the Covenant was brought to an end.{{Ref/Reuse|The Covenant}} |
|
| |
|
| During the demo of Halo Wars, a Scarab is lucidly seen in combat. The [[Spirit of Fire]]'s [[AI]] said, when she saw the Scarab: "Well this is new. And scary"<ref>Halo Wars E3 Demo</ref>, suggesting that this was the first UNSC sighting of a Scarab. Though it caused widespread destruction to the UNSC forces, the Scarab was eventually taken down using the orbital MAC guns. This variant appeared to be armed, only with its beam weapon (which it used on the UNSC forces to great effect), with no counter-boarding weapons or secondary weapons. This Scarab resembled the [[Halo 2]] variant, with the only differences being that the main platform is completely covered in a bluish [[Covenant]] armour, and the lack of anti-air turrets. This may have been the earliest version of the Scarab, explaining its armoured deck and why the variant lacks turrets.
| | ==Gameplay== |
| | ===''Halo 3'', ''Halo 3: ODST'', and ''Halo: Reach''=== |
| | [[File:69504874-Full.jpg|thumb|250px|A Scarab attacking a Scorpion in ''Halo 3''.]] |
| | The ''Deutoros''-pattern Scarabs encountered in ''[[Halo 3]]'' have far more destructible parts than the {{Pattern|Protos|Scarab}} seen in ''[[Halo 2]]''. Destructible armor covers each joint of a Scarab's legs, and doing enough damage to the legs will cause the Scarab to go into lockdown, making it stop moving altogether. The flaps covering the main gun can be destroyed, though this does not affect the gun's operation. The crest on and around the rear anti-air turret can be completely blown off, slowing the turret's rate of fire and reducing the size of its plasma bolts. Two side door panels near the bottom of the Scarab's back can be torn off, allowing entry onto the vehicle. |
|
| |
|
| === [[Battle of Reach]] ===
| | A Scarab's rear armor possesses a glowing red circle; inflicting enough damage upon this circle will detach the armor, leaving the Scarab's core exposed. The core itself can be destroyed; its destruction will trigger a massive explosion that blows the Scarab into pieces, leaving few intact parts. |
|
| |
|
| During the [[Battle of Reach]], [[Spartan-104]] describes seeing several large "insect like" excavating machines digging up [[CASTLE Base]]. If these were indeed Scarabs, which was not specified, they appear to be much weaker models, since Fred is able to destroy them using [[Plasma Mortar]]s from a [[Wraith]] tank.
| | If one can successfully manage to board the Scarab in ''[[Halo: Reach]]'', they will find that only the core of the Scarab can be destroyed. All other parts of the Scarab, including Plasma Cannons, cannot be destroyed. Destroying the core of the Scarab will also not destroy the Scarab itself. Instead, it will expose a hole in the Scarab, which bleeds orange Lekgolo blood if shot.{{Ref/Reuse|TPoA}} |
| [[Image:ScarabAttack.jpg|right|thumb|200px|The Scarab in [[Halo Wars]].]]
| |
|
| |
|
| === [[Battle of Earth]] === | | ===''Halo Wars''=== |
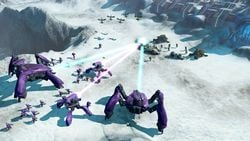
| | [[File:Two Scarabs.jpg|thumb|250px|left|Two Scarabs, assisted by two Locusts and an infantry lance, engage UNSC forces in ''Halo Wars''.]] |
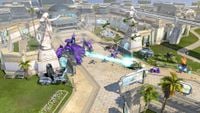
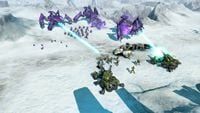
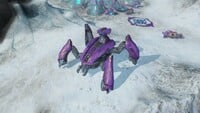
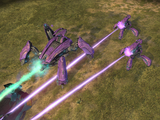
| | ''[[Halo Wars]]'' features the ''Deutoros''-pattern Scarab as a playable unit in [[Skirmish]] and multiplayer modes for Covenant leaders, though it is smaller for the sake of gameplay. Each Scarab costs {{HWResources|3,000}} [[resources]] and {{HWPop|20}} population in Skirmish, with no upgrades available due to their cost and is built at the [[Covenant citadel]]. Up to two can be spawned at a time in a [[Standard]] mode and four in [[Deathmatch (Halo Wars)|Deathmatch]] mode. ''Halo Wars''{{'}} [[Halo Wars Title Updates|Title Update #4]] enhanced the Scarab by providing an additional 25% hitpoints and a 25% damage increase, and is now capable of surviving four direct MAC blasts as a result of the improved hitpoints. |
|
| |
|
| ==== [[First Battle of Earth]] ====
| | The Scarabs excel at attacking vehicles and infantry with their powerful weapons, though aircraft take longer for the Scarab to take down. Scarabs are very mobile, being able to climb over most obstacles. Only certain obstructions, like craters or fire, can block them. In the campaign level Beachhead, the player may use a [[SPARTAN-II program|Spartan]] to commandeer an abandoned Scarab. Commandeering this Scarab and using it to destroy twenty-five enemy units unlocks the achievement [[Beaming With Pride]]. |
|
| |
|
| When the Covenant first travelled to Earth, led by the [[Prophet of Regret]], they had no idea that it could be populated by humans, never mind it being their home-world, leading to the [[Scarabs]] being used as highly effective siege weapon. One of the deployed Scarabs was encountered and destroyed by Spartan [[John-117]] during the [[Battle of New Mombasa]]<ref>''[[Halo 2]]'', ''[[Metropolis (Level)|Metropolis]]''</ref>. A second Scarab was attacked by the [[UNSC Marine Corps]] in a section of [[Old Mombasa]] known as ''[[Turf]]'', and was wrecked in the process.
| | Scarabs are extremely difficult to destroy. Overwhelming it with a massive attack force works well, particularly when using anti-vehicle units like the [[SP42 Cobra]] or some [[Hunters]], but a significant portion of the attack force will be lost in the process. An upgraded [[Magnetic Accelerator Cannon#Halo Wars gameplay|MAC blast]] or [[carpet bomb]] can destroy a Scarab rather quickly, as can a group of [[AC-220 Vulture]]s using their missile barrages. Covenant leader units' special abilities can inflict massive damage on a Scarab, with the [[Prophet of Regret]]'s cleansing beam being a good example. |
|
| |
|
| However, the deployment of [[Scarabs]] was not limited to the African theater of operations. [[Frederic-104]] encountered a third Scarab during his mission in [[Havana]], Cuba. [[William-043]] destroyed it by crashing a fuel truck into it and igniting the combustibles.
| | Winning a Skirmish game with two Scarabs unlocks the [[2 Bugs Are Better Than 1]] achievement. |
|
| |
|
| [[Scarabs]] were also present in the ''[[Halo Graphic Novel]]'' in the story ''Second Sunrise Over New Mombasa'' though this could have been one of the two operating in New Mombasa. | | ==Trivia== |
| | {{Linkbox|gallery=yes|gallerypage=Images of Scarabs}} |
| | ===General=== |
| | *Early in the development of ''Halo: Reach'', there was to be a level between "[[New Alexandria]]" and "[[The Package]]" in which the player would navigate a Scarab through the ruins of [[New Alexandria (location)|New Alexandria]]. According to [[Marcus Lehto]], the level was cut because it was ''"a little crazy"''.{{Ref/YouTube|inIxRwTzajc|Sacharified|Halo Reach Legendary Edition - Developer Commentary Part 6|D=06|M=01|Y=2024}} |
| | *On three occasions in ''Halo: Reach'', Scarabs come within dangerous proximity to the player character, yet the player is unable to fight or board them. [[Martin O'Donnell]] refers to these moments as "Scarab teases."{{Ref/YouTube|eLmtVh_bmhs|Sacharified|Halo Reach Legendary Edition - Developer Commentary Part 4|D=06|M=01|Y=2024}} |
| | *The ''Deutoros''-pattern Scarab was recreated for use in ''[[Halo ActionClix]]''; it is the largest figure ever made by WizKids, the game's creator. A battle-damaged version was released at the 2007 San Diego Comic-Con for $250, which included the Scarab, two outdoor maps, an indoor map (representing the Scarab's interior), four character cards, and rules for both the Scarab and the game itself. A normal model was also released at select retailers in November 2007. |
|
| |
|
| ==== [[Second Battle of Earth]] ==== | | ===Glitches=== |
| During the battle to reach the Ark excavation site, a Scarab attacked the Master Chief and a Group of Marines. It took the combined efforts of [[Mongoose|Mongoose ATVs]] and Missile pods to destroy it.
| | *In ''Halo 3'' and ''Halo 3: ODST'', if the player jumps onto one of the legs of a Scarab, and the leg rises up, it will cause the player to fly through the air for a considerable distance and finally die after a while, possibly after hitting a barrier. |
| | *On the ''Halo 3'' level "The Ark", a glitch can be used to create an "undead Scarab".{{Ref/YouTube|0YDSTSD3mTM|CMNeir|Halo 3 Tricks: Episode 62 *Undead Scarab*|D=06|M=01|Y=2024}} When the level's Scarab first appears, it walks past the player and behind a cliff face; when the player makes it to the end of the area, it walks back in. If a player uses a Ghost to board the Scarab while it walks behind the cliff face, he can destroy the Scarab prematurely. From there, another player must simply get to the end of that section, triggering the Scarab's return. The damaged front half of the destroyed Scarab will walk out and then stay still. |
| | *In ''Halo 3'', the player can steer a Scarab. To do this, a player must board the Scarab, go to the front of the lower deck, and run into either the left or right wall. The Scarab will go in that direction, possibly because the Scarab attempts to reorient itself in order to get a clear shot at the player. |
| | *On the ''Halo 3'' level "The Covenant", if a player manages to kill a Scarab before its landing animation is finished, the Scarab will briefly go underground and launch everyone on board across the level. |
|
| |
|
| === [[Battle of Onyx]] === | | ==Gallery== |
| | ===''Halo 3'' design=== |
| | <gallery> |
| | File:Halo3-Scarab1.png|A view of the ''Halo 3'' Scarab, facing right. |
| | File:Halo3-Scarab2.png|Another view of the Scarab in ''Halo 3''. |
| | File:ScarabH3.png|A Scarab in ''Halo 3''. |
| | File:H3 Storm Scarab.jpg|A Scarab in [[Voi]], [[Kenya]]. |
| | File:1217438400 Core.jpg|A close up of a ''Deutoros''-pattern Scarab's core. |
| | File:Scarabcore.jpg|A view of a Scarab's damaged core. |
| | File:1216050538 Scarab.jpg|A ''Deutoros''-pattern Scarab firing its main cannon. |
| | File:Scarab_Walk.jpg|A ''Deutoros''-pattern Scarab landing on Installation 00. |
| | File:H3ODST_GaussBanshees.jpg|A Scarab on the Mombasa Coastal Highway in ''Halo 3: ODST''. |
| | File:HR Scarab Render.jpg|An in-game render of a Scarab from ''Halo: Reach''. |
| | File:Halo Reach Scarab.png|A Scarab on [[Reach]] being harassed by [[Carter-A259]]'s [[D77-TC Pelican]]. |
| | File:HaloReach-Scarab-Angle.png|A ''Deutoros''-pattern Scarab in ''Halo: Reach''. |
| | File:HR-T47ScarabUHAP-RefChart.jpg|A turnaround reference of the Scarab in ''Halo: Reach''. |
| | File:HW2_KnowYourEnemy_Concept_2.jpg|Concept art of two Scarabs for ''[[Know Your Enemy]]''. |
| | File:HW2C-Scarabs.png|Another revision of the previous concept piece. |
| | File:HFR Scarab.jpg|A ''Deutoros''-pattern Scarab in ''[[Halo: Fireteam Raven]]''. |
| | File:HINF Concept EarlyZetaBattle.jpg|''Halo Infinite'' concept art depicting a ''Deutoros''-pattern Scarab firing on a [[Banished]] spacecraft. |
| | </gallery> |
|
| |
|
| [[Kurt]] also witnessed one arrive on [[Onyx]] during the [[Covenant Loyalist]] invasion. [[Elites]] were witnessed fighting for the [[Covenant]] on Onyx, suggesting that these events take place before the Uprising. This one operated as a first strike vehicle.<ref>''[[Halo: Ghosts of Onyx]]'', page 306</ref>
| | ===''Halo Wars''=== |
| | <gallery> |
| | File:HW DeutorosScarab Concept.jpg|Concept art of the ''Deutoros''-pattern Scarab for ''Halo Wars''. |
| | File:HW PirthCityScarab.jpg|A Scarab in [[Pirth City]]. |
| | File:HW ChasmsScarabs.jpg|A trio of Scarabs on Harvest. |
| | File:HW Scarab Screenshot.jpg|A Scarab in ''Halo Wars''. |
| | File:HW ScarabFiring.png|The Scarab firing its focus cannon. |
| | File:HW Scarab&Locusts.png|A Scarab alongside two ''Shua'ee''-pattern Locusts. |
| | </gallery> |
|
| |
|
| === [[Battle of Installation 05]] === | | ==List of appearances== |
| [[Image:Sargescarab.jpg|thumb|Sergeant Johnson at a Scarab's controls.]]
| | {{Col-begin}} |
| Another Scarab was stationed by the [[Covenant Loyalist]]s on [[Installation 05]] near the [[Control Room]]. Though guarded by a large group of [[Brutes]], this Scarab was eventually retaken by the [[Arbiter (character)|Arbiter]]. It was commandeered by [[Avery Johnson]] and used to break into the [[Control Room]] of Delta Halo, allowing the Arbiter and dozens of [[Councilor]]s, [[Zealot]]s, and [[Special Operations Elite]]s to break into the Control Room and kill [[Tartarus]].
| | {{Col-2}} |
| | | *''[[Halo: Uprising]]'' {{1st}} |
| | | *''[[Halo 3]]'' |
| ===[[Battle of the Ark]]===
| | *''[[Halo Wars]]'' |
| | | *''[[Halo 3: ODST]]'' |
| A Scarab attacked UNSC forces advancing on the Ark's Cartographer. With the assistance of Master Chief and three [[Scorpion|M808B Scorpion MBTs]], the Scarab was brought down, and the attack pressed on.
| | *''[[Halo Legends]]'' |
| Two more Scarabs were deployed from orbit by Covenant Loyalists to hold off the UNSC/Covenant Separatist offensive on the Citadel, where the Prophet of Truth was located. Despite their superior defences and numbers, the Scarabs and Loyalist forces were destroyed, thanks to the efforts of [[John-117]] and UNSC "Hornet" pilots and ground troops.
| | **''[[Origins]]'' |
| | | {{Col-2}} |
| === [[Halo Wars]] ===
| | *''[[Halo: Reach]]'' |
| | | *''[[Halo 4]]'' {{Mo}} |
| Scarabs will also appear in [[Halo Wars]] as the Covenant's super ground weapon/unit, being capable of annihilating whole legions of [[UNSC]] forces with its main plasma cannon, described in the E3 2007 demo as an "anti-everything gun". Their one weakness is the UNSC super [[weapon]], the orbital [[MAC]] strike. During the developer walk-through/demo, the characters in-game react as if they'd never seen a Scarab before, therefore possibly marking the Scarab's debut against the UNSC in the ''Halo'' timeline, though this is not yet certain.
| | *''[[Halo: Spartan Assault]]'' |
| | | *''[[Halo: New Blood]]'' |
| == Variation ==
| | *''[[Halo: Spartan Strike]]'' |
| The Scarab has undergone a few transformations over its canon life.
| | *''[[Halo: Hunters in the Dark]]'' |
| | | *''[[Halo: Fireteam Raven]]'' |
| === Halo 2 ===
| | {{Col-end}} |
| [[Image:ScarabPng.png|thumb|A Halo 2-era Scarab]]
| |
| | |
| {{quote|We've all run the simulations. They're tough, but they ain't invincible.|[[Avery J. Johnson]] to several marines in [[Halo 2]]}} | |
| | |
| | |
| This is when the Scarab, was first seen, rather than described, and appeared as a large, four legged, silver armoured behemoth, with an estimated height of ninety feet. It featured a deck on top that was guarded by numerous Elites, Jackals and Grunts along with a walkway going over the entrance to its control room. There were two spine mounted plasma cannons to provide anti-air defence. Its shell was invulnerable to damage from 90mm shells, missiles, .50 cal rounds, and ANVIL HE missiles (the armour could be similar to the ship plating the Covenant use on their starships) It proved vulnerable, to boarding actions and destruction from inside. Bungie themselves have joked that this Scarab looks more like a basket than an actual assault platform.
| |
| | |
| === Halo Graphic Novel ===
| |
| [[Image:Hgnpng.png|thumb|The Halo Graphic Novel version of the Scarab]]
| |
| In here it has a very different appearance with a roughly crucifix shaped body, the across sections bearing dual cannons, neither end having a visible plasma cannon, its legs are a distinctly different shape (straight, with an 'L'-shaped joint to the body). It should be noted, however, that the story in which it appears, Second Sunrise Over New Mombasa, uses a very large amount of artistic license. The story is canonical, but the visuals of the story are clearly not.
| |
| | |
| === Halo 3 ===
| |
| [[Image:Scarab_Walk.jpg|thumb|right|A Halo 3-era Scarab]]
| |
| *Its body has a different shape, being more bulbous at the end, similar to the [[Wraiths]] of ''[[Halo: Combat Evolved]]''. | |
| *It seems to have a greater width than in ''Halo 2'', but not as tall. | |
| *It wields a smaller plasma beam that seems weaker (On [[Legendary]] the player is able to withstand sustained fire for a short amount of time (approx 0.8s), as opposed to the instant death of the Halo 2 Scarab gun).
| |
| *The two anti-air turrets are gone, having been replaced by a single, large turret at the rear.
| |
| *The flaps on the plasma beam, are gone and replaced by two destructible stationary plates.
| |
| *It now appears to have no crew controlling it and it is currently thought to be controlled by [[Lekgolo]] worms. This is conjecture, of course, but has a certain amount of evidence behind it. There appear to be Lekgolo worms in it's engine and it is notable in the level "The Covenant" that the Scarabs shake themselves off after the fall.
| |
| *It features a set of powerful belly-jets that allow it to survive a drop from low orbit with little or no ill effects.
| |
| *The Main gun is also different, it is like a hose in ''[[Halo 3]]'', instead of just a straight beam appearance in ''[[Halo 2]]''.
| |
| *The Scarab appears to have high impact legs due to all the jumps it makes. | |
| *It appears to be more manoeuvrable than in Halo 2.
| |
| | |
| | |
| | |
| A likely conjecture is that this version of the Scarab is intended to be a weapon. Its color is changed to a shade of purple, like other Covenant war-ready vehicles and it is better-defended, having superior weapons. It has been speculated that Scarabs of ''Halo 2'' were not weapons, but rather mining tools that were deployed as emergency combat relief by Regret upon finding humans on Earth. They could be the mining Scarabs from Fall Of Reach. This is supported by the fact that Regret was looking for the device that opened the [[Portal]] to the [[Ark]] and he would need digging machines to excavate it.
| |
| | |
| Differences aside, it still has many similarities to the old Scarab. There are three levels (or decks). The lowest is accessible when the Scarab has been temporarily disabled. This level features a Grunt-mounted Plasma Turret, and usually one to four brutes, depending on the difficulty level. There's a ramp that leads to the second level, where there are a varying number of enemies, depending on the level and difficulty. Usually, you can expect to find a few Brutes and Grunts. On this level, there are two more Plasma Turrets, aimed to either side of the Scarab. If you turn 180° immediately upon ascending the ramp to this level, you can go up the purple slope to the third tier. This is just an open, unprotected platform below the large turret. Past the turrets on the second level (round the corner) is the power core that must be destroyed to take down the Scarab.
| |
| | |
| [[Bungie]] has also stated in the September issue of EGM, that the Scarab uses an unscripted game AI (not to be confused with story A.I.s like [[Cortana]]) to create a more dynamic battle with it as it will roam across the battlefield of its own accord and attack targets in its path. This way it will no longer require a relatively easy boarding action every time but a tactical approach. | |
| | |
| === Halo Wars ===
| |
| | |
| It seems to be a combination of the ''Halo 2'' and ''Halo 3'' Scarab designs, featuring an encased, [[Covenant]] purple chassis with a single spine mounted plasma cannon. The flaps on its plasma cannon, while bearing a similarity to those of the Halo 3 Scarab and also resembling a beak of a bird, operate like the flaps of the famous ''Halo 2'' [[Scarab gun]]. They first conceal the weapon then it folds out into 8 separate pieces and seems to shoot a sustained stream of plasma fire. The cannon was described in the demo as "An anti-everything cannon". This is unconfirmed, but it appears the the Halo Wars Scarab is 'Drivable.'
| |
| | |
| Since the Halo Wars version of the Scarab seems to resemble the Halo 3 version more, it could just be a early version.
| |
| | |
| == List of Destructible Parts==
| |
| [[Image:Scarabcore.jpg|right|thumb|200px|The Core]]
| |
| === Halo 3 ===
| |
| *All four of the Scarab's legs are destructible to the point that the Scarab temporarily buckles under the weight of the platform. The armour on these legs can also be blown off.
| |
| *The flaps covering the Scarab's main gun can be destroyed. This does not, however, disable the weapon.
| |
| *The crest on and around the turret can be ''completely'' blown off. This has been reported to temporarily disable the turret. | |
| *Two side door panels near the bottom rear can be torn off to allow a singular entry.
| |
| *The huge barrier protecting the Core can be ripped away from the back of the Scarab by shooting the red glowing circle at the top of the barrier. Doing so will result in the Core being completely exposed, making it easier to destroy.
| |
| *All three [[Plasma Cannons]].
| |
| *The Core.
| |
| | |
| ''Note: If you destroy the Core, all parts of the Scarab will be destroyed at once, except for the crest of the Scarab Gun.''
| |
| | |
| There is also a glitch on the Scarab when it explodes. When you destroy just one leg, and the Scarab explodes, go to another leg. Start shooting it. The pieces from the leg will start to fly off, as if it were still attached to the Scarab. Another Glitch is on The Ark when the Scarab comes by but doesn't attack, you can get on it and blow it up. When it is supposed to come back, the front half of the broken Scarab will get up and walk around, but will not attack.
| |
| | |
| === Halo 2 ===
| |
| *The forward Plasma Turret
| |
| *The rear Plasma Turret
| |
| *The plating on the main gun '''Note:'''This takes an incredible amount of damage and is only possible using the tank glitch.
| |
| *The underside grate
| |
| | |
| == Weaponry ==
| |
| | |
| ==== Primary ====
| |
| | |
| *'''(1) Front-Mounted Cannon'''
| |
| *'''Ammo''': Super-Heated Plasma, presumably unguided.
| |
| *'''Rate of Fire''': 4 second stream; 30 to 40 per second
| |
| *'''Movement of cannon''': Through careful examination, one can see that the inside gun part seems to move forward from a cradle as the flaps open up.
| |
| *'''Notes''': The projectile emitted from the Scarab's main gun emits a neon-green/bluish glow, indicating extremely high temperature. As the gun fires, white, hot liquid pours from the barrel onto the ground. The gun's force is enough to destroy any vehicle smaller than the Scarab in a matter of seconds.
| |
| *'''Approx. Range''': The effective range on a Scarab's main cannon is not exceptionally good, about .4 miles as seen during the Citadel and Cartographer battles, where its attack can easily be evaded if at a distance.
| |
| | |
| ==== Secondary ====
| |
| | |
| *'''Mounted Anti-Aircraft Turrets (Two in Halo 2, One in Halo 3)'''
| |
| *'''Ammo''': Super-Heated Plasma, (similar to [[Shielded Plasma Cannon]])
| |
| *'''Rate of Fire''': 400-600 rounds/minute
| |
| *'''Notes''': Presumed computer controlled, but a close look indicates that it may be manually controlled. It does wildly spin around when the core is destroyed as if the automatic controls crashed. Can be shot off with little firepower. '''NOTE''': In Halo 3 the AA cannon cannot be shot off and is invincible. The AA gun(s) are unsurprisingly extremely effective against aircraft.
| |
| *'''Approx. Range''': These weapons have a much better range than the primary cannon on the Scarab. They're extremely effective against airborne vehicles, but can also be used against ground-based vehicles, such as Warthogs or Scorpions. They are effective up to about 1.5 miles, which is a rough but evidence-based conclusion drawn from ships and vehicles with similar weaponry. | |
| | |
| ==[[Halo 2]] Strategies ==
| |
| | |
| === [[Image:Easy Shield.png|30px]]Easy ===
| |
| | |
| To defeat the Scarab's crew on easy difficulty, fire at its crew on the top of the Scarab when they appear with either a Rocket Launcher, Sniper Rifle or Battle Rifle. When you reach the end of the bridge it is recommended you collect a Shotgun, the second weapon is up to you but a Rocket Launcher is recommended. Throw a couple grenades at the surviving Grunts, Jackals and Elites to kill some of them and weaken the others' shields. Jump onto the Scarab and eliminate surviving Covenant with one of your weapons. When the top deck is clear proceed down to the interior. If you have a Rocket Launcher make sure it is loaded and fire two shots to kill the Ultra. You may eliminate the rest of the interior crew however you want.
| |
| | |
| === [[Image:Normal.jpg|30px]]Normal ===
| |
| | |
| To defeat the Scarab's crew on normal difficulty fire at its crew on the top of the Scarab when they appear with either a Rocket Launcher, Sniper Rifle or Battle Rifle. When you reach the end of the bridge it is recommended you collect a Shotgun, the second weapon is up to you but our user usually has his second weapon be a Rocket Launcher. Throw four grenades at the surviving Grunts, Jackals, and Elites to kill some of them and weaken the others' shields. Jump onto the Scarab and eliminate surviving Covenant with one of your weapons. When the top deck is clear proceed down to the interior. If you have a Rocket Launcher make sure it is loaded and fire two or three shots to kill the Ultra. You may eliminate the rest of the interior crew however you want.
| |
| | |
| === [[Image:Heroic.jpg|30px]]Heroic ===
| |
| | |
| To defeat the Scarab's crew on heroic difficulty fire at it's crew on the top of the Scarab when they appear with either a Rocket Launcher, Sniper Rifle or Battle Rifle. When you reach the end of the bridge it is recommended you collect a Shotgun, the second weapon is up to you but our user usually has his second weapon be a Rocket Launcher. Throw all your grenades at the surviving Grunts, Jackals and Elites to kill some of them and weaken the others' shields. Jump onto the Scarab and eliminate surviving Covenant with one of your weapons. When the top deck is clear proceed down to the interior. If you have a Rocket Launcher make sure it is loaded and fire three or four shots to kill the Ultra. You may eliminate the rest of the interior crew however you want.
| |
| | |
| === [[Image:Legendary.jpg|40px]]Legendary ===
| |
| | |
| It's up to you how you want to end this: the quick way, or the slow but reassuring way. The quick way is to jump down onto the Scarab immediately, rush into the control room, blast all the Covenant in there, and hope you don’t get run down from behind. The slow but reassuring way is to wait for the Scarab to get to the end of the waterway and fill up on rockets while waiting for it. At the end of the waterway, you can take out all the Covenant that come out, then jump down, go in, and finish off whatever Covenant are still inside. Either way, you win. Keep in mind, once you get inside, to kill the Ultra Elite first, toss grenades when needed, and be sure not to blow yourself up with the launcher.
| |
| | |
| ==[[Halo 3]] Strategies==
| |
| For all of the following strategies, the player must destroy the core located at the back of the Scarab. A large wall of armor as well as an energy shield protects it.
| |
| | |
| ===Hybrid Internal/Long-Range Destruction===
| |
| You may be lucky enough to come upon a Scarab while in the vicinity of a [[Missile Pod]]. If this is the case begin firing at the scarab with the missile pod still attached to its stand, enabling infinite ammunition. If you get even luckier the scarab may show its back to you or you may get a shot at the power core as the scarab moves lateral to your position. In this case you may be able to shatter the power core from a distance. This is rather difficult to do and requires a large element of luck. More often the missile pod can be used to take down the legs of the scarab. The scarab remains grounded for up to thirty seconds, in which time the attacker can cover a large expanse of ground and board it, then proceed with the Internal Destruction method.
| |
| | |
| '''Note:''' On the fourth level of Campaign, the Scarab can be easily and quickly destroyed by abandoning your mongoose and going for a mounted Missile Pod located along the wall. As the Scarab comes over the wall, it is invulnerable for a brief period until it stops out over the lake bed. But by aiming at the general area of the armour guarding the Core and firing repeatedly, the Scarab can be destroyed in as little as 4 missile shots in Easy difficulty. <ref>[http://www.highspeedhalo.net/index.php?news&id=357|A speed run of the Storm which includes this trick]. Gameplay by RC Master, recorded and hosted by HighspeedHalo.net</ref> This still requires a good deal of luck to pull off, as the Scarab will often turn away too quickly for all of the missiles to hit properly. This can still be done on higher difficulties, even Legendary, although this is harder as the casing takes more shots to knock off (at least 6 on Legendary) and so requires the Scarab to stay nearly stationary, in the correct position, for several seconds
| |
| | |
| ===Internal Destruction===
| |
| A few of the methods below require you to board the Scarab and destroy it from the inside. Here's how:
| |
| *There is a walkway on both sides of the Scarab so if your lucky you can jump on them when it is down.
| |
| *There are several ways to board the Scarab, some of which are rather harrowing. One way, and the most common way, is to blow the legs and manually jump or grav-lift to the walkway. Another way is the "Terrain Method". On The Storm, if you proceed to the back of the 'arena', you will find several Marines and several missile pods. Disregard all of these and head in either direction along the hallway until you reach a turnoff. Move along this path, and you should find an elevator, which will take you to a catwalk far above the battle. From here, jump down onto the Scarab. On the level The Ark, when fighting the Scarab, move to the large building located in the centre of the area. There you should find a grav-lift and a Chopper. You will need both of these. Get to the top of the building, and deploy the grav-lift on the edge. Reverse until you form a line with the grav-lift and the Scarab. Once the Scarab is close enough, boost over the grav-lift toward it, and try to land on the main platform (note: It is recommended you leap out of your Chopper if it is going to overshoot the Scarab.).
| |
| *You can, if you wish, avoid having to go to the back of the Scarab. On each side of the Scarab, there is a purple panel that can be blown open. They are located towards the rear of the Scarab, just around from the main entrance. Destroy one of these side doors, jump in and kill whatever is waiting for you. The reason you go in the side is the Plasma Turret located at the main entrance. This way, it doesn't fire at you as you approach. | |
| *The most common approach is to go to board the Scarab at its back ramp while it is down. Go up the ramp in the back of the Scarab. Turn 180°, and kill the enemies down one or both sides of the Scarab in whatever way you see fit.
| |
| *If the Scarab is disabled, you can jump up onto the ramp located next to the Scarabs main weapon. From there you go straight and turn near the rear of the Scarab and you will see the core.
| |
| | |
| After you have successfully boarded the Scarab, you must follow these steps to finish it off.
| |
| | |
| *At the very back of the Scarab (above the main entrance), there is the Core. It looks like a bright blue disk, similar to a [[Jackal Personal Arm Shield|Jackal Shield]]. | |
| *This disk is an energy shield. Shoot at it until it disappears.
| |
| *Next there is a protective metal cover, shoot this off as well. Under this cover is a sort of X shape with a blue light in the middle. Shoot or hit this until the light turns red. Alternatively, it may be faster to shoot the orange strands of flesh that cross out of the power core. Another way is to use spike grenades to stick the core, this has the bons of giving you a head start from the explosion.
| |
| *Turn and jump off the back of the Scarab, and get as far away as possible, because if you're too close, the explosion can kill you. It is advisable, if you can, to use a [[Bubble Shield]], if unable to escape the explosion range, though this can still remove the Master Chief's or Arbiter's shield, much as a [[Power Drainer]] can. Do look out for falling parts of the exploded Scarab. They can hit you through the [[bubble shield]] and kill you
| |
| *Watch the pretty blue explosion caused by your handy work.
| |
| | |
| ===Airborne===
| |
| There are a few ways a Scarab can be engaged from the air. The only thing to remember, really, is that the AA-gun on the back is just that; an Anti-Aircraft gun. Give it a chance and that thing will tear a [[Hornet]] or [[Banshee]] apart in seconds. So stay close to the back and you will find a little sort of blue bolt like that of a Wraith (in Halo 2). Shoot it and the back piece falls off, leaving the core exposed. Shoot it, get some distance between you and the Scarab, and watch the fireworks. But this can be hard to achieve seeing as the Scarab wants to face you to not only protect the power core, but to shoot you with its main gun, if you are in a Hornet it would be advisable to lock on to one of the back legs and keep circling around the Scarab and continually fire. The Scarab will eventually buckle and you can quickly target the back-plating and the power core before the AA gun comes back online. You can also land a Hornet or Banshee on the 2nd deck, though it is extremely hard if the Scarab is moving a lot. If you are piloting a Banshee, it is advised to strafe at the legs or at the panel protecting the core. Just remember, the Banshee's Fuel Rod Cannon's ordinance drops over a period of time. Take advantage of this, and try to aim for either point you're looking to destroy. If bombed enough, the Scarab will be temporarily disabled, giving you some time to finish up and watch the fireworks.
| |
| | |
| ====Aerial Drop==== ( The H.A.L.O. Drop )
| |
| This is especially effective when fighting more than one Scarab in Co-op. Have one player fly a Hornet, with the other player rides in one of the side-seats. The first (piloting) player lands on top of the Scarab. The second (non-piloting) player, gets off the Hornet, and proceeds to destroy the Scarab internally. The first player, meanwhile, flies to the other Scarab and either gets off on top of the Scarab and follows the second player's example, or engages the Scarab in any way they see fit. Only one player can do this in a Banshee, obviously.
| |
| | |
| In single player, if the player rides in the side seat with a marine in the pilot's seat, the marine will let the player board the Scarab. When the Core has been destroyed, the marine will return to pick up the player; usually remaining stationary above, or even touching, the Scarab's top-most deck. (Note: Sometimes the Marine may not come back, so be ready at all times to jump off the Scarab without your hornet.) Also, you can do this yourself by jumping off and letting the Hornet fall below. This may take multiple tries because the Scarab has the tendency to step on everything.
| |
| | |
| ====Aerial Drop for Legendary (co-op)====
| |
| This tactic is really only useful in legendary mode when fighting more than one Scarab. Have one player fly the Hornet, with the other player riding in one of the side seats. The first (piloting) player hovers over the top of the Scarab for around 2 seconds whilst the other player jumps out and aims to land on the Scarab. As soon as the second player has left the Hornet the first player should either be flying into the mountains to the left or to the right under cover from the Scarab. This means that if the second player should die, he will spawn again next to the Hornet ready to take off and repeat the drop off run again.
| |
| | |
| ===Direct Assault===
| |
| Keep circle-strafing around the Scarab, and shoot at the large blue disc located below the AA gun on the rear of the Scarab. This disc will turn red, then disappear. Keep shooting at where it was, until a large chunk of armour falls off the back of the Scarab. This barrier protects the Core. Once the barrier comes away, it may be advantageous to shoot at the legs until the Scarab goes down so that you can get an easier shot at the Core. Alternatively, keep circle-strafing and try and hit the Core, it doesn't take much to destroy it.
| |
| | |
| ====Indirect Assault====
| |
| Use your aircraft's weapons to take down a leg, using your superior three-dimensional manoeuvrability to avoid destruction. Land on the ground, get out of your aircraft and proceed to take the Scarab out from the inside. This method is a bit redundant, unless you're playing meta-campaign, and want the points from all the individual kills inside, which you otherwise wouldn't get.
| |
| | |
| * Using a rocket launcher you can shoot the back of it and it will do damage to the core. | |
| | |
| | |
| ===Bridge Jump===
| |
| Go to an elevator, go across the bridge, and wait for the Scarab to get right in front of you. If you have a Rocket Launcher fire a couple of rockets at the Grunts onboard, then at the Plasma Cannon. Use a Battle Rifle to take out the Brute. Then, jump down and you'll land on top of it. Beware the front cannons and rockets being fired from marines. Of course, this can only be done on the level [[The Storm]].
| |
| | |
| ===Land===
| |
| Land combat depends hugely on what vehicle you use.
| |
| | |
| ====[[Scorpion]]====
| |
| You have two choices. You can either engage from an extremely long range, or an extremely short range. The Scorpion is too slow to challenge the main gun from a middle distance. Regardless, a [[scorpion tank]] if you can get in close and finally get under the scarab is one of the best vehicles for the job. Its huge firepower takes down a scarab leg in as few as 3 shots. The scarab falls slowly enough and gives enough warning, via its alarm to get out of the way. Back up and watch out for its big guns which are still active while the scarab is grounded. Back up just enough to get a crack at the power core and two quick shots later you have blasted the shield off the core and destroyed it. Roll backwards further for a nice neon-blue explosion.
| |
| | |
| If you are playing Co-op, it's usually best to keep the Scorpion at long range, whilst the other player uses a fast, manoeuvrable vehicle, such as a [[Ghost]] or [[Mongoose]] to draw Scarab away. When your partner has forced the Scarab to present its back to you, fire at the barrier protecting the Core. Once that has been destroyed, fire at the Core.
| |
| | |
| The Scarab has two side doors. The will be destroyed with an explosion. You can use them to board the Scarab too.
| |
| | |
| ====[[Mongoose]]====
| |
| There are a few ways the Mongoose can be used. The easiest way is to put a [[Marine]] on the back with a [[Rocket Launcher]] (don't use your Co-op partner, as they run out of ammo), and drive around under the Scarab until it goes down. Then dismount the Mongoose, and hop in the back of the Scarab. Proceed to destroy it from the inside, or fire directly on the Core, since the angle will be easy enough to get. Only do this if you have your own Rocket Launcher or Fuel Rod Cannon, since the Scarab will more than likely have recovered before you can do enough damage with any other weapon. Also, you may use the elevators and take a Mongoose up in the elevator. Then when the Scarab is close enough, drive onto the Scarab.
| |
| A fun way of destroying the Scarab on [[The Storm]] is driving the Mongoose onto it. You will need to drive the Mongoose onto the elevator to and take it to the top. Wait for the Scarab to get close so you can drive onto the back. Drive down the ramp and park it by the control screen. Then kill remaining enemies and destroy the Scarabs core. Then hurry to the Mongoose and drive out of the Scarab before it explodes. This may take time to do due to difficulty of doing that. Note, the [[Mongoose]] will get thrown due to the Scarabs explosion.
| |
| | |
| Alternatively, the large earthen hills on the level [[The Covenant]] make excellent ramps for jumping a Mongoose directly onto the Scarab. Drive your vehicle as far to the rear of the ramp as possible, touching the canyon wall, and wait for the Scarab to turn to face you (be aware that the other scarab can still attack you, so be ready to move if necessary). Once your target scarab is in position, drive as quickly as possible and try to land on the main deck. Fight the enemies, or just run directly to the Core. It is rarely worthwhile to try to recover your vehicle, and it can sometimes survive the Scarab's explosion anyway.
| |
| | |
| ====[[Warthog]]====
| |
| The [[Gauss Warthog]] is reasonably effective at bringing a Scarab to its knees. Similar tactics apply as with the Mongoose, except you have more firepower. This is a nice vehicle to use on Co-op, as your partner can gun or drive, and you can still have a rocket-armed Marine passenger. Also, while in the level [[The Storm (Level)|The Storm]], if you get a [[Troop Transport Warthog]] you can fill it with Marines equipped with rocket launchers. It can be more effective than a mongoose with someone using a rocket launcher, but because it is slower, be careful not to get destroyed by the scarab's legs.
| |
| | |
| The M41 variant of the Warthog is not as effective, but can still get the job done. Also, see above for an alternative strategy, but replace "Mongoose" with "Warthog".
| |
| | |
| ====[[Wraith]]====
| |
| Don't attempt this unless you are VERY proficient with the Plasma Mortar. The Wraith's turning speed is too slow to make a short-range attack feasible, so it has to be engaged from long range. However you can use a wraith at close range against a scarab as long as you stay underneath it and fire as fast as you can at one of the legs, then follow up by boarding it or firing at the core. This is considerably more difficult than using a mongoose with a rocket launcher armed marine riding on the back, or even just going on foot with a rocket launcher, so a long range strategy is much more advisable. Either aim for the legs, and try and get close enough to finish the job yourself, or, in Co-op, have your partner draw the Scarab's attention from you, and fire directly at the barrier and subsequently the Core. Remember to lead your target, as the mortars travel quite slowly.
| |
| | |
| Another way to utilize the wraith is to hijack one from a pesky brute and give it to a marine, letting them bomb the Scarab from long range with its plasma mortar.
| |
| | |
| ====[[AA Wraith]]====
| |
| If you are skilled enough to use the [[AA Wraith]] glitch (see [[How to Pilot an AA Wraith]]) to successfully use the vehicle in combat, it can prove quite potent against a Scarab. This tactic can only be used in the level [[The Storm (Level)|The Storm]]. Once you have reached the part in the level where you are on a [[Mongoose]] with a [[Marine]] with a [[rocket launcher]] on their back, you will find two [[AA Wraith]]s. Destroy one of the them and dismount your Mongoose. (Note: make sure that the [[Ghost]]s and [[Chopper]]s have also been destroyed. Otherwise they will make it very hard to get to the AA Wraith.) Use the glitch and you have a nice anti-Scarab weapon. If you are playing on [[co-op]], you can have two anti-air wraiths as long as you don't destroy either wraith. Mop up the rest of the Covenant and wait for the Scarab. Remember that if you get out of the AA Wraith, it will explode. Take cover near the platforms with the rocket pods on them so you have a place to hide from the [[Scarab]]'s withering beam. You can "button-mash" with the AA Wraith and let loose hell against the Scarab with the six [[Fuel Rod Cannon]]s. Just fire on its legs till it goes down and then go around to the back and either board it or blow up the core cover and the core with the AA Wraith. Also remember that the same basic rules as using a normal Wraith against a Scarab apply here as well.
| |
| | |
| ====[[Ghost]]====
| |
| With the Ghost, you may shoot accurately, and slowly destroy the armour on one of the Scarab's legs, therefore causing it to 'kneel down' and making it possible to board. You can try this at least on [[The Ark (Level)|The Ark]] and on [[The Storm (Level)|The Storm]] levels.
| |
| Remember to be wary about the Scarab impaling you with one of its pointy legs, and with no one to distract the Scarab, it can be very dangerous even to approach it on higher difficulties. This strategy is only for fun, as it is considerably slower and more dangerous than any other.
| |
| | |
| ====[[Chopper]]====
| |
| When using a Chopper, taking out a Scarab can differ in difficulty depending on the level. If its on [[The Ark]] or [[The Covenant]] it's ability to boost into and destroy other vehicles in a great help. If you want to you could use the same tactic as the [[Scorpion]], but the more fun way is to guide the Scarab over to a ledge/ramp where you can then boost off of and onto the Scarab's deck. You then can proceed to boost along the side, killing any infantry there and position yourself to either boost again into the core, or just shoot it. This is easiest achieved on [[The Ark]], where the Scarab will usual remain around the general area of the main building in the centre. This tactic is possible on [[The Storm]], but is more difficult as first you would have to get a [[Chopper]] before it is destroyed by the marines, and getting it up the elevator is quite difficult, as it may not fit. The last danger really is when you finally get up onto the crane, where theres the risk of one of the marines on the missile pods may hit it, or sometimes you.
| |
| | |
| ====On Foot====
| |
| Get as many explosives as you can. [[M41 SSR MAV/AW Rocket Launcher|Rockets]], [[Fuel Rod Cannon|Fuel Rod Cannons]], [[Grenades]] ([[Type-1 Antipersonnel Grenade|Plasma]], [[Type-2 Antipersonnel Fragmentation Grenade|Spike]] and [[Type-3 Antipersonnel/Antimatériel Incendiary Grenade|Incendiary]]), [[Missile Pod|Missile Pods]] and [[Brute Shot|Brute Shots]] are the ONLY viable weapons. Use cover to get as close to the Scarab as possible. Ideally, you want to be underneath it. Pick a leg, and fire on the joint. Use everything you've got. Don't change to a different leg, and don't fire anywhere other than the joint. If you manage to get the Scarab down, proceed to destroy it from the inside. You can also use a Power Drain to destroy a Scarab. Take down the shielding and then fire two BR bursts into the middle of the core and then throw down a [[Power Drain]]. Please note that you will not get you the '[[We're in for some chop]]' achievement by doing this.
| |
| | |
| On "The Storm" you can also board the Scarab by riding the two crane's lifts and jumping onto the scarab as it passes by, but be warned if you miss you might fall to your death. It is also possible to land a Mongoose or a Warthog in this manner but is very difficult due to the scarab moving as you land, or your rocket marine(s) blowing you off course. This Marine also, if you manage to land on the Scarab, will fire his rockets, killing himself and you if you are nearby.
| |
| It is suggested to give your Marine another weapon or make him get off the Mongoose entirely.
| |
| | |
| There is also a Sniper Rifle on the crane closest to the door that you leave the lake bed through (the right-hand crane when looking from the cliff inwards). This is useful for picking off enemies on the Scarab before you jump on.
| |
| | |
| ====Dumpster====
| |
| This is only possible through the use of the so-called "Flying Dumpster" on [[The Storm (Level)|The Storm]]. If both co-op players get inside the dumpster while it is on its side, you may make it fly by repeatedly pressing the Jump Button. Note: It is nearly impossible to control the dumpster and, therefore, nearly impossible to attack the Scarab. If you do land on the Scarab, proceed to slaughter its defenders and destroy the core. If you need help on flying a dumpster, there are many tutorials and other useful videos on Youtube.<ref>[http://youtube.com/watch?v=icltl9KhUsY Flying Dumpster Tutorial</ref> It is still unknown if this glitch was intended by Bungie.
| |
| | |
| ==General tips==
| |
| *On each leg, just below the joint, there is a small blue square. This is what you want to aim for, the weakest point of the leg, and firing at it will cause the Scarab to go down much faster.
| |
| *The core is extremely vulnerable. If you see a shot from the ground, and are confident you can make it, go for it.
| |
| *Plasma grenades don't stick to Scarabs, on the legs or elsewhere. They can be used to take out a leg, but only by making it balance atop the joint.
| |
| *If you want to board and destroy it from the inside on Legendary, fire a few shots from your Scorpion into the open back deck, this will make short work of the Brutes inside.
| |
| | |
| == Character Compatibility ==
| |
| | |
| *[[Elite]]s (Halo 2 only)
| |
| *[[Sergeant Johnson]] (Halo 2 only)
| |
| *[[Brute]]s (Halo 3 only)
| |
| *[[Lekgolo]] (theorized pilots and part of the core system of Scarabs in Halo 3)
| |
| | |
| == Trivia ==
| |
| [[Image:Lekgolo-scarab.jpg|thumb|Exposed [[Lekgolo]] in the [[Scarab]]'s core.]]
| |
| *The Scarab is one of the only [[Covenant]] "vehicles" that is not named after supernatural beings (like a Ghost, Banshee, or Wraith), with the exception of [[Brute]]-made vehicles.
| |
| *In the Halo 2 Level [[The Great Journey]] you can get in the scarab and see Johnson holding a Plasma Pistol
| |
| *In the [[Halo 2]] Level [[Metropolis]], if you wait until the Scarab has become trapped before jumping onto the Scarab, jump onto the leg of the Scarab (the top of the leg) you can see through the Scarab into the inside section and you can fire through, killing everybody inside.
| |
| *In [[Halo 3]], you can actually hide from a scarab by simply hiding behind a rock, while making sure that you aren't exposed at all. This can be easily done on one of the two scarabs on [[The Covenant]], where there are rocks everywhere for you to hide behind.
| |
| *In [[Halo 3]], when you shoot the Scarab's core after you take out all of the shielding, you can see what appears to be Hunter's blood coming out of it. There is also an audible 'squishy' sound when you stand next to the 'worms' in the conduits. Another hint that Halo 3 Scarabs are controlled by Lekgolo worms is that, on the level [[The Covenant (Level)|The Covenant]], after the two Scarabs land they stand up and seemingly shake themselves. It would serve no purpose for them to do this if controlled by a pilot, but might make sense if they are controlled by the worms and were shaking off the impact. However, because the Halo 2 Scarab had to be controlled to move and the ''Halo 3'' one didn't, the ''[[Halo 2]]'' ones are normal machines and the Lekgolo worms might only control the ''Halo 3'' Scarabs. Some players believe that the Scarab is actually Lekgolo technology, and the Halo 2 version was just a mining machine. Others suggest that the Halo 2 Scarab was in fact a weapon, but after Johnson took over a Scarab on Delta Halo, the Covenant may have updated their tech so it couldn't be hijacked, which would explain why the Scarab core contains Hunter worms, why there is no control room on the Halo 3 Scarab, and why the Scarab changed from it's original Halo 2 version. Although this is possibly not true, seeing as the Covenant never changed their security on their ships, even after being "Hijacked" several times by Spartans and Marines. | |
| *A [[Wikipedia: Scarabaeidae|Scarab]] is an Egyptian beetle that was worshiped as a manifestation of [[Wikipedia: Khepri|Khepri]], an Egyptian god who drove the sun across the sky.
| |
| *In [[Halo 3]] if you jump onto a leg of a Scarab, and the leg raises up and if you jump at the same time it will cause you to fly through the air for a considerable distance.
| |
| *The [[Scarab Gun]] is a weapon that players can pick up in Halo 2; it looks like a plasma rifle and can be found on the level [[Metropolis]] as seen in a video. It fires the same projectile as the Scarab's main gun, and it never overheats and can fire continuous rapid fire.
| |
| *The Scarab could have been based off of the AT-AT from Star Wars.
| |
| *In [[Halo 3]] if you're on a [[Scarab]] and it blows up you die but a [[Brute]] on the [[Scarab]] or in a vehicle may survive the blast.
| |
| *In [[Halo 2]], it is possible to look inside of a Scarab. On the level [[Metropolis]], when the Scarab stops at the end of a level, hop on the Scarab and kill all but ONE enemy. Then, go to the main gun and hop down in the gun. Keep on one of the latches and walk towards the Scarab. You will be able to look inside the Scarab. You will also be able to detach your torso from your legs and see them walk forwards. You can try and jump on one of the Scarabs legs and get back on the Scarab, but due to it moving back and forth, it might be difficult. When looking inside a Scarab, you can shoot a [[Sniper Rifle]] or [[Particle Beam Rifle]] into it and you will see either the bullet or the beam bounce and ricochet around wildly; whether this will work depends on where you shoot inside.
| |
| *It is possible that Scarabs are the [[Sharquoi]] mentioned in [[Conversations from the Universe]].
| |
| *It is also notable that when a Scarab's leg is disabled, it emits a loud beep, much like that of a reversing truck (except of a lower pitch). This effect is perhaps a nod to the same death sequence (and sound) of the Juggernaut flying tanks in a previous Bungie game [[Marathon]].
| |
| [[Image:Scarab Walk.jpg|190px|right|thumb|A Scarab on the level [[The Covenant (Level)|The Covenant]].]]
| |
| *The Scarab, once the core has been compromised, takes seven seconds to explode (going with the usual [[7]] "nods" Bungie puts into the games).
| |
| *The [[Halo ]]3 Scarab was recreated in Halo Actionclix and as of the game's release is the largest figure ever made by Wizkids, the game's creator. A battle-damaged version was released at the 2007 San Diego Comic Con for $250, which included the Scarab, two outdoor maps, an indoor map (representing the scarab's interior), four character cards, and rules for both the Scarab and the game itself. A normal one was also released at select retailers in November 2007.
| |
| *{{Article Quote|*Azathoth117 asks: "Are the orange worm-type thingies in the back of the Scarab the same things as the worms in Hunters, or is it just superficial resemblance?"
| |
| *[[Bungie]]: "The resemblance is not just superficial. A future DLC map might expand upon that mystery."}}
| |
| *In the level "The Ark" there is a way you can kill the Scarab before you fight it, which results in fighting a dead Scarab. It doesn't attack you and you can not kill it so it is impossible to advance. | |
| *The Scarab is the only manufactured Covenant vehicle (Excluding Brute vehicles) that is not named after some sort of spirit, although in Egyptian legend the bite of a Scarab beetle resulted in death.
| |
| *In a [[Halo 3]] Video Documentary (ViDoc) about the new Scarab, the art directors stated that the Scarab in Halo 2 had a horrible design; [[Shi Kai Wang]] quoted "It looked like a basket with a handle and could go shopping with it."
| |
| *On both sides of the [[Halo 3]] Scarabs, there are blast doors that can be blown off, and it is possible to enter the Scarab via this entrance.
| |
| *If you find that you may not be able to get away from a Scarab in time before it explodes, you can throw a Bubble Shield down. The shield will fully protect you from the explosion, regardless of how close you are to the Scarab,even you are inside of it. It should be noted that doing so on the Scarab will not work, and that any large pieces from the Scarab can still pass through the shield and potentially kill you.
| |
| *In [[Halo 3]], on the level, "[[The Covenant]]", two Scarabs are deployed by the Covenant Loyalist's fleet overhead, to defend the Citadel. However, on the previous level, "[[The Ark]]", [[Rtas 'Vadum]] claimed that "Truth's fleet lies in ruins". It could be possible that these were launched by a remaining ship as a last push to win the battle.
| |
| *A Scarab's explosion is extremely visible, as Rtas 'Vadum remarks how he saw the explosion of a Scarab "from orbit." | |
| *In the [[Halo 3]] level [[The Covenant (Level)|The Covenant]], it is possible to make the Scarab glitch underground. To do this, you must kill either of the Scarabs very quickly. If it has not yet completed it's landing animation when the killing blow hits it, the glitch will happen. This can be done with a [[Hornet]]: either drop on the deck and destroy the core ASAP, or use the Hornet to blow its back off and shoot the core. The first method will send you flying out of map, usually killing you.
| |
| *When [[Sgt Johnson]] takes control of his Scarab, he finds a way to deploy an energy shield that protected the controllers from a boarding party. Apparently the [[Covenant]] at [[New Mombasa]] either didn't have it, didn't want to use it, didn't consider the possibility of being boarded, or it could be to allow the crew to walk outside and defend the scarab (this is most likely reasonable despite the fact that they could just stay inside and keep it on, because of the sheer honor at a chance to defeat the 'demon')
| |
| *Taking out one of the Scarab's joints, forces it to buckle and use all of its power into standing up again, which deactivates it's main gun. | |
| *The Scarabs legs can be used as weapons by crushing vehicles below. Also, if you try to board the Scarab via vehicle using the [[Mongoose]] for example, and if the timing is right, when it lifts its leg up, it can crush you in the air.
| |
| *The Scarab's legs are apparently shock absorbent due to the fact that it makes large jumps. | |
| *Once destroyed,the entire rear section that surrounds the core is vaporized.
| |
| *In the [[Halo Custom Edition]], you could drive a Scarab.
| |
| *In the [[Halo 2]] Level [[Metropolis]] beginning cutscene, if you have the [[Sputnik]] Skull on, it causes the truck it steps on to fly up.
| |
| *In [[Halo 2]] on [[Metropolis]] near the end of the level when the [[marines]] open fire moments before it's trapped it is possible to push the marines on the [[Scarab]].
| |
| *In [[Halo 2]], it is impossible to kill a Scarab. (even in [[Metropolis]], the Scarab is only downed in the cutscene, not in actual gameplay).
| |
| *[[Hornet]] missiles do no damage to a Scarab on [[Legendary|higher difficulties]].
| |
| *On the level Metropolis,when you see the warthog be vaporized by the scarab,you can grenade jump out of the map and see the scarab walking away,but it dissappears afterwards.
| |
| *It has been stated by Bungie that the next Halo 3 DLC map, [[Purple Reign]], will expand on the Scarab-Hunter mystery.
| |
| *In [[Halo 3]] if you get near and jump in front of one of the scarabs legs while it is in motion you will get a boast up jump that will send you up by a little higher than what you normaly jump.
| |
| *When a [[scarab]] is destroyed,no sign of [[lekgolo]] is anywhere,this could be because of heavy explosion.
| |
| *The Scarab bears some resemblance to the tripods from the H.G. Wells novel ''The War of the Worlds'' as both are used as assault vehicles by alien species, and are unusually agile for their sizes. The numerous spiderlike legs are also similar.
| |
| *In Halo 3, when you destroy the Scarab's power core, the orange parts theorized to be Lekgolo worms appear to turn gray at "death," supporting the theory that Scarabs are manned by Lekgolo worms. | |
| | |
| == Gallery ==
| |
| <GALLERY>
| |
| Image:scarabbiggyprob.jpg|A Scarab near [[Voi]].
| |
| Image:Scarab explodes.jpg|A scarab explodes on [[The Covenant (Level)| The Covenant]].
| |
| Image:1211491926 1660189468 81be5fa728 o.jpg|A destroyed Scarab.
| |
| Image:1216050538 Scarab.jpg|The Scarab firing it's main cannon.
| |
| Image:1217438400 Core.jpg|A close up of a Scarab's Core.
| |
| </GALLERY>
| |
|
| |
|
| ==Sources== | | ==Sources== |
| <references/>
| | {{Ref/Sources|2}} |
| | |
| {{Covenant Vehicles}} | |
| | |
| [[Category:The Covenant]]
| |
| [[Category:Vehicles]]
| |
|
| |
|
| ==External Links==
| | {{Covenant Ground Vehicles}} |
| http://youtube.com/watch?v=SSIxd-NiYDI
| | [[Category:Excavators|Scarab, Type-47A 'Deutoros']] |
| on halo2 you have to defeat a scarab on the level_metropolis
| |
| Deutoros-pattern Fortress Breaker
|
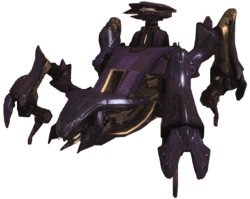
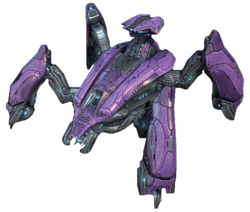
Two alternate chassis' for the Scarab.
|
| Production information
|
|
Manufacturer:
|
Assembly Forges[1][2]
|
|
Product line:
|
Excavator tier-four[3]
|
|
Model:
|
Scarab[3]
|
| Technical specifications
|
|
Length:
|
48.6 meters (159.5 ft)[3][2][4]
|
|
Width:
|
48.3 meters (158.4 ft)[3][2]
|
|
Height:
|
38.6 meters (126.8 ft)[3][2]
|
|
Mass:
|
171.8 metric tons (169.1 LT; 189.4 ST)[3][2]
|
|
Maximum speed:
|
76 kilometres per hour (47 mph)[3]
|
|
Armament:
|
|
|
Crew:
|
|
|
Complement:
|
|
| Usage
|
|
In service:
|
|
|
Role(s):
|
- Heavy assault platform[4]
- Deep excavation[4]
- Mobile command base[4]
|
|
Affiliation:
|
Covenant[4]
|
- "Pro tip: Shoot them in the legs first. And it's okay to cheer when you blow one of them up. You deserve it."
- — Spartan Edward Buck, offering advice on how to destroy a Deutoros-pattern Scarab[5]
The Deutoros-pattern Fortress Breaker[2] (UNSC Type classification: Type-47B Deutoros, T-47B Ultra-Heavy Assault Platform),[6] or Scarab, is a large, heavily armored, all-terrain, quadrupedal walker. Classified as a tier-four Excavator, the Deutoros-pattern Scarab was employed by the Covenant as a siegeworks ultra-heavy artillery assault platform.[3]
Originally designed strictly for mining operations and deep excavations on widely varied terrain,[1][6] the Deutoros-pattern Scarab has since been repurposed for combat.[4] The walker is used to attack heavily defended structures and emplacements and to provide nearly-unstoppable combat support for Covenant ground forces. A heavily-fortified and dexterous mobile platform that boasts impressive levels of firepower, the Scarab is known for striking fear into its opponents.[6]
Overview[edit]
Design details[edit]
- "It's a tank the size of a building that walks around on four legs bent like a spider's, and it bristles with enough weaponry to qualify as a mobile demolition platform."
- — Spartan Edward Buck, referring to a Deutoros-pattern Scarab[5]

Exposed Rhulolekgolo in a
Deutoros-pattern Scarab's core.
Like other patterns of Scarab, the body of the Deutoros-pattern Scarab rests atop four powerful legs. Its main body features an interior bay and command center, where many of the vehicle's essential functionaries are accessible. An infantry platform that surrounds the enclosed bay allows the defensive personnel of the Scarab to fire upon hostiles from above or eliminate other threats.[1][6] Although the Deutoros-pattern Scarab appears to be a traditional vehicle, it is actually a bio-mechanical construct that makes extensive use of Rhulolekgolo.[1] Hundreds of Rhulolekgolo swarm beneath the Scarab's battle plate, acting as a gestalt intelligence, interfacing with its exoskeleton and control systems,[2] though the gestalt is seldom given complete control of the entire Scarab. The Lekgolo meta-colonies that inhabit these Scarabs are often populated by particularly unruly Lekgolo individuals that can not be trusted with total control over the vehicle without causing undesired chaos.[3] A central power junction located inside the Scarab's interior bay is one of the only locations on the walker where the Lekgolo are exposed.[6] Due to the Scarab's reliance on the Lekgolo and their ability to operate independently, the weapons platform was never formally categorized as a vehicle by the Covenant, instead being classified as a single, ultra-heavy infantry unit by the Covenant.[1][3] The chassis of the Scarab is built in specialized, cavernous assemblies, such as the Assembly Forges on the now-destroyed Covenant capital city of High Charity. At these facilities, Rhulolekgolo are fused into the carapace and appendages,[6] and bound to the control systems.[3] Like many Covenant vehicles, the Deutoros-pattern Scarab is modularly crafted on an assembly line, where its various pieces are combined then activated.[6]
While they are known to be particularly robust, Deutoros-pattern Scarabs are not without their weaknesses. A Scarab will be temporarily stalled if its legs sustain enough damage,[5] causing the walker lower into a crouch-like position and allowing potential boarders to jump into the vehicle's troop bay. The central power junction is protected only by the vehicle's external armor and the exposed Rhulolekgolo are susceptible to weapon fire,[1] so attacking the junction is relatively easy for hostile boarders. Once the core is destroyed, the Rhulolekgolo gestalt's tissue tears and a chain reaction will occur, which will quickly destroy the Scarab.[6]
Mobility[edit]

A Scarab slowing itself from its low-orbital deployment on Installation 00.
Unlike most vehicles deployed by the Covenant, the Deutoros-pattern Scarab does not employ anti-gravity propulsion to move; instead, it uses a quadrupedal leg assembly for locomotion. These jointed legs are very powerful, strong enough to even withstand the shock of low-orbital drop.[7][8] Scarabs are equipped with several underside thrusters that allow the vehicle to slow its descent during its initial deployment.[7][2] The Scarab can move at a relatively fast speed, with a maximum speed at 76 kilometers per hour (47 miles per hour).[3]
The articulated legs and the spiked "feet" of a Deutoros-pattern Scarab allow the vehicle to sturdily grip the ground, climb over obstacles, and even kneel down.[4] The legs are also very nimble, affording the Scarab a surprising degree of maneuverability. For example, Deutoros-pattern Scarabs have been observed mantling inclines in excess of forty-five degrees[9] and they can attempt to right themselves if knocked off balance.[8] The Deutoros-pattern Scarab is capable of carrying out excavations and assaults in varied terrains and rough environments,[1][6] and it is even capable of operating underwater, if only for brief periods.[9]
Crew and complement[edit]
The Deutoros-pattern Scarab is occasionally used as a mobile command base, and rarely as a large-scale troop transport vehicle.[4] An officer of the Covenant military serves as a supervisor and pilot aboard the Scarab. Rather than steer the walker themselves, the Scarab's supervisor "guides" the direction of the machine and occasionally directs the artillery when needed. The Scarab's Rhulolekgolo complement manages and carries out most of the walker's functions and processes.[6] The supervisor may operate the Deutoros-pattern Scarab's weaponry when increased precision is needed, as the Rhulolekgolo have no fine control over the armaments.[3]
As Deutoros-pattern Scarabs were too valuable to operate without support, the Covenant would often supply the walker with at least twelve security personnel when deployed in the field.[3][2] The accompanying infantry and supervisory personnel aboard a Scarab serve to prevent boarders from destroying the vehicle from within or from attempting to seize the walker for themselves. The security personnel aboard a Scarab were additionally charged with eliminating any hostiles that were able to survive the vehicle's bombardment of a location.[4] The security personnel of Deutoros-pattern Scarabs typically consisted of lances of Unggoy and Kig-Yar, as well as some Jiralhanae and Sangheili.[10]
Armaments[edit]
The primary armament of the Deutoros-pattern Scarab is an ultra-heavy focus cannon mounted beneath the head end of the infantry platform.[1][2] The focus cannon is typically affixed towards the end of the Scarab's production process.[6] The weapon fires a stream of superheated plasma and is a nearly capital ship-scale energy projector capable of both mass destruction and delicate stratigraphic excavation, depending on the weapon's tuning and the operator's expertise.[3] The cannon is capable of melting through five feet of concrete, with one Scarab having enough firepower to level a small city.[4] The cannon is housed in a cradle that is protected by flaps, which open before firing. The focus cannon has a relatively low rate of fire and is typically discharged in brief bursts. As the weapon is fired, it releases a green-glowing liquid, which may be coolant.[7] The ultra-heavy focus cannon is useful for uncovering artifacts during excavation operations.[6] Additionally, the focus cannon is capable of being replaced—a delicate process that requires calibrating all the coolant subsystems, as any heat spike from the core can pose a serious threat to the Rhulolekgolo gestalt.[11]
The secondary armament of the Deutoros-pattern is an ultra-heavy plasma cannon,[2] which is mounted atop the back of the Scarab. This armament serves primarily as an anti-aircraft weapon, having a greater effective range than the focus cannon possessing a 360° field-of-fire.[4]
Additionally, the Deutoros-pattern Scarab carries three mounted Pek-pattern plasma cannons, each manually operated by the Scarab's security personnel.[6][2] These are used primarily in an anti-infantry role,[4] but can also be effective against light ground vehicles and, to a lesser extent, light aircraft such as AV-14 Hornets. The Scarab's crew often utilize these weapons to repel boarders and to provide covering fire.[1][3]
Variants[edit]
Two major variants of the Deutoros' design have been encountered. The more-commonly encountered version was heavily used throughout the war, particularly in its final battles.
During the Harvest campaign and Battle of Trove, the Covenant fielded a variant of the Deutoros-pattern Scarab with an altered chassis. The altered design features a more compact design without the walkways extending around the side of the vehicle, alongside a completely enclosed rear section. This design of the Scarab appears to be in some way able to be piloted by a non-Lekgolo operator - demonstrated by Red Team during the engagement on Trove.[12]
The Deutoros-pattern Scarab with the altered chassis.
Operational history[edit]
Human-Covenant War[edit]

A Scarab under attack during the Fall of Reach.
Despite being encountered as early as 2527 and officially observed in 2529, the UNSC did not fully catalog the Deutoros-pattern Scarab until 2547.[3] During the later stages of the Battle of Trove, the Covenant Fleet of Glorious Interdiction deployed a number of Deutoros-pattern Scarabs in efforts to stop not only the crew of the UNSC Spirit of Fire but also the Flood and Sentinels that inhabited the shield world. During the battle, the Flood made an attempt to capture at least one Scarab, with Flood roots erupting out of the ground around the walker and ensnaring it, forcing nearby Covenant infantry to flee. Before they could commandeer the Scarab, they were attacked by UNSC forces who eliminated the roots allowing a SPARTAN-II to take control of the walker. The captured Scarab provided a significant combat advantage for the UNSC as they fought to destroy several Covenant citadels which would provide them with a staging area in order to assault the Apex Site. Another Deutoros-pattern Scarab along with a contingent of Sangheili Honor Guardsmen were stationed at the final Covenant citadel but the UNSC forces, with the aid of their captured Scarab, were able to eliminate all Covenant forces.[12] At least one Deutoros-pattern Scarab attempted to halt the UNSC's assault on the Apex Site but fell to the human's determined assault.[13] A number of Deutoros-pattern Scarabs were deployed around the portal that would allow the Spirit of Fire to escape the shield world, both to counter the human forces, as well as a large Flood presence as well as hostile Forerunner constructs. They were ultimately unsuccessful in preventing the departure of the Spirit of Fire from the Etran Harborage.[14]
Deutoros-pattern Scarabs were rarely employed by the Covenant during the sieges on the Outer Colonies, though they saw increased field deployment in large numbers near the end of the Human-Covenant War to crush UNSC fortifications on well-defended Inner Colony worlds.[3] Unprecedented numbers of Deutoros-pattern Scarabs were used by the Covenant during the Fall of Reach.[3] During their initial incursions on Reach, the Fleet of Valiant Prudence deployed significant Covenant ground forces, including at least three Deutoros-pattern Scarabs at Szurdok Ridge, hiding their presence from the UNSC using several deployment spire. When the site was attacked by the UNSC on August 12, 2552, these three Scarabs provided support for Covenant ground forces as the two massive armies clashed at the landing zone.[15] Towards the end of the Fall of Reach, Deutoros-pattern Scarabs and other Covenant heavy armor were deployed to stop UNSC forces from escaping from the doomed planet.[8]
During the final hours of the Battle of Installation 04, the Covenant deployed a Deutoros-pattern Scarab to combat swarming Flood forces in the arid badlands around the downed UNSC Pillar of Autumn. During the battle, remaining UNSC personnel on the ringworld launched an assault on the Covenant forces, with the objective of drawing them away from the Autumn while SPARTAN John-117 boarded the cruiser. However when the Chief's commandeered Banshee approached the ship, the Scarab soon took notice and moved to ambush the Spartan. Fireteam Raven was quick to act, boarding a Falcon and proceeding to pursue the walker. Despite its best efforts, the team of ODSTs was able to successfully board the Scarab, wiping out its entire complement of soldiers and destroying the core.[16]
When the High Prophet of Regret invaded Earth in October, 2552, he deployed at least five Scarabs to Mombasa, Africa, with at least one of them being a Deutoros.[17] Two Scarabs were placed in New Mombasa, while another three were deployed in Old Mombasa. One of the Scarabs in New Mombasa was apparently charged with destroying the Mombasa Tether.[18] Shortly after Solemn Penance's retreat, one of these was stationed in the partially-flooded Kikowani Station, where it was engaged and neutralized by Alpha-Nine.[19]
On the morning of October 21 when the High Prophet of Truth's Jiralhanae-led reinforcements arrived over Kenya,[20][21][22] as Alpha-Nine members Edward Buck, Veronica Dare and the Rookie escorted a high-value asset: the defecting Covenant Huragok Quick to Adjust containing information from a subroutine of the city's Superintendant artificial intelligence, they witnessed several Scarabs being deployed by the massing Covenant warships. While most of them ignored or didn't notice the humans, one of the Scarabs did take notice and opened fire on the Olifant containing the Huragok with its focus cannon, heavily damaging the vehicle and forcing the team to abandon it outside of the Uplift Nature Reserve.[9]
During the Battle of Voi, a Deutoros-pattern Scarab was deployed into a lake bed near Traxus Factory Complex 09 after all of the Covenant Anti-Aircraft defences in the area were cleared by a mounted UNSC assault force. John-117 was able to eventually bring down the walker, allowing the human forces to regroup and push on to their final objective, a Covenant Anti-Aircraft Cannon.[23] The Prophet of Truth deployed multiple Deutoros-pattern Scarabs during the Battle of Installation 00. Outside Installation 00's Cartographer, John-117, with the assistance of a UNSC armored unit, destroyed a Deutoros-pattern Scarab. During the battle outside the Citadel, a pair of Deutoros-pattern Scarabs were deployed as a last-ditch effort by the Covenant to prevent the UNSC-Sangheili forces from reaching the Prophet of Truth. Despite their best efforts, both Scarabs were neutralized by the Master Chief, and with the death of the final Prophet Hierarch shortly later, the Covenant was brought to an end.[7]
Gameplay[edit]
Halo 3, Halo 3: ODST, and Halo: Reach[edit]

A Scarab attacking a Scorpion in
Halo 3.
The Deutoros-pattern Scarabs encountered in Halo 3 have far more destructible parts than the Protos-pattern Scarab seen in Halo 2. Destructible armor covers each joint of a Scarab's legs, and doing enough damage to the legs will cause the Scarab to go into lockdown, making it stop moving altogether. The flaps covering the main gun can be destroyed, though this does not affect the gun's operation. The crest on and around the rear anti-air turret can be completely blown off, slowing the turret's rate of fire and reducing the size of its plasma bolts. Two side door panels near the bottom of the Scarab's back can be torn off, allowing entry onto the vehicle.
A Scarab's rear armor possesses a glowing red circle; inflicting enough damage upon this circle will detach the armor, leaving the Scarab's core exposed. The core itself can be destroyed; its destruction will trigger a massive explosion that blows the Scarab into pieces, leaving few intact parts.
If one can successfully manage to board the Scarab in Halo: Reach, they will find that only the core of the Scarab can be destroyed. All other parts of the Scarab, including Plasma Cannons, cannot be destroyed. Destroying the core of the Scarab will also not destroy the Scarab itself. Instead, it will expose a hole in the Scarab, which bleeds orange Lekgolo blood if shot.[8]
Halo Wars[edit]

Two Scarabs, assisted by two Locusts and an infantry lance, engage UNSC forces in
Halo Wars.
Halo Wars features the Deutoros-pattern Scarab as a playable unit in Skirmish and multiplayer modes for Covenant leaders, though it is smaller for the sake of gameplay. Each Scarab costs  3,000 resources and
  20 population in Skirmish, with no upgrades available due to their cost and is built at the Covenant citadel. Up to two can be spawned at a time in a Standard mode and four in Deathmatch mode. Halo Wars' Title Update #4 enhanced the Scarab by providing an additional 25% hitpoints and a 25% damage increase, and is now capable of surviving four direct MAC blasts as a result of the improved hitpoints.
The Scarabs excel at attacking vehicles and infantry with their powerful weapons, though aircraft take longer for the Scarab to take down. Scarabs are very mobile, being able to climb over most obstacles. Only certain obstructions, like craters or fire, can block them. In the campaign level Beachhead, the player may use a Spartan to commandeer an abandoned Scarab. Commandeering this Scarab and using it to destroy twenty-five enemy units unlocks the achievement Beaming With Pride.
Scarabs are extremely difficult to destroy. Overwhelming it with a massive attack force works well, particularly when using anti-vehicle units like the SP42 Cobra or some Hunters, but a significant portion of the attack force will be lost in the process. An upgraded MAC blast or carpet bomb can destroy a Scarab rather quickly, as can a group of AC-220 Vultures using their missile barrages. Covenant leader units' special abilities can inflict massive damage on a Scarab, with the Prophet of Regret's cleansing beam being a good example.
Winning a Skirmish game with two Scarabs unlocks the 2 Bugs Are Better Than 1 achievement.
General[edit]
- Early in the development of Halo: Reach, there was to be a level between "New Alexandria" and "The Package" in which the player would navigate a Scarab through the ruins of New Alexandria. According to Marcus Lehto, the level was cut because it was "a little crazy".[24]
- On three occasions in Halo: Reach, Scarabs come within dangerous proximity to the player character, yet the player is unable to fight or board them. Martin O'Donnell refers to these moments as "Scarab teases."[25]
- The Deutoros-pattern Scarab was recreated for use in Halo ActionClix; it is the largest figure ever made by WizKids, the game's creator. A battle-damaged version was released at the 2007 San Diego Comic-Con for $250, which included the Scarab, two outdoor maps, an indoor map (representing the Scarab's interior), four character cards, and rules for both the Scarab and the game itself. A normal model was also released at select retailers in November 2007.
Glitches[edit]
- In Halo 3 and Halo 3: ODST, if the player jumps onto one of the legs of a Scarab, and the leg rises up, it will cause the player to fly through the air for a considerable distance and finally die after a while, possibly after hitting a barrier.
- On the Halo 3 level "The Ark", a glitch can be used to create an "undead Scarab".[26] When the level's Scarab first appears, it walks past the player and behind a cliff face; when the player makes it to the end of the area, it walks back in. If a player uses a Ghost to board the Scarab while it walks behind the cliff face, he can destroy the Scarab prematurely. From there, another player must simply get to the end of that section, triggering the Scarab's return. The damaged front half of the destroyed Scarab will walk out and then stay still.
- In Halo 3, the player can steer a Scarab. To do this, a player must board the Scarab, go to the front of the lower deck, and run into either the left or right wall. The Scarab will go in that direction, possibly because the Scarab attempts to reorient itself in order to get a clear shot at the player.
- On the Halo 3 level "The Covenant", if a player manages to kill a Scarab before its landing animation is finished, the Scarab will briefly go underground and launch everyone on board across the level.
Gallery[edit]
Halo 3 design[edit]
A view of the Halo 3 Scarab, facing right.
Another view of the Scarab in Halo 3.
A close up of a Deutoros-pattern Scarab's core.
A view of a Scarab's damaged core.
A Deutoros-pattern Scarab firing its main cannon.
A Deutoros-pattern Scarab landing on Installation 00.
A Scarab on the Mombasa Coastal Highway in Halo 3: ODST.
An in-game render of a Scarab from Halo: Reach.
A Deutoros-pattern Scarab in Halo: Reach.
A turnaround reference of the Scarab in Halo: Reach.
Another revision of the previous concept piece.
Halo Infinite concept art depicting a Deutoros-pattern Scarab firing on a Banished spacecraft.
Halo Wars[edit]
Concept art of the Deutoros-pattern Scarab for Halo Wars.
A trio of Scarabs on Harvest.
The Scarab firing its focus cannon.
A Scarab alongside two Shua'ee-pattern Locusts.
List of appearances[edit]
Sources[edit]
- ^ a b c d e f g h i j k l m n Halo: The Essential Visual Guide, page 163
- ^ a b c d e f g h i j k l m n o p q r Halo Encyclopedia (2022 edition), page 279
- ^ a b c d e f g h i j k l m n o p q r s t u v w Halo Waypoint, Scarab (Retrieved on Jun 30, 2021) [archive]
- ^ a b c d e f g h i j k l Halo Encyclopedia (2011 edition), page 254-255
- ^ a b c Halo: New Blood, chapter 8
- ^ a b c d e f g h i j k l m Halo Waypoint, Scarab (Retrieved on Mar 14, 2011) [local archive] [external archive]
- ^ a b c d Halo 3, campaign level The Covenant
- ^ a b c d Halo: Reach, campaign level The Pillar of Autumn
- ^ a b c Halo 3: ODST, campaign level Coastal Highway
- ^ Halo 3, Scarab in-game enemy
- ^ Halo Wars Launch Site, Covenant Side: ENGINEERING REP\STAT
- ^ a b Halo Wars, campaign level Beachhead
- ^ Halo Wars, campaign level Reactor
- ^ Halo Wars, campaign level Escape
- ^ Halo: Reach, campaign level Tip of the Spear
- ^ Halo: Fireteam Raven, campaign level Last Stand
- ^ Halo Waypoint, Canon Fodder - Scarab Tactics (Retrieved on Dec 23, 2019) [archive]
- ^ Halo: Evolutions - Palace Hotel
- ^ Halo 3: ODST, campaign level Kikowani Station
- ^ Halo Waypoint, Canon Fodder - Vergil Reality (Retrieved on Jun 15, 2021) [archive]
- ^ Ten Twenty
- ^ Halo 3: ODST, campaign level Coastal Highway
- ^ Halo 3, campaign level The Storm
- ^ YouTube - Sacharified, Halo Reach Legendary Edition - Developer Commentary Part 6 (Retrieved on Jan 6, 2024)
- ^ YouTube - Sacharified, Halo Reach Legendary Edition - Developer Commentary Part 4 (Retrieved on Jan 6, 2024)
- ^ YouTube - CMNeir, Halo 3 Tricks: Episode 62 *Undead Scarab* (Retrieved on Jan 6, 2024)
Ground vehicles of the Covenant and its remnants
|
|
|
Rapid Assault Vehicles
|
|
|
|
Infantry Support Vehicles
|
|
|
|
Light Assault Vehicles
|
|
|
|
Heavy Ground Vehicles
|
|
|
|
Transport Vehicles
|
|
|
|
Maritime vehicles
|
|
|
|
Walkers
|
|
|
|
|
|
|
|
|
Siegeworks vehicles
|
|
|
|
Miscellaneous
|
|
|


![]() 3,000 resources and
3,000 resources and ![]() 20 population in Skirmish, with no upgrades available due to their cost and is built at the Covenant citadel. Up to two can be spawned at a time in a Standard mode and four in Deathmatch mode. Halo Wars' Title Update #4 enhanced the Scarab by providing an additional 25% hitpoints and a 25% damage increase, and is now capable of surviving four direct MAC blasts as a result of the improved hitpoints.
20 population in Skirmish, with no upgrades available due to their cost and is built at the Covenant citadel. Up to two can be spawned at a time in a Standard mode and four in Deathmatch mode. Halo Wars' Title Update #4 enhanced the Scarab by providing an additional 25% hitpoints and a 25% damage increase, and is now capable of surviving four direct MAC blasts as a result of the improved hitpoints.

