The Pillar of Autumn (Halo: Combat Evolved level): Difference between revisions
From Halopedia, the Halo wiki
m (Reverted edits by 68.55.152.141 (Talk) to last version by AnonymousSavior) |
No edit summary |
||
| (237 intermediate revisions by 84 users not shown) | |||
| Line 1: | Line 1: | ||
{{ | {{Title|The Pillar of Autumn}} | ||
{{Status|Gameplay}} | |||
{{Center|''For more articles of the same name, see [[The Pillar of Autumn|The Pillar of Autumn (disambiguation)]].''}} | |||
{{Level infobox | {{Level infobox | ||
|pagegamelabel=CE | |||
|prev=''[[Lone Wolf]]'' {{C|''[[Halo: The Master Chief Collection|MCC]]''}} | |||
|next=''[[Halo (Halo: Combat Evolved level)|Halo]]'' | |||
|name='''''The Pillar of Autumn''''' | |name='''''The Pillar of Autumn''''' | ||
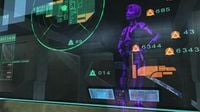
|image=[[File: | |image=[[File:HCEA PillarOfAutumn Loadscreen.png|300px]] | ||
|game=''[[Halo: Combat Evolved]]'' | |game=''[[Halo: Combat Evolved]]'' {{C|''[[Halo: Combat Evolved Anniversary|Anniversary]]''}} | ||
|player=[[ | |devname=<code>a10</code>{{Ref/File|Id=HCEEK|HCEEK|HCEEK\tags\levels\a10\a10.scenario}} | ||
|player=[[Master_Chief_(gameplay)#Halo:_Combat_Evolved|Master Chief]] | |||
|date=[[2552#September 19, 2552|September 19, 2552]] | |date=[[2552#September 19, 2552|September 19, 2552]] | ||
|place=Aboard the {{UNSCShip|Pillar of Autumn}} | |place=Aboard the {{UNSCShip|Pillar of Autumn}}, in orbit of [[Installation 04]] in [[Soell system]] | ||
|objective= Retrieve [[Cortana]] from the [[bridge]] and escape the ''Autumn'' | |||
|parscore=17,000 {{C|''Master Chief Collection''-only}} | |||
|partime=00:15:00 {{C|''Master Chief Collection''-only}} | |||
| | |||
| | |||
}} | }} | ||
{{Article | {{Article quote|Escape intact as Covenant forces board your ship.}} | ||
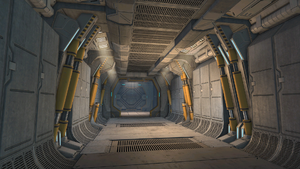
'''''The Pillar of Autumn''''' is the first | '''''The Pillar of Autumn''''' is the first level in the [[campaign]] of ''[[Halo: Combat Evolved]]'' and the ''Halo'' game series overall. The {{UNSCShip|Pillar of Autumn}}, having escaped [[Fall of Reach|the destruction of Reach]], has arrived near a [[Installation 04|strange object]]. Unfortunately, the [[Covenant]], who are here as well, attack the ship. [[Master Chief Petty Officer]] [[SPARTAN-II program|SPARTAN]] [[John-117]] is awakened from his cryo-sleep and makes his way to the bridge of the titular ship to be debriefed by [[Captain (Navy)|Captain]] [[Jacob Keyes]] about their current situation. After the brief meeting, the Master Chief, with his [[Artificial Intelligence|AI]] companion [[Cortana]], makes his way off the ship via a [[Bumblebee]] escape pod. | ||
==Transcript== | ==Transcript== | ||
= | [http://www.youtube.com/watch?v=dMWrM0VWsv8 '''{''Original Cutscene''}'''] | ||
[http://www.youtube.com/watch?v=LKOZtWKAkPI '''{Anniversary ''Cutscene''}'''] | |||
[http://www.youtube.com/watch?v= | |||
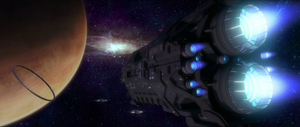
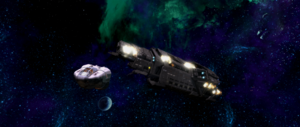
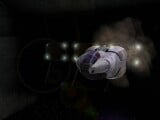
''Fades into space. [[Installation 04 | [[File:Autumn Arrival.png|thumb|300px|The UNSC ''Pillar of Autumn'' approaching Installation 04.]] | ||
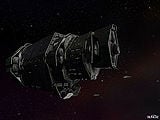
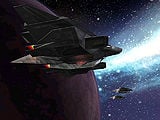
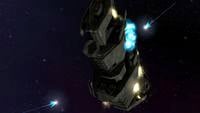
''Fades into space. [[Installation 04]] is visible above [[Threshold]]. The ''Pillar of Autumn'' appears, moving slowly toward the ring. [[C709 Longsword-class Interceptor|Longsword]] escorts soar alongside. In ''Anniversary'', the camera fades into the ''Autumn'' and pans to show Installation 04 and Threshold as the ship moves.'' | |||
''The camera slowly turns and zooms in | ''The camera slowly turns and zooms in on the ''Pillar of Autumn''.'' | ||
*'''[[Captain (Navy)|Captain]] [[Jacob Keyes]]''': "Cortana, all I need to know is did we lose [[Covenant | *'''[[Captain (Navy)|Captain]] [[Jacob Keyes]]''': "Cortana, all I need to know is did we lose [[Covenant|them]]?" | ||
*'''[[ | *'''[[Cortana]]''': "I think we both know the answer to that." | ||
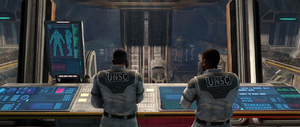
''Inside ship, the camera focuses on Keyes.'' | ''Inside the ship's bridge, the camera focuses on Keyes.'' | ||
*''' | *'''Keyes''': ''(sighs)'' "We made a blind jump. How did they—" | ||
*'''Cortana''': "Get here first? The Covenant ships have always been faster. As for tracking us all the way from [[Reach]]...at [[ | *'''Cortana''': "Get here first? The Covenant ships have always been faster. As for tracking us all the way from [[Reach]]...at [[slipspace|light speed]], my maneuvering options were limited." | ||
''Keyes begins pacing around, looking at viewscreens.'' | ''Keyes begins pacing around, looking at viewscreens.'' | ||
*''' | *'''Keyes''': "We were running dark, yes?" | ||
*'''Cortana''': "Until we decelerated. No one could have missed the hole we tore in subspace." | *'''Cortana''': "Until we decelerated. No one could have missed the hole we tore in subspace." | ||
| Line 61: | Line 49: | ||
*'''Cortana''': "They were waiting for us on the far side of the planet." | *'''Cortana''': "They were waiting for us on the far side of the planet." | ||
''The crewman presses some buttons. The screen shows a diagram of | ''The crewman presses some buttons. The screen shows a diagram of Threshold with Installation 04 in orbit.'' | ||
*''' | *'''Keyes''': "So, where do we stand?" | ||
*'''Cortana''': "Our fighters are mopping up the last of their recon picket now, nothing serious." | *'''Cortana''': "Our fighters are mopping up the last of their recon picket now, nothing serious." | ||
| Line 69: | Line 57: | ||
''Keyes examines the main screen, pulls his pipe out of his mouth and shakes some ash off it. He closes his eyes wearily.'' | ''Keyes examines the main screen, pulls his pipe out of his mouth and shakes some ash off it. He closes his eyes wearily.'' | ||
*'''Cortana''': | *'''Cortana''': "But I've isolated approach signatures from multiple [[Ket-pattern battlecruiser|CCS-class]] battle groups, make it three capital ships per group. And in about 90 seconds they'll be all over us." | ||
*''' | *'''Keyes''': "Well, that's it then. Bring the ship back up to Combat Alert Alpha. I want everyone at their stations." | ||
*'''Cortana''': "Everyone, sir?" | *'''Cortana''': "Everyone, sir?" | ||
*''' | *'''Keyes''': "''Everyone.''" | ||
''Alarm klaxon sounds. Crewmen run towards their stations.'' | ''Alarm klaxon sounds. Crewmen run towards their stations.'' | ||
*''' | *'''Keyes''': "And Cortana..." | ||
''Cortana's avatar appears.'' | ''Cortana's avatar appears on a [[holotank]].'' | ||
*'''Cortana''': "Hmm?" | *'''Cortana''': "Hmm?" | ||
*''' | *'''Keyes''': "...let's give our old friends a warm welcome." | ||
*'''Cortana''': "I've already begun." | *'''Cortana''': "I've already begun." | ||
''Cuts to the | ''Cuts to the one of the launch bays of the ''Pillar of Autumn''. A Marine waves light batons to guide a [[Pelican]] into the correct docking position. The view moves towards the lower deck.'' | ||
*'''Cortana ( | *'''Cortana (PA)''': "Attention, all combat personnel: Please report to your action stations." | ||
*'''Cortana ( | *'''Cortana (PA)''': "5th Platoon, secure airlocks on Deck 11. 14th Platoon, rendezvous with 22nd Tactical at bulkhead Charlie 14." | ||
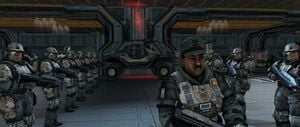
''[[UNSC Marine Corps|Marines]] start talking, readying their weapons, preparing [[M808B Main Battle Tank|Scorpion Tanks]] and [[M12 Light Reconnaissance Vehicle|Warthogs]], or just loitering, until the view shows | ''[[UNSC Marine Corps|Marines]] start talking, readying their weapons, preparing [[M808B Main Battle Tank|Scorpion Tanks]] and [[M12 Light Reconnaissance Vehicle|Warthogs]], or just loitering, until the view shows Staff Sergeant Avery Junior Johnson walking through a line of Marines.'' | ||
*'''[[Sergeant]] [[Johnson]]:''' "You heard the lady! Move like you've got a purpose!" | *'''[[Staff Sergeant]] [[Avery Junior Johnson]]:''' "You heard the lady! Move like you've got a purpose!" | ||
*'''Cortana ( | *'''Cortana (PA)''': "This is not a drill. I repeat, this is not a drill." | ||
[http://www.youtube.com/watch?v=HnXOsyGRnFc '''{''Cutscene w/ All Difficulties''}'''] | [http://www.youtube.com/watch?v=HnXOsyGRnFc '''{''Original Cutscene w/ All Difficulties''}'''] | ||
[http://www.youtube.com/watch?v=AjnwbCUmwoA '''{Anniversary ''Cutscene w/ All Difficulties''}'''] | |||
''Marines get in two lines, facing each other. Johnson walks down the column between the formation.'' | ''Marines get in two lines, facing each other. Johnson walks down the column between the formation.'' | ||
*''' | *'''Johnson''': ''([[Easy]])'' "Men...keep your eyes down range, fingers on your triggers, and we all go home in one piece." ''(turns around)'' "''Am I right, Marines?''" | ||
*'''Johnson''': ''([[Normal]])'' "Once again, it is our job to finish what the flyboys started. We are leaving this ship, platoon, and engaging the [[Covenant]] on solid ground. When we meet the enemy, we will rip their skulls from their spines, and toss 'em away, laughin'!" ''(turns around)'' "''Am I right, Marines?''" | |||
[[File:HCEA Johnson&Marines.jpg|thumb|300px|Johnson giving his speech]] | |||
*''' | *'''Johnson''': ''([[Heroic]])'' "Men, here is where we show those [[Sangheili|split-chin squid-head sons-of-bitches]] that they could not have picked a worse enemy than the [[human]] race! We are going to blow the hell out of those dumb bugs, until we don't have anything left to shoot 'em with! And then we are going to strangle them with their ''own-living-guts!''" ''(turns around)'' "''Am I right, Marines?''" | ||
*''' | *'''Johnson''': ''([[Legendary]])'': "Men, we led those dumb bugs out to the middle of nowhere to keep 'em from gettin' their ''filthy'' claws on [[Earth]], but we stumbled onto somethin' they're so hot for that they're scramblin' over each other to get it. Well, I don't care if it's [[Forerunner|God]]'s own anti-[[Flood|son-of-a-bitch]] machine or a giant hula hoop, we're not gonna let 'em have it! What we ''will'' let 'em have...is a belly full of lead and a pool of their own blood to drown in!" ''(turns around)'' "''Am I right, Marines?''" | ||
*''' | *'''Marines:''' "Sir, yes sir!" | ||
*''' | *'''Johnson''': "Uh-huh. Damn right, I am. Now move it out! Double time!" | ||
''The Marines break formation and run out of the area, as Johnson follows them slowly.'' | ''The Marines break formation and run out of the area, as Johnson follows them slowly.'' | ||
*'''Cortana ( | *'''Cortana (PA)''': "Attention, all personnel: We are re-engaging the enemy. Internal and external contact imminent." | ||
*'''Johnson''': "All you greenhorns who wanted to see Covenant up close...this is gonna be your lucky day." | |||
[[File:ChiefThawing.png|thumb|300px|Technicians awakening the Master Chief.]] | |||
''Cut to a computer screen.'' | ''Cut to a computer screen.'' | ||
:<tt>>X - | :<tt>>X - CORTANA 1 0 CRYOSTOR. 23.4.7<br />>(PRIORITY ALPHA)</tt> | ||
:<tt>>UNSEAL THE HUSHED CASKET</tt> | :<tt>>UNSEAL THE HUSHED CASKET</tt> | ||
| Line 135: | Line 128: | ||
''The crewmen begin pressing buttons.'' | ''The crewmen begin pressing buttons.'' | ||
*''' | *'''Marcus''': "Okay. Bringing low-level systems online. Cracking the case in thirty seconds." | ||
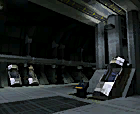
''Cut to [[John-117]]'s cryo | ''Cut to [[John-117]]'s [[cryo chamber]], which excretes steam.'' | ||
*''' | *'''Marcus''': "He's hot! Blowing the pins in five..." | ||
'''{''Gameplay''}''' | |||
'' | |||
'' | ===Reveille=== | ||
[[File:MasterChiefExitCryoPod.jpg|thumb|300px|The Master Chief exits his cryo pod.]] | |||
''Note: Testing only happens in single-player, on Easy and Normal difficulties.'' | |||
*''' | *'''Marcus (PA)''': "His tube shows green. Cycle complete." | ||
''Tube cover lifts itself'' | ''Tube cover lifts itself, Shephard, standing in front of it, salutes.'' | ||
*''' | *'''Shephard''': "Sorry for the quick thaw, Master Chief. Things are a little hectic right now. The disorientation should pass quickly." | ||
*''' | *'''Marcus (PA)''': ''(waves)'' "Welcome back, sir. We'll have you battle ready stat." | ||
*''' | *'''Shephard''': "Chief, please look around the room. I need to get a calibration reading for your battle suit's diagnostics." | ||
''The Chief looks around.'' | ''The Chief looks around.'' | ||
*''' | *'''Shephard''': "Good. Thank you sir." | ||
*'''Marcus (PA)''': "I'm bringing your [[health]] monitors online, sir." | |||
''The [[heads-up display]]'s health bars appear.'' | |||
*'''Shephard''': "Vital signs look normal. No [[freezer burn]]. Okay sir, go ahead and climb out of the cryo tube." | |||
[http://www.youtube.com/watch?v=1jYyG8ZVXxA '''{''Original Cutscene''}'''] | |||
[http://www.youtube.com/watch?v=KQHM0hltKsQ '''{Anniversary ''Cutscene''}'''] | |||
''The [[ | ''The Master Chief gets out of the cryo chamber. On [[Cooperative Play]], a second Spartan also gets out from a cryo chamber next to the Chief's.'' | ||
'''{''Gameplay''}''' | |||
*'''Shephard''': "I gave you a double dose of the [[Stim-pack|wake-up stim]]. Take a quick walk around the cryo bay and join me at the optical diagnostics station when you're ready." | |||
'' | ''Shephard walks over, soon Master Chief follows him and stands on a red square.'' | ||
''If Chief does not face Shephard or begins to wander:'' | |||
'' | *'''Shephard''': "Stand on the red square please." | ||
'' | *'''Shephard''': "Ok sir, look at me to begin." | ||
''When the Chief faces Shephard and stands on the square:'' | |||
[[File:HCEA Targeting test.png|thumb|300px|The targeting test.]] | |||
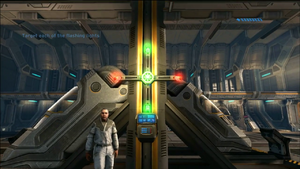
*''' | *'''Shephard''': "I know the ordnance techs usually take care of your targeting sensors, but we're short of time, Chief. Just look at each of the flashing panels to target them. When you lock on, it'll change color." | ||
''Chief looks at the flashing lights.'' | ''Chief looks at the flashing lights.'' | ||
*''' | *'''Shephard''': "Okay, that looks good..." | ||
*''' | *'''Marcus (PA)''': "Sir, I'm getting some calibration errors. I'm going to invert your looking pitch, so you can see if you like it better that way." | ||
''The pitch is inverted.'' | ''The pitch is inverted.'' | ||
*''' | *'''Marcus (PA)''': "Try targeting the flashing lights again." | ||
''The Chief looks at the panel.'' | ''The Chief looks at the panel.'' | ||
*''' | *'''Marcus (PA)''': "Is that better or should I switch it back?" | ||
''The Chief decides the way he wants.'' | ''The Chief decides the way he wants.'' | ||
*''' | *'''Marcus (PA)''': "OK, I'll leave the pitch normal/inverted. But if you want, you can change it yourself later. ''(pause)'' I'm ready for the energy shield test now." | ||
*''' | *'''Shephard''': "Please follow me to the [[energy shield test station]]." | ||
*'''Cortana ( | *'''Cortana (PA)''': "Fire teams: Report to defensive positions Alpha through Sierra. Sensors show inbound Covenant boarding craft. Stand by to repel boarders." | ||
'' | ''Cortana then proceeds to give PA announcements coordinating the crew's defense against the Covenant boarders that loop till John-117 meets Keyes on the bridge.'' | ||
*''' | *'''Cortana (PA)''': "Warning! Covenant incursions on port decks Three and Nine. Alpha Team, engage enemy boarders." | ||
'' | ''Later:'' | ||
*''' | *'''Cortana (PA)''': "Enemy boarding parties on starboard decks Eight through Ten. Echo Team, intercept Covenant forces." | ||
''Later:'' | |||
'' | *'''Cortana (PA)''': "Covenant boarding craft detected on port decks Four, Five, Seven, Eight, and Eleven. All available [[Combat Team]]s, respond!" | ||
''Later:'' | |||
*'''Cortana (PA)''': "Baker Team reports Covenant forces engaged on port deck Seven. Security teams, move to assist." | |||
''Later:'' | |||
*''' | *'''Cortana (PA)''': "Warning! Covenant boarders on starboard decks Four and Six. Sierra Team reports heavy resistance! Security teams, assist." | ||
''Later:'' | |||
*''' | *'''Cortana (PA)''': "Alert! Alpha and Charlie Teams report heavy fighting on port decks Five through Nine. Foxtrot Team, move to starboard decks Eight and Ten, and stand by." | ||
''Later:'' | |||
*''' | *'''Cortana (PA)''': "Reserve Combat Teams Tango through X-Ray to port decks Five and Six, on the double!" | ||
''Later:'' | |||
'' | *'''Cortana (PA)''': "Reserve Combat Teams Oscar and Romeo to port decks Nine through Eleven." | ||
''If Chief does not look at Shepard.'' | |||
*''' | *'''Shephard''': "Sir, I need you to look at me to begin." | ||
'' | ''If Chief does not stand on the square'' | ||
*''' | *'''Shephard''': "Stand on the yellow square. This'll just take a second." | ||
''The | ''The Chief steps into the square.'' | ||
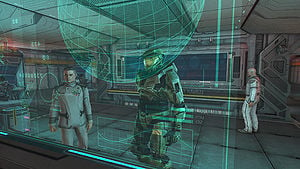
*''' | *'''Shephard''': "Okay, bring his energy shields online please." | ||
'' | ''The Chief's shield meter appears, and charges to full.'' | ||
*''' | *'''Marcus (PA)''': "Alright. Shields read as fully charged." | ||
'' | *'''Shephard''': "Okay, sir. Bring them down to test the automatic recharge." | ||
'' | ''The Chief's shields get depleted, and recharge themselves again.'' | ||
*'''Marcus (PA)''': "Recharging normal. Showing green across the board." | |||
*''' | *'''Captain Keyes (PA):''' "Bridge to Cryo Two, this is Captain Keyes. Send the Master Chief to the bridge immediately." | ||
'' | *'''Shephard''': "Captain, we'll have to skip the weapons diagnostics and I-" | ||
*''' | *'''Captain Keyes (PA)''': "On the double, crewman." | ||
'' | *'''Shephard''': "Aye aye, sir. ''(to the Chief)'' The skipper seems jumpy, we'd better get moving. We'll find you weapons later." | ||
*''' | *'''Marcus (PA)''': "Okay. I'll leave the self-diagnostics running, at least." | ||
'' | *'''Shephard''': "Good idea. You'd better get to your evac group, Sam!" | ||
*''' | *'''Marcus (PA)''': "Affirmative. Just have to reset the computer and I'm outta here!" | ||
''Banging is heard on one of the observation chamber doors. An alarm activates and flashes red.'' | |||
'' | *'''Marcus (PA)''': "Oh God! They're trying to get through the door!" | ||
''The door breaks open and a [[Sangheili]] [[Sangheili Major|Major]] enters, firing on Marcus.'' | |||
'' | *'''Marcus (PA)''': "Security! Intruders in Cryo Two! No, please don't— ''(a plasma bolt hits him, and he falls)'' ''Agh!''" | ||
''The Sangheili turns around and tries to shoot at the Master Chief from above, but can't get through the glass. The Sangheili runs off.'' | |||
'' | *'''Shephard''': ''(panicked)'' "Sam! Sam! ''(to the Chief)'' C'mon, we've got to get the hell out of here!" | ||
''Shephard unlocks the exit door.'' | |||
'' | *'''Shephard''': "This way!" | ||
''If the level is played on Heroic or Legendary, gameplay begins here.'' | |||
'' | ''Shephard leads Master Chief out of Cryo Two and down a corridor. Shephard tries to open the second door, which explodes, killing him. The Master Chief leaves the area and sees crewmen battling the Covenant while another crewman is killed by an explosion.'' | ||
*''' | *'''[[Crewman 1|Crewman #1]]''': "Behind us! They're right behind us!" | ||
'' | ''A few crewmen run into the room while the blast doors are closing.'' | ||
*''' | *'''[[Crewman]] #2 or Marine''': "Secure those [[blast door]]s! Move! ''Move''!" | ||
'' | ''A crewman runs away from the blast door, with a second directly behind him.'' | ||
*''' | *'''Crewman #3''': "Wait for me!" | ||
'' | ''The crewman is killed by an explosion just as he reaches the blast doors, which shut slowly.'' | ||
*''' | ''If Chief lingers around the area:'' | ||
*'''Crewman''': "Master Chief, sir, the situation's secure here. You're probably needed somewhere else!" | |||
'' | ''The Chief finds his way to a corridor intersection where (on Easy and Normal) he comes face to face with a [[Sangheili Minor]]. It growls at him but is suddenly attacked by Marines, and the Sangheili flees behind a closing door.'' | ||
*''' | *'''Marine #1''': "Chief, Cortana says get to the bridge, double quick!" | ||
''The Chief makes his way to a room where [[Private First Class|PFC]] [[Chips Dubbo]] is helping some crewmen battle the Covenant boarders.'' | ''The Chief makes his way to a room where [[Private First Class|PFC]] [[Chips Dubbo]] is helping some crewmen battle the Covenant boarders.'' | ||
*'''PFC | *'''PFC Chips Dubbo''': "Sir! The Captain needs you on the bridge, ASAP! You better follow me." | ||
''The Chief follows Dubbo through a | ''The Chief follows Dubbo through an emptied armory with a few dead or wounded Marines. Outside there's another fight between the crew and the Covenant. The Chief arrives just in time to witness a crewman being killed in an explosion.'' | ||
*''' | *'''Dubbo''': "Get clear, Chief!" | ||
''The blast doors close locking the Covenant out.'' | ''The blast doors close, locking the Covenant out.'' | ||
''The Chief and Dubbo get to the bridge:'' | ''The Chief and Dubbo get to the bridge:'' | ||
*''' | *'''Dubbo''': "Captain Keyes is waiting for you, sir!" | ||
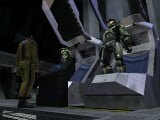
''The Chief approaches Keyes.'' | |||
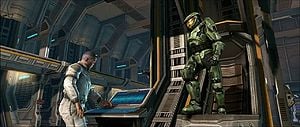
[[File:2817468-gallery.jpg|thumb|300px|The Chief and Captain Keyes, discussing the situation.]] | |||
[http://www.youtube.com/watch?v=v3HHf3TQw3E '''{''Original Cutscene''}'''] | |||
[http://www.youtube.com/watch?v=6DQ0da9xvqg '''{Anniversary ''Cutscene''}'''] | |||
*'''[[Master Chief]]''': "Captain Keyes." | *'''[[Master Chief Petty Officer]] [[John-117]]''': "Captain Keyes." | ||
''Keyes shakes the Master Chief's hand.'' | ''Keyes turns away from the main view screen and shakes the Master Chief's hand.'' | ||
*''' | *'''Keyes''': "Good to see you, Master Chief. Things aren't going well. Cortana did her best, but we never really had a chance." | ||
''Cortana's avatar appears on the holotank.'' | ''Cortana's avatar appears on the holotank.'' | ||
*'''Cortana''': "A dozen Covenant superior battleships against a single | *'''Cortana''': "A dozen Covenant superior battleships against a single [[Halcyon-class light cruiser|''Halcyon''-class cruiser]]. With those odds, I'm content with three - make that ''four'' kills." ''(to the Chief)'' "Sleep well?" | ||
*''' | *'''John-117''': "No thanks to your driving, yes." | ||
''Cortana smiles.'' | |||
*'''Cortana''': "So you ''did'' miss me." | |||
''A loud explosion rocks the bridge. The Chief lurches and Keyes grabs a pedestal for support.'' | ''A loud explosion rocks the bridge. The Chief lurches and Keyes grabs a pedestal for support.'' | ||
*''' | *'''Keyes''': "Report!" | ||
*'''Cortana''': "It must have been one of their boarding parties! I'd guess an [[ | *'''Cortana''': "It must have been one of their boarding parties! I'd guess an [[antimatter charge]]!" | ||
*'''Fire Control Officer''': "Ma'am! Fire control to the [[Magnetic Accelerator Cannon|main cannon]] is offline!" | *'''Fire Control Officer''': "Ma'am! Fire control to the [[Magnetic Accelerator Cannon|main cannon]] is offline!" | ||
| Line 351: | Line 359: | ||
*'''Cortana''': "Captain, the cannon was my last offensive option." | *'''Cortana''': "Captain, the cannon was my last offensive option." | ||
*''' | *'''Keyes''': "Alright then. I'm initiating [[Cole Protocol#Article 2|Cole Protocol, Article 2]]. We're abandoning the ''Autumn''. That means you too, Cortana." | ||
*'''Cortana''': "While you do what, go down with the ship?" | *'''Cortana''': "While you do what, go down with the ship?" | ||
*''' | *'''Keyes''': "In a manner of speaking. The [[Installation 04|object]] we found, I'm going to try and land the ''Autumn'' on it." | ||
*'''Cortana''': "With all due respect, sir, this war has ''enough dead heroes''." | *'''Cortana''': "With all due respect, sir, this [[Human-Covenant War|war]] has ''enough dead heroes''." | ||
*''' | *'''Keyes''': "I appreciate your concern, Cortana, but it's not up to me. Protocol is clear. Destruction or capture of a shipboard AI is absolutely unacceptable, that means you're leaving the ship. Lock in a selection of emergency landing zones, upload them to my neural lace, and then sort yourself for a hard transfer." | ||
*'''Cortana''': "Aye aye, sir." | *'''Cortana''': "Aye aye, sir." | ||
| Line 365: | Line 373: | ||
''Cortana's avatar disappears.'' | ''Cortana's avatar disappears.'' | ||
*''' | *'''Keyes''': "...which is where you come in, Chief. Get Cortana off this ship. Keep her safe from the enemy. If they capture her, they'll learn everything. Force deployment, weapons research...''[[Earth]]''." | ||
*''' | *'''John-117''': "I understand." | ||
''Cortana's avatar reappears.'' | ''Cortana's avatar reappears.'' | ||
| Line 374: | Line 381: | ||
*'''Cortana''': "The ''Autumn'' will continue evasive maneuvers until you initiate a landing sequence. Not that you'll listen, but I'd suggest letting my subroutines handle the final approach." | *'''Cortana''': "The ''Autumn'' will continue evasive maneuvers until you initiate a landing sequence. Not that you'll listen, but I'd suggest letting my subroutines handle the final approach." | ||
*''' | *'''Keyes''': "Excellent work, Cortana. Thank you. Are you ready?" | ||
''Cortana looks | ''Cortana looks around the bridge for one last time, then sighs.'' | ||
[[File:KeyesChipCEA.png|thumb|300px|Captain Keyes gives Cortana's data chip to the Chief.]] | |||
*'''Cortana''': "Yank me." | *'''Cortana''': "Yank me." | ||
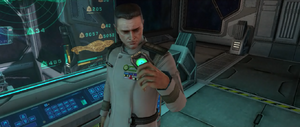
''Captain Keyes pulls a data chip out of the holotank and gives to the Master Chief.'' | ''Captain Keyes pulls a data chip out of the holotank and Cortana disappears. He gives the chip to the Master Chief.'' | ||
*''' | *'''Keyes''': "Good luck, Master Chief." | ||
''The Chief slides the chip into the back of his helmet.'' | ''The Chief slides the chip into the back of his helmet.'' | ||
| Line 388: | Line 397: | ||
*'''Cortana''': "Hmm...your architecture isn't much different from the ''Autumn's''..." | *'''Cortana''': "Hmm...your architecture isn't much different from the ''Autumn's''..." | ||
*''' | *'''John-117''': "Don't get any funny ideas." | ||
'''{''Gameplay''}''' | '''{''Gameplay''}''' | ||
''Keyes hands his [[M6D | ===AI Constructs and Cyborgs First!=== | ||
''Keyes hands his [[M6D magnum|pistol]] to the Chief.'' | |||
*''' | *'''Keyes''': "I don't keep it loaded, son. You'll have to find ammo as you go." | ||
''If | ''If Chief lingers next to Captain Keyes:'' | ||
*''' | *'''Keyes''': "Get moving, Master Chief. There's nothing you can do here." | ||
''or'' | ''or'' | ||
*''' | *'''Keyes''': ''(angrily)'' "I gave you an order, soldier. Get off this ship!" | ||
''If | ''If Chief stays on the bridge but not next to Captain Keyes:'' | ||
*'''Cortana''': "We need to get off this ship, Chief, before we're completely overrun by Covenant." | *'''Cortana''': "We need to get off this ship, Chief, before we're completely overrun by Covenant." | ||
''If | ---- | ||
''If Chief uses the pistol to kill Captain Keyes or any crewmen:'' | |||
*'''Cortana''': ''(shocked and infuriated)'' "What the hell are you doing?!" | *'''Cortana''': ''(shocked and infuriated)'' "What the hell are you doing?!" | ||
| Line 415: | Line 426: | ||
*'''Cortana (COM)''': "Security to the bridge, the Master Chief has gone rampant! Take him down, boys!" | *'''Cortana (COM)''': "Security to the bridge, the Master Chief has gone rampant! Take him down, boys!" | ||
''Invincible Marines come in and quickly kill the Master Chief, taunting him afterward.'' | ''The doors leading to bridge lock up. Invincible Marines come in and quickly kill the Master Chief, taunting him afterward.'' | ||
---- | |||
''When Chief moves away from Keyes, the PA announcements Cortana was doing is replaced by PA announcements by Keyes. These loop till the end of the mission.'' | |||
*'''Keyes (PA)''': "Combat Teams on decks Seven and Eight, fall back to secondary defensive positions." | |||
''Later:'' | |||
*'''Keyes (PA)''': "Reserve Combat Teams on decks Five through Nine, fall back to secondary defensive positions!" | |||
''Later:'' | |||
*'''Keyes (PA)''': "Crew and Ops personnel on decks One through Four, report to evac stations immediately!" | |||
'' | ''Later:'' | ||
*''' | *'''Keyes (PA)''': "Ops personnel on decks Nine through Twelve, report to evac stations now!" | ||
''Later:'' | |||
*'''Keyes (PA)''': "All hands, this is the Captain. Prepare to abandon ship! Combat Teams, repel boarders until Ops personnel are away. Good luck. Keyes out." | |||
''Later:'' | |||
*'''Keyes (PA)''': "All remaining crew and Ops personnel, hit the lifeboats! Fall back to evac stations." | |||
''Later:'' | |||
'' | *'''Keyes (PA)''': "Combat teams Alpha through November, pull out to nearest evac station!" | ||
'' | ''Later:'' | ||
*''' | *'''Keyes (PA)''': "Combat Teams Sierra through Victor, prepare for evac!" | ||
''Later:'' | |||
'' | *'''Keyes (PA)''': "All combat personnel, fall back to tertiary defensive positions!" | ||
''Continuing, without killing anyone on the bridge, the Chief picks up ammunition for the pistol, and meets three Unggoy, who he quickly deals with. He enters the door on the opposite wall and sees groups of Marines engaging the Covenant in the mess hall.'' | |||
*''' | *'''Cortana''': "Those Marines could use some help, Chief! Do what you do best!" | ||
'' | ''The Chief steps over a body of a dead Marine and picks up an [[MA5B assault rifle|Assault Rifle]].'' | ||
''From here to the end of the level, if Chief takes a hit with his shields down:'' | |||
'' | *'''Cortana''': ''(urgently)'' "Keep your head down! There's two of us in here now, remember?" | ||
''The Chief clears the mess hall then heads out into the corridors. He comes across a group of three Marines fighting a Sangheili. After he helps them kill the Sangheili, the ship is rocked by a violent explosion.'' | |||
*'''Marine #2''': "What the hell? Did something just hit us?" | |||
'' | *'''Marine #3''': "Move it! Back to the airlock!" | ||
''An explosion comes from the airlock, caused by a [[Brhi Xur-pattern Leech|Covenant boarding vessel]] crashing into the ship, killing the two Marines standing guard next to it. Covenant troops pour into the corridor. The Chief and the Marines eliminate them. If John-117 enters the Covenant boarding craft:'' | |||
*''' | *'''Cortana''': "They're using ''our'' lifeboat airlocks to attach their boarding craft! We go out and they come in! Clever bastards..." | ||
'' | ''The Chief leaves the airlock area.'' | ||
*'''Marine 3''': "We' | *'''Marine #3''': "Go on ahead, Chief. We'll secure this airlock." | ||
[[File:ChiefEliteCEA.jpg|thumb|300px|The Chief engages a [[Sangheili Minor]].]] | |||
'' | ''The Chief finds a trio of Marines fighting Covenant while taking cover behind [[Combat Barriers]].'' | ||
*''' | *'''Marine #4''': "We're taking fire. We could use a hand!" | ||
'' | ''The Chief enters a room where the Covenant are on a ledge above him. Marines engage the boarders by taking cover behind the central staircase.'' | ||
*''' | *'''Cortana''': "Covenant! On the landing above us!" | ||
'' | ''After the battle on the ledges, the Chief climbs the staircase to the second floor. The Chief sees a [[lifepod]] launching with pulse lasers bursting all around the airlocks.'' | ||
*'''Cortana''': "The lifepods are launching! We should hurry." | *'''Cortana''': "The lifepods are launching! We should hurry." | ||
''Plasma torpedoes continue to hit the hull. Three lifepods launch from the airlocks in sequence. The third one is hit by enemy fire and explodes.'' | |||
''Plasma | |||
*'''Cortana''': "The Covenant are destroying the lifepods...they really don't want us on that ring." | *'''Cortana''': "The Covenant are destroying the lifepods...they really don't want us on that ring." | ||
'' | ''The Chief passes a set blast doors, the blast door closes, leaving any of the surviving accompanying Marines behind the door.'' | ||
*'''Cortana:''' "Warning! Blast doors closing! ''(pause)'' We'll have to use the ship's maintenance access ways. Follow the NAV point, it will lead you to an opening." | *'''Cortana:''' "Warning! Blast doors closing! ''(pause)'' We'll have to use the ship's maintenance access ways. Follow the NAV point, it will lead you to an opening." | ||
---- | |||
''Note: The following only occurs in Easy and Normal difficulties.'' | ''Note: The following only occurs in Easy and Normal difficulties.'' | ||
'' | ''The Chief enters the access tunnel, and after eliminating two Unggoy who were exploring the tunnel, he finds an opening.'' | ||
*'''Cortana''': "I'm detecting Covenant movement outside the access ways. Activating motion tracker. Let's find a safe exit." | *'''Cortana''': "I'm detecting Covenant movement outside the access ways. Activating motion tracker. Let's find a safe exit." | ||
| Line 489: | Line 521: | ||
''The Chief approaches the first door. Red dots surround his position on the motion tracker.'' | ''The Chief approaches the first door. Red dots surround his position on the motion tracker.'' | ||
*'''Cortana''': "They're right on top of us! We need to find another way through | *'''Cortana''': "They're right on top of us! We need to find another way through." | ||
''The Chief finds another locked door. Red dots still appear on the motion tracker.'' | ''The Chief finds another locked door. Red dots still appear on the motion tracker.'' | ||
| Line 499: | Line 531: | ||
*'''Cortana''': "Motion tracker shows all clear." | *'''Cortana''': "Motion tracker shows all clear." | ||
'' | ''On Easy and Normal, the Chief encounters a broken door.'' | ||
*'''Cortana''': "Wait. We need to get through that door, but it's been damaged by an explosion. Analyzing... The door's control mechanism is offline, but it's taken a lot of damage. You should be able to bash it open with the butt of your weapon." | *'''Cortana''': "Wait. We need to get through that door, but it's been damaged by an explosion. Analyzing... The door's control mechanism is offline, but it's taken a lot of damage. You should be able to bash it open with the butt of your weapon." | ||
| Line 505: | Line 537: | ||
''The Chief melees the door and it opens.'' | ''The Chief melees the door and it opens.'' | ||
---- | |||
''As the Chief crosses through the control room for his cryo bay, he sees a trio of | ''As the Chief crosses through the control room for his cryo bay, he sees a trio of Sangheili looking around in the bay.'' | ||
*'''Cortana''': "It looks like the Covenant wanted to catch you napping." | *'''Cortana''': "It looks like the Covenant wanted to catch you napping." | ||
''The | ''The Sangheili intruders spot the Master Chief, open fire on him (with no effect due to the glass protection), and soon leave the cryo bay.'' | ||
''The Chief leaves the control room and makes his way to another access tunnel.'' | ''The Chief leaves the control room and makes his way to another access tunnel.'' | ||
''Later, while the Chief passes through a damaged part of the ship:'' | ''Later, while the Chief passes through a damaged part of the ship:'' | ||
| Line 523: | Line 551: | ||
*'''Cortana''': "The damage to the superstructure is extensive... I don't know how much more abuse the ''Autumn'' can take." | *'''Cortana''': "The damage to the superstructure is extensive... I don't know how much more abuse the ''Autumn'' can take." | ||
''The Chief fights his way to the final airlock. With the help of the surviving Marines, the Spartan defeats the immediate Covenant forces around the last airlock.'' | |||
'' | *'''Cortana''': "There's one last lifeboat! Quickly, get aboard before it launches!" | ||
'' | ''The Chief heads for the last airlock.'' | ||
[http://www.youtube.com/watch?v=QY6Kd-qfRM8 '''{''Original Cutscene''}'''] | |||
[http://www.youtube.com/watch?v=t628k8Bqv44 '''{Anniversary ''Cutscene''}'''] | |||
[[File:AutumnDamagedCEA.png|thumb|300px|[[Bumblebee]] lifeboat [[Lima Foxtrot Alpha 43|LFA-43]] speeds away as the ''Autumn'' burns.]] | |||
'' | ''A Marine heads for the airlock, but is thrown to the ground by an explosion.'' | ||
*'''Marine #5''': "Oh no, oh no!" | |||
''The Marine looks behind him and sees the Master Chief, who picks him up and throws him into the life pod.'' | |||
*'''Cortana''': "Now would be a ''very'' good time to leave!" | *'''Cortana''': "Now would be a ''very'' good time to leave!" | ||
| Line 543: | Line 572: | ||
''The Chief sweeps his rifle into the hallway one last time to check for enemies, and then enters the lifeboat. He grabs onto a handhold on the ceiling, while the Marine he picked up crawls into a seat.'' | ''The Chief sweeps his rifle into the hallway one last time to check for enemies, and then enters the lifeboat. He grabs onto a handhold on the ceiling, while the Marine he picked up crawls into a seat.'' | ||
*''' | *'''John-117''': "Punch it." | ||
*'''Bumblebee Pilot''': | *'''Bumblebee Pilot''': "Aye aye, sir!" | ||
''The lifeboat launches out of the airlock.'' | ''The pilot seals her eye visor. The lifeboat launches out of the airlock.'' | ||
*'''Bumblebee Pilot''': "We're disengaged. Goin' for minimum safe distance." | *'''Bumblebee Pilot''': "We're disengaged. Goin' for minimum safe distance." | ||
*''' | *'''Marine #6''': "We're gonna make it, aren't we, sir? I don't wanna die out here!" | ||
[[File:LFA-43 Halo.png|thumb|300px|John-117's lifeboat approaches [[Installation 04]].]] | |||
''The Chief pats him on the shoulder.'' | ''The Chief pats him on the shoulder.'' | ||
| Line 557: | Line 588: | ||
*'''Cortana''': "Look!" | *'''Cortana''': "Look!" | ||
''The Chief steps up front. Halo swings into view and the Bumblebee drops towards it'' | ''The Chief steps up front. Halo swings into view and the Bumblebee drops towards it.'' | ||
*'''Marine''': "What is that thing, [[Lieutenant]]?" | *'''Marine #6''': "What ''is'' that thing, [[Lieutenant]]?" | ||
*'''Bumblebee Pilot''': "Hell if I know, but we're landin' on it | *'''Bumblebee Pilot''': "Hell if I know, but we're landin' on it!" | ||
*''' | *'''Marine #5''': "The ''Autumn''! She's been hit!" | ||
''The Chief dashes to the back of the lifeboat, and watches the ''Autumn''.'' | ''The Chief dashes to the back of the lifeboat, and watches the ''Autumn''.'' | ||
*'''Cortana''': "I knew it! The ''Autumn'' | *'''Cortana''': "I knew it! The ''Autumn's'' accelerating. Keyes is going in manually!" | ||
''The ''Autumn'' accelerates and flies over the lifepod (past the pod's starboard side in ''Anniversary''). It is struck by multiple [[plasma torpedo]]es.'' | |||
[[File:BumblebeeAnniversary.png|thumb|300px|The Bumblebee enters Installation 04's atmosphere.]] | |||
*'''Bumblebee Pilot''': "Heads up everyone, this is it! We're entering the ring's atmosphere in five!" | *'''Bumblebee Pilot''': "Heads up, everyone, this is it! We're entering the ring's atmosphere in five!" | ||
*'''Cortana''': "Sure you wouldn't rather take a seat?" | *'''Cortana''': "Sure you wouldn't rather take a seat?" | ||
*''' | *'''John-117''': "We'll be fine." | ||
''The Chief grips the sides of the lifeboat, and bends his knees.'' | ''The Chief grips the sides of the lifeboat, and bends his knees.'' | ||
| Line 582: | Line 615: | ||
''The Bumblebee heads into Installation 04's atmosphere.'' | ''The Bumblebee heads into Installation 04's atmosphere.'' | ||
''Fade to white.'' | |||
''Level ends.'' | ''Level ends.'' | ||
==Achievements== | |||
The following [[achievement]]s can be unlocked on ''The Pillar of Autumn'' across the [[Xbox 360]] and ''[[Halo: The Master Chief Collection]]'' editions of ''Halo: Combat Evolved Anniversary''. The original [[Xbox]] and [[Halo: Combat Evolved (PC port)|PC]] and [[Halo: Combat Evolved for Macintosh|Macintosh]] releases of ''Halo: Combat Evolved'' did not contain achievement unlocks. | |||
{| class="wikitable" | |||
|- | |||
! scope="col" style="width:135px;text-align:center;" |'''''Halo: Combat Evolved Anniversary'' (Xbox 360)''' | |||
! scope="col" style="width:135px;text-align:center;" |'''''Halo: MCC'' (Xbox One, Xbox Series X|S)''' | |||
! scope="col" style="width:135px;text-align:center;" |'''''Halo: MCC'' (Steam)''' | |||
! scope="col" style="width:175px;height:20px;text-align:center;" |'''Title''' | |||
! scope="col" style="width:350px;height:20px;text-align:center;" |'''Unlock requirement''' | |||
! scope="col" style="width:200px;height:20px;text-align:center;" |'''Games''' | |||
|- | |||
|[[File:HCEA Achievement Pillar of Autumn.png|center|64px]] | |||
|[[File:HTMCC HCEA Achievement PillarOfAutumn.png|center|114px]] | |||
|[[File:HTMCC HCEA Achievement Steam PillarOfAutumn.jpg|center|64px]] | |||
|<center>'''[[Pillar of Autumn (achievement)|Pillar of Autumn]]'''</center> | |||
|Beat The Pillar of Autumn on any difficulty. | |||
|<center>''[[Halo: Combat Evolved Anniversary]]''<br/>''[[Halo: The Master Chief Collection]]''</center> | |||
|- | |||
|[[File:HR Achievement Overshields are for Sissies.png|center|64px]] | |||
|[[File:HTMCC HCEA Achievement OvershieldsareforSissies.png|center|114px]] | |||
|[[File:HTMCC Achievement OvershieldsAreForSissies Steam.jpg|center|64px]] | |||
|<center>'''[[Overshields are for Sissies]]'''</center> | |||
|Beat The Pillar of Autumn on Legendary difficulty without picking up an [[Overshield]]. | |||
|<center>''[[Halo: Combat Evolved Anniversary]]''<br/>''[[Halo: The Master Chief Collection]]''</center> | |||
|- | |||
|[[File:HR Achievement Walk it Off.png|center|64px]] | |||
|[[File:HTMCC HCEA Achievement WalkItOff.png|center|114px]] | |||
|[[File:HTMCC Achievement WalkItOff Steam.jpg|center|64px]] | |||
|<center>'''[[Walk it Off]]'''</center> | |||
|Beat The Pillar of Autumn on Legendary difficulty without picking up a health pack. | |||
|<center>''[[Halo: Combat Evolved Anniversary]]''<br/>''[[Halo: The Master Chief Collection]]''</center> | |||
|- | |||
|<center>N/A</center> | |||
|[[File:HTMCC HCEA Achievement Didn'tLikeThisShipAnyways.png|center|114px]] | |||
|[[File:HTMCC HCEA Achievement Steam DLTSA.jpg|center|64px]] | |||
|<center>'''[[Didn't Like This Ship Anyways]]'''</center> | |||
|Beat the par time on The Pillar of Autumn. | |||
|<center>''[[Halo: The Master Chief Collection]]''</center> | |||
|- | |||
|<center>N/A</center> | |||
|[[File:HTMCC HCEA Achievement PillarofAwesome.png|center|114px]] | |||
|[[File:HTMCC HCEA Achievement Steam PillarOfAwesome.jpg|center|64px]] | |||
|<center>'''[[Pillar of Awesome]]'''</center> | |||
|Beat the par score on The Pillar of Autumn. | |||
|<center>''[[Halo: The Master Chief Collection]]''</center> | |||
|- | |||
|<center>N/A</center> | |||
|[[File:HTMCC HCEA Achievement Arrival.png|center|114px]] | |||
|[[File:HTMCC HCEA Achievement Steam Arrival.jpg|center|64px]] | |||
|<center>'''[[Arrival (achievement)|Arrival]]'''</center> | |||
|Find the [[Terminal (Halo: Combat Evolved Anniversary)|Terminal]] on The Pillar of Autumn. | |||
|<center>''[[Halo: The Master Chief Collection]]''</center> | |||
|- | |||
|<center>N/A</center> | |||
|[[File:HTMCC HCEA Achievement SkulltakerIron.png|center|114px]] | |||
|[[File:HTMCC HCEA Achievement Steam SkulltakerIron.jpg|center|64px]] | |||
|<center>'''[[Skulltaker Halo: CE: Iron]]'''</center> | |||
|Find the [[Halo: Combat Evolved Anniversary skulls#Iron|Iron Skull]] on The Pillar of Autumn. | |||
|<center>''[[Halo: The Master Chief Collection]]''</center> | |||
|- | |||
|<center>N/A</center> | |||
|[[File:HTMCC HCEA Achievement Megg.png|center|114px]] | |||
|[[File:HTMCC HCEA Achievement Steam Megg.jpg|center|64px]] | |||
|<center>'''[[Megg (achievement)|Megg]]'''</center> | |||
|It's a sign. | |||
|<center>''[[Halo: The Master Chief Collection]]''</center> | |||
|- | |||
|} | |||
==Production notes== | |||
{{Main|Development of Halo: Combat Evolved}} | |||
Bungie designer [[Jaime Griesemer]] led the gameplay design of ''The Pillar of Autumn'',{{Ref/YouTube|Id=IGN|9ndZbg8Mr-Q|IGN|Halo: Combat Evolved Devs React to Speedrun (Martin O’Donnell, Marcus Lehto)}} while artist [[Paul Russel]] was led the design for the level environment.{{Ref/Book|AoH|Page=75}} Russel's art design for the interiors was inspired by the work of artist [[Wikipedia:Ron Cobb|Ron Cobb]] on the films ''[[Wikipedia:Star Wars (film)|Star Wars]]'' and ''[[Wikipedia:Alien (film)|Alien]]''.{{Ref/Reuse|IGN}} | |||
In both the opening and ending cinematics, the ''Pillar of Autumn'' model remains static. Instead, the movement of surrounding objects and background matte painting forged an illusion that the ship was moving in space.{{Ref/Film|Id=Commentary|[[Halo 3 Legendary Edition|''Halo 3'' Legendary Edition]], Halo: Combat Evolved developer commentary}} | |||
The events of this level occurs concurrently with the ''[[Halo: Fireteam Raven]]'' level ''[[Escape (Halo: Fireteam Raven level)|Escape]]'', which takes place on the same ship. John-117 makes a brief cameo on ''Escape'' in a re-interpretation of his actions in the final cinematic of this level. Like in the cinematic, the Spartan throws a Marine into the Bumblebee pod, but, with Covenant still in the hallway on ''Escape'', he fires his M6D pistol at the boarders before running into the escape pod. | |||
==Trivia== | ==Trivia== | ||
===Glitches=== | ===Glitches=== | ||
{{Main|Glitches}} | {{Main|Glitches}} | ||
*There is a glitch which allows the player to get back into the | *It's possible to save Thom (the crewman who runs the diagnostics tests) from being killed by the malfunctioning door down the hall, just after exiting the first room. It requires the player to stand in front of the door and absorb the damage. If Thom survives, his character model will freeze. | ||
*It's possible to stand outside of the energy shield test station while the test is running. Just move carefully into the square and when it starts, the machine will push | *There is a glitch which allows the player to get back into the cryo chamber. The player must jump inside the tube and crouch before the cover closes. Once inside, the player will be able to see [[Headless Master Chief|an apparently decapitated copy of the Master Chief]], but once the cover closes, the player will be trapped inside and must load the last checkpoint or restart the level. | ||
*There is a glitch in the level that allows | *It's possible to stand outside of the energy shield test station while the test is running. Just move carefully into the square and when it starts, the machine will push the player out, freezing the player in place until the process is done. | ||
*There is also another glitch that allows | *There is a glitch in the level that allows the player to [[Three weapons glitch|carry three weapons]] instead of only two. Get off the bridge very fast after Keyes gives the player the pistol. | ||
*There is also another glitch that allows the player to exit the ''Pillar of Autumn''. If the player goes to the spot where 3 Unggoy stand near the 3 launched lifepod stations, the player can crouch on the window looking out into space and, still crouching, slowly move out of the ship. | |||
===Mistakes=== | ===Mistakes=== | ||
* | *Sam Marcus and Thom Shephard are wearing orange fatigues in the beginning cutscene, but during the diagnostic, they are wearing yellow fatigues. Similarly, the officer that shouts to Cortana "Ma'am! Fire Control for the main cannon is offline!" wears blue in the cutscene, however, when the player walks up to him in gameplay, he wears yellow. | ||
*Captain Keyes tells the combat forces to pull back to their tertiary (third) positions before he tells them to pull back to their secondary (second) positions. | |||
*Captain Keyes wears the insignia of a [[Unified Ground Command|UNICOM]] [[Captain (ground forces)|captain]] when he should wear those of a [[Captain (Navy)|Navy captain]]. | |||
*If the one listens closely when Johnson and his Marines break formation and move out in the launch bay during the beginning cutscene, the sound of a Warthog crashing into a wall can be heard in the background. | |||
*Captain Keyes tells the combat forces to pull back to their tertiary ( | *In the cinematic when the player goes to the bridge for the first time, the ''Pillar of Autumn'' is hit by an antimatter charge, and the bridge will shake. Captain Keyes and Master Chief will fall on the bridge, but the crewmen behind them are not affected in any way. | ||
*Captain Keyes | *After Keyes puts his cigar in his mouth, his lip becomes permanently tilted as if the cigar was there, even when it has been removed. | ||
*In the cinematic when | *Sometimes, in the cafeteria area, there are two Johnsons among the Marines. One of them comes out of the door where the Sangheili Minor is as normal. The other one is where the rest of the Covenant forces come out of the two doors at the other side of the cafeteria. The second Johnson is pointing his weapon at a pillar that's next to a table. He doesn't attack the Covenant or the player when the rest of the marines think of the player as a [[Treason|traitor]]. He won't budge unless the player or the Covenant kill him. He'll still do his speeches as normal. | ||
*If one looks closely, the Master Chief's escape pod still has its rear hatch open when it launches. | |||
* | |||
*Sometimes, in the cafeteria area, there are | |||
===Easter | ===Easter eggs=== | ||
{{Main|Easter | {{Main|Easter eggs}} | ||
*In ''Anniversary'', the introductory cutscene is more faithful to the original version on [[Legendary]] difficulty: camera angles for the ''Autumn''{{'}}s arrival, Johnson's speech, and the cryo tube's unsealing, as well as the music, are nearly identical to the original ''Halo''. | |||
*"Keyes" on Captain Keyes' uniform says "[[Hellomyname Keyes|Hello my name]]" above it. The "is" is missing. This is probably due to the fact that it wouldn't fit. | |||
*In ''Anniversary'', the [[Halo: Combat Evolved Anniversary skulls#Iron Skull|Iron Skull]] can be found in the cryo bay, behind a stack of crates that are at the left of the targeting lights. | |||
*In ''Anniversary'', the [[Terminal (Halo: Combat Evolved Anniversary)#The Terminals|first terminal]] is one of the computer consoles located on the left side of the Autumn's bridge. All of the console's screens flash "INCOMING MESSAGE" in red, and a crewman is standing beside it instead of manning the console. | |||
*The bulletin board located near the entrance to the bridge has many fliers that can be read, including the flier for the missing cat, [[Jonesy]]. | *The bulletin board located near the entrance to the bridge has many fliers that can be read, including the flier for the missing cat, [[Jonesy]]. | ||
*There is | **In the remastered version of the billboard on the ship's bridge, there is a movie poster titled ''Dark Planetoid Rising'' with an image of the [[Requiem|planet that appeared in the Legendary ending of ''Halo 3'']] - a reference to [http://web.archive.org/web/20160409095813/https://www.neogaf.com/forum/showpost.php?p=9274467&postcount=33832 a 2008 NeoGAF meme]. In addition, in the lower left corner there is an image of the "Troll Face" easter egg, which is a widely known internet meme. | ||
* | **Also, in the location of the ''missing cat'' ad in the remastered version, there is an ad for a missing goose that lays golden eggs. | ||
*There is "The [[Megg]]" which is the letter "M" made from blood and bullets. | |||
*In the remastered version of the monitors in the cryo chamber control room, it is shown in a schematic that [[Linda-058]] is present. | |||
===References=== | ===References=== | ||
*"Reveille" is French for "waking up", referring to John's cryonic sleep. It is also the name of the bugle call commonly heard in the United States military that is played at sunrise each day. | |||
*"Reveille" is French for "waking up", referring to | *The phrase ''"Unseal the Hushed Casket"'' is a reference to the last line of John Keat's sonnet 'To Sleep'. | ||
* | *In ''Halo: Combat Evolved'', the Navy crewmembers' uniforms are very similar to those of the [[marathongame:BOB|BOBs]] from the ''[[Marathon]]'' series. However, in ''Halo: Combat Evolved Anniversary'', their uniforms are much more reserved, resembling the gray Navy service uniforms seen in ''[[Halo Wars]]'', ''[[Halo: Reach]]'', ''[[Halo Legends]]'', and other more recent media. | ||
* In ''[[wikipedia:Forza Horizon 4|Forza Horizon 4]]'', the Autumn Showcase Remix version of ''[[The Halo Experience Showcase]]'' is named ''Pillar of Autumn''. | |||
* | |||
===Miscellaneous=== | ===Miscellaneous=== | ||
*Sergeant Johnson appears a few times in this level. Firstly, when he is giving his speech to the line of Marines and also | *The ''Autumn''{{'}}s main view screen has a diagram on it, with an annotation displaying, 'Trajectory FD: Halo,' despite the ring's name being unknown until Captain Keyes overhears the guards on the ''[[Truth and Reconciliation]]'' talking about it. | ||
*If | *Sergeant Johnson appears a few times in this level. Firstly, when he is giving his speech to the line of Marines and also as the driver of the Warthog in the background of the same cutscene. He is always in the mess hall fighting Covenant. He then sometimes appears guarding a lifeboat airlock, and then is killed in an explosion, and finally appears in the battle with the Covenant on the landing. | ||
* | *If the player shoots the bridge console crewmen in the head, they will not die, but the reticule will change from blue to red when the player targets them. | ||
* | *Sometimes the player has to kill bridge crewmen to trigger the invincible Marines, and sometimes the player only has to injure one. | ||
* | *If the player kills an ally from outside the bridge, they will be teleported to the bridge. This is a programmatic measure to prevent the player from escaping the horde of invincible Marines that try to kill them; it stops the player from rushing out of the bridge after killing an ally. However, the player could climb down a ladder near the pilots' chair and recover there. | ||
*In the novel ''[[Halo: The Fall of Reach]]'' there is a command chair on the bridge, but there isn't one in this level. | |||
* | *Markings seen on the monitors at the front of the bridge and the tactical monitors at the center of the bridge bear strong resemblance to the [[reticule]] for the [[Vostu-pattern carbine|Covenant Carbine]] in ''Halo 2'' and ''Halo 3''. | ||
*Strangely enough, all the Covenant and Marines the player finds on his way to the bridge are invincible. This could be so that players cannot take weapons of fallen enemies or allies. | |||
*The Covenant encountered on the way to the bridge will mostly ignore the player. Sometimes they will shoot at you, but inflict very little damage. | |||
*The three Unggoy encountered outside the bridge will not drop their plasma pistols when the player kills them. | |||
*[[Zuka 'Zamamee]] was an enemy in this level, but with a different Sangheili model (Usually a Sangheili Major). By hints from ''Halo: The Flood'', Zuka 'Zamamee is probably the Sangheili guarding the last escape pod, as that is the setting that the book best describes his presence. | |||
*In the ''Anniversary'' version of this level, the Bumblebee pilot is a female Marine model from ''Halo 3'', as opposed to a repurposed UNSC Army Trooper model from ''Halo Reach.'' | |||
*The soundtracks played in this level include [[Brothers in Arms]], [[Enough Dead Heroes]], [[Perilous Journey]], and a small section from [[Suite Autumn]]. | |||
*The opening cutscene with the ''Pillar of Autumn'' approaching Installation 04 resembles the shot of the USS ''Sulaco'' approaching LV-426 in the film [[Wikipedia:Aliens|''Aliens'']]. | |||
*This level is modified depending on the difficulty chosen in the following ways: | |||
**[[Staff Sergeant|Sergeant]] [[Avery Junior Johnson|Johnson]] makes different speeches at the beginning of the level. | |||
**On [[Easy]] and [[Normal]], the player goes through a testing diagnostic which acts as a tutorial for basic controls and the mechanics of health and shields. On Heroic and Legendary difficulty, this is automatically skipped and the player immediately heads out to find Captain Keyes. | |||
**On Easy and Normal difficulty, the [[Motion tracker]] and grenades are disabled until certain moments in the level. On Heroic and Legendary, they can be used right from the start. | |||
**On Easy and Normal, when the player walks through a darkened hallway on the way to the bridge, a [[Sangheili]] will appear to attack Chief only for a squad of marines to chase him off. | |||
**On Easy and Normal, there is a stuck door that the player must use a melee attack on to open, which Cortana will point out. | |||
**On Easy and Normal, there is an [[Unggoy]] with its back to the player that serves as a tutorial for the stealth melee attack mechanic. | |||
*The crewman who screams "Wait for me!" at the start of the level is voiced by [[Martin O'Donnell]].{{Ref/Twitter|Id=MT|MartyTheElder|1318351385738371073|Marty O'Donnell|Quote=I really appreciate Alan Tudyk's homage to my acting eight years later.|Y=2021|M=2|D=28}} | |||
==Gallery== | |||
===''Halo: Combat Evolved''=== | |||
<gallery> | |||
File:HCE PillarOfAutumn Bridge Concept.jpg|''Halo: Combat Evolved'' concept art of the bridge. | |||
File:HCE PillarOfAutumn Corridor Concept.jpg|''Halo: Combat Evolved'' concept art of a corridor on the ship. | |||
File:HCE_PillarOfAutumn_Storyboard.jpg|A storyboard for the level. | |||
File:HCE Menu 01 The Pillar of Autumn.png|Preview of the level in ''Halo: Combat Evolved'' menu. | |||
File:The Pillar of Autumn.jpg|The UNSC ''Pillar of Autumn'' escorted by Longswords. | |||
File:Longsword Fighter.jpg|C709 Longswords in space. | |||
File:HCE Fireteam Charlie 2.jpg|Sergeant Johnson rouses his men. | |||
File:HCE Coop Cryo.jpg|Two Spartans exiting cryo tubes on cooperative play. | |||
File:HCE ShieldTest.jpg|The crewmen charge up MJOLNIR's energy shielding. | |||
File:HCE TPOA Sam killed.png|Sam Marcus is shot and killed by a Sangheili. | |||
File:PoA Crewmen.jpg|Crewmen attempt to fight off Covenant boarders. | |||
File:Wounded Marine.png|A Marine wounded by the Covenant. | |||
File:Cortana on Autumn.jpg|Cortana on a holotank in the bridge. | |||
File:HCE Bumblebee Launch.jpg|A Bumblebee launching from the ''Autumn''. | |||
File:Siege.jpg|Marines repelling Covenant boarders. | |||
File:HTMCC-HCE BumblebeeMarines.png|Marines onboard a Bumblebee. | |||
File:HaloCE-PoA-Damaged.jpg|The ''Autumn'' taking heavy fire in battle. | |||
File:HTMCC-HCE BumblebeeAtmosphere.png|The Bumblebee enters Installation 04's atmosphere. | |||
</gallery> | |||
===''Halo: Combat Evolved Anniversary''=== | |||
<gallery> | |||
File:HCEA - Shield Test Station.jpg|Concept art of the energy shield test station in ''Anniversary''. | |||
File:HCEA_PillarOfAutumn_Props_Concept.jpg|Concept art of various props on the level. | |||
File:HCEA_PillarOfAutumn_CorridorBattle_Concept.jpg|Concept art of the battle on the ship. | |||
File:HCEA-Concept-PoA-Chief-Profile.jpg|Concept art of John-117 aboard the ''Autumn''. | |||
File:HCEA AutumnInterior Concept 1.jpg|Concept art of the ship's interior. | |||
File:HCEA AutumnInterior Concept 2.jpg|Concept art of the ship's interior. | |||
File:HCEA Menu 01 PoA.png|Preview of the level in ''Halo: Combat Evolved Anniversary'' menu. | |||
File:AnniversaryCoop.png|Two Spartans exiting cryo tubes on cooperative play. | |||
File:HCEA-EnergyShieldTestStation-Screen.jpg|The crewmen charge up MJOLNIR's energy shielding. | |||
File:CEA BridgeChat1.png|The Master Chief, Cortana, and Captain Keyes meeting on the bridge. | |||
File:HCEA MarinesVsCoviesCafeteria.png|Marines fighting the Covenant in the mess hall. | |||
File:HCEA CoviesAttackingCrewmen.png|Covenant boarders attacking crewmen. | |||
File:2817467-gallery.jpg|The Master Chief charging through the ''Autumn''{{'}}s corridors. | |||
File:2817470-gallery.jpg|Two Unggoy near a set of blast doors. | |||
File:2817466-gallery.jpg|The Chief and a Marine engaging Sangheili Minors in ''Anniversary''. | |||
File:HCEA CoviesBoardingAutumn.png|Covenant troops exiting their boarding craft. | |||
File:HTMCC-HCEA BumblebeeEjecting.png|A Bumblebee launching from the ''Autumn''. | |||
File:HCEA PillarOfAutumn Bumblebee Destroyed.png|A Bumblebee destroyed mid-flight by the Covenant. | |||
</gallery> | |||
==Sources== | |||
{{Ref/Sources}} | |||
{{succession box | before = '' | {{succession box | before = ''[[Lone Wolf]] {{C|''[[Halo: The Master Chief Collection|MCC]]''}} <br />| title = [[Halo: Combat Evolved#Campaign|''Halo CE'' Campaign Missions]] | years = '''''The Pillar of Autumn''''' |after = ''[[Halo (Halo: Combat Evolved Level)|Halo]]''}} | ||
{{Levels}} | {{Levels|H1}} | ||
Latest revision as of 07:21, November 7, 2024
|
Prev: |
|
|
Next: |
|
| The Pillar of Autumn | |
|---|---|
| |
|
Game: |
|
|
File name (?): |
|
|
Player: |
|
|
Date: |
|
|
Location: |
Aboard the UNSC Pillar of Autumn, in orbit of Installation 04 in Soell system |
|
Objective(s): |
|
|
Par Time: |
00:15:00 (Master Chief Collection-only) |
|
Par Score: |
17,000 (Master Chief Collection-only) |
 |
Halopedia has a walkthrough guide for this level; see The Pillar of Autumn (Halo: Combat Evolved level)/Walkthrough. |
| “ | Escape intact as Covenant forces board your ship. | ” |
The Pillar of Autumn is the first level in the campaign of Halo: Combat Evolved and the Halo game series overall. The UNSC Pillar of Autumn, having escaped the destruction of Reach, has arrived near a strange object. Unfortunately, the Covenant, who are here as well, attack the ship. Master Chief Petty Officer SPARTAN John-117 is awakened from his cryo-sleep and makes his way to the bridge of the titular ship to be debriefed by Captain Jacob Keyes about their current situation. After the brief meeting, the Master Chief, with his AI companion Cortana, makes his way off the ship via a Bumblebee escape pod.
Transcript[edit]
{Original Cutscene} {Anniversary Cutscene}
Fades into space. Installation 04 is visible above Threshold. The Pillar of Autumn appears, moving slowly toward the ring. Longsword escorts soar alongside. In Anniversary, the camera fades into the Autumn and pans to show Installation 04 and Threshold as the ship moves.
The camera slowly turns and zooms in on the Pillar of Autumn.
- Captain Jacob Keyes: "Cortana, all I need to know is did we lose them?"
- Cortana: "I think we both know the answer to that."
Inside the ship's bridge, the camera focuses on Keyes.
- Keyes: (sighs) "We made a blind jump. How did they—"
- Cortana: "Get here first? The Covenant ships have always been faster. As for tracking us all the way from Reach...at light speed, my maneuvering options were limited."
Keyes begins pacing around, looking at viewscreens.
- Keyes: "We were running dark, yes?"
- Cortana: "Until we decelerated. No one could have missed the hole we tore in subspace."
Keyes looks at a bridge crewman's console.
- Cortana: "They were waiting for us on the far side of the planet."
The crewman presses some buttons. The screen shows a diagram of Threshold with Installation 04 in orbit.
- Keyes: "So, where do we stand?"
- Cortana: "Our fighters are mopping up the last of their recon picket now, nothing serious."
Keyes examines the main screen, pulls his pipe out of his mouth and shakes some ash off it. He closes his eyes wearily.
- Cortana: "But I've isolated approach signatures from multiple CCS-class battle groups, make it three capital ships per group. And in about 90 seconds they'll be all over us."
- Keyes: "Well, that's it then. Bring the ship back up to Combat Alert Alpha. I want everyone at their stations."
- Cortana: "Everyone, sir?"
- Keyes: "Everyone."
Alarm klaxon sounds. Crewmen run towards their stations.
- Keyes: "And Cortana..."
Cortana's avatar appears on a holotank.
- Cortana: "Hmm?"
- Keyes: "...let's give our old friends a warm welcome."
- Cortana: "I've already begun."
Cuts to the one of the launch bays of the Pillar of Autumn. A Marine waves light batons to guide a Pelican into the correct docking position. The view moves towards the lower deck.
- Cortana (PA): "Attention, all combat personnel: Please report to your action stations."
- Cortana (PA): "5th Platoon, secure airlocks on Deck 11. 14th Platoon, rendezvous with 22nd Tactical at bulkhead Charlie 14."
Marines start talking, readying their weapons, preparing Scorpion Tanks and Warthogs, or just loitering, until the view shows Staff Sergeant Avery Junior Johnson walking through a line of Marines.
- Staff Sergeant Avery Junior Johnson: "You heard the lady! Move like you've got a purpose!"
- Cortana (PA): "This is not a drill. I repeat, this is not a drill."
{Original Cutscene w/ All Difficulties} {Anniversary Cutscene w/ All Difficulties}
Marines get in two lines, facing each other. Johnson walks down the column between the formation.
- Johnson: (Easy) "Men...keep your eyes down range, fingers on your triggers, and we all go home in one piece." (turns around) "Am I right, Marines?"
- Johnson: (Normal) "Once again, it is our job to finish what the flyboys started. We are leaving this ship, platoon, and engaging the Covenant on solid ground. When we meet the enemy, we will rip their skulls from their spines, and toss 'em away, laughin'!" (turns around) "Am I right, Marines?"
- Johnson: (Heroic) "Men, here is where we show those split-chin squid-head sons-of-bitches that they could not have picked a worse enemy than the human race! We are going to blow the hell out of those dumb bugs, until we don't have anything left to shoot 'em with! And then we are going to strangle them with their own-living-guts!" (turns around) "Am I right, Marines?"
- Johnson: (Legendary): "Men, we led those dumb bugs out to the middle of nowhere to keep 'em from gettin' their filthy claws on Earth, but we stumbled onto somethin' they're so hot for that they're scramblin' over each other to get it. Well, I don't care if it's God's own anti-son-of-a-bitch machine or a giant hula hoop, we're not gonna let 'em have it! What we will let 'em have...is a belly full of lead and a pool of their own blood to drown in!" (turns around) "Am I right, Marines?"
- Marines: "Sir, yes sir!"
- Johnson: "Uh-huh. Damn right, I am. Now move it out! Double time!"
The Marines break formation and run out of the area, as Johnson follows them slowly.
- Cortana (PA): "Attention, all personnel: We are re-engaging the enemy. Internal and external contact imminent."
- Johnson: "All you greenhorns who wanted to see Covenant up close...this is gonna be your lucky day."
Cut to a computer screen.
- >X - CORTANA 1 0 CRYOSTOR. 23.4.7
>(PRIORITY ALPHA)
- >UNSEAL THE HUSHED CASKET
- Tech Officer Sam Marcus: "Whoa! Sir?"
- Tech Chief Thom Shephard: "Right. Let's thaw him out."
The crewmen begin pressing buttons.
- Marcus: "Okay. Bringing low-level systems online. Cracking the case in thirty seconds."
Cut to John-117's cryo chamber, which excretes steam.
- Marcus: "He's hot! Blowing the pins in five..."
{Gameplay}
Reveille[edit]
Note: Testing only happens in single-player, on Easy and Normal difficulties.
- Marcus (PA): "His tube shows green. Cycle complete."
Tube cover lifts itself, Shephard, standing in front of it, salutes.
- Shephard: "Sorry for the quick thaw, Master Chief. Things are a little hectic right now. The disorientation should pass quickly."
- Marcus (PA): (waves) "Welcome back, sir. We'll have you battle ready stat."
- Shephard: "Chief, please look around the room. I need to get a calibration reading for your battle suit's diagnostics."
The Chief looks around.
- Shephard: "Good. Thank you sir."
- Marcus (PA): "I'm bringing your health monitors online, sir."
The heads-up display's health bars appear.
- Shephard: "Vital signs look normal. No freezer burn. Okay sir, go ahead and climb out of the cryo tube."
{Original Cutscene} {Anniversary Cutscene}
The Master Chief gets out of the cryo chamber. On Cooperative Play, a second Spartan also gets out from a cryo chamber next to the Chief's.
{Gameplay}
- Shephard: "I gave you a double dose of the wake-up stim. Take a quick walk around the cryo bay and join me at the optical diagnostics station when you're ready."
Shephard walks over, soon Master Chief follows him and stands on a red square.
If Chief does not face Shephard or begins to wander:
- Shephard: "Stand on the red square please."
- Shephard: "Ok sir, look at me to begin."
When the Chief faces Shephard and stands on the square:
- Shephard: "I know the ordnance techs usually take care of your targeting sensors, but we're short of time, Chief. Just look at each of the flashing panels to target them. When you lock on, it'll change color."
Chief looks at the flashing lights.
- Shephard: "Okay, that looks good..."
- Marcus (PA): "Sir, I'm getting some calibration errors. I'm going to invert your looking pitch, so you can see if you like it better that way."
The pitch is inverted.
- Marcus (PA): "Try targeting the flashing lights again."
The Chief looks at the panel.
- Marcus (PA): "Is that better or should I switch it back?"
The Chief decides the way he wants.
- Marcus (PA): "OK, I'll leave the pitch normal/inverted. But if you want, you can change it yourself later. (pause) I'm ready for the energy shield test now."
- Shephard: "Please follow me to the energy shield test station."
- Cortana (PA): "Fire teams: Report to defensive positions Alpha through Sierra. Sensors show inbound Covenant boarding craft. Stand by to repel boarders."
Cortana then proceeds to give PA announcements coordinating the crew's defense against the Covenant boarders that loop till John-117 meets Keyes on the bridge.
- Cortana (PA): "Warning! Covenant incursions on port decks Three and Nine. Alpha Team, engage enemy boarders."
Later:
- Cortana (PA): "Enemy boarding parties on starboard decks Eight through Ten. Echo Team, intercept Covenant forces."
Later:
- Cortana (PA): "Covenant boarding craft detected on port decks Four, Five, Seven, Eight, and Eleven. All available Combat Teams, respond!"
Later:
- Cortana (PA): "Baker Team reports Covenant forces engaged on port deck Seven. Security teams, move to assist."
Later:
- Cortana (PA): "Warning! Covenant boarders on starboard decks Four and Six. Sierra Team reports heavy resistance! Security teams, assist."
Later:
- Cortana (PA): "Alert! Alpha and Charlie Teams report heavy fighting on port decks Five through Nine. Foxtrot Team, move to starboard decks Eight and Ten, and stand by."
Later:
- Cortana (PA): "Reserve Combat Teams Tango through X-Ray to port decks Five and Six, on the double!"
Later:
- Cortana (PA): "Reserve Combat Teams Oscar and Romeo to port decks Nine through Eleven."
If Chief does not look at Shepard.
- Shephard: "Sir, I need you to look at me to begin."
If Chief does not stand on the square
- Shephard: "Stand on the yellow square. This'll just take a second."
The Chief steps into the square.
- Shephard: "Okay, bring his energy shields online please."
The Chief's shield meter appears, and charges to full.
- Marcus (PA): "Alright. Shields read as fully charged."
- Shephard: "Okay, sir. Bring them down to test the automatic recharge."
The Chief's shields get depleted, and recharge themselves again.
- Marcus (PA): "Recharging normal. Showing green across the board."
- Captain Keyes (PA): "Bridge to Cryo Two, this is Captain Keyes. Send the Master Chief to the bridge immediately."
- Shephard: "Captain, we'll have to skip the weapons diagnostics and I-"
- Captain Keyes (PA): "On the double, crewman."
- Shephard: "Aye aye, sir. (to the Chief) The skipper seems jumpy, we'd better get moving. We'll find you weapons later."
- Marcus (PA): "Okay. I'll leave the self-diagnostics running, at least."
- Shephard: "Good idea. You'd better get to your evac group, Sam!"
- Marcus (PA): "Affirmative. Just have to reset the computer and I'm outta here!"
Banging is heard on one of the observation chamber doors. An alarm activates and flashes red.
- Marcus (PA): "Oh God! They're trying to get through the door!"
The door breaks open and a Sangheili Major enters, firing on Marcus.
- Marcus (PA): "Security! Intruders in Cryo Two! No, please don't— (a plasma bolt hits him, and he falls) Agh!"
The Sangheili turns around and tries to shoot at the Master Chief from above, but can't get through the glass. The Sangheili runs off.
- Shephard: (panicked) "Sam! Sam! (to the Chief) C'mon, we've got to get the hell out of here!"
Shephard unlocks the exit door.
- Shephard: "This way!"
If the level is played on Heroic or Legendary, gameplay begins here.
Shephard leads Master Chief out of Cryo Two and down a corridor. Shephard tries to open the second door, which explodes, killing him. The Master Chief leaves the area and sees crewmen battling the Covenant while another crewman is killed by an explosion.
- Crewman #1: "Behind us! They're right behind us!"
A few crewmen run into the room while the blast doors are closing.
- Crewman #2 or Marine: "Secure those blast doors! Move! Move!"
A crewman runs away from the blast door, with a second directly behind him.
- Crewman #3: "Wait for me!"
The crewman is killed by an explosion just as he reaches the blast doors, which shut slowly.
If Chief lingers around the area:
- Crewman: "Master Chief, sir, the situation's secure here. You're probably needed somewhere else!"
The Chief finds his way to a corridor intersection where (on Easy and Normal) he comes face to face with a Sangheili Minor. It growls at him but is suddenly attacked by Marines, and the Sangheili flees behind a closing door.
- Marine #1: "Chief, Cortana says get to the bridge, double quick!"
The Chief makes his way to a room where PFC Chips Dubbo is helping some crewmen battle the Covenant boarders.
- PFC Chips Dubbo: "Sir! The Captain needs you on the bridge, ASAP! You better follow me."
The Chief follows Dubbo through an emptied armory with a few dead or wounded Marines. Outside there's another fight between the crew and the Covenant. The Chief arrives just in time to witness a crewman being killed in an explosion.
- Dubbo: "Get clear, Chief!"
The blast doors close, locking the Covenant out.
The Chief and Dubbo get to the bridge:
- Dubbo: "Captain Keyes is waiting for you, sir!"
The Chief approaches Keyes.
{Original Cutscene} {Anniversary Cutscene}
- Master Chief Petty Officer John-117: "Captain Keyes."
Keyes turns away from the main view screen and shakes the Master Chief's hand.
- Keyes: "Good to see you, Master Chief. Things aren't going well. Cortana did her best, but we never really had a chance."
Cortana's avatar appears on the holotank.
- Cortana: "A dozen Covenant superior battleships against a single Halcyon-class cruiser. With those odds, I'm content with three - make that four kills." (to the Chief) "Sleep well?"
- John-117: "No thanks to your driving, yes."
Cortana smiles.
- Cortana: "So you did miss me."
A loud explosion rocks the bridge. The Chief lurches and Keyes grabs a pedestal for support.
- Keyes: "Report!"
- Cortana: "It must have been one of their boarding parties! I'd guess an antimatter charge!"
- Fire Control Officer: "Ma'am! Fire control to the main cannon is offline!"
- Cortana: "Captain, the cannon was my last offensive option."
- Keyes: "Alright then. I'm initiating Cole Protocol, Article 2. We're abandoning the Autumn. That means you too, Cortana."
- Cortana: "While you do what, go down with the ship?"
- Keyes: "In a manner of speaking. The object we found, I'm going to try and land the Autumn on it."
- Cortana: "With all due respect, sir, this war has enough dead heroes."
- Keyes: "I appreciate your concern, Cortana, but it's not up to me. Protocol is clear. Destruction or capture of a shipboard AI is absolutely unacceptable, that means you're leaving the ship. Lock in a selection of emergency landing zones, upload them to my neural lace, and then sort yourself for a hard transfer."
- Cortana: "Aye aye, sir."
Cortana's avatar disappears.
- Keyes: "...which is where you come in, Chief. Get Cortana off this ship. Keep her safe from the enemy. If they capture her, they'll learn everything. Force deployment, weapons research...Earth."
- John-117: "I understand."
Cortana's avatar reappears.
- Cortana: "The Autumn will continue evasive maneuvers until you initiate a landing sequence. Not that you'll listen, but I'd suggest letting my subroutines handle the final approach."
- Keyes: "Excellent work, Cortana. Thank you. Are you ready?"
Cortana looks around the bridge for one last time, then sighs.
- Cortana: "Yank me."
Captain Keyes pulls a data chip out of the holotank and Cortana disappears. He gives the chip to the Master Chief.
- Keyes: "Good luck, Master Chief."
The Chief slides the chip into the back of his helmet.
- Cortana: "Hmm...your architecture isn't much different from the Autumn's..."
- John-117: "Don't get any funny ideas."
{Gameplay}
AI Constructs and Cyborgs First![edit]
Keyes hands his pistol to the Chief.
- Keyes: "I don't keep it loaded, son. You'll have to find ammo as you go."
If Chief lingers next to Captain Keyes:
- Keyes: "Get moving, Master Chief. There's nothing you can do here."
or
- Keyes: (angrily) "I gave you an order, soldier. Get off this ship!"
If Chief stays on the bridge but not next to Captain Keyes:
- Cortana: "We need to get off this ship, Chief, before we're completely overrun by Covenant."
If Chief uses the pistol to kill Captain Keyes or any crewmen:
- Cortana: (shocked and infuriated) "What the hell are you doing?!"
- Cortana (COM): "Security to the bridge, the Master Chief has gone rampant! Take him down, boys!"
The doors leading to bridge lock up. Invincible Marines come in and quickly kill the Master Chief, taunting him afterward.
When Chief moves away from Keyes, the PA announcements Cortana was doing is replaced by PA announcements by Keyes. These loop till the end of the mission.
- Keyes (PA): "Combat Teams on decks Seven and Eight, fall back to secondary defensive positions."
Later:
- Keyes (PA): "Reserve Combat Teams on decks Five through Nine, fall back to secondary defensive positions!"
Later:
- Keyes (PA): "Crew and Ops personnel on decks One through Four, report to evac stations immediately!"
Later:
- Keyes (PA): "Ops personnel on decks Nine through Twelve, report to evac stations now!"
Later:
- Keyes (PA): "All hands, this is the Captain. Prepare to abandon ship! Combat Teams, repel boarders until Ops personnel are away. Good luck. Keyes out."
Later:
- Keyes (PA): "All remaining crew and Ops personnel, hit the lifeboats! Fall back to evac stations."
Later:
- Keyes (PA): "Combat teams Alpha through November, pull out to nearest evac station!"
Later:
- Keyes (PA): "Combat Teams Sierra through Victor, prepare for evac!"
Later:
- Keyes (PA): "All combat personnel, fall back to tertiary defensive positions!"
Continuing, without killing anyone on the bridge, the Chief picks up ammunition for the pistol, and meets three Unggoy, who he quickly deals with. He enters the door on the opposite wall and sees groups of Marines engaging the Covenant in the mess hall.
- Cortana: "Those Marines could use some help, Chief! Do what you do best!"
The Chief steps over a body of a dead Marine and picks up an Assault Rifle.
From here to the end of the level, if Chief takes a hit with his shields down:
- Cortana: (urgently) "Keep your head down! There's two of us in here now, remember?"
The Chief clears the mess hall then heads out into the corridors. He comes across a group of three Marines fighting a Sangheili. After he helps them kill the Sangheili, the ship is rocked by a violent explosion.
- Marine #2: "What the hell? Did something just hit us?"
- Marine #3: "Move it! Back to the airlock!"
An explosion comes from the airlock, caused by a Covenant boarding vessel crashing into the ship, killing the two Marines standing guard next to it. Covenant troops pour into the corridor. The Chief and the Marines eliminate them. If John-117 enters the Covenant boarding craft:
- Cortana: "They're using our lifeboat airlocks to attach their boarding craft! We go out and they come in! Clever bastards..."
The Chief leaves the airlock area.
- Marine #3: "Go on ahead, Chief. We'll secure this airlock."
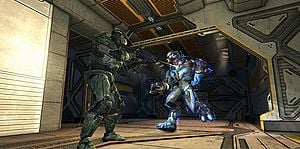
The Chief finds a trio of Marines fighting Covenant while taking cover behind Combat Barriers.
- Marine #4: "We're taking fire. We could use a hand!"
The Chief enters a room where the Covenant are on a ledge above him. Marines engage the boarders by taking cover behind the central staircase.
- Cortana: "Covenant! On the landing above us!"
After the battle on the ledges, the Chief climbs the staircase to the second floor. The Chief sees a lifepod launching with pulse lasers bursting all around the airlocks.
- Cortana: "The lifepods are launching! We should hurry."
Plasma torpedoes continue to hit the hull. Three lifepods launch from the airlocks in sequence. The third one is hit by enemy fire and explodes.
- Cortana: "The Covenant are destroying the lifepods...they really don't want us on that ring."
The Chief passes a set blast doors, the blast door closes, leaving any of the surviving accompanying Marines behind the door.
- Cortana: "Warning! Blast doors closing! (pause) We'll have to use the ship's maintenance access ways. Follow the NAV point, it will lead you to an opening."
Note: The following only occurs in Easy and Normal difficulties.
The Chief enters the access tunnel, and after eliminating two Unggoy who were exploring the tunnel, he finds an opening.
- Cortana: "I'm detecting Covenant movement outside the access ways. Activating motion tracker. Let's find a safe exit."
The Chief approaches the first door. Red dots surround his position on the motion tracker.
- Cortana: "They're right on top of us! We need to find another way through."
The Chief finds another locked door. Red dots still appear on the motion tracker.
- Cortana: "We're too close! We need to find another route."
The Chief finds an unlocked door leading into a darkened room.
- Cortana: "Motion tracker shows all clear."
On Easy and Normal, the Chief encounters a broken door.
- Cortana: "Wait. We need to get through that door, but it's been damaged by an explosion. Analyzing... The door's control mechanism is offline, but it's taken a lot of damage. You should be able to bash it open with the butt of your weapon."
The Chief melees the door and it opens.
As the Chief crosses through the control room for his cryo bay, he sees a trio of Sangheili looking around in the bay.
- Cortana: "It looks like the Covenant wanted to catch you napping."
The Sangheili intruders spot the Master Chief, open fire on him (with no effect due to the glass protection), and soon leave the cryo bay.
The Chief leaves the control room and makes his way to another access tunnel.
Later, while the Chief passes through a damaged part of the ship:
- Cortana: "The damage to the superstructure is extensive... I don't know how much more abuse the Autumn can take."
The Chief fights his way to the final airlock. With the help of the surviving Marines, the Spartan defeats the immediate Covenant forces around the last airlock.
- Cortana: "There's one last lifeboat! Quickly, get aboard before it launches!"
The Chief heads for the last airlock.
{Original Cutscene} {Anniversary Cutscene}
A Marine heads for the airlock, but is thrown to the ground by an explosion.
- Marine #5: "Oh no, oh no!"
The Marine looks behind him and sees the Master Chief, who picks him up and throws him into the life pod.
- Cortana: "Now would be a very good time to leave!"
The Chief sweeps his rifle into the hallway one last time to check for enemies, and then enters the lifeboat. He grabs onto a handhold on the ceiling, while the Marine he picked up crawls into a seat.
- John-117: "Punch it."
- Bumblebee Pilot: "Aye aye, sir!"
The pilot seals her eye visor. The lifeboat launches out of the airlock.
- Bumblebee Pilot: "We're disengaged. Goin' for minimum safe distance."
- Marine #6: "We're gonna make it, aren't we, sir? I don't wanna die out here!"
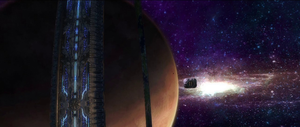
The Chief pats him on the shoulder.
- Cortana: "Look!"
The Chief steps up front. Halo swings into view and the Bumblebee drops towards it.
- Marine #6: "What is that thing, Lieutenant?"
- Bumblebee Pilot: "Hell if I know, but we're landin' on it!"
- Marine #5: "The Autumn! She's been hit!"
The Chief dashes to the back of the lifeboat, and watches the Autumn.
- Cortana: "I knew it! The Autumn's accelerating. Keyes is going in manually!"
The Autumn accelerates and flies over the lifepod (past the pod's starboard side in Anniversary). It is struck by multiple plasma torpedoes.
- Bumblebee Pilot: "Heads up, everyone, this is it! We're entering the ring's atmosphere in five!"
- Cortana: "Sure you wouldn't rather take a seat?"
- John-117: "We'll be fine."
The Chief grips the sides of the lifeboat, and bends his knees.
- Cortana: "If I still had fingers, they'd be crossed..."
The Bumblebee heads into Installation 04's atmosphere.
Fade to white.
Level ends.
Achievements[edit]
The following achievements can be unlocked on The Pillar of Autumn across the Xbox 360 and Halo: The Master Chief Collection editions of Halo: Combat Evolved Anniversary. The original Xbox and PC and Macintosh releases of Halo: Combat Evolved did not contain achievement unlocks.
| Halo: Combat Evolved Anniversary (Xbox 360) | Halo: MCC (Xbox One, Xbox Series X|S) | Halo: MCC (Steam) | Title | Unlock requirement | Games |
|---|---|---|---|---|---|
| Beat The Pillar of Autumn on any difficulty. | Halo: The Master Chief Collection | ||||
| Beat The Pillar of Autumn on Legendary difficulty without picking up an Overshield. | Halo: The Master Chief Collection | ||||
| Beat The Pillar of Autumn on Legendary difficulty without picking up a health pack. | Halo: The Master Chief Collection | ||||
| Beat the par time on The Pillar of Autumn. | |||||
| Beat the par score on The Pillar of Autumn. | |||||
| Find the Terminal on The Pillar of Autumn. | |||||
| Find the Iron Skull on The Pillar of Autumn. | |||||
| It's a sign. |
Production notes[edit]
- Main article: Development of Halo: Combat Evolved
Bungie designer Jaime Griesemer led the gameplay design of The Pillar of Autumn,[2] while artist Paul Russel was led the design for the level environment.[3] Russel's art design for the interiors was inspired by the work of artist Ron Cobb on the films Star Wars and Alien.[2]
In both the opening and ending cinematics, the Pillar of Autumn model remains static. Instead, the movement of surrounding objects and background matte painting forged an illusion that the ship was moving in space.[4]
The events of this level occurs concurrently with the Halo: Fireteam Raven level Escape, which takes place on the same ship. John-117 makes a brief cameo on Escape in a re-interpretation of his actions in the final cinematic of this level. Like in the cinematic, the Spartan throws a Marine into the Bumblebee pod, but, with Covenant still in the hallway on Escape, he fires his M6D pistol at the boarders before running into the escape pod.
Trivia[edit]
Glitches[edit]
- Main article: Glitches
- It's possible to save Thom (the crewman who runs the diagnostics tests) from being killed by the malfunctioning door down the hall, just after exiting the first room. It requires the player to stand in front of the door and absorb the damage. If Thom survives, his character model will freeze.
- There is a glitch which allows the player to get back into the cryo chamber. The player must jump inside the tube and crouch before the cover closes. Once inside, the player will be able to see an apparently decapitated copy of the Master Chief, but once the cover closes, the player will be trapped inside and must load the last checkpoint or restart the level.
- It's possible to stand outside of the energy shield test station while the test is running. Just move carefully into the square and when it starts, the machine will push the player out, freezing the player in place until the process is done.
- There is a glitch in the level that allows the player to carry three weapons instead of only two. Get off the bridge very fast after Keyes gives the player the pistol.
- There is also another glitch that allows the player to exit the Pillar of Autumn. If the player goes to the spot where 3 Unggoy stand near the 3 launched lifepod stations, the player can crouch on the window looking out into space and, still crouching, slowly move out of the ship.
Mistakes[edit]
- Sam Marcus and Thom Shephard are wearing orange fatigues in the beginning cutscene, but during the diagnostic, they are wearing yellow fatigues. Similarly, the officer that shouts to Cortana "Ma'am! Fire Control for the main cannon is offline!" wears blue in the cutscene, however, when the player walks up to him in gameplay, he wears yellow.
- Captain Keyes tells the combat forces to pull back to their tertiary (third) positions before he tells them to pull back to their secondary (second) positions.
- Captain Keyes wears the insignia of a UNICOM captain when he should wear those of a Navy captain.
- If the one listens closely when Johnson and his Marines break formation and move out in the launch bay during the beginning cutscene, the sound of a Warthog crashing into a wall can be heard in the background.
- In the cinematic when the player goes to the bridge for the first time, the Pillar of Autumn is hit by an antimatter charge, and the bridge will shake. Captain Keyes and Master Chief will fall on the bridge, but the crewmen behind them are not affected in any way.
- After Keyes puts his cigar in his mouth, his lip becomes permanently tilted as if the cigar was there, even when it has been removed.
- Sometimes, in the cafeteria area, there are two Johnsons among the Marines. One of them comes out of the door where the Sangheili Minor is as normal. The other one is where the rest of the Covenant forces come out of the two doors at the other side of the cafeteria. The second Johnson is pointing his weapon at a pillar that's next to a table. He doesn't attack the Covenant or the player when the rest of the marines think of the player as a traitor. He won't budge unless the player or the Covenant kill him. He'll still do his speeches as normal.
- If one looks closely, the Master Chief's escape pod still has its rear hatch open when it launches.
Easter eggs[edit]
- Main article: Easter eggs
- In Anniversary, the introductory cutscene is more faithful to the original version on Legendary difficulty: camera angles for the Autumn's arrival, Johnson's speech, and the cryo tube's unsealing, as well as the music, are nearly identical to the original Halo.
- "Keyes" on Captain Keyes' uniform says "Hello my name" above it. The "is" is missing. This is probably due to the fact that it wouldn't fit.
- In Anniversary, the Iron Skull can be found in the cryo bay, behind a stack of crates that are at the left of the targeting lights.
- In Anniversary, the first terminal is one of the computer consoles located on the left side of the Autumn's bridge. All of the console's screens flash "INCOMING MESSAGE" in red, and a crewman is standing beside it instead of manning the console.
- The bulletin board located near the entrance to the bridge has many fliers that can be read, including the flier for the missing cat, Jonesy.
- In the remastered version of the billboard on the ship's bridge, there is a movie poster titled Dark Planetoid Rising with an image of the planet that appeared in the Legendary ending of Halo 3 - a reference to a 2008 NeoGAF meme. In addition, in the lower left corner there is an image of the "Troll Face" easter egg, which is a widely known internet meme.
- Also, in the location of the missing cat ad in the remastered version, there is an ad for a missing goose that lays golden eggs.
- There is "The Megg" which is the letter "M" made from blood and bullets.
- In the remastered version of the monitors in the cryo chamber control room, it is shown in a schematic that Linda-058 is present.
References[edit]
- "Reveille" is French for "waking up", referring to John's cryonic sleep. It is also the name of the bugle call commonly heard in the United States military that is played at sunrise each day.
- The phrase "Unseal the Hushed Casket" is a reference to the last line of John Keat's sonnet 'To Sleep'.
- In Halo: Combat Evolved, the Navy crewmembers' uniforms are very similar to those of the BOBs from the Marathon series. However, in Halo: Combat Evolved Anniversary, their uniforms are much more reserved, resembling the gray Navy service uniforms seen in Halo Wars, Halo: Reach, Halo Legends, and other more recent media.
- In Forza Horizon 4, the Autumn Showcase Remix version of The Halo Experience Showcase is named Pillar of Autumn.
Miscellaneous[edit]
- The Autumn's main view screen has a diagram on it, with an annotation displaying, 'Trajectory FD: Halo,' despite the ring's name being unknown until Captain Keyes overhears the guards on the Truth and Reconciliation talking about it.
- Sergeant Johnson appears a few times in this level. Firstly, when he is giving his speech to the line of Marines and also as the driver of the Warthog in the background of the same cutscene. He is always in the mess hall fighting Covenant. He then sometimes appears guarding a lifeboat airlock, and then is killed in an explosion, and finally appears in the battle with the Covenant on the landing.
- If the player shoots the bridge console crewmen in the head, they will not die, but the reticule will change from blue to red when the player targets them.
- Sometimes the player has to kill bridge crewmen to trigger the invincible Marines, and sometimes the player only has to injure one.
- If the player kills an ally from outside the bridge, they will be teleported to the bridge. This is a programmatic measure to prevent the player from escaping the horde of invincible Marines that try to kill them; it stops the player from rushing out of the bridge after killing an ally. However, the player could climb down a ladder near the pilots' chair and recover there.
- In the novel Halo: The Fall of Reach there is a command chair on the bridge, but there isn't one in this level.
- Markings seen on the monitors at the front of the bridge and the tactical monitors at the center of the bridge bear strong resemblance to the reticule for the Covenant Carbine in Halo 2 and Halo 3.
- Strangely enough, all the Covenant and Marines the player finds on his way to the bridge are invincible. This could be so that players cannot take weapons of fallen enemies or allies.
- The Covenant encountered on the way to the bridge will mostly ignore the player. Sometimes they will shoot at you, but inflict very little damage.
- The three Unggoy encountered outside the bridge will not drop their plasma pistols when the player kills them.
- Zuka 'Zamamee was an enemy in this level, but with a different Sangheili model (Usually a Sangheili Major). By hints from Halo: The Flood, Zuka 'Zamamee is probably the Sangheili guarding the last escape pod, as that is the setting that the book best describes his presence.
- In the Anniversary version of this level, the Bumblebee pilot is a female Marine model from Halo 3, as opposed to a repurposed UNSC Army Trooper model from Halo Reach.
- The soundtracks played in this level include Brothers in Arms, Enough Dead Heroes, Perilous Journey, and a small section from Suite Autumn.
- The opening cutscene with the Pillar of Autumn approaching Installation 04 resembles the shot of the USS Sulaco approaching LV-426 in the film Aliens.
- This level is modified depending on the difficulty chosen in the following ways:
- Sergeant Johnson makes different speeches at the beginning of the level.
- On Easy and Normal, the player goes through a testing diagnostic which acts as a tutorial for basic controls and the mechanics of health and shields. On Heroic and Legendary difficulty, this is automatically skipped and the player immediately heads out to find Captain Keyes.
- On Easy and Normal difficulty, the Motion tracker and grenades are disabled until certain moments in the level. On Heroic and Legendary, they can be used right from the start.
- On Easy and Normal, when the player walks through a darkened hallway on the way to the bridge, a Sangheili will appear to attack Chief only for a squad of marines to chase him off.
- On Easy and Normal, there is a stuck door that the player must use a melee attack on to open, which Cortana will point out.
- On Easy and Normal, there is an Unggoy with its back to the player that serves as a tutorial for the stealth melee attack mechanic.
- The crewman who screams "Wait for me!" at the start of the level is voiced by Martin O'Donnell.[5]
Gallery[edit]
Halo: Combat Evolved[edit]
Halo: Combat Evolved Anniversary[edit]
Sources[edit]
- ^ Halo: Combat Evolved Editing Kit, game file
HCEEK\tags\levels\a10\a10.scenario - ^ a b YouTube - IGN, Halo: Combat Evolved Devs React to Speedrun (Martin O’Donnell, Marcus Lehto)
- ^ The Art of Halo, page 75
- ^ Halo 3 Legendary Edition, Halo: Combat Evolved developer commentary
- ^ Twitter, Marty O'Donnell (@MartyTheElder): "I really appreciate Alan Tudyk's homage to my acting eight years later." (Retrieved on Feb 28, 2021) [archive]
| Preceded by Lone Wolf (MCC) |
Halo CE Campaign Missions The Pillar of Autumn |
Succeeded by Halo |
| |||||||||||||||||||||||
