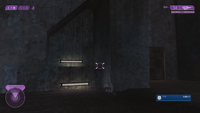
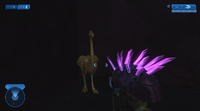
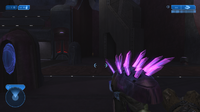
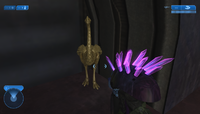
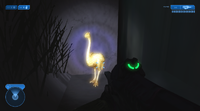
Moa statue (Halo 2): Difference between revisions
From Halopedia, the Halo wiki
mNo edit summary |
|||
| (35 intermediate revisions by 7 users not shown) | |||
| Line 1: | Line 1: | ||
{{Title|Moa statue (''Halo 2'')}} | {{Title|Moa statue (''Halo 2'')}} | ||
{{Status|Gameplay}} | {{Status|Gameplay}} | ||
{{ | {{New content|MCC July 2023 update}} | ||
{{Disambig header|the collectibles in ''Halo 2''|similar collectibles in other games|Moa statue}} | {{Disambig header|the collectibles in ''Halo 2''|similar collectibles in other games|Moa statue}} | ||
[[File:HTMCC H2 MoaStatue.jpg|400px|thumb|A golden Moa on the New Mombasa suspension bridge on [[Metropolis]] in ''Halo 2''.]] | [[File:HTMCC H2 MoaStatue.jpg|400px|thumb|A golden Moa on the New Mombasa suspension bridge on [[Metropolis]] in ''Halo 2''.]] | ||
| Line 11: | Line 11: | ||
==Statue locations== | ==Statue locations== | ||
===Cairo Station=== | ===Cairo Station=== | ||
[[Cairo Station]] has 5 Moa Statues, which can be found in the following locations: | |||
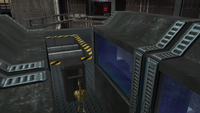
*At the start of the level, go behind the train and check behind the trash can. | |||
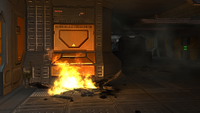
*After the first encounter, head through the door the covenant broke through then go left instead of right. Check behind the fire. | |||
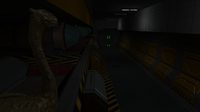
*After [[Athens Station]] explodes, head downstairs and check the right half of the hallway ceiling on the left by the door. | |||
*When you reach the area with the [[Yanme'e|drones]], check on top of the crane on the left. | |||
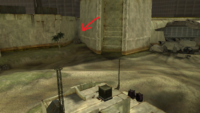
*When you head back out into space and face the three [[Sangheili Ranger|Elite Rangers]], check the right side of the [[Shepsu-pattern plasma cannon|plasma turret]]. | |||
<gallery> | |||
File:HTMCC H2A CairoStation MoaStatue Screenshot 1.png | |||
File:HTMCC H2A CairoStation MoaStatue Screenshot 2.png | |||
File:HTMCC H2A CairoStation MoaStatue Screenshot 3.png | |||
File:HTMCC H2A CairoStation MoaStatue Screenshot 4.png | |||
File:HTMCC H2A CairoStation MoaStatue Screenshot 5.png | |||
</gallery> | |||
===Outskirts=== | ===Outskirts=== | ||
[[Outskirts]] has 6 Moa Statues in this mission which can be found in these locations: | |||
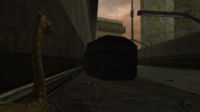
*At the beginning of the level, check behind the red truck towards the back alley. Also to the left where the enemies spawn when [[Sergeant Johnson]] says "More on the street. left side!" | |||
*After Johnson boards the [[Pelican]], head over to where the jackal snipers are at the crashed building and look on top of the window cover by the street light aimed towards [[Hotel Zanzibar]]. Alternatively, proceed through the mission until you reach Hotel Zanzibar. Head right and run to the end of the street and look on the last window on the right. | |||
*When the [[Warthog]] drives by, take it back to where it came from and also where the [[Ghost | Ghosts]] are coming from. Then go to the very end of the road and check behind the dumpster to the right. | |||
*Over by the first AA Cannon, check in between the two rusted tubes. | |||
*During the last section before you head in the tunnel, check the left side of the wall behind some rocks. | |||
*At the last section before leaving the tunnel and ending the mission, check the far left corner near the entrance. | |||
<gallery> | |||
Outskirts Moa 1.png | |||
Outskirts Moa 2a.png | View with crashed building. | |||
Outskirts Moa 2b.png | Alternate view with Hotel Zanzibar in the background. | |||
Outskirts Moa 3.png | |||
Outskirts Moa 4.png | |||
Outskirts Moa 5a.png | |||
Outskirts Moa 5b.png | Alternate view from above UNSC building. | |||
Outskirts Moa 6.png | |||
</gallery> | |||
===Metropolis=== | ===Metropolis=== | ||
[[Metropolis]] has 5 Moa Statues in this mission which can be found in these locations: | |||
* At the beginning of the level, drive/walk past the hole in the bridge and check the left beam near the ledge. | |||
* Just before you go into the tunnel, check up the left ramp to the left of the dumpster. | |||
* After going in the tunnel and you see the [[Warthog]] drive off to the dead end, head up to where it was intended to come from. | |||
* After facing the [[Wraith]] and Ghosts, look in the water near the sewer. | |||
* When you get to the section where you have to defeat 3 Wraiths, go left down that road and towards the corner building, check on the roof. | |||
<gallery> | |||
Met Moa 1.jpg | |||
Met Moa 2.jpg | |||
Met Moa 3.jpg | |||
Met Moa 4.jpg | |||
Met Moa 5.jpg | |||
</gallery> | |||
===The Arbiter=== | ===The Arbiter=== | ||
[[The Arbiter]] has 5 Moa Statues in this mission which can be found in these locations: | |||
* On your first encounter, check on one of the ledges to the top left of the room as you walk in. | |||
* After going down the elevator, check the right on top of a ledge just above where you get off at. | |||
* When you head downstairs into the factory, go straight and look under the ramp. | |||
* As soon as you open the door to the round room just before you get to the Banshee section, look to the top right on the ledge. | |||
* When you go outside to get the [[Banshee]], look to the top right of the right door (left door if you are facing the facility in a Banshee). | |||
<gallery> | |||
Arb Moa 1.jpg | |||
Arb Moa 2.jpg | |||
Arb Moa 3.jpg | |||
Arb Moa 4.jpg | |||
Arb Moa 5.jpg | |||
</gallery> | |||
===The Oracle=== | ===The Oracle=== | ||
[[The Oracle]] has 4 Moa Statues in this mission which can be found in these locations: | |||
* At the beginning of the level, look on top of the tank holding small fleshy lifeforms. | |||
* While you're heading about half way down the elevator, check the ledges where the [[Flood]] climb up the walls and land at in the corner. | |||
* After you exit the elevator and head down the hallway and enter the next room, go sharp left before dropping down and check by the locked door. | |||
* In the same room, instead, take a sharp right and check by the last locked door before dropping down. | |||
<gallery> | |||
Ora Moa 1.jpg | |||
Ora Moa 2.jpg | |||
Ora Moa 3.jpg | |||
Ora Moa 4.jpg | |||
</gallery> | |||
===Delta Halo=== | ===Delta Halo=== | ||
[[Delta Halo]] has 5 Moa Statues in this mission which can be found in these locations: | |||
* Towards the beginning of the level, check on top of the small structure on the left side by the big building. | |||
* Once you lower the bridge, go there then look to the left of where the control panel is at on a small ledge. | |||
* Once you cross the bridge and go in the tunnel, take the bottom path over the top one, then check the small hole on the left. | |||
* When you get to the section where you would normally leave your [[Scorpion]], go to the far left side of the section and check by the cliff behind the two [[Shade]] turrets. | |||
* Towards the end of the level where you encounter Jackal Snipers with the waterfall, drop down the waterfall then follow the water right into a small hole. | |||
<gallery> | |||
Delta Moa 1.jpg | |||
Delta Moa 2.jpg | |||
Delta Moa 3.jpg | |||
Delta Moa 4.jpg | |||
Delta Moa 5.jpg | |||
</gallery> | |||
===Regret=== | ===Regret=== | ||
In the first building after the gondola ride, on the top floor to the right of the fuel rod gun & grunt. | [[Regret (Halo 2 level) | Regret]] has 6 Moa Statues in this mission which can be found in these locations: | ||
* At the beginning of the level, check the ceiling above where you spawn. | |||
* Check below the first bridge as you cross it. | |||
* Just after you cross the bridge and before you enter the second part of the building, look towards the ledge to the left in the corner. | |||
* In the first building after the gondola ride, on the top floor to the right of the fuel rod gun & grunt. | |||
* After you take the first underwater elevator and enter the first long hallway, head under the ramp. | |||
* After the second gondola, follow the walkway on the outside of the building to the right of the door, take a left and tucked in the corner by the wall. | |||
<gallery> | |||
Reg Moa 1.jpg | |||
Reg Moa 2.jpg | |||
Reg Moa 3.jpg | |||
Reg Moa 4.jpg | |||
Reg Moa 5.jpg | |||
Reg Moa 6.jpg | |||
</gallery> | |||
===Sacred Icon=== | ===Sacred Icon=== | ||
[[Sacred Icon]] has | [[Sacred Icon]] has 6 Moa Statues, which can be found in the following locations: | ||
* | * At the start of the level, take a left just before you jump up and look toward the ceiling. | ||
* | * After dropping down the vent and head to the next room, check the left corner of the room where you entered. | ||
* | * Just before facing the first [[Enforcer Sentinel]] before heading down, look to the right corner in the previous room with the Sentinel spawns. | ||
* | * When you reach the open area and face your fifth Enforcer, check the left side by the cliff. | ||
* | * Before you head down the long vent outside (the second to last vent), look toward the left in the corner. | ||
* At the end of the level, check the far hole on the ledge. | |||
<gallery> | <gallery> | ||
Halo The Master Chief Collection-2024 06 09-18 08 59.png|At the start of the level. | |||
Sacred Icon 1.2.png | Sacred Icon 1.2.png | ||
Sacred Icon 1.1.png|Different view further shot of where the previous image is at. | Sacred Icon 1.1.png|Different view further shot of where the previous image is at. | ||
Sacred_Icon_Moa_2.png | Sacred_Icon_Moa_2.png | ||
Halo The Master Chief Collection-2024 06 09-19 23 34.png|Before the second to last vent. | |||
Sacred Icon 3.2.png | |||
Sacred Icon 3.1.png|Different view further shot of where the previous image is at. | |||
</gallery> | </gallery> | ||
===Quarantine Zone=== | ===Quarantine Zone=== | ||
* In the first battle arena, on a ledge to the left of the exit. | |||
<gallery> | |||
Halo The Master Chief Collection-2024 06 12-00 00 13.png | |||
</gallery> | |||
===Gravemind=== | ===Gravemind=== | ||
[[Gravemind]] has | |||
* | |||
* | |||
* | [[Gravemind]] has *** Moa Statues, which can be found in the following locations: | ||
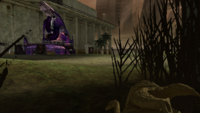
* | * In the starting room, go to the exit door & look beside the left pillar. | ||
* | * When you first get outside after the starting room, look to the right side of the door you just exited. | ||
* In the prison room, the Moa can be found on the middle level in one of the jail cells. | |||
* When you get to the first light bridge, look to your left next to the door. | |||
* When you get to the second area between the light bridges (where the waterfalls are dry), go to the left towards the last light bridge. The Moa is in the garden area. | |||
* On the bridge before the final battle (that you might want to sit out), look behind you up high to the right of the door. | |||
<gallery> | <gallery> | ||
H2 Gravemind MoaStatue 1.jpg.png | H2 Gravemind MoaStatue 1.jpg.png | ||
H2 Gravemind MoaStatue 2.png| | H2 Gravemind MoaStatue 2.png| When you first get outside after the starting room, look to the right side of the door you just exited. | ||
H2_Gravemind_MoaStatue_2.1.png | H2_Gravemind_MoaStatue_2.1.png | ||
H2_Gravemind_MoaStatue_2.0.png| | H2_Gravemind_MoaStatue_2.0.png|When you first get outside after the starting room, look to the right side of the door you just exited. | ||
H2_Gravemind_MoaStatue_3.0.png | H2_Gravemind_MoaStatue_3.0.png | ||
H2_Gravemind_MoaStatue_3.png| | H2_Gravemind_MoaStatue_3.png|In the prison room, the Moa can be found on the middle level in one of the jail cells. | ||
Halo The Master Chief Collection-2024 05 22-19 25 07.png|Before the first light bridge. | |||
Halo The Master Chief Collection-2024 05 22-19 46 49.png|Before the last light bridge. | |||
Halo The Master Chief Collection-2024 05 22-20 10 03.png|On the bridge before the final battle. | |||
</gallery> | </gallery> | ||
===Uprising=== | ===Uprising=== | ||
[[Uprising]] has | [[Uprising]] has four Moa Statues, which can be found in the following locations: | ||
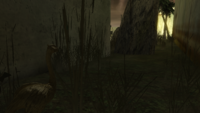
* | * Before leaving the first cavern, look behind you. | ||
* | * In the two tiered room before going outside, look above the door that you entered. | ||
* | * Once outside again, when you get to the river, look under a log at the headwaters. | ||
* | * In an alcove of the building across from the waterfall, near where the two wraiths are. | ||
<gallery> | <gallery> | ||
H2_The_Great_Journey_MoaStatue_1.0.png | File:H2_The_Great_Journey_MoaStatue_1.0.png | ||
H2_The_Great_Journey_MoaStatue_1.png|Different view further shot of where the previous image is at. | File:H2_The_Great_Journey_MoaStatue_1.png|Different view further shot of where the previous image is at. | ||
H2_The_Great_Journey_MoaStatue_2.0.png | File:H2_The_Great_Journey_MoaStatue_2.0.png | ||
H2_The_Great_Journey_MoaStatue_2.png|Different view further shot of where the previous image is at. | File:H2_The_Great_Journey_MoaStatue_2.png|Different view further shot of where the previous image is at. | ||
H2_The_Great_Journey_MoaStatue_3.0.png | File:HTMCC H2A Uprising MoaStatue 1.png|Under a log at the headwaters. | ||
H2_The_Great_Journey_MoaStatue_3.png|Different view further shot of where the previous image is at. | File:H2_The_Great_Journey_MoaStatue_3.0.png | ||
File:H2_The_Great_Journey_MoaStatue_3.png|Different view further shot of where the previous image is at. | |||
</gallery> | </gallery> | ||
===High Charity=== | ===High Charity=== | ||
[[High Charity]] has Four Moa Statues, which can be found in the following locations: | [[High Charity]] has Four Moa Statues, which can be found in the following locations: | ||
* | * Look to your right after entering the first hallway after the light bridges. | ||
* | * In the first atrium, cross the water and up the hill, look to the far right. (See 1st pair of pictures below.) | ||
* | * In the second atrium, cross the water and up the hill, look to the far left. (See 2nd pair of pictures below.) | ||
* | * | ||
<gallery> | <gallery> | ||
H2_High_Charity_MoaStatue_1.0.png | Halo The Master Chief Collection-2024 06 14-02 20 15.png|The first hallway after the light bridges. | ||
H2_High_Charity_MoaStatue_1.0.png|In the first atrium | |||
H2_High_Charity_MoaStatue_1.png|Different view further shot of where the previous image is at. | H2_High_Charity_MoaStatue_1.png|Different view further shot of where the previous image is at. | ||
H2_High_Charity_MoaStatue_2.0.png | H2_High_Charity_MoaStatue_2.0.png|In the second atrium | ||
H2_High_Charity_MoaStatue_2.png|Different view further shot of where the previous image is at. | H2_High_Charity_MoaStatue_2.png|Different view further shot of where the previous image is at. | ||
</gallery> | </gallery> | ||
| Line 89: | Line 218: | ||
===The Great Journey=== | ===The Great Journey=== | ||
[[The Great Journey]] has Five Moa Statues, which can be found in the following locations: | [[The Great Journey]] has Five Moa Statues, which can be found in the following locations: | ||
* | * Before entering the first structure, look under a support column for the platform where the scarab is parked. | ||
* | * After your first battle after joining up with the hunters, look above the door behind you. | ||
* | * When you get to the bridge where the covenant gunship shows up on your left, look behind you and up. | ||
* | * Above the door behind you after you exit the building and converse with Johnson (before or after the cutscene). | ||
* After Johnson blows the door, look for one among the rubble you crawl through, just past the next door (before going through the door). | |||
<gallery> | <gallery> | ||
Halo The Master Chief Collection-2024 05 07-01 56 10.png | |||
H2_Uprising_MoaStatue_1.0.png | H2_Uprising_MoaStatue_1.0.png | ||
H2_Uprising_MoaStatue_1.png|Different view further shot of where the previous | H2_Uprising_MoaStatue_1.png|Different view further shot of where the previous two images are at. | ||
H2_Uprising_MoaStatue_2.0.png | H2_Uprising_MoaStatue_2.0.png | ||
H2_Uprising_MoaStatue_2.png|Different view further shot of where the previous image is at. | H2_Uprising_MoaStatue_2.png|Different view further shot of where the previous image is at. | ||
H2_Uprising_MoaStatue_3.0.png | H2_Uprising_MoaStatue_3.0.png | ||
H2_Uprising_MoaStatue_3.png|Different view further shot of where the previous image is at. | H2_Uprising_MoaStatue_3.png|Different view further shot of where the previous image is at. | ||
Halo The Master Chief Collection-2024 05 02-23 08 59.png|At the cutscene. | |||
Halo The Master Chief Collection-2024 05 22-23 37 42.png|In the rubble. | |||
</gallery> | </gallery> | ||
| Line 105: | Line 238: | ||
{{Ref/Sources}} | {{Ref/Sources}} | ||
{{Easter Egg|H2}} | {{Easter Egg|H2}} | ||
[[Category: | [[Category:Moa statues]] | ||
Latest revision as of 21:59, July 14, 2024
"WE'VE GOT A NEW CONTACT, UNKNOWN CLASSIFICATION!" This article may contain information based upon upcoming, unreleased, or recently-released content from MCC July 2023 update, and may not be fully complete. Additionally, the information may be subject to change if it is based on pre-release material. Please update it as soon as any relevant and accurate material is available.
|
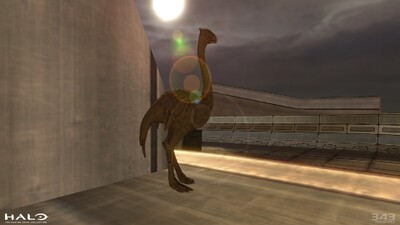
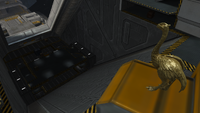
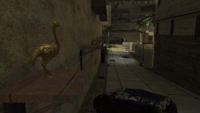
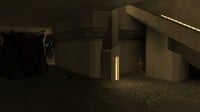
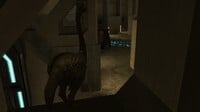
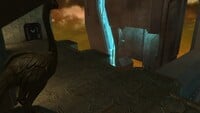
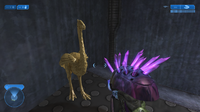
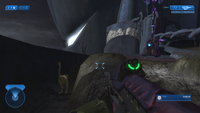
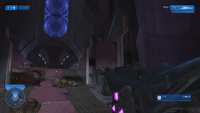
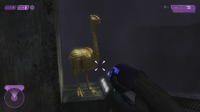
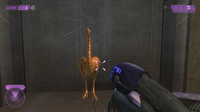
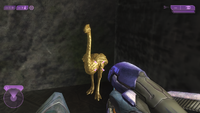
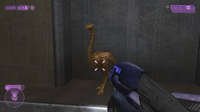
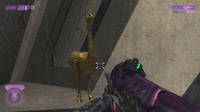
Moa statues are a collectible available in the campaign of Halo 2. The statues were added to Halo 2's campaign in the Series 9 July 2023 update for Halo: The Master Chief Collection, and are not present in the original Xbox or Windows Vista editions of the game.[1]
Overview[edit]
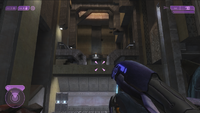
Several moa statues can be found in each level on any difficulty and take the form of a small golden Moa. Upon being discovered, the statues can be destroyed, with the weekly challenge Eye Spy requiring the destruction of three such Moa for completion. Three levels are chosen to spawn Moa within each week (observable on the challenge itself), with each level getting three statues chosen, meaning they are not all consistently placed all the time.[2] As such, this page lists all potential statue locations. Statues marked as (Broken) spawn every week and don't count towards the challenge, even when the challenge selects the level the statues are placed on. Statues marked as (Unobtainable) denote statues placed in cutscene rooms that aren't accessible.
Statue locations[edit]
Cairo Station[edit]
Cairo Station has 5 Moa Statues, which can be found in the following locations:
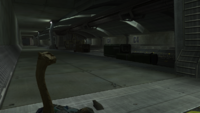
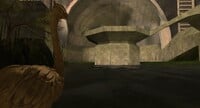
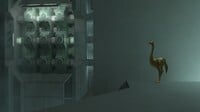
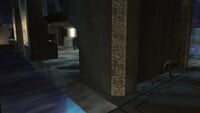
- At the start of the level, go behind the train and check behind the trash can.
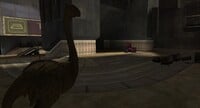
- After the first encounter, head through the door the covenant broke through then go left instead of right. Check behind the fire.
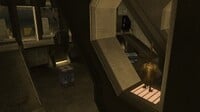
- After Athens Station explodes, head downstairs and check the right half of the hallway ceiling on the left by the door.
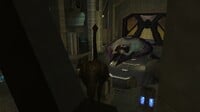
- When you reach the area with the drones, check on top of the crane on the left.
- When you head back out into space and face the three Elite Rangers, check the right side of the plasma turret.
Outskirts[edit]
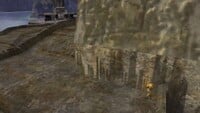
Outskirts has 6 Moa Statues in this mission which can be found in these locations:
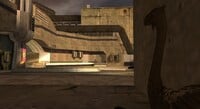
- At the beginning of the level, check behind the red truck towards the back alley. Also to the left where the enemies spawn when Sergeant Johnson says "More on the street. left side!"
- After Johnson boards the Pelican, head over to where the jackal snipers are at the crashed building and look on top of the window cover by the street light aimed towards Hotel Zanzibar. Alternatively, proceed through the mission until you reach Hotel Zanzibar. Head right and run to the end of the street and look on the last window on the right.
- When the Warthog drives by, take it back to where it came from and also where the Ghosts are coming from. Then go to the very end of the road and check behind the dumpster to the right.
- Over by the first AA Cannon, check in between the two rusted tubes.
- During the last section before you head in the tunnel, check the left side of the wall behind some rocks.
- At the last section before leaving the tunnel and ending the mission, check the far left corner near the entrance.
Metropolis[edit]
Metropolis has 5 Moa Statues in this mission which can be found in these locations:
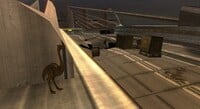
- At the beginning of the level, drive/walk past the hole in the bridge and check the left beam near the ledge.
- Just before you go into the tunnel, check up the left ramp to the left of the dumpster.
- After going in the tunnel and you see the Warthog drive off to the dead end, head up to where it was intended to come from.
- After facing the Wraith and Ghosts, look in the water near the sewer.
- When you get to the section where you have to defeat 3 Wraiths, go left down that road and towards the corner building, check on the roof.
The Arbiter[edit]
The Arbiter has 5 Moa Statues in this mission which can be found in these locations:
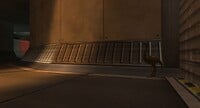
- On your first encounter, check on one of the ledges to the top left of the room as you walk in.
- After going down the elevator, check the right on top of a ledge just above where you get off at.
- When you head downstairs into the factory, go straight and look under the ramp.
- As soon as you open the door to the round room just before you get to the Banshee section, look to the top right on the ledge.
- When you go outside to get the Banshee, look to the top right of the right door (left door if you are facing the facility in a Banshee).
The Oracle[edit]
The Oracle has 4 Moa Statues in this mission which can be found in these locations:
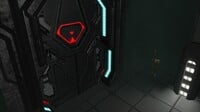
- At the beginning of the level, look on top of the tank holding small fleshy lifeforms.
- While you're heading about half way down the elevator, check the ledges where the Flood climb up the walls and land at in the corner.
- After you exit the elevator and head down the hallway and enter the next room, go sharp left before dropping down and check by the locked door.
- In the same room, instead, take a sharp right and check by the last locked door before dropping down.
Delta Halo[edit]
Delta Halo has 5 Moa Statues in this mission which can be found in these locations:
- Towards the beginning of the level, check on top of the small structure on the left side by the big building.
- Once you lower the bridge, go there then look to the left of where the control panel is at on a small ledge.
- Once you cross the bridge and go in the tunnel, take the bottom path over the top one, then check the small hole on the left.
- When you get to the section where you would normally leave your Scorpion, go to the far left side of the section and check by the cliff behind the two Shade turrets.
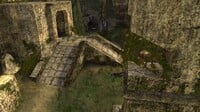
- Towards the end of the level where you encounter Jackal Snipers with the waterfall, drop down the waterfall then follow the water right into a small hole.
Regret[edit]
Regret has 6 Moa Statues in this mission which can be found in these locations:
- At the beginning of the level, check the ceiling above where you spawn.
- Check below the first bridge as you cross it.
- Just after you cross the bridge and before you enter the second part of the building, look towards the ledge to the left in the corner.
- In the first building after the gondola ride, on the top floor to the right of the fuel rod gun & grunt.
- After you take the first underwater elevator and enter the first long hallway, head under the ramp.
- After the second gondola, follow the walkway on the outside of the building to the right of the door, take a left and tucked in the corner by the wall.
Sacred Icon[edit]
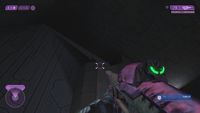
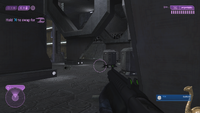
Sacred Icon has 6 Moa Statues, which can be found in the following locations:
- At the start of the level, take a left just before you jump up and look toward the ceiling.
- After dropping down the vent and head to the next room, check the left corner of the room where you entered.
- Just before facing the first Enforcer Sentinel before heading down, look to the right corner in the previous room with the Sentinel spawns.
- When you reach the open area and face your fifth Enforcer, check the left side by the cliff.
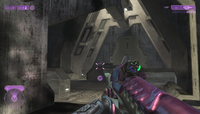
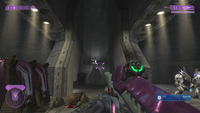
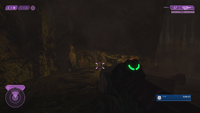
- Before you head down the long vent outside (the second to last vent), look toward the left in the corner.
- At the end of the level, check the far hole on the ledge.
Quarantine Zone[edit]
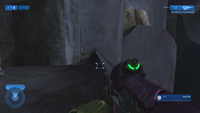
- In the first battle arena, on a ledge to the left of the exit.
Gravemind[edit]
Gravemind has *** Moa Statues, which can be found in the following locations:
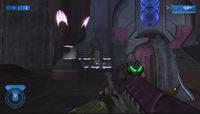
- In the starting room, go to the exit door & look beside the left pillar.
- When you first get outside after the starting room, look to the right side of the door you just exited.
- In the prison room, the Moa can be found on the middle level in one of the jail cells.
- When you get to the first light bridge, look to your left next to the door.
- When you get to the second area between the light bridges (where the waterfalls are dry), go to the left towards the last light bridge. The Moa is in the garden area.
- On the bridge before the final battle (that you might want to sit out), look behind you up high to the right of the door.
Uprising[edit]
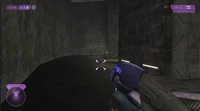
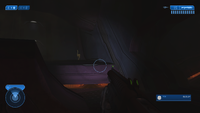
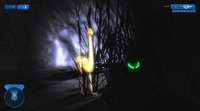
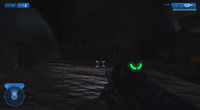
Uprising has four Moa Statues, which can be found in the following locations:
- Before leaving the first cavern, look behind you.
- In the two tiered room before going outside, look above the door that you entered.
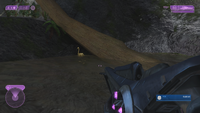
- Once outside again, when you get to the river, look under a log at the headwaters.
- In an alcove of the building across from the waterfall, near where the two wraiths are.
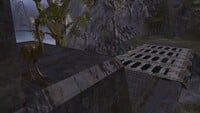
High Charity[edit]
High Charity has Four Moa Statues, which can be found in the following locations:
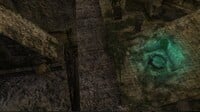
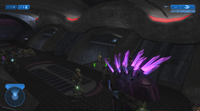
- Look to your right after entering the first hallway after the light bridges.
- In the first atrium, cross the water and up the hill, look to the far right. (See 1st pair of pictures below.)
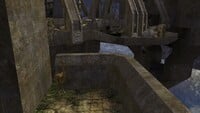
- In the second atrium, cross the water and up the hill, look to the far left. (See 2nd pair of pictures below.)
The Great Journey[edit]
The Great Journey has Five Moa Statues, which can be found in the following locations:
- Before entering the first structure, look under a support column for the platform where the scarab is parked.
- After your first battle after joining up with the hunters, look above the door behind you.
- When you get to the bridge where the covenant gunship shows up on your left, look behind you and up.
- Above the door behind you after you exit the building and converse with Johnson (before or after the cutscene).
- After Johnson blows the door, look for one among the rubble you crawl through, just past the next door (before going through the door).
Sources[edit]
- ^ Halo Waypoint, Halo MCC July 2023 Update (Retrieved on Jul 10, 2023) [archive]
- ^ YouTube - Halo, Seasonal Sitrep: MCC Season 8, Mythic
| ||||||||
