Blood Gulch: Difference between revisions
From Halopedia, the Halo wiki
Raider2747 (talk | contribs) Tag: Mobile edit |
mNo edit summary |
||
| (41 intermediate revisions by 14 users not shown) | |||
| Line 1: | Line 1: | ||
{{ | {{Status|Gameplay}} | ||
{{disambig header|the original Blood Gulch in Halo: Combat Evolved|similar maps|Blood Gulch (disambiguation)}} | {{disambig header|the original Blood Gulch in Halo: Combat Evolved|similar maps|Blood Gulch (disambiguation)}} | ||
{{Multiplayer | {{Multiplayer map infobox | ||
|pagegamelabel=CE | |||
|name=Blood Gulch | |name=Blood Gulch | ||
|image=[[File:Blood gulch.jpg|300px]] | |image=[[File:Blood gulch.jpg|300px]] | ||
|game=*''[[Halo: Combat Evolved]]'' | |game=*''[[Halo: Combat Evolved]]'' | ||
*''[[Halo: Combat Evolved Trial|Halo Trial]]'' | *''[[Halo: Combat Evolved Trial|Halo Trial]]'' | ||
|devname=<code>bloodgulch</code>{{Ref/File|Id=HCEEK|HCEEK|HCEEK\tags\levels\test\bloodgulch\bloodgulch.scenario}} | |||
|map= | |map= | ||
|location=[[Installation 04]] | |location=[[Installation 04]] | ||
|terrain=Desert/Canyon | |terrain=Desert/Canyon | ||
|symmetry= | |symmetry=Semi-symmetrical | ||
|playernumber=4-16 | |playernumber=4-16 | ||
|gametypes=*[[ | |gametypes=*[[Big Team Battle]] | ||
}} | }} | ||
{{Article | {{Article quote|The Quick and the Dead.}} | ||
'''Blood Gulch''' is a [[multiplayer]] | '''Blood Gulch''' is a [[multiplayer]] map in ''[[Halo: Combat Evolved]]''. It is set in an enclosed, semi-symmetrical canyon with a base at either end and an open field between. The level supports vehicles and is recommended for 4-16 players. The map is almost entirely devoid of life, save some sparse grass and bushes. Blood Gulch is easily the most famous multiplayer level from ''Halo: Combat Evolved'', and while its simplicity and size have contributed much to its popularity, the biggest factor to Blood Gulch's fame is the fact that the popular [[machinima]] series ''[[Red vs. Blue]]'' is set in this level. | ||
== | ==Universe and lore== | ||
[[ | Blood Gulch takes the form of a desert canyon on [[Installation 04]]. The area is one of many examples of the [[Forerunner]]s' tendency for repeated designs{{Ref/Site|URL=https://www.halowaypoint.com/en-us/forums/db05ce78845f4120b062c50816008e5d/topics/how-did-valhalla-get-to-requiem/8cff90a9-7d22-413e-aebf-e35800653cc6/posts|Site=Halo Waypoint Forums|Page=How Did Valhalla Get to Requiem?|D=03|M=08|Y=2020|LocalArchive=Catalog/Archive/2014#How Did Valhalla Get to Requiem?}}, with similar such canyons also known to exist on [[Installation 05]]{{Ref/Map|H2|Coagulation}} and [[Trove]]{{Ref/Map|HW|Blood Gulch (Halo Wars map)|Blood Gulch}} The UNSC believe that the almost-identical canyon found on Installation 05 may have once served as a site for young [[Warrior-Servant]]s to prove their combat prowess.{{Ref/Site|URL=https://www.halowaypoint.com/en-us/universe/locations/delta-halo|Site=Halo Waypoint|Page=Delta Halo|D=01|M=6|Y=2020}} | ||
==Overview== | |||
===Layout=== | |||
Blood Gulch's layout is quite simplistic; it is set in a vast canyon, with two [[base]]s, a huge open field with hills and ditches, and caves and cliffs along the rock walls. In addition, there are [[teleporters]] located on each base's roof; each will transport players to the center field. Blue Team has the advantage of utilizing a ledge near Red Base which is an ideal spot for sniping while Red Team has the advantage of surprising the Blue Team via tunnel access located on the side of the map. | Blood Gulch's layout is quite simplistic; it is set in a vast canyon, with two [[base]]s, a huge open field with hills and ditches, and caves and cliffs along the rock walls. In addition, there are [[teleporters]] located on each base's roof; each will transport players to the center field. Blue Team has the advantage of utilizing a ledge near Red Base which is an ideal spot for sniping while Red Team has the advantage of surprising the Blue Team via tunnel access located on the side of the map. | ||
<gallery> | |||
==Strategies== | File:HMCC HCE Blood Gulch Map.png|Blood Gulch Map. | ||
File:Bloodgulch.jpg|Map of the Level. | |||
</gallery> | |||
===Strategies=== | |||
*Once you get better at sniping, try sniping on the large hill next to the red team's teleporter in the middle of the map. | *Once you get better at sniping, try sniping on the large hill next to the red team's teleporter in the middle of the map. | ||
*The [[Type-26 Banshee|Banshee]] ([[Halo PC]] and [[Halo: The Master Chief Collection]] only) can kill very effectively in three ways: with the [[Fuel Rod Cannon]], [[Class-2 directed energy cannon|plasma cannons]], and ramming (being hit, no matter how hard, with ANY vehicle, results in an instant kill in ''Halo: Combat Evolved''). | *The [[Type-26 Banshee|Banshee]] ([[Halo: Combat Evolved (PC port)|''Halo: Combat Evolved'' for PC]] and [[Halo: The Master Chief Collection]] only) can kill very effectively in three ways: with the [[Fuel Rod Cannon]], [[Class-2 directed energy cannon|plasma cannons]], and ramming (being hit, no matter how hard, with ANY vehicle, results in an instant kill in ''Halo: Combat Evolved''). | ||
*Driving a [[M12 Warthog|Warthog]] into the base and remaining on the Warthogs turret is a sound defense strategy; however, this will leave you vulnerable to enemy fire. | *Driving a [[M12 Warthog|Warthog]] into the base and remaining on the Warthogs turret is a sound defense strategy; however, this will leave you vulnerable to enemy fire. | ||
*Having a pair of Warthogs with three players on board, with a [[M41 SPNKR|rocket launcher]] in the passenger seat, can be used in two ways. Have both Warthogs go through the cave systems to the left of the Blue base, taking care not to be hit by a grenade by any hostile infantry in the caves. The first Warthog should drive down, with a second Warthog above supporting it by bombarding the base. Drop off the side rider/gunner and drive in circles to avoid being bombed or sniped while the carrier is getting the flag. A [[ | *Having a pair of Warthogs with three players on board, with a [[M41 SPNKR|rocket launcher]] in the passenger seat, can be used in two ways. Have both Warthogs go through the cave systems to the left of the Blue base, taking care not to be hit by a grenade by any hostile infantry in the caves. The first Warthog should drive down, with a second Warthog above supporting it by bombarding the base. Drop off the side rider/gunner and drive in circles to avoid being bombed or sniped while the carrier is getting the flag. A [[Karo'etba-pattern Ghost|Ghost]] can be used instead of the Warthog. One or two players should accompany a Warthog to the base on foot. The Warthog will then circle the enemy base while one player gets the flag. The player and their gunner will then get in a Warthog and go up the cliff or simply go in a straight line back to the base. | ||
*If you're on your own, a simple ''"run in, grab the flag and get in a Warthog"'' strategy is quite effective if the enemy is engaged in combat. However, if you are noticed and the enemy has vehicles, the other tactic may be less risky. This tactic is not recommended for the [[M808B Scorpion|Scorpion]], due to its slower speed. Vehicles that make this work best are the Ghost, Warthog or Banshee (Halo PC and Halo: The Master Chief Collection only). If you are doing this with a Warthog, you can just drive the hog into the entrance, grab the flag, and drive back, while the other team has to go through the other entrance to get you. | *If you're on your own, a simple ''"run in, grab the flag and get in a Warthog"'' strategy is quite effective if the enemy is engaged in combat. However, if you are noticed and the enemy has vehicles, the other tactic may be less risky. This tactic is not recommended for the [[M808B Scorpion|Scorpion]], due to its slower speed. Vehicles that make this work best are the Ghost, Warthog or Banshee (Halo PC and Halo: The Master Chief Collection only). If you are doing this with a Warthog, you can just drive the hog into the entrance, grab the flag, and drive back, while the other team has to go through the other entrance to get you. | ||
*Have some teammates drive around the enemy base while you exit out of the passenger seat of a Warthog. While your teammates cause mischief around the enemies, you could grab the flag and then escape while your other enemies are distracted. A very effective plan when you are you are using two full Warthogs. Avoid this tactic if the enemy has a powerful vehicle like a Scorpion, as it could result in your entire team being wiped out, allowing enemies to make a counterattack. | *Have some teammates drive around the enemy base while you exit out of the passenger seat of a Warthog. While your teammates cause mischief around the enemies, you could grab the flag and then escape while your other enemies are distracted. A very effective plan when you are you are using two full Warthogs. Avoid this tactic if the enemy has a powerful vehicle like a Scorpion, as it could result in your entire team being wiped out, allowing enemies to make a counterattack. | ||
*Park a Warthog/Ghost/Banshee (Halo PC and Halo: The Master Chief Collection only) at the relevant teleporter, walk into the enemy base, grab the flag, run through the teleporter and drive/fly away for a quick escape. | *Park a Warthog/Ghost/Banshee (Halo PC and Halo: The Master Chief Collection only) at the relevant teleporter, walk into the enemy base, grab the flag, run through the teleporter and drive/fly away for a quick escape. | ||
*You can hide in a small crevice behind the Blue base with a [[SRS99C-S2 AM sniper rifle|sniper rifle]] to take out enemies from behind. Just be aware of the visible vapor trail of the sniper rifle and take care not to be seen by crouching. Be prepared to run when a grenade is thrown into the crevice. | *You can hide in a small crevice behind the Blue base with a [[SRS99C-S2 AM sniper rifle|sniper rifle]] to take out enemies from behind. Just be aware of the visible vapor trail of the sniper rifle and take care not to be seen by crouching. Be prepared to run when a grenade is thrown into the crevice. | ||
*If your team has control over the middle part of the base the fuel rod cannon can help a lot. Hide behind the hills in the middle and use the fuel rod | *If your team has control over the middle part of the base, the fuel rod cannon can help a lot. Hide behind the hills in the middle, and use the fuel rod cannon's ark ability to bombard the enemy with fuel rod blasts. | ||
*If you are in the Red Team, there is a large hill with some rocks for defense behind the red base. One tactic is driving a rocket hog up there and keep shooting rockets at the blue base's roof. The view is excellent and you should get a few kills before the enemy recognizes you. This is not recommended for [[Team Snipers]]. | *If you are in the Red Team, there is a large hill with some rocks for defense behind the red base. One tactic is driving a rocket hog up there and keep shooting rockets at the blue base's roof. The view is excellent and you should get a few kills before the enemy recognizes you. This is not recommended for [[Team Snipers]]. | ||
*Another useful hill tactic is to go up there with a sniper rifle (usually found on top of either bases) and shoot the enemy. The sniping view is perfect for a couple of quick headshots before the enemy locates your position. This is unwise in all snipers games. | *Another useful hill tactic is to go up there with a sniper rifle (usually found on top of either bases) and shoot the enemy. The sniping view is perfect for a couple of quick headshots before the enemy locates your position. This is unwise in all snipers games. | ||
*This tactic should be used only for taking out enemy Banshees: Take a [[M12A1 Warthog|rocket]] or chaingun Warthog up the hill, and shoot at the enemy Banshee (chaingun recommended) or if the enemy Banshee is flying straight towards you, use the rocket to easily blast it out of the sky. However, the chaingun is recommended for taking out any aircraft. Do not use this tactic in all-snipers games. | *This tactic should be used only for taking out enemy Banshees: Take a [[M12A1 Rocket Warthog|rocket]] or chaingun Warthog up the hill, and shoot at the enemy Banshee (chaingun recommended) or if the enemy Banshee is flying straight towards you, use the rocket to easily blast it out of the sky. However, the chaingun is recommended for taking out any aircraft. Do not use this tactic in all-snipers games. | ||
*It is advised to pick up a sniper rifle and a shotgun for beginners. You can dispatch enemies in sniping spots shown and deal with other threats with the shotgun. | *It is advised to pick up a sniper rifle and a shotgun for beginners. You can dispatch enemies in sniping spots shown and deal with other threats with the shotgun. | ||
*Try to guard the opposing teams' teleporters in [[Capture the Flag|CTF]]. This will help your team a lot when you have the flag and are being pursued. | *Try to guard the opposing teams' teleporters in [[Capture the Flag|CTF]]. This will help your team a lot when you have the flag and are being pursued. | ||
| Line 43: | Line 50: | ||
{{Main | {{Main | ||
|1=Coagulation | |1=Coagulation | ||
|2=Valhalla | |2=Valhalla | ||
|3=Blood Gulch (Halo Wars Level) | |3=Blood Gulch (Halo Wars Level) | ||
|l3=Halo Wars' Blood Gulch | |l3=Halo Wars' Blood Gulch | ||
|4 | |4=Hemorrhage | ||
|5=Ragnarok | |5=Ragnarok | ||
|6=Bloodline | |6=Bloodline | ||
|7=Basin | |7=Basin | ||
}} | }} | ||
Blood Gulch was remade into Coagulation for ''[[Halo 2]]'', with the bases excavated to provide more room, as well as a number of other minor differences, such as the addition of a Banshee to each base, but it still very much remains the original map. The Blood Gulch concept was later reworked into Valhalla for ''[[Halo 3]]'', featuring a similar size and layout, but with dramatic changes in the terrain and the base structures. [[Standoff]] has been called another Blood Gulch successor, given its similar terrain, but features a different layout. A map called Blood Gulch was included in ''[[Halo Wars]]'', and is somewhat accurate to the original, though it lacks the caves, since it would be hard to implement, as the game is a real-time strategy game. | Blood Gulch was remade into Coagulation for ''[[Halo 2]]'', with the bases excavated to provide more room, as well as a number of other minor differences, such as the addition of a Banshee to each base, but it still very much remains the original map. The Blood Gulch concept was later reworked into Valhalla for ''[[Halo 3]]'', featuring a similar size and layout, but with dramatic changes in the terrain and the base structures. [[Standoff]] has been called another Blood Gulch successor, given its similar terrain, but features a different layout. A map called Blood Gulch was included in ''[[Halo Wars]]'', and is somewhat accurate to the original, though it lacks the caves, since it would be hard to implement, as the game is a real-time strategy game. | ||
Blood Gulch has also been remade for use as a multiplayer map variant for [[Forge World]] in ''[[Halo: Reach]]''. It was revealed in a [[Red vs. Blue Halo: Reach PSA: Deja View|special episode]] of ''Red vs Blue''. The bases are ported from Blood Gulch, while the terrain geometry is a direct port from Coagulation, and the general setting of the Forge World map resembles Valhalla. In ''Halo 4'', Valhalla was remade into Ragnarok. In ''[[Halo 2: Anniversary]]'', Coagulation was remade into Bloodline. | Blood Gulch has also been remade for use as a multiplayer map variant for [[Forge World]] in ''[[Halo: Reach]]''. It was revealed in a [[Red vs. Blue Halo: Reach PSA: Deja View|special episode]] of ''Red vs. Blue''. The bases are ported from Blood Gulch, while the terrain geometry is a direct port from Coagulation, and the general setting of the Forge World map resembles Valhalla. In ''Halo 4'', Valhalla was remade into Ragnarok. In ''[[Halo 2: Anniversary]]'', Coagulation was remade into Bloodline. | ||
''[[Halo 5: Guardians]]'' features several [[Forge]] maps inspired by Blood Gulch. [[Basin]] was inspired by both Blood Gulch and Valhalla. | ''[[Halo 5: Guardians]]'' features several [[Forge]] maps inspired by Blood Gulch. [[Basin]] was inspired by both Blood Gulch and Valhalla. Blood Gulch was recreated in the [[Halo Mash-Up: Minecraft Evolved]].{{Ref/Site|D=10|M=10|Y=2014|URL=https://blogs.halowaypoint.com/en-us/blogs/waypoint/posts/more-master-chief-and-minecraft|Site=Halo Waypoint|Page=More Master Chief and Minecraft}} | ||
==Achievements== | |||
The following achievements can be unlocked on Blood Gulch on ''[[Halo: The Master Chief Collection]]''. | |||
{| class="wikitable" | |||
|- | |||
! scope="col" style="text-align:center;" |'''''Halo: MCC'' (Xbox One)''' | |||
! scope="col" style="width:135px;text-align:center;" |'''''Halo: MCC'' (Steam)''' | |||
! scope="col" style="width:175px;height:20px;text-align:center;" |'''Title''' | |||
! scope="col" style="width:350px;height:20px;text-align:center;" |'''Unlock requirement''' | |||
! scope="col" style="width:200px;height:20px;text-align:center;" |'''Games''' | |||
|- | |||
|[[File:HTMCC HCE Achievement BackInTheDay.png|center|115px]] | |||
|[[File:HTMCC HCE Achievement Steam Back in the Day.jpg|center|65px]] | |||
|<center>'''[[Back In The Day]]'''</center> | |||
|Play a [[Capture the Flag]] game on Blood Gulch with 4 player splitscreen on the same console. | |||
|''[[Halo: The Master Chief Collection]]''</center> | |||
|} | |||
==Trivia== | ==Trivia== | ||
*''Blood Gulch'' is the only multiplayer map available in the ''Halo'' Demo. | |||
*''Blood Gulch'' is the only multiplayer map available in the ''Halo'' Demo | |||
*Blood Gulch and Coagulation are the setting for most of the first five seasons of [[Rooster Teeth Productions|Rooster Teeth]]'s popular web series ''Red vs. Blue'', hence the subtitle of the first five seasons, ''The Blood Gulch Chronicles''. | *Blood Gulch and Coagulation are the setting for most of the first five seasons of [[Rooster Teeth Productions|Rooster Teeth]]'s popular web series ''Red vs. Blue'', hence the subtitle of the first five seasons, ''The Blood Gulch Chronicles''. | ||
* | *Several changes were made to the map with the release of [[Gearbox Software]]'s port of ''Halo: Combat Evolved'' on PC. | ||
**A third bush was added to the middle of the map next to the rocket launcher spawn. | |||
* | **A floating bush present in the [[Xbox]]'s version of the map near the rocket launcher spawn was fixed. | ||
* | **A few small, steep inclines near blue base's teleporter exit were smoothed out. | ||
* | |||
==Gallery== | ==Gallery== | ||
{{Linkbox|gallery=yes}} | |||
<gallery> | <gallery> | ||
File: | File:HCE BloodGulch RedBase.png|Red base. | ||
File:HCE_BloodGulch_BlueBase.png|Blue base. | |||
File:HCE BloodGulch SniperCliff.png|The cliff overlooking red base, with the sniper rifle spawn. | |||
File:HCE BloodGulch RedTeam.jpg|Red team on Blood Gulch. | |||
</gallery> | </gallery> | ||
==Sources== | ==Sources== | ||
{{Ref/Sources}} | |||
{{Levels|H1|mode=yes}} | {{Levels|H1|mode=yes}} | ||
Latest revision as of 17:14, October 5, 2024
| Blood Gulch | |
|---|---|
| |
| Map overview | |
|
Game: |
|
|
Map file name (?): |
|
| Lore information | |
|
Location: |
|
| Gameplay overview | |
|
Terrain: |
Desert/Canyon |
|
Map layout: |
Semi-symmetrical |
|
Recommended number of players: |
4-16 |
|
Recommended gametype(s): |
|
| “ | The Quick and the Dead. | ” |
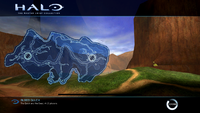
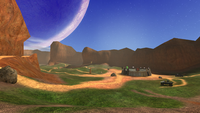
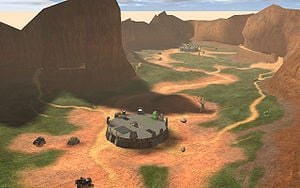
Blood Gulch is a multiplayer map in Halo: Combat Evolved. It is set in an enclosed, semi-symmetrical canyon with a base at either end and an open field between. The level supports vehicles and is recommended for 4-16 players. The map is almost entirely devoid of life, save some sparse grass and bushes. Blood Gulch is easily the most famous multiplayer level from Halo: Combat Evolved, and while its simplicity and size have contributed much to its popularity, the biggest factor to Blood Gulch's fame is the fact that the popular machinima series Red vs. Blue is set in this level.
Universe and lore[edit]
Blood Gulch takes the form of a desert canyon on Installation 04. The area is one of many examples of the Forerunners' tendency for repeated designs[2], with similar such canyons also known to exist on Installation 05[3] and Trove[4] The UNSC believe that the almost-identical canyon found on Installation 05 may have once served as a site for young Warrior-Servants to prove their combat prowess.[5]
Overview[edit]
Layout[edit]
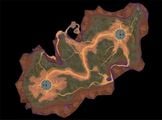
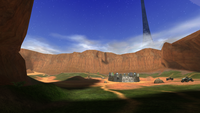
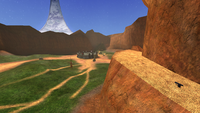
Blood Gulch's layout is quite simplistic; it is set in a vast canyon, with two bases, a huge open field with hills and ditches, and caves and cliffs along the rock walls. In addition, there are teleporters located on each base's roof; each will transport players to the center field. Blue Team has the advantage of utilizing a ledge near Red Base which is an ideal spot for sniping while Red Team has the advantage of surprising the Blue Team via tunnel access located on the side of the map.
Strategies[edit]
- Once you get better at sniping, try sniping on the large hill next to the red team's teleporter in the middle of the map.
- The Banshee (Halo: Combat Evolved for PC and Halo: The Master Chief Collection only) can kill very effectively in three ways: with the Fuel Rod Cannon, plasma cannons, and ramming (being hit, no matter how hard, with ANY vehicle, results in an instant kill in Halo: Combat Evolved).
- Driving a Warthog into the base and remaining on the Warthogs turret is a sound defense strategy; however, this will leave you vulnerable to enemy fire.
- Having a pair of Warthogs with three players on board, with a rocket launcher in the passenger seat, can be used in two ways. Have both Warthogs go through the cave systems to the left of the Blue base, taking care not to be hit by a grenade by any hostile infantry in the caves. The first Warthog should drive down, with a second Warthog above supporting it by bombarding the base. Drop off the side rider/gunner and drive in circles to avoid being bombed or sniped while the carrier is getting the flag. A Ghost can be used instead of the Warthog. One or two players should accompany a Warthog to the base on foot. The Warthog will then circle the enemy base while one player gets the flag. The player and their gunner will then get in a Warthog and go up the cliff or simply go in a straight line back to the base.
- If you're on your own, a simple "run in, grab the flag and get in a Warthog" strategy is quite effective if the enemy is engaged in combat. However, if you are noticed and the enemy has vehicles, the other tactic may be less risky. This tactic is not recommended for the Scorpion, due to its slower speed. Vehicles that make this work best are the Ghost, Warthog or Banshee (Halo PC and Halo: The Master Chief Collection only). If you are doing this with a Warthog, you can just drive the hog into the entrance, grab the flag, and drive back, while the other team has to go through the other entrance to get you.
- Have some teammates drive around the enemy base while you exit out of the passenger seat of a Warthog. While your teammates cause mischief around the enemies, you could grab the flag and then escape while your other enemies are distracted. A very effective plan when you are you are using two full Warthogs. Avoid this tactic if the enemy has a powerful vehicle like a Scorpion, as it could result in your entire team being wiped out, allowing enemies to make a counterattack.
- Park a Warthog/Ghost/Banshee (Halo PC and Halo: The Master Chief Collection only) at the relevant teleporter, walk into the enemy base, grab the flag, run through the teleporter and drive/fly away for a quick escape.
- You can hide in a small crevice behind the Blue base with a sniper rifle to take out enemies from behind. Just be aware of the visible vapor trail of the sniper rifle and take care not to be seen by crouching. Be prepared to run when a grenade is thrown into the crevice.
- If your team has control over the middle part of the base, the fuel rod cannon can help a lot. Hide behind the hills in the middle, and use the fuel rod cannon's ark ability to bombard the enemy with fuel rod blasts.
- If you are in the Red Team, there is a large hill with some rocks for defense behind the red base. One tactic is driving a rocket hog up there and keep shooting rockets at the blue base's roof. The view is excellent and you should get a few kills before the enemy recognizes you. This is not recommended for Team Snipers.
- Another useful hill tactic is to go up there with a sniper rifle (usually found on top of either bases) and shoot the enemy. The sniping view is perfect for a couple of quick headshots before the enemy locates your position. This is unwise in all snipers games.
- This tactic should be used only for taking out enemy Banshees: Take a rocket or chaingun Warthog up the hill, and shoot at the enemy Banshee (chaingun recommended) or if the enemy Banshee is flying straight towards you, use the rocket to easily blast it out of the sky. However, the chaingun is recommended for taking out any aircraft. Do not use this tactic in all-snipers games.
- It is advised to pick up a sniper rifle and a shotgun for beginners. You can dispatch enemies in sniping spots shown and deal with other threats with the shotgun.
- Try to guard the opposing teams' teleporters in CTF. This will help your team a lot when you have the flag and are being pursued.
Remakes[edit]
- Main articles: Coagulation, Valhalla, Halo Wars' Blood Gulch, Hemorrhage, Ragnarok, Bloodline, Basin
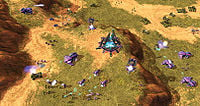
Blood Gulch was remade into Coagulation for Halo 2, with the bases excavated to provide more room, as well as a number of other minor differences, such as the addition of a Banshee to each base, but it still very much remains the original map. The Blood Gulch concept was later reworked into Valhalla for Halo 3, featuring a similar size and layout, but with dramatic changes in the terrain and the base structures. Standoff has been called another Blood Gulch successor, given its similar terrain, but features a different layout. A map called Blood Gulch was included in Halo Wars, and is somewhat accurate to the original, though it lacks the caves, since it would be hard to implement, as the game is a real-time strategy game.
Blood Gulch has also been remade for use as a multiplayer map variant for Forge World in Halo: Reach. It was revealed in a special episode of Red vs. Blue. The bases are ported from Blood Gulch, while the terrain geometry is a direct port from Coagulation, and the general setting of the Forge World map resembles Valhalla. In Halo 4, Valhalla was remade into Ragnarok. In Halo 2: Anniversary, Coagulation was remade into Bloodline.
Halo 5: Guardians features several Forge maps inspired by Blood Gulch. Basin was inspired by both Blood Gulch and Valhalla. Blood Gulch was recreated in the Halo Mash-Up: Minecraft Evolved.[6]
Achievements[edit]
The following achievements can be unlocked on Blood Gulch on Halo: The Master Chief Collection.
| Halo: MCC (Xbox One) | Halo: MCC (Steam) | Title | Unlock requirement | Games |
|---|---|---|---|---|
| Play a Capture the Flag game on Blood Gulch with 4 player splitscreen on the same console. | Halo: The Master Chief Collection |
Trivia[edit]
- Blood Gulch is the only multiplayer map available in the Halo Demo.
- Blood Gulch and Coagulation are the setting for most of the first five seasons of Rooster Teeth's popular web series Red vs. Blue, hence the subtitle of the first five seasons, The Blood Gulch Chronicles.
- Several changes were made to the map with the release of Gearbox Software's port of Halo: Combat Evolved on PC.
- A third bush was added to the middle of the map next to the rocket launcher spawn.
- A floating bush present in the Xbox's version of the map near the rocket launcher spawn was fixed.
- A few small, steep inclines near blue base's teleporter exit were smoothed out.
Gallery[edit]

|
Browse more images in this article's gallery page. |
Sources[edit]
- ^ Halo: Combat Evolved Editing Kit, game file
HCEEK\tags\levels\test\bloodgulch\bloodgulch.scenario - ^ Halo Waypoint Forums, How Did Valhalla Get to Requiem? (Retrieved on Aug 3, 2020) [local archive] [external archive]
- ^ Halo 2, multiplayer map Coagulation
- ^ Halo Wars, multiplayer map Blood Gulch
- ^ Halo Waypoint, Delta Halo (Retrieved on Jun 1, 2020) [archive]
- ^ Halo Waypoint, More Master Chief and Minecraft (Retrieved on Oct 10, 2014) [archive]
| |||||||||||||||||||||||
