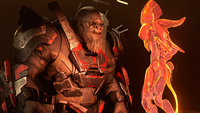
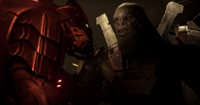
Pelican Down (Halo Infinite level): Difference between revisions
From Halopedia, the Halo wiki
m (→Transcript: Link replacement, replaced: Installation 07 conflict| → Battle for Zeta Halo|) |
m (→Achievements) |
||
| (17 intermediate revisions by 4 users not shown) | |||
| Line 1: | Line 1: | ||
{{Status|Gameplay}} | {{Status|Gameplay}} | ||
{{Title|Pelican Down (''Halo Infinite'' level)}} | {{Title|Pelican Down (''Halo Infinite'' level)}} | ||
{{ | {{disambig header|the campaign mission|other uses of "Pelican Down"|Pelican Down (disambiguation)}} | ||
{{Level infobox | {{Level infobox | ||
|pagegamelabel=HI | |pagegamelabel=HI | ||
| Line 9: | Line 9: | ||
|devname= | |devname= | ||
|name = Pelican Down | |name = Pelican Down | ||
|image = [[File:HINF | |image = [[File:HINF CampaignMenu 8 PelicanDown.png|300px]] | ||
|player = [[John-117]] | |player = [[John-117]] | ||
|date = [[2560#May|May 28, 2560]]{{Ref/Generic|Id=Premiere|[[Halo Infinite Campaign Gameplay Premiere]]}} | |date = [[2560#May|May 28, 2560]]{{Ref/Generic|Id=Premiere|[[Halo Infinite Campaign Gameplay Premiere]]}} | ||
|place = [[Installation 07]] | |place = [[Installation 07]] | ||
|objective = *Destroy the three [[Gorespike cannon]]s | |objective = *Destroy the three [[Kywasky Workshop Gorespike cannon]]s | ||
*Defeat [[Hyperius]] and [[Tovarus]] | *Defeat [[Hyperius]] and [[Tovarus]] | ||
*Find [[Fernando Esparza|the Pilot]] | *Find [[Fernando Esparza|the Pilot]] | ||
| Line 20: | Line 20: | ||
}} | }} | ||
{{Article quote|Eliminate the Banished gun batteries to escape the island and continue your pursuit of the Harbinger.}} | {{Article quote|Eliminate the Banished gun batteries to escape the island and continue your pursuit of the Harbinger.}} | ||
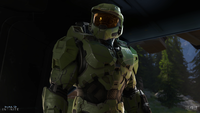
'''Pelican Down''' is the ninth [[campaign]] main mission in ''[[Halo Infinite]]'', under the fourth campaign section "Graveyards". It is a multi-stage mission, which features three [[Gorespike cannon|anti-aircraft gun batteries]] as the main objective. | '''Pelican Down''' is the ninth [[campaign]] main mission in ''[[Halo Infinite]]'', under the fourth campaign section "Graveyards". It is a multi-stage mission, which features three [[Kywasky Workshop Gorespike cannon|anti-aircraft gun batteries]] as the main objective. | ||
==Overview== | ==Overview== | ||
{{Article quote|En route to the second Spire, the Pelican is brought down by [[Banished]] [[Gorespike cannon|anti-aircraft gun batteries]]. [[John-117|Chief]] sets out on foot to disable the guns and is confronted via hologram by [[Escharum]], who reveals that he has sent his best warriors to stop the Chief: the [[Hand of Atriox]], better known to their prey as Spartan Killers. In rapid succession, Chief brings down the AA guns, defeats the Spartan Killers [[Hyperius]] and [[Tovarus]], and retrieves [[Fernando Esparza|the Pilot]] in a graveyard of [[Mulsanne-class light frigate|UNSC ships]]. Reunited, the Pilot, the Weapon, and Master Chief make for the second Spire — and [[ | {{Article quote|En route to the second Spire, the Pelican is brought down by [[Banished]] [[Kywasky Workshop Gorespike cannon|anti-aircraft gun batteries]]. [[John-117|Chief]] sets out on foot to disable the guns and is confronted via hologram by [[Escharum]], who reveals that he has sent his best warriors to stop the Chief: the [[Hand of Atriox]], better known to their prey as Spartan Killers. In rapid succession, Chief brings down the AA guns, defeats the Spartan Killers [[Hyperius]] and [[Tovarus]], and retrieves [[Fernando Esparza|the Pilot]] in a graveyard of [[Mulsanne-class light frigate|UNSC ships]]. Reunited, the Pilot, the Weapon, and Master Chief make for the second Spire — and The [[Harbinger]].}} | ||
Pelican Down relocks the first two open-world areas until it is complete. Thus, the player must make do with what they have, plus any weapons enemies drop and the five Spartan Cores in the "Graveyard" area. Completing Pelican Down unlocks the third and final open-world area. | Pelican Down relocks the first two open-world areas until it is complete. Thus, the player must make do with what they have, plus any weapons enemies drop and the five Spartan Cores in the "Graveyard" area. Completing Pelican Down unlocks the third and final open-world area. | ||
| Line 30: | Line 30: | ||
'''''{Cutscene}''''' | '''''{Cutscene}''''' | ||
''There is a faint ''thud'' and a soft ringing of the ears. As the screen fades in, the pilot is unconscious, leaning forward in his seat. The Chief grabs his shoulder and pulls him back. The pilot regains consciousness with a heavy gasp.'' | |||
*'''Ship AI''': "WARNING. CRITICAL MALFUNCTION. ATTEMPTING RECONSTRUCTION." | *'''Ship AI''': "WARNING. CRITICAL MALFUNCTION. ATTEMPTING RECONSTRUCTION." | ||
| Line 99: | Line 37: | ||
*'''John-117''' ''(calmly)'': "Breathe." | *'''John-117''' ''(calmly)'': "Breathe." | ||
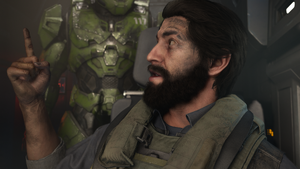
[[File:HINF PelicanDown PilotAngry.png|thumb|300px|The Pilot, angry with the Chief.]] | |||
*'''Pilot''' ''(irritated)'': "No! You don't get to tell me what to do! You don't get to tell me anything! We're..." | *'''Pilot''' ''(irritated)'': "No! You don't get to tell me what to do! You don't get to tell me anything! We're..." | ||
| Line 144: | Line 82: | ||
''The pilot turns to point.'' | ''The pilot turns to point.'' | ||
*'''Pilot''': "I ''know'' I saw [[Condor]] | *'''Pilot''': "I ''know'' I saw [[D80 Condor|Condors]] over there." | ||
''He pivots back around, clenching his fist.'' | ''He pivots back around, clenching his fist.'' | ||
*'''Pilot''': "I'm going to dig through them and find one with a working [[Slipspace drive]], and when you're done with | *'''Pilot''': "I'm going to dig through them and find one with a working [[Slipspace drive]], and when you're done with [[Battle for Zeta Halo|this war]], we'll get away from [[Installation 07|here]]." | ||
''The Pelican's bay doors open. Light floods the troop bay.'' | ''The Pelican's bay doors open. Light floods the troop bay.'' | ||
| Line 159: | Line 97: | ||
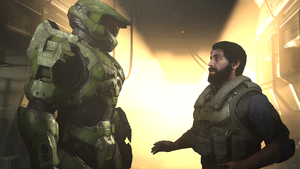
*'''Pilot''': "Woah, woah. Please." | *'''Pilot''': "Woah, woah. Please." | ||
[[File:HINF PelicanDown Chief&PilotTalk.png|thumb|300px|The Pilot bargains with the Chief.]] | |||
''He lets go of the Chief's arm.'' | ''He lets go of the Chief's arm.'' | ||
| Line 219: | Line 157: | ||
*'''Weapon''': "They call this security? Please. Hold tight, I'll handle it." | *'''Weapon''': "They call this security? Please. Hold tight, I'll handle it." | ||
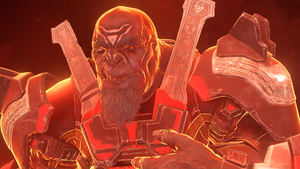
[[File:HINF Pelican Down Escharum hologram.png|thumb|300px|Escharum taunts the Chief.]] | |||
''An alarm inside the gun suddenly blares. The doors all slam shut. The local topographic map behind the console changes into a hologram of [[Escharum]].'' | ''An alarm inside the gun suddenly blares. The doors all slam shut. The local topographic map behind the console changes into a hologram of [[Escharum]].'' | ||
| Line 230: | Line 168: | ||
''He chuckles cruelly.'' | ''He chuckles cruelly.'' | ||
*'''Escharum (hologram)''': "We are one step ahead! Always! The Ring is already under our control! Soon, the [[Silent Auditorium (location)|Auditorium]] as well. [[ | *'''Escharum (hologram)''': "We are one step ahead! Always! The Ring is already under our control! Soon, the [[Silent Auditorium (location)|Auditorium]] as well. The [[Harbinger]] and the Banished share the same goal! We fight together to honor the will of [[Atriox]]! But..." | ||
''He turns away.'' | ''He turns away.'' | ||
| Line 384: | Line 322: | ||
*'''Weapon''': "Chief! We've got... well, a lot. See that [[Chopper]]? I guess that's [[Hyperius|one of the Spartan Killers]]." | *'''Weapon''': "Chief! We've got... well, a lot. See that [[Chopper]]? I guess that's [[Hyperius|one of the Spartan Killers]]." | ||
''A [[Gydrozka Workshop Breaching Pod]] lands on top of a wrecked frigate. A heavily armored Jiralhanae armed with a [[Scrap Cannon]] emerges.'' | ''A [[Gydrozka Workshop Breaching Pod]] lands on top of a wrecked frigate. A heavily armored Jiralhanae armed with a [[Grenflekt Workshop Scrap Cannon]] emerges.'' | ||
*'''Weapon''': "And there's [[Tovarus|the other one]]. Up there in the wreckage! You need to stop them!" | *'''Weapon''': "And there's [[Tovarus|the other one]]. Up there in the wreckage! You need to stop them!" | ||
| Line 411: | Line 349: | ||
*'''John-117''': "Let him. Echo 216?" | *'''John-117''': "Let him. Echo 216?" | ||
''If the Chief kills both Spartan Killers quickly'' | |||
*'''Weapon''':"You call them Spartan Killers? You make it look easy." | |||
*'''Chief''': "It was. Echo-216?" | |||
''No answer.'' | ''No answer.'' | ||
| Line 419: | Line 363: | ||
'''{''Cutscene''}''' | '''{''Cutscene''}''' | ||
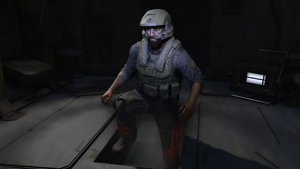
[[File:HINF PelicanDown PilotEmerges.png|thumb|300px|The pilot, wearing a helmet, climbs out from the hatch in the floor.]] | |||
''Scene slowly zooms in on the inside of the Condor's wreck. A hatch in the floor opens up, and the Pilot, now wearing a helmet, climbs out.'' | ''Scene slowly zooms in on the inside of the Condor's wreck. A hatch in the floor opens up, and the Pilot, now wearing a helmet, climbs out.'' | ||
| Line 445: | Line 389: | ||
*'''Pilot''': "And over there is another. Shattered and cratered over a kilometer." | *'''Pilot''': "And over there is another. Shattered and cratered over a kilometer." | ||
[[File:HINF PelicanDown PilotPointing.png|thumb|300px|The Pilot pointing at a Condor.]] | |||
''He turns and points at the Condor the Chief found him in.'' | ''He turns and points at the Condor the Chief found him in.'' | ||
| Line 489: | Line 433: | ||
''The Chief approaches and drops to one knee beside him.'' | ''The Chief approaches and drops to one knee beside him.'' | ||
[[File:HINF Pelican Down J117 Esparza.png|thumb|300px|The Chief bonds with the Pilot.]] | |||
*'''Pilot''': ''(still sobbing)'' "You should leave me here with the rest of the garbage." | *'''Pilot''': ''(still sobbing)'' "You should leave me here with the rest of the garbage." | ||
| Line 544: | Line 488: | ||
*'''Pilot''': "So. What's the plan? Let me guess. It's dangerous and is probably going to get us killed." | *'''Pilot''': "So. What's the plan? Let me guess. It's dangerous and is probably going to get us killed." | ||
''There's a sudden booming sound. Scene shifts to the right. In the distance, a [[ | ''There's a sudden booming sound. Scene shifts to the right. In the distance, a [[Beacon tower|beam of blue energy]] streaks up into the sky.'' | ||
*'''Pilot''': "Huh." | *'''Pilot''': "Huh." | ||
| Line 593: | Line 537: | ||
*'''Harbinger (hologram)''': "The Reformation is controlled from [[Command Spire (location)|this Spire]]. It must be protected." | *'''Harbinger (hologram)''': "The Reformation is controlled from [[Command Spire (location)|this Spire]]. It must be protected." | ||
[[File:HINF Escharum Harbinger Spire.png|thumb|300px|Escharum and the Harbinger prepare for the Reformation.]] | |||
''Escharum acquiesces to her instructions. He enters a few commands into the holotable. Banished Phantoms and deployable structures materialize around the Spire.'' | ''Escharum acquiesces to her instructions. He enters a few commands into the holotable. Banished Phantoms and deployable structures materialize around the Spire.'' | ||
| Line 644: | Line 588: | ||
|[[Brothers Grim]] | |[[Brothers Grim]] | ||
|Took down the Spartan Killers Hyperius and Tovarus. | |Took down the Spartan Killers Hyperius and Tovarus. | ||
|-align="center" | |||
|[[File:HINF Achievement GunRunner.png|114px]] | |||
|[[File:HINF Achievement Gameplay Steam.jpg|64px]] | |||
|[[Gun Runner]] | |||
|Take down all three Banished AA guns in under 20 minutes. | |||
|} | |} | ||
==Collectibles== | |||
*'''Audio logs''' (8): [[Audio log (Halo Infinite)/Banished/Escharum/05|Escharum's Testimony 05 - Reformation]], [[Audio log (Halo Infinite)/Banished/Escharum/06|Escharum's Testimony 06 - Home]], [[Audio log (Halo Infinite)/Banished/Escharum/07|Escharum's Testimony 07 - Loyalty]], [[Audio log (Halo Infinite)/Spartan/Reverie/02|Reverie 02 - Debrief]], [[Audio log (Halo Infinite)/Spartan/Retaliation/01|Retaliation 01 - The Mission]], [[Audio log (Halo Infinite)/Spartan/Retaliation/02|Retaliation 02 - Those Left Behind]], [[Audio log (Halo Infinite)/Spartan/Retaliation/03|Retaliation 03 - Confrontation]], [[Audio log (Halo Infinite)/Spartan/Retaliation/04|Retaliation 04 - Reverie's End]] | |||
*'''Mjolnir armory lockers''' (1): [[Weapon customization#Mjolnir Locker|Warmaster's Prize Battle Rifle coating]] | |||
*'''[[Spartan core]]s''' (5) | |||
==Production notes== | ==Production notes== | ||
| Line 658: | Line 613: | ||
<gallery> | <gallery> | ||
File:HINF ChiefandPilotTalking.png|John and Esparza in the Pelican troop bay. | File:HINF ChiefandPilotTalking.png|John and Esparza in the Pelican troop bay. | ||
File:HINF ChiefDemo.png|Chief prepares to exit the Pelican. | |||
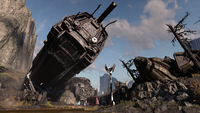
File:HINF UnknownWreckage.png|A view of a {{Class|Mulsanne|light frigate}} wreckage. | File:HINF UnknownWreckage.png|A view of a {{Class|Mulsanne|light frigate}} wreckage. | ||
File:HINF PilotLookingatWreckage.png|Esparza looking out | File:HINF DropPod Brute.png|A Jiralhanae Captain emerges from a drop pod. | ||
File:HINF PilotLookingatWreckage.png|Esparza looking out at a destroyed Condor. | |||
File:HINF XGS2020 TACMAP 2.png|A early version of the [[TACMAP]] view of the area. | File:HINF XGS2020 TACMAP 2.png|A early version of the [[TACMAP]] view of the area. | ||
</gallery> | |||
===Screenshots=== | |||
<gallery> | |||
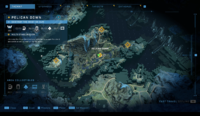
File:HINF Pelican Down TACMap final version.png|[[TACMAP]] shows the locations of the three AA cannons. | |||
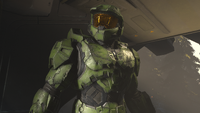
File:HINF PelicanDown Chief.png|The Chief looks at the Pilot before leaving the Pelican. | |||
File:HINF Pelican Down Chief heads out.png|The Chief heads out to deal with the Gorespike cannons. | |||
File:HINF MulsanneWreckBow.png|A view of a {{Class|Mulsanne|light frigate}} wreckage. | |||
File:HINF Pelican Down ship graveyard.png|The Chief moves through the ship graveyard. | |||
File:HINF PelicanDown BanishedElevator.png|A Banished fortification underneath the western Gorespike. | |||
File:HINF PelicanDown DropPods.png|Banished drop pods are deployed. | |||
File:HINF Pelican Down western gun approach.png|Approaching the western Gorespike. | |||
File:HINF Pelican Down western gun shade no shields.png|The Chief eliminates the Banished guarding the western cannon. | |||
File:HINF Pelican Down gorespike interior.png|Inside the Gorespike cannon. | |||
File:HINF Pelican Down Weapon hacks gorespike.png|The Weapon hacks the Gorespike. | |||
File:HINF Pelican Down generator exposed.png|The Gorespike's power generator is exposed. | |||
File:HINF Pelican Down generator destroyed.png|The power generator is destroyed. | |||
File:HINF Pelican Down western gun destroyed.png|The western Gorespike explodes. | |||
File:HINF Pelican Down east gun approach.png|Approaching the eastern Gorespike. | |||
File:HINF Pelican Down east gun grav controls.png|The controls for the eastern Gorespike's gravity lift. | |||
File:HINF Pelican Down east gun grav lift.png|The eastern Gorespike's gravity lift activated. | |||
File:HINF Pelican Down east gun destroyed.png|The eastern Gorespike is destroyed. | |||
File:HINF Pelican Down north gun approach.png|Approaching the northern Gorespike. | |||
File:HINF Pelican Down north gun grav controls.png|The controls for the northern Gorespike's gravity lift. | |||
File:HINF Pelican Down north gun grav lift.png|The northern Gorespike's gravity lift activated. | |||
File:HINF Pelican Down north gun destroyed.png|The northern Gorespike is destroyed. | |||
File:HINF Hyperius.png|Hyperius on foot. | |||
File:HINF HyperiusAndChopper.jpg|Hyperius in his customized Chopper. | |||
File:HINF Chief Hijacks Hyperius.png|The Chief hijacks Hyperius' Chopper. | |||
File:HINF TovarusCannon.jpg|Tovarus aims his scrap cannon. | |||
File:HINF Pelican Down Tovarus battle.png|Tovarus in combat. | |||
File:HINF Pelican Down finding pilot.png|The Chief finds Esparza after defeating Hyperius and Tovarus. | |||
File:HINF PelicanDown PilotDistraught.png|Esparza feeling distraught having found no slipspace drives. | |||
File:HINF PelicanDown PilotOurburst.png|Esparza has an outburst at the Chief. | |||
File:HINF Fernando John.png|John-117 talking to Esparza. | |||
File:HINF Pelican Down John Weapon Esparza.png|John-117 and the Weapon give Esparza encouragment. | |||
File:HINF PelicanDown Escharum&Harbinger.png|Escharum speaking to the Harbinger. | |||
File:HINF Pelican Down Escharum Jega.png|Escharum instructs Jega 'Rdomnai. | |||
</gallery> | </gallery> | ||
==Sources== | ==Sources== | ||
{{Ref/List}} | {{Ref/List}} | ||
{{Levels/HI}} | {{Levels/HI}} | ||
[[Category:Halo Infinite campaign]] | [[Category:Halo Infinite campaign]] | ||
Revision as of 19:06, January 1, 2025
|
Prev: |
|
|
Next: |
|
| Pelican Down | |
|---|---|
| |
|
Game: |
|
|
Player: |
|
|
Date: |
|
|
Location: |
|
|
Objective(s): |
|
 |
Halopedia doesn't currently have a walkthrough for this level; could you write one? |
| “ | Eliminate the Banished gun batteries to escape the island and continue your pursuit of the Harbinger. | ” |
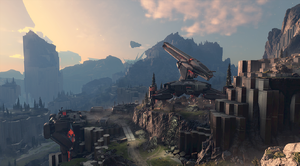
Pelican Down is the ninth campaign main mission in Halo Infinite, under the fourth campaign section "Graveyards". It is a multi-stage mission, which features three anti-aircraft gun batteries as the main objective.
Overview
| “ | En route to the second Spire, the Pelican is brought down by Banished anti-aircraft gun batteries. Chief sets out on foot to disable the guns and is confronted via hologram by Escharum, who reveals that he has sent his best warriors to stop the Chief: the Hand of Atriox, better known to their prey as Spartan Killers. In rapid succession, Chief brings down the AA guns, defeats the Spartan Killers Hyperius and Tovarus, and retrieves the Pilot in a graveyard of UNSC ships. Reunited, the Pilot, the Weapon, and Master Chief make for the second Spire — and The Harbinger. | ” |
Pelican Down relocks the first two open-world areas until it is complete. Thus, the player must make do with what they have, plus any weapons enemies drop and the five Spartan Cores in the "Graveyard" area. Completing Pelican Down unlocks the third and final open-world area.
Transcript
{Cutscene}
There is a faint thud and a soft ringing of the ears. As the screen fades in, the pilot is unconscious, leaning forward in his seat. The Chief grabs his shoulder and pulls him back. The pilot regains consciousness with a heavy gasp.
- Ship AI: "WARNING. CRITICAL MALFUNCTION. ATTEMPTING RECONSTRUCTION."
- Pilot (angrily): "No! Get...! No! You! I can't! Stand this! Oh, you are...!"
- John-117 (calmly): "Breathe."
- Pilot (irritated): "No! You don't get to tell me what to do! You don't get to tell me anything! We're..."
- Ship AI: "079 Reset 18%"
The pilot looks at the Chief.
- Pilot (irritated): "Are you even listening?!"
The Chief is staring out the cockpit window.
- John-117: "I count three anti-aircraft cannons."
- Pilot: "Three what?!"
The Chief turns to leave the cockpit.
- John-117: "You'll be safe here."
- Pilot: (sarcastically) "Oh? I'll be safe?!"
He lets out a mirthless chuckle. The pilot's seat slides back as he unbuckles. He gets out of the seat to follow the Chief to the troop bay.
- Ship AI: "079 Reset 67%"
- Pilot: "Safe?! I haven't been "safe" since I found you! I found you, remember?!"
The camera pans around the Chief to the aft of the troop bay.
- Pilot: "You were out there on your own, and you'd still be there if it wasn't for me! I thought I was going home!"
The camera pans around to face the Chief.
- John-117: "There won't be a home if we don't stop the Banished."
- Ship AI: "079 Reset 100%"
The camera continues around behind the pilot.
- Pilot: "You keep saying that. We're outgunned, outnumbered."
- Ship AI: "Service restored. Attention...(inaudible)"
The pilot turns to point.
- Pilot: "I know I saw Condors over there."
He pivots back around, clenching his fist.
- Pilot: "I'm going to dig through them and find one with a working Slipspace drive, and when you're done with this war, we'll get away from here."
The Pelican's bay doors open. Light floods the troop bay.
- Pilot: "Far away."
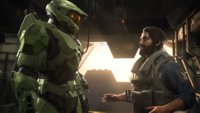
- John-117: "Wait here."
The Chief heads for the exit. The pilot quickly catches up, grabbing the Chief's arm.
- Pilot: "Woah, woah. Please."
He lets go of the Chief's arm.
- Pilot: "Let me see what I can find."
- John-117: "Cannons first. When I get back...we can look. Together."
The pilot lets out a small huff through his nose and walks back towards the cockpit.
- Pilot: "Okay, big guy."
The Pilot retreats back into the Pelican.
{Gameplay}
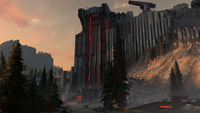
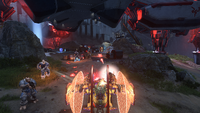
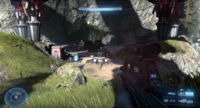
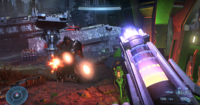
The Banished have set up three anti-aircraft cannons nearby: one to the East, one to the North, and one to the West. The Chief heads out to destroy them in whatever order he chooses. The Western gun is immediately accessible via its gravity lift, but the Northern and Eastern guns need to have their gravity lifts reactivated before the Chief can enter them.
The Chief approaches the Eastern/Northern gun:
- Weapon: "The entrance to this AA gun requires a power source for the grav lift beneath it."
After dealing with the Eastern/Northern gun, the Chief approaches the Northern/Eastern gun:
- Weapon: "As expected. The grav lift to this gun needs to be powered on too. Look for a power source nearby."
The dialogue triggered when the Chief reactivates either the Eastern or Northern gun's gravity lifts differs based on the order he destroys the guns.
If the Chief heads to the Eastern/Northern gun first:
- Weapon: "That's it. The gravity lift is on. Let's get inside and shut this gun down."
If the Chief heads to the Eastern/Northern gun second:
- Weapon: "Second AA gun is open for business. And by open I mean-"
- John-117: "Let's go."
If the Chief heads to the Eastern/Northern gun last:
- Weapon: "There we go. Last gun open."
- John-117: "Let's go fire it."
- Weapon: "So, let me get this straight. It's okay for you to make jokes..."
- John-117: "Correct."
The Chief enters the first gun.
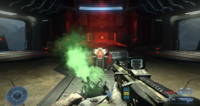
- Weapon: "Plug me in and I'll take care of the cannon."
The Chief deploys the Weapon onto the terminal.
{Cutscene}
The Weapon starts hacking the cannon.
- Weapon: "They call this security? Please. Hold tight, I'll handle it."
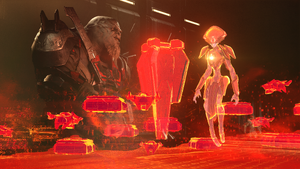
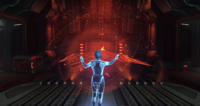
An alarm inside the gun suddenly blares. The doors all slam shut. The local topographic map behind the console changes into a hologram of Escharum.
- Escharum (hologram): "The UNSC lost this war months ago. Your people are broken. Scattered. Hunted. Defeated. By me."
Escharum smirks as he continues.
- Escharum (hologram): "I wish I could tell you it was difficult. But it wasn't."
He chuckles cruelly.
- Escharum (hologram): "We are one step ahead! Always! The Ring is already under our control! Soon, the Auditorium as well. The Harbinger and the Banished share the same goal! We fight together to honor the will of Atriox! But..."
He turns away.
- Escharum (hologram): "But, without challenge, I grew...weary. Lost. Alone. But..."
He smiles and turns to face the Chief again.
- Escharum (hologram): "Here you now stand."
He exhales menacingly.
- Escharum (hologram): "This is my last fight. A true test of legends! Our story will outlive us both."
He growls in anticipation of the coming battle.
- Escharum (hologram): "Set a fire in your heart, Spartan! Bare your fangs! Fight hard. Die well."
The hologram fades.
- Weapon: "Thank you!"
She turns around.
- Weapon: "Chief?"
- John-117: "That word. Auditorium. What is it?"
- Weapon: "I was hoping you'd know the answer to that one. I'm new. Remember?"
She finishes hacking the cannon.
- Weapon: "Okay, I'm done here."
The Chief retrieves her.
{Gameplay}
The AA gun's generator is exposed.
- Weapon: "I've exposed the gun's generator. Destroy it and the fuse is ticking."
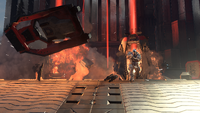
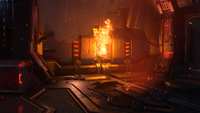
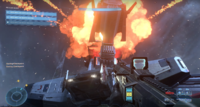
The Chief destroys the generator, setting off a chain reaction. Explosions rock the cannon. The doors open.
- Weapon: "Good. Let's get out of here before the fireworks start."
The Chief jumps out of the cannon and gets to safety. The cannon explodes behind him.
- Pilot (COM): "The Banished are mobilizing in a big way. Clock's ticking, Chief. How much longer?"
- John-117: "One gun down, two more to go."
- Pilot (COM): "We are running out of time."
- Weapon: "The Harbinger and the Banished share the same goal..."
- John-117: "Rebuild the Ring."
- Weapon: "But why?"
- Pilot (COM): (sarcastically) "Maybe they want to go home too."
The Chief reaches the second gun and gets inside. As before, he deploys the Weapon onto the control terminal.
{Cutscene}
- Weapon: "I'm on it. The lockdown's probably going to trigger again...
She starts hacking the cannon.
- Weapon: "...but don't worry, we'll be out of here in-"
The lockdown triggers again. Escharum appears before them via Hologram once more.
- Escharum (hologram): "How many Spartans remain? Do you even know? There would have been fifty at Laconia Station. Maybe more. Such a loss."
He leans forward, pressing a hand to his chest.
- Escharum (hologram): "Do you feel it in your heart? Does it leave a hole?"
He wheezes and looks away.
- Escharum (hologram): "Atriox was my finest recruit." (turns back to the Chief) "He understood sacrifice and when one is necessary." (closes his eyes) "I honor his memory each day." (opens his eyes) "When our enemy rises, we meet their challenge. It is why I created the Hand of Atriox. I found the best. The cruelest. The most efficient killers in the universe... and taught them how to be better. (rasps) My Spartan Killers are coming for you."
He smiles and holds out his arms.
- Escharum (hologram): "It is your time to rise."
The hologram fades.
- Weapon: "Spartan Killers? Really? Everyone is trying to kill you. I'm done here. Now it's your turn."
The Chief retrieves her.
{Gameplay}
As before, the gun's generator is exposed, allowing the Chief to destroy it. The lockdown lifts and the Chief escapes the gun before it explodes.
- Weapon: "Chief, we're being contacted on UNSC channels. Comm signature belongs (pause) to a Spartan Theodore Sorel... the one we found. Dead."
- John-117: "Put it through."
- Hyperius (COM): (mockingly) "Spartan... Spartan... (chuckles menacingly) I know you can hear me. Will you die with honor?"
Hyperius lets out a cruel laugh.
- Hyperius (COM): "I doubt it. You are human. Weak. Pathetic. I will crack your armor. Peel you from your shell. It will not be my first Spartan blood. (inhales) But it will be the sweetest."
The transmission is terminated.
- Pilot (COM): "They're sending a Spartan Killer? Chief... This is crazy. This is crazy. We gotta get out of here. We gotta move!"
- John-117: "Not yet. Hold position."
- Pilot (COM): (frustrated) "When this goes bad... it's on you, Chief. Remember that."
The Chief reaches the last gun, gets inside, and deploys the Weapon onto the control terminal. She starts hacking it.
- Weapon: "Last one. And... cue the lockdown."
She waits but nothing happens this time.
- Weapon: "Huh. No Escharum? I'm almost disappointed."
She finishes hacking the gun.
- Weapon: "Almost. All set. Let's get back to the Pelican. We did it!"
The Chief retrieves her, destroys the exposed generator, and escapes while the final cannon explodes behind him.
- Weapon: "There's a repeated message across all Banished frequencies. The first part is Hand of Atriox..."
- John-117: "And then what?"
- Weapon: (concerned) "Deploy."
- Pilot (COM): "Chief. Where are you?"
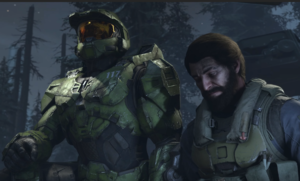
- John-117: "Hold position. We're on our way."
- Pilot (COM): "I'm sorry, Chief... I can't stay."
- Weapon: "I've lost his signal. If the Spartan Killers find him..."
- John-117: "That won't happen."
- Weapon: "How can you be sure?"
- John-117: "Because they'll need to go through me first."
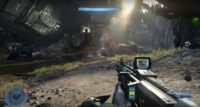
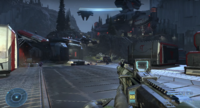
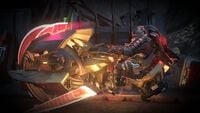
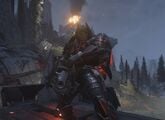
The Chief heads back to the Pelican's crash site. Multiple Banished troops have already arrived. Among them is a Jiralhanae on a customized Chopper.
- Weapon: "Chief! We've got... well, a lot. See that Chopper? I guess that's one of the Spartan Killers."
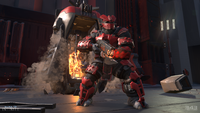
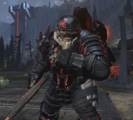
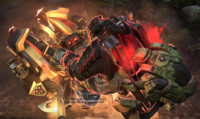
A Gydrozka Workshop Breaching Pod lands on top of a wrecked frigate. A heavily armored Jiralhanae armed with a Grenflekt Workshop Scrap Cannon emerges.
- Weapon: "And there's the other one. Up there in the wreckage! You need to stop them!"
Hyperius and Tovarus are no ordinary Brutes, and they prove themselves to be formidable opponents.
If the Chief kills Hyperius first:
- Tovarus: "The coward deserved what he got! Now face me, Spartan!"
If the Chief kills Tovarus first:
- Hyperius: "Brother! I'll kill you slowly for that, Spartan!"
More Banished drop pods are deployed to reinforce the surviving brother.
- Weapon: "I think you made him mad! Reinforcements inbound!"
Or
- Weapon: "Watch out, Chief! He's calling in backup!"
The Chief finally kills the other Spartan Killer.
- Weapon: "That wasn't easy, was it? What if Escharum sends more?"
- John-117: "Let him. Echo 216?"
If the Chief kills both Spartan Killers quickly
- Weapon:"You call them Spartan Killers? You make it look easy."
- Chief: "It was. Echo-216?"
No answer.
- Weapon: "Nothing. But I think I can... yes. Comms are still offline but I was able to activate his tracking beacon remotely. He's... he's out in the open. The UNSC ship graveyard. I hope he's okay."
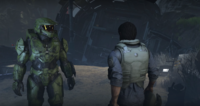
Guided by the Weapon, the Chief tracks the Pilot's signal to a crashed Condor.
{Cutscene}
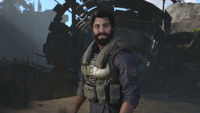
Scene slowly zooms in on the inside of the Condor's wreck. A hatch in the floor opens up, and the Pilot, now wearing a helmet, climbs out.
- Pilot: (disgusted) "Animals..."
He pulls the helmet off.
- Pilot: "Chief, my eyes didn't deceive me back there."
He exits the Condor's wreck and walks right past the Chief, who's waiting for him.
- John-117: "We need to go."
The Pilot ignores him. He turns around and holds up three fingers, before turning back around and continuing to walk away.
- Pilot: "Three UNSC Condors." (holds up one finger) "Seeing one is rare." (holds up three fingers again) "Finding three? It's a miracle. I should have known better."
He stops and points at the wreckage of another Condor.
- Pilot: "Torn apart. Completely gutted." (turns back to the Chief) "Slipspace drives obliterated."
- John-117: "We don't have the time."
The Pilot ignores him and walks a few steps, before stopping to point, helmet still in hand, at a second destroyed Condor.
- Pilot: "And over there is another. Shattered and cratered over a kilometer."
He turns and points at the Condor the Chief found him in.
- Pilot: "And there."
He walks back to the wreckage of the final Condor.
- Pilot: "The last one. All of it."
He turns to the Chief.
- Pilot: (despairing) "Crushed. Broken. Beaten! Useless!"
The Chief steps towards him.
- John-117: "Enough."
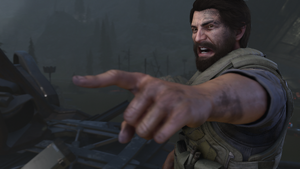
- Pilot: (hysterical) "When? When is it enough, Chief?! When we're in there? Because that's where I belong." (points at the Condor) "In there. With them!"
He flings his helmet into the Condor. His frustration not abated, he walks over to a piece of debris, picks it up, and throws it back down.
- Pilot: "Worthless junk!"
He turns to the Chief, his teeth clenched.
- Pilot: "Not this. I'm not you."
He hangs his head in shame and walks past the Chief.
- Pilot: (on the verge of tears) "I'm not a pilot. I'm not even a soldier, a marine!"
He stands with his back to the Chief, unable to face the Spartan.
- Pilot: "I'm a fraud. I stole that Pelican." (he turns around) "I stole it! You know why?"
The Chief doesn't answer.
- Pilot: "Of course you don't. Have you ever been scared? So scared that you..."
Unable to finish his sentence, the Pilot walks away from the Chief. He kneels down at the edge of the crater containing the wreckage of UNSC ships.
- Pilot: (sobbing) "I'm worthless."
The Chief approaches and drops to one knee beside him.
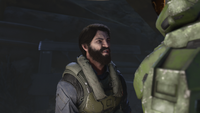
- Pilot: (still sobbing) "You should leave me here with the rest of the garbage."
- John-117: "We all fail. We all make mistakes. It's what makes us human."
- Pilot: (incredulous) "I'm sorry, Chief. But how have you ever failed?"
The Chief hesitates for a moment before answering.
- John-117: "I should have protected Cortana. Stopped everything from going wrong."
The Pilot stares at him in surprise.
- John-117: "I failed her."
He turns to the Pilot.
- John-117: "I will not fail you."
- Weapon: "Chief..."
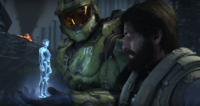
The Weapon's avatar appears in the palm of the Chief's hand.
- Weapon: (to the Pilot) "We...we're going to make it."
- Pilot: (turning away) "I..."
- Weapon: "We have to."
The Pilot looks back at them.
- Pilot: "...this is all I've got."
- John-117: "It's all we need. Our only way home is straight through the heart of the Banished."
- Weapon: "We need you."
- John-117: "We can fix this."
- Weapon: "Together."
Her avatar disappears. The Chief stands back up. He waits for the Pilot to do the same.
Scene focuses in on the Pilot, as he makes his decision.
- Pilot: "Of course we can."
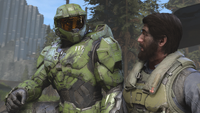
The Chief holds out his hand. The Pilot takes it and gets back to his feet.
- Pilot: "Together."
Having regained his composure, the Pilot puts his hands on his hips and sighs.
- Pilot: "So. What's the plan? Let me guess. It's dangerous and is probably going to get us killed."
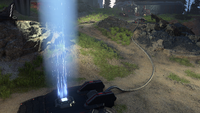
There's a sudden booming sound. Scene shifts to the right. In the distance, a beam of blue energy streaks up into the sky.
- Pilot: "Huh."
Scene shifts back to him.
- Pilot: "I have my answer."
He turns to the Chief and raises a fist.
- Pilot: "Let's do this."
Fade to black.
Open back up on a hologram of the UNSC ship graveyard. Camera slowly pans across the corpses of Hyperius and Tovarus.
- Harbinger: (off-screen) "You are losing control."
Scene pans up to Escharum, who turns away from the holotable. He waves his hand dismissively and the hologram dissolves.
- Escharum: "Nothing is lost."
The Harbinger appears before him via hologram.
- Harbinger (hologram): "Deploy your army!" (clenches her fist) "Descend upon him."
- Escharum: "No. Odds will not break him."
He turns away. The Harbinger turns away as well, contemplating the situation.
- Harbinger (hologram): "The Spartan is not alone."
Surprised, Escharum turns back to her.
- Harbinger (hologram): "There's something here... helping him. Connected to this installation."
His attention captured, Escharum flexes his hand.
- Escharum: "What is it?"
- Harbinger (hologram): "It's remarkably vulnerable..." (she turns to face Escharum) "...but highly intelligent."
- Escharum: (eagerly) "Is it a weakness? Something to exploit?"
- Harbinger (hologram): "We will see."
She waves a hand and the image of a Spire appears before them.
- Harbinger (hologram): "The Reformation is controlled from this Spire. It must be protected."
Escharum acquiesces to her instructions. He enters a few commands into the holotable. Banished Phantoms and deployable structures materialize around the Spire.
- Escharum: "Done."
He points at the Harbinger.
- Escharum: "Atriox believed you to be valuable."
The Spire and the Banished assets disappear from the holotable.
- Escharum: "Prove him correct."
- Harbinger (hologram): "When the Endless are found. And when you have your Ring." (she turns away from him) "Then you will never question my worth and I will never question your judgment."
Her hologram fades. Escharum growls in frustration, before starting to cough and gasp, his age taking its toll on him. Jega 'Rdomnai enters the room and walks up to him.
- Jega 'Rdomnai: "The scent grows stronger. Save your strength."
Escharum turns to the Sangheili Blademaster and places a hand on his shoulder.
- Escharum: "I need something of you, old friend."
- Jega 'Rdomnai: "Anything."
- Escharum: "Bring me the Master Chief... (lets out a throaty rasp) Alive."
Fade to black.
Level ends.
Achievements
The following achievements can be unlocked on Pelican Down across the all editions of Halo Infinite.
| Xbox | Steam | Title | Unlock requirement |
|---|---|---|---|

|

|
One Down... | Destroyed a Banished anti-aircraft gun. |

|

|
Brothers Grim | Took down the Spartan Killers Hyperius and Tovarus. |

|

|
Gun Runner | Take down all three Banished AA guns in under 20 minutes. |
Collectibles
- Audio logs (8): Escharum's Testimony 05 - Reformation, Escharum's Testimony 06 - Home, Escharum's Testimony 07 - Loyalty, Reverie 02 - Debrief, Retaliation 01 - The Mission, Retaliation 02 - Those Left Behind, Retaliation 03 - Confrontation, Retaliation 04 - Reverie's End
- Mjolnir armory lockers (1): Warmaster's Prize Battle Rifle coating
- Spartan cores (5)
Production notes
An in-development version of this level was used in the Halo Infinite Campaign Gameplay Premiere trailer.
Gallery
Development images
Pre-release
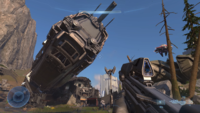
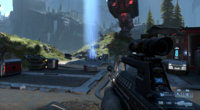
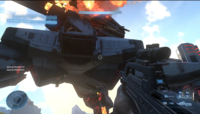
A view of a Mulsanne-class light frigate wreckage.
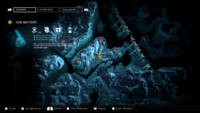
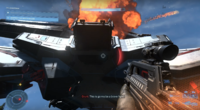
A early version of the TACMAP view of the area.
Screenshots
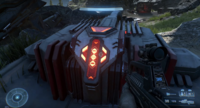
TACMAP shows the locations of the three AA cannons.
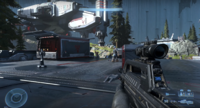
A view of a Mulsanne-class light frigate wreckage.
Sources
