Bastion of the Brutes: Difference between revisions
From Halopedia, the Halo wiki
No edit summary |
|||
| (64 intermediate revisions by 40 users not shown) | |||
| Line 1: | Line 1: | ||
{{ | {{Status|Canon}} | ||
{{Status|Canon}} | |||
{{Base infobox | |||
|image=[[File:H2ABastionOfTheBrutes.png|300px]] | |||
|location=[[Forerunner]] structures, [[Installation 05]] | |||
|purpose=[[Military base]] | |||
|length= | |||
|width= | |||
|height= | |||
|surface= | |||
|armament= | |||
|complement= | |||
|built= | |||
|destroyed= | |||
|usage=[[2552#November|November 3, 2552]] | |||
|usage-title=Repurposed | |||
|controlledby=*[[Forerunner]] [[ecumene]] {{c|formerly}} | |||
*[[Covenant]] | |||
|commander= | |||
*[[Chieftain of the Jiralhanae]] [[Tartarus]]{{Ref/Reuse|TGJ}} | |||
*[[Jiralhanae Chieftain|Chieftain]] [[Avitus]]{{Ref/Reuse|AoR}} | |||
|notable= | |||
}} | |||
The '''Bastion of the Brutes'''{{Ref/Book|Id=H2SG|Halo 2: The Official Strategy Guide|Page=152}}{{Ref/Book|Id=AoR|Halo: Age of Retribution}} was a major [[Covenant]] base during the [[Battle of Installation 05]], located in a [[Forerunner]] complex near the [[Installation 05|Installation]]'s [[Control Room]]. The [[Jiralhanae encampment]] was located nearby, in another set of Forerunner structures.{{Ref/Level|Id=TGJ|H2|The Great Journey}} | |||
==Layout== | ==Layout== | ||
The Bastion of the Brutes consisted of six sections | The Bastion of the Brutes consisted of six sections; an entrance tunnel, a two-leveled room, a massive indoor and outdoor bridge, a prison facility, and a landing pad. | ||
==History== | |||
{{Main|Battle of Installation 05}} | |||
During the [[Battle of Installation 05]], the structure was one of many in the region to be occupied by Covenant forces preparing to fire the Halo. Owing to the name, the bastion was predominantly occupied by [[Jiralhanae]] "Brute" forces under the command of [[Jiralhanae Chieftain|Chieftain]] [[Avitus]]. At the outset of the [[Great Schism]], Avitus and his Jiralhanae troops were ordered to begin rounding up the [[Sangheili High Councilor]]s who were on Delta Halo's surface to observe Halo's firing to ensure that the [[Prophet of Truth]]'s coup of the Covenant would be successful. In the early stages of the fighting, Avitus was successful in rounding up two High Councilors alongside a pair of Sangheili-allied [[Mgalekgolo]], whom he intended to interrogate. Among the councilors was [[Raas 'Yajadai]], who was deposited into his cell with only a [[Okarda'phaa-pattern plasma rifle|plasma rifle]] - with the note that he could use it to commit suicide in dishonour, or wait for Avitus' return to be executed.{{Ref/Reuse|AoR}} A number of captured [[human]]s were also held at the facility including Sergeant Major [[Avery Johnson]], Master Sergeant [[Marcus Stacker]], and a handful of other [[UNSC Marine Corps|UNSC Marines]].{{Ref/Reuse|TGJ}} | |||
This return never took place. Amidst the confusion of the erupting civil war, [[Arbiter]] [[Thel 'Vadam]]ee was able to lead a Sangheili force through the nearby [[Jiralhanae encampment]]s, taking the fight to the Brutes.{{Ref/Level|H2|Uprising}} Their assault was stopped short due to an inability to access the control room - with [[Rtas 'Vadum]]ee being the one to suggest taking the {{Pattern|Protos|Scarab}} docked at the bastion to assault the control room. 'Vadam's forces fought into the Bastion, recruiting more allied Sangheili and Mgalekgolo along the way, before finally emerging into the holding area to free 'Yajadai and the other prisoners. The group then stormed the landing pad, killing the Brutes there and capturing the Scarab and a number of {{Pattern|Oghal|Banshee}}s with which they could assault the control room. In the chaos of the fighting on the landing pad, Sergeant Johnson escaped his Brute captors and climbed into the Scarab, gaining a powerful leverage against his potential Sangheili enemies. Luckily for both sides, however, he and the Arbiter were able to strike a mutual peace in recognition of their [[Tartarus|much greater shared enemy]]. The peace struck on the landing pad of the bastion was ultimately the foundation for the continued [[Covenant separatists|separatist]]-[[United Nations Space Command|UNSC]] alliance that would see the war to its end, and later the basis for the [[Swords of Sanghelios]]' longer-term cooperation with the UNSC in the ensuing [[Post-Covenant War conflicts|post-war era]].{{Ref/Reuse|TGJ}} | |||
The | |||
The | ==Production notes== | ||
The bastion is not formally named in ''[[Halo 2]]'' itself, only being named in ''[[Halo 2: The Official Strategy Guide]]''.{{Ref/Reuse|H2SG}} In the book, the bastion is named twice on the same page, once referred to offhand as "''the last bastion of the Brutes''" and then again more formally as a proper noun for the title of the second section of the page. The name was later formally adopted and referenced in canon in the [[Halo Waypoint Chronicle]] ''[[Halo: Age of Retribution]]''.{{Ref/Reuse|AoR}} | |||
The | ==Trivia== | ||
The thirteenth [[Terminal (Halo 2: Anniversary)|Terminal]] in ''Halo 2: Anniversary'' can be found in the prison. | |||
===Prison | ==Gallery== | ||
<gallery> | |||
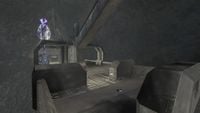
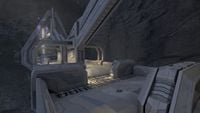
File:HTMCC-H2 Bastion of the Brutes Bridge.jpg|The outdoor bridge overlooking the control room in ''Halo 2''. | |||
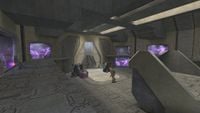
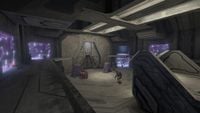
File:HTMCC-H2 Bastion of the Brutes Prison.jpg|The prison with Jiralhanae guards in ''Halo 2''. | |||
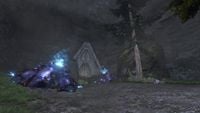
File:HTMCC-H2A Bastion of the Brutes Entrance.jpg|The ground floor entrance of the structure in ''Halo 2: Anniversary''. | |||
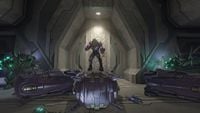
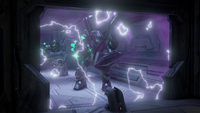
File:HTMCC-H2A SpecOps Sangheili and Mgalekgolo.jpg|A Sangheili and Mgalekgolo in the structure. | |||
File:HTMCC-H2A Bastion of the Brutes Bridge.jpg|The outdoor bridge overlooking the control room in ''Halo 2: Anniversary''. | |||
File:HTMCC-H2A Bastion of the Brutes Prison.jpg|The prison with Jiralhanae guards in ''Halo 2: Anniversary''. | |||
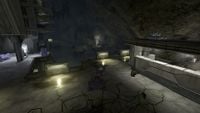
File:HTMCC-H2A Bastion of the Brutes Cavern.jpg|The indoor bridge in the cavern in ''Halo 2: Anniversary''. | |||
File:H2A-ImprisonedMgalekgolo.png|thumb|Two Mgalekgolo imprisoned by the Jiralhanae in ''Halo 2: Anniversary'' | |||
File:HTMCC-H2A Sangheili Councillor Breakout.jpg|A Sangheili Councilor breaking free another Councilor in ''Halo 2: Anniversary''. | |||
File:HTMCC-H2A Marines Execution.jpg|Jiralhanae about to execute UNSC prisoners at the landing pad before Sangheili forces intervene in ''Halo 2: Anniversary''. | |||
</gallery> | |||
==List of appearances== | |||
*''[[Halo 2]]'' {{1st}} | |||
*''[[Halo 2: Anniversary]]'' | |||
*''[[Halo: Age of Retribution]]'' | |||
== | ==Sources== | ||
{{Ref/Sources}} | |||
[[Category: | [[Category:Installation 05 locations]] | ||
[[Category:Military bases]] | |||
Latest revision as of 09:57, December 30, 2024
| Bastion of the Brutes | |
|---|---|
| |
| Facility information | |
|
Location: |
Forerunner structures, Installation 05 |
|
Purpose: |
|
| Historical information | |
|
Repurposed: |
|
|
Controlled by: |
|
|
Known commander(s): |
|
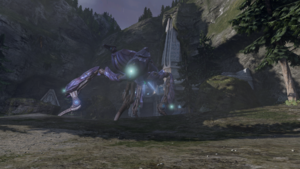
The Bastion of the Brutes[3][2] was a major Covenant base during the Battle of Installation 05, located in a Forerunner complex near the Installation's Control Room. The Jiralhanae encampment was located nearby, in another set of Forerunner structures.[1]
Layout[edit]
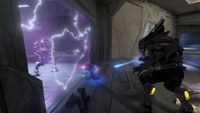
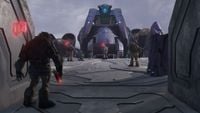
The Bastion of the Brutes consisted of six sections; an entrance tunnel, a two-leveled room, a massive indoor and outdoor bridge, a prison facility, and a landing pad.
History[edit]
- Main article: Battle of Installation 05
During the Battle of Installation 05, the structure was one of many in the region to be occupied by Covenant forces preparing to fire the Halo. Owing to the name, the bastion was predominantly occupied by Jiralhanae "Brute" forces under the command of Chieftain Avitus. At the outset of the Great Schism, Avitus and his Jiralhanae troops were ordered to begin rounding up the Sangheili High Councilors who were on Delta Halo's surface to observe Halo's firing to ensure that the Prophet of Truth's coup of the Covenant would be successful. In the early stages of the fighting, Avitus was successful in rounding up two High Councilors alongside a pair of Sangheili-allied Mgalekgolo, whom he intended to interrogate. Among the councilors was Raas 'Yajadai, who was deposited into his cell with only a plasma rifle - with the note that he could use it to commit suicide in dishonour, or wait for Avitus' return to be executed.[2] A number of captured humans were also held at the facility including Sergeant Major Avery Johnson, Master Sergeant Marcus Stacker, and a handful of other UNSC Marines.[1]
This return never took place. Amidst the confusion of the erupting civil war, Arbiter Thel 'Vadamee was able to lead a Sangheili force through the nearby Jiralhanae encampments, taking the fight to the Brutes.[4] Their assault was stopped short due to an inability to access the control room - with Rtas 'Vadumee being the one to suggest taking the Protos-pattern Scarab docked at the bastion to assault the control room. 'Vadam's forces fought into the Bastion, recruiting more allied Sangheili and Mgalekgolo along the way, before finally emerging into the holding area to free 'Yajadai and the other prisoners. The group then stormed the landing pad, killing the Brutes there and capturing the Scarab and a number of Oghal-pattern Banshees with which they could assault the control room. In the chaos of the fighting on the landing pad, Sergeant Johnson escaped his Brute captors and climbed into the Scarab, gaining a powerful leverage against his potential Sangheili enemies. Luckily for both sides, however, he and the Arbiter were able to strike a mutual peace in recognition of their much greater shared enemy. The peace struck on the landing pad of the bastion was ultimately the foundation for the continued separatist-UNSC alliance that would see the war to its end, and later the basis for the Swords of Sanghelios' longer-term cooperation with the UNSC in the ensuing post-war era.[1]
Production notes[edit]
The bastion is not formally named in Halo 2 itself, only being named in Halo 2: The Official Strategy Guide.[3] In the book, the bastion is named twice on the same page, once referred to offhand as "the last bastion of the Brutes" and then again more formally as a proper noun for the title of the second section of the page. The name was later formally adopted and referenced in canon in the Halo Waypoint Chronicle Halo: Age of Retribution.[2]
Trivia[edit]
The thirteenth Terminal in Halo 2: Anniversary can be found in the prison.
Gallery[edit]
List of appearances[edit]
- Halo 2 (First appearance)
- Halo 2: Anniversary
- Halo: Age of Retribution
