
Halo 3 manual: Difference between revisions
From Halopedia, the Halo wiki
KoalaPhoenix (talk | contribs) No edit summary Tag: Mobile edit |
|||
| (20 intermediate revisions by 9 users not shown) | |||
| Line 1: | Line 1: | ||
{{ | {{Status|RealWorld}} | ||
{{Title|''Halo 3'' | {{Title|''Halo 3'' manual}} | ||
{{Under | {{Under construction}} | ||
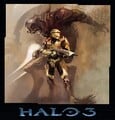
[[File:H3 ManualCover 2 Concept 6.jpg|thumb|250px]] | |||
The '''''Halo 3'' manual''' is a publication by [[Bungie Studios]] that accompanies all copies of ''[[Halo 3]]''. It serves as an introduction to ''[[Halo 3]]'', revealing characters, weaponry, controls, and further. | |||
==Sections of the manual== | |||
==Sections of the | |||
The manual has 33 pages. It is divided into a number of sections. | The manual has 33 pages. It is divided into a number of sections. | ||
| Line 66: | Line 66: | ||
===Heads-Up Display (HUD)=== | ===Heads-Up Display (HUD)=== | ||
This section describes the different components of the heads-up display, as well as their functions. | This section describes the different components of the heads-up display, as well as their functions. It details Grenades, Equipment, Shields, Motion Tracker, Waypoint, Weapons and Ammo/Charge, and Multiplayer Information. | ||
===Characters=== | ===Characters=== | ||
| Line 223: | Line 223: | ||
<div class="tabcontainer"> | <div class="tabcontainer"> | ||
<div class="tabbox"> | <div class="tabbox"> | ||
<div class="tab">Pistol* M6G</div> | <div class="tab">Pistol* | ||
M6G</div> | |||
12 Rounds/Magazine | 12 Rounds/Magazine | ||
</div> | </div> | ||
<div class="tabbox"> | <div class="tabbox"> | ||
<div class="tab">SUBMACHINE GUN* M7/CASELESS</div> | <div class="tab">SUBMACHINE GUN* | ||
M7/CASELESS</div> | |||
60 Rounds/Magazine | 60 Rounds/Magazine | ||
</div> | </div> | ||
<div class="tabbox"> | <div class="tabbox"> | ||
<div class="tab">ASSAULT RIFLE MA5C ICWS</div> | <div class="tab">ASSAULT RIFLE | ||
MA5C ICWS</div> | |||
32 Rounds/Magazine | 32 Rounds/Magazine | ||
</div> | </div> | ||
<div class="tabbox"> | <div class="tabbox"> | ||
<div class="tab">BATTLE RIFLE BR55HB SR</div> | <div class="tab">BATTLE RIFLE | ||
BR55HB SR</div> | |||
36 Rounds/Magazine | 36 Rounds/Magazine | ||
</div> | </div> | ||
<div class="tabbox"> | <div class="tabbox"> | ||
<div class="tab">SHOTGUN M90A CAWS</div> | <div class="tab">SHOTGUN | ||
M90A CAWS</div> | |||
6 8 Gauge Shells | 6 8 Gauge Shells | ||
</div> | </div> | ||
<div class="tabbox"> | <div class="tabbox"> | ||
<div class="tab">SNIPER RIFLE SRS 99D AM</div> | <div class="tab">SNIPER RIFLE | ||
SRS 99D AM</div> | |||
4 Rounds/Magazine | 4 Rounds/Magazine | ||
</div> | </div> | ||
<div class="tabbox"> | <div class="tabbox"> | ||
<div class="tab">ROCKET LAUNCHER M41 SSR MAV/AW</div> | <div class="tab">ROCKET LAUNCHER | ||
M41 SSR MAV/AW</div> | |||
2 HE Rockets/Launch Assembly | 2 HE Rockets/Launch Assembly | ||
</div> | </div> | ||
<div class="tabbox"> | <div class="tabbox"> | ||
<div class="tab">SPARTAN LASER WAV M6 GGNR</div> | <div class="tab">SPARTAN LASER | ||
WAV M6 GGNR</div> | |||
5 Shots/Charge | 5 Shots/Charge | ||
</div> | </div> | ||
| Line 296: | Line 312: | ||
'''Grenades''' | '''Grenades''' | ||
You can carry a maximum of two of each grenade type at a time. Press Left-Bumper | "You can carry a maximum of two of each grenade type at a time. Press Left-Bumper | ||
to switch between available grenade types when not dual-wielding. | to switch between available grenade types when not dual-wielding." | ||
<div class="tabcontainer"> | <div class="tabcontainer"> | ||
<div class="tabbox"> | <div class="tabbox"> | ||
<div class="tab">Frag Grenade</div> | <div class="tab">Frag Grenade</div> | ||
M9HE-DP Fragmentation | M9HE-DP Fragmentation | ||
Kill Radius: 5m | Kill Radius: 5m | ||
Casualty Radius: 15m | Casualty Radius: 15m | ||
</div> | </div> | ||
| Line 308: | Line 326: | ||
<div class="tab">Plasma Grenade</div> | <div class="tab">Plasma Grenade</div> | ||
Type-1 Antipersonnel | Type-1 Antipersonnel | ||
Kill Radius: 4m | Kill Radius: 4m | ||
Casualty Radius: 12m | Casualty Radius: 12m | ||
</div> | </div> | ||
| Line 314: | Line 334: | ||
<div class="tab">Spike Grenade</div> | <div class="tab">Spike Grenade</div> | ||
Type-2 Antipersonnel | Type-2 Antipersonnel | ||
Kill Radius: 3m | Kill Radius: 3m | ||
Casualty Radius: 11m | Casualty Radius: 11m | ||
</div> | </div> | ||
| Line 321: | Line 343: | ||
'''Support Weapons''' | '''Support Weapons''' | ||
A turret is typically activated by pressing Right-Bumper. A Spartan, however, is strong | "A turret is typically activated by pressing Right-Bumper. A Spartan, however, is strong | ||
enough to tear off these weapons (press B-Button while using the turret) and | enough to tear off these weapons (press B-Button while using the turret) and | ||
use them almost like rifles. When detached, these weapons have limited | use them almost like rifles. When detached, these weapons have limited | ||
ammunition capacity. | ammunition capacity." | ||
<div class="tabcontainer"> | <div class="tabcontainer"> | ||
<div class="tabbox"> | <div class="tabbox"> | ||
<div class="tab">Plasma Cannon</div> | <div class="tab">Plasma Cannon</div> | ||
Type-52 Automatic Plasma Cannon | Type-52 Automatic Plasma Cannon | ||
200 Shots/Charge | 200 Shots/Charge | ||
</div> | </div> | ||
| Line 334: | Line 357: | ||
<div class="tab">Machine Gun</div> | <div class="tab">Machine Gun</div> | ||
AIE-486H HMG | AIE-486H HMG | ||
200 Rounds/Belt | 200 Rounds/Belt | ||
</div> | </div> | ||
| Line 339: | Line 363: | ||
<div class="tab">Missile Pod</div> | <div class="tab">Missile Pod</div> | ||
LAU-65D/SGM-151 | LAU-65D/SGM-151 | ||
8 Guided Missiles/Charger | 8 Guided Missiles/Charger | ||
</div> | </div> | ||
| Line 344: | Line 369: | ||
===Equipment=== | ===Equipment=== | ||
This section covers the equipment usable in the game. | This section covers the equipment usable in the game, giving several examples. | ||
"UNSC and Covenant forces have recently deployed powerful new combat | |||
equipment to all fronts in the war. Once you pick up a piece of equipment, | |||
you can activate it by pressing X-Button or swap it with a different piece of | |||
equipment by holding Right-Bumper. Note: Some equipment is activated immediately | |||
upon acquisition. | |||
Here are a few of the many equipment options you’ll encounter in the field:" | |||
<div class="tabcontainer"> | |||
<div class="tabbox"> | |||
<div class="tab">Bubble Shield</div> | |||
This globular local-radius energy shield deflects all projectile | |||
weapons and thrown grenades. Its effect is short-lived, and it can | |||
be penetrated by simply walking through its field. The generator | |||
itself is very fragile once deployed. | |||
</div> | |||
<div class="tabbox"> | |||
<div class="tab">Trip Mine</div> | |||
This pressure-sensitive explosive can be set off by any contact with | |||
a physical object or by close contact with vehicular gravitational or | |||
energy fields. Trip Mine explosive power is significant, and mines | |||
should be handled with extreme caution. | |||
</div> | |||
<div class="tabbox"> | |||
<div class="tab">Grav Lift</div> | |||
This basic tool use of the gravity field generators found on Covenant | |||
vehicles provides a short-range lift allowing the easy vertical elevation of beings, objects, and even vehicles. | |||
</div> | |||
</div> | |||
===Vehicles=== | ===Vehicles=== | ||
This section covers the UNSC and Covenant vehicles found in the game. | This section covers the UNSC and Covenant vehicles found in the game. | ||
====UNSC Vehicles==== | |||
<div class="tabcontainer"> | |||
<div class="tabbox"> | |||
<div class="tab">Mongoose</div> | |||
Crew: 2 | |||
Weaponry: No Armament | |||
</div> | |||
<div class="tabbox"> | |||
<div class="tab">Warthog LRV/LAAV</div> | |||
Crew: 2 (+ 1 gunner) | |||
Weaponry: Variable | |||
</div> | |||
<div class="tabbox"> | |||
<div class="tab">Scorpion</div> | |||
Crew: 1 (+ 1 gunner and 4 jumpseats) | |||
Weaponry: 90mm High-Velocity Cannon, | |||
7.62mm Machine Gun | |||
</div> | |||
<div class="tabbox"> | |||
<div class="tab">Hornet</div> | |||
Crew: 1 (+ 2 jumpseats) | |||
Weaponry: 2 Class-2 Guided Munitions | |||
Launch Systems | |||
</div> | |||
<div class="tabbox"> | |||
<div class="tab">Pelican</div> | |||
Crew: 1 (+ 10 in cargo hold) | |||
Weaponry: Variable | |||
</div> | |||
</div> | |||
====Covenant Vehicles==== | |||
<div class="tabcontainer"> | |||
<div class="tabbox"> | |||
<div class="tab">Ghost</div> | |||
Crew: 1 | |||
Weaponry:Twin Plasma Cannons | |||
(100–250 kW range) | |||
</div> | |||
<div class="tabbox"> | |||
<div class="tab">Shade</div> | |||
Crew: 1 | |||
Weaponry: 2 Class-2 Energy | |||
</div> | |||
<div class="tabbox"> | |||
<div class="tab">Wraith</div> | |||
Crew: 1 (+ 1 gunner) | |||
Weaponry: Plasma Mortar, | |||
Dual Auto-Firing Plasma Cannons | |||
</div> | |||
<div class="tabbox"> | |||
<div class="tab">Banshee</div> | |||
Crew: 1 | |||
Weaponry: 2 Class-2 Energy, | |||
1 Class-2 Projectile | |||
</div> | |||
<div class="tabbox"> | |||
<div class="tab">Phantom</div> | |||
Crew: 1 (+ 2 gunners and 24 in cargo hold) | |||
Weaponry: 3 Class-2 Energy | |||
</div> | |||
</div> | |||
===Basics=== | ===Basics=== | ||
This section covers the basics of playing the game, such as game lobbies and settings. | This section covers the basics of playing the game, such as game lobbies and settings. It details Campaign, Matchmaking, Custom Games, Forge, and Theater, as well as the customization of in-game identity and experience through the Media and Settings functionalities. | ||
===Multiplayer=== | ===Multiplayer=== | ||
This section covers the basics of multiplayer gameplay, such as | This section covers the basics of multiplayer gameplay, such as Matchmaking, Custom Games, and Co-Op. It details the Xbox Live system, System Link connections, the Party system, Voice Communication, Custom Game Variant creation, the Carnage Report, the Spartan Ratings system, File Share, and Campaign Scoring. | ||
===Viewing Films=== | ===Viewing Films=== | ||
This section provides an overview of the Theater mode. | This section provides an overview of the Theater mode, a game film functionality. | ||
===The Forge=== | ===The Forge=== | ||
This section provides an overview of the Forge mode. | This section provides an overview of the Forge mode, a new map editing game mode. | ||
===Bungie.net=== | ===Bungie.net=== | ||
This section provides an overview of Bungie.net. | This section provides an overview of Bungie.net, the official website of Bungie and on-line home for ''Halo 3'' resources. | ||
===Xbox Live=== | ===Xbox Live=== | ||
This section provides an overview of Xbox Live. | This section provides an overview of Xbox Live, including connecting and family settings. | ||
===The Xbox 360 Hard Drive=== | ===The Xbox 360 Hard Drive=== | ||
| Line 378: | Line 506: | ||
==Trivia== | ==Trivia== | ||
*[[Avery Johnson]] appears to have a lighter skin tone than he did in ''[[Halo: Combat Evolved]]'' and ''[[Halo 2]]''. | *[[Avery Johnson]] appears to have a lighter skin tone than he did in ''[[Halo: Combat Evolved]]'' and ''[[Halo 2]]''. | ||
*[[Grunts]], [[Drones]], and [[Jackals]] seem to have had major aesthetic overhauls and the [[Covenant]] name for the [[Prophet]] race, San' Shyuum, has been revealed. | *[[Grunts]], [[Drones]], and [[Jackals]] seem to have had major aesthetic overhauls and the [[Covenant]] name for the [[Prophet]] race, San' Shyuum, has been revealed. | ||
*The [[ | *The [[Type-50 particle beam rifle]] and the [[Type-51 Carbine|Carbine]] have their ammo counts wrong. The Beam Rifle only has 10 shots, instead of 18. The Carbine is claimed to have a 36 round magazine instead of the actual 18 rounds per mag. | ||
*The [[Mauler]], [[Gravity | *The [[Mauler]], [[Gravity hammer (fiction)|gravity hammer]], [[Fuel Rod Gun]], the [[Sentinel Beam]], the [[Flamethrower]], and the [[Orgudam Workshop firebomb]] are missing from the manual. | ||
==Gallery== | |||
===Poster=== | |||
<gallery> | |||
File:H3 PosterController.jpg|The poster included with the manual, showing the game's [[Control schemes|controller layout]]. | |||
File:H3 PosterArbyChief.jpg|The alternate side of the poster, with art by [[:Category:Images by Ashley Wood|Ashley Wood]]. | |||
</gallery> | |||
===Variant 1=== | |||
<gallery> | |||
File:H3 ManualCover 1 Concept 1.jpg|Variant 1 early design. | |||
File:H3 ManualCover 1 Concept 2.jpg|Variant 2 early design. | |||
</gallery> | |||
===Variant 2=== | |||
<gallery> | |||
File:H3 ManualCover 2 Concept 1.jpg|Variant 2 early design. | |||
File:H3 ManualCover 2 Concept 2.jpg|Variant 2 early design. | |||
File:H3 ManualCover 2 Concept 3.jpg|Variant 2 early design. | |||
File:H3 ManualCover 2 Concept 4.jpg|Variant 2 early design. | |||
File:H3 ManualCover 2 Concept 5.jpg|Variant 2 early design. | |||
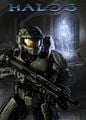
File:H3 ManualCover 2 Concept 6.jpg|Variant 2 final design. | |||
</gallery> | |||
== | ===Variant 3=== | ||
<gallery> | |||
File:H3_ManualCover_3_Concept_1.jpg|Variant 3 early design. | |||
File:H3_ManualCover_3_Concept_2.jpg|Variant 3 final design. | |||
</gallery> | |||
== | ==See also== | ||
Download the PDF versions from [[Xbox.com]]: | Download the PDF versions from [[Xbox.com]]: | ||
*[http://download.microsoft.com/download/F/9/9/F99AB8F0-5191-4EDD-B312-7A9B9E4784FA/Halo3_MNL_EN_PEGI.pdf Manual Download] | *[http://download.microsoft.com/download/F/9/9/F99AB8F0-5191-4EDD-B312-7A9B9E4784FA/Halo3_MNL_EN_PEGI.pdf Manual Download] (Internal backup {{file link|H3 Manual.pdf|here}}) | ||
{{Manual}} | |||
[[Category:Halo 3]] | [[Category:Halo 3]] | ||
[[Category: | [[Category:Game manuals]] | ||
Latest revision as of 00:34, December 5, 2024
| This article is currently under construction and needs to be improved. Please refer to the talk page for more info. You can help by editing the page. |

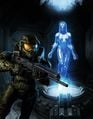
The Halo 3 manual is a publication by Bungie Studios that accompanies all copies of Halo 3. It serves as an introduction to Halo 3, revealing characters, weaponry, controls, and further.
Sections of the manual[edit]
The manual has 33 pages. It is divided into a number of sections.
Introduction[edit]
This section contains health and safety information, as well as a guide to the rating system (differing depending on region).
The Story So Far[edit]
"It is the year 2552. Humanity has long been at war with the terrifying alien civilization that collectively calls itself the Covenant. This monstrous conglomerate of warlike species sees Humanity as a form of heresy against their religion—a religion based in the single-minded belief that a Great Journey awaits its faithful and that this Journey can be embarked upon by firing an array of vast ringlike weapons scattered throughout the galaxy.
"These immense terraformed rings, known as Halos, have been abandoned by their mysterious and long-vanished creators, the Forerunners.
"This conflict, terrible and destructive though it is, has recently been complicated by a series of cascading events. One of these artificial worlds, these Halos, was discovered and subsequently destroyed by Human forces, led by Spartan-117—the Master Chief—the last fighting member of the legendary SPARTAN II military program and Humanity’s last, best hope.
"Conflict at a second Halo installation then ignited a galaxy-spanning conflagration as civil war erupted within the Covenant, driven by revelations that the Covenant leadership, the Prophets, had been deliberately deceiving its populace.
"In truth, these Halos would not take the Covenant on a Great Journey but rather eradicate all sentient life in the galaxy—a last-resort defense against the most terrifying menace the galaxy has ever known—and a menace the deluded Covenant has reawakened for the second time in a hundred thousand years.
"That horror is the Flood—a sentient, all-consuming parasite that makes monstrous puppets of those it kills and will not stop until every last thinking creature is absorbed into its ferociously intelligent plan.
"The second Halo has been activated, putting all of the remaining installations in a dangerous state of emergency standby—they are now primed to fire. Worse still, the Covenant has discovered the long-hidden location of Earth and crushed almost all Human resistance as it seeks vital clues to the nature of the Halo array, some of which may have been hidden under our very feet for untold millennia.
"Even with our newfound allies, the Elites, and their valiant and honorable leader, the Arbiter, we are still hopelessly outnumbered. The Prophets set their wills against us—and forces greater than the Covenant wheel malevolently into place, intent upon the destruction of all but the Flood.
"As the Master Chief hurtles Earthward in a Forerunner spacecraft, he may be our last chance to stop the Covenant, the Flood, and the ticking time bomb that is the Halo network, before every last soul in the galaxy is destroyed. The stakes have never been higher.
"It’s time to finish the fight."
Game Controls (Default)[edit]
This section explains the default game controls, including the film and forge mode controls.
Heads-Up Display (HUD)[edit]
This section describes the different components of the heads-up display, as well as their functions. It details Grenades, Equipment, Shields, Motion Tracker, Waypoint, Weapons and Ammo/Charge, and Multiplayer Information.
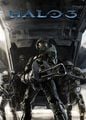
Characters[edit]
This section describes the different characters present in the game.
- Spartan-117: The Master Chief
- The Arbiter
- Cortana
- The Prophet of Truth
- Gravemind
- Sergeant Johnson
- Commander Miranda Keyes
The Master Chief is the last of the elite SPARTAN II soldiers. These genetically superior, highly trained super-soldiers stand nearly 7 feet tall and, in MJOLNIR Mark VI powered assault armor, weigh almost 1000 pounds. Spartan-117 is an expert in all weapons and combat systems and can run faster, jump higher, and hit harder than any normal Human. Honed by years of battlefield experience, he has an unparalleled natural talent for war.
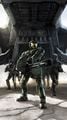
Covenant Species[edit]
This section covers the alien species encountered in-game.
- Grunts (Unggoy)
- Prophets (San ‘Shyuum)
- Jackals (Kig-yar)
- Drones (Yanme’e)
- Brutes (Jiralhanae)
- Elites (Sangheili)
- Hunters (Lekgolo)
Tough, vicious, and capable with a wide range of Covenant hardware, Grunts are a significant military force. Their discipline, however, is hierarchy-reliant and dependant upon strong leadership and strength of numbers. Leaderless, they present significantly less resistance.
Weapons[edit]
This section covers the UNSC and Covenant weapons usable in the game.
"Spartans are trained to use any weapon found on the battlefield—Human or otherwise. This training and philosophy means that resupply is always just one victory away. Efficient and deadly, Spartans often look at opposing forces as a kind of mobile weapons cache."
UNSC Weapons
- Pistol* M6G
- SUBMACHINE GUN* M7/CASELESS
- ASSAULT RIFLE MA5C ICWS
- BATTLE RIFLE BR55HB SR
- SHOTGUN M90A CAWS
- SNIPER RIFLE SRS 99D AM
- ROCKET LAUNCHER M41 SSR MAV/AW
- SPARTAN LASER WAV M6 GGNR
12 Rounds/Magazine
* Denotes weapons that can be dual-wielded.
Covenant Weapons
100–150 kV, 2–3 dA
* Denotes weapons that can be dual-wielded.
Grenades
"You can carry a maximum of two of each grenade type at a time. Press Left-Bumper to switch between available grenade types when not dual-wielding."
M9HE-DP Fragmentation
Kill Radius: 5m
Casualty Radius: 15m
Support Weapons
"A turret is typically activated by pressing Right-Bumper. A Spartan, however, is strong enough to tear off these weapons (press B-Button while using the turret) and use them almost like rifles. When detached, these weapons have limited ammunition capacity."
Type-52 Automatic Plasma Cannon
200 Shots/Charge
Equipment[edit]
This section covers the equipment usable in the game, giving several examples.
"UNSC and Covenant forces have recently deployed powerful new combat equipment to all fronts in the war. Once you pick up a piece of equipment, you can activate it by pressing X-Button or swap it with a different piece of equipment by holding Right-Bumper. Note: Some equipment is activated immediately upon acquisition.
Here are a few of the many equipment options you’ll encounter in the field:"
This globular local-radius energy shield deflects all projectile weapons and thrown grenades. Its effect is short-lived, and it can be penetrated by simply walking through its field. The generator itself is very fragile once deployed.
Vehicles[edit]
This section covers the UNSC and Covenant vehicles found in the game.
UNSC Vehicles[edit]
Crew: 2
Weaponry: No Armament
Covenant Vehicles[edit]
Crew: 1
Weaponry:Twin Plasma Cannons (100–250 kW range)
Basics[edit]
This section covers the basics of playing the game, such as game lobbies and settings. It details Campaign, Matchmaking, Custom Games, Forge, and Theater, as well as the customization of in-game identity and experience through the Media and Settings functionalities.
Multiplayer[edit]
This section covers the basics of multiplayer gameplay, such as Matchmaking, Custom Games, and Co-Op. It details the Xbox Live system, System Link connections, the Party system, Voice Communication, Custom Game Variant creation, the Carnage Report, the Spartan Ratings system, File Share, and Campaign Scoring.
Viewing Films[edit]
This section provides an overview of the Theater mode, a game film functionality.
The Forge[edit]
This section provides an overview of the Forge mode, a new map editing game mode.
Bungie.net[edit]
This section provides an overview of Bungie.net, the official website of Bungie and on-line home for Halo 3 resources.
Xbox Live[edit]
This section provides an overview of Xbox Live, including connecting and family settings.
The Xbox 360 Hard Drive[edit]
This section covers the Xbox 360's hard drive functionality in the game.
Credits[edit]
This section lists those who worked on the game.
Warranty and Customer Service[edit]
This section covers information about the game warranty and customer service, as well as including copyright information.
Trivia[edit]
- Avery Johnson appears to have a lighter skin tone than he did in Halo: Combat Evolved and Halo 2.
- Grunts, Drones, and Jackals seem to have had major aesthetic overhauls and the Covenant name for the Prophet race, San' Shyuum, has been revealed.
- The Type-50 particle beam rifle and the Carbine have their ammo counts wrong. The Beam Rifle only has 10 shots, instead of 18. The Carbine is claimed to have a 36 round magazine instead of the actual 18 rounds per mag.
- The Mauler, gravity hammer, Fuel Rod Gun, the Sentinel Beam, the Flamethrower, and the Orgudam Workshop firebomb are missing from the manual.
Gallery[edit]
Poster[edit]

The poster included with the manual, showing the game's controller layout.
The alternate side of the poster, with art by Ashley Wood.


Variant 1[edit]
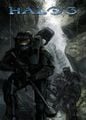
Variant 1 early design.
Variant 2 early design.


Variant 2[edit]
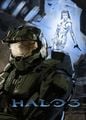
Variant 2 early design.
Variant 2 early design.
Variant 2 early design.
Variant 2 early design.
Variant 2 early design.
Variant 2 final design.


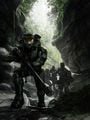
Variant 3[edit]
Variant 3 early design.
Variant 3 final design.


See also[edit]
Download the PDF versions from Xbox.com:
- Manual Download (Internal backup here)
| ||


