Operation C: Valiant Hammer: Difference between revisions
From Halopedia, the Halo wiki
m (→Sources: text replacement) |
No edit summary |
||
| (6 intermediate revisions by 3 users not shown) | |||
| Line 1: | Line 1: | ||
{{Title|''Operation C: Valiant Hammer''}} | {{Title|''Operation C: Valiant Hammer''}} | ||
{{ | {{Status|Gameplay}} | ||
{{Level | {{Level infobox | ||
|pagelabel=Campaign chapter | |||
|pagegamelabel=HSS | |||
|prev=''[[Operation B: Steadfast Pursuit]]'' | |prev=''[[Operation B: Steadfast Pursuit]]'' | ||
|concurrent=*''[[Mission 13: All the Way to the Altar|All the Way to the Altar]]'' | |||
*''[[Mission 14: Up in the Air|Up in the Air]]'' | |||
*''[[Mission 15: Till Death Do Us Part|Till Death Do Us Part]]'' | |||
*''[[Mission 16: Leave 'em at the Altar|Leave 'em at the Altar]]'' | |||
*''[[Mission 17: Deliverance|Deliverance]]'' | |||
*''[[Mission 18: Don't Touch My Ride|Don't Touch My Ride]]'' | |||
|next=''[[Operation D: Adamantine Shield]]'' | |next=''[[Operation D: Adamantine Shield]]'' | ||
|name=''Operation C: Valiant Hammer'' | |name=''Operation C: Valiant Hammer'' | ||
|image=[[File:HSS-Cinematic-Altar.png|300px]] | |image=[[File:HSS-Cinematic-Altar.png|300px]] | ||
|game=''[[Halo: Spartan Strike]]'' | |||
|player= | |player= | ||
|date= | |date=[[2557]] | ||
|place= | |place=[[Installation 03]] | ||
|objective= | |objective= | ||
|nowalk=yes | |nowalk=yes | ||
| Line 17: | Line 25: | ||
==Missions== | ==Missions== | ||
{| class="wikitable" style="width:80%; border:1px solid #999999; background: #FFFFFF;" | |||
! # | |||
! Name | |||
! Description | |||
|- | |||
|C-1 | |||
|'''[[Mission 13: All the Way to the Altar|All the Way to the Altar]]''' | |||
|''"Find a way to the [[Altar]]"'' | |||
|- | |||
|C-2 | |||
|'''[[Mission 14: Up in the Air|Up in the Air]]''' | |||
|''"Destroy the [[Wraith]]s"'' | |||
|- | |||
|C-3 | |||
|'''[[Mission 15: Till Death Do Us Part|Till Death Do Us Part]]''' | |||
|''"Stop the [[Promethean]] takeover of [[Installation 03|Gamma Halo]]"'' | |||
|- | |||
|C-4 | |||
|'''[[Mission 16: Leave 'em at the Altar|Leave 'em at the Altar]]''' | |||
|''"Get the [[Conduit]] off the Altar"'' | |||
|- | |||
|C-5 | |||
|'''[[Mission 17: Deliverance|Deliverance]]''' | |||
|''"Transport the Conduit to the extraction point"'' | |||
|- | |||
|C-6 | |||
|'''[[Mission 18: Don't Touch My Ride|Don't Touch My Ride]]''' | |||
|''"Hold off enemy forces until the [[Pelican]] is fixed"'' | |||
|- | |||
|} | |||
==Transcript== | ==Transcript== | ||
| Line 29: | Line 61: | ||
''The data recovered from the terminal on [[Installation 03|Gamma Halo]] yielded shocking intel. The [[Conduit]] could open [[Forerunner]] [[Slipspace portal|portals]] across the [[Milky Way|galaxy]]... And not only that, it was able to enter [[slipspace]] to save itself from destruction!'' | ''The data recovered from the terminal on [[Installation 03|Gamma Halo]] yielded shocking intel. The [[Conduit]] could open [[Forerunner]] [[Slipspace portal|portals]] across the [[Milky Way|galaxy]]... And not only that, it was able to enter [[slipspace]] to save itself from destruction!'' | ||
''Driven by religious fervor and a thirst for power, the [[Jul 'Mdama's Covenant | ''Driven by religious fervor and a thirst for power, the [[Jul 'Mdama's Covenant|Covenant]] never gave up searching for the artifact... And they found it moments before we did.'' | ||
''They brought it to a place they called "the [[Altar]]". Their plan: use the Conduit to open portals for [[Promethean]]s to [[Battle of Installation 03|invade]] Gamma Halo... Giving the Covenant control of the Halo ring. They were confident of imminent victory... But they didn't know a Spartan was coming for 'em!'' | ''They brought it to a place they called "the [[Altar]]". Their plan: use the Conduit to open portals for [[Promethean]]s to [[Battle of Installation 03|invade]] Gamma Halo... Giving the Covenant control of the Halo ring. They were confident of imminent victory... But they didn't know a Spartan was coming for 'em!'' | ||
| Line 41: | Line 73: | ||
==Sources== | ==Sources== | ||
{{Ref/Sources}} | |||
{{Levels|HSS}} | {{Levels|HSS}} | ||
Latest revision as of 20:36, November 10, 2024
|
Prev: |
|
|
Concurrent: |
|
|
Next: |
|
| Operation C: Valiant Hammer | |
|---|---|

| |
|
Game: |
|
|
Date: |
|
|
Location: |
|
 |
Halopedia doesn't currently have a walkthrough for this level; could you write one? |
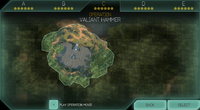
Operation C: Valiant Hammer is the third operation of Halo: Spartan Strike. This operation is an in-universe simulation of the Battle of Installation 03, following a Spartan Headhunter's attempt to recover the Conduit.[1]
Missions[edit]
| # | Name | Description |
|---|---|---|
| C-1 | All the Way to the Altar | "Find a way to the Altar" |
| C-2 | Up in the Air | "Destroy the Wraiths" |
| C-3 | Till Death Do Us Part | "Stop the Promethean takeover of Gamma Halo" |
| C-4 | Leave 'em at the Altar | "Get the Conduit off the Altar" |
| C-5 | Deliverance | "Transport the Conduit to the extraction point" |
| C-6 | Don't Touch My Ride | "Hold off enemy forces until the Pelican is fixed" |
Transcript[edit]
{Cutscene}
The data recovered from the terminal on Gamma Halo yielded shocking intel. The Conduit could open Forerunner portals across the galaxy... And not only that, it was able to enter slipspace to save itself from destruction!
Driven by religious fervor and a thirst for power, the Covenant never gave up searching for the artifact... And they found it moments before we did.
They brought it to a place they called "the Altar". Their plan: use the Conduit to open portals for Prometheans to invade Gamma Halo... Giving the Covenant control of the Halo ring. They were confident of imminent victory... But they didn't know a Spartan was coming for 'em!
Gallery[edit]
Sources[edit]
| ||||||||


