Mission 8: Signal Fires: Difference between revisions
From Halopedia, the Halo wiki
m (→Assault Op 1: Link update, replaced: [[Type-54 Ghost| → [[Karo'wark-pattern Ghost|) |
m (Text replacement - "infobox↵↵|" to "infobox |") |
||
| (4 intermediate revisions by 2 users not shown) | |||
| Line 2: | Line 2: | ||
{{Status|Gameplay}} | {{Status|Gameplay}} | ||
{{Level infobox | {{Level infobox | ||
|pagegamelabel=HSS | |pagegamelabel=HSS | ||
|prev=''[[Mission 7: Gamma Halo|Gamma Halo]]'' | |prev=''[[Mission 7: Gamma Halo|Gamma Halo]]'' | ||
| Line 14: | Line 13: | ||
|place=[[Installation 03]] | |place=[[Installation 03]] | ||
|objective=Clear Covenant drop zones. | |objective=Clear Covenant drop zones. | ||
|hss- | |hss-gold=95,000 | ||
|hss- | |hss-silver=85,000 | ||
|hss- | |hss-bronze=70,000 | ||
}} | }} | ||
'''Signal Fires''' is the eight mission of ''[[Halo: Spartan Strike]]'' and the second of [[Operation B: Steadfast Pursuit]]. A [[Unidentified Spartan-IV|Spartan-IV]] must clear [[Covenant]] drop zones to help track down the [[Conduit]]. | '''Signal Fires''' is the eight mission of ''[[Halo: Spartan Strike]]'' and the second of [[Operation B: Steadfast Pursuit]]. A [[Unidentified Spartan-IV|Spartan-IV]] must clear [[Jul 'Mdama's Covenant|Covenant]] drop zones to help track down the [[Conduit]]. | ||
==Introduction== | ==Introduction== | ||
Latest revision as of 11:46, August 29, 2023
|
Prev: |
|
|
Next: |
|
| Signal Fires | |
|---|---|

| |
|
Game: |
|
|
Player: |
|
|
Date: |
July 2557(Actual events) |
|
Location: |
|
|
Objective(s): |
Clear Covenant drop zones. |
| Spartan Strike scores | |
 |
Halopedia doesn't currently have a walkthrough for this level; could you write one? |
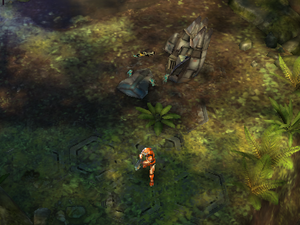
Signal Fires is the eight mission of Halo: Spartan Strike and the second of Operation B: Steadfast Pursuit. A Spartan-IV must clear Covenant drop zones to help track down the Conduit.
Introduction[edit]
With the Covenant signal jammers eliminated, ONI analysts are closing in on the Conduit's unique frequency pattern - but it's still too weak to pinpoint. Clear drop zones for signals amplification devices to help locate the Conduit.
Transcript[edit]
The Spartan-IV begins standing at a drop pod.
- Lieutenant Kwon (COM): "To boost the Conduit's signal, we need three drop zones cleared for signal beacons. I'll set a waypoint for the first one."
⚠ Reach the first drop zone
The Spartan makes his way to the first drop zone fighting through Covenant, with the option of a Ghost to assist him.
- Lieutenant Kwon (COM): "Clear the first drop zone of all Covenant."
⚠ Secure the first drop zone
After the Spartan clears the first site.
- Lieutenant Kwon (COM): "Well done. We're dropping the beacon. Stand clear!"
A beacon then lands in the first drop zone
- Lieutenant Kwon (COM): "Now get to the next drop zone, Spartan."
⚠ Reach the next drop zone
Once the spartan fight through a group of Covenant to the next drop zone.
- Lieutenant Kwon (COM): "I'm detecting enemy fuel rod turrets in the area. Take them out so we can drop the beacon!"
⚠ Destroy the fuel rod turrets
Once the fuel rod turrets are destroyed
- Lieutenant Kwon (COM): "Incoming beacon!"
Once the beacon lands in the second site
- Lieutenant Kwon (COM): "Clear the next drop zone. One more beacon and we can pinpoint the Conduit's signal."
⚠ Reach the last drop zone
Once the spartan reaches the final drop zone.
- Lieutenant Kwon (COM): "Heads up! Covenant incoming!"
⚠ Secure the last drop zone
Once the Covenant in the drop zone are cleared.
- Lieutenant Kwon (COM): "Final beacon dropping. Stand by!"
Once the final beacon lands in the third site.
- Lieutenant Kwon (COM): "We're getting a stronger signal from the Conduit. It's close. Look around, Spartan."
⚠ Follow the Conduit signal
Once the spartan approaches the signal location
- Lieutenant Kwon (COM): "There! Heavy artillery could take out the power core to that gate."
MISSION ACCOMPLISHED
Level ends
Assault Ops[edit]
Assault Op 1[edit]
Destroy 2 Ghosts with grenades
Assault Op 2[edit]
Kill 8 Jackals with melee attacks
Assault Op 3[edit]
| ||||||||