Hang 'Em High
From Halopedia, the Halo wiki
| Hang 'Em High | |
|---|---|

| |
| Map overview | |
|
Game: |
|
|
Map file name (?): |
|
| Lore information | |
|
Location: |
Storage facility, Installation 04[2] |
| Gameplay overview | |
|
Terrain: |
Multi-leveled building |
|
Map layout: |
Semi-symmetrical |
|
Recommended number of players: |
4-16 |
|
Recommended gametype(s): |
|
| “ | Tombstones for Everybody. | ” |
Hang 'Em High is a multiplayer map in Halo: Combat Evolved and Halo: Combat Evolved for PC. It is set inside a Forerunner facility on Installation 04.
Hang 'Em High was remade into the map Tombstone, for the Xbox version of Halo 2. Some parts of the Halo 3 map Longshore were influenced by this map. This map was remade into "High Noon" for Halo: Combat Evolved Anniversary.
Summary[edit]
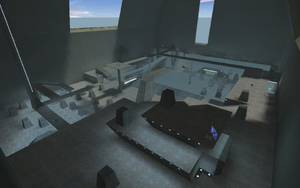
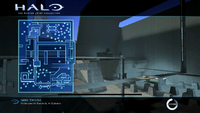
Hang 'Em High is a medium-sized map suited for 4v4 action and is tailored for Slayer and Capture the Flag, the map is set inside a Forerunner installation on Halo. The map is a simple asymmetrical map with multi-leveled buildings on each side of the map. On the first floor, the map is littered with many small blocks which are referred to as Tombstones, and two small shelter structures on either side of the map, and in the center of the map lies a large trench. The second and third levels contain many ramps and bridges that connect both sides of the map and two structures on the top of each side that in CTF games serve as the base.
Strategies[edit]
- Hang 'Em High provides an excellent location for all sorts of scenarios. The sniper rifle and rocket launcher are located on the catwalks above and are well worth the risk. Meanwhile, the shotguns spawn in the shelters on either side of the map, so spin through these areas occasionally during your exploration. During Oddball, try controlling the areas around the "shotgun gallery," as there are only two ways in and out.
- This map is a sniper's dream; if you can grab the sniper rifle on the platform by jumping from the high bridge, return to the top of blue base, or red team's tower base, and decimate anyone who tries to cross the open spaces, sides, or bridges, making it very hard for enemies to reach your flag.
- In Oddball, go to the shotgun spawn in one of the structures. Have one person use it to cover one entrance, and have someone else cover the other one with a pistol. Have the carrier duck below the window with a sniper looking out from it. This, when done properly, is almost foolproof.
- There are two ways onto the middle platform, to get down without dying, make sure you land on the sides of the trench, you'll slide to safety, you could also crouch when you almost land which does not make your shield depleted at all.
- Don't get stuck in the trench; it isn't easy to get out as a small overhang forces you to jump out.
- Beneath the corner with the tall tower is a long tunnel. This is easily defended in team Oddball games. Another benefit: It is situated beneath several spawn locations, where your teammates will reappear when they die.
- Hiding behind the "Tombstones" and staying in the tunnels help you stay away from snipers. You are limited for strategies though, so try using the pistol and shotgun in the tunnel.
- In team oddball games have one player running first by the active camouflage pick that up then straight left and up the ramp then left down the little ramp out by where the Needler spawns by default along that ledge then drop down to the floor run either left or straight to the active camouflage pick that up and along the same path. The rest of the team should be distracting the other team.
- Using the elevated walkways are very good when bringing back flag to base in CTF, because the grenades bounce off and it's hard to aim at platforms with rocket launcher.
- Players attempting to go for the sniper rifle are easily seen and may be easily killed by players using the pistol, they may also fall off and suffer fall damage if they drop from a high level.
- A player could take a shotgun and take cover in a shelter, and taking out any opponents that come within range.
- Use the Rocket Launcher - when used properly, it can be as valuable as the sniper rifle. If you do have it, stick to higher ground as the “tombstones” will provide good cover from your rockets.
Trivia[edit]
- Hang 'Em High is a reference to the 1968 Western Film Hang 'Em High (1968), starring Clint Eastwood.
- In Season 2 of the machinima Red vs. Blue, Hang 'Em High was used to depict the inside of Caboose's Mind.
- If standing on the second level bridge flooring, facing the side of the map with the smallest sky light in the roof, stand directly in front of the rocket launcher's muzzle, aim up near the ceiling and to the left of the pillar leading to the ceiling, and throw a plasma grenade and try to have it hit the ceiling, if it does it will look as if the grenade sticks on the ceiling, it will fall but look as if its stuck there.
- If throwing a plasma grenade out of one of the many skylights it will stick in mid-air and disappear and not explode. It seems the map's boundaries end right outside of the skylights.
- The shadows of the assault rifles which spawn on the bridges crossing the map's central trench can be seen passing through the bridges, projecting onto the floor below. Additionally, the player is able to pick up the assault rifles through the bridges when standing beneath them.
Gallery[edit]

|
Browse more images in this article's gallery page. |
Sources[edit]
- ^ Halo: Combat Evolved Editing Kit, game file
HCEEK\tags\levels\test\hangemhigh\hangemhigh.scenario - ^ Bungie.net, Guides: Multiplayer Pages: "A large storage facility on the Halo which provides an excellent location for all sorts of scenarios." (Retrieved on Feb 12, 2005) [archive]
| |||||||||||||||||||||||
