Ghost Town
From Halopedia, the Halo wiki
Template:Multiplayer Map Infobox Template:Article Quote
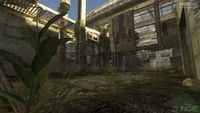
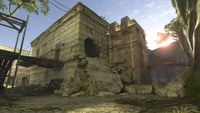
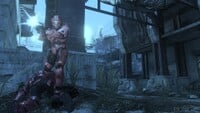
Ghost Town is a multiplayer map featured in Halo 3 set in the same jungle near Voi as the campaign level Sierra 117[1]. It is a water purification facility built in the 24th Century that has since fallen into ruins. Its main function was to take melted water from Mount Kilimanjaro, purify it, then pump it to the rest of Africa. It consists of three buildings surrounded by hills and trees. The inside of one building features rubble and vegetation that has overgrown during years of the desolation. The level is a bridge between nature and failed human civilization.[2] It has many levels and open air catwalks with sights down to semi-protected alleys where you can "rain death from above". These catwalks have entrances to the main building as well. Ghost Town is featured as one of the maps in the Legendary Map Pack.
Bases
Ghost Town consists of three main buildings. The buildings are not symmetrical, as it is an asymmetrical map. The defenders spawn in the "Interior Base", seen in the lower right corner of the overhead image, while the attackers spawn in the Tunnel. Originally the attackers spawned in the building, and the defenders in the Tunnel, but it has since changed.
The Atrium: Is a long lean hallway with a walkway that connects to the Pump Station building. The Atrium area also houses the Sniper Rifle. It features rubble and vegetation that has overgrown after years of desolation. Its ceiling is curved and is formed from several small windowpanes.
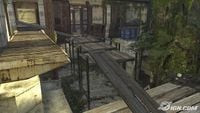
The Pump Station: A three-story building in the center of the map, with catwalks leading to the Interior Base. It has several entrances, and is connected to the Atrium via a wooden catwalk. On the opposite side of the building it is connected to the area where the Shotgun spawns by a similar catwalk.
The Interior Base: An interior section in the corner of the map. It connects to the Pump Station via a catwalk where a Brute shot spawns, and has an exit leading towards the Shotgun spawn. This is where the Defenders spawn.
The Tunnel: This is where the Attackers respawn. The Tunnel has three entrances/exits, made up of ruined parts of pipes, similar to those running parallel to the Tsavo Highway.
Overview
Starting from the Mongoose in the upper left corner of the image (see overview image in the image section) is one of the two bases (the other is in the bottom right of the image). The “Atrium” area (the building in the upper right corner, indicated with a 3) is a long, lean and overgrown two-story hallway with a catwalk that connects to the Pump Station, a three story building with catwalks that exit to the Interior Base (again in the lower right corner) and second level walkways to the Shotgun (where the Bubble Shield is located). From Shotgun spawn, if players head to the right after coming from the Pump Station, they’ll be able to stay on a path that feeds down to the Overshield and there’s a second level walkway overhead housing the Rocket Launcher and grenades. Directly to the left and under the Plasma Grenades that spawn near the Rocket Launcher is a tunnel that curves behind and empties almost into the area where the number 2 Camera was taken.
The Pump Station’s main room is a bombed out shell of a structure with "God Rays" filtering through the ceiling - and that top floor has a walkway that leads toward Sniper in the Atrium and a walkway (where the Brute Shot spawns) that leads to the Interior base in the lower right corner. That multi-level base has a few connecting walkways that lead to an elevated and dilapidated structure that overlooks Active Camo, and a Gravity Lift spawn and is positioned above a dark hallway that funnels into the Atrium.
For the most part players have quick and dirty methods at their disposal, via quick jumps or equipment to get to the map’s second and third level catwalks and there are long sight lines from the Attackers’ base (Rocket Launcher side) down in front of Atrium and also down the Woods side (Shotgun side).
Strategies
- Grab the Overshield when the game begins. It may not help against the Rocket Launcher, but with so many brutal weapons; you can easily die on this map.
- Remember, there is a Shotgun on this map. It is near the cut-down tree near the municipal house. Take it and use it at your disposal. This also works well with the Overshield being nearby.
- The Atrium can be a great place to hide or camp.
- Dual Spikers and Plasma Rifles work great on this map.
- As it is always suggested that the destined winning team possesses the Shotgun, a combination of a Battle Rifle and a Shotgun works well on this map.
- While playing Team SWAT in the Interior Base, there is a little hole that is a good place to hide in and kill from.
Forge Tips
- Using the walkway and bridges, you can create faster travel between some of the buildings, allowing the pace of the game to move faster.
- You can access the upper area of the Atrium by placing a ramp or bridge between two support beams and then place a teleporter on top of the ramp/bridge.
Behind the concrete ramp in the Pump Station, there is a fenced off passageway which can be accessed by spawning a respawn inside. It is advised that you spawn a two-way teleporter node inside upon gaining access. This method can also be used to access the ruined brick building between the Atrium and the Interior Base.
- Ghost Town is another popular map besides Foundry to be Forged for an Infection-based map.
New Forge Objects
- Wooden ramps similar to the "bridge" object in the Heroic Map Pack.
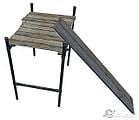
- Wooden platforms attached to metal legs, effectively making a small watchtower.
- Curved metal walls and concrete barriers are useful for filling in ruined gaps in the level.
- Blue water containers that are spawned in groups of four with palettes on both ends.
- Impassable and indestructible barred walls have been added too.
- A new object called FX can change the color, tint, brightness and contrast of the whole level. It appears as a blue transparent orb with a small camera inside. You can combine them and use equipment to make cool visual effects.
Trivia
Miscellaneous
- This map's codename was O.K. Corral -- a reference to the Gunfight at the O.K. Corral.
- Many thought this map would be a map similar to Tombstone because of the codename O.K. Corral, which was a famous gunfight in Tombstone, Arizona.
- There was speculation that this map could have been a remake of Turf or Tombstone, considering the fact they both sport catwalks, alleys, and multiple levels.
- It is set in and based on the same jungle as the Halo 3 campaign level Sierra 117.
- The pipeline seen running parallel to Tsavo Highway is from this structure.
- There were certain individuals within Bungie that wanted to name the map Mortar, but, however, the name Ghost Town stuck with the map instead.[3]
- The first part of the The Storm is also called "Ghost Town."
- Bungie staffers also jokingly called Ghost Town "that Counter-Strike map," referencing the popular PC shooter game, and Specifically referencing the map "Italy" of which Ghost Town bears more than a passing resemblance.
- You can hear artillery shells exploding in the background every once in a while on Ghost Town, which is interesting since it is unknown and unlikely that Artillery is even still widely used in the 2500s.
- Swallows can be found on this map.
- The upper invisible barrier of Ghost Town is one of the lowest in the game, in order to keep people from camping on rooftops.
- The map makes a great racetrack due to its rectangular shape.
- A lot of excellent hiding places, such as the slab of collapsed concrete below the large building, and the collapsed brick room between the Atrium and Interior Base, have invisible walls to stop people from camping.
- If you listen you can hear the sound of Sniper Jackals turning on their Beam Rifles. This can also be heard on the mission, Sierra 117 (Level).
- In the recent ViDoc, Victor Leon of Bungie pointed out the "Water Barrels" had in fact no water in them at all.
- The map bears a resemblance to the Halo 2 map, Turf. The resemblance is most easily seen with a birds-eye view. This slight resemblance is more of a layout similarity than of play style resemblance, as in Ghost Town, the player can enter the buildings, and there are no alleys like in Turf.
- The Atrium bears similarities with the Atrium found at the end of Sierra 117.
- Every so often, Jackals can be heard screeching in the background.
- Some say that this map resembles the facilities from the "Jurassic Park" movies.
Glitches
- On occasion, items will spawn outside of the map.
- There is a hidden room in one corner of the map that has a fractured ceiling with rear and concrete sticking out as well as a hole in the brick wall where you can use the trick with the turret that people use to get out of The Pit's fence on the hole and there are three levels of hidden room to snipe in.
- Under the Pump Station, beyond the concrete ramp, there is a fenced-off passageway leading to another part of the building. It seems to have been fenced off by Bungie for the final version of the map. This passageway is actually quite large, but resembles more of an abstract room. It is easily accessible via the Forge. See Forge above for details.
Gallery
- Overheadghost.jpg
An overview of weapons, grenades and vehicles of Ghost Town.
- 1203632193 Halo3 DLC2 GhostTown 03b.jpg
The Outdoor area.
- 1203635841 Halo3 DLC2 GhostTown 01b.jpg
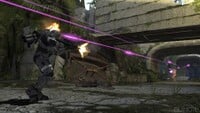
One of the indoor areas of Ghost Town.
- Halo-3-legendary-map-pack--20080408000250090.jpg
