Raid on the Pillar of Autumn
From Halopedia, the Halo wiki
|
Previous: |
|||||||||||||||
|
Concurrent: |
|||||||||||||||
|
Next: |
|||||||||||||||
| Raid on the Pillar of Autumn | |||||||||||||||
|---|---|---|---|---|---|---|---|---|---|---|---|---|---|---|---|

| |||||||||||||||
|
Conflict: |
|||||||||||||||
|
Date: |
|||||||||||||||
|
Location: |
Downed wreckage of the Pillar of Autumn | ||||||||||||||
|
Outcome: |
UNSC victory | ||||||||||||||
| |||||||||||||||
The Raid on the Pillar of Autumn was a UNSC mission occurring during the Battle of Installation 04, in which ODST forces led by Lieutenant Melissa McKay launched a raid to gather arms and supplies from the downed wreckage of the downed UNSC Pillar of Autumn.[2]
Prelude
On September 19, 2552, the Halcyon-class light cruiser arrived in the Soell system near the megastructure Installation 04, having narrowly escaped the Fall of Reach. During the subsequent space battle and boarding attempts conducted by the Fleet of Particular Justice, Captain Jacob Keyes initiated Article 2 of the Cole Protocol - ordering a general evacuation of the ship by all crew.[3] The ship's Orbital Drop Shock Troopers deployed via SOEIV drop pods, and regrouped to take over the facility later referred to as Alpha Base. Following the ship's crash-landing, the Covenant instilled a guard detail on the ship to prevent human intrusion[4] consisting of two Type-26 Banshees and six Type-32 Ghosts, as well as various infantry.[2]
To ensure the success of UNSC prolonged operations on the ring, Lieutenant McKay was ordered to take a contingent of ODSTs to scout out the wreckage of the Pillar of Autumn and recover as many weapons, supplies and vehicles as they could. A team of troopers assembled on the landing pad of Alpha Base in the night before insertion for inspection by Sergeant Lister to ensure none of the marines' full combat loads would make any noise that might give the teams away during the mission. The troopers were briefed by Major Antonio Silva on the mission - to recover supplies (and a bottle of scotch left in the Major's office) before the Covenant could launch an all-out attack on Alpha Base. The troopers then filed onto their D77-TC Pelican dropship for the short flight over to the plains where the Autumn lay. Several teams were deployed onto the plains ahead of the main force via Pelican dropships Echo 136 and Echo 206, with the ring's unpredictable weather granting rain to provide the teams cover.[4]
Thanks to the simultaneous Raid on the Truth and Reconciliation being conducted by the Master Chief, Covenant forces on the ring were distracted, allowing an easier insertion by McKay's forces.[2]
The battle
Opening engagement
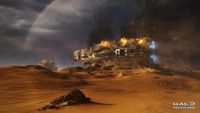
The rainfall cleared just before dawn, allowing the waiting UNSC troopers to view the sunrise slowly illuminate the Autumn in a golden glow. The sixty-two ODSTs of McKay's company lay in wait just beyond the Covenant patrol perimeter, and had watched as the Covenant patrolled in a listless manner - suggesting the guards were not expecting an attack. McKay's company was divided into three platoons - Red, Blue and Green, with McKay designated as Red One and the other platoon leaders as Blue and Green One, respectively. McKay finally ordered the other platoon leaders to commit to the attack.[2]
The primary target for the ODSTs was the Covenant vehicle support. To counter these threats, three M41 SPNKR rocket launchers were trained on each of the two Banshees, and three further marines had been assigned to take out each Ghost. Two rockets missed their targets, but both Banshees were destroyed simultaneously to leave the Ghost drivers confused before they were eliminated by the marine fire. Marine snipers then proceeded to suppress fire, and McKay ordered the assault force to begin making their way across the open plain to reach the ship itself. Covenant infantry began to emerge from inside the ship, only to be cut down by the SRS99C-S2 AM sniper rifles. The ODSTs had managed to make their way across a Covenant killing field almost unscathed until a Type-25 Spirit began to strafe the area with its plasma cannon, cutting down at least one sniper. McKay ordered the snipers to fire on the dropship, who had mistakenly positioned itself so that its troop bay doors were facing the snipers. Through sheer luck, one of the sniper rounds hit a plasma grenade in the troop bay as the doors opened, with the resulting explosion severing the dropship's control line and causing the aircraft to explode.[2]
Looting and counterattack
The marines proceeded to clear the ship, utilising fragmentation grenades and flashbang grenades to push the Covenant occupiers into the upper decks and non-mission critical areas of the ship and sealing the hatches between decks to ensure the looting of the ship went undisturbed. Namely, the portions of the ship needed for the mission were the ship's magazine, cargo holds and hangar bays. First Platoon, led by Lieutenant Oros, begun the task of hitching trailers to the ship's Warthog complement and loading them with food, munitions and the rest of McKay's supply list while Second Platoon finished clearing the ship. The Warthogs were driven down several ramps alongside four M808B Scorpion main battle tanks, while Oros utilised a Cyclops exoskeleton to facilitate final loading.
In total, more than twenty-six Warthog-trailer combinations were set up to be escorted by the tanks, with the Chaingun-equipped vehicles utilising M41 and M46 Vulcan chainguns to fend off Covenant attackers. Two of the Warthogs were flown back to Alpha Base by two Pelicans, while more supplies rolled off the ship. To fully man the convoy, the infantry company would be hard-pressed to fight and drive, so the Pelicans were to return within 45 minutes with additional personnel from Alpha Base to man a gun or drive a vehicle.[2]
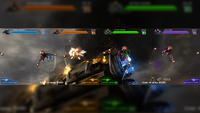
At some point, ODST Fireteam Raven would find their way to the crash site as the UNSC reinforcements neared the ship only to find the Covenant counter-attacking the company en masse. The battle would see the employ of dozens of armored vehicles including M12B Warthogs, Scorpion tanks, D77 Pelicans, UH-144 Falcons and M274R Mongooses, while the Covenant reinforced their assault with Type-26 Wraiths, Banshees and Ghosts. The UNSC convoy would reach the ship, and hold off more waves of vehicles and infantry including a swarm of Yanme'e, before the Covenant attack ceased and the convoy could prepare to set off back to Alpha Base.[5][note 1] The Pelicans would refuel and ultimately transport several M910 Rampart turrets back to Alpha Base after being bribed with candy, though no missile or rocket pod ammo for the Pelicans and little 70mm chaingun ammunition could be found, leaving the UNSC air support lacking.[2]
Return to Alpha Base
Now loaded and ready to go, McKay organised the assault force into three platoons; one of Warthogs led by Lieutenant Oros designated to only focus on attacking aircraft targets that might brey on the ground vehicles, one of Scorpion MBTs under command of MSgt Lister kept at the centre of the formation, and the third under command of McKay herself, designated to focus on ground targets. McKay's platoon had five Warthogs not towing trailers to act as fast-reaction force. Due to the size of the convoy, McKay had no illusions about keeping it stealthy or hidden, and knew that the Covenant would attempt to organise a response as revenge for the UNSC's repeated raids over the past day on more than a dozen locations.[6]
As the convoy headed east, the flat plains gave way to a series of hills and a canyon the ground vehicles would need to get through single file, leaving the convoy vulnerable. There was a different route, however, half a kilometre wide, which had been fortified by the Covenant under Field Master Noga 'Putumee. The route was flanked by two hills on either side and a third just beyond to create a second "gate" the humans would need to pass through. Elite Ado 'Mortumee was stationed on the Covenant-designated "Second Hill" with a Wraith artillery piece, with an identical unit across the way on "First Hill". 'Mortumee had been sent by the Council of Masters to act as a spy on both the battle and 'Putumee. 'Putumee ordered 'Mortumee to give word for their hidden Banshees to begin their attack, to which McKay cleared First Platoon to engage. Five flights of ten banshees, fifty in total, passed between the hills with some flying so low that 'Mortumee found himself looking down upon the ships as they engaged their targets. Eight of the ten of the first wave were shredded apart by the M41 LAAGs on the Warthogs, though at least one Warthog managed to suffer a hit to its gun, killing the gunner and rolling the vehicle and supplies across the plain.[6]
The second flight of Banshees split up their attack patterns while 'Putumee ordered the Wraiths on first and second hills to begin firing. Both mortars fired, though the ranging shots missed any targets. Green platoon was cleared to fire, with Lister ordering Scorpions Foxtrot One and Foxtrot Two to fire on the left hill, while Three and Four concentrated the right. As the cannons of Foxtrot One and Two turned to face him. 'Mortumee fled for cover much to the amusement of 'Putumee and his staff. Nonetheless, the Banshees were able to score a hit on another Warthog, destroying a trailer of ammo and three marines. McKay considered ordering her forces to fire on the Banshees, but no sooner did a wave of Ghosts enter the pass and begin firing on the Warthogs. The five-vehicle reaction force designated as "Romeo units" swept past First Hill as the Wraith fired for a third and fourth time, with one shot narrowly missing Warthog Romeo-Five.[6]
With the convoy advancing into the canyon, the Scorpions were reaching the point at which their weapons would no longer be able to fire on the Wraiths, and had only one more shot left. Lister ordered the commanders to correct their aim, and the tanks fired again, destroying the Wraith on First Hill and a file of Jackals along with it. 'Putumee was impassive about this loss, as he wouldn't be able to fire into the canyon anyway without risking friendly fire on the two dozen Ghosts engaging the human ground convoy, and ordered the Second Hill Wraith to stop firing as it launched one last plasma mortar.[6]
By this time, Oros and First Platoon had cleared roughly two-thirds of the Banshee threat from the sky, and began to rally volunteers to a rocky outcropping equipped with M41 rocket launchers and as many missiles as they could carry. The marines in hiding threw out smoke flares onto the desert sand to draw in the attention of the Banshees and waited until thirteen of the craft were swarming the sky above them, before firing five rockets in succession, followed by two more volleys. Ten were destroyed immediately, while two retreated and the third was heavily damaged and ultimately managed to kamikaze itself into the ambush team, killing them.[6]
Assassinating the Sangheili
One of the Warthogs taken out by mortar fire was one belonging to Lance Corporal "Snaky" Jones. Jones was sent flying from his M41 LAAG without a helmet. Without a radio, the Corporal wouldn't be able to radio for help, so he instead took cover behind the Warthog wreck and found his sniper rifle and supply pack. Sergeant Corly was dead in the driver's seat. Jones began making his way to the hill line with his rifle, so that he could wait out the battle and begin hiking back to Alpha Base. Jones followed his natural instinct to seek higher ground, eventually being able to overlook the entirety of the top of the second hill and all the infantry stood upon it, including a blue Sangheili Minor and a gold-clad leader. By this time, the marine convoy had cleared First and Second Hills, and were now faced with a third Wraith on the Third Hill. Knowing they were out of range of the Wraith, the Scorpions lined four abreast and all fired at the same time, destroying the last mortar tank completely. As 'Mortumee began to explain how he would report the Field Master's failure to the Council, the 14.5mm shot fired by Jones pierced the Sangheili spy in the base of his neck, and exited through the top of his head. The second shot narrowly missed 'Putumee due to the Field Master's quick reflexes, prompting the Sangheili to radio his Banshee wing commander with the sniper's position, though Jones had already fled to cover and out of sight.[6]
Aftermath
The rest of the convoy returned to Alpha Base apparently without incident. Thanks to the raid's success, Alpha Base would now be defended by several Warthog LRVs, Scorpions, captured Ghosts and even a couple 50mm PDCs ripped from the Autumn's hull. The Warthogs and Ghosts would begin patrolling the perimeter of Alpha Base in a configuration of two Warthogs, two Ghosts for every patrol to allow the leveraging of each vehicle's best qualities.[7] These reinforcements would be critical in later defending Alpha Base from the Covenant assault led by a spiteful Noga 'Putumee the next day.[1]
Covenant forces led by an elite named 'Ontomee would later take back control of the ship, and attempt to keep UNSC and Flood forces away until September 22, when the Master Chief was able to infiltrate the ship and destroy its fusion reactors, destroying Installation 04 entirely.
Behind the scenes
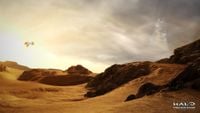
The raid was first described in Halo: The Flood chapters five, six and seven, but later expanded upon in the level Rubble in the 2018 game Halo: Fireteam Raven.
Gallery
List of appearances
- Halo: The Flood (First appearance)
- Halo: Fireteam Raven
Notes
- ^ The Raid on the Pillar of Autumn as depicted in Halo: Fireteam Raven shows Raven linking up with a UNSC convoy assaulting the Pillar of Autumn, which does not fit any event described in Chapter Five of Halo: the Flood. However, Lieutenant Oros does mention that the UNSC at Alpha Base are sending their Pelicans back with additional personnel to help man the convoy, and the next scene with McKay only depicts the Convoy heading back to the base. Because of this, this engagement with the heavy land war between the UNSC and Covenant forces can only fit in between the off-loading of equipment from the cruiser and the return of UNSC forces to Alpha Base.
Sources
- ^ a b Halo Waypoint: Canon Fodder - That's So Raven
- ^ a b c d e f g Halo: The Flood, chapter five
- ^ Halo: Combat Evolved, campaign level The Pillar of Autumn
- ^ a b Halo: the Flood, chapter four
- ^ Halo: Fireteam Raven, campaign level Rubble
- ^ a b c d e f Halo: the Flood, chapter six
- ^ Halo: the Flood, chapter seven
| ||||||||||||||


