Battle of Kenya
From Halopedia, the Halo wiki
|
Previous: |
||||||||||||||||||||||||||||
|
Concurrent: |
||||||||||||||||||||||||||||
|
Next: |
||||||||||||||||||||||||||||
| Battle of Kenya | ||||||||||||||||||||||||||||
|---|---|---|---|---|---|---|---|---|---|---|---|---|---|---|---|---|---|---|---|---|---|---|---|---|---|---|---|---|
| ||||||||||||||||||||||||||||
|
Conflict: |
||||||||||||||||||||||||||||
|
Date: |
||||||||||||||||||||||||||||
|
Location: |
||||||||||||||||||||||||||||
|
Outcome: |
Pyrrhic UNSC-Fleet of Retribution tactical victory Strategic Covenant victory
| |||||||||||||||||||||||||||
| ||||||||||||||||||||||||||||
- "Marines, the Prophet of Truth doesn't know it yet, but he's about to get kicked right off his throne. You will take our city back. And drive our enemy into the grave they've been so happily digging. One final effort is all that remains."
- — Fleet Admiral Terrence Hood
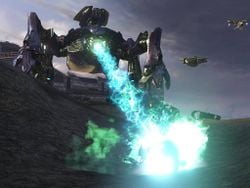
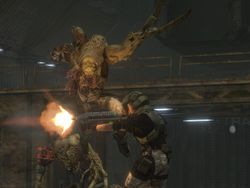
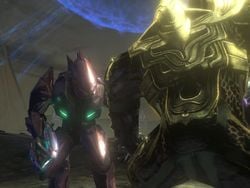
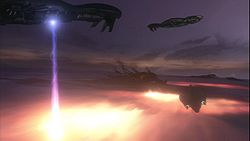
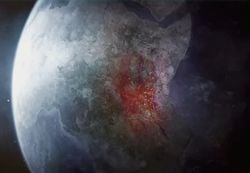
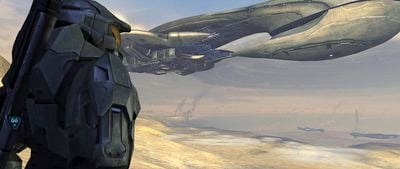
The Battle of Kenya[1] was a large battle between forces of the United Nations Space Command and the Fleet of Retribution against the Covenant, and later, the Flood during the later stages of the Battle for Earth on November 17, 2552. The fighting was spread across the African countries of Kenya and Tanzania and culminated in the retreat of the majority of the remaining Covenant forces from Earth and the glassing of a portion of the continent by Sangheili warships to prevent the spread of the Flood across the planet.[8]
Background
After discovering a Forerunner Luminary on Meridian, the Prophet of Regret discovered the presence of a gateway portal to the Ark on the planet of "Erde-Tyrene". From the Ark, he would be able to activate the Halo Array and commence the "Great Journey". To this end, he and his fleet of fifteen warships made for the portal's location. Unbeknownst to Regret, Erde-Tyrene was actually the heavily-defended homeworld of humanity. On October 20, 2552, the Prophet's fleet arrived at Earth and was immediately engaged by the numerically-superior UNSC Home Fleet, forcing him to jump his personal assault carrier directly to the city of New Mombasa.[11] As his troops in the city were repelled by UNSC ground forces and faced with interception by human fleet elements were he to return to orbit, Regret opted to initiate a slipspace jump to Installation 05 while still over New Mombasa.[12] This jump heavily damaged the city, and partially revealed the portal that the Prophet had been searching for.[13] One day after his departure,[14] a large Jiralhanae-led fleet sent by the Prophet of Truth arrived and resumed control of the battle, deploying more additional ground troops into the devastated city while their ships begun to excavate the portal beneath Mombasa.[15][16]
Over the course of the month, the fighting would spread across the globe, with newer Covenant reinforcements now continuing to arrive and attacking various locations including North America,[3] Mount Erebus in the Antarctic, the Yucatán Peninsula and Havana, Cuba.[17] Covenant fleets would continue to arrive throughout the battle, scattering Earth's orbital defense grid as the Great Schism would begin with Sangheili forces now removed from the Covenant now led by the Jiralhanae.[17] On November 17, final Covenant loyalist naval forces, including a final contingent of Jiralhanae-controlled warships from the splintered High Charity defense fleet, would arrive and began to route the numerically-inferior and outgunned remnants of Home Fleet and inflict heavy losses on the human defenders as the Prophet of Truth himself would arrive on board the Anodyne Spirit. This armada nearly completely shattered the weakened orbital defense grid, allowing it to inflict more catastrophic terrestrial casualties with their subsequent bombardment on the now-pratically defenseless Earth.[18] As Spartan John-117 departed from the Anodyne Spirit during the Forerunner ship's descent into Earth's atmosphere, an Orbital Drop Shock Trooper fighting in Sector Six managed to use a laser designator to determine the Master Chief's trajectory.[19] This allowed several squads of Marines led by Avery Johnson to locate the Spartan after he crashed into a Tanzanian jungle south of Mount Kilimanjaro.[20]
Covenant ground forces would heavily occupy swathes of territory in Kenya, overwhelming UNSC defenders along the Tsavo Highway and in the city of Voi, where they would station heavy defences including numerous Anti-Aircraft Wraiths and Mantis emplacements as part of a network of extensive perimeter defenses for the Ark's portal.[5] Remaining UNSC personnel were scattered and cut off from friendly forces, forced to hunker down and fight for their lives against heavy Covenant opposition.[6][5] The final remaining UNSC stronghold in the region was a re-purposed 20th-century base, Crow's Nest, located within close proximity to the city of Voi. From here, the UNSC would co-ordinate their remaining forces and treat Marines wounded in the field. After Commander Miranda Keyes' arrival at Earth from Installation 05, she would assume command of the base.[18]
Battle
Recovery of John-117
- Main article: Recovery of John-117
- Avery Johnson: "Radio for VTOL, heavy lift gear. We're not leaving him here."
- John-117: "Yeah, you're not."
- — John-117 after regaining consciousness.[20]
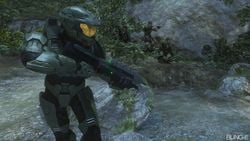
In the morning of 17 November, 2552, Sergeant Major Avery Johnson led several teams of Marines into the jungles of Tanzania to recover Spartan John-117, using the triangulation data acquired by forces fighting in Sector Six. The Marines succeeded in finding the Master Chief, who was unconscious after his armor had been locked by it's gel layer. After some uncertainty regarding the his status, John woke up, informing Johnson that Cortana had remained on High Charity. After some initial hostility between John-117 and Arbiter Thel 'Vadam, the Chief was given an assault rifle as the unit prepared to move out.[20]
As the group moved through the jungle towards their extraction point at a nearby river, Gunnery Sergeant Reynolds of Bravo Team warned them of nearby Covenant forces before dropping out of contact. The group opted to split up to reduce the likelihood of being spotted by Covenant patrols. John, Thel and First Squad soon came into contact with Jiralhanae-led Covenant forces, and were forced to fight through several groups dropped off by Phantoms before they made their way through an encampment heavily defended by Covenant troops. They soon rescued Reynolds, the sole survivor of Bravo Team who was being tortured for information by a Jiralhanae Captain. Johnson's group made it to the river first, and were under heavy attack by Covenant troops by the time the Master Chief and Thel arrived. Both extraction Pelicans were shot down by fuel rods fired by Banshees, with Echo 051 containing Johnson and Second Squad crashing half a kilometer downriver from the dam. John, Thel and the Marines of First Squad made their way back into the jungle, fighting through a narrow pass filled with Kig-Yar snipers before witnessing Johnson and his unit fleeing from Echo 051's crash site under heavy Covenant fire. Eventually clearing out all of the Covenant in the area, John and Thel proceeded into the cave Johnson had taken, which emerged onto an overlook of the A2 Hydroelectric Facility, where they discovered that Johnson had been taken prisoner by a large group of Covenant led by a Jiralhanae Chieftain. The team was able to fight their way across the facility, eliminating the Chieftain and his bodyguards before reaching the building that Johnson was detained in. After releasing the sergeant and his surviving Marines, the group held out against two Phantoms and their complements of infantry until Kilo 023 arrived. The Pelican promptly destroyed the two Phantoms and landed, allowing the group to leave the jungle for the nearby UNSC base Crow's Nest.[21]
Attack on Crow's Nest
- Main article: Attack on Crow's Nest
- "You are, all of you, vermin. Cowering in the dirt, thinking what, I wonder? That you might escape the coming fire? No. Your world will burn until its surface is but glass! And not even your demon will live to creep, blackened from its hole to mar the reflection of our passage... the culmination of our journey. For your destruction is the will of the gods! And I? I am their instrument!"
- — The Prophet of Truth threatening UNSC personnel in Crow's Nest.[18]
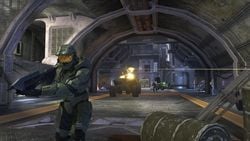
Commander Keyes arrived at Crow's Nest's landing pad to meet John-117, Thel 'Vadam and Sergeant Johnson. After greeting the Spartan, she escorted the group towards the operations center, briefing the Spartan about the previous events following Truth's arrival at Earth before confirming that she had managed to stop Installation 05's activation sequence, but the Halo Array remained on standby and ready to activate from the Ark, which she believed to be the main focus of the Covenant in Kenya. John then reported in to Admiral Hood, who was confident in Keyes' plan to neutralize one of the Mantis Anti-Aircraft Cannons in Truth's array of defenses with the support of the Spartan, allowing a battle group from the tattered UNSC Home Fleet to assault the excavation site, believed by the UNSC to be the Ark but in reality was the Portal at Voi that would lead to the installation. Before Hood could continue, the power cut out completely, before the High Prophet of Truth himself broadcasted a message to the base, promising to reduce Earth to glass and telling them that even the "Demon" would perish. After Truth cut the broadcast, Keyes immediately ordered the base's personnel to prepare for departure, knowing that the Covenant would soon attack. Johnson and Thel remained to guard the operations center while John moved towards the hangar which the Phantoms would use to deploy troops. As Marines assembled machine gun turrets and other defences, a series of tremors shook the base as Covenant forces begun their offensive. The Master Chief made his way into the base's vehicle access, arriving too late to save a Warthog's destruction from plasma grenades. John and his Marines pushed down the vehicle access, defeating Covenant troops before arriving at the hangar, where they provided assistance for the locally-stationed Marines in repelling several Phantom's and their complements of infantry sent from a nearby CCS-class battlecruiser. Once all Covenant were defeated, a Pelican was able to undock and descend, allowing the Marines in the hangar to exfiltrate from the base.[18]
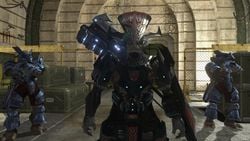
At this time, the Covenant attack on the base intensified. The operations center came under heavy Covenant attack prompting Sergeant Johnson to recall the Master Chief. At the same time, Yanme'e infiltrated Crow's Nest through the base's ventilation system and the barracks was attacked by a large Jiralhanae pack led by a War Chieftain, which would see the majority of it's personnel massacred and several survivors tortured and killed for sport. In the cave before the operations center, a massive swarm of Yanme'e burst out of the ventilation pipes behind the Marine defenders. Due to the timely arrival of John-117, the Drones were all taken out. In the operations center, Commander Keyes radioed in from Kilo 023, revealing to John the bomb that Marines were rigging to detonate to wipe out the Covenant attackers after all UNSC personnel had evacuated. Johnson led the Chief to a door that would lead to the barracks, where they had lost contact from the Marines within. John advanced into the base's motor pool, fighting a Jiralhanae Chieftain and his pack. After clearing the motor pool, John made his way to the barracks, where Thel revealed that the Jiralhanae had taken prisoners. The two fought through the barracks, rescuing the few Marines that lived and killing every Covenant soldier in the vicinity including a War Chieftain. They led the surviving Marines onto an elevator to the landing pad. Unfortunately, Kilo 023 was attacked by a unit of Jiralhanae Jumpers attempting to destroy her engines. John, Thel and the Marines subsequently defeated the Brutes, with Sergeant Johnson and a small group of Marines arrived immediately after, on the run from the operations center which had been overrun by the Covenant. Keyes ordered John to return to the operations center and re-arm the bomb. Johnson, Thel and the surviving Marines boarded Kilo 023 and left the base, leaving John as the only living human still in Crow's Nest.[18]
John-117 made his way back down the path Johnson had arrived from, passing numerous destroyed Warthogs and Marine corpses, clearing a path to the operations center that was now heavily fortified by Covenant plasma cannons. After clearing out the motor pool, the Spartan entered the operations center where he overheard a conversation between the Prophet of Truth and the War Chieftain commander. John took the Covenant forces by surprise and killed them all before re-arming the UNSC bomb. With smaller charges going off throughout the base, the Spartan hastily made his way towards the hangar, retracing his steps from earlier while being assailed by more quotes from Halsey. Engaging scattered and panicking Covenant forces as he went, he arrived in the hangar as Phantoms departed, abandoning Unggoy and Kig-Yar to their fates. John pushed through and entered an elevator, the doors closing just as flames from the bomb's detonation reached the hangar bay. As the elevator descended, fire exploded into the elevator shaft, sending the elevator plummeting into the depths and knocking the Spartan unconscious, the last thing he heard being Cortana telling him that this would be his tomb.[18]
Assault on the Tsavo Highway
- Main article: Assault on the Tsavo Highway
- "There's something in the crater, Ma'am. Something beneath the storm"
- — ONI Recon 111 reporting the existence of what UNSC forces assumed was the Ark.[6]
After regaining consciousness in an underground vehicle bay, John regrouped with Gunnery Sergeant Reynolds and other Marine survivors. While all the troops fit for duty mounted a pair of surviving Warthogs, the injured personnel and the men treating them remained behind. The two Warthogs passed through the large cave system beneath the base before emerging into the open air of Kenya, where chunks of the Mombasa Tether lay strewn across the plains following it's collapse during the Battle of Mombasa on October 20.[22][6] Seeking to put as much distance as possible between themselves and Crow's Nest, the two Warthogs made their way across the plains, engaging scattered Covenant troops gathered around their destroyed Phantoms while Reynolds attempted to raise Commander Keyes on COM to no avail. The team eventually reached a small dam occupied by Covenant forces, which they successfully traversed. As they left the dam, they got a garbled message from Gunnery Sergeant Stacker who was leading a supply convoy down the Tsavo Highway for the Marines in Voi. The sergeant's convoy had been attacked by Banshees and subsequently attacked by Covenant infantry and vehicles who sealed a nearby tunnel with an anti-vehicle barrier. As John and his team arrived at the survivor's location, they witnessed a Warthog getting rammed by a Chopper. The team engaged in combat with the various Covenant units in the area, including several Choppers, a number of Shade turrets and snipers. With the Covenant presence depleted, the survivors retreated behind the energy barrier, where a swarm of Yanme'e emerged to attack the humans. The UNSC forces eventually killed all of the Covenant soldiers and John destroyed the barrier's power source, while a nearby hologram of the Prophet of Truth sermonized the artifact in the excavated ruins of Mombasa. Stacker prompted John to continue on to Voi, as the beleaguered Marines in the city would be grateful for his assistance. John and his convoy of vehicles continued through the tunnel and along the Tsavo Highway, witnessing a CCS-class battlecruiser pass overheat towards the portal site. An ONI reconnaissance team reporting Covenant activity at the excavation site confirmed the existence of the portal within. Eventually forced to dismount due to roadblocks and a broken section of highway, John and his team continued on foot. Commander Keyes finally re-established communication with John, believing that the object Truth had uncovered was the Ark. John eventually reached Voi Municipal Water Pump House 03, the site of a large battle with Marines holding a network of structures on top of a nearby hill from encroaching Covenant forces. John assisted the Marines in killing the enemy soldiers and regrouped with the Marines, where they informed him that they needed to hold their position until Pelicans could arrive with resupply for a push against heavy Covenant armor on Tsavo Highway.[6]
The team were forced to fend off two Phantoms transporting large packs of Jiralhanae onto the battlefield before contending with a Wraith that arrived from a nearby Covenant garrison. After the Wraith was neutralised, several resupply Pelicans arrived, deploying reinforcement Marines and vehicles for the assault on the Coenant-held Tsavo Highway. The now-mobilized UNSC forces advanced into the Covenant garrison in the next valley and destroyed it before rejoining the Tsavo Highway. A large Covenant armored unit including several Wraiths, turrets and a large force of Choppers were stationed on and around the next section of highway. John and the UNSC forces attacked anda massive battle soon began. Eventually clearing all Covenant forces, the unit was able to proceed along the highway while Commander Keyes ordered ONI Recon 111 to retreat from the crater. Further along the Tsavo Highway a large force of Jiralhanae had blocked off the path with roadblocks and heavily entrenched themselves in a series of nearby structures. The team managed to fight their way through, killing a War Chieftain and his pack guarding another anti-vehicle barrier. With the Tsavo Highway now free of Covenant forces, several Pelicans arrived to drop off more vehicles and soldiers for the push into Voi. Knowing that the Covenant fleet had fully uncovered the presumed Ark, Admiral Hood rallied the UNSC forces, delivering words of reassurance and emphasising the importance of stopping the Prophet of Truth before he could activate the artifact. Once the force mounted up, they pushed on to Voi.[6]
Siege at Voi
- Main article: Battle of Voi
- "Chief, the Prophet of Truth has found the Ark. Our only chance of stopping him is a surprise aerial assault. Clear this sector of Covenant anti-air defenses. Make a hole for the Admiral’s ships."
- — Commander Keyes gives John-117 his primary objective.[5]
The convoy of UNSC vehicles continued down the Tsavo Highway until they reached the entrance to Traxus Factory Complex 09, which had been heavily occupied by Covenant forces in the preceding hours. After dismounting from his vehicle, John and a group of Marines made their way inside, ambushing Covenant troops listening to a holographic sermon from the Prophet of Truth and opening several doors allowing their supporting Chaingun Warthog to advance. After killing a large group of Covenant in the next tunnel, John proceeded into the first of several lake beds, where an Anti-Aircraft Wraith was attacking several Hornets that were engaged in aerial dogfights with Banshees above the factory. Eventually clearing out the AA Wraith and its accompanying unit of Ghosts, John re-entered the factory, assisting a group of Marines in flushing out Covenant troops in a nearby office. Once the way was clear, the Marines opened the doors into the next section of the factory for the Spartan. In the next room, a Phantom deployed a swarm of Yanme'e through a shattered glass roof, which failed to halt the UNSC advance. John met up with a Marine anti-tank unit in the tunnel leading to the second lake bed. Mounting up on a Mongoose with a rocket launcher-armed passenger, John entered the second lake bed, where more Ghosts and Choppers defended a pair of Anti-Aircraft Wraiths. Despite the heavy Covenant presence, the anti-tank unit was able to make short work of them, as well as several waves of reinforcements brought in by Phantoms. The Covenant made a last-ditch attempt to retake the lake bed, deploying a Scarab into the area. The human forces were able to weaken the Scarab by attacking it's vulnerable leg joints and allowing John to board the walker. The Spartan engaged the crew in close quarters before destroying the Scarab's power core, completely destroying the assault platform. With the lake bed clear, more Pelicans arrived to drop off reinforcements, including Arbiter Thel 'Vadam.[5]
The victorious UNSC forces re-entered the factory, passing through an aid-station that had been set up to deal with injured Marines and civilian factory workers. Reports coming in revealed that the Covenant fleet was pulling back to the portal as well as the presence of a single Covenant ship that had arrived in-system. John and Thel entered the warehouse section of the factory complex, where Jiralhanae forces were attacking scattered Marines and slaughtering civilian workers. After clearing out several sections of warehouse and recruiting a number of Marines and armed civilians to their side, the group proceeded to the other side of the factory, killing a Mgalekgolo pair that had just wiped out a group of fleeing civilians. A Jiralhanae Chieftain and an assortment of other Covenant troops defended the path to the nearby Mantis anti-aircraft emplacement while the Prophet of Truth gave encouragement from a nearby holotank. Despite this, they failed to stop John and his forces. The group moved forward towards their objective as UNSC Battle Group Victory began their approach. With their time running out, the group launched an attack on the heavily-defended plateau that the cannon was stationed on. After a furious battle, they emerged victorious and John destroyed the anti-aircraft cannon's rapidly overheating core, neutralizing the battery. With a hole now punched in the Covenant defenses, the battle group approached, bombarding the Prophet's vessel sitting in the center of the portal. Their attack failed to damage the Forerunner keyship, and the portal was activated. The Anodyne Spirit ascended into the portal to the Ark, with the rest of the Covenant fleet following. As Admiral Hood ordered the UNSC forces to regroup, the Flood-infested CCS-class battlecruiser Indulgence of Conviction exited slipspace over Voi and crashed into the opposite side of the Traxus factory complex. As Thel pondered the arrival of the ship as more Covenant reinforcements, John knew that it was something even worse.[5]
Outbreak in Voi
- Main article: Outbreak on Earth
- Commander Miranda Keyes: "The Flood - it's spreading all over the city."
- Admiral Terrence Hood: "How do we contain it?"
- Commander Keyes: "Find the crashed Flood ship; overload its engine core. We either destroy this city, or risk losing the entire planet."
- Admiral Hood: "Do it."
- — Commander Keyes and Admiral Hood realize the severity of the Flood threat, and order the destruction of Voi to stop it.[8]
The Flood quickly began to spread throughout the city of Voi, assimilating both the corpses of fallen UNSC Marines and Covenant troops, as well as still-living human forces. The weary Marine forces stationed across Voi were ill-prepared for this new threat and the majority of them were quickly assimilated by the parasite. As John and Thel made their way back to the Traxus factory complex, he received transmissions of confused Marines attempting to regroup while being attacked by the unfamiliar hostiles. Returning to the now-sealed off warehouse, John witnessed a horde of Flood Pod infectors and combat forms swarming a cluster of Marines near the bay door, forcing the survivors to turn their weapons on their comrades who were mutating before their eyes. After fighting off the wave of Flood, John and Thel re-entered the warehouse through a nearby office, narrowly saving a Marine from a number of Pod infectors. In the warehouse beyond, masses of Flood were attacking straggling UNSC defenders led by Sergeant Stacker. After rescuing whatever Marines they could and clearing out all the Flood forms in the warehouse sections of the facility, John and Thel proceeded onward while the Marines stayed behind. The group proceeded back towards the aid station, using side offices as the bay doors had been closed off. In the aid-station, only a single delirious Marine still lived. Surrounded by his dead comrades, the Marine rambled incoherently about his squad's infection by the Flood. Unable to help the Marine, John and Thel continued out into the lakebed, the majority of which had been sheared away by the crashing battlecruiser.[8]
At that moment, a battle group of the Sangheili Fleet of Retribution arrived, having pursued the Indulgence of Conviction from Installation 05.[Note 2] The fleet deployed a number of drop pods, depositing a team of Special Operations Sangheili who proceeded to attack the Flood forms around them. John and Thel fought their way across to the team, and the commanding Sangheili Major revealed that High Charity had completely fallen to the Flood and the subsequent quarantine by Sangheili warships had fallen, before warning them that the Flood had evolved. John, Thel and the Special Operations team fought their way across the outskirts of the destroyed lake bed, before re-entering the factory and contending with the Flood forms that had completely infested the building. Sergeant Johnson revealed that the Sangheili had confirmed the presence of Cortana on board the Flood ship, and ordered John to retrieve the AI. On the other side of the factory, as the group entered the lake bed that the Indulgence of Conviction had crashed in, the group was confronted by the Flood's pure forms for the first time, as a spindly crawler form transformed into a hulking tank form to confront them. As they made their way to the wrecked husk of the CCS-class battlecruiser, the team was forced to engage large numbers of the new pure Flood forms, as well as more combat forms until they reached a rent in the ship's hull. Thel announced that he and the other Sangheili would remain behind to secure the entrance while the Master Chief ventured inside alone.
John made his way through corridors thick with Flood biomass and blisters until he entered a larger room where he discovered what he thought was Cortana-in truth a message from her-inside a Covenant storage device. Before he could listen to the message, a Sangheili Phantom arrived and 343 Guilty Spark descended down toward the Spartan. Still hostile towards the monitor for his earlier actions, John resisted when Spark attempted to interface with the storage device. Eventually relenting, John allowed Spark to take the device and the two entered the Phantom. The dropship quickly took off from the Flood-infested cruiser as the Fleet of Retribution began to glass the city of Voi to ensure that the Flood parasite could not spread further. On board the fleet's flagship, the CAS-class assault carrier Shadow of Intent, a meeting was convened between John-117, Thel 'Vadam, 343 Guilty Spark, Admiral Hood, Commander Keyes and Fleetmaster Rtas 'Vadum. The group listened to the message from Cortana, which revealed that the Flood were on their way to Earth with the infested High Charity, but hinting at a solution for the Flood problem that lay beyond the portal, at the Ark. While Admiral Hood wished to marshal their strength at Earth in preparation for the Flood assault, 'Vadum scoffed at this notion while the others believed that their best choice was to travel through the opened portal and find the "solution" Cortana had spoke of. Eventually, Hood acquiesced, allowing Keyes to take the UNSC Forward Unto Dawn to accompany the Fleet of Retribution through the portal. As the fleet departed for Installation 00, Hood rallied the surviving forces at Earth to prepare for the Flood's arrival, which never came as the Gravemind took High Charity to the Ark instead.[8][23]
Aftermath
The end of the Battle of Kenya concluded the fighting in East Africa, as the majority of Covenant vessels accompanied the Prophet of Truth to the Ark. Some of the remaining Covenant forces on Earth fortified themselves in Arizona, URNA. After the withdrawal of Truth's fleet through through the Ark's portal, Covenant battle network cohesion broke down allowing UNSC forces to begin a major counteroffensive, with the codeword LUX declared on November 19 in anticipation of the nuclear bombardment of shielded Covenant positions at Free-fire area OZONE. The campaign culminated on December 3, with Operation: MARSH FLASH, which successfully eliminated clusters of Jiralhanae leadership attempting to activate an unknown artifact.[24]
The task force that ventured through the portal was successful in defeating both the remnants of the Covenant and the Flood. Thel 'Vadam killing the Prophet of Truth and John-117 activating the incomplete Installation 08 over the Ark to destroy the Flood presence.[23][25] With this, the Human-Covenant War was officially over, after almost thirty years of devastating conflict. After the cessation of war on March 3, 2553, a memorial ceremony was held on a hilltop near the ruined city of Voi, where survivors of the war gathered to remember those who had fallen in the conflict.[25]
At some point following the Battle of Kenya, ODST squad Alpha-Nine carried out Operation: JOINT MONITOR in the ruins of Voi, now dubbed the Voi Exclusion Zone, to determine if any Flood had survived the city's glassing by the Fleet of Retribution. No traces of the parasite was found.[26] The glassing of Voi was disguised as a Covenant attack from the general populace after the war's end, to keep the knowledge of the Flood's arrival on the planet hidden.[1] In order to prepare for the hypothetical return of the parasite, simulated training was provided for Spartan-IVs to undertake.[1]
Participants
List of appearances
- Halo: First Strike
- Petra (Mentioned only)
- Halo 3 (First appearance)
- Halo Legends
- Halo: Spartan Assault (Mentioned only)
- Halo: Mortal Dictata (Indirect mention)
- Halo Mythos
Notes
- ^ Although the date of the beginning of this battle is unknown, the events of Halo 3 on Earth, including the end of the battle with the glassing of Voi, takes place on this date.
- ^ a b c See here.
- ^ a b c See Truth's fleet's Notes section about the size of the fleet along with the battle group of the Fleet of Retribution and the Battle Group Victory.
- ^ As seen in the Tsavo Highway and The Storm levels, 41 gathered distant cruisers can be observed over the ruined Mombasa city and are depicted in the likeness of CCS-class battlecruisers though are all background 2D graphics instead 3 dimensional renders, making their sizes maybe not accurate. As they were also not canonly confirmed to be CCS-class battlecruisers, this could indicate that several of these cruisers might be CRS-class light cruisers (only properly introduced in Halo 4) due to be virtually identical to the CCS-class in outward appearance. An additional at least 6 CCS-class battlecruisers (in 3 dimensional renders, thus with accurate sizes comparing to the assault carriers) can be seen in the last cutscene of the Tsavo Highway level.
Sources
- ^ a b c d Halo: Spartan Assault: Flood missions introductory cutscene
- ^ Halo: The Essential Visual Guide, page 74
- ^ a b c d e f Halo Legendary Crate - Data Drop #2: Naval Records Archives #2
- ^ Halo Mythos, page 117
- ^ a b c d e f g h i j k l m n o p q Halo 3, campaign level The Storm
- ^ a b c d e f g h i j k l m n o p Halo 3, campaign level Tsavo Highway
- ^ a b c Halo 3, campaign level The Ark
- ^ a b c d e f g h i j k l m n o Halo 3, campaign level Floodgate
- ^ a b c d Halo Legendary Crate - Data Drop #5: Apollo Leader To CDR S. Palmer
- ^ a b Halo: Envoy
- ^ Halo 3: ODST: Sadie's Story, Circle 1, Arc 2
- ^ Halo 2, campaign level Metropolis
- ^ Halo 3: ODST, campaign level Prepare To Drop
- ^ Halo Waypoint, Canon Fodder - Vergil Reality (Retrieved on Jun 15, 2021) [archive]
- ^ Halo 3: ODST, campaign level Coastal Highway
- ^ Halo Waypoint - Ten Twenty
- ^ a b Halo: Ghosts of Onyx, chapter 23
- ^ a b c d e f g h Halo 3, campaign level Crow's Nest
- ^ Halo: Landfall
- ^ a b c Halo 3, campaign level Arrival
- ^ a b c d Halo 3, campaign level Sierra 117
- ^ Halo 3: ODST, campaign level Uplift Reserve
- ^ a b Halo 3, campaign level The Covenant
- ^ Halo Legendary Crate, Data Drop #2
- ^ a b Halo 3, campaign level Halo
- ^ Halo 5: Guardians Limited Edition: Spartan Locke's Classified Orders
- ^ a b bungie.net, The Tru7h About Co-Op in Halo 3 (Retrieved on Nov 14, 2014) [archive]
| |||||||||||

