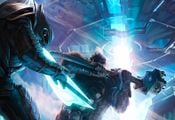
Category:Images of Installation 05
From Halopedia, the Halo wiki
Images featuring Installation 05, also known as Delta Halo.
Subcategories
This category has the following 18 subcategories, out of 18 total.
I
- Images of Ascension (11 F)
- Images of Backwash (15 F)
- Images of Beaver Creek (9 F)
- Images of Coagulation (32 F)
- Images of Cold Storage (19 F)
- Images of Containment (11 F)
- Images of Desolation (7 F)
- Images of Lockdown (34 F)
- Images of Lockout (30 F)
- Images of Pegasus (8 F)
- Images of Relic (13 F)
- Images of Remnant (31 F)
- Images of Sanctuary (5 F)
- Images of Shrine (24 F)
- Images of Skyward (10 F)
- Images of Uplift (7 F)
- Images of Warlock (6 F)
- Images of Zenith (32 F)
Media in category "Images of Installation 05"
The following 200 files are in this category, out of 533 total.
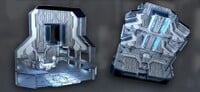
(previous page) (next page)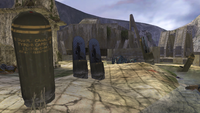 H2 Type-B Capsules.png 1,920 × 1,080; 2.63 MB
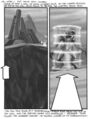 H2 Uprising Storyboard Intro 1.jpg 1,257 × 1,650; 271 KB
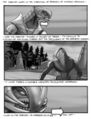 H2 Uprising Storyboard Intro 2.jpg 1,251 × 1,641; 309 KB
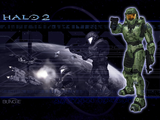 H2 Wallpaper Master Chief and ODST.png 1,600 × 1,200; 2.19 MB
 H2 Wallpaper Tartarus and Brutes.png 1,600 × 1,200; 2.84 MB
 H2 warthogguys.jpg 1,680 × 1,212; 1.54 MB
 H2 Weaponless Brute.jpg 286 × 377; 11 KB
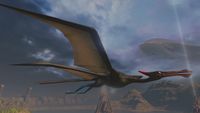
 H2-Delta Halo Quadwings.jpg 800 × 600; 56 KB
 H2-EnforcerSentinel-ScanScreen.jpg 2,240 × 1,120; 2.19 MB
 H2-SpectreturretHUD.png 1,138 × 640; 1.16 MB
 H2-T32HUD.png 1,138 × 640; 1.06 MB
 H2-T33FRGHUD.jpg 290 × 217; 13 KB
 H2-WraithHUD.png 1,138 × 640; 1.14 MB
 H2A - Arbiter and 'Vadum.png 1,173 × 491; 1.19 MB
 H2A - Arbiter and former guardsmen.jpg 1,280 × 540; 150 KB
 H2A - Arbiter attacking Johnson.jpg 1,280 × 540; 54 KB
 H2A - Arbiter.png 1,280 × 820; 1.53 MB
 H2A - Arrival of High Charity.jpg 1,280 × 541; 80 KB
 H2A - Battle of Delta Halo.jpg 1,280 × 543; 98 KB
 H2A - Chief outrunning plasma.jpg 1,280 × 544; 92 KB
 H2A - Delta Halo activated.jpg 1,280 × 541; 103 KB
 H2A - Delta Halo.jpg 1,920 × 1,080; 1.33 MB
 H2A - DeltaHalo.jpg 1,920 × 1,080; 269 KB
 H2A - Enforcer.jpg 1,280 × 543; 160 KB
 H2A - Fist of Rukt on Arbiter.jpg 1,280 × 544; 107 KB
 H2A - Gravemind saves MC.jpg 1,031 × 540; 58 KB
 H2A - Great Schism.jpg 1,279 × 539; 84 KB
 H2A - GuiltyJohnsonMiranda.png 1,920 × 808; 1.35 MB
 H2A - Halo Array hologram.jpg 1,280 × 542; 125 KB
 H2A - HEVs deployed.jpg 1,280 × 539; 49 KB
 H2A - HEVs over Delta Halo.jpg 1,280 × 541; 91 KB
 H2A - Hierarchs with Vadum.jpg 1,280 × 540; 128 KB
 H2A - In Amber Clad approaches Halo.png 1,920 × 810; 913 KB
 H2A - In Amber Clad heading for Delta Halo.jpg 1,280 × 542; 146 KB
 H2A - Inevitable betrayal.jpg 1,280 × 543; 110 KB
 H2A - Library.jpg 1,280 × 544; 179 KB
 H2A - LibraryConcept.png 1,920 × 1,080; 3.51 MB
 H2A - Make More Noise.jpg 1,280 × 541; 111 KB
 H2A - Mean Jackal.jpg 1,280 × 542; 199 KB
 H2A - Prophet of Regret hologram.jpg 1,280 × 542; 171 KB
 H2A - RegretGravemind.jpg 1,060 × 808; 268 KB
 H2A - Rtas and Thel.jpg 1,280 × 541; 134 KB
 H2A - Rtas rallying troops.jpg 1,280 × 543; 112 KB
 H2A - Scarab console.jpg 1,280 × 542; 100 KB
 H2A - ScarabConcept.png 1,920 × 1,080; 4.46 MB
 H2A - Spark with Hierarchs and Arbiter.jpg 1,280 × 539; 170 KB
 H2A - T27 Shade 1.jpg 1,920 × 1,080; 630 KB
 H2A - T27 Shade 2.jpg 1,920 × 1,080; 647 KB
 H2A - Tartarus capturing Keyes.jpg 1,280 × 536; 86 KB
 H2A - Tartarus with Keyes and Spark.jpg 1,071 × 541; 97 KB
 H2A - Tartarus with Rukt.jpg 899 × 542; 111 KB
 H2A Aggressor.png 3,840 × 2,160; 9.17 MB
 H2A Base Beam Hud1.png 1,280 × 720; 1.21 MB
 H2A Base Beam Hud2.png 1,280 × 720; 1,020 KB
 H2A Base Beam Hud4.png 1,280 × 720; 1,017 KB
 H2A Base Beam.png 254 × 118; 46 KB
 H2A BlurLibraryInterior Render 1.jpg 1,920 × 817; 314 KB
 H2A BlurLibraryInterior Render 2.jpg 1,920 × 817; 260 KB
 H2A BlurRegretTemple Render 1.jpg 1,920 × 960; 515 KB
 H2A BlurRegretTemple Render 2.jpg 1,920 × 960; 441 KB
 H2A Brute Minor.png 3,840 × 2,160; 13.55 MB
 H2A Brute Pack.png 3,840 × 2,160; 11.91 MB
 H2A Compare beams.png 263 × 239; 84 KB
 H2A ConstructorAndPiston.png 3,840 × 2,160; 6.49 MB
 H2A ConstructorSacredIcon.png 3,840 × 2,160; 7.96 MB
 H2A ControlRoom Concept.jpg 1,300 × 692; 165 KB
 H2A ControlRoom Platform Concept.jpg 1,404 × 1,600; 578 KB
 H2A ControlRoomCover Concept 1.jpg 1,612 × 1,080; 273 KB
 H2A ControlRoomCover Concept 2.jpg 1,920 × 1,384; 409 KB
 H2A CouncilorJailRoom Concept 1.jpg 1,920 × 967; 440 KB
 H2A CouncilorJailRoom Concept 2.jpg 1,920 × 887; 439 KB
 H2A CovenantDropPod Back.png 1,920 × 1,080; 2.98 MB
 H2A CovenantDropPod Closed.png 1,920 × 1,080; 2.85 MB
 H2A CovenantDropPod Open.png 1,920 × 1,080; 2.85 MB
 H2A CovenantDropPod Top.png 1,920 × 1,080; 3.46 MB
 H2A Cutscene SanctumHaloView.png 1,920 × 818; 1.68 MB
 H2A DeltaCliffs Platform Concept.jpg 1,920 × 1,087; 280 KB
 H2A DeltaHalo BrownStealthSangheili.png 419 × 660; 705 KB
 H2A DeltaHalo Loadscreen.png 1,920 × 1,080; 2.99 MB
 H2A DeltaHalo LZ Concept.jpg 848 × 996; 385 KB
 H2A DeltaHaloLZ Ruins Concept.jpg 640 × 640; 127 KB
 H2A DeltaHaloRuins Concept.jpg 640 × 640; 94 KB
 H2A DeltaStructure.png 1,920 × 1,080; 4.01 MB
 H2A EliteInCover.png 3,840 × 2,160; 7.24 MB
 H2A EncampmentBattle.png 3,840 × 2,160; 8.2 MB
 H2A FirinMahLazer.png 3,840 × 2,160; 7.91 MB
 H2A ForerunnerWall Concept.jpg 1,920 × 2,493; 822 KB
 H2A Gold Beam Hud1.png 1,280 × 720; 1,020 KB
 H2A Gold Beam Hud2.png 1,280 × 720; 1,023 KB
 H2A Gold Beam Hud3.png 1,280 × 720; 1 MB
 H2A Gold Beam Hud4.png 1,280 × 720; 1.01 MB
 H2A Gold Beam.png 204 × 173; 57 KB
 H2A gold sent beam.png 158 × 153; 34 KB
 H2A Gold Sentinel.png 302 × 256; 141 KB
 H2A Gravemind Loadscreen.png 1,920 × 1,080; 2.14 MB
 H2A Gravemind.jpg 1,656 × 1,034; 678 KB
 H2A HuntersDeploying.png 1,920 × 1,080; 2.58 MB
 H2A Jiralhanae Captain.png 1,280 × 720; 830 KB
 H2A JohnVsRegret.jpg 1,404 × 1,236; 724 KB
 H2A Library.png 4,083 × 2,025; 4.28 MB
 H2A LikeAPostcard.png 1,920 × 1,080; 2.68 MB
 H2A MarineSnipingJackal.png 1,920 × 1,080; 3.03 MB
 H2A NeedlerSentinel.png 678 × 722; 793 KB
 H2A ODSTAttack.png 1,920 × 1,080; 3.42 MB
 H2A ODSTsFighting.png 1,920 × 1,080; 4.09 MB
 H2A QuarantineZone Loadscreen.png 1,920 × 1,080; 2.42 MB
 H2A Rangmejo.jpg 542 × 305; 86 KB
 H2A Recharge Station and Elites.jpg 1,920 × 1,080; 425 KB
 H2A Recharge Station.jpg 1,920 × 1,080; 509 KB
 H2A Regret BossRoom Concept.jpg 1,920 × 2,000; 733 KB
 H2A Regret Loadscreen.png 1,920 × 1,080; 2.44 MB
 H2A SacredIcon Loadscreen.png 1,920 × 1,080; 2.06 MB
 H2A ScarabStandoff.png 1,920 × 744; 1.76 MB
 H2A SentinelBois.png 3,840 × 2,160; 9.48 MB
 H2A SentinelFactory Entrance Concept.jpg 1,007 × 1,443; 387 KB
 H2A Silver sent.png 321 × 218; 143 KB
 H2A SpecOps Sangheili.png 1,280 × 720; 1.59 MB
 H2A TankBeatsEverything.png 1,920 × 1,080; 3.44 MB
 H2A Terminals - Great Schism.png 1,882 × 800; 1.49 MB
 H2A Terminals - Murder of the Councilors.jpg 1,916 × 814; 586 KB
 H2A TheGreatJourney BridgeBunker Concept.jpg 1,920 × 714; 223 KB
 H2A TheGreatJourney Loadscreen.png 1,920 × 1,080; 2.33 MB
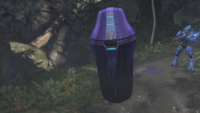
 H2A Type-B Capsule Empty.png 954 × 1,080; 1.31 MB
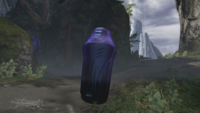
 H2A Type-B Capsule Full.png 954 × 1,080; 1.5 MB
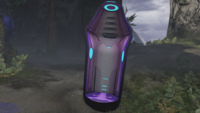
 H2A Type-B Capsule Label.png 954 × 1,080; 1.24 MB
 H2A Type-B Capsules.png 1,920 × 1,080; 3.27 MB
 H2A Uprising Loadscreen.png 1,920 × 1,080; 2.78 MB
 H2A Uprising RampRoom Concept.jpg 1,725 × 2,204; 558 KB
 H2A Uprising StairsRoom Concept.jpg 1,920 × 835; 305 KB
 H2A Uprising WeaponsRoom Concept.jpg 1,890 × 1,081; 741 KB
 H2A WraithsGuardingBridge.png 1,920 × 1,080; 2.89 MB
 H2A-Arbiter&Co.jpg 1,923 × 822; 594 KB
 H2A-Arbiter&Johnson.jpg 1,921 × 818; 382 KB
 H2A-Arbiter&Prophets.jpg 1,920 × 823; 243 KB
 H2A-bogdan-marica-05-control-room.jpg 1,500 × 833; 333 KB
 H2A-Control room.png 1,920 × 1,080; 3.04 MB
 H2A-HowYaDoing.jpg 1,280 × 545; 205 KB
 H2A-In Amber Clad Quarantine Zone.png 1,920 × 1,080; 1.55 MB
 H2A-InfectedHumans.png 1,280 × 720; 1.14 MB
 H2A-JohnNeedlers.jpg 1,920 × 1,080; 340 KB
 H2A-JohnWithGravemind.jpg 1,280 × 545; 228 KB
 H2A-KeyesWithSMG2.jpg 708 × 398; 19 KB
 H2A-KigYarMinor.png 1,920 × 1,080; 3.56 MB
 H2A-Library-Wall.jpg 3,500 × 2,571; 1.94 MB
 H2A-Miranda.jpg 1,921 × 820; 376 KB
 H2A-ODSTsWarthog.png 1,280 × 720; 1.22 MB
 H2A-Photobombing Minor.png 1,280 × 720; 1.23 MB
 H2A-Quadwing.png 1,158 × 514; 716 KB
 H2A-Ricochet.png 1,920 × 1,080; 3.01 MB
 H2A-Rtas&Arbiter.jpg 1,921 × 822; 674 KB
 H2A-SOEIV entry.png 1,920 × 815; 1.35 MB
 H2A-Solemn Penance.png 1,920 × 1,080; 2.06 MB
 H2A-SOSMgalekgolo.png 376 × 319; 257 KB
 H2A-Spec Ops and Zealot.png 1,280 × 720; 1.48 MB
 H2A-SpectreturretHUD.png 1,138 × 640; 1.3 MB
 H2A-Substance From Delta Halo.png 1,920 × 1,080; 1.57 MB
 H2A-T27Shade.png 365 × 553; 404 KB
 H2A-TallMgalekgolo.png 196 × 280; 121 KB
 H2A-Tartarus&Co.jpg 1,921 × 822; 510 KB
 H2A-ThelVadam GreatSchism Uprising.png 1,920 × 818; 1.76 MB
 H2A-UnggoyUltra.png 1,920 × 1,080; 3.15 MB
 H2A2401&Regret.png 1,059 × 539; 434 KB
 H2AArbyChief.png 993 × 536; 464 KB
 H2ABastionOfTheBrutes.png 1,920 × 1,080; 3.57 MB
 H2ABridge.jpg 1,920 × 1,080; 576 KB
 H2ACampaign ChiefVsRegret.png 1,920 × 1,080; 2.49 MB
 H2ACP-SentinelBeamHUD.png 1,280 × 720; 994 KB
 H2ACP-Wraith.png 711 × 663; 827 KB
 H2ACP-WraithHUD.png 1,138 × 640; 1.31 MB
 H2AJiralhanaeEncampment.png 1,920 × 1,080; 1.89 MB
 H2AJiralhanaeEncampmentEntrance.png 1,920 × 1,080; 3.59 MB
 H2AJohnRegret.jpg 1,280 × 538; 261 KB
 H2AMAJ.jpg 1,280 × 543; 188 KB
 H2AMirandaCable.jpg 1,280 × 544; 164 KB
 H2AMP-T33FRG.png 723 × 1,061; 1.09 MB
 H2AMP-T51zoom.png 1,920 × 1,080; 2.13 MB
 H2AShade.jpg 1,920 × 1,080; 1.91 MB
 H2AWaterfall.jpg 1,920 × 1,080; 475 KB
 H2V ForerunnerSample Screenshot 1.jpg 800 × 500; 89 KB
 H2V ForerunnerSample Screenshot 2.jpg 800 × 500; 79 KB
 Halo picture 04.jpg 800 × 600; 117 KB
 Halo-2-Anniversary-Gravemind-2.png 3,840 × 1,630; 2.96 MB
 Halo2 - SFPelican.jpg 1,920 × 1,080; 951 KB
 Halo2AnniversaryUnggoyUltra.jpg 564 × 564; 122 KB
 Halo6.jpg 1,365 × 768; 125 KB
 HaloConflict Waypoint.jpg 542 × 542; 27 KB
 Halophantom.jpg 1,365 × 768; 161 KB
 Haloroom.jpg 1,365 × 768; 173 KB
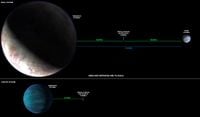 Haloverse-PlanetDistances scaled.jpg 2,615 × 1,524; 163 KB
 Hevstohalo05.jpg 800 × 600; 37 KB
 HLC The Great Schism.jpg 1,570 × 1,080; 504 KB
 HM-DeltaHalo.jpg 5,669 × 3,661; 4.27 MB
 HTMCC Achievement Can'tPutItDown.png 1,920 × 1,080; 2.29 MB
 HTMCC Achievement HuntersHunted.png 1,920 × 1,080; 2.77 MB
 HTMCC Achievement Knightbane.png 1,920 × 1,080; 1.81 MB
 HTMCC Achievement LoreMaster.png 1,920 × 1,080; 2.28 MB
 HTMCC Achievement MedalCompletionist.png 1,920 × 1,080; 1.66 MB
 HTMCC Achievement MultiplayerChampion.png 1,920 × 1,080; 1.66 MB
 HTMCC Achievement RemovetheBishopsFromtheBoard.png 1,920 × 1,080; 2.36 MB
 HTMCC Achievement SteadyAim.png 1,920 × 1,080; 1.62 MB


