
Category:Images of Thel 'Vadam
Images featuring the Arbiter Thel 'Vadam.
Media in category "Images of Thel 'Vadam"
The following 200 files are in this category, out of 564 total.
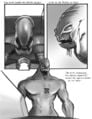
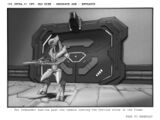
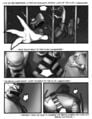
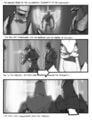
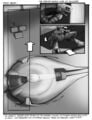
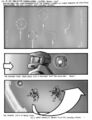
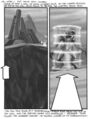
(previous page) (next page) H2 TheArbiter V1 Storyboard Intro 2.jpg 1,256 × 1,630; 398 KB
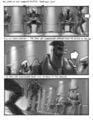
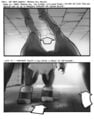
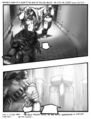
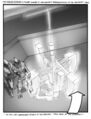
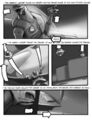
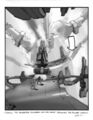
 H2 TheArbiter V1 Storyboard Intro 3.jpg 1,260 × 1,638; 326 KB
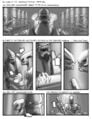
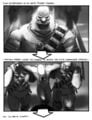
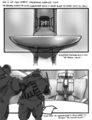
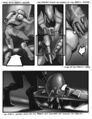
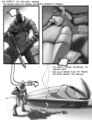
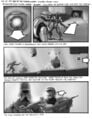
 H2 TheArbiter V1 Storyboard Intro 4.jpg 1,272 × 1,634; 223 KB
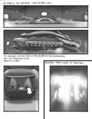
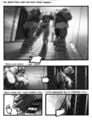
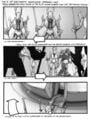
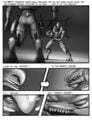
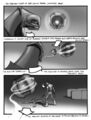
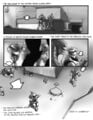
 H2 TheArbiter V1 Storyboard Intro 5.jpg 1,268 × 1,634; 325 KB
 H2 TheArbiter V1 Storyboard Intro 6.jpg 1,264 × 1,638; 358 KB
 H2 TheArbiter V1 Storyboard Intro 7.jpg 1,260 × 1,634; 296 KB
 H2 TheArbiter V1 Storyboard Intro 8.jpg 1,256 × 1,630; 250 KB
 H2 TheArbiter V2 Storyboard Intro 2.jpg 1,260 × 1,630; 329 KB
 H2 TheArbiter V2 Storyboard Intro 4.jpg 1,256 × 1,630; 371 KB
 H2 TheArbiter V2 Storyboard Intro 7.jpg 1,256 × 1,630; 259 KB
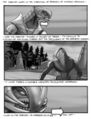
 H2 TheArbiter V3 Storyboard Intra 6.jpg 1,650 × 1,239; 301 KB
 H2 TheArbiter V3 Storyboard Intra 7.jpg 1,650 × 1,239; 225 KB
 H2 TheArbiter V3 Storyboard Intro 1.jpg 1,269 × 1,611; 279 KB
 H2 TheArbiter V3 Storyboard Intro 2.jpg 1,248 × 1,632; 317 KB
 H2 TheArbiter V3 Storyboard Intro 3.jpg 1,251 × 1,632; 358 KB
 H2 TheArbiter V3 Storyboard Intro 4.jpg 1,260 × 1,635; 322 KB
 H2 TheArbiter V3 Storyboard Intro 5.jpg 1,251 × 1,641; 318 KB
 H2 TheArbiter V3 Storyboard Intro 6.jpg 1,254 × 1,641; 288 KB
 H2 TheArbiter V3 Storyboard Intro 8.jpg 1,251 × 1,641; 358 KB
 H2 TheArbiter V3 Storyboard Intro 9.jpg 1,254 × 1,626; 283 KB
 H2 TheArbiter V3 Storyboard Intro 10.jpg 1,263 × 1,635; 291 KB
 H2 TheArbiter V3 Storyboard Intro 11.jpg 1,248 × 1,608; 275 KB
 H2 TheArbiter V3 Storyboard Intro 12.jpg 1,251 × 1,632; 284 KB
 H2 TheArbiter V3 Storyboard Intro 13.jpg 1,251 × 1,629; 323 KB
 H2 TheArbiter V3 Storyboard Intro 14.jpg 1,260 × 1,635; 338 KB
 H2 TheArbiter V3 Storyboard Intro 15.jpg 1,257 × 1,635; 310 KB
 H2 TheArbiter V3 Storyboard Intro 16.jpg 1,248 × 1,638; 313 KB
 H2 TheArbiter V3 Storyboard Intro 18.jpg 1,256 × 1,626; 371 KB
 H2 TheArbiter V3 Storyboard Intro 19.jpg 1,251 × 1,641; 321 KB
 H2 TheArbiter V3 Storyboard Intro 20.jpg 1,254 × 1,635; 324 KB
 H2 TheArbiter V3 Storyboard Intro 21.jpg 1,251 × 1,629; 253 KB
 H2 TheArbiter V3 Storyboard Intro 23.jpg 1,248 × 1,644; 331 KB
 H2 TheArbiter V3 Storyboard Intro 33.jpg 1,263 × 1,623; 253 KB
 H2 TheArbiter V3 Storyboard Intro 34.jpg 1,260 × 1,629; 284 KB
 H2 TheHeretic V1 Storyboard 3.jpg 1,256 × 1,630; 351 KB
 H2 TheHeretic V1 Storyboard 6.jpg 1,260 × 1,634; 381 KB
 H2 TheHeretic V1 Storyboard 7.jpg 1,256 × 1,630; 289 KB
 H2 TheHeretic V1 Storyboard 10.jpg 1,260 × 1,634; 379 KB
 H2 TheHeretic V1 Storyboard 11.jpg 1,260 × 1,638; 473 KB
 H2 TheHeretic V1 Storyboard 12.jpg 1,260 × 1,630; 401 KB
 H2 Thel Vadam Crouch.png 500 × 440; 233 KB
 H2 TheOracle Storyboard Intro 1.jpg 1,251 × 1,623; 227 KB
 H2 TheOracle Storyboard Intro 2.jpg 1,254 × 1,626; 269 KB
 H2 TheOracle Storyboard Intro 3.jpg 1,251 × 1,626; 276 KB
 H2 TheOracle Storyboard Intro 4.jpg 1,248 × 1,638; 317 KB
 H2 TheOracle Storyboard Intro 5.jpg 1,257 × 1,635; 297 KB
 H2 TheOracle Storyboard Intro 6.jpg 1,245 × 1,632; 290 KB
 H2 TheOracle Storyboard Outro 2.jpg 1,257 × 1,632; 326 KB
 H2 TheOracle Storyboard Outro 3.jpg 1,254 × 1,629; 297 KB
 H2 TheOracle Storyboard Outro 4.jpg 1,257 × 1,638; 229 KB
 H2 TheOracle Storyboard Outro 5.jpg 1,257 × 1,629; 331 KB
 H2 TheOracle Storyboard Outro 6.jpg 1,254 × 1,629; 254 KB
 H2 TheOracle Storyboard Outro 7.jpg 1,254 × 1,638; 288 KB
 H2 TheOracle Storyboard Outro 8.jpg 1,251 × 1,638; 264 KB
 H2 TheOracle Storyboard Outro 9.jpg 1,257 × 1,638; 282 KB
 H2 TheOracle Storyboard Outro 11.jpg 1,254 × 1,632; 318 KB
 H2 TheOracle Storyboard Outro 12.jpg 1,245 × 1,635; 259 KB
 H2 TheOracle Storyboard Outro 13.jpg 1,251 × 1,647; 309 KB
 H2 TruthBattle Storyboard Intro 1.jpg 1,256 × 1,634; 288 KB
 H2 TruthBattle Storyboard Intro 2.jpg 1,248 × 1,638; 335 KB
 H2 TruthBattle Storyboard Intro 3.jpg 1,256 × 1,626; 333 KB
 H2 TruthBattle Storyboard Intro 4.jpg 1,256 × 1,634; 307 KB
 H2 TruthBattle Storyboard Intro 5.jpg 1,260 × 1,630; 330 KB
 H2 TruthBattle Storyboard Intro 6.jpg 1,252 × 1,638; 323 KB
 H2 TruthBattle Storyboard Outro 1.jpg 1,254 × 1,635; 301 KB
 H2 TruthBattle Storyboard Outro 2.jpg 1,251 × 1,632; 354 KB
 H2 TruthBattle Storyboard Outro 4.jpg 1,254 × 1,629; 306 KB
 H2 TruthBattle Storyboard Outro 6.jpg 1,266 × 1,638; 329 KB
 H2 TruthBattle Storyboard Outro 10.jpg 1,254 × 1,632; 265 KB
 H2 TruthBattle Storyboard Outro 13.jpg 1,254 × 1,641; 246 KB
 H2 TruthBattle Storyboard Outro 14.jpg 1,251 × 1,614; 275 KB
 H2 TruthBattle Storyboard Outro 16.jpg 1,263 × 1,638; 330 KB
 H2 TruthBattle Storyboard Outro 17.jpg 1,266 × 1,635; 309 KB
 H2 Uprising Storyboard Intro 1.jpg 1,257 × 1,650; 271 KB
 H2 Uprising Storyboard Intro 2.jpg 1,251 × 1,641; 309 KB
 H2-ArbiterThelVadamRifle.png 1,330 × 1,880; 1.7 MB
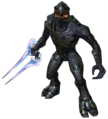 H2-ArbiterThelVadamStance.png 940 × 1,040; 970 KB
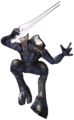 H2-ArbiterThelVadamSword.png 480 × 780; 509 KB
 H2-SpectreturretHUD.png 1,138 × 640; 1.16 MB
 H2-T32HUD.png 1,138 × 640; 1.06 MB
 H2A - Arbiter & Swords.png 1,920 × 816; 1.07 MB
 H2A - Arbiter and 'Vadum.png 1,173 × 491; 1.19 MB
 H2A - Arbiter and former guardsmen.jpg 1,280 × 540; 150 KB
 H2A - Arbiter attacking Johnson.jpg 1,280 × 540; 54 KB
 H2A - Arbiter helmet.jpg 1,280 × 542; 171 KB
 H2A - Arbiter.png 1,280 × 820; 1.53 MB
 H2A - Changing of the Guard.jpg 1,280 × 544; 100 KB
 H2A - Covenant Honor Guard.jpg 1,280 × 542; 124 KB
 H2A - Enforcer.jpg 1,280 × 543; 160 KB
 H2A - Fist of Rukt on Arbiter.jpg 1,280 × 544; 107 KB
 H2A - Heresy.jpg 1,920 × 818; 243 KB
 H2A - Hierarchs with Vadum.jpg 1,280 × 540; 128 KB
 H2A - Inevitable betrayal.jpg 1,280 × 543; 110 KB
 H2A - Rtas and Thel.jpg 1,280 × 541; 134 KB
 H2A - Rtas rallying troops.jpg 1,280 × 543; 112 KB
 H2A - Scarab console.jpg 1,280 × 542; 100 KB
 H2A - ScarabConcept.png 1,920 × 1,080; 4.46 MB
 H2A - Spark with Hierarchs and Arbiter.jpg 1,280 × 539; 170 KB
 H2A - Spark, Thel, and Sesa.jpg 1,280 × 540; 125 KB
 H2A - Tartarus branding.jpg 1,280 × 539; 142 KB
 H2A - Thel before armor.jpg 1,280 × 542; 167 KB
 H2A - Thel's face.jpg 1,280 × 542; 106 KB
 H2A ArbitersPlan.png 1,920 × 1,080; 1.92 MB
 H2A Arby.jpg 1,920 × 1,080; 135 KB
 H2A Cutscene 343Stasis.png 1,920 × 816; 2.02 MB
 H2A Cutscene SanctumHaloView.png 1,920 × 818; 1.68 MB
 H2A GasMineAerialBattle.png 1,920 × 1,080; 2.02 MB
 H2A ScarabStandoff.png 1,920 × 744; 1.76 MB
 H2A SesaShieldDoor.png 1,920 × 1,080; 1.38 MB
 H2A Terminals - 3rd Battalion slaughter.jpg 1,024 × 436; 51 KB
 H2A Terminals - Arbiter kneeling.png 1,360 × 574; 1.03 MB
 H2A Terminals - Jai vs Thel-2.jpg 1,919 × 822; 86 KB
 H2A Terminals - Jai vs Thel.jpg 3,840 × 1,634; 2.74 MB
 H2A terminals - Marine POV.jpg 1,280 × 544; 320 KB
 H2A Terminals - SupremeCommanderThel.png 3,840 × 1,601; 3.59 MB
 H2A Terminals - Thel and Marine.png 3,840 × 1,629; 3.21 MB
 H2A Terminals - Thel and Prophet.jpg 1,280 × 536; 101 KB
 H2A Terminals - Thel and Zhar.jpg 1,280 × 538; 91 KB
 H2A Terminals - ThelZealot.png 3,840 × 1,634; 3.6 MB
 H2A Terminals ThelTraining.png 3,840 × 1,626; 3.94 MB
 H2A Thel Epilogue.png 1,175 × 675; 570 KB
 H2A ThelVsSesaBanshee.png 1,920 × 1,080; 1,017 KB
 H2A-Arbiter-01.jpg 1,921 × 820; 472 KB
 H2A-Arbiter-02.jpg 1,925 × 820; 523 KB
 H2A-Arbiter-03.jpg 1,921 × 820; 548 KB
 H2A-Arbiter&Co.jpg 1,923 × 822; 594 KB
 H2A-Arbiter&Johnson.jpg 1,921 × 818; 382 KB
 H2A-Arbiter&Prophets.jpg 1,920 × 823; 243 KB
 H2A-Arbiter&Rtas-01.jpg 1,923 × 822; 561 KB
 H2A-Arbiter&Rtas.jpg 1,921 × 822; 484 KB
 H2A-Arbiter&Sesa-02.jpg 1,920 × 820; 666 KB
 H2A-ArbiterThelVadam-Render.jpg 1,420 × 800; 327 KB
 H2A-bogdan-marica-05-control-room.jpg 1,500 × 833; 333 KB
 H2A-EnergyShackle.png 1,042 × 812; 941 KB
 H2A-ep-Arbiter&Locke.jpg 1,919 × 818; 449 KB
 H2A-HighCouncilSession.jpg 1,280 × 545; 312 KB
 H2A-holoJohn.jpg 1,920 × 818; 248 KB
 H2A-HowYaDoing.jpg 1,280 × 545; 205 KB
 H2A-Lichdooropens.png 1,920 × 820; 1.4 MB
 H2A-Rtas&Arbiter.jpg 1,921 × 822; 674 KB
 H2A-Rtas&Co.jpg 1,923 × 820; 554 KB
 H2A-SanctumEntrance.jpg 1,280 × 545; 346 KB
 H2A-ShadeHUD.png 1,920 × 1,080; 1.54 MB
 H2A-SpectreturretHUD.png 1,138 × 640; 1.3 MB
 H2A-Thel SC.jpg 1,920 × 1,080; 345 KB
 H2A-Thel SC2.jpg 1,920 × 1,080; 349 KB
 H2A-ThelBeforeCouncil.jpg 1,280 × 545; 317 KB
 H2A-ThelBeforeHierarchs.jpg 1,280 × 545; 343 KB
 H2A-ThelModel-Face.jpg 1,794 × 1,793; 1.1 MB
 H2A-ThelModel-Front.jpg 1,913 × 1,073; 450 KB
 H2A-ThelModel-FullBody.jpg 1,707 × 1,404; 256 KB
 H2A-ThelPunished.png 1,919 × 816; 2.11 MB
 H2A-ThelRestrained.png 1,920 × 816; 2.01 MB
 H2A-ThelVadam GreatSchism Uprising.png 1,920 × 818; 1.76 MB
 H2A-WeightOfYourHeresy.jpg 1,280 × 545; 288 KB
 H2AArbyChief.png 993 × 536; 464 KB
 H3 - Poster Chief-Arby.jpg 727 × 960; 75 KB
 H3 Arbiter CommandChair.png 1,889 × 1,101; 2.63 MB
 H3 Arbiter Flamethrower.jpg 1,920 × 1,080; 361 KB
 H3 Arbiter model.png 800 × 1,720; 967 KB
 H3 Arbiter taunt.jpg 1,536 × 1,152; 262 KB
 H3 Arbiter Thel Vadam.png 1,316 × 2,160; 1.75 MB
 H3 ArbiterEyeGlitch.jpg 3,840 × 2,160; 921 KB
 H3 BarrierTowerBattle.png 3,840 × 2,160; 8.83 MB
 H3 Chief01 Storyboard.jpg 320 × 240; 63 KB
 H3 ChiefAndArbyReady.png 3,840 × 1,634; 6.82 MB
 H3 Crow'sNest Storyboard 2.jpg 1,311 × 743; 78 KB
 H3 Crow'sNest Storyboard 3.jpg 1,602 × 906; 145 KB
 H3 Epilogue Storyboard 2.jpg 1,606 × 906; 146 KB
 H3 Epilogue Storyboard 4.jpg 1,606 × 906; 79 KB
 H3 HighCharityView.jpg 3,840 × 1,634; 1.43 MB
 H3 Installation08 Reveal Concept.jpg 1,920 × 938; 370 KB
 H3 John and Thel Back to back.jpg 1,280 × 1,068; 243 KB
 H3 John and Thel side by side.jpg 1,161 × 1,580; 397 KB
 H3 MC& Hood.png 1,920 × 816; 1.71 MB
 H3 PosterArbyChief.jpg 2,038 × 2,127; 340 KB
 H3 StealthElites.jpg 1,600 × 900; 324 KB
 H3 The Ark Arbiter and Master Chief.jpg 1,536 × 1,152; 191 KB
 H3 TheArk Storyboard 6.jpg 1,606 × 906; 145 KB
 H3 TheArk Storyboard 7.jpg 1,606 × 906; 108 KB
 H3 TheArk Storyboard 10.jpg 1,606 × 906; 107 KB
 H3 TheCovenant Storyboard 7.jpg 1,606 × 906; 148 KB
 H3 TheCovenant Storyboard 16.jpg 1,606 × 906; 159 KB
 H3 TheCovenant Storyboard 17.jpg 1,606 × 906; 129 KB
 H3 TheCovenant Storyboard 18.jpg 1,606 × 906; 71 KB
 H3 TheCovenant Storyboard 21.jpg 1,309 × 737; 247 KB
 H3 TheCovenant Storyboard 23.jpg 1,606 × 906; 299 KB
 H3 TheCovenant Storyboard 24.jpg 1,606 × 906; 282 KB
 H3 TheCovenant Storyboard 25.jpg 1,586 × 895; 150 KB
 H3 TheCovenant Storyboard 27.jpg 1,606 × 906; 105 KB
 H3 TheCovenant Storyboard 28.jpg 1,606 × 906; 128 KB
 H3 TheCovenant Storyboard 29.jpg 1,606 × 906; 146 KB
 H3 TheCovenant Storyboard 30.jpg 1,606 × 906; 185 KB
 H3 TheCovenant Storyboard 31.jpg 1,606 × 906; 184 KB
 H3 TheCovenant Storyboard 32.jpg 1,606 × 906; 139 KB
 H3 TheCovenant Storyboard 33.jpg 1,606 × 906; 151 KB
 H3 TheCovenant Storyboard 35.jpg 1,606 × 906; 154 KB
 H3 TheCovenant Storyboard 36.jpg 1,606 × 906; 148 KB
 H3 TheCovenant Storyboard 37.jpg 1,606 × 906; 84 KB
 H3 TheCovenant Storyboard 38.jpg 1,606 × 906; 90 KB


