Operation: TALON
From Halopedia, the Halo wiki
| Operation: TALON | |||||||||||||||||||
|---|---|---|---|---|---|---|---|---|---|---|---|---|---|---|---|---|---|---|---|
| |||||||||||||||||||
|
Conflict: |
|||||||||||||||||||
|
Date: |
|||||||||||||||||||
|
Location: |
|||||||||||||||||||
|
Outcome: |
| ||||||||||||||||||
| |||||||||||||||||||
- "Your mission is to infiltrate the rebel base, capture Watts, and return him—alive and unharmed—to UNSC-controlled space. This will deprive the rebels of their new leadership. And it will provide ONI a chance to interrogate Watts and root out traitors within FLEETCOM."
- — Doctor Catherine Halsey[5]
Operation: TALON[6] was an operation of the United Nations Space Command to capture Colonel Robert Watts from the United Rebel Front's Eridanus Secundus, a hidden asteroid facility in the Eridanus system's asteroid belt.[7] The mission was undertaken by Blue Team, and would be the first operation in which the Spartan-IIs participated. The operation was a success and Watts was captured.[2]
Prelude
The leader of the United Rebel Front
- "In 2513, an armed insurrection in this system was suppressed by the UNSC force—Operation: TREBUCHET. The insurrection was put down. However, elements of the rebel forces escaped and regrouped in the local asteroid belt."
- — Doctor Catherine Halsey[8]
Colonel Robert Watts was once a decorated and highly regarded commander of the UNSC Marine Corps. However, as the Insurrection began in the Outer Colonies, Watts began disillusioned with the United Nations Space Command and joined the emerging insurrectionist factions.[6] In 2495, Watts led a takeover of the Outer Colony of Eridanus II in the Eridanus system from the Eridanus Government and Unified Earth Government. The UNSC responded harshly in 2496 through Operation: CHARLEMAGNE, in which a battle group of warships eliminated most of Watts' forces and retook Eridanus II.[9]
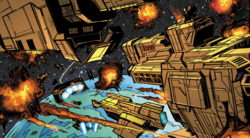
Eventually, Watts realigned the surviving insurgent factions in the Outer Colonies and took command of them. These forces eventually unified under the United Rebel Front. Watts and the URF continued to prove a threat to the UNSC as the insurgent colonel waged many battles against the UNSC and Colonial Military Administration on a number of worlds throughout the Insurrection.[3][6] Watts and the United Rebel Front eventually re-accumulated enough strength to attempt to overthrow the Eridanus Government once again, as Watts hoped to use Eridanus II as a base of operations for the URF and drag the CMA into a costly guerrilla war.[6] In 2513, Watts initiated another armed uprising on Eridanus II. Having anticipated the attack, the UNSC engaged United Rebel Front forces as part of Operation: TREBUCHET. A UNSC fleet of carriers, cruisers, and destroyers attacked Watts' own fleet of roughly one hundred smaller spaceships, while ground engagements waged across Eridanus II's surface.[10] Ultimately, the United Rebel Front's forces were routed and defeated by the UNSC before they could properly establish a presence on Eridanus II.[6] Watts called for the exodus of URF forces from the planet and the faction eventually fled Eridanus II through slipstream space.[11]
The United Rebel Front regrouped and eventually constructed a stronghold within Eridanus Secundus, a hollowed-out asteroid located in the Eridanus system's largest asteroid belt.[6] While the URF worked to regain their former strength yet again, the faction resorted to piracy throughout the system.[12] Efforts to locate the URF were met with either a lack of results or with an ambush by superior URF forces.[10]
The first test
- "We're taking them on a mission ONI has been saving for the right crew and the right time. This is it."
- — Doctor Catherine Halsey, to Chief Petty Officer Franklin Mendez[13]
The UNSC Navy's Office of Naval Intelligence was aware that the URF was taking shelter in the extensive asteroid belt, though they did not know Eridanus Secundus' location and knew very little about their strength. After initially assuming the rebel forces were largely unorganized, ONI realized that they had remained unified under the URF and Watts' leadership. Meanwhile, UNSC Fleet Command discovered that rebel sympathizers among its ranks were leaking valuable information to the URF.[10] Furthermore, by 2525, ONI had learned that Watts intended to launch an attack against medical satellites throughout the Outer Colonies. In that same year, a member of the URF approached the UNSC and offered to make a deal with ONI. The rebel was not aware of the exact coordinates of Eridanus Secundus, though he revealed to ONI that the Parabola-class freighter Laden was a URF supply vessel.[14] Further investigation proved that Laden was indeed captained by a thought-to-be-dead URF officer and was stocked with enough food and water to supply a small city. With a way to reach Eridanus Secundus in sight, ONI decided to wait until they had the right team and time to enact the operation.[10]
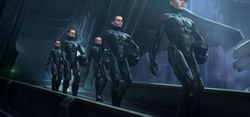
After the UNSC learned of the Covenant and their attack on Harvest in October 2525, UNSC High Command and ONI wanted to test the recently augmented Spartan-IIs to ensure that the supersoldiers would be able to aid in the inevitable war against the alien empire. The program's creator, Doctor Catherine Halsey, was contacted by the Admiralty and informed of the attack on Harvest. Agreeing with High Command, Halsey resolved to deploy the Spartans on a the mission that ONI had been saving for the proper team—Operation: TALON. While Halberd-class destroyer UNSC Pioneer transported Halsey, Chief Petty Officer Franklin Mendez, and the Spartan-IIs to the Eridanus system for the mission on September 12, 2525, Halsey and Mendez debriefed the Spartan-IIs on Watts and Eridanus Secundus. A small team of Spartans was to board Laden, gain access to Eridanus Secundus, infiltrate the asteroid, capture Watts, and return to UNSC-controlled space. With a mission window of thirteen hours, the Spartans were given a panic button in the case of an emergency, with support from Pioneer and the prowler Athens if necessary. After the briefing, Mendez promptly promoted John-117 to petty officer, third class and ordered him to choose the operation's team and equipment. Deciding he only needed a small team, John selected Samuel-034, Linda-058, Kelly-087, and Fred-104, forming Blue Team.[10] Donning black body suits and outfits worn by those among Laden's crew, most of Blue Team armed themselves with MA2B assault rifles and combat knives, while Linda chose a SRS99C-S2 AM sniper rifle.[4]
The operation
- "Stop! My men are coming. You think I'm alone? You're all dead. Drop your weapons."
- — Colonel Robert Watts to Blue Team, seconds before his capture[15]
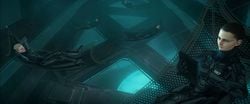
On September 14, 2525, UNSC Pioneer had deployed Blue Team to the Eridanus II space docks, where Laden was undergoing a routine engine re-certification. By 1210 hours, Blue Team had infiltrated the freighter by slipping past a lone guard, while disguised as members of the crew. Sam rigged the fill sensor on the freighter's water reservoir to prevent the storage tank from filling any further, allowing the Spartans to hide among the reservoir's upper girders while resting in a web of support nets Blue Team had set up. The water in the tank masked the Spartans' heat signatures, while also blocking any motion sensors. Having ten hours to spare, Blue Team took rotating sleep patterns. Easily accessing the freighter's systems, Kelly learned that Laden was to reach her destination within the Eridanus asteroid belt in ten hours. Viewing the contents of the freighter, Kelly noticed many luxury goods among Laden's otherwise unnoteworthy items, including Sweet William cigars and Procyon champagne. Locating the luxury items within a crate, Blue Team determined that the crate was headed to either Watts himself or his officers. The Spartans tagged the crate with a NAV marker transmitter, allowing them to follow the crate to its destination once they reached the asteroid.[1] When Laden arrived at Eridanus Secundus' docking bay, Blue Team left the water tank and traveled to the freighter's cargo bay. Once the freighter's crew began moving about, Blue Team left Laden and traversed through Eridanus Secundus' docking bay. Moving into the far end of the docking bays, John led Blue Team to the public showers, and decided that it would be their fallback point if something went wrong.[2]
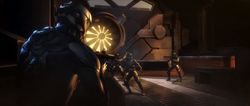
Blue Team exited the asteroid's docking bay and arrived at Eridanus Secundus' residential complex. The Spartans determined that the crate of luxury goods was aboard a cargo tram by pinpointing the location of the NAV marker. Blue Team discreetly followed the tram and remained spread out to avoid arousing suspicious, until the tram arrived at the city's barracks, a twelve-story tall building with a front entrance guarded by two armed rebels. While three other armed insurrectionists carried the crate of luxury goods into the building, John and Kelly silently neutralized the two guards at the barracks' entrance. Blue Team moved inside the building and into the lobby of the barracks, where the Spartans eliminated another five rebels. After Fred hid the bodies, Blue Team quickly scaled nine double flights of stairs. Realizing that Watts' apartment on the twelfth floor would be heavily guarded, the Spartans pried open the elevator doors at the ninth floor and climbed the cable to the twelfth floor. While Sam and John pried open the doors again, Fred, Kelly, and Linda open fired on the five guards standing near the elevator. Climbing into the hallway on the floor, Blue Team took notice of a balcony that led to an empty alley at the side of the barracks.[2]
Proceeding through the hallway, John kicked open the door to Watts' apartment, where the colonel hid behind his crate of luxury goods while the three men who had been carrying the crate open fired at the Spartans. Not having a clear shot, John attempted to dive out of the way, but was shot three times in the side by one of the rebels. Recovering, John ignored his injury and killed the center guard, while Fred and Sam killed the other two. Brandishing a pistol, Watts ordered the Spartans to drop their weapons as his reinforcements were arriving. Fred and Sam shot suppressing fire towards the colonel to force him to duck into cover, while John leaped to Watts' position, snapped his finger, and choked him to unconsciousness. Kelly proceeded to inject Watts with enough polypseudomorphine to keep him sedated for nearly a day and the Spartans forced the colonel into the sealed cargo crate. On his part, John received a dose of biofoam in order to stop the internal bleeding from his wounds. Sam spotted incoming vehicles and rebel infantry arriving at the barracks and John ordered Blue Team to the nearby balcony. The Spartans then rappelled down the side of the building and, hefting Watts in the airtight crate, made their way back to the docking bay. Returning to the showers, John ordered Sam to set C-12 shaped charges on the docking bay doors, while he activated the panic button to transmit the location of Eridanus Secundus to the UNSC, leaving the button in an empty locker. The Spartans then boarded a stolen UNSC Pelican dropship, while Sam detonated the C-12 explosives. As the docking bays decompressed, killing numerous URF dockworkers, Sam returned to the Pelican and the dropship promptly departed the asteroid. The Pelican then reached the extraction point two hours later, with Watts aboard.[2]
Aftermath
A successful mission
- "Don't be spoiled, don't start a fight. Always be careful, here at night. Because the Spartans might come, in suits that weigh half a ton. And they'll steal from you all you gots, just like they did from Colonel Watts."
- — A children's rhyme created after the operation[16]
After Blue Team returned to the UNSC at Reach, Watts was imprisoned by the Office of Naval Intelligence.[17] During his imprisonment, Watts was interrogated by ONI operatives, though his fate following the interrogations was classified as top-secret and was yet to have been revealed as of 2552.[3] The Office of Naval Intelligence's "propaganda machine" spread word across the human colonies that Watts had been arrested by the UNSC, though did not specify who had captured him and led to some individuals presuming the Orbital Drop Shock Troopers were responsible for his capture.[18] Watts' capture essentially severed the head of the United Rebel Front, at least temporarily.[6] After Watts' capture, the United Rebel Front's entire network desperately scrambled to find a new replacement leader. Additionally, as Spartans became more known to the general public in the following years due to the Covenant War, some insurrectionists correctly concluded that the supersoldiers were responsible for the colonel's capture.[16] Eventually, insurgent Jacob Jiles ascended to a leadership position and replaced Watts as governor of Eridanus Secundus.[17] By 2531, the United Rebel Front was led by a triumvirate of men, including General Howard Graves.[19]
After the mission, John was awarded a Purple Heart for the injuries he sustained in Operation: TALON. Although he was glad that his first true mission was a success, he felt uneasy about having to kill unarmed dockworkers and civilians within Eridanus Secundus. He acknowledged that they were technically the enemy as they were aligned with the United Rebel Front, but he still did not feel comfortable killing them. Nonetheless, he put his worries in the back of his mind and resolved that following orders and ensuring a mission's success were more important.[2] The mission also succeeded as Operation: TALON proved the effectiveness of the SPARTAN-II program to the UNSC's leadership.[20]
Trading one villain for another
- "You mean five people made a zero-gee vacuum infiltration onto this space station? And then exfiltrated with a prisoner who happened to be the guy in charge of the place?"
- — Vice Admiral Danforth Whitcomb to John-117, after learning of the operation[21]
While the UNSC was now aware of the location of Eridanus Secundus due to the panic button John had left behind, the UNSC never bothered to return to the asteroid, due to the threat of the emerging Human-Covenant War. When the Covenant arrived in the Eridanus system in 2530 and glassed Eridanus II, the URF remained silent at Eridanus Secundus to avoid detection.[22] The asteroid, outfitted with Titanium-A armor, was capable of deflecting Covenant sensors, further allowing Eridanus Secundus to go unnoticed by the Covenant.[23]
Under Jiles, the United Rebel Front repaired the damage Eridanus Secundus had sustained from Operation: TALON over the years. While the URF continued to operate on a number of worlds throughout the Covenant War, occasionally opposing the UNSC and continuing to succeed colonies,[19] Eridanus Secundus' population kept to itself.[22] However, on September 12, 2552, the ship hybrid Ascendant Justice–Gettysburg traveled to Eridanus Secundus to seek repairs after John's suggestion, while pursued closely by the Covenant. Vice Admiral Danforth Whitcomb, who was commanding Ascendant Justice–Gettysburg, contacted Jiles and requested repairs to the ship and, in exchange, the UNSC would evacuate Eridanus Secundus to Earth. Realizing that the UNSC had led the Covenant to the asteroid, Jiles reluctantly agreed as the URF could not take on a Covenant fleet alone.[24] Unbeknownst to the URF and Jiles, the ship hybrid was carrying four of the Spartans that had previously captured Watts. When the Covenant inevitably arrived, the URF and UNSC worked together to fend off several warships, while rebel engineers repaired Ascendant Justice–Gettysburg. However, when a fleet of thirty Covenant warships arrived at the asteroid, Ascendant Justice–Gettysburg and its crew were forced to leave the URF behind as they desperately needed to return to Earth with news that the Covenant had discovered the location of the planet.[25] Without the UNSC, the URF made a valiant effort to combat the Covenant, though eventually the rebels were all massacred and Eridanus Secundus was destroyed.[22]
Behind the scenes
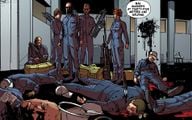
Operation: TALON was first depicted in Halo: The Fall of Reach, and later in the novel's comic and animated adaptations. Partially due to artistic liberties, the adaptations of the operation differ from its portrayal in the novel. The comic's depiction of the event is similar to that of the novel with minor differences. In the comic, Watts retreats to a heavily armored safe room before his capture, after Blue Team breaches his apartment. The crate he is placed in is later thrown from his apartment's balcony, rather than carried by the Spartans as they rappel down the building.[26]
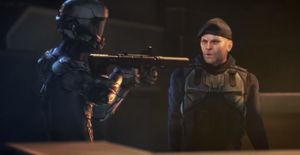
In the animated series, Blue Team uses M7S SMGs rather than MA2B assault rifles and Linda-058's SRS99C-S2 AM sniper rifle, while the URF use the M7 SMG instead of the HMG-38. After Watts' guards are defeated, the colonel attempts to commit suicide with his sidearm, but Linda disarms him by shooting the pistol out of his hand. Watts proceeds to threaten the Spartans before being knocked unconscious by Sam and thrown into the crate.[14] In both depictions, John is shot by a rebel when pushing Sam out of the line of fire, rather than John being shot due to him being in an unfortunate position.[26][14]
Gallery
List of appearances
- Halo: The Fall of Reach (First appearance)
- Halo: First Strike (Mentioned only)
- Halo: The Cole Protocol (Mentioned only)
- Halo: Evolutions - Essential Tales of the Halo Universe
- Dirt (Mentioned only)
- Halo: Fall of Reach
- Halo: The Fall of Reach - The Animated Series
- Halo 5: Guardians
- Limited Edition (Mentioned only)
- Halo Mythos: A Guide to the Story of Halo (Mentioned only)
Sources
- ^ a b c d Halo: The Fall of Reach, pages 102-104 (2010)
- ^ a b c d e f g h i j k l m n o p Halo: The Fall of Reach, pages 106-116 (2010)
- ^ a b c Halo Encyclopedia, pages 44-45 (2011)
- ^ a b Halo: The Fall of Reach, pages 100-101 (2010)
- ^ Halo: The Fall of Reach, page 97 (2010)
- ^ a b c d e f g Halo Waypoint: Colonel Watts
- ^ Halo 5: Guardians Limited Edition, Spartan Locke's Classified Orders
- ^ Halo: The Fall of Reach, page 95 (2010)
- ^ Halo Encyclopedia, pages 34-35 (2011)
- ^ a b c d e Halo: The Fall of Reach, pages 96-98 (2010)
- ^ Halo: Fall of Reach - Boot Camp, Issue #1
- ^ Halo: Fall of Reach - Boot Camp, Issue #2
- ^ Halo: The Fall of Reach, page 94 (2010)
- ^ a b c Halo: The Fall of Reach - The Animated Series, Act Two
- ^ Halo: The Fall of Reach, page 112 (2010)
- ^ a b Halo: The Cole Protocol, page 69
- ^ a b Halo Encyclopedia, page 79 (2011)
- ^ Halo: Evolutions, "Dirt", page 118
- ^ a b Halo: Ghosts of Onyx, page 37
- ^ Halo Encyclopedia, page 106 (2011)
- ^ Halo: First Strike, page 302 (2010)
- ^ a b c Halo Encyclopedia, page 299 (2011)
- ^ Halo: First Strike, page 309 (2010)
- ^ Halo: First Strike, pages 301-313 (2010)
- ^ Halo: First Strike, pages 337-349 (2010)
- ^ a b Halo: Fall of Reach - Boot Camp, Issue #4
