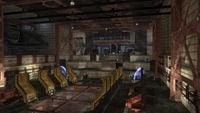
Crow's Nest (location)
From Halopedia, the Halo wiki
Crow's Nest[1] was a UNSC military base in Kenya, Africa, close to the town of Voi.[2] It was a command center for local UNSC forces in Kenya late in the Battle of Earth in November 2552. During the battle, the base was under command of Commander Miranda Keyes.
Background
The base is located inside Chawia hill, one of the Taita hills, about 24 kilometers west from Voi, Kenya, a few kilometers north of the Tsavo Highway. According to a UNSC Marine, Crow's Nest was built for a war in the 20th century. Because of its age, the base often frustrated UNSC personnel because it required constant maintenance and employed outdated technology, such as its door controls.[3]
It was used during the Battle of Voi for its proximity to what the UNSC thought was the Ark (which in reality was the Portal), as well as the fact that its fortified location provided relative protection from aerial and orbital bombardment.[3][4][5] From it, the UNSC coordinated its resistance efforts in the region surrounding the remnants of New Mombasa and the local countryside.
On the regions surrounding the base and along the Tsavo Highway, there were small UNSC bunker installations with numeric designations such as 6 and F6.[2]
History
Early history
The Crow's Nest was originally constructed for an unspecified conflict, evidently in the 20th century. In several locations, NATO compasses can still be seen on the walls. During the occupation of Earth from October to November 2552, it became a base of asymmetrical warfare for human forces in East Africa, because of its prime location deep in the African jungle.[3]
Battle of Voi
- Main article: Battle of Voi
During the Battle of Voi, the Crow's Nest was used as a command base for forces in the area, such as contingents in Tsavo, Mombasa, and Arusha, as well as the jungles and savanna.[3]
Many wounded marine survivors from encounters with Covenant patrols were sent to the base for medical treatment. The few able-bodied soldiers were organized into fire teams, but were spread thin throughout the base.
When Master Chief John-117 arrived at the base, Fleet Admiral Hood briefed him and the command staff at the base, including the Arbiter and Sergeant Major Avery Johnson about a low-level assault on Covenant Loyalist warships stationed over the so called "Ark". However, their communication systems were hacked into and the humans received a transmission from the Prophet of Truth, who declared that humanity was doomed to destruction, thus initiating his assault on the Crow's Nest. The UNSC moved to evacuate the facility, electing to destroy the base once they had fled their Covenant attackers. John-117, Gunnery Sergeant Stacker, Gunnery Sergeant Reynolds, and the Arbiter then organized a defense of the base.
In the opening stage of the battle, the Master Chief and his allies attacked infantry, mainly Grunts and Jackals in a large roadway containing numerous supply trucks and armaments. They then assaulted the barracks, where the Marines were being massacred by Brute forces. They were successful in rescuing the remaining survivors and wiping out their killers. They then advanced on one of the base's hangars controlled by Covenant Loyalist forces, with support by Type-52 "Phantom" Troop Carriers.[3] The UNSC forces then sent in several Pelicans to collect their remaining forces. The Master Chief was forced to return to the command center when the Brutes attempted to disarm the bomb meant to destroy the base, and quickly reactivated the bomb upon killing the Brutes. With the bomb approaching detonation, the Master Chief and the remaining stragglers retreated to the elevator, fleeing to the underground motor pool just as the bomb detonated.
Current status
The Crow's Nest was reportedly destroyed when the bomb armed by Master Chief detonated. However, the motor pool and the cave leading to the Tsavo Highway are still intact, having only received minor damage after the explosion. The smoking hangars leading into the Crow's Nest are still visible from the outside.[3][2]
Locations
- Operations Center
- Armory
- Pipe Room
- South Hangar
- Motor Pool
- Barracks
- Landing Pad Bravo
- Service Elevator
- Basement
- Ventilation Hub
- Corridor MH1260
- Corridor M70
- Ammunition storage facility (colloquially named "Rat's Nest")[6]
- Air Turbine 77 (adjacent to 88)
- Air Turbine 88 (adjacent to 77)
Trivia
- The name "Crow's Nest" originates from a ship's lookout position, located near the mast.[7]
- Crow's Nest and Voi are the only specific locations that are each featured in two different levels in the Halo 3 campaign.
- In the final cutscene of the previous level, Crow's Nest is wrongly depicted to be located near the base of Mount Kilimajaro, when actually it is at least 90 kilometers East.
- In Halo 3, a Marine states that the base was built for "some 20th-century war". A snippet of dialog cut from the final game expands on this, with another Marine claiming that the conflict in question was World War II.[8] This is unlikely to be the case, however, as Kenya was not involved in World War II to the extent as to warrant the construction of a facility as extensive as Crow's Nest; given the region's lack of involvement in large-scale conflicts as of the early 21st century it is more likely that the base was actually constructed at some point later on.
Gallery
- H3 Holdout 1.jpg
Concept art of the interior of the base.
- Concept-H3-Crow-Hangar.jpg
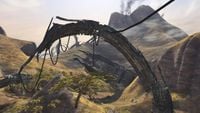
Concept art of the base's Pelican bay, with the savannahs of Voi stretching out below.
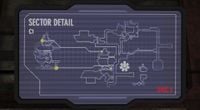
A schematic of the base, with the Seventh Column symbol visible on the screen.
- H3 Holdout 2.jpg
The Pelican bay of the base.
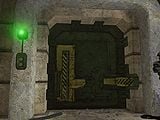
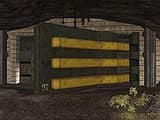
A door in the base.
List of appearances
- Halo 3 (First appearance)
- Halo Legends
Sources
- ^ Halo 3, campaign level, Sierra 117
- ^ a b c Halo 3, campaing level, Tsavo Highway
- ^ a b c d e f Cite error: Invalid
<ref>tag; no text was provided for refs namedcrow - ^ Halo 3, campaign level, Floodgate
- ^ Halo 3, campaign level, The Ark
- ^ Halo Waypoint: Earth
- ^ Wikipedia: Crow's nest
- ^ YouTube: Halo 3 - Cut Mission Dialog
