Scarab Gun: Difference between revisions
From Halopedia, the Halo wiki
(rv blanking) |
No edit summary |
||
| Line 6: | Line 6: | ||
'''Note''': The [[Skull#Sputnik|Sputnik skull]] is recommended for this, but not necessarily required. | '''Note''': The [[Skull#Sputnik|Sputnik skull]] is recommended for this, but not necessarily required. | ||
At the beginning of the level [[Metropolis (Level)|Metropolis ]] ([[Easy]] difficulty recommended), kill all allies and take the rocket launchers. Kill all enemies as you go over the bridge and make sure to kill both allies and take the rocket ammo when they appear halfway across the bridge. (The reason for this being because you don't want your allies to blow up the Banshees that you will be using later). At the point where the two extra allies show up on the bridge, the first two Banshees show up. Saving as many Banshees as possible will help later so that should one be lost others are available. When the end of the tunnel is reached, destroy all the enemies but do '''not''' blow up any of the Banshees. Lure each Banshee close enough to board it. Kill each enemy after forcing them out. Next, clear the tunnel ahead. Stop once you reach the closed section of the roadway and have to detour off into the pipes. (Make sure to kill the sniper in there before heading back.) This will leave the tunnel enemy free, making it easier to work a Banshee down the tunnel to the spot needed. This is where the Sputnik skull comes in handy. | At the beginning of the level [[Metropolis (Level)|Metropolis ]], OutSkirts, and the final level The Great Journey ([[Easy]] difficulty recommended), kill all allies and take the rocket launchers. Kill all enemies as you go over the bridge and make sure to kill both allies and take the rocket ammo when they appear halfway across the bridge. (The reason for this being because you don't want your allies to blow up the Banshees that you will be using later). At the point where the two extra allies show up on the bridge, the first two Banshees show up. Saving as many Banshees as possible will help later so that should one be lost others are available. When the end of the tunnel is reached, destroy all the enemies but do '''not''' blow up any of the Banshees. Lure each Banshee close enough to board it. Kill each enemy after forcing them out. Next, clear the tunnel ahead. Stop once you reach the closed section of the roadway and have to detour off into the pipes. (Make sure to kill the sniper in there before heading back.) This will leave the tunnel enemy free, making it easier to work a Banshee down the tunnel to the spot needed. This is where the Sputnik skull comes in handy. | ||
Because your melees make objects move further, it will be easier to maneuver the Banshee where you need it. Return to the end of the bridge and move a tank to road on the bridge. Land a Banshee on top of the tank and then drive the tank down the tunnel. When you reach the first road block, you will need to position the Banshee on the top of the ramp to the right. It is important that you don't attempt to fly the Banshee once in the tunnel. It will cause you to die. You are not able to fly the Banshee into the tunnel due to an invisible wall. Now by hitting the Banshee you can maneuver it through the walk way at the top of the ramp and past the road block. To get the Banshee through the walk ways and end tunnel it may be necessary to shoot off the wings. To do this use either a plasma rifle or a sniper rifle and shoot single shots until the wings are deformed. It is important that you carry two different sized weapons (for instance an smg and a rocket launcher) because sometimes a larger weapon is too much and sometimes a smaller weapon just isn't enough. Don't hit the Banshee in succession too many times. Allow it to rest between attacks or you will blow it up. Two melees is the most that the Banshees can usually take without needing to rest. | Because your melees make objects move further, it will be easier to maneuver the Banshee where you need it. Return to the end of the bridge and move a tank to road on the bridge. Land a Banshee on top of the tank and then drive the tank down the tunnel. When you reach the first road block, you will need to position the Banshee on the top of the ramp to the right. It is important that you don't attempt to fly the Banshee once in the tunnel. It will cause you to die. You are not able to fly the Banshee into the tunnel due to an invisible wall. Now by hitting the Banshee you can maneuver it through the walk way at the top of the ramp and past the road block. To get the Banshee through the walk ways and end tunnel it may be necessary to shoot off the wings. To do this use either a plasma rifle or a sniper rifle and shoot single shots until the wings are deformed. It is important that you carry two different sized weapons (for instance an smg and a rocket launcher) because sometimes a larger weapon is too much and sometimes a smaller weapon just isn't enough. Don't hit the Banshee in succession too many times. Allow it to rest between attacks or you will blow it up. Two melees is the most that the Banshees can usually take without needing to rest. | ||
Revision as of 18:24, May 27, 2007
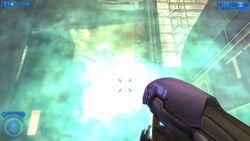
In the Halo 2 level Metropolis, there is a hidden Plasma Rifle with the power of a Scarab's main cannon. It has unlimited ammo, continuous rapid fire, and never overheats. If you fire this gun too close to your position, however, you will die instantly.
Walk Through
Note: The Sputnik skull is recommended for this, but not necessarily required.
At the beginning of the level Metropolis , OutSkirts, and the final level The Great Journey (Easy difficulty recommended), kill all allies and take the rocket launchers. Kill all enemies as you go over the bridge and make sure to kill both allies and take the rocket ammo when they appear halfway across the bridge. (The reason for this being because you don't want your allies to blow up the Banshees that you will be using later). At the point where the two extra allies show up on the bridge, the first two Banshees show up. Saving as many Banshees as possible will help later so that should one be lost others are available. When the end of the tunnel is reached, destroy all the enemies but do not blow up any of the Banshees. Lure each Banshee close enough to board it. Kill each enemy after forcing them out. Next, clear the tunnel ahead. Stop once you reach the closed section of the roadway and have to detour off into the pipes. (Make sure to kill the sniper in there before heading back.) This will leave the tunnel enemy free, making it easier to work a Banshee down the tunnel to the spot needed. This is where the Sputnik skull comes in handy.
Because your melees make objects move further, it will be easier to maneuver the Banshee where you need it. Return to the end of the bridge and move a tank to road on the bridge. Land a Banshee on top of the tank and then drive the tank down the tunnel. When you reach the first road block, you will need to position the Banshee on the top of the ramp to the right. It is important that you don't attempt to fly the Banshee once in the tunnel. It will cause you to die. You are not able to fly the Banshee into the tunnel due to an invisible wall. Now by hitting the Banshee you can maneuver it through the walk way at the top of the ramp and past the road block. To get the Banshee through the walk ways and end tunnel it may be necessary to shoot off the wings. To do this use either a plasma rifle or a sniper rifle and shoot single shots until the wings are deformed. It is important that you carry two different sized weapons (for instance an smg and a rocket launcher) because sometimes a larger weapon is too much and sometimes a smaller weapon just isn't enough. Don't hit the Banshee in succession too many times. Allow it to rest between attacks or you will blow it up. Two melees is the most that the Banshees can usually take without needing to rest.
Work the Banshee past the second road block by forcing it up the wall to the right and through the walk way again. Force the Banshee into the tunnel on the right and up the first ramp in the tunnel. You need to position the Banshee (once on the platform at the top of the ramp) so that it is facing into the next tunnel. Your Banshee should be upright and you should be able to walk up to it and see the "Hold X to pilot Banshee" message. Now force the Banshee into the tunnel by using well placed and strategic hits. Once the "Loading ..." message appears you need to enter the Banshee before it disappears, If you don't make it you will have to revert to last check point and clear the tunnel again. If the Banshee is destroyed, it is necessary to go back and retrieve another and force it down the tunnel the same way.
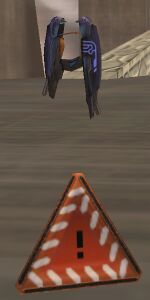
After "Loading..." disappears, fly through the tunnel and then directly up and to the left. There will be two suspension bridges; head to the first one. On the middle of the suspension bridge is a cone over which the Scarab Gun is hovering.
Alternative Way
This way requires LOTS of patience.
First, kill all allies and eliminate everything but one Banshee at the section before the tunnel. Kill all the allies and enemies in the tunnel while luring the Banshee through the tunnel by making it chase you down and occasionally firing a Plasma Pistol at it to get its attention. Due to the AI wanting to do complex maneuvers, such as turning around or turning in general, it will occasionally get stuck in a crack. To fix this simply go directly behind it and move backwards a little bit, this will make the AI follow you out of the place. Eventually when you and it are in the service tunnel a loading screen will come up. You will have to board it before it disappears, but during the loading screen. This will take expert timing to do. Now fly up to the bridge and get your gun!
External Links
The other two Scarab Guns can be found here:

